Structural Integrity Evaluation Of Vintage Frames
The single most important step you take is testing every bentwood joint before you touch a paintbrush. We all know these old chairs look solid but wobble like crazy when you sit down. You want to apply firm pressure to each leg and back spindle, listening for that telltale creak of loose glue. If you hear it, you need to re-glue the joint with wood adhesive and clamp it overnight.
This structural re-gluing prevents the whole piece from coming apart after you finish your project. Trust me, a stable base is the foundation for any successful vintage sewing chair makeover, so never skip this check. Doing the prep work now saves weeks of repairs later.
Selecting Durable Upholstery Fabrics For High Friction
Your fabric choice determines whether your chair lasts a year or a decade, so always pick an upholstery-grade weight textile. Decorative quilting cotton might look pretty in photos, but it wears thin and pills under the daily slide of sitting down. You need a heavy-duty material like a tight-weave linen or a performance velvet that handles constant friction. This is why a lasting vintage sewing chair makeover relies on these durable textures against the painted frame.
They hold their shape and color, so your hard work stays looking fresh. The good news is that these fabrics come in every pattern and color you love, from classic florals to modern solids. You will find the exact match for your space without sacrificing comfort.
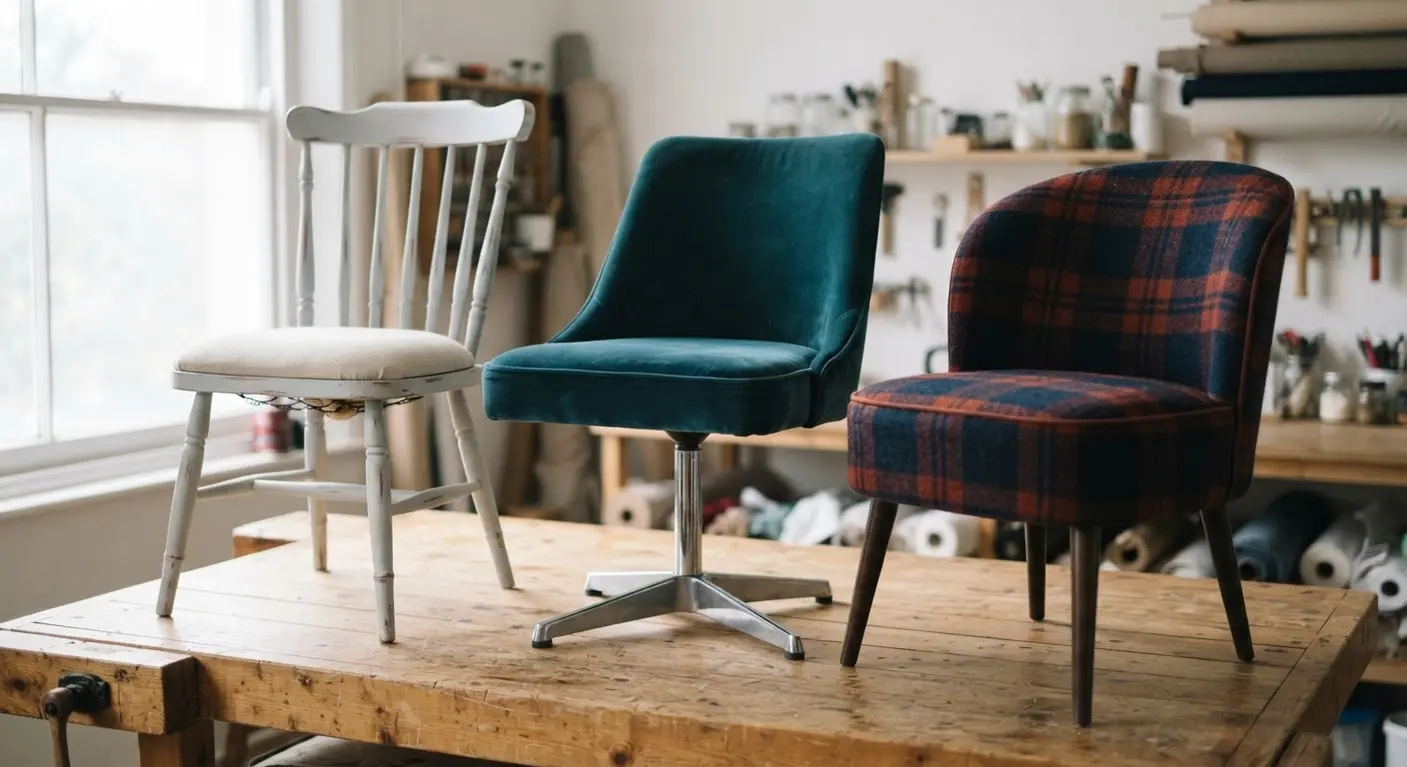
1. Distressed White Farmhouse Spindle Chair With Rustic Charm
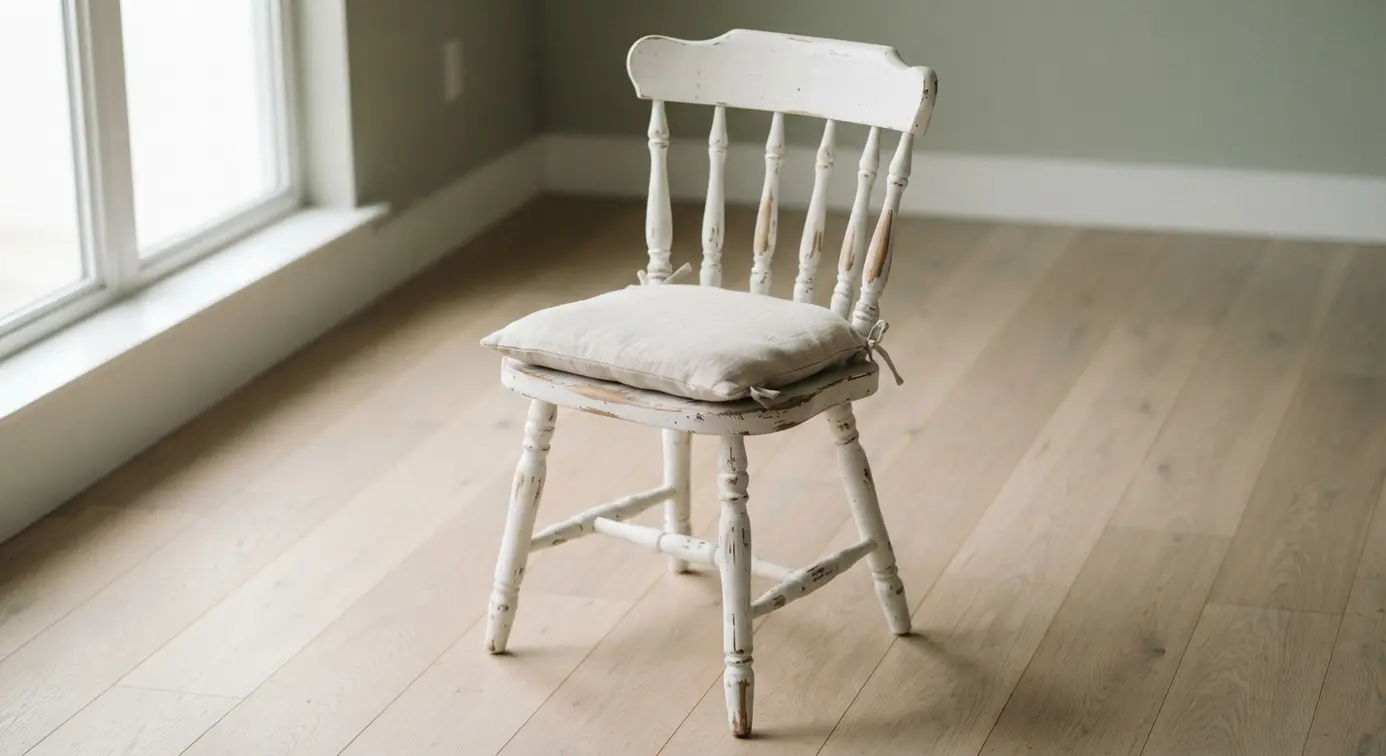
Ever wondered how to give an old chair that cozy, lived-in character we all love? This look starts with a solid wood seat, like one crafted from pine or oak. You will apply a creamy white paint, then carefully sand the edges and spindles to reveal the wood grain beneath.
Why does a simple vintage sewing chair makeover add such instant history and warmth, letting the piece fit right into a farmhouse kitchen or a shabby chic bedroom? I love that it feels authentic, not perfect. The slightly worn surface tells a story you cannot fake with machine finishes.
A key tip to finish your piece is to protect all your hard work with a clear topcoat. This seals the paint so your charming seat stays beautiful for years. Feel that rustic satisfaction when the final layer dries!
2. Velvet Upholstered Mid-Century Sewing Swivel: Modern Comfort
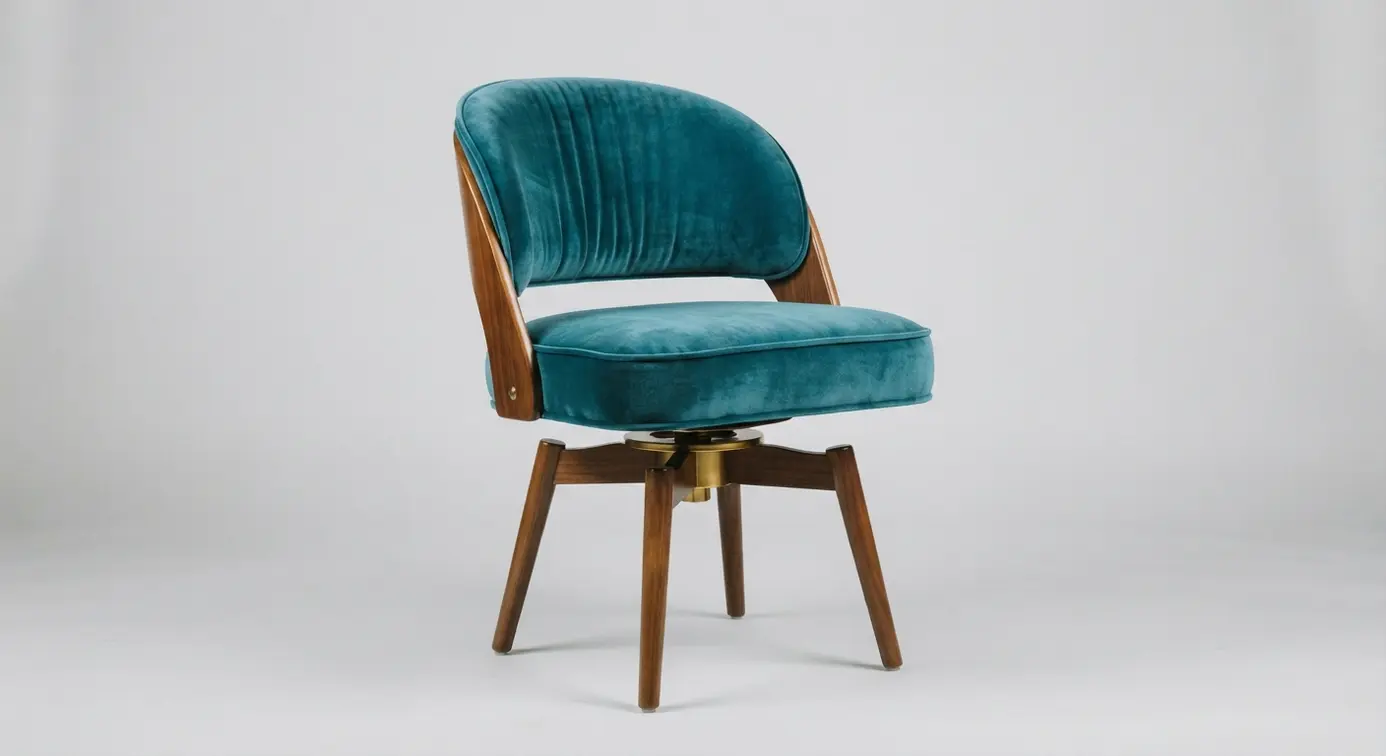
Ever think a workshop seat could be the star of your room? The rich velvet upholstery looks so inviting and feels even better to sit on, making it a clear focal point of your vintage sewing chair makeover. It pairs that luxury with clean mid-century lines and a smooth, functional swivel base.
What I love is how it refuses to be boxed in. While it is perfect for your crafting nook, its comfort and style make it a fantastic home office piece or a glamorous spot for your vanity. For a cohesive atmosphere in your space, try your hand at crafting vintage-looking ornaments to complement its timeless feel.
Trust me, the blend of modern comfort and classic design is genuinely satisfying. You will feel the upgrade immediately. It brings a quiet elegance that elevates the whole room.
3. Floral Linen Cottagecore Wooden Stool — Soft Vintage Appeal
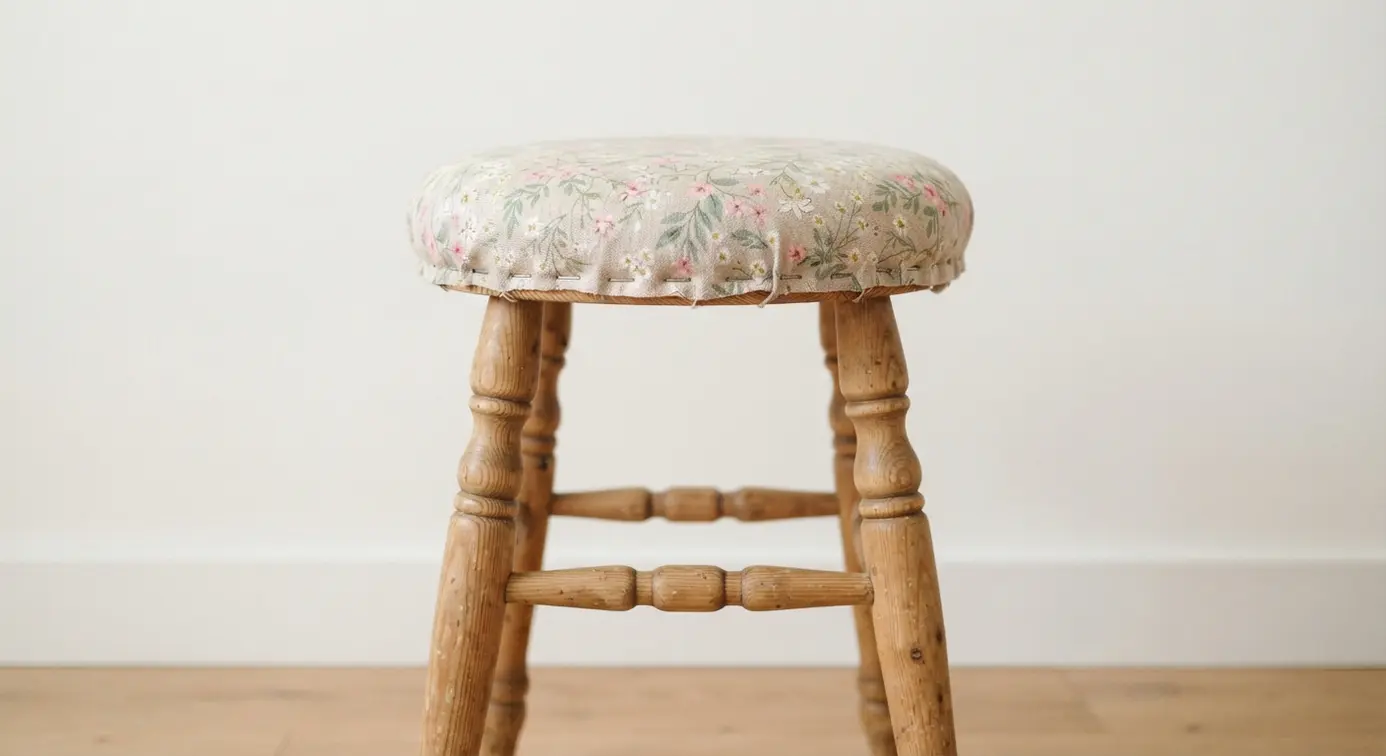
Ever wondered how to get that perfectly worn, soft look? Start by prepping your light-colored wood base with a gentle sanding, which is the essential first step for your vintage sewing chair makeover. Let some of the natural grain show through for authenticity before you add color.
Choose a muted floral linen with faded pastels, like blush or sage. This is your chance to add a touch of cottagecore charm. Pull it taut over your foam-padded seat and secure it underneath with a staple gun.
This works because it creates a warm, nostalgic focal point that feels both handmade and timeless. I love how the combination of natural textures and delicate patterns brings such a cozy feel to a room. You will appreciate the quiet nostalgia it adds to your daily routine.
4. Navy Chalk Painted Industrial Thonet With Aged Patina
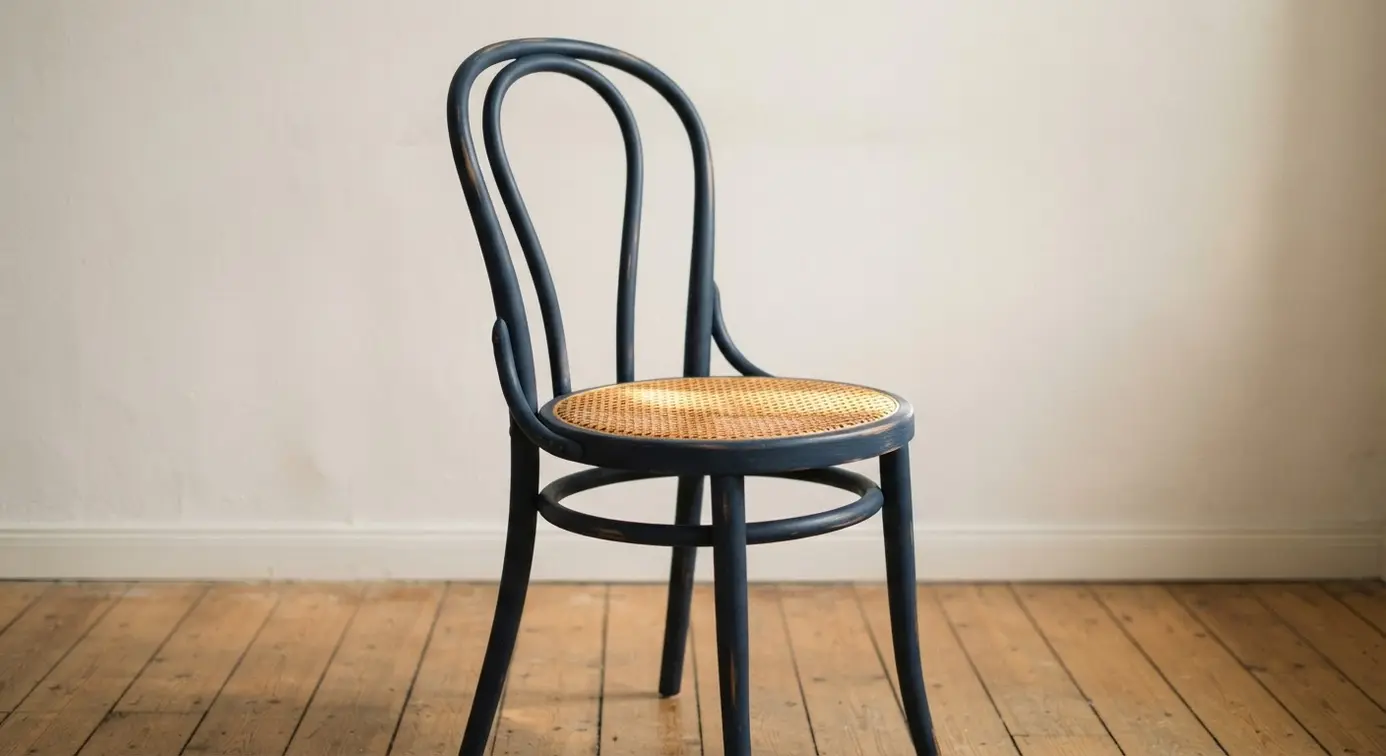
This one surprised me because the result looks like it has decades of history, but you create it in a weekend. The magic happens when you apply dark furniture wax over your dried navy chalk paint to elevate this vintage sewing chair makeover. Work it into the corners, edges, and details, then immediately wipe back the excess with a clean cloth.
Why does it work so well? It makes the sturdy industrial form feel genuinely storied and personal. Your tip is to practice the dark wax application on a scrap piece first to get a feel for the wiping pressure.
Finish by lightly distressing the high points with sandpaper to reveal the wood beneath. This layering technique brings serious depth that a flat coat could never achieve. For a similar project that blends old and new character, your breakfast nook transformation project offers great ideas on balancing finds with fresh tones.
5. Geometric Print Contemporary Upholstered Seat: Bold Pattern Play
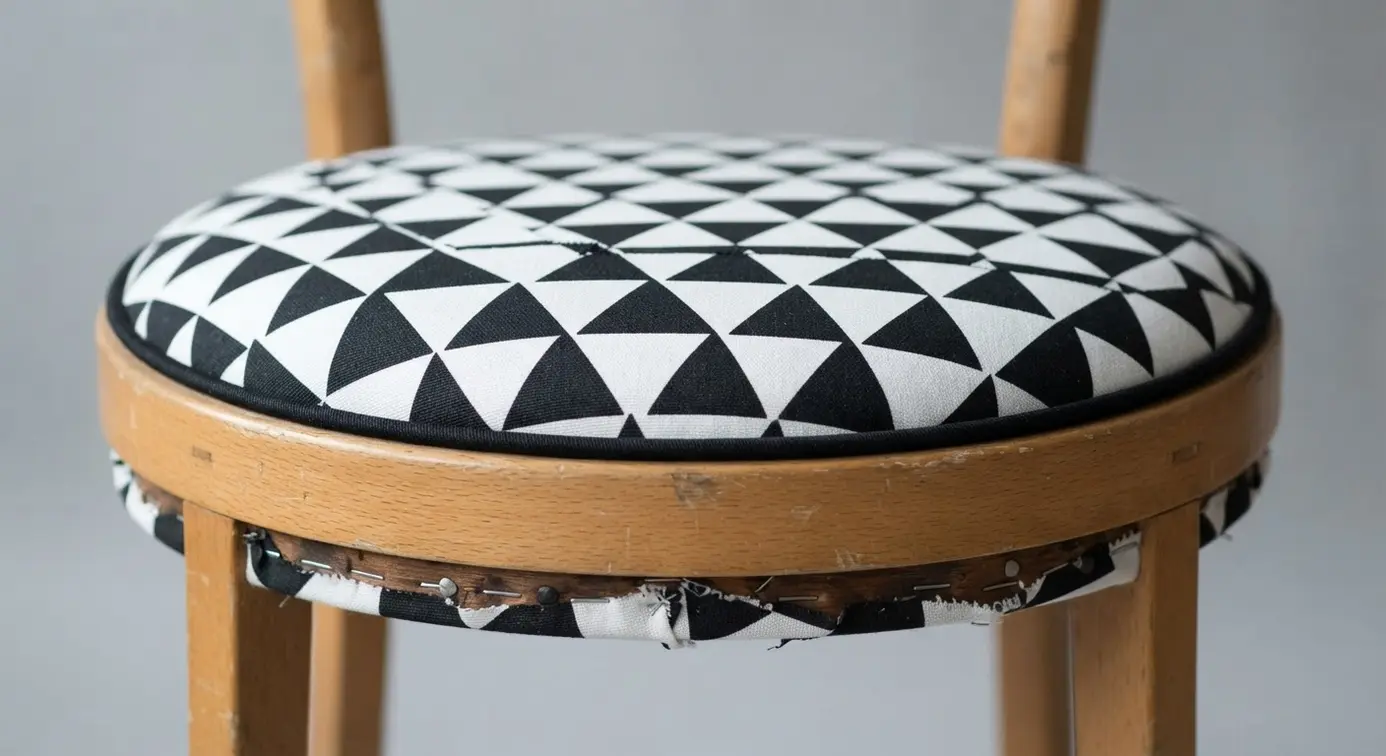
Doesn’t a bold print feel like a modern jolt of energy? The key is choosing a high-contrast fabric with a crisp, repeating pattern, like a classic houndstooth or a dynamic chevron. You will carefully align the print across the cushion, ensuring every line is perfectly straight before you staple it down.
It works because the clean lines of a contemporary frame create the perfect, quiet stage for that loud, graphic textile. I love how a striking vintage sewing chair makeover turns a simple seat into a conversation piece. The geometric rhythm draws the eye without feeling cluttered.
My go-to tip is to use a material with a clear grid or repeat to make alignment foolproof. For a similar creative thrill, this project shares the same inventive spirit as creative wine bottle upcycling where you transform everyday objects with a bold new vision. Feel that rush of modern style when you step back.
6. Natural Oak Minimalist Sewing Bench: Clean Scandinavian Lines
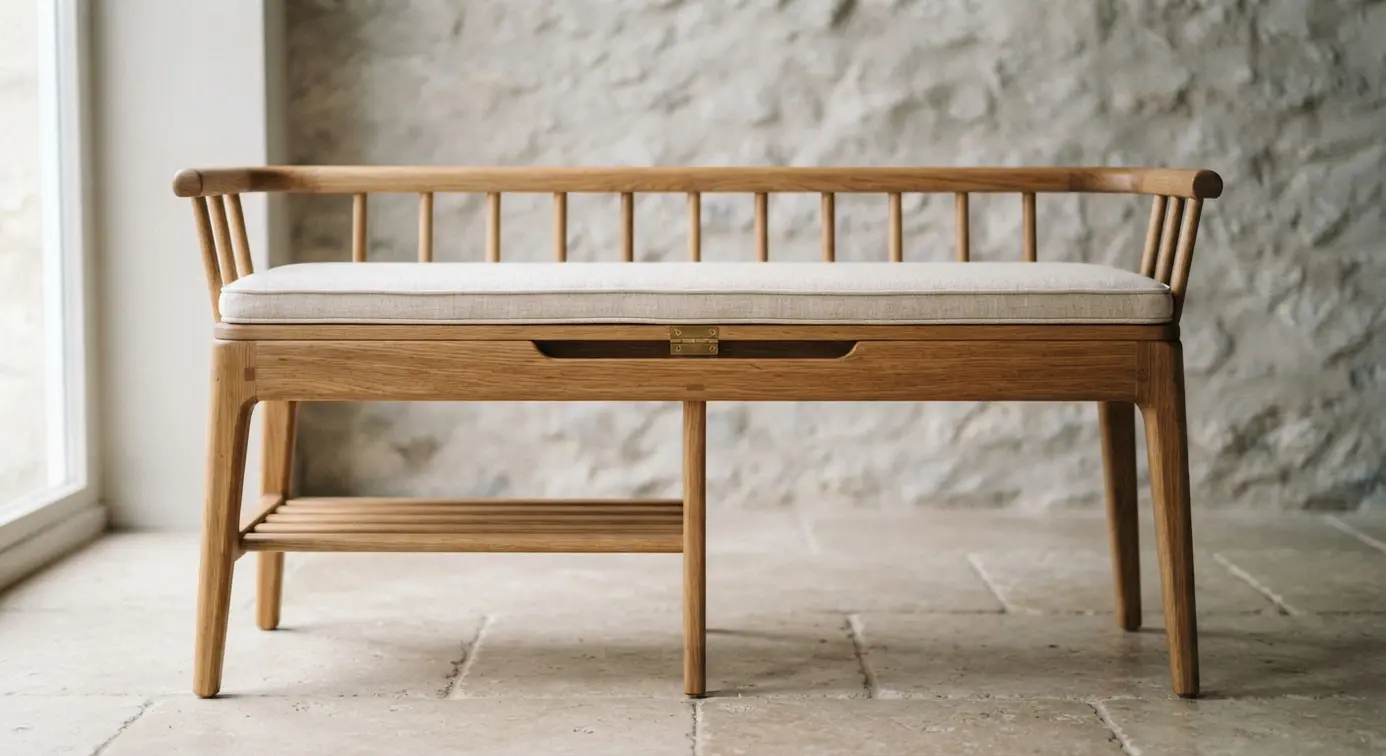
Who says a workbench has to be fussy? This design is all about celebrating the simple beauty of wood. You start with solid oak, cutting and joining it into a clean-lined frame with a discreet drawer or lift-top for storage. The real magic happens when you finish it with a clear, matte oil to highlight this natural vintage sewing chair makeover.
I love how this piece feels both sturdy and light. It works because the natural warmth provides a calming, durable spot for your daily tasks. You will notice how the open space underneath makes the room feel larger.
Trust me, resisting the urge to stain it dark is the true key to keeping it light. Let the wood speak for itself, and you will end up with a timeless piece that feels fresh and functional. It effortlessly matches both rustic and modern decor.
7. Tufted Leather Vintage Pedestal Chair: Classic Workshop Style
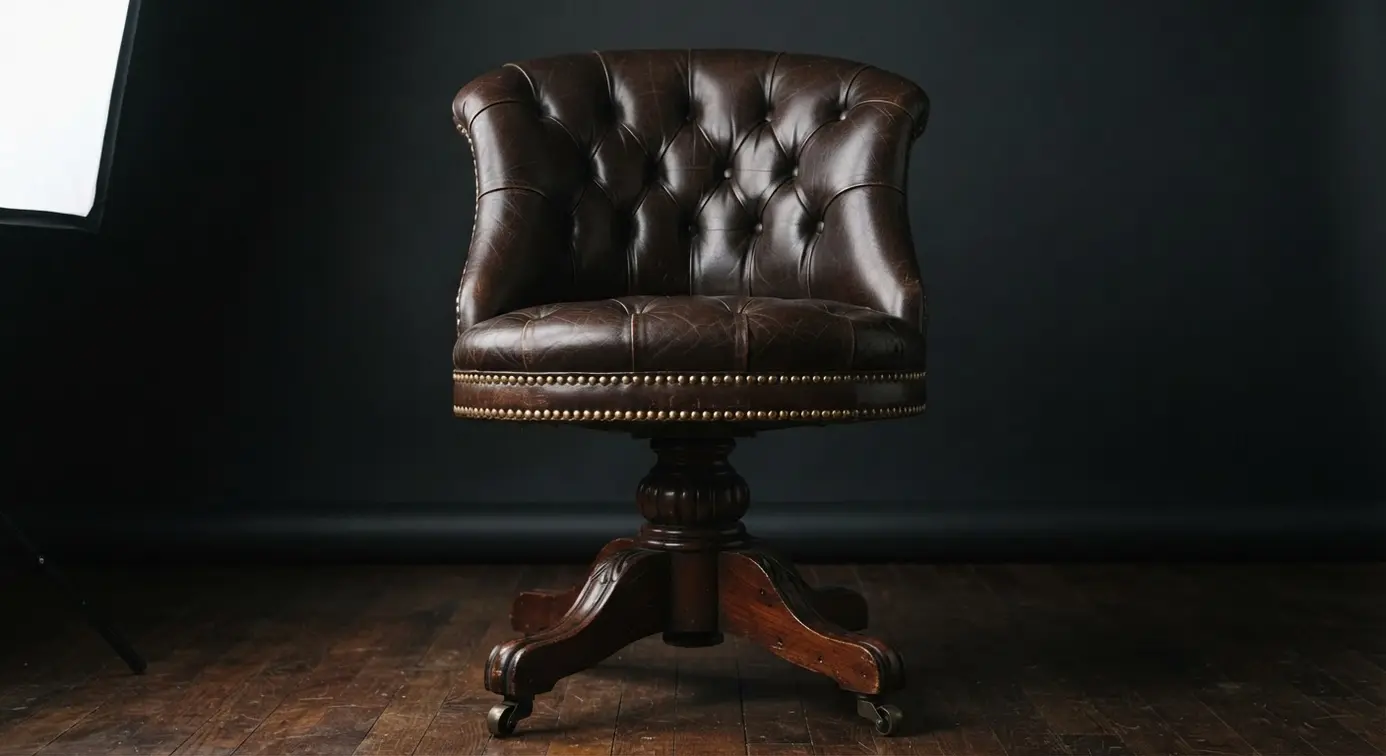
This seat looks complex, but its sturdy charm comes from a few classic choices. You start with a solid metal pedestal base, often with a swivel mechanism. Then, you build comfort with thick foam and wrap it in supple, aged leather to give depth to your vintage sewing chair makeover. The magic is in the deep, hand-sewn tufting.
I love how it works because it is built to last. The materials age beautifully together, developing a rich patina that tells a story. For a similar touch of handcrafted texture, look at the process for crafting lace-like doily bowls.
Your best tip for this build? Embrace the natural wear on the surface instead of trying to hide it. A good conditioner is your friend, helping it soften and shine over time instead of fighting its character. Feel that sturdy, timeless satisfaction.
8. Botanical Print Velvet Tufted Seat: Lush Green Accents
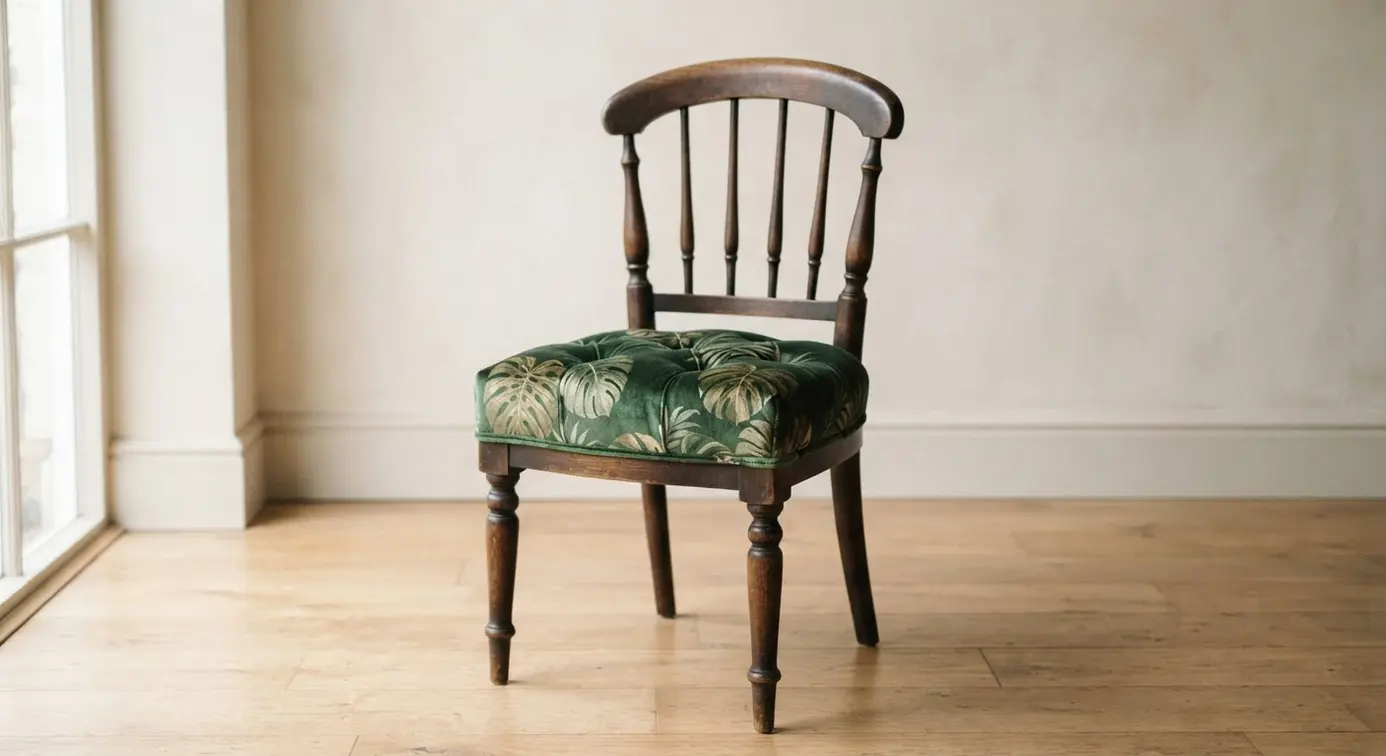
Doesn’t a plush, buttoned seat feel like a hug for your furniture? You start by securing your botanical print velvet over a firm foam cushion, making sure those lush green leaves are perfectly centered. Then comes the pulling process with a long upholstery needle.
I love this technique because it transforms a flat cushion into a tactile masterpiece. The tufting not only looks elegant but also makes the fabric feel softer and more inviting for your vintage sewing chair makeover. It creates a statement piece that brings a little piece of a serene garden indoors.
Getting the tension right is key for a smooth finish. A pro tip is to practice your button tufting on a scrap piece first. For another project that uses textile in a cozy way, look at making a rustic fabric ornament craft.
9. Gold Leaf Accented Victorian Stool With Ornate Details
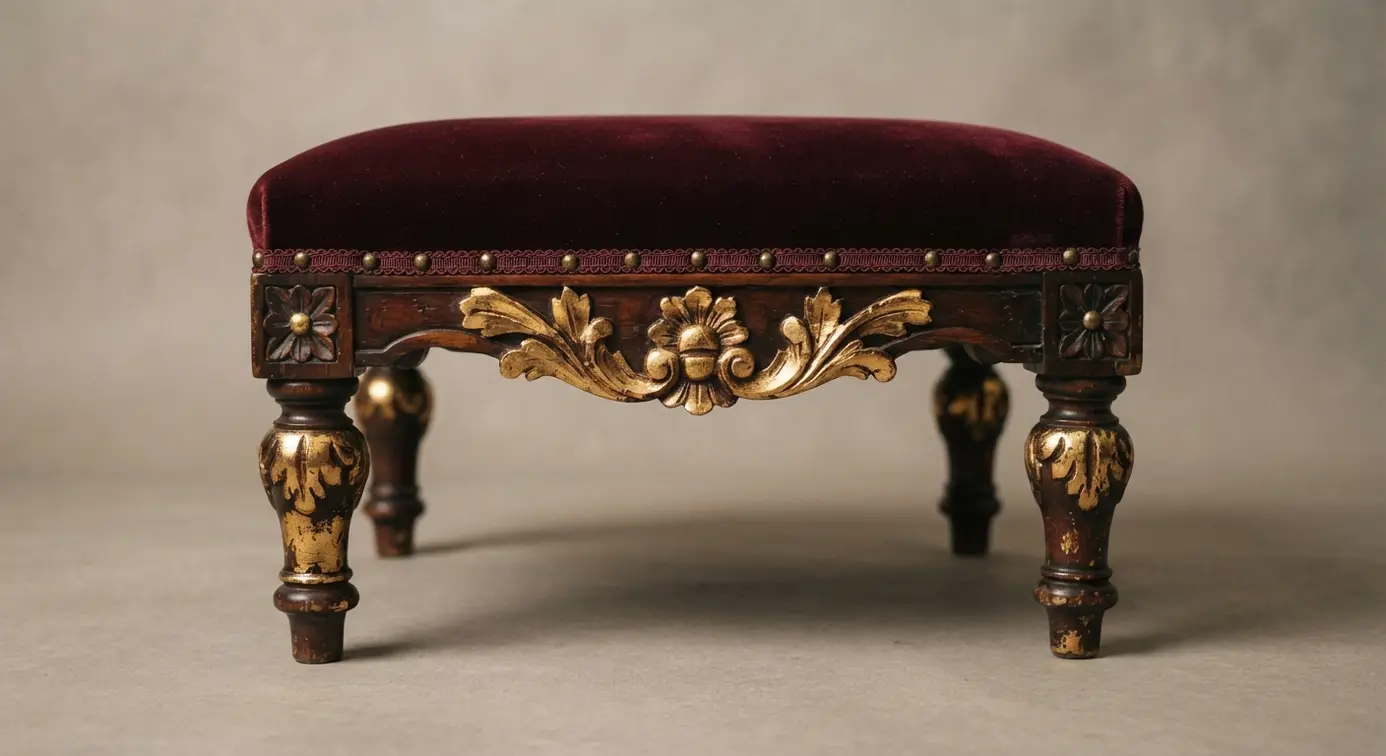
Who says a low bench cannot be a showstopper? This transformation is all about that brilliant, reflective finish that instantly shouts luxury. The secret is applying gold leaf sheets by hand to the carved details, which makes the ornate woodwork pop against a darker stain. You apply a special adhesive, wait for it to get perfectly tacky, and then gently lay the leaf over the carvings.
I love how this technique turns a simple seat into a true focal point. It works because that shimmer creates a stunning contrast with the rich timber, bringing historical charm to any vintage sewing chair makeover. For a cohesive look, your cover choice matters a lot, so picking a seat cover with custom hand-painted fabric designs can tie the whole aesthetic together beautifully.
My top tip is to work in a dust-free spot and test your adhesive on a scrap piece first. Trust me, patience here makes all the difference in achieving that flawless, opulent finish you are after.
10. Plaid Wool Upholstered Storage Chair: Cozy Hidden Storage
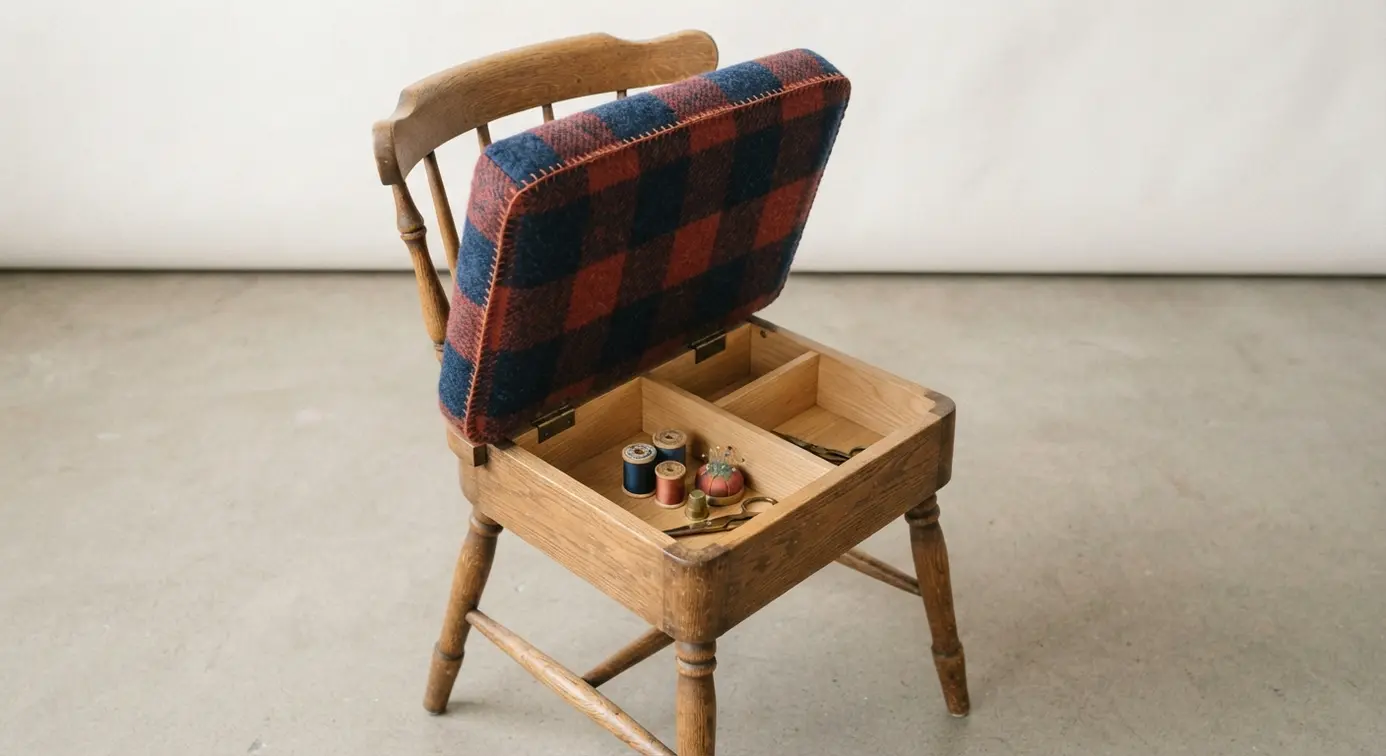
Ever feel like you need an extra seat and a place to stash supplies? This clever design solves both problems at once. It looks like a standard, cozy armchair, but the lift-up seat reveals a hidden compartment. You get all the comfort of wool upholstery plus a secret spot for your clutter.
I love how it turns a necessary piece into a tidy organization hack. It works because the storage stays completely concealed, so your room keeps looking neat and intentional. This is my go-to trick for making a small living area feel more organized.
Just remember to check the storage dimensions before you buy to ensure your vintage sewing chair makeover fits what you plan to store. For an extra warm touch, you could even add some woven baskets nearby for quick access to your tools.
Surface Protection Methods For Finished Woodwork
A matte or satin water-based polyurethane brushed over your sanded wood creates an invisible shield that locks in your finish. This clear coat is the final step that determines the piece’s character and longevity, protecting it from spills and scratches. You will notice it deepens the wood grain or gives your paint a unified, professional look.
Apply two thin coats with a foam brush, sanding lightly with 220-grit paper between layers for a silky feel. The key is to avoid glossy poly on older pieces, as it looks too modern and plastic-like. Proper surface sealing lets the frame’s history shine through while being ready for daily use.
Conclusion
Taking on a vintage sewing chair makeover is more than just a furniture project. It becomes a quiet ritual where you strip away old layers, test fabric swatches in the afternoon light, and finally sit down to stitch with something you reshaped yourself. The beauty of these builds is that no two results ever look the same because you get to make choices that match your own space and personality.
That distressed farmhouse piece might end up looking completely different in someone else’s hands, and that is exactly the point. Before you jump into your next find, take a minute to really test the frame for sturdy joints and bring a sample of your favorite material along. The most rewarding transformations happen when you trust your eye and let the piece guide you a little.
FAQs
Q: What type of fabric works best for a sewing chair that gets daily use?
A: Medium weight upholstery fabrics like cotton canvas, linen blends, or lightweight denim hold up well and are easy to sew. Look for double rub ratings above 15,000 if possible, but for home seating, a tightly woven natural fiber will last years and clean up nicely.
Q: How do I know if a vintage chair frame is worth saving?
A: Check that all four legs sit flat on the ground and give the frame a gentle shake from the back and arms. The joints should feel solid without loose movement or cracking sounds. Small surface scratches are fine, but avoid seats with soft or spongy wood around the corners.
Q: Can I reupholster a chair without sewing experience?
A: Yes, many beginners use simple staple gun techniques that replace seat covers without a machine. You can fold neat corners like wrapping a present and secure the fabric taut underneath. For more complex shapes, hand sewing a cushion cover is enough for a smooth finish.
Q: What paint finish holds up best on wooden chair arms?
A: Chalk paint with a clear wax topcoat or a water based enamel paint both provide a durable surface that resists scratches from daily handling. Avoid leaving bare chalk paint unsealed on areas your hands touch often, because it will absorb oils and wear unevenly over time.
Q: Should I replace the foam cushion when redoing an old chair?
A: It is almost always a good idea to replace old padding, especially if it feels crumbly or flat. High density foam in a thickness around two inches gives you comfortable support that holds its shape longer than the original material from most older seats.


