

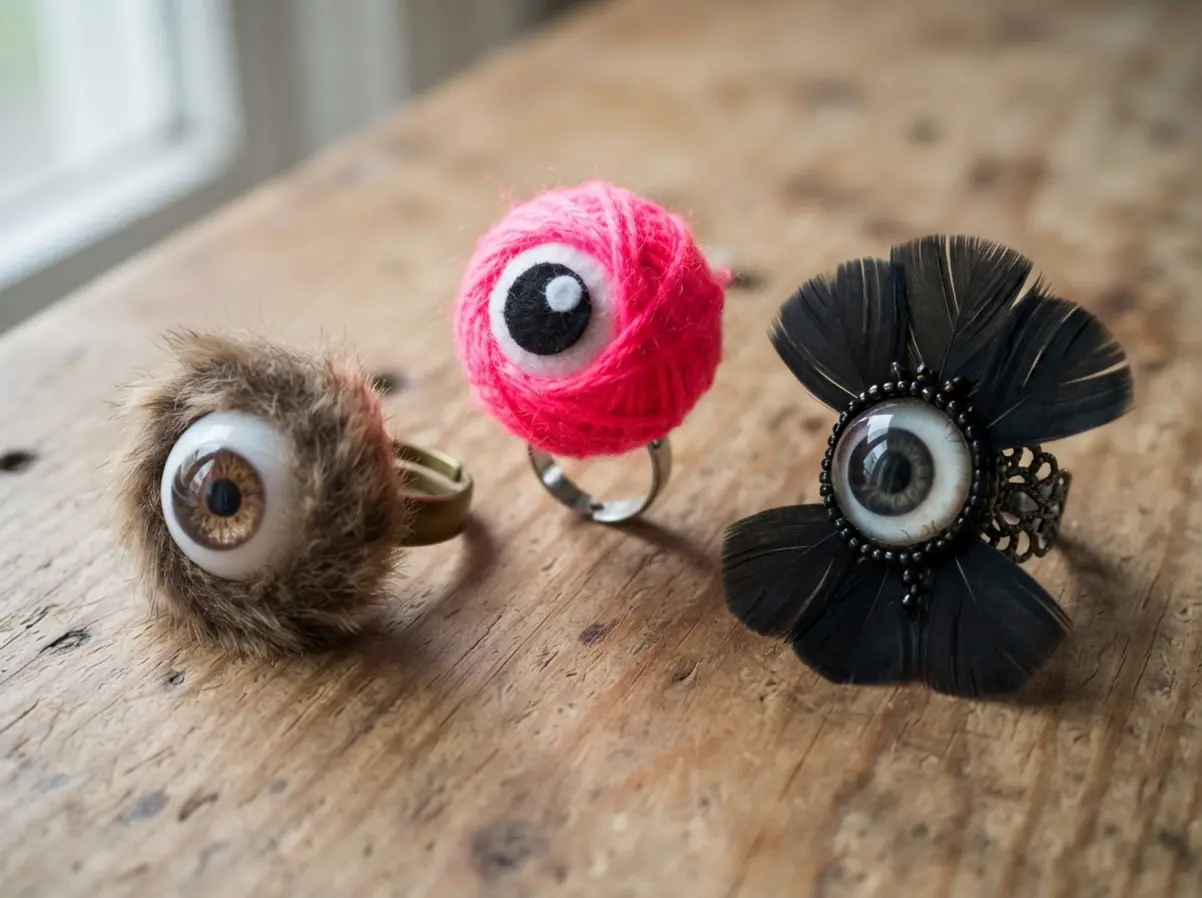
There’s something so fun about mixing the glossy realism of an eyeball with the chaotic texture of fake fur, yarn, or feathers. It is a project that lets you be as gross or as glam as you like. I love how these little builds turn a simple ring base into a personal statement of Halloween spirit. Let’s look at ten hairy eyeball ring designs that range from gothic to neon, each one a quick and high-impact addition to your spooky season toolkit.
Adhesive Selection for Durable Accessory Construction
The fastest way to ruin your DIY hairy halloween eyeball rings is reaching for a hot glue gun. Trust me on this, you need the long-term hold of a heavy-duty adhesive like E6000 industrial-strength glue for a ring that survives Halloween night.
Hot glue is brittle and will crack under pressure, letting your eye pop off at the worst moment. You want a flexible, waterproof bond that cures to a clear finish without any yellowing. Plan for a full 24-hour cure time before you wear the ring, pressing the cabochon firmly into place on the blank.
That patience is the secret to a durable accessory you can reuse for years. Keep your workspace clean while the adhesive sets.
Sourcing Realistic Optical Components for Horror Effects
Sourcing parts for DIY hairy halloween eyeball rings means you need a high-quality glass cabochon to achieve that unsettling, lifelike stare. The good news is, you can find these online, but you must look for a flat back and a printed iris with hyper-realistic depth.
Cheap plastic doll eyes look cartoonish and ruin the biological horror effect you are going for. A premium cab has an optical ‘follow-you’ quality that makes the sclera look wet and real.
Pair that with a color palette featuring necrotic green veins or bloodshot capillaries for a truly gruesome touch. This contrast between the pristine iris and the damaged sclera creates the uncanny valley effect that makes these rings so memorably spooky.
1. Faux Fur Rimmed Realistic Eyeball Ring
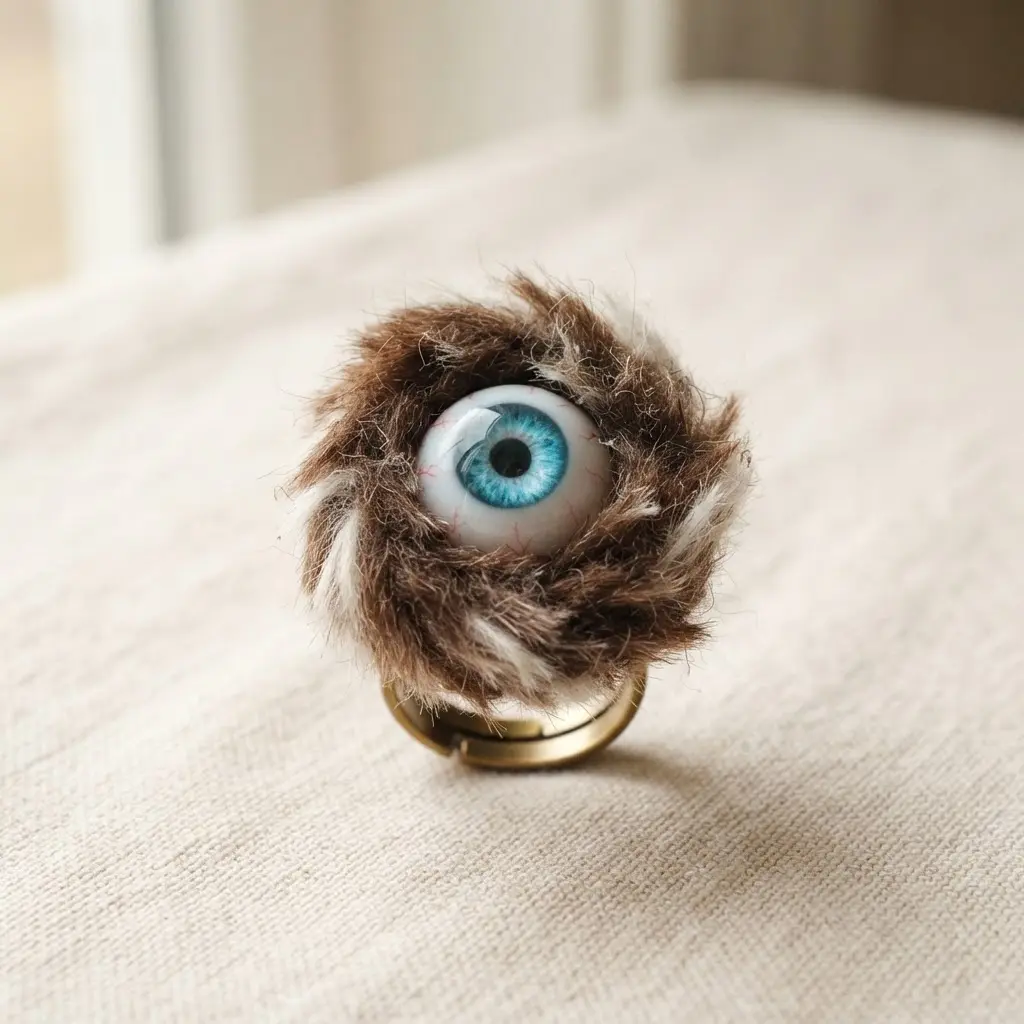
This one looks complex, but making your DIY hairy halloween eyeball rings is a surprisingly quick win for a creepy accessory. The core technique is gluing a detailed realistic eyeball cabochon to a ring base and then framing it with soft faux fur. You will cut strips of fur and carefully adhere them around the eye, creating a stark contrast between the smooth, hard surface and the shaggy texture.
It works because the unsettling realism of the eye paired with the fuzzy rim feels both monstrous and intriguingly tactile. I love using a strong jewelry adhesive to make sure everything stays put for the whole night. This project is a fantastic way to level up from simpler easy Halloween crafts for adults because it adds a custom, high-impact detail.
The key is to choose a high-quality, hand-painted eyeball for that truly uncanny valley effect. Does that not look wonderfully grotesque? Keep your blades sharp when cutting the fur strips.
2. Neon Yarn Wrapped Eyeball Statement Ring
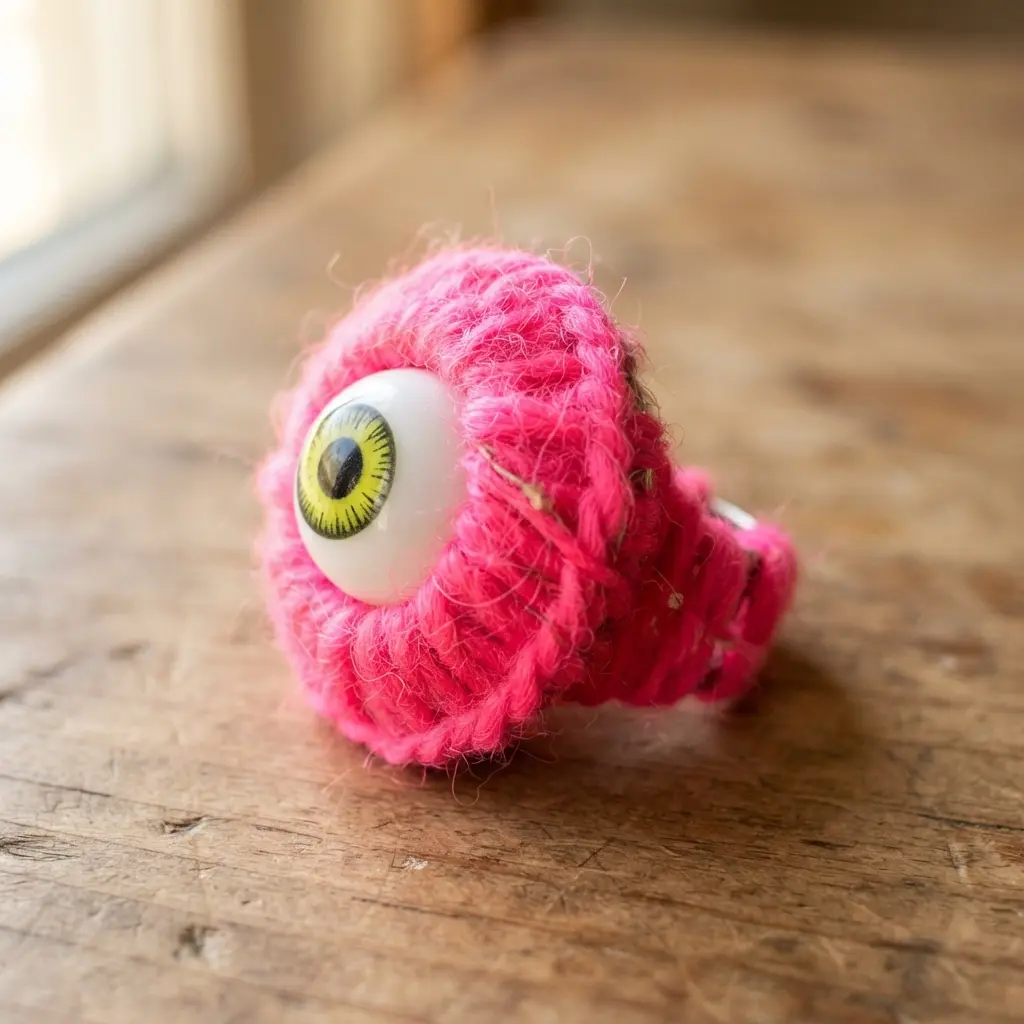
Who would have thought something so delightfully creepy could feel so soft and playful? This is the ideal model for DIY hairy halloween eyeball rings if you love a bold accessory that makes people smile and look twice. You start by firmly gluing a flat-backed glass cabochon eyeball to the pad of an adjustable ring blank. Then, you just wrap and wrap with your brightest neon yarn until the metal is completely covered and the eyeball is perfectly framed.
It works because the contrast is everything. That slightly unsettling eye paired with cheerful, glowing yarn creates a unique personality you cannot get from a store-bought piece. My go-to tip is to use small dabs of fabric glue as you wrap to keep everything secure.
If you enjoy other tactile projects, you will find the same hands-on fun in making spooky spider Halloween crafts with yarn and pipe cleaners. Feel how satisfying it is to create such a fun, conversation-starting accessory. Store extra yarn lengths for quick repairs.
3. Black Feathered Gothic Eyeball Ring
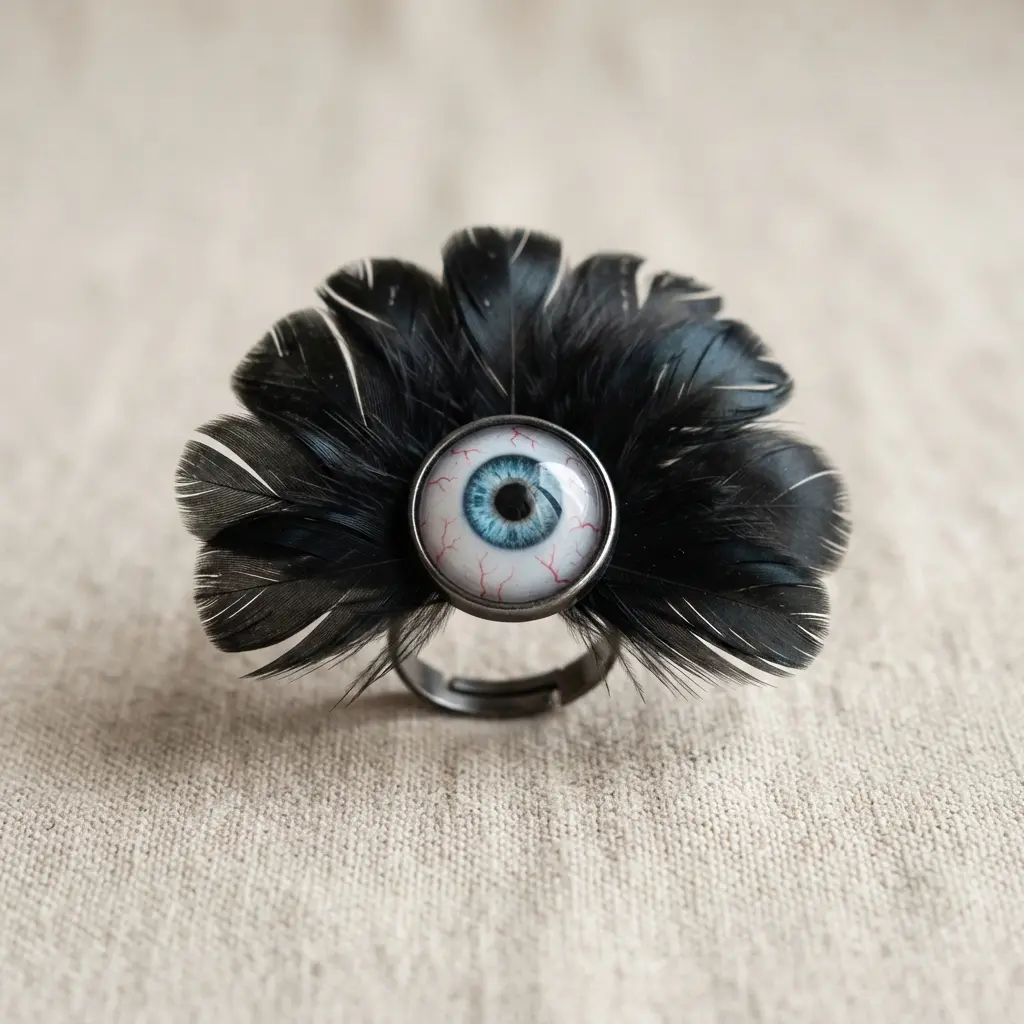
Ever wondered how to add a touch of macabre mystery to your jewelry? The magic of DIY hairy halloween eyeball rings lies in combining a realistic glass eyeball with delicate black feathers. You will affix the eyeball to a dark metal ring base using a strong jewelry adhesive. Then, carefully arrange the feathers around it to create a wing-like frame.
It works because the feathers add gothic texture and movement, suggesting something mystical and watchful. I love how this piece feels like a story on your finger. For a durable alternative to real feathers, look at making some DIY Halloween bookmark crafts to practice with similar lightweight materials first.
Use tweezers for precise feather placement, and feel that satisfying gothic drama when it all comes together. Press each feather down gently until the glue sets.
4. Silver Filigree Bloodshot Eyeball Ring
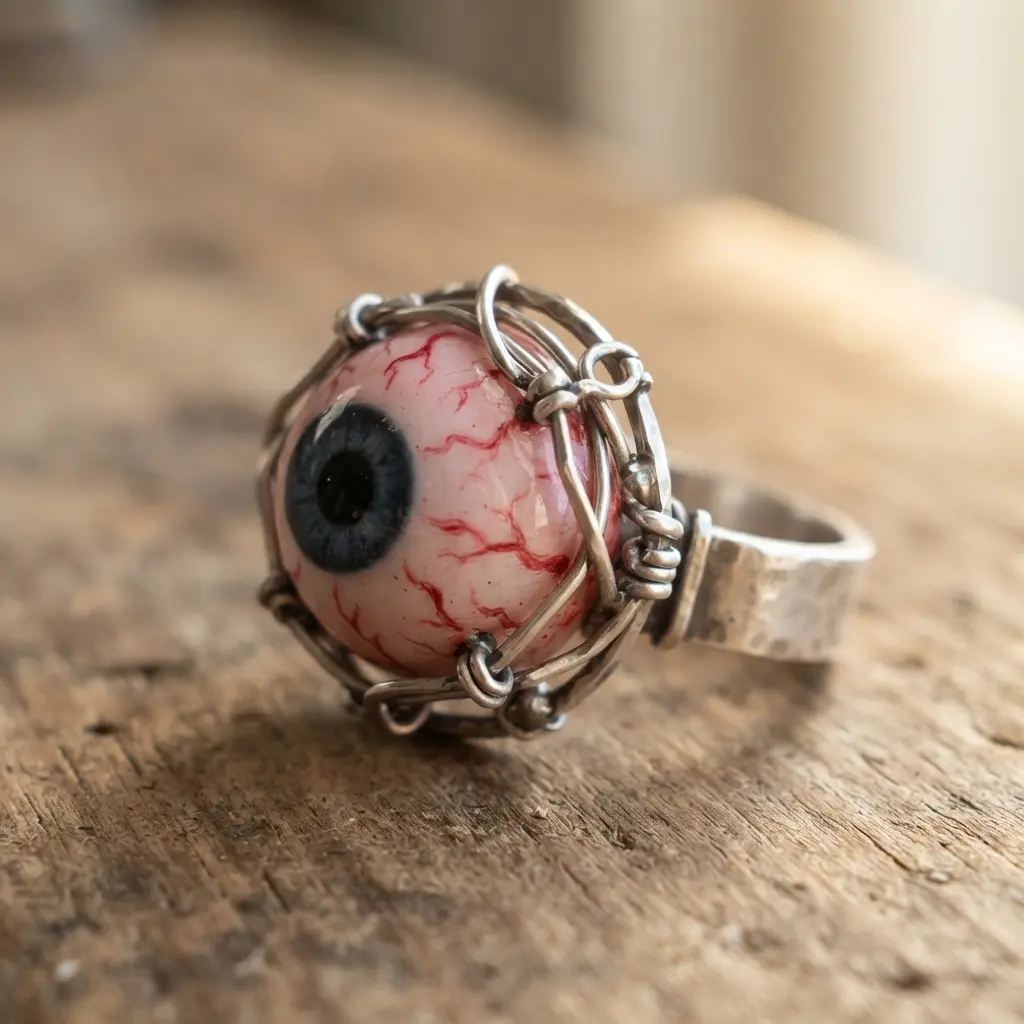
This blueprint for DIY hairy halloween eyeball rings is a gorgeous contradiction, blending delicate metalwork with a truly unsettling gaze. You start by shaping sterling silver wire into scrolls and spirals, soldering them to form an airy, openwork band. Then, you paint or embed those fine, realistic red veins onto the eyeball’s surface.
The final touch is an antique finish that makes all that detail pop. It works because that sharp contrast between the ornate frame and the raw, staring eye is impossible to ignore. I love how it feels like a piece of elegant gothic jewelry that tells a story.
Getting the bloodshot effect right is key, so use the tiniest brush you have and a light touch. It is a fantastic, detailed project for someone who has already mastered basic wire skills and wants to level up their creepy accessories, perhaps while planning some no-sew Halloween costumes for kids for the rest of the family. The payoff is a stunning, conversation-starting ring you will be proud to wear.
5. White Synthetic Fiber Spooky Eyeball Ring
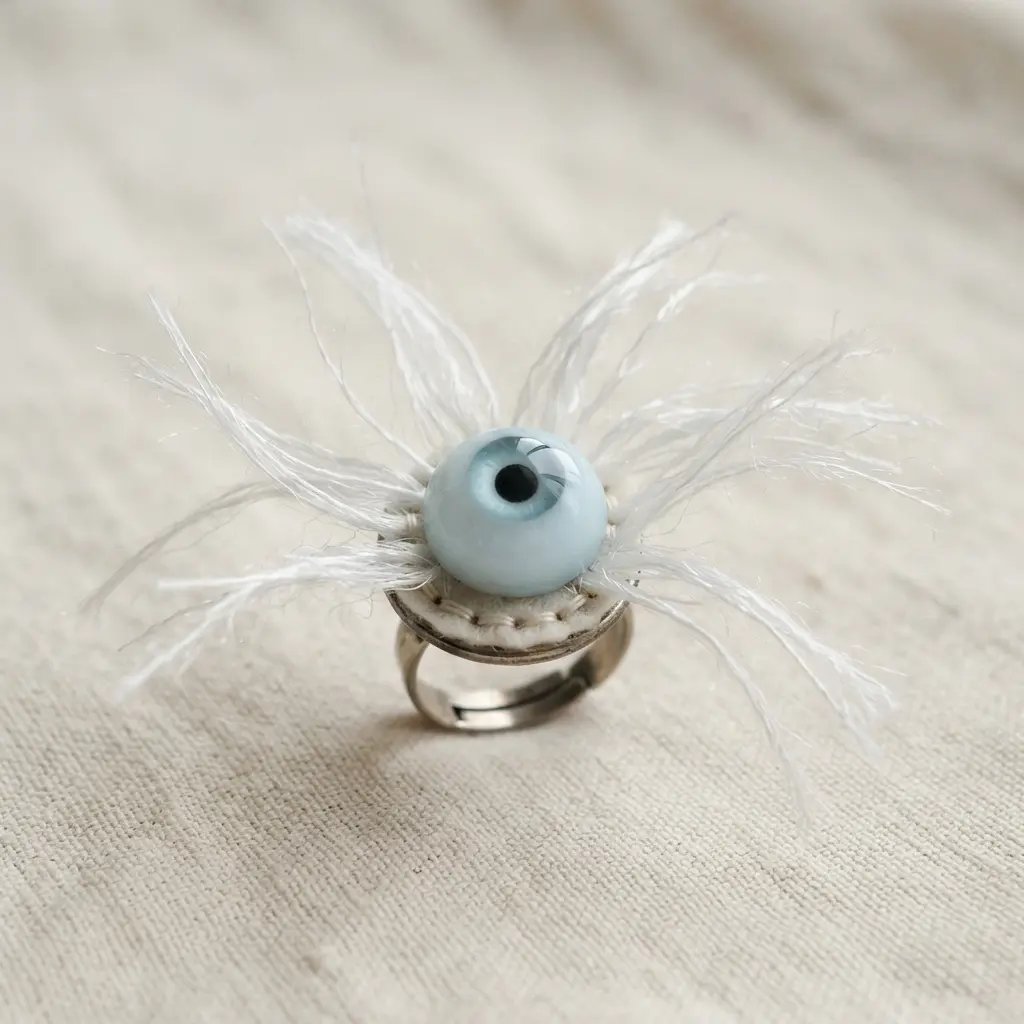
Ever wanted a ring that feels as creepy as it looks? Building these DIY hairy halloween eyeball rings delivers a wonderfully gross, fuzzy texture. You start by painting a small craft eye with a spooky iris and pupil.
Then, you carefully glue fluffy white synthetic fibers all around it, leaving that unsettling detail peeking through. It works because the soft, hairy texture makes the classic eyeball motif feel fresh and tactile. I love how it turns a simple plastic dome into something you just have to touch.
A clear coat of gloss varnish on the eye gives a fantastic wet look that contrasts with the matte fibers. Pro tip: add this statement piece to your costume after you finish a festive Halloween wreath craft for your door. It is the perfect unsettling detail for your whole spooky ensemble.
6. Multi Colored Spiky Hair Eyeball Ring
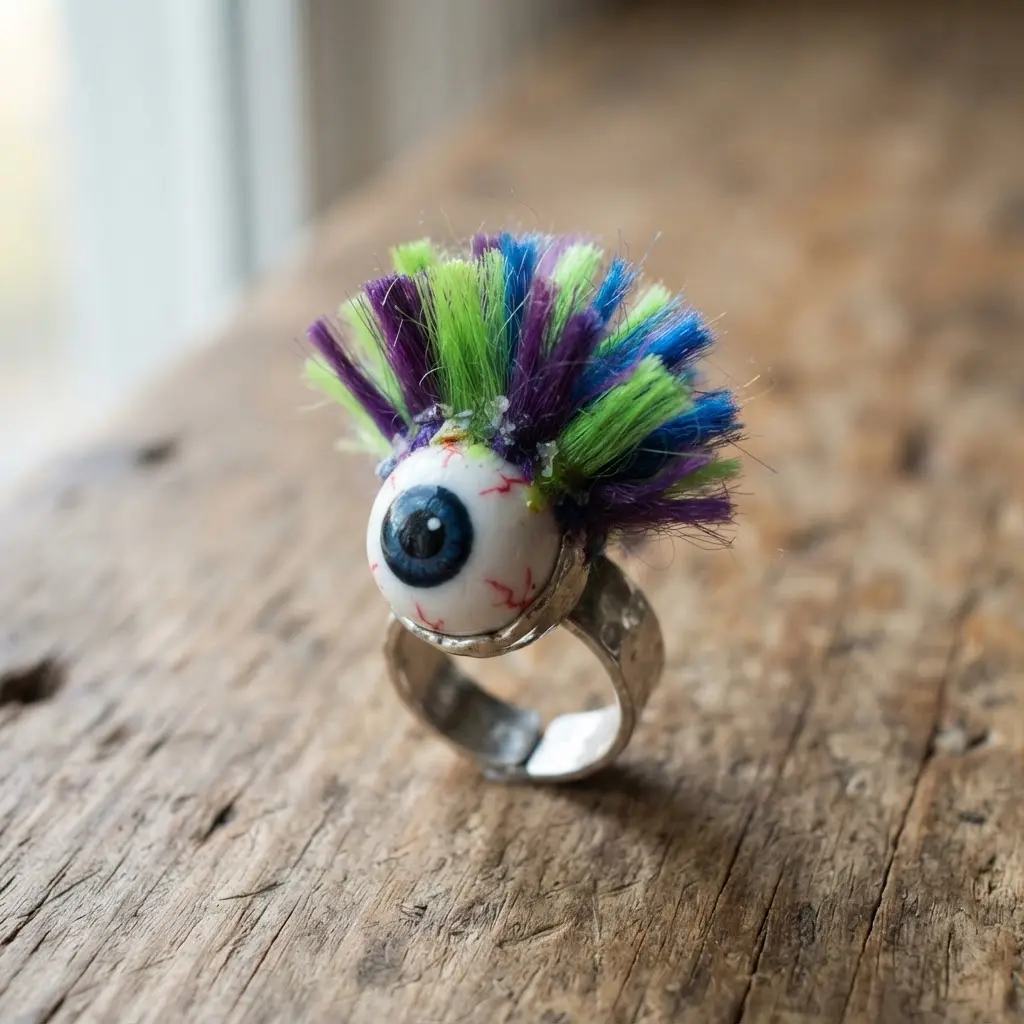
This is the ring that makes people stop and stare. Making standout DIY hairy halloween eyeball rings means starting with this wild idea: a central eyeball with a funky, textured fringe. I love using polymer clay for this because you can sculpt the eyeball and the individual spikes all from the same material.
Bake them, then paint each spike a different vibrant color before you glue the whole assembly to a ring band. It works because the mix of a staring eye and that chaotic, colorful hair is pure playful energy. The trick is to make sure your adhesive is strong enough to hold everything.
A fun extra step is to add a printable Halloween gift tag when you give one to a friend, so they know exactly what they are getting into. Keep your paint palette organized for faster coloring.
7. Golden Wire Wrapped Hairy Eyeball Ring
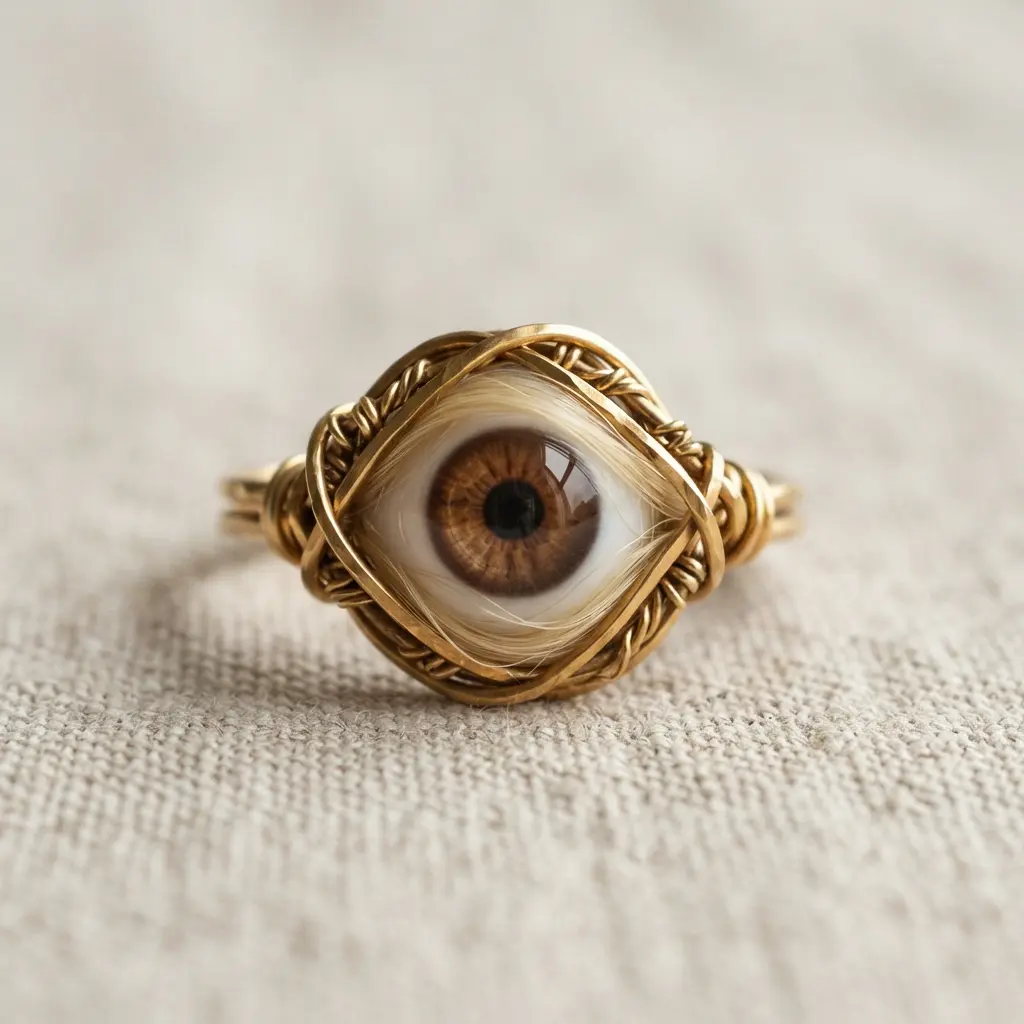
Assembling these DIY hairy halloween eyeball rings looks intricate, but honestly, it is a fantastic way to make a spooky accessory that feels both elegant and unsettling. You start by wrapping a gold-tone artistic wire around a glass eye or painted bead to form the ring band and a secure bezel. Then you add your chosen creepy texture, like short synthetic fibers or tiny feathers, around the eyeball’s base before finishing the wrap.
It works because that metallic shine against the weird, fuzzy texture creates an instant conversation piece. A practical tip is to use a small dab of strong adhesive on your fibers so they stay put and do not shed. When you are done, you have a unique, handcrafted ring perfect for your Halloween costume.
It pairs wonderfully with other handmade items, like filling DIY Halloween treat boxes for a complete spooky gift set. Wire cutters make trimming the excess much cleaner.
8. Matte Clay Eyeball with Eyelash Hair
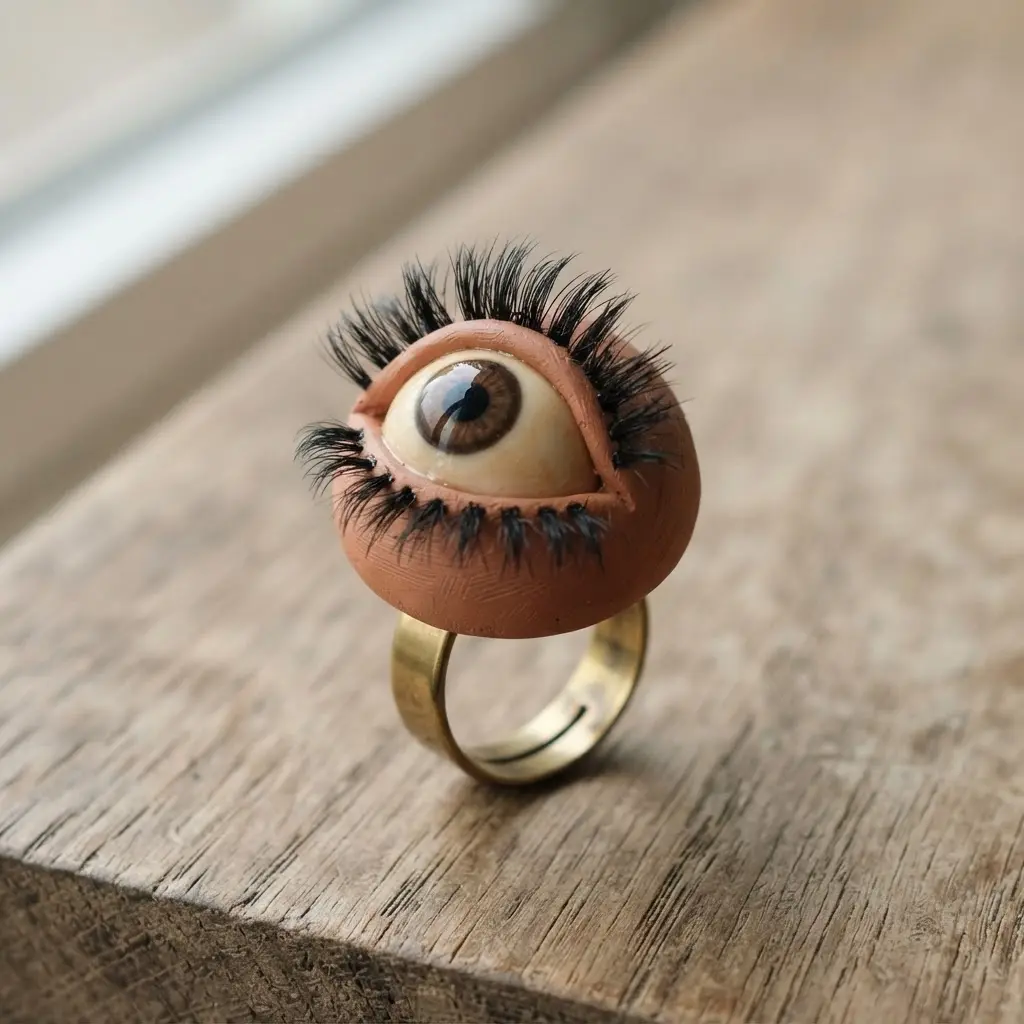
This one is my favorite among DIY hairy halloween eyeball rings for its realistic, unsettling look. You start by sculpting a smooth sphere from air dry clay and gently carving out the iris area. Then you paint the sclera, iris, and fine red veins with matte acrylics for that perfect prosthetic appearance.
Once the paint is dry, you carefully cut and attach sections of false eyelashes around the edge. Isn’t that a creepy detail? The lashes add a textural element that makes this eyeball feel almost real.
This project works so well because the matte finish gives it a serious, medical quality, unlike a glossy toy. For a fun, spooky break after sculpting, try out a printable Halloween coloring page. My go-to tip is to use a matte sealer as your final step to lock in that finish and protect all your hard work.
You will love how gross it turns out. Let the clay dry completely overnight before painting.
9. Distressed Burlap Base Eyeball Ring
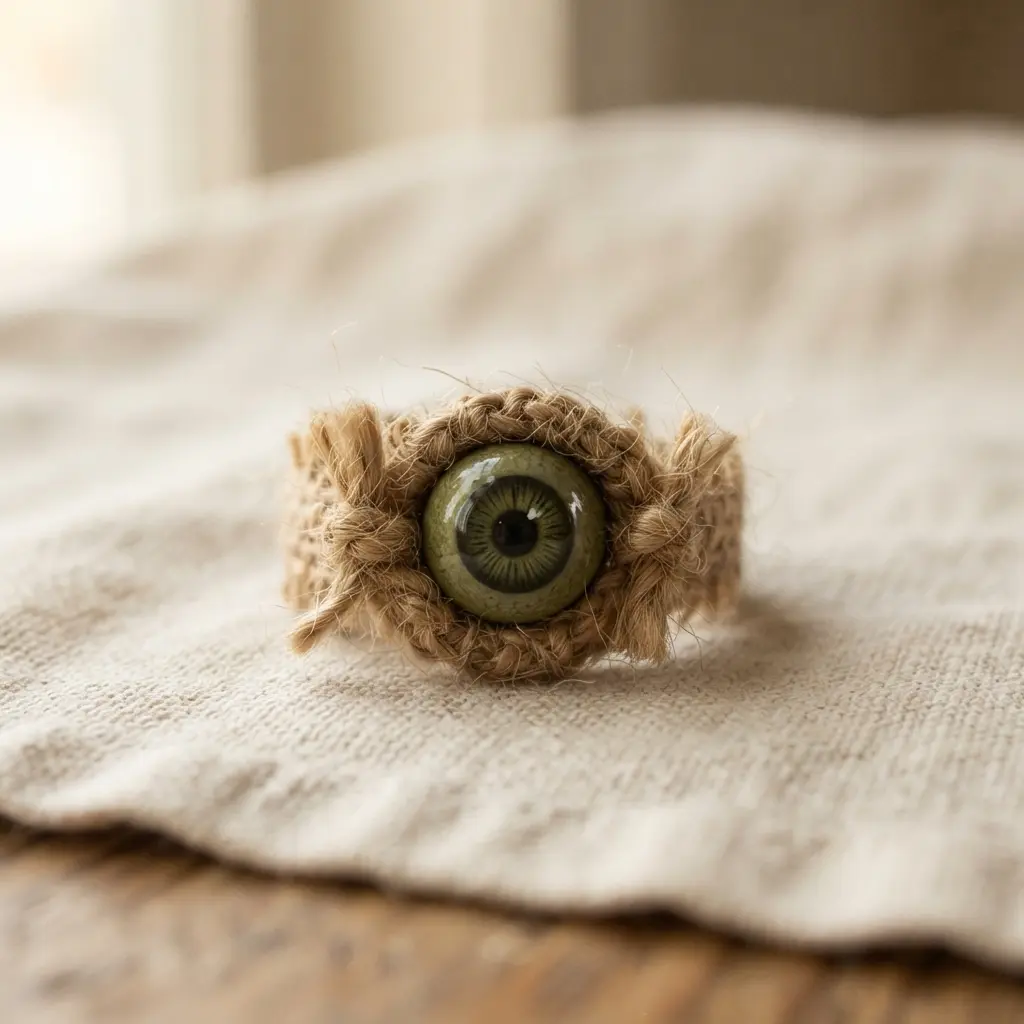
Who would have thought burlap could make something so unsettling? Wrapping DIY hairy halloween eyeball rings in burlap makes something surprisingly creepy, and this one is all about texture. You take a piece of genuine burlap, tear it into a small, frayed patch, and glue your eyeball right onto the center.
The rough, fibrous base makes the smooth, glossy eye look even more unsettling. It works because the rustic, aged feel of the fabric adds a whole new layer of macabre character. I love using a strong industrial-grade glue for this to make sure everything stays put.
For a truly spooky setup, you could pair this ring with some spooky cheesecloth ghost decorations on your mantle. Doesn’t that combination just feel perfectly haunted? Rough up the burlap edges with your fingers before gluing.
10. Pastel Goth Hairy Eyeball Ring
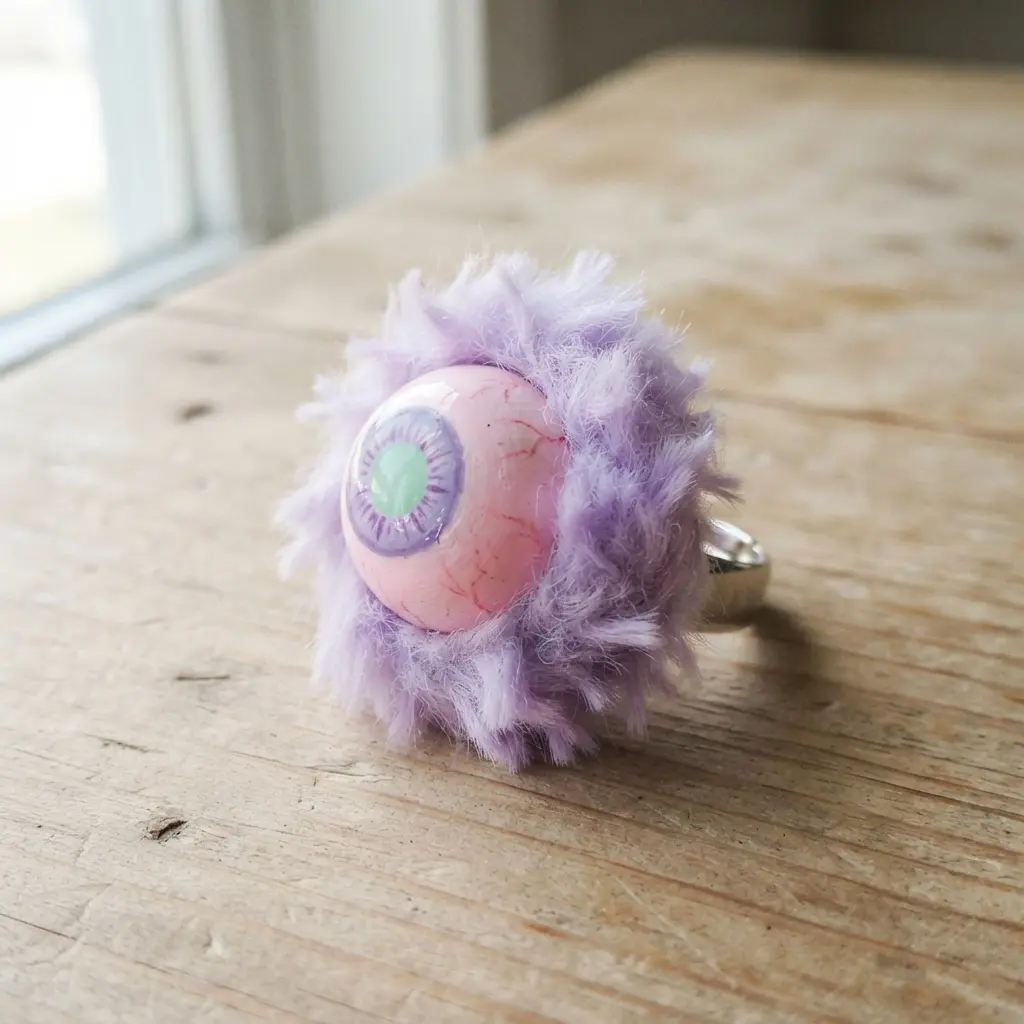
You can sculpt the eyeball from polymer clay or pour resin into a mold, then paint on a pastel iris and pupil. This pastel take on DIY hairy halloween eyeball rings plays the most fun trick on your eyes, looking like a creepy accessory dressed in soft pinks, lavenders, and mint greens. The ‘hair’ comes from little synthetic fibers or some wild lashes you glue around the edge.
I love how it perfectly captures that cute and creepy vibe. The secret is using a strong adhesive like E6000 to attach your finished eyeball to the ring band. This prevents any tragic pop-offs and lets you wear your spooky pastel statement with confidence.
After you have made your ring, you could use the same pastel goth approach on a DIY Halloween Boo sign to tie your whole decor theme together. Does that not feel like such a clever, stylish twist? Mix your paint colors slowly to hit the exact soft shades.
Protecting Delicate Fibers and Cabochon Surfaces
Maintaining your DIY hairy halloween eyeball rings starts with a quick pass with a lighter along the cut edges of your faux fur to prevent it from shedding all over your costume. This heat-sealing step takes seconds and protects weeks of work. For the eyeball itself, you want to keep that glassy finish pristine.
Avoid handling the cabochon surface with your fingers after the adhesive has cured to prevent oily smudges. Store your finished ring in a soft pouch or a small box where the delicate synthetic fibers will not get crushed. This simple care ensures your tactile texture contrast remains sharp and your accessory looks professionally made every time you put it on.
Conclusion
The best part about making your own collection is how it reflects your personal style, whether you lean toward gothic drama or playful neon. Each of these ideas starts with that same simple, creepy charm but lets you run with it in your own direction.
My advice is to pick the one that made you grin the most and gather your materials—a strong jewelry glue, your chosen eyeball, and something wonderfully textured for the hair. Once you make your first one, you will want to make a whole set for every finger.
These DIY hairy halloween eyeball rings are a small, satisfying way to add a big dose of personality to your costume. Share your spooky creations with friends and watch their reactions closely.
FAQs
Q: What is the best glue for making a hairy eyeball ring?
A: Use a high-tack jewelry glue or a strong hot glue. These hold synthetic hair, feathers, and yarn securely to the ring base and the eyeball itself, preventing shedding when you wear it.
Q: Can kids make these Halloween rings safely?
A: Yes, with supervision for steps involving glue. Choose low-temperature glue guns and pre-made plastic eyeballs. The assembly is simple, focusing on attaching fun textures.
Q: Where can I find the eyeballs for this project?
A: Craft stores and online retailers sell small plastic or acrylic eyeballs in many sizes. Look in the doll-making or general craft sections for the best selection.
Q: Will the hair or fur fall off the ring?
A: It should not if you attach it properly. Apply glue generously to the base of the hair material and press it firmly against the ring. Let the glue cure fully before wearing.
Q: How do I make the eyeball look more realistic?
A: Start with a high-quality acrylic eye. You can add fine red lines with paint for bloodshot veins or use a glossy sealant over the iris to make it look wet and lifelike.








