We have all opened a closet door only to be greeted by a cascade of scarves spilling out or a precarious tower of hats threatening to topple. It is a familiar, slightly frustrating moment that turns a simple search for an accessory into a mini excavation. While we have been accustomed to stuffing these beautiful items into drawers or letting them pile up, there is a better way that honors both their function and their form. I love seeing accessories go from hidden clutter to a joyful, accessible display.
Building a diy scarf and hat organizer focuses on clarity, accessibility, and a touch of personal style, using everything from repurposed materials to clever hardware. Let us turn that tangled pile into a feature you will be happy to see every morning.
Evaluating Vertical Space and Wall Material Requirements
The most common reason a DIY wall organizer fails is using hardware that pulls away from the surface. Before assembling any diy scarf and hat organizer, you need to locate the studs behind your drywall for any system holding more than a few lightweight scarves. For plaster or masonry walls, that means using screw-in masonry anchors rated for the full weight.
The good news is you can test your wall material with a simple pushpin. If it goes in with firm pressure, you are likely working with drywall. A solid mounting point prevents the whole thing from sagging under the weight of winter woolens. This upfront check takes five minutes but saves you from a frustrating redo later.
Balancing Accessory Visibility and Closet Storage Capacity
When designing a diy scarf and hat organizer, you should plan for the visual weight of your bulkiest items first. Space your hooks or pegs at least eight inches apart to let a chunky knit scarf or a wide-brimmed hat breathe. This prevents the visual clutter that makes a small closet feel chaotic.
A modular system like a painted pegboard panel is perfect because you can always rearrange hooks as your collection grows. You create intentional negative space around each piece, which turns storage into a decorative element. Trust me, this balance makes grabbing your favorite accessory a pleasure, not a puzzle.
1. Cascading Shower Ring Hanger Display
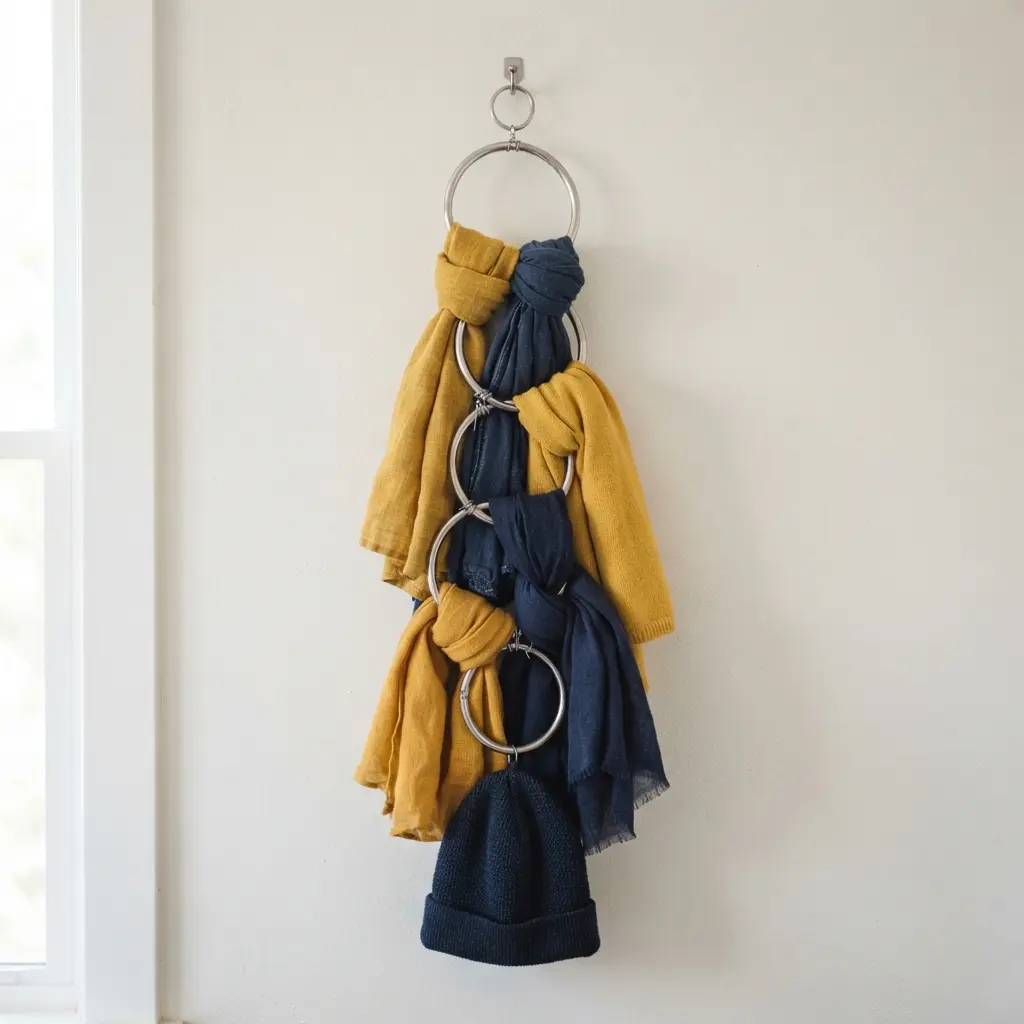
Ever wonder where all your shower curtain rings go? This simple multi-hook hanger solves that mystery. It looks like a standard clothes hanger, but with a series of hooks cascading down from the main bar. Once your diy scarf and hat organizer uses a few cascading rings, you hang it in your closet or on a door, then clip each ring onto its own dedicated hook.
I love this one because it instantly transforms vertical dead space into a neat, accessible display. Your rings stay untangled and visible, so you never have to dig through a messy drawer again. It is a fantastic space-saving solution for any small closet.
Before you start, a solid grasp of how to organize locker supplies helps you think creatively about vertical space. The same principle applies here. Try it and feel the satisfaction of a perfectly ordered accessory station.
2. Wall Mounted Wooden Dowel Rack
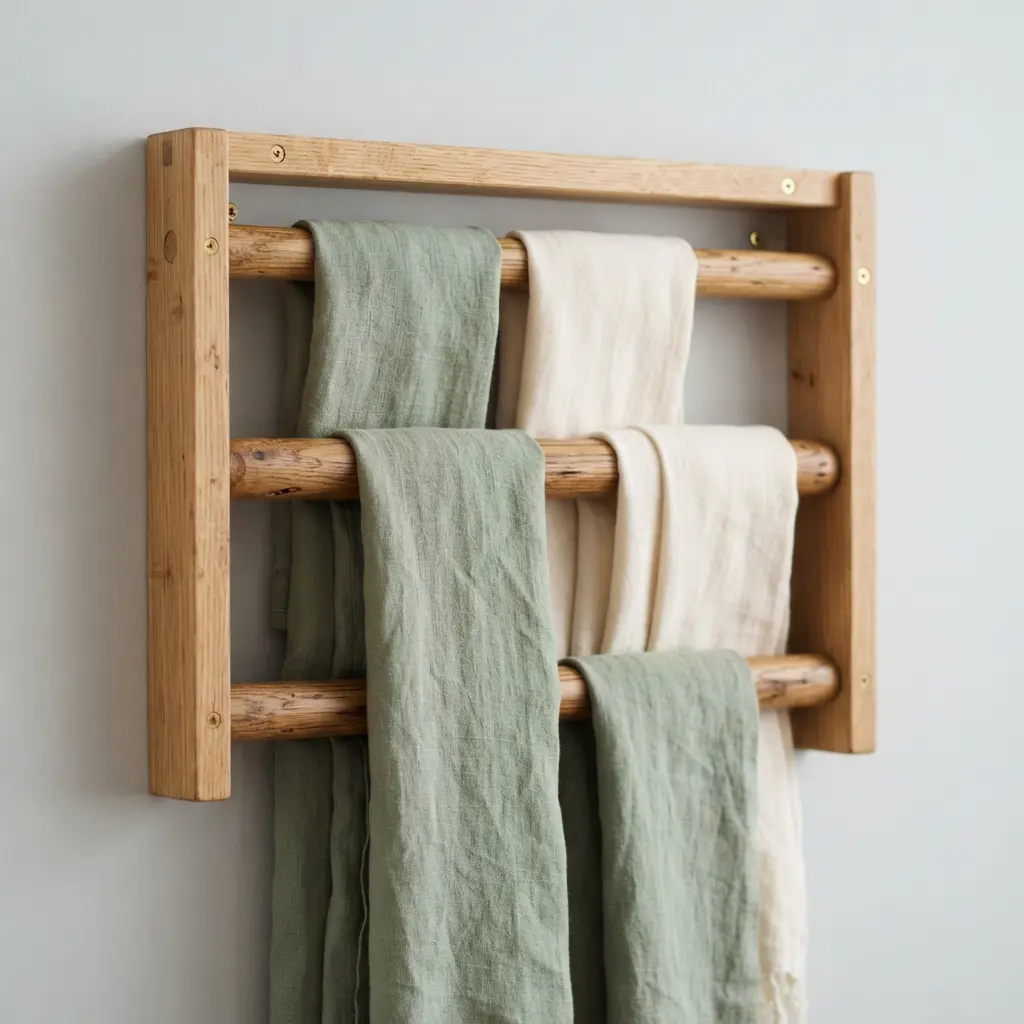
Ever looked at a blank wall and thought it could be doing more for you? This project is the perfect answer. It is simply a sturdy board mounted to your wall, with a few wooden dowels poking out. You just hang your scarves and hats right on those pegs, which makes a reliable diy scarf and hat organizer.
It feels so satisfying to have everything visible and off the floor. I love how it keeps things neat and accessible. The natural wood looks warm and adds a cozy touch to your room.
You can easily customize it by painting the board or choosing different dowel lengths. Trust me, seeing your favorite accessories displayed like this is a real mood booster.
3. Modular PVC Pipe Jewelry Cubby
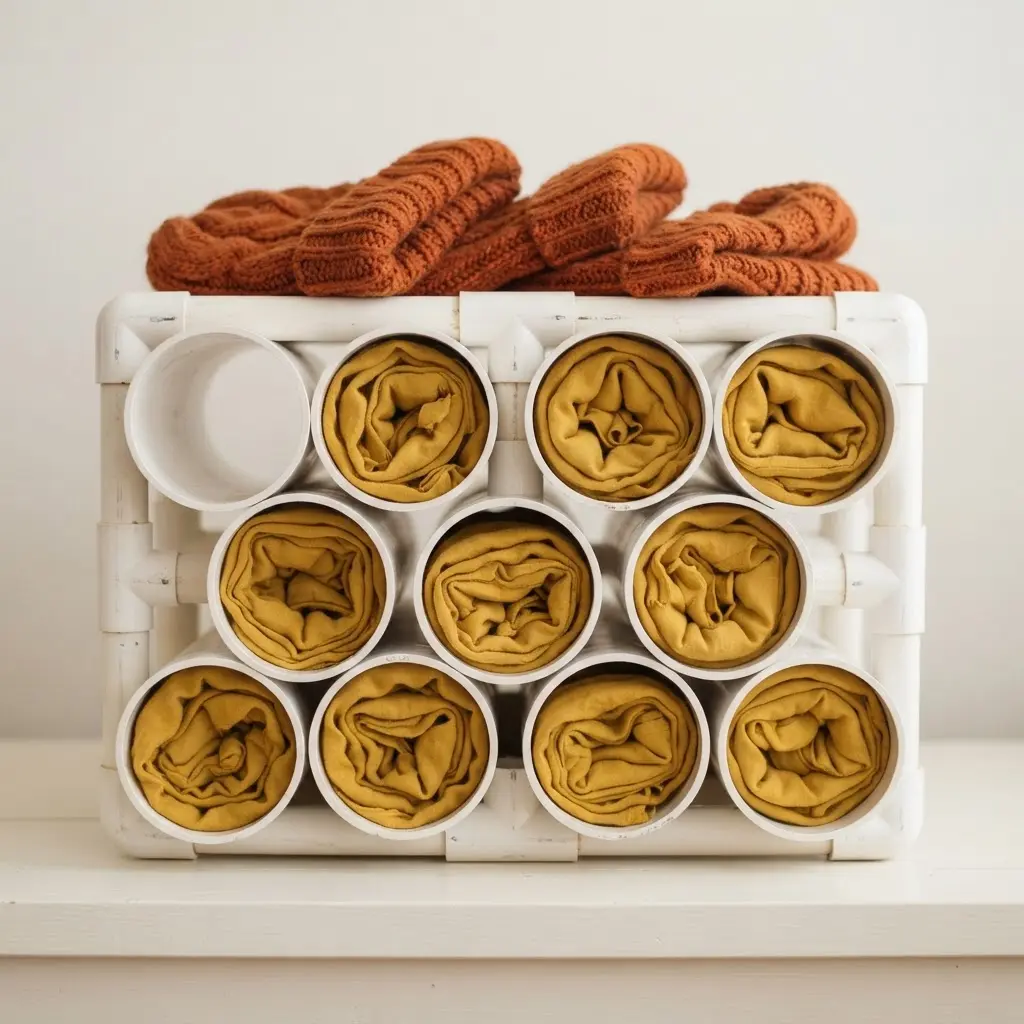
Who knew plumbing supplies could look so chic on a dresser? This project is a personal favorite because it feels so clever and modern. For this diy scarf and hat organizer project, you start by cutting lengths of PVC pipe into short segments with a ratcheting pipe cutter.
Then, you simply glue those segments together into a grid or staggered pattern on a backing board. It works so well because each little cubby keeps delicate items like necklaces and rings separate and instantly visible, stopping the dreaded tangle.
For a cohesive look that ties into your whole space, you can paint the whole unit to match your bedroom organization and decor theme. It is a seriously satisfying way to finally see your whole jewelry collection at a glance.
4. Leather Strap and Brass Hook Rail
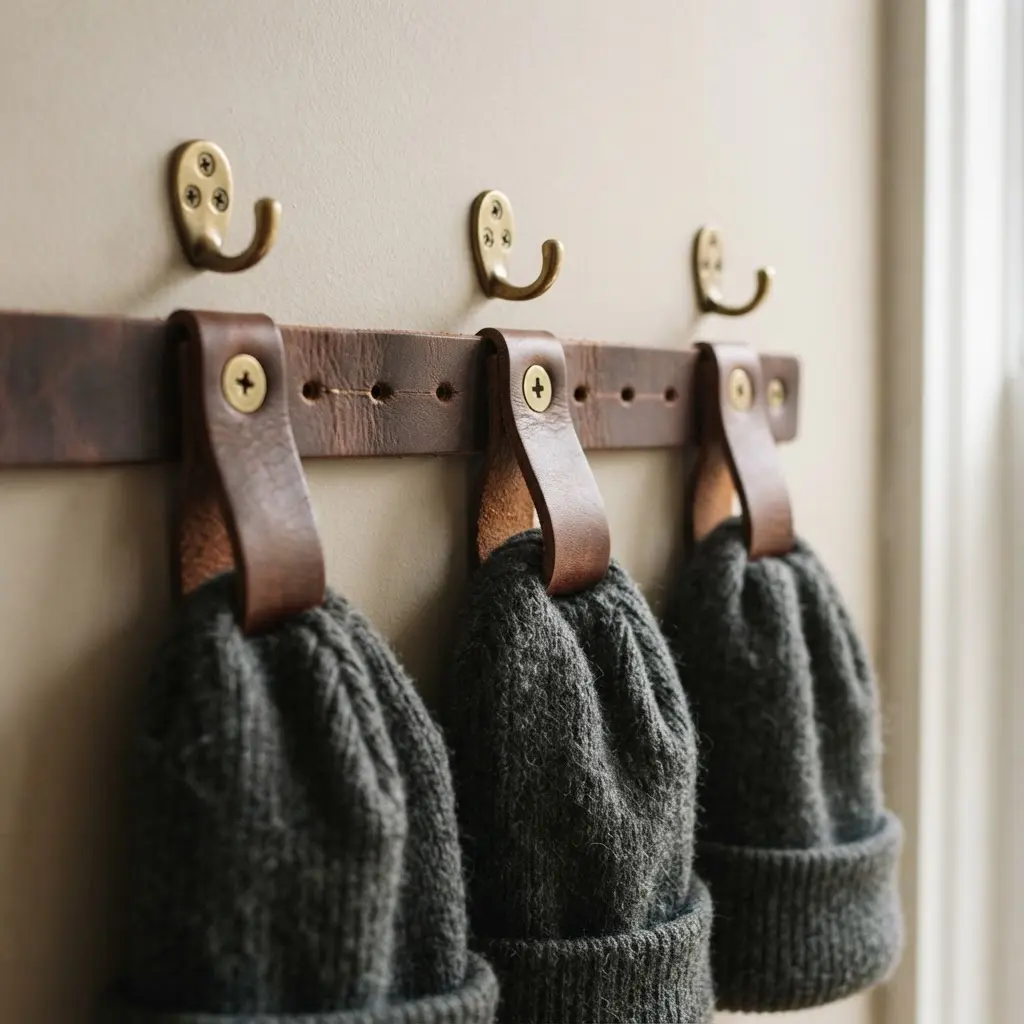
You might think this look is strictly for rustic decor, but trust me, it works in so many spaces. It is simply a folded leather strap secured to the wall, with brass hooks attached to it for hanging. A well-crafted diy scarf and hat organizer relies on solid brass hooks that are durable and develop a lovely patina, while the leather adds instant warmth and texture.
This combination creates a minimalist, vertical storage solution that feels both functional and like a piece of decor. The key is making sure you install it properly with the right wall anchors, as a secure mount is everything. Once it is up, you will love how it declutters an entryway or bedroom.
For another smart way to maximize a small storage area, reading about clever locker organization ideas can give you great inspiration. Does that not look stunning and organized?
5. Repurposed Vintage Ladder Scarf Stand
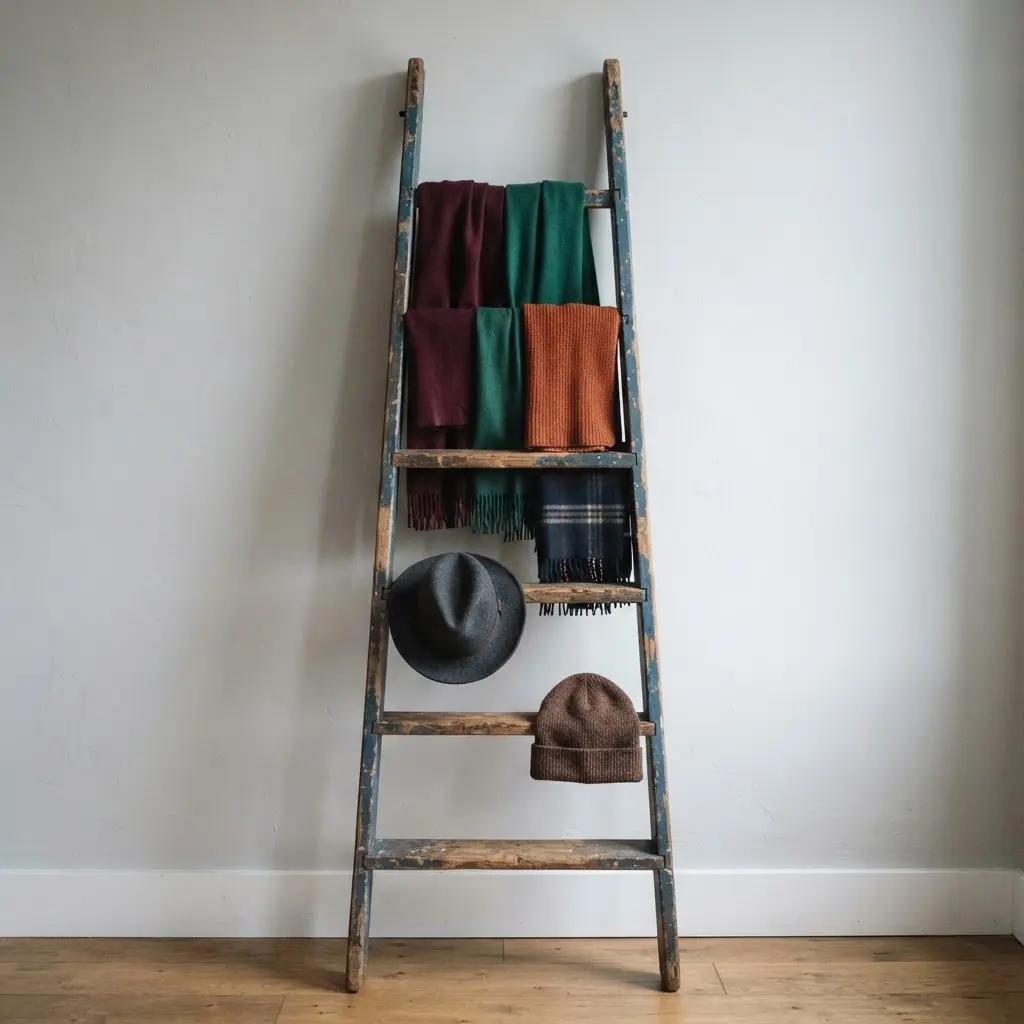
Who would have thought an old ladder could be so pretty and practical? I love this one because it turns a forgotten piece into a functional showpiece. For a vintage-inspired diy scarf and hat organizer, you simply drape your scarves over the wooden rungs, and suddenly your whole collection is on display, tangle-free and easy to see.
Isn’t that a wonderful way to add a rustic touch to a room? The key is finding a ladder with good rung spacing for your scarves and giving it a proper clean-up. Sand any rough spots to protect delicate fabrics, and consider a coat of clear sealant to preserve that lovely, weathered look.
This project feels so satisfying because you are giving new life to something old. Your scarves get to be both stored and styled, and you end up with a unique conversation piece. Feel proud of your clever upcycle.
6. Pegboard Accessory Wall with Clips
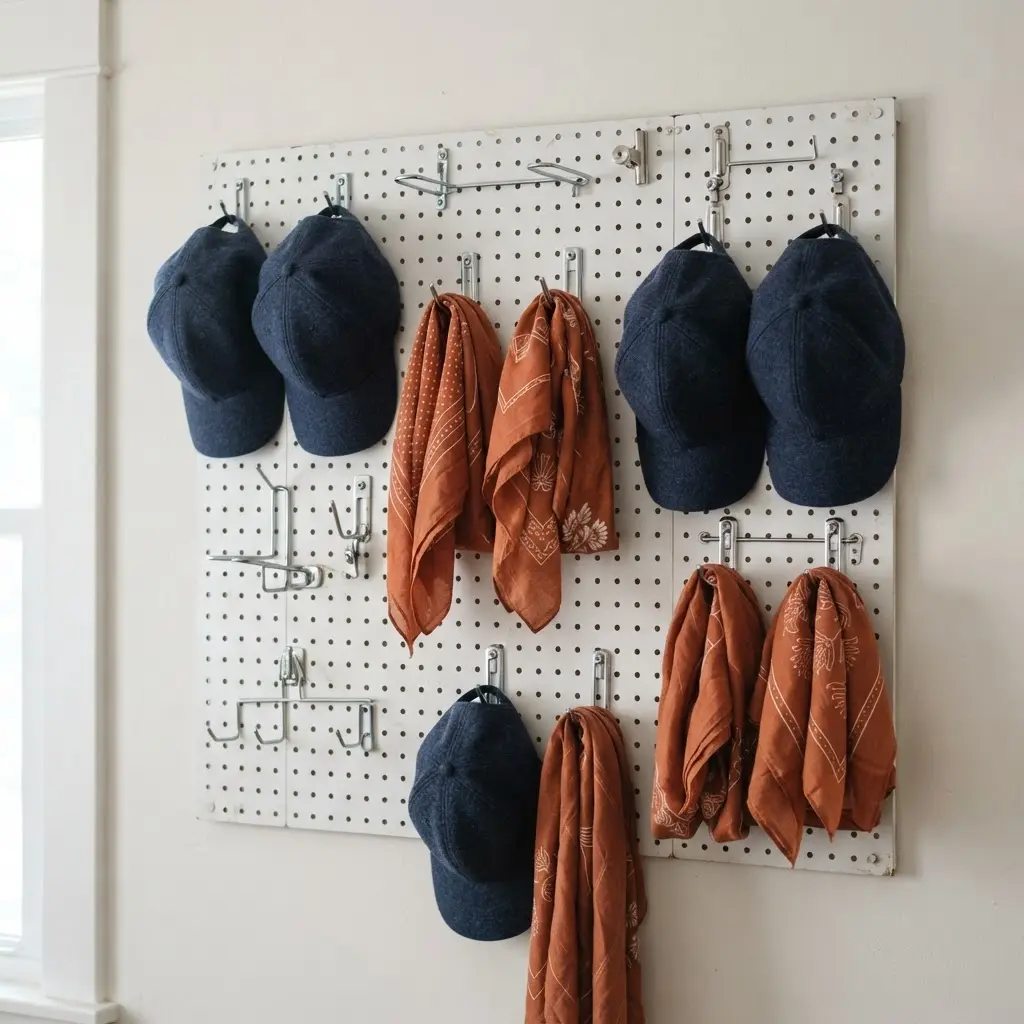
Ever feel like you have a collection of oddly shaped accessories that just will not stay put? A pegboard wall is the ultimate answer. The real secret to a functional diy scarf and hat organizer is using furring strips or spacers behind the board to create that crucial gap for the clips.
Once mounted, you can pop in any type of clip you need, from spring clips for brushes to alligator clips for notes, and rearrange them in seconds. I love how this system turns a blank wall into a totally custom command center. Your scarves and hats are not just stored, they are displayed and securely gripped so they never fall.
For a similar way to keep your favorite memories on display, you need a solid set of creative photo display solutions. It is that flexibility that makes this project so satisfying. Feel the relief of finally having a home for every little thing.
7. Industrial Pipe Clothing Rod System
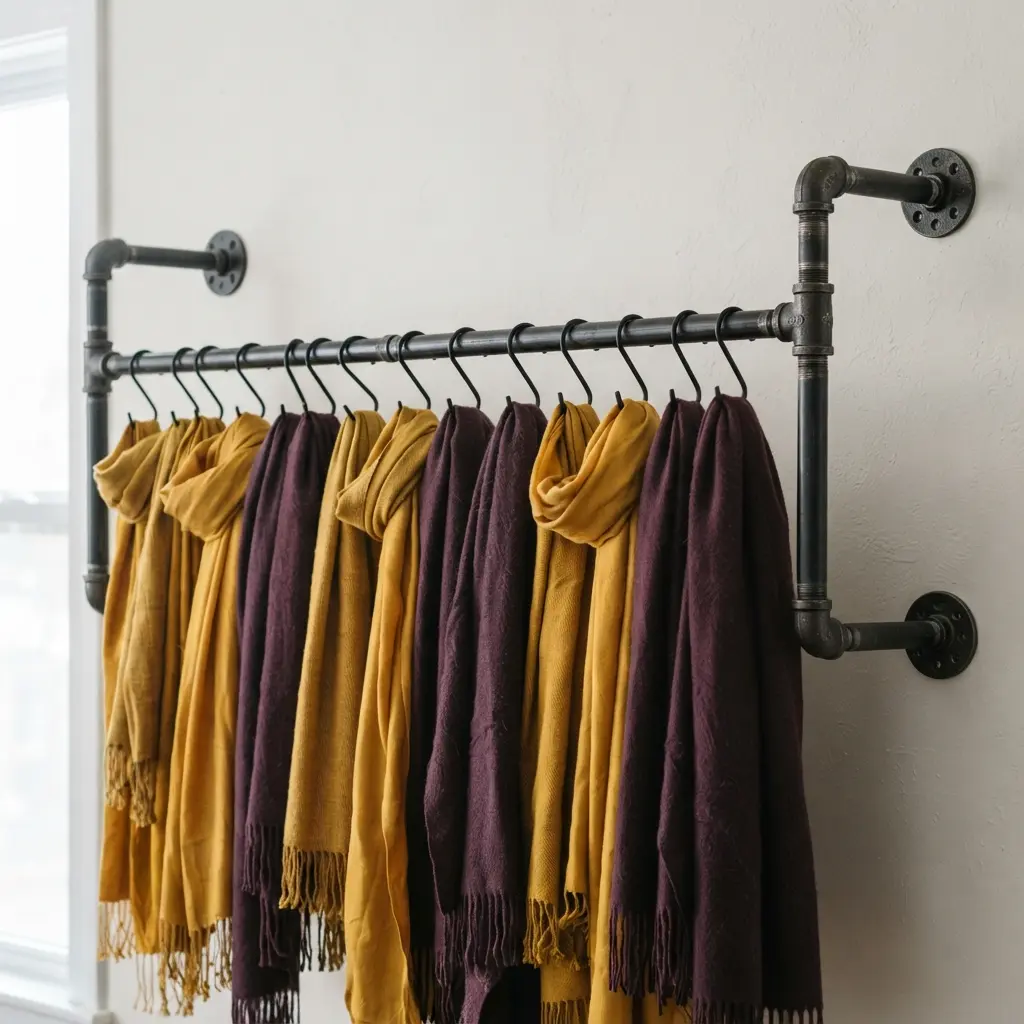
This is the one that looks so intimidating but is surprisingly straightforward to put together. You are basically building a super sturdy rack from heavy-duty pipes and fittings. The core idea behind this heavy-duty diy scarf and hat organizer is using black iron or galvanized steel pipes connected with flanges, elbows, and tees to create a rod that can hold a ton of weight.
You start by securing heavy-duty flanges into wall studs or with proper concrete anchors. Then you just thread your horizontal pipe between them. I love how you can customize the layout, like adding a tee for a vertical support or using elbows to turn a corner.
It feels so solid once it is up. Does that not sound satisfying? The real payoff is seeing all your heavy coats and bulkier items hanging neatly without any sag or worry. Just make sure your measurements are spot on before you buy any parts.
8. Over Door Bungee Cord Grid
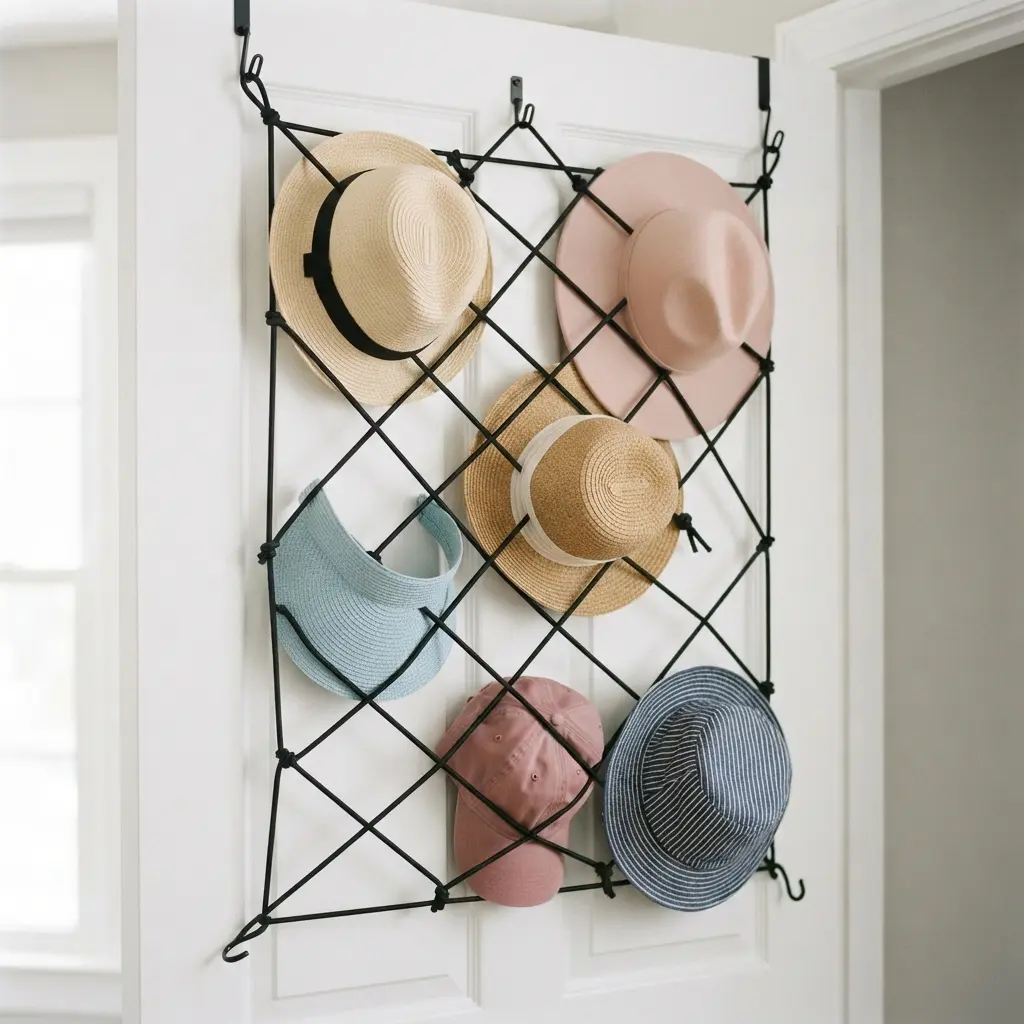
Ever looked at the back of a door and thought, ‘What a waste of space?’ I used to, until I discovered this clever solution. This portable diy scarf and hat organizer is essentially a rigid frame with a web of elastic bungee cords stretched across it.
You simply hook it over the top of any standard door, instantly transforming that flat surface into a dynamic storage wall. It works brilliantly for lightweight scarves and hats because the cords stretch to hold items snugly. You get a visible, accessible display that keeps your collection off the floor and shelves.
This method is perfect for maximizing vertical space in a closet or bedroom, and it is surprisingly easy to install. My favorite part is the versatility. You can arrange items by color or type, and it adapts to different sizes.
Just make sure not to overload it, as it is best for lighter accessories. For heavier gear, like a pool bag full of towels, you will want a sturdier storage solution.
9. Braided Rope Macrame Scarf Hanger
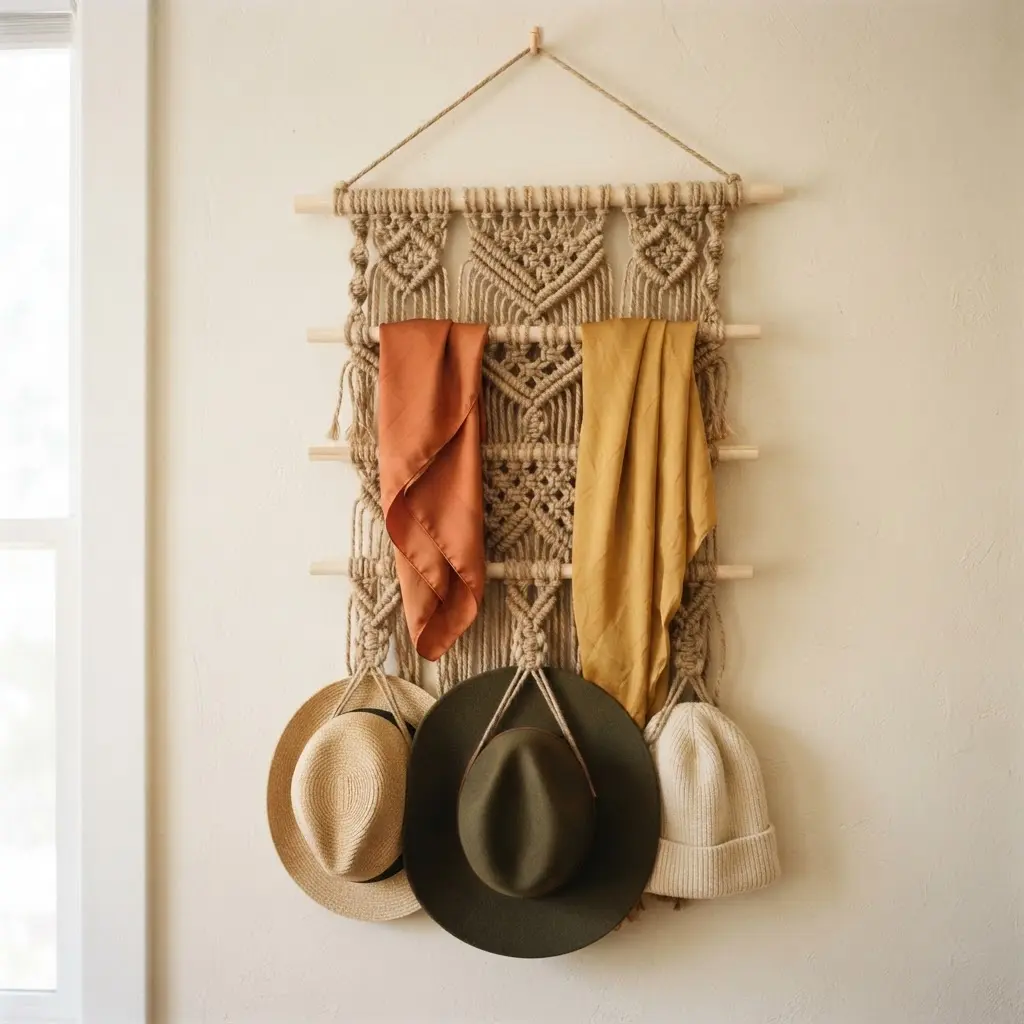
Who would have thought a few simple knots could create such a pretty storage solution? This project looks intricate, but it is really just a series of repeating patterns. When building a boho diy scarf and hat organizer, you will start by cutting your cotton macrame cord into long strands and attaching them to a wooden dowel.
Then, you work a series of square knots to form the open weave that will hold your scarves. It works so well because it turns a basic closet item into a piece of wall art. I love how the natural texture of the rope adds warmth to any room.
A key tip is to always cut your cords much longer than you think you need, because the knotting eats up a lot of length. Getting the tension right is crucial for a neat finish, so take your time with each knot. For a similar hands-on project, you could try to make a sturdy tote bag using the same patient, knot-focused technique.
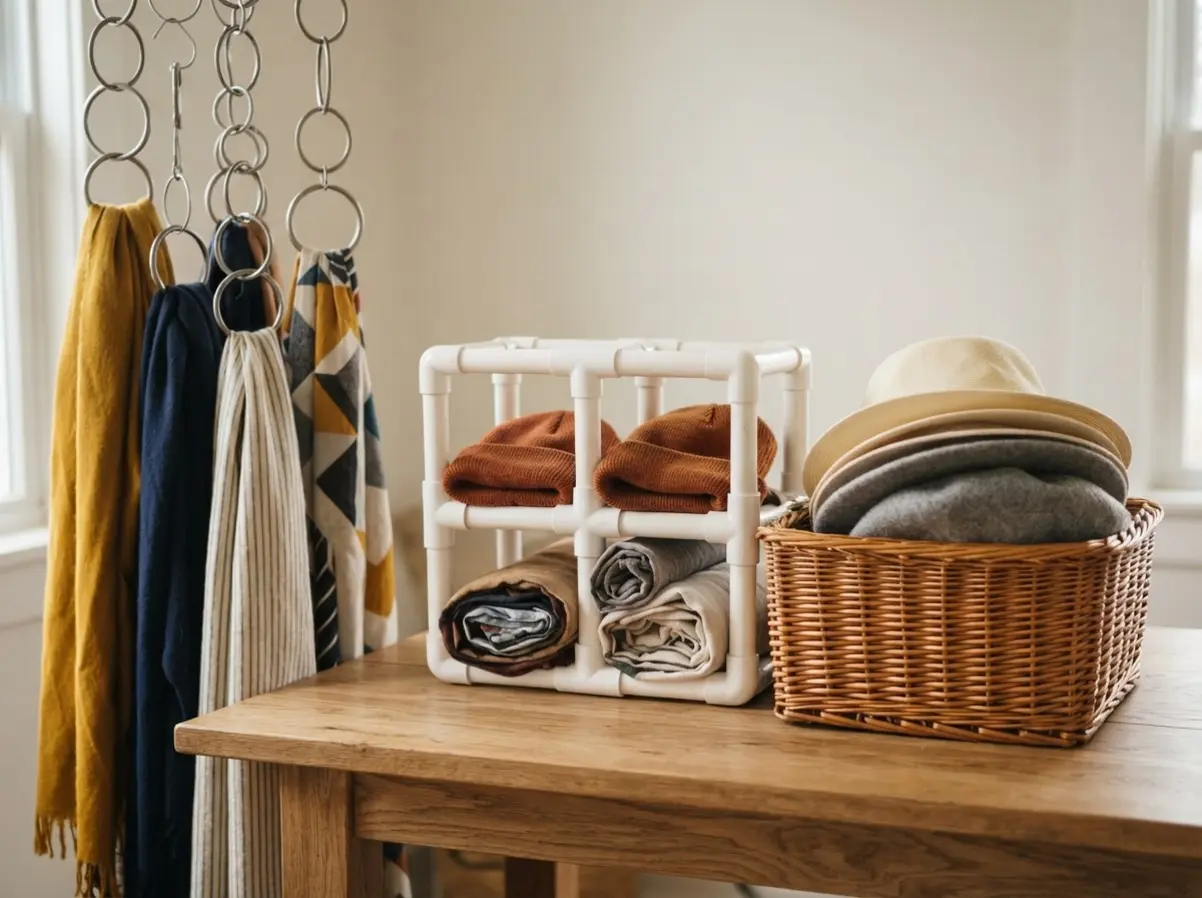
10. Deep Wicker Basket Hat Storage
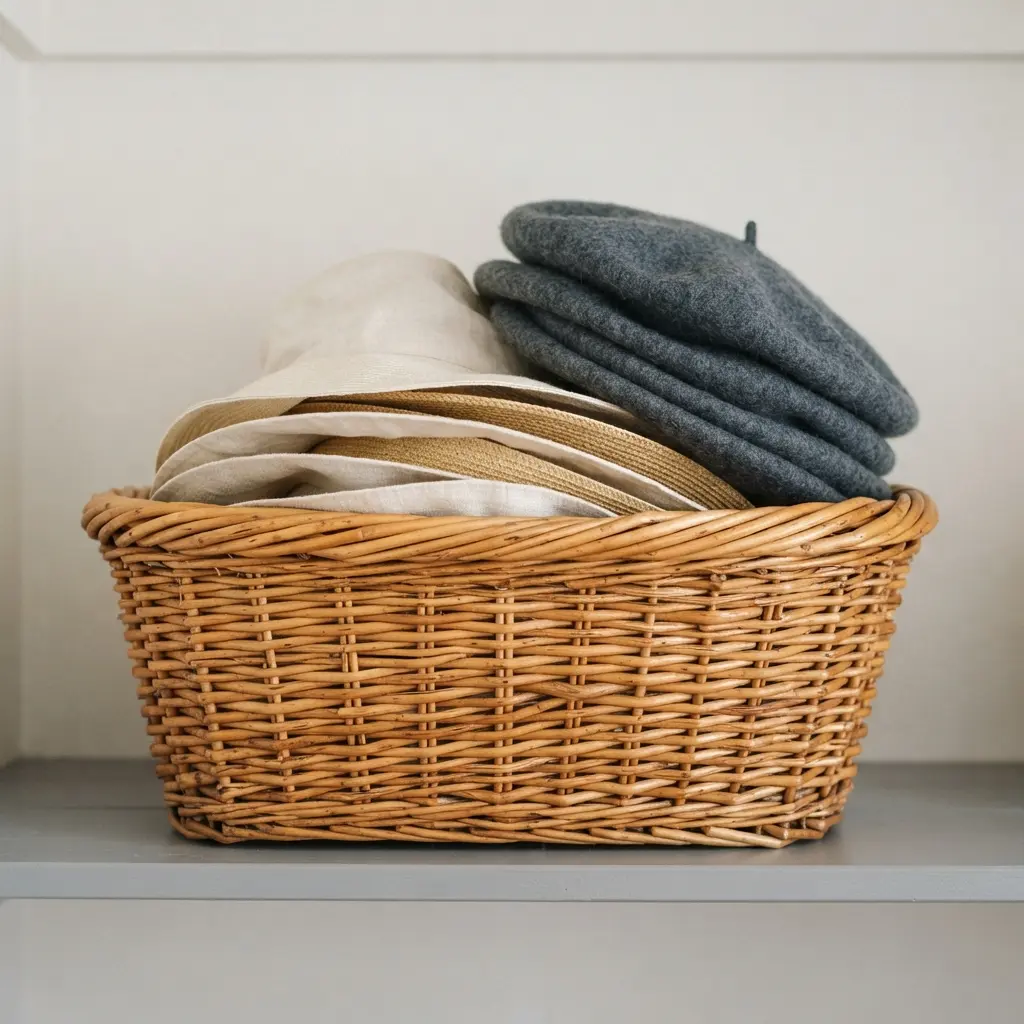
Ever feel like you are constantly rescuing your hats from being squashed on a shelf? This solution is as pretty as it is practical. For this floor-friendly diy scarf and hat organizer, you simply place your hats inside a deep, tapered basket.
The natural wicker structure provides gentle support, allowing you to stack a few without crushing their shape. I love how this keeps everything tidy and doubles as a lovely room accent. Make sure your basket is truly deep enough to fully enclose your tallest hat crown.
A common mistake is picking one that is too shallow, which still bends the brims. For the best protection, place your largest hats at the bottom. Feel that sense of calm when your favorite pieces are beautifully stored and ready to wear.
Maintaining Scarf Fabric Integrity and Hat Shape
The fastest way to damage a delicate scarf is to hang it on a thin wire hook that pulls and stretches the weave. You want a smooth, rounded surface instead. For structured hats like wool fedoras, the crown needs support to hold its form over time.
A simple solution is to use rounded wooden dowels for scarves and hat stands with a broad curve for the brim. Maintaining the longevity of any diy scarf and hat organizer requires gentle gravity-based draping over a bar, while you always avoid sharp edges or narrow points that create permanent creases.
This gentle support preserves the fabric and shape, so your items look new season after season.
Conclusion
So, how does your closet look now, at least in your imagination? I hope these ideas sparked a vision for a space that feels both orderly and inspiring. Look at what you can make that is real skill right there, turning everyday materials into a system that works for you.
My favorite piece of advice is to start with one project that solves your most immediate frustration, whether it is hat-denting or scarf-tangling. A successful diy scarf and hat organizer is not the most complex one; it is the one you will use and enjoy seeing every day. Pick your favorite from this list and get started right away.
FAQs
Q: How do I organize scarves without stretching them?
A: Use wide, smooth surfaces like wooden dowels or shower rings. Avoid thin wire hangers or sharp hooks that can pull threads. For delicate fabrics, gently drape or fold them over a padded rail.
Q: What is the best way to store winter hats to keep their shape?
A: Store hats on wide, flat surfaces or in roomy baskets. Avoid crushing them under other items. For structured hats like fedoras, consider using hat stands or stuffing them with acid-free tissue paper.
Q: Can I make these organizers if I am renting my home?
A: Absolutely. Many ideas use tension rods, over-door systems, adhesive hooks, or freestanding ladders that require no permanent wall damage. Always check with removable adhesive strengths for your wall type.
Q: How do I choose an organizer that fits my small closet?
A: Maximize vertical space and door interiors. A cascading ring hanger, over-door grid, or a single tension rod mounted high inside the closet adds storage without sacrificing floor space.
Q: What materials work best for a beginner DIY project?
A: Start with simple materials like pre-cut wooden dowels, shower curtain rings, or a basic pegboard panel. These require minimal tools, like a drill or hammer, and offer clear, satisfying results quickly.


