The 15 projects below focus on shapes you cut with scissors and decorations like pom-poms, sequins, and stick-on jewels. Each idea starts with a distinct silhouette, from pointed geometric peaks to soft scalloped edges, so you can find one that matches your little one’s personality. Pick a design that sparks her imagination, gather your supplies, and make an afternoon of it.
Measuring Head Size For Perfect Fit
The fastest way to ruin a felt crown is guessing the size, leaving you with a piece that pinches or slides right off. When reviewing diy felt tiara crown ideas, trust me on this, taking a quick measurement with a soft tape ensures your creation gets worn instead of tossed aside. You want to measure the head circumference right above the ears, then add an extra inch for the overlap where your elastic or ribbon will attach.
This small overlap zone is your secret for a secure fit, and using a paper template cut to this final length lets you test the shape before committing your felt. I promise, this one extra minute saves you from that sinking feeling of a crown that will not stay put.
Selecting Durable Felt Thickness And Blends
Grab the cheap craft squares and your beautiful tiara will wilt after a single play session, losing its shape and looking sad. The good news is that a slightly thicker, blended wool felt holds its crisp silhouette and resists pilling. When sorting through diy felt tiara crown ideas, you will notice the difference immediately in how it cuts cleanly and supports layered decorations without flopping over.
For the base of any crown, I always use this sturdier felt, and for the best structural flexibility, consider a dual-layer construction where you glue two base pieces together. This creates a firm foundation that prevents sagging, making your jeweled or pointed designs stand tall and proud through countless adventures.
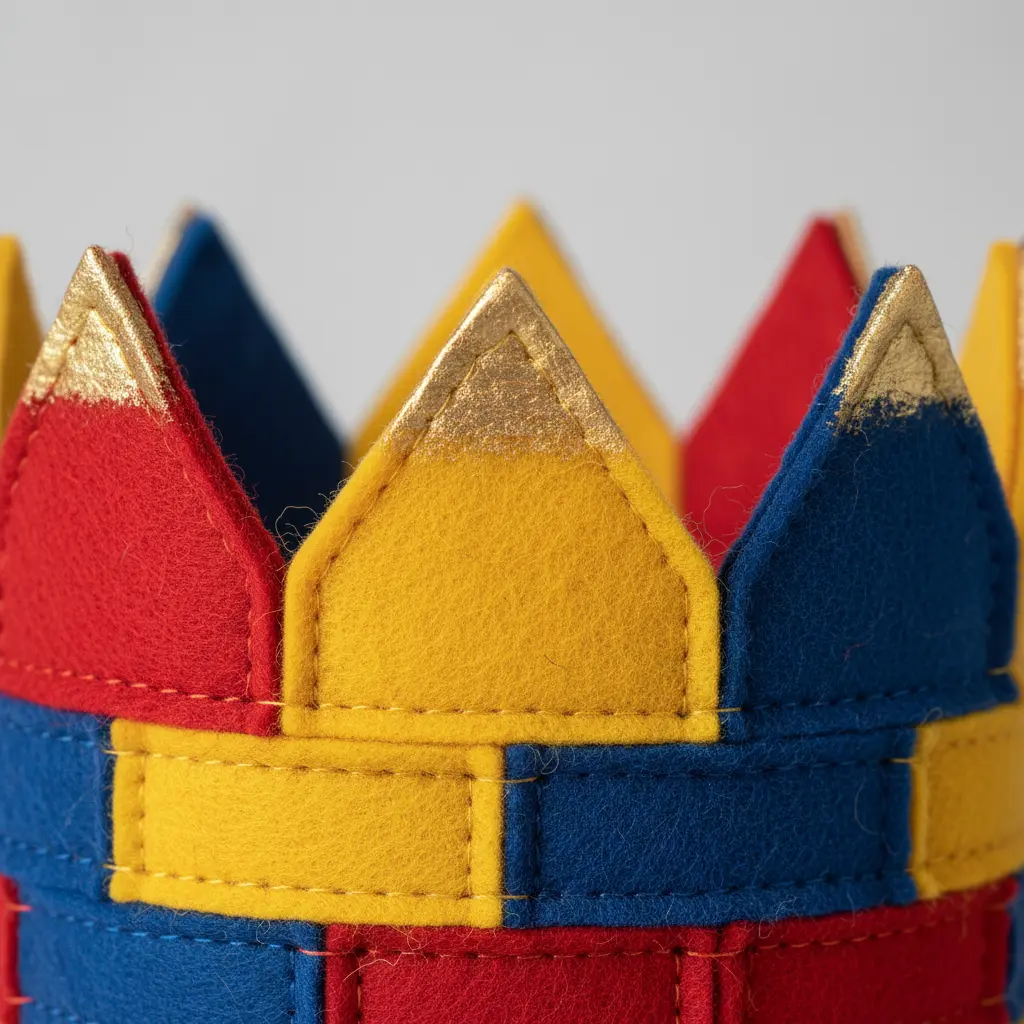
1. Bold Geometric Pointed Stiffened Felt Crown
Ever felt your costume needed a piece with serious presence? This crown is your answer. You start by sketching sharp, angular shapes and cutting them from sturdy felt with a craft knife and ruler.
When planning diy felt tiara crown ideas, I love applying a liquid stiffener or backing the pieces with plastic to lock in that rigid, architectural form. It is all about achieving a look of power or modern artistry.
Getting the structure right is essential, so before you glue everything, make sure you review DIY felt banner craft ideas to master felt adhesives. Your final piece will stand tall and command attention. Does that not feel amazing?
2. Whimsical Scalloped Edge Pastel Tiara: Soft Colors for a Gentle Look
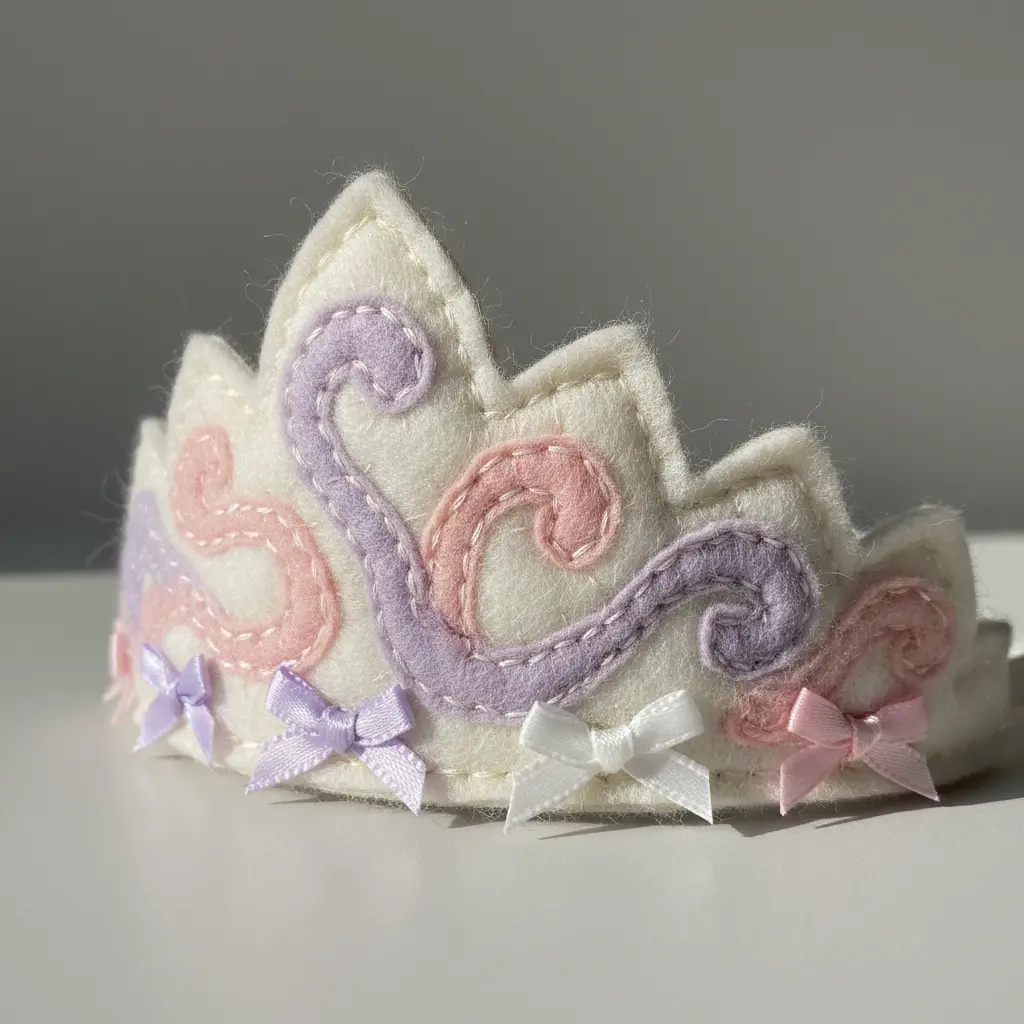
Ever wondered how to make a tiara look like it floated out of a fairy tale? This style answers that with its soft, wavy edges and gentle colors. You will start by cutting scallop shapes from pastel-colored felt.
When exploring diy felt tiara crown ideas, you can layer these slightly irregular pieces to create a playful, whimsical feel. Attach them to a simple wire or fabric-covered base, then add tiny pearl beads or subtle iridescent accents.
The magic happens because you are not aiming for perfect symmetry. Letting the shapes flow organically gives it that innocent, dreamlike charm. Try it and feel the delight of creating something so softly magical.
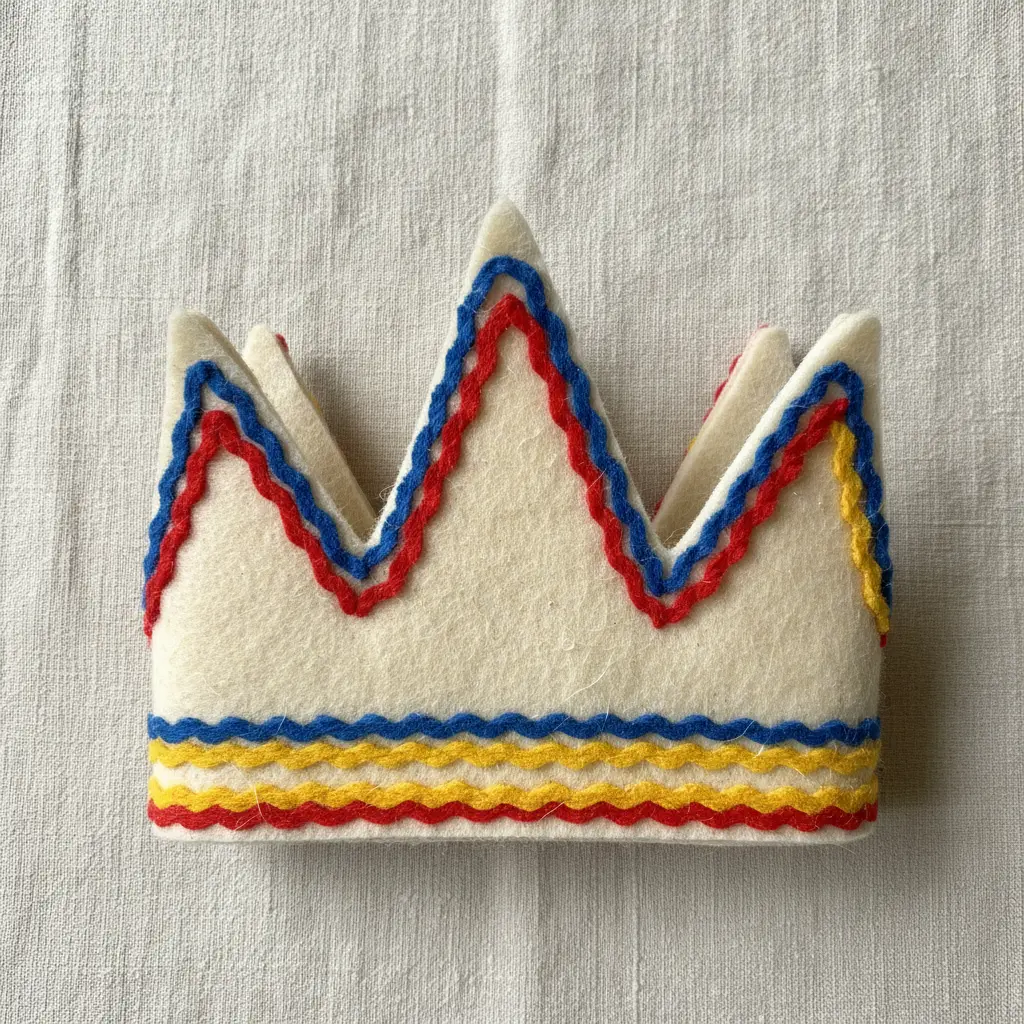
3. Layered Contrast Color Felt Crown — Striped Felt Panels Create Depth
Who would have thought layering felt could make such a big difference? This design looks wonderfully complex, but the method is straightforward. You start by cutting your main crown base shape from one felt color.
When organizing diy felt tiara crown ideas, layer strips in contrasting colors to build up those dynamic panels. I love how the physical stacking creates actual depth, making the crown feel sturdier.
The real secret is choosing colors that pop against each other. Using similar shades blends everything together, but bold contrast makes each stripe stand out. Trust me on this one.
This is a fantastic project if you have spare felt sheets and want to practice your fabric glue skills. It is also a great way to use up smaller scraps from other magical DIY craft ideas for kids. The finished piece feels so much more substantial than a flat crown.
4. Central Teardrop Jewel Felt Tiara with a Sparkling Focal Point
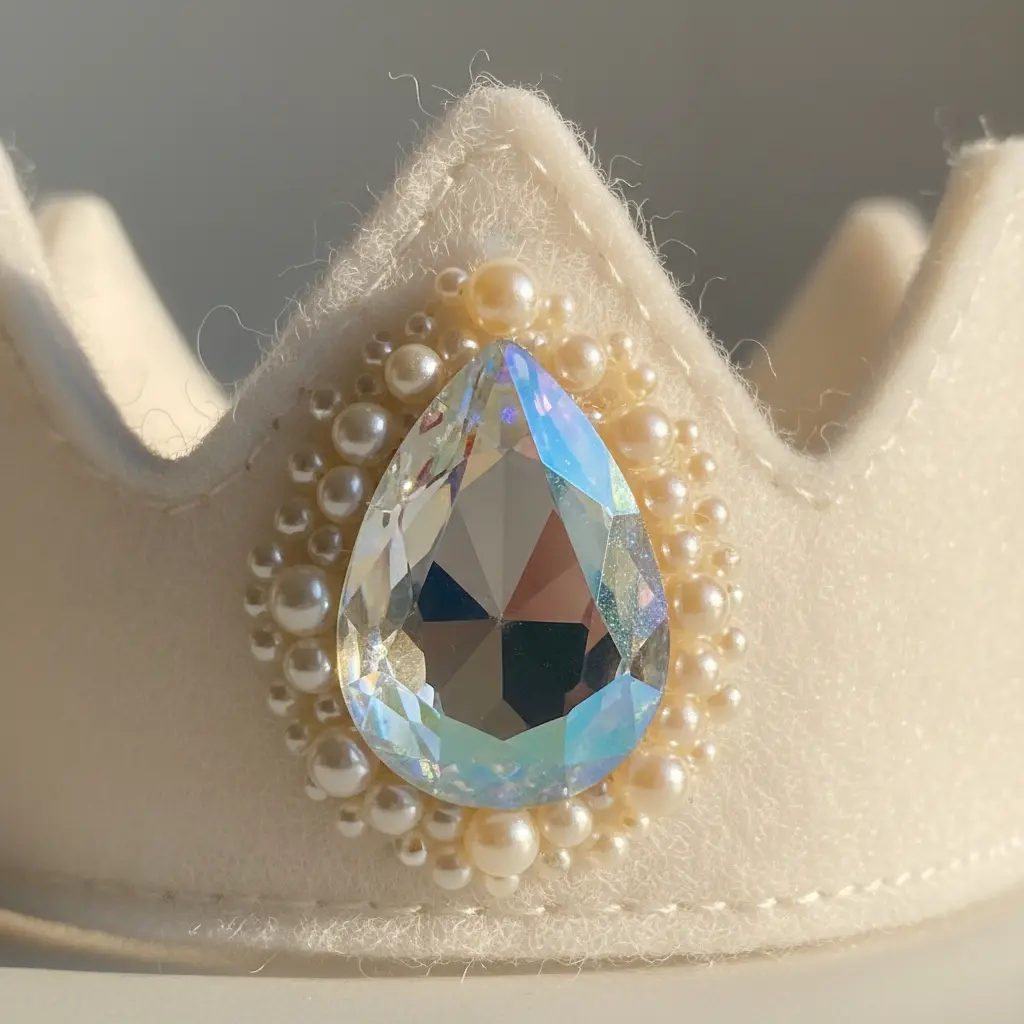
Ever wondered how a simple felt band can look so elegant? This tiara is a perfect example. It starts with a soft felt tiara base that you cut to your own size.
When browsing diy felt tiara crown ideas, you will always notice how a single large accessory draws the eye. Create the star of the show by gluing a gorgeous teardrop jewel right in the center front. I love how the soft felt makes it comfy to wear, while that single sparkling point captures all the attention.
You will want to use a strong fabric glue or a hot glue gun for this step. Hold the jewel firmly in place for a minute to let the adhesive set. Taking that extra moment prevents a sad droopy jewel later.
Isn’t it satisfying when one bold element does all the work? Your finished piece feels both handmade and luxe. If you are making this for a child, look for other soft, safe accessory ideas. The same gentle materials work beautifully together. Feel proud when you see that sparkle catch the light.
5. Floral Applique Woodland Theme Crown: It is Perfect for Nature Lovers
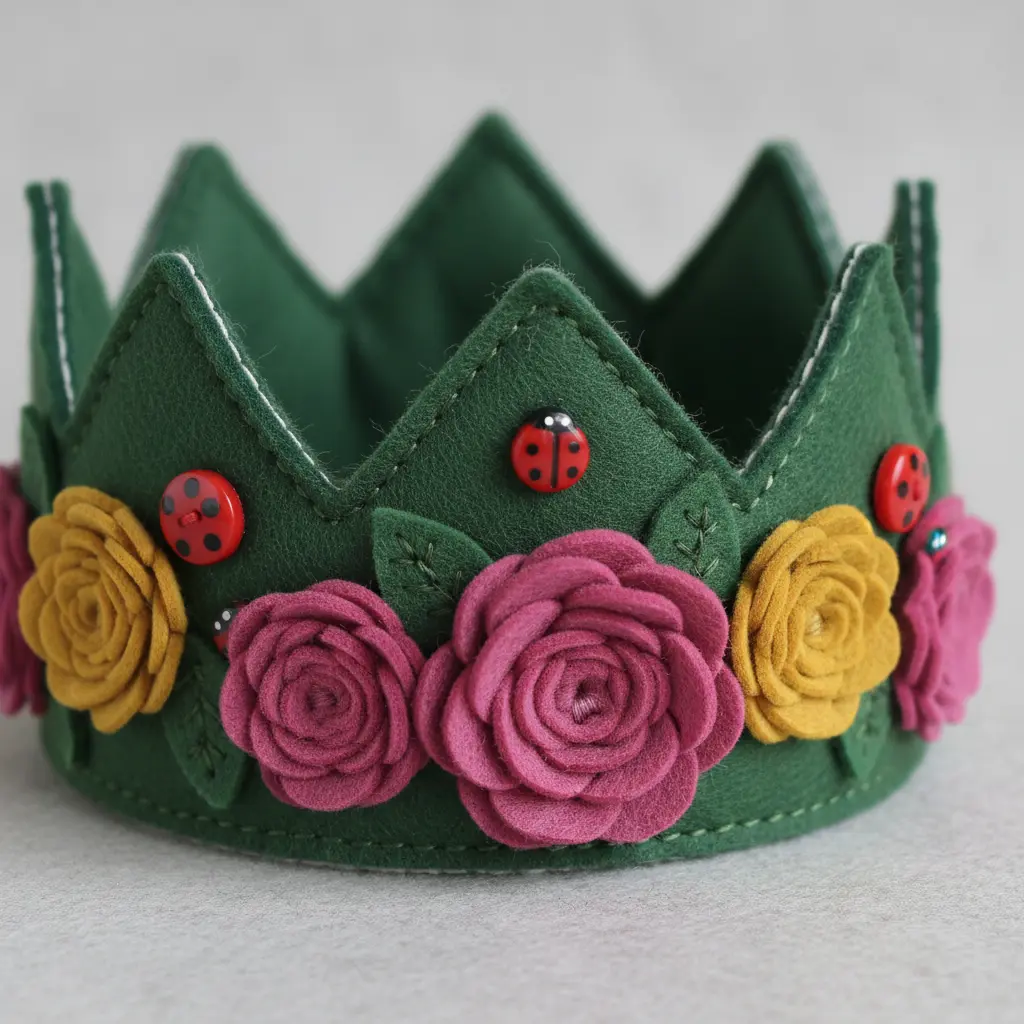
Ever wanted to wear a piece of the forest? This crown brings a walk in the woods right to your head. You will layer different fabric flowers and leaves onto a simple base, adding little mushrooms or berries for that magical touch.
When gathering materials for diy felt tiara crown ideas, start with felt shapes since they do not fray. Use a hot glue gun to build up your arrangement before you commit. The key is to play with placement until it feels balanced and full of life.
It works because it is a totally personal celebration of nature. You get to choose every leaf and petal, making something no one else has. Try it and feel that whimsical, earthy joy come together right on your head.
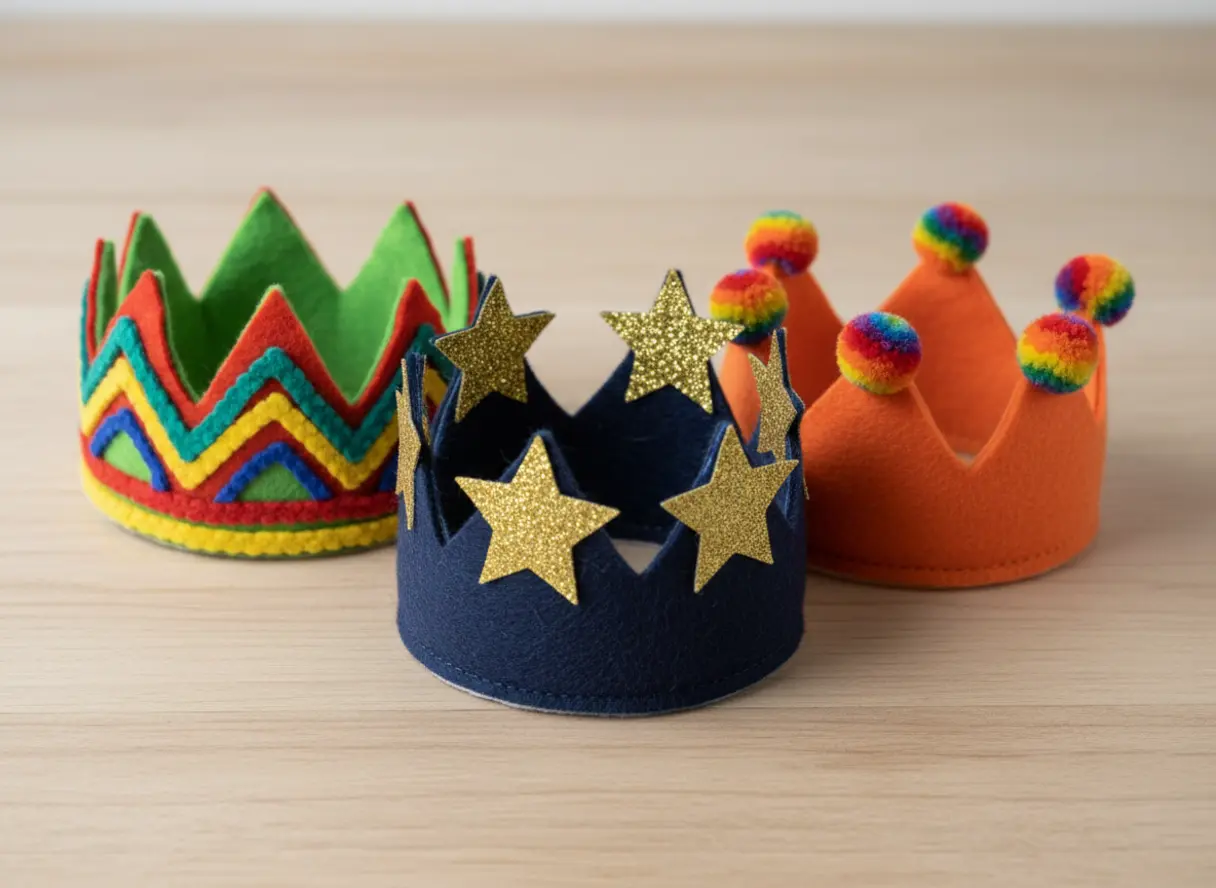
6. Glittered Star Detail Felt Crown — Sprinkle Magic across Every Point
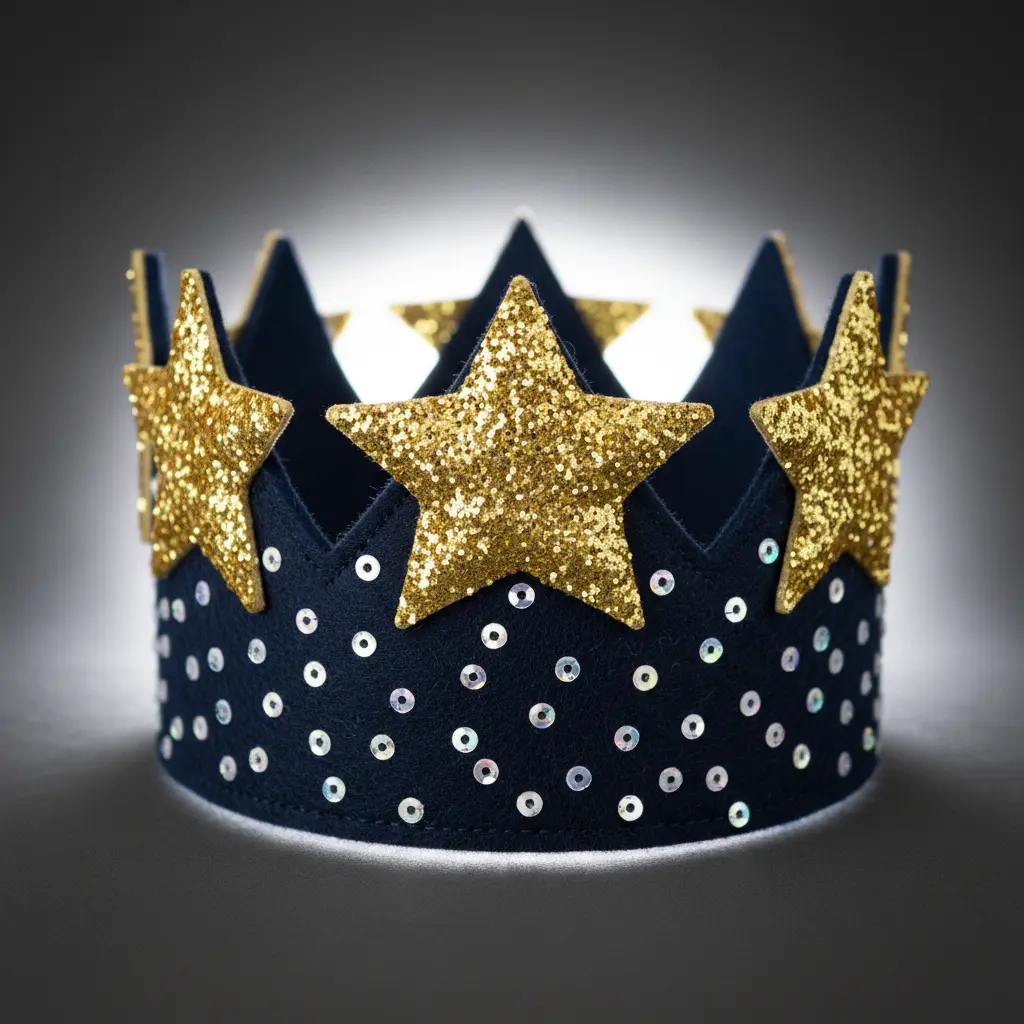
This crown looks like it belongs in a fairy tale, doesn’t it? The secret is that soft felt base. It gives you a comfortable, durable shape to work with before the sparkle even starts. I love how you cut it into those tall, regal points so easily.
When selecting diy felt tiara crown ideas, I always apply those shimmering glitter stars carefully on each point and along the base. They catch every bit of light, creating that dazzling, eye-catching effect kids adore.
Using a high-quality fabric adhesive is my go-to tip. It keeps the glitter secure and minimizes shedding during play. It works because it instantly transforms any little prince or princess, sparking their imagination.
The soft materials are safe, and the adjustable ribbon or elastic makes a perfect fit. It is a fantastic choice for a birthday party or imaginative play at home. Check the archive for more easy craft ideas for kids.
7. Beaded Edge Majestic Purple Tiara with Pearl and Gem Accents
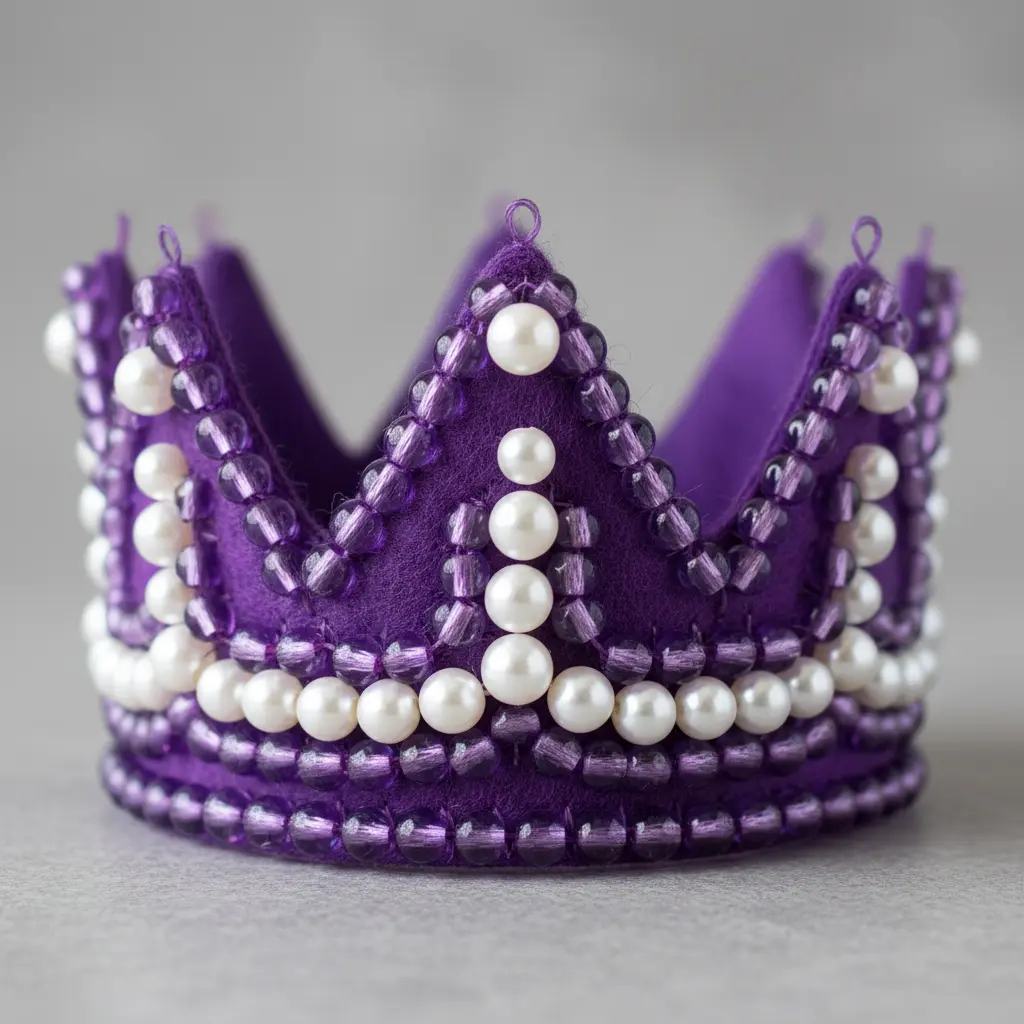
Ever feel like you want to add a touch of royal drama to your look? This tiara delivers with a deep purple base that screams elegance. You start with a metal frame and apply a rich purple enamel or plating.
The magic is in the beaded edge, where tiny seed beads get meticulously stitched or glued along the entire outline. Then, you add soft faux pearls and sparkling gems for contrast. When compiling diy felt tiara crown ideas, I love this one because the combination of texture and color feels incredibly opulent.
Try it and feel absolutely majestic.
8. Pompom Trimmed Playful Felt Crown: Add a Bounce of Color
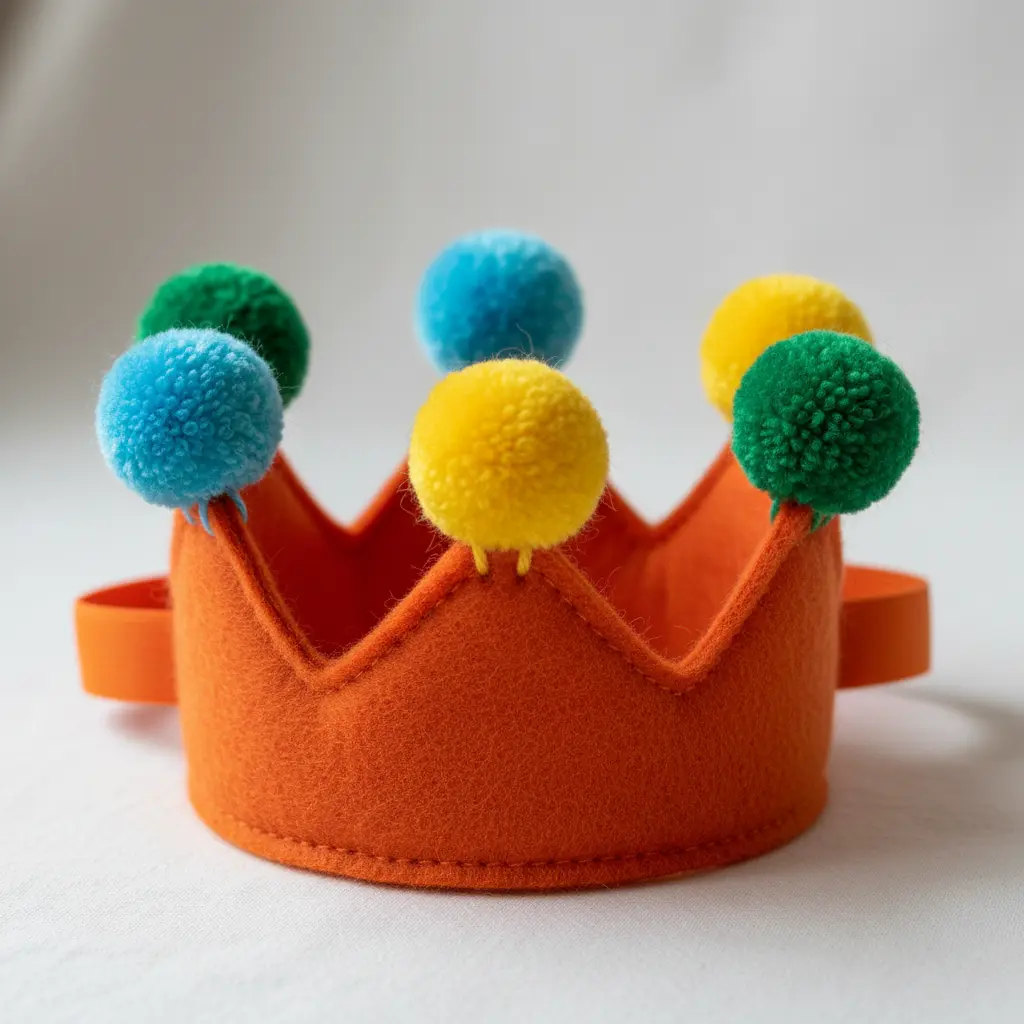
This one is pure, tactile fun. You start by cutting your classic crown shape from a sheet of stiff craft felt. Then comes the magic: pinning a line of colorful pompom trim right along the top edge so those fluffy balls stand up proudly above the points.
When testing diy felt tiara crown ideas, I learned that sewing the trim on, rather than gluing, makes it survive the most enthusiastic play. That secure stitch is the secret to a crown that keeps its bounce.
It is a fantastic accessory for any child’s dress-up box, and you can find more inspiration for other spooky Halloween costume accessories if you are planning a themed look. Simply measure the head carefully and let the elastic do the work for a comfortable fit. The final look is so cheerful and bright.
9. Metallic Gold Paint Filigree Tiara — Simple Swirls Make a Statement
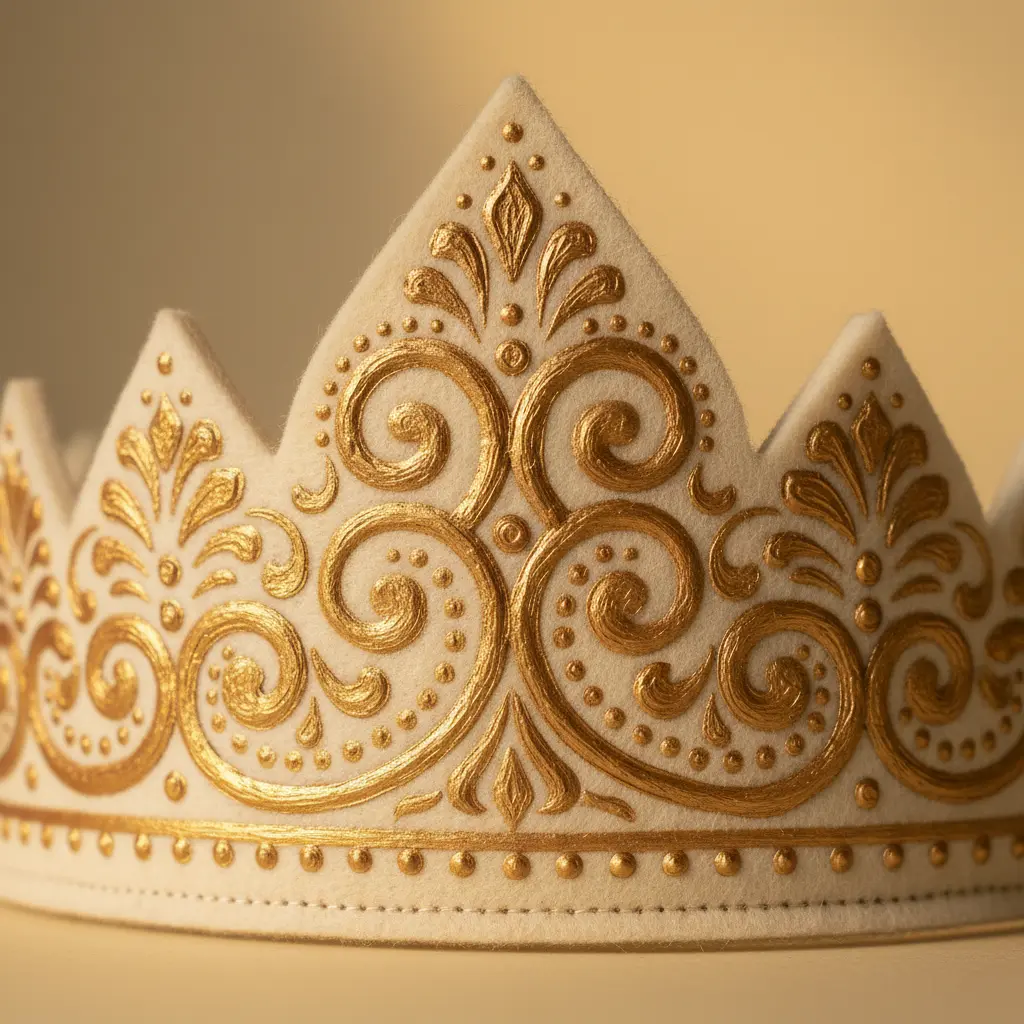
This one surprised me. It looks like delicate gold metalwork, but it is only paint and a steady hand. You start with a plain tiara base and a bottle of high-quality metallic gold paint.
Using a fine brush, you paint simple, graceful swirls and loops. The key is thin, smooth lines that give the illusion of interwoven scrollwork. Let each coat dry completely before adding another.
That patience gives you those crisp, lustrous lines. Among diy felt tiara crown ideas, this technique creates a regal, expensive look with minimal effort and cost. It is perfect for a beginner who wants to make a bold statement without the weight of real metal.
You can apply the same elegant painting technique to a set of Halloween themed crafts for kids. Feel proud when you see that golden shine catch the light.
10. Heart Cutout Valentine Felt Crown with Sweet Red Accents
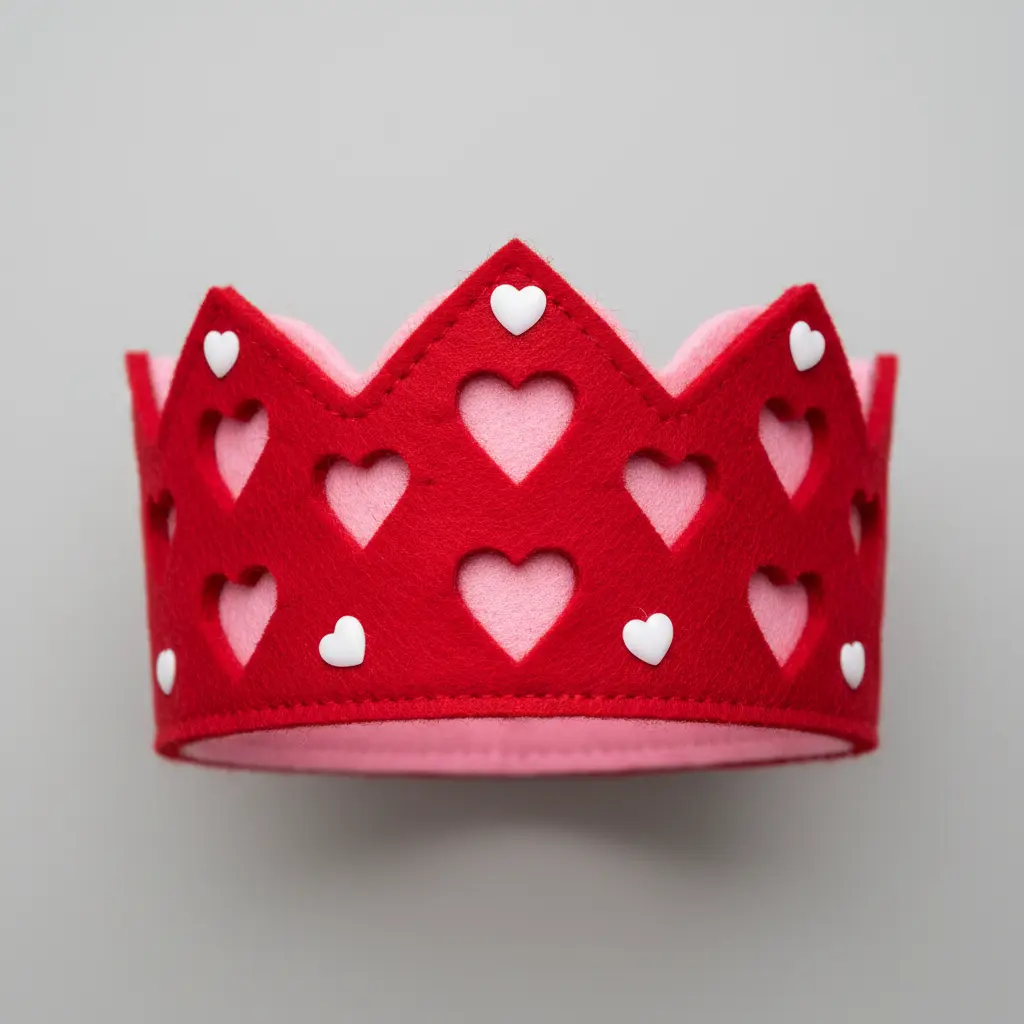
Ever wondered how to make a Valentine’s Day crown that looks like it came from a storybook? This one is so sweet and soft, it feels like a hug for your head. You start with a long strip of your main color felt, cutting scalloped edges along the top.
Then the real fun begins. You trace and cut hearts in all sizes from a bright red felt sheet. I love gluing the larger hearts on first to set the layout.
After that, you add all the sweet red accents like tiny sequins, beads, or little embroidered stitches. Why does this work so well? It is a tactile project that lets you play with texture and dimension.
Your final step is attaching a piece of elastic cord to the back. Pro tip: add an extra inch to your head measurement when cutting the base strip. Does that not look stunning and ready for pretend play?
11. Feather Accented Boho Style Tiara: Earthy Tones for Free Spirits
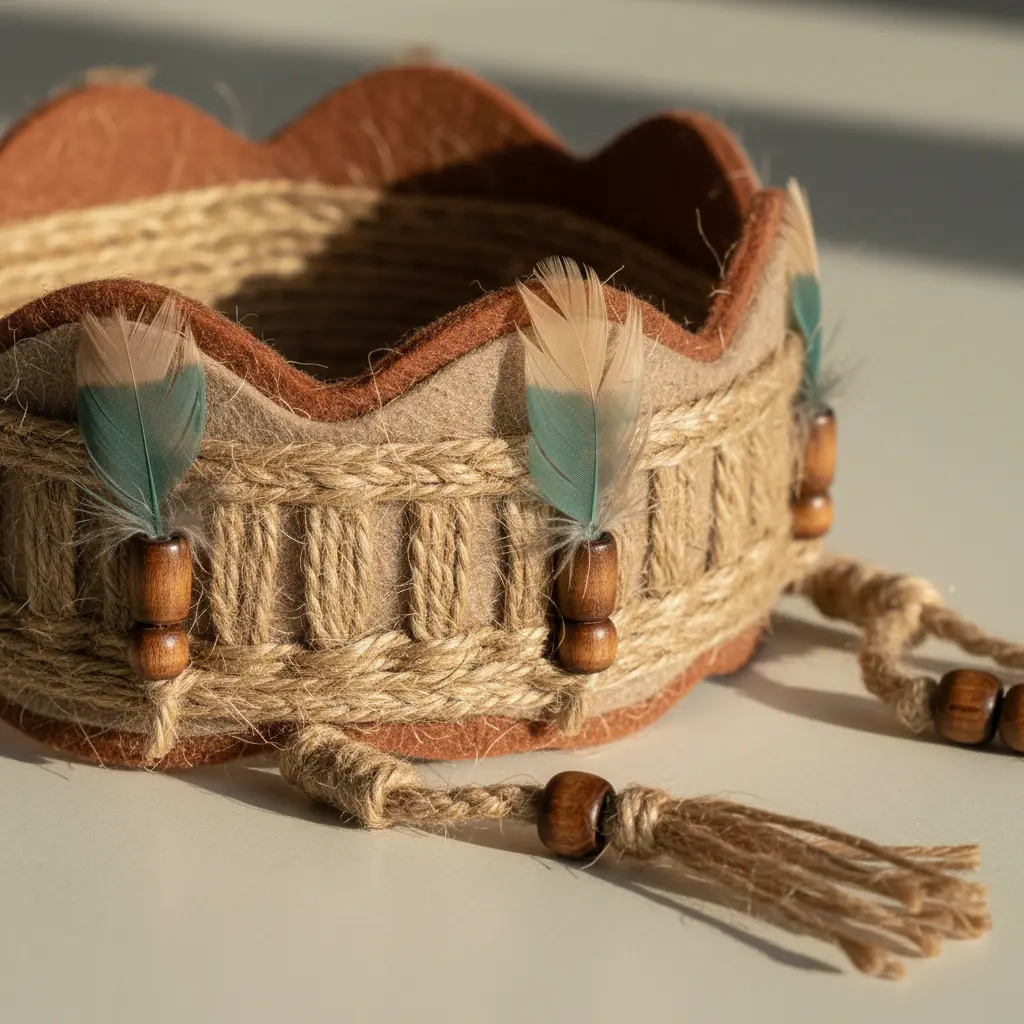
This one feels like a walk in the woods, doesn’t it? I love how a few natural feathers and muted beads create a relaxed, personal accessory. Start by shaping your flexible wire base and use a strong adhesive to attach your chosen feathers.
When arranging diy felt tiara crown ideas, I always lay everything out first to get that perfect, asymmetrical balance. The magic is in mixing textures. Wrap suede cording around the wire and tuck in a few wood or stone beads.
You will find this tiara works because it feels authentic and connected to nature, unlike a heavy costume piece. For a fantastic seasonal project, apply the same earthy layering techniques to your DIY Halloween decor and crafts. The result is quietly beautiful and satisfying to wear. Trust me on that.
12. Sequined Monarch Butterfly Felt Crown — Wings of Shimmering Orange
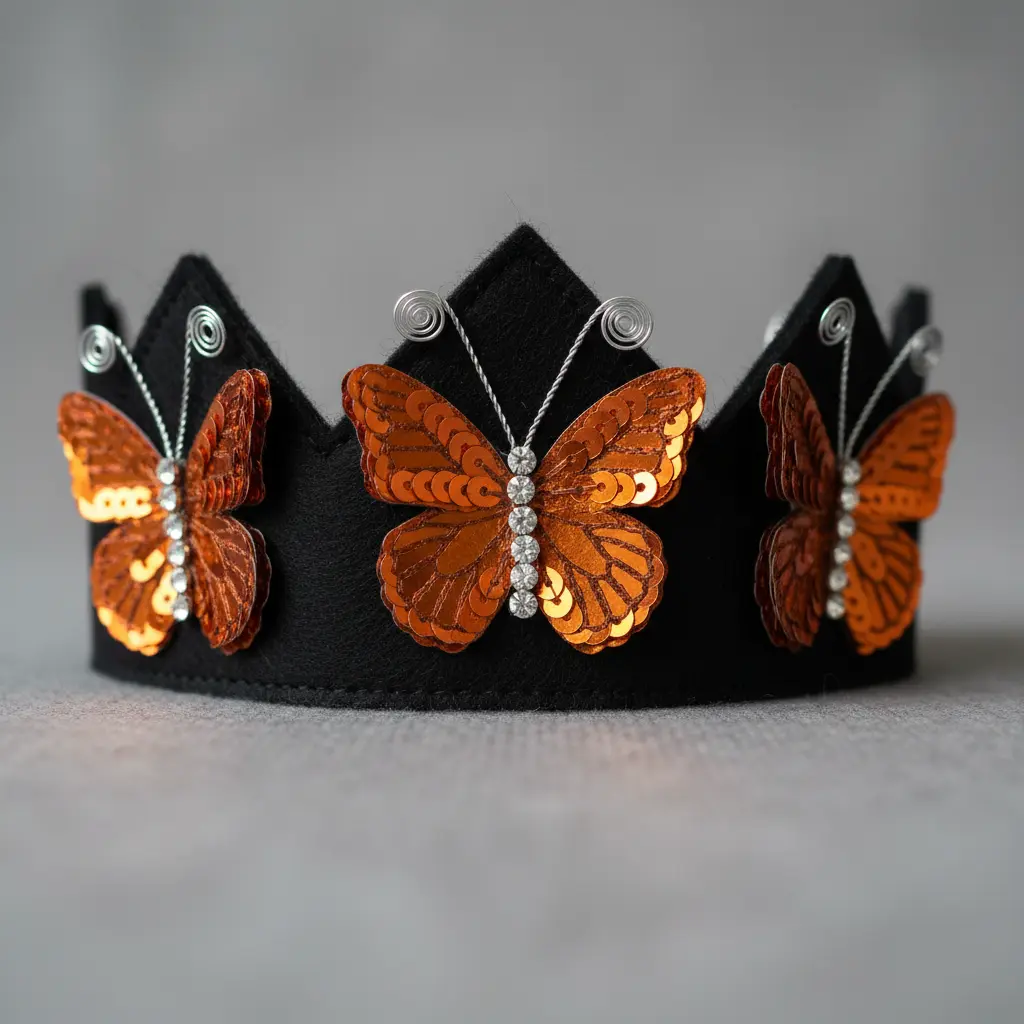
Who would have thought a butterfly crown could look this dazzling? This one looks intricate, but the process is straightforward. You start with a medium-weight orange felt base cut into a crown shape.
You add the iconic black vein patterns with a marker or black felt pieces. The magic happens when you cover the main wing areas with shimmering orange sequins, sewing or gluing them on in neat, overlapping rows.
When planning diy felt tiara crown ideas, remember that the sequins catch every bit of light, creating that captivating sparkle a real monarch has. My go-to tip is to start gluing sequins from the outer edge and work inward for the most uniform shimmer.
13. Ribbon Wrapped Simple Felt Crown: Soft Finish with Satin Ties
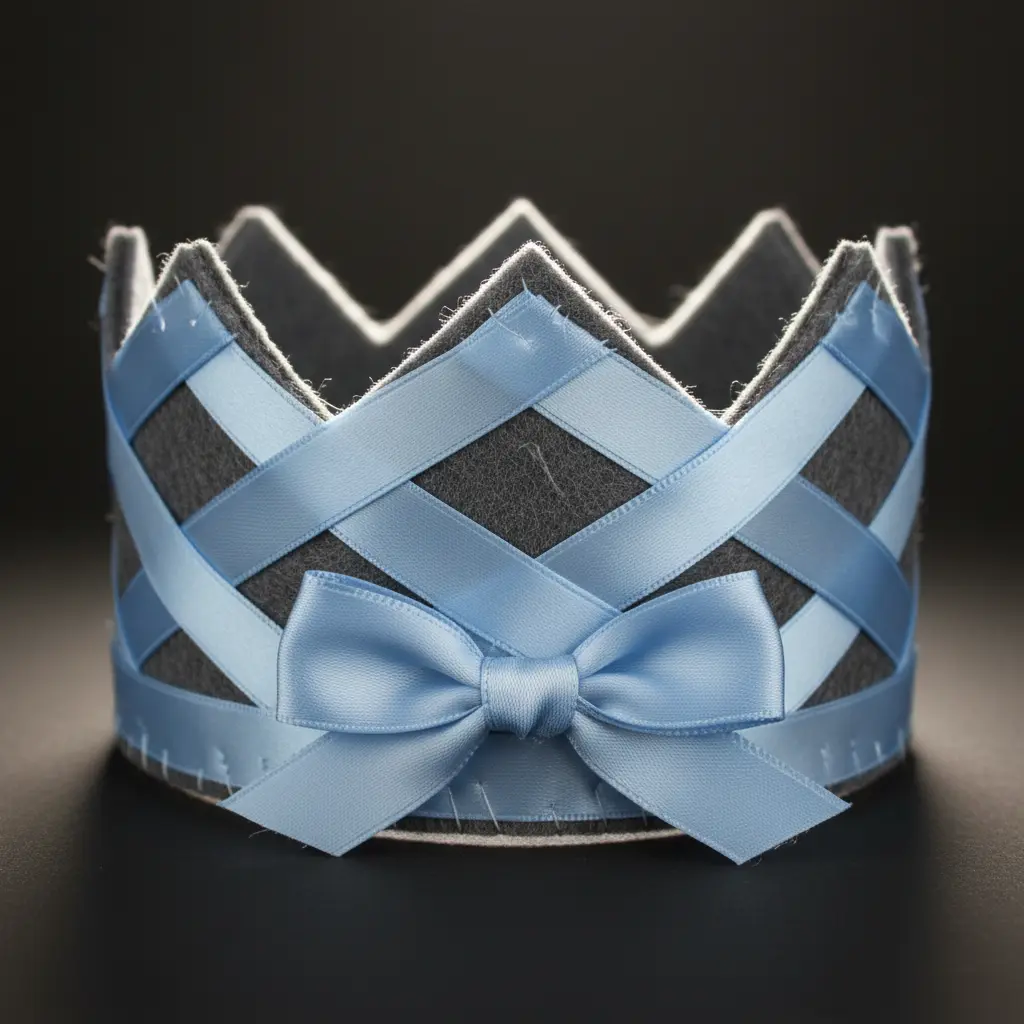
This one is a favorite for creating a gentle, elegant look without sharp edges. You start by cutting a simple felt crown shape and gluing on your satin ribbon ties at each end.
Then you wrap the entire felt piece tightly with a long length of ribbon, slightly overlapping each turn until it is completely covered. I love how the soft felt base and smooth ribbon make it comfortable for little ones to wear all day.
Among diy felt tiara crown ideas, this method yields a beautifully finished accessory that feels as good as it looks. To avoid running short, always measure and cut more ribbon than you think necessary. This project is perfect for a rainy day activity, and you can find more festive holiday craft ideas to keep the creative fun going all season long.
14. Icy Snowflake Winter Theme Tiara — Sparkling as Fresh Snow
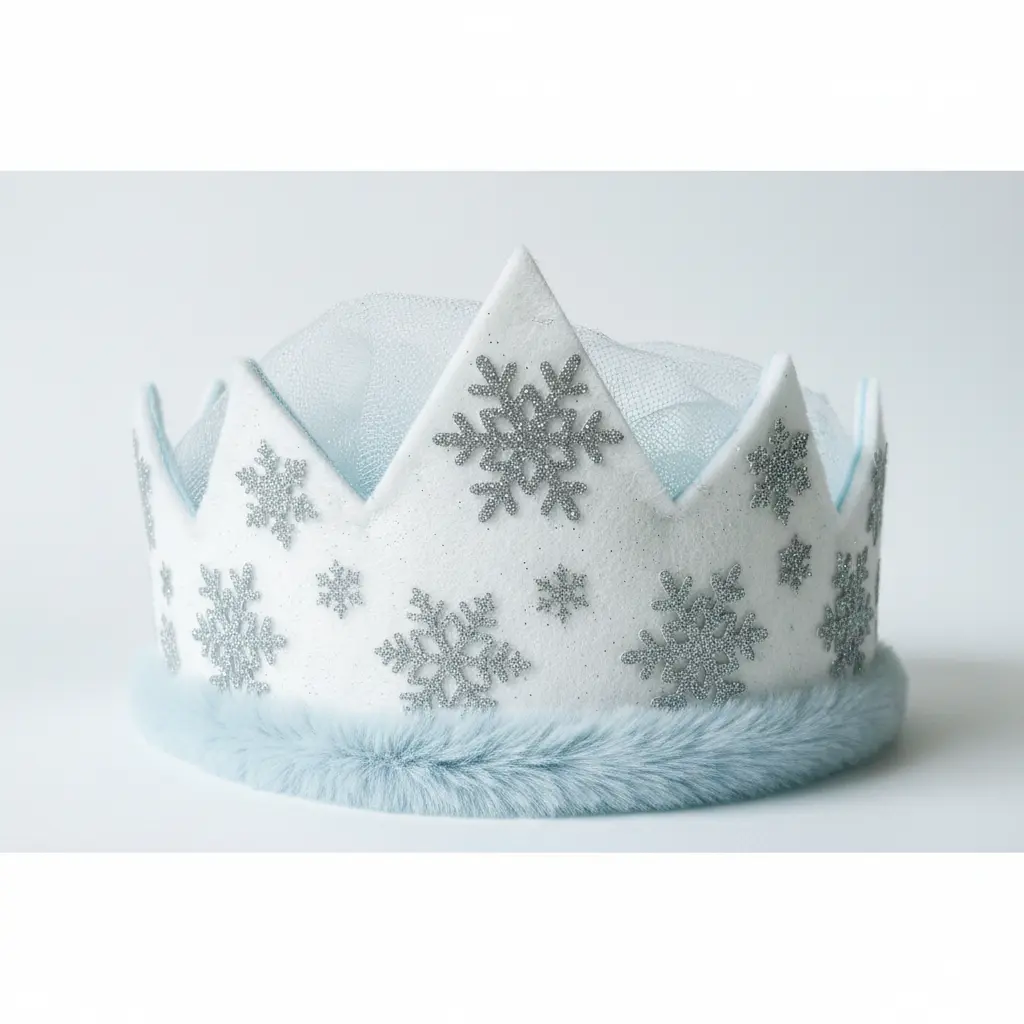
Ever wanted to look like a winter queen? This project captures that feeling perfectly. The magic comes from layering different types of felt and adding loads of sparkle.
When assembling diy felt tiara crown ideas, I love using iridescent felt for the base snowflake shapes to get that frozen, ethereal look. Then you hand-sew clear and silver sequins, adding a sprinkle of glitter glue along the edges. Does not that sound like fun? The key is to build up the sparkle in stages so every snowflake has depth.
This design works because it is all about that delicate, crystalline beauty. Always reinforce your tiara band with stiff craft foam before gluing anything on. It makes all the difference. This is a fantastic project for a winter pageant, pairing wonderfully with last-minute no-sew Halloween costumes for a complete look without stress.
15. Velvet Fabric Hybrid Felt Crown: Luxurious Texture Meets Structure
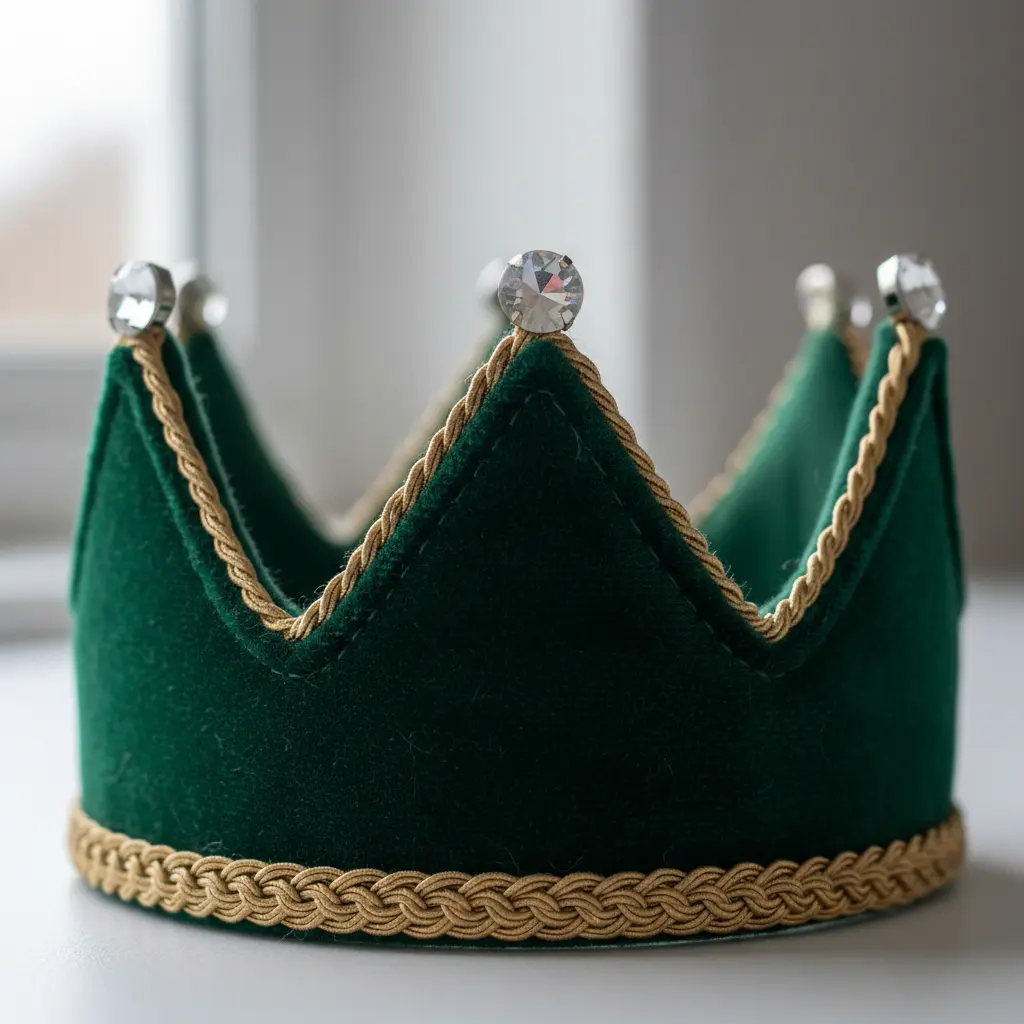
This is the crown that feels as grand as it looks. You start by cutting your felt base into your chosen crown shape, which gives the piece sturdy, upright structure. Carefully wrap that base in beautiful velvet, smoothing it with thin fabric glue to avoid lumps.
Isn’t it amazing how two simple materials create something so impressive? What makes this hybrid perfect for dress-up is that it combines sensory luxury with durability. The velvet offers rich texture, while the inside felt ensures shape retention through every adventure.
When executing diy felt tiara crown ideas, always cut your velvet from the back side using sharp scissors to keep the plush pile intact. Press from the center outward when gluing, and you will have a smooth crown that feels incredibly satisfying to wear.
Reinforcing Attachment Points For Active Play
That spot where the elastic loops through the felt is the first place to tear, especially with enthusiastic little royals. A simple knot or glue dab will not hold up to the tugging. You need a reinforced patch on the inside of the crown where the attachment sits.
Cut a small rectangle of leftover felt and use a tight running stitch or fabric glue to secure it over the area, sandwiching the elastic end. This felt back-patch distributes stress and turns the weakest link into the strongest part.
When finalizing diy felt tiara crown ideas, this reinforcement guarantees your piece survives the most vigorous coronation ceremony. Trust me, a few extra seconds of prep saves countless repairs.
Conclusion
Watching a child twirl in front of a mirror with a crown perched on her head is one of those small joys that makes the creative messes worth it. These diy felt tiara crown ideas are more than pretty accessories. They are invitations to a world where your little one calls the shots.
Let her personality guide the project. If she reaches for purple pom-poms and insists on adding a dozen more, go with it. That decorated crown will be the one she remembers forever.
When you make these together, you give her a memory of time spent side by side. Keep a small bin of felt scraps, elastic, and gems handy so the next royal craving gets satisfied quickly. Who knows what kingdom she will dream up tomorrow.
FAQs
Q: What type of felt should I use so the crown does not flop?
A: Choose craft felt labeled as stiffened or heavy-duty. Standard soft felt will collapse. Glue two layers together or iron on a stiff fusible interfacing between felt sheets for extra support.
Q: How do I make the crown fit my child’s head comfortably?
A: Measure the circumference of her head where the crown will sit. Cut your felt strip about an inch longer than that measurement to allow for an overlap or elastic closure. Sew or hot glue a piece of elastic through the back so it stretches gently.
Q: How do I avoid hot glue around young children?
A: Yes. Use tacky craft glue that dries clear but be prepared for longer drying times. Double-sided adhesive sheets and self-stick felt are mess-free alternatives. Supervise and apply dots of glue yourself, then let the child press on the decorations.
Q: What are the easiest decorations for a beginner?
A: Stick-on jewels, large pom-poms, and peel-and-stick foam shapes require zero drying time. Sequins on a string and pre-cut felt shapes are also easy to attach with a simple glue dot. Avoid tiny beads if small hands are helping.
Q: How do I store handmade felt crowns so they keep their shape?
A: Lay them flat in a drawer or hang them on a hook by the elastic. If a crown bends, press it with an iron on a low setting with a pressing cloth. Keep them away from direct sunlight to prevent fading.


