We all have that one bag we reach for every time—the one that’s just the right size, feels sturdy in your hand, and makes you smile when you see it. There’s something deeply satisfying about using something you’ve made, something that holds up to real life and still looks sharp.
That’s the magic of a well-made canvas tote, especially one with the crisp, energetic lines of a chevron pattern. I love how a simple zigzag can transform a basic bag into a modern statement piece. This collection features fresh canvas tote bag ideas that play with color, scale, and clever construction. So, let’s find your next favorite project.
Achieving Perfect Chevron Point Alignment Techniques
Exploring diverse canvas tote bag ideas requires mastering your seam allowances from day one. Trust me on this, you need a 6×24 inch quilting ruler and a sharp rotary blade to cut every angle with perfect 45-degree precision. We all know the frustration of seam drift, where your points wander and the pattern looks disjointed.
That specific ruler gives you the consistent repeat length you need to keep every V aligned. Press your seams open as you go to reduce bulk and give yourself a clearer view of the next join. The good news is, taking this extra moment with your cutting mat makes the actual sewing a breeze. You will notice a huge difference in the final texture of your bag.
Selecting Durable Canvas Weights for Structured Bags
Unbleached, raw canvas offers the ideal base weight and a gorgeous neutral texture for pairing with your patterned cottons. When evaluating sturdy canvas tote bag ideas, fabric weight dictates how well your finished carryall holds up. Here is the thing, a mid-weight canvas around 10 to 12 ounces gives your tote the body it needs without being impossible to sew through multiple layers.
That raw quality also means the fabric has a tighter weave and less sizing to wash out, so it holds its shape beautifully. You want to avoid anything too light that will sag under a laptop or a few library books. For the best visual pop, pair this sturdy base with a high-contrast fabric for your chevron strips, like a deeply saturated solid or a bold print.
1. Monochrome Grey Pieced Chevron Tote – A Modern Minimalist Statement
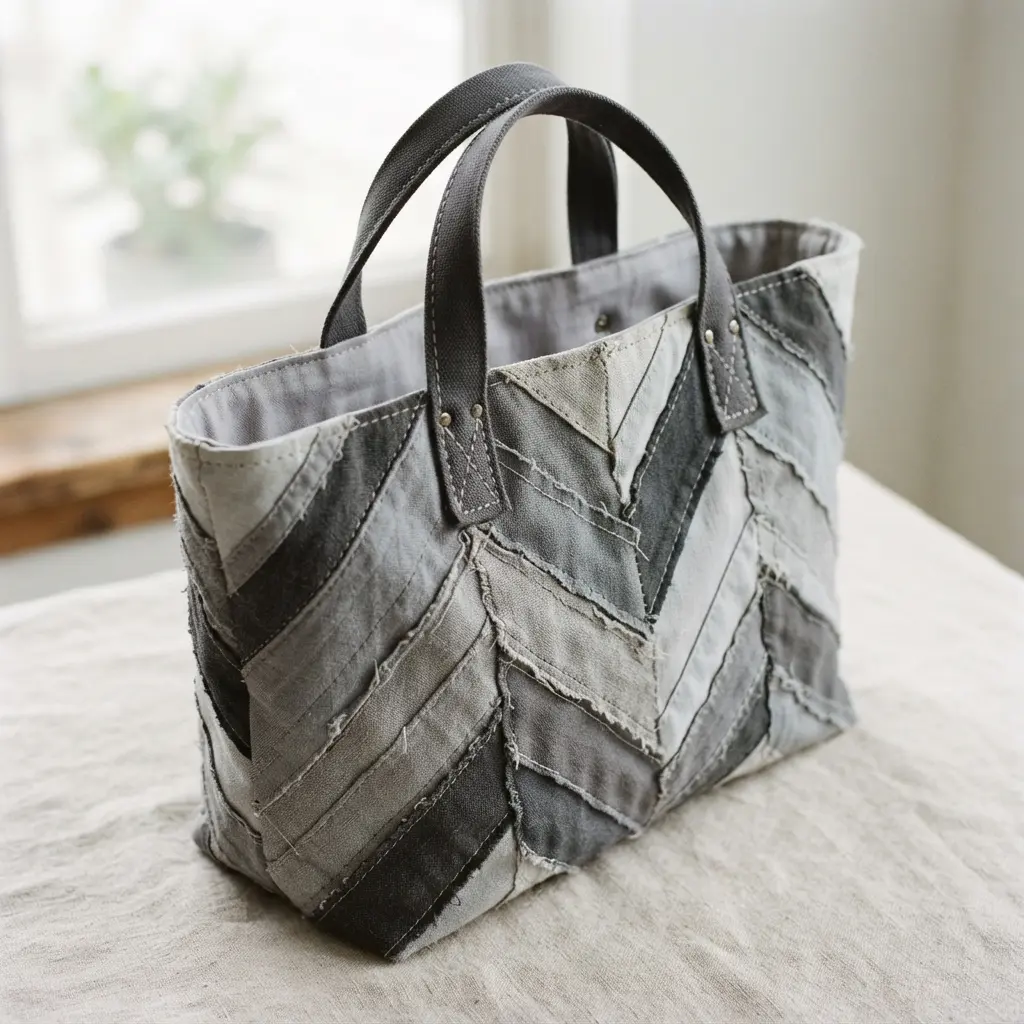
Ever wondered how to make a simple geometric pattern look so effortlessly chic? If you want elegant canvas tote bag ideas, start by sewing together grey strips at precise angles to form the chevron. You then fuse fusible fleece interfacing to the back of your pieced panels to give the bag its clean, structured shape. It works because the monochrome palette keeps it sophisticated while the dynamic pattern adds just enough visual punch.
I love how this bag proves that a little precision leads to a lot of style. Many successful canvas tote bag ideas rely on a walking foot during construction to prevent fabric layers from shifting. For a fantastic first project in this style, check out some easy summer bag sewing projects to build your confidence with similar shapes and fabrics. Feel the satisfaction of creating something so polished and versatile.
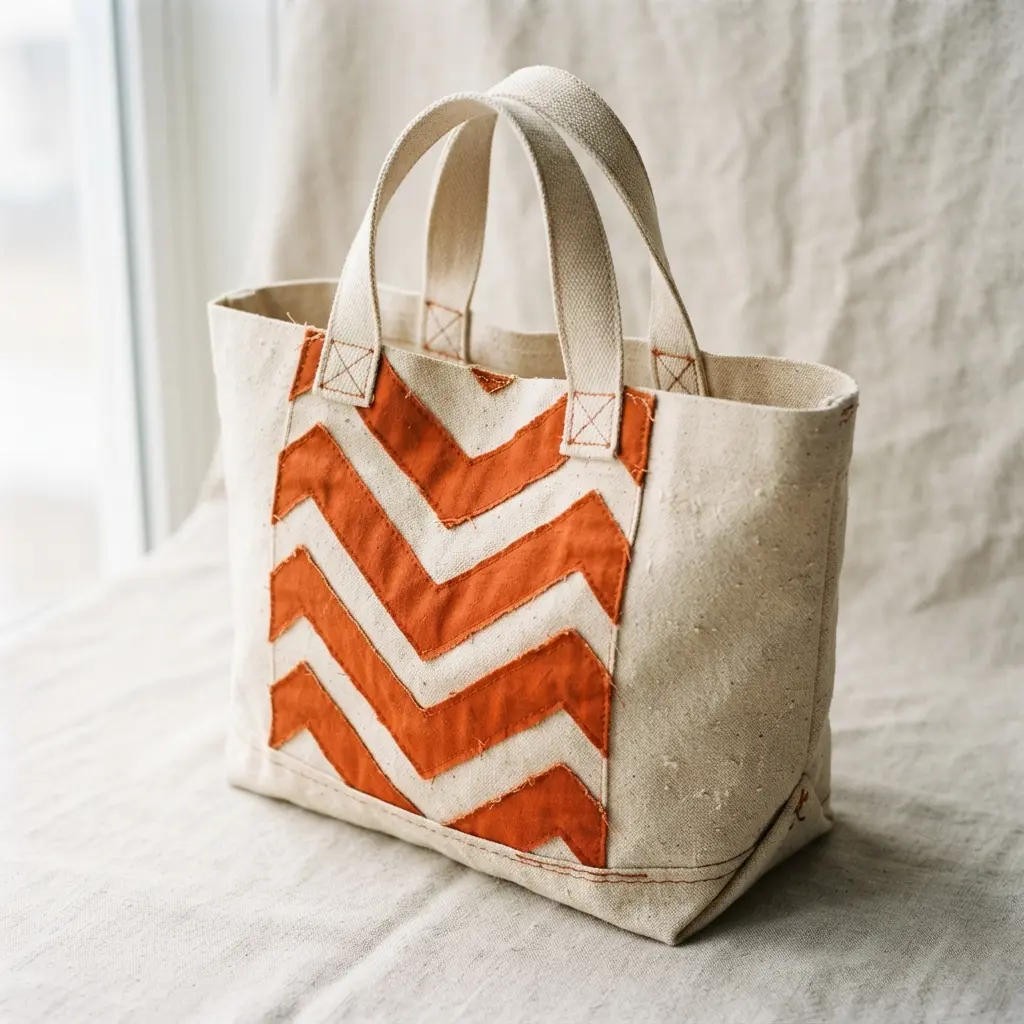
2. Rainbow Geometric Appliqué Canvas Tote – Bold and Colorful Accents
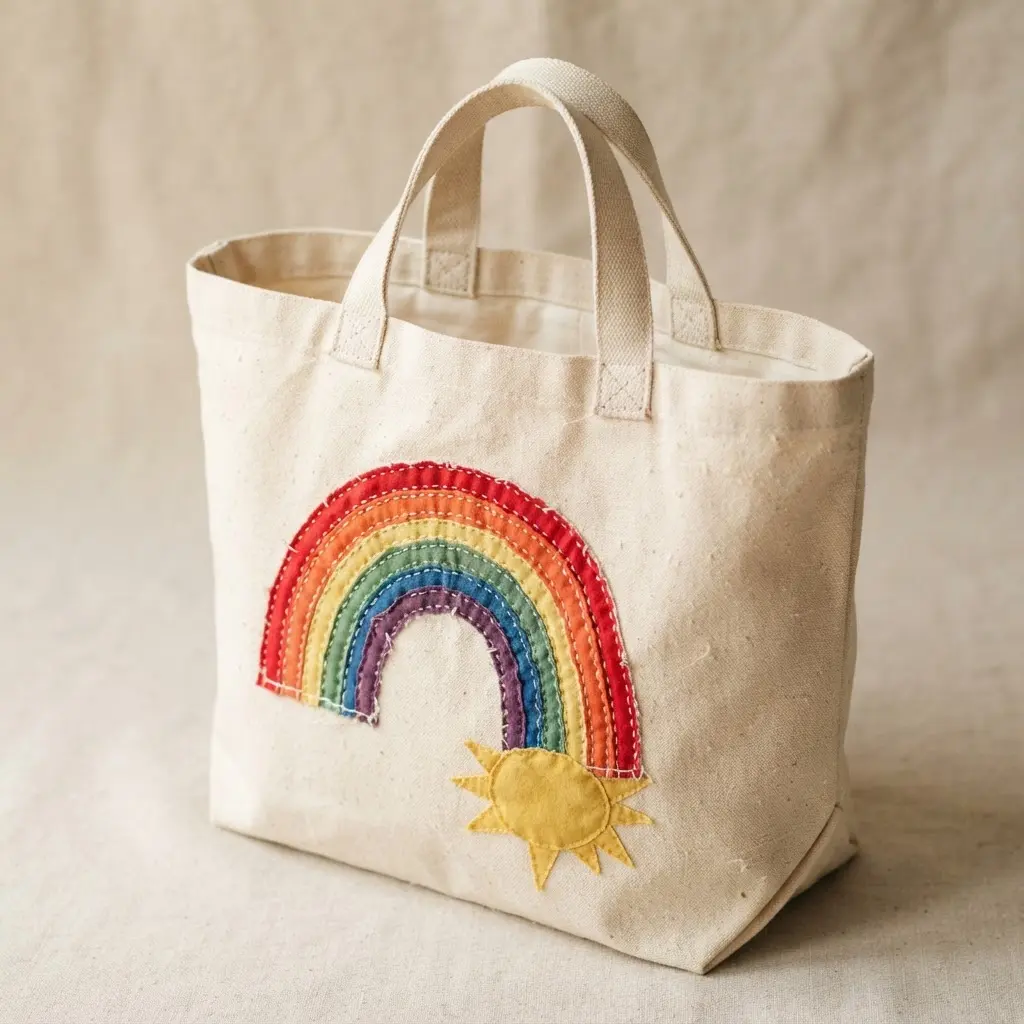
Ever feel like your everyday bag needs a serious pop of color? You will notice how these colorful canvas tote bag ideas gain life from layered appliqué details that start with a sturdy natural canvas base. I love how the tactile, three-dimensional quality of the appliqué makes it feel truly handmade. Trust me, securing each piece with plenty of pins or a temporary adhesive before you stitch is the key to a crisp, professional look.
This project proves that practical canvas tote bag ideas easily become bold personal statements when you layer rainbow fabrics. Your finished tote will be a cheerful accessory that sparks conversation. For another fun way to add playful texture to a summer bag, you can look at DIY pom pom beach bag designs. Does that not look stunning?
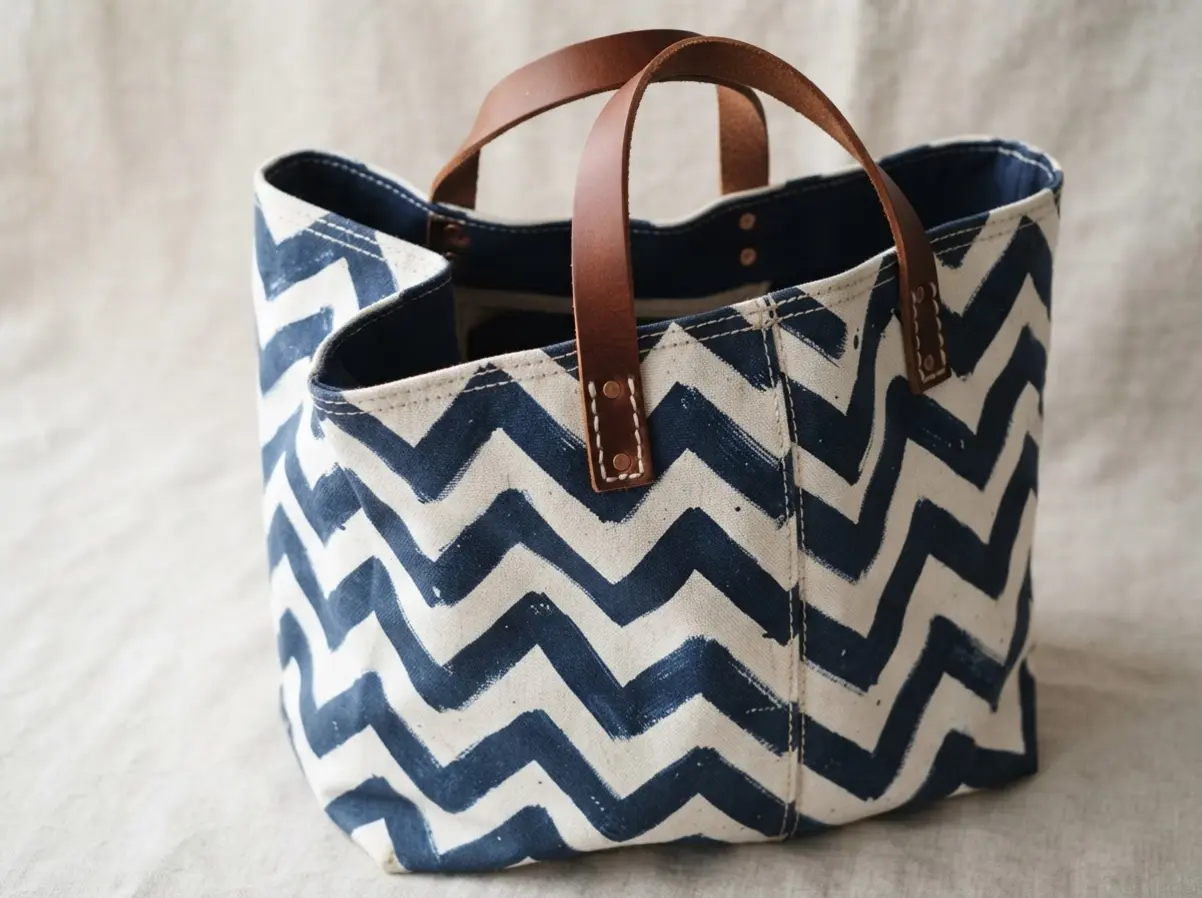
3. Navy and Cream Zigzag Shopping Tote – Classic Contrast for Everyday Use
This classic navy and cream combo looks complex, but the zigzag pattern is just clever piecing. When hunting for timeless canvas tote bag ideas, I love how high contrast makes the graphic lines pop. You cut strips of each color, then sew them together at angles to create those sharp designs. I love running the stripes in any direction you want.
For a bag that gets daily use, you need heavy-duty canvas and strong thread to prevent sagging. Reinforce all the stress points, especially where the handles attach, to make sure your carryall handles a full load of groceries without a fuss.
Getting a clean finish on the top edge is much easier if you first learn to sew a roll-up tote strap for practice. That professional topstitching trick is the exact technique you will apply here. Does that not look sharp and ready for anything?
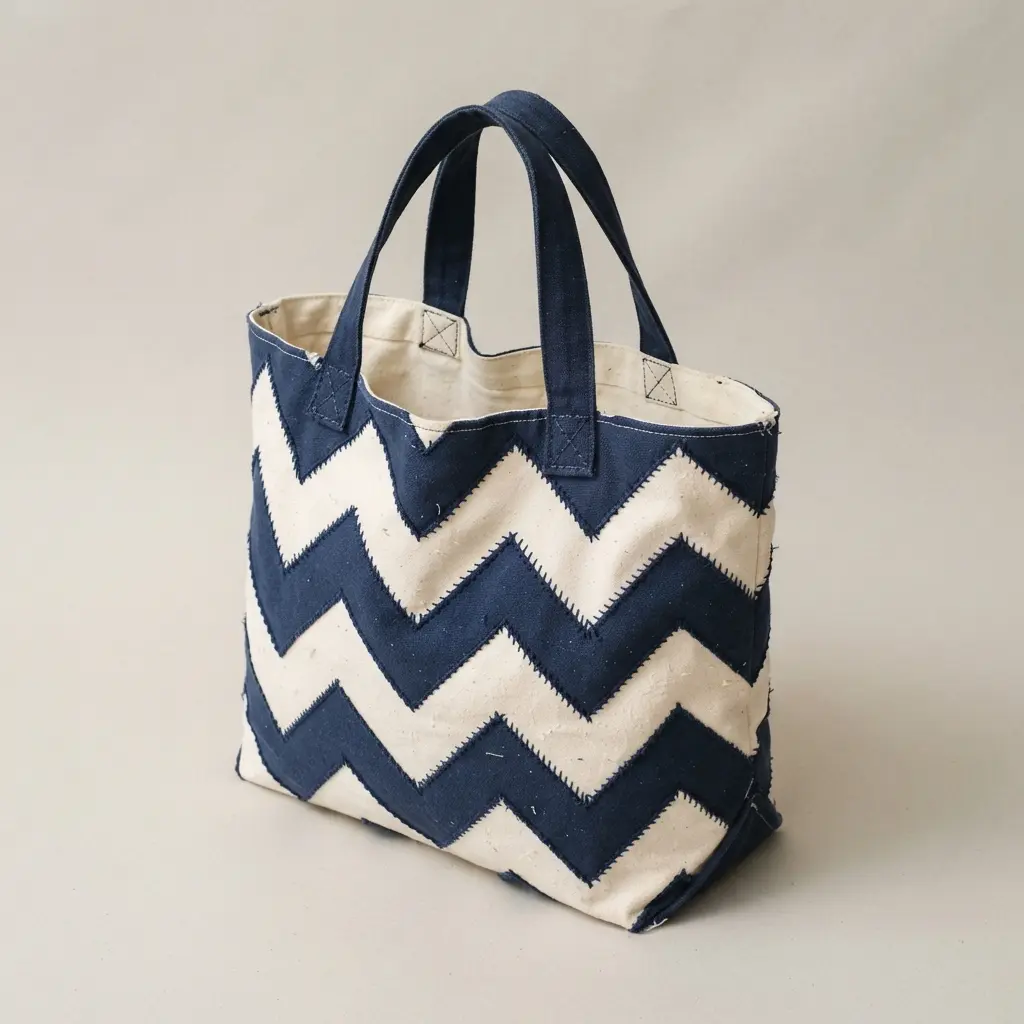
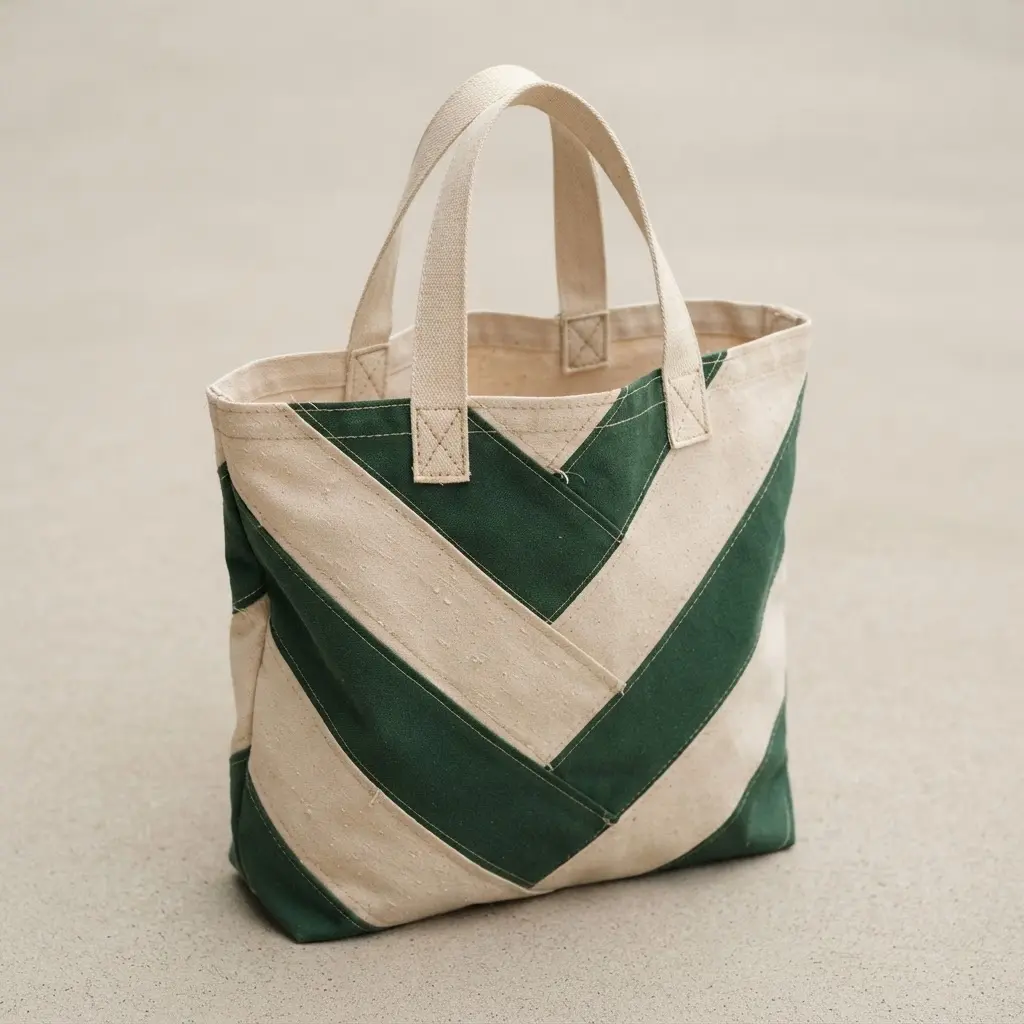
4. Large Scale Two Tone Chevron Tote – Making a Graphic Impact
Does a bold, graphic statement sound complicated? It is not, I promise you. Large-scale canvas tote bag ideas rely on a high-contrast fabric pairing and wide, angled stripes to create a powerful chevron look. You will cut and piece two solid colors or use a pre-printed panel, then construct a sturdy bag body with reinforced straps.
I love how this design turns a classic pattern into a modern accessory. It works because the expansive layout makes the geometry feel fresh and intentional. Your biggest win with statement canvas tote bag ideas comes from perfect alignment before you stitch. Take your time matching those chevron points before you sew, and press every seam open for a crisp finish. Trust me, that professional touch makes all the difference. Keeping your craft storage solutions for sewers organized makes projects like this much smoother, too. Feel proud when you carry this striking bag out the door.
5. Chevron Panel Boxy Market Tote – Structured Style with Geometric Flair
Does a structured tote sound intimidating? Trust me, this one is a fantastic project that looks more complex than it is. Structured canvas tote bag ideas succeed when you build crisp corners with a rigid boxy form that stands completely on its own. You then get to play with the fun part, sewing together contrasting fabric panels to create that dynamic V-shaped chevron pattern on each side.
I love how this design marries serious utility with modern style. The sturdy shape keeps your groceries or library books from getting crushed, while the geometric panels add a personalized, artistic touch. For a clean, professional finish, your secret weapon is meticulous pressing with an iron after every single seam.
Once you’ve mastered this structured silhouette, you’ll find the skills translate beautifully to other projects. Sewing a flowy easy summer dress follows the exact same rules for maintaining clean lines.
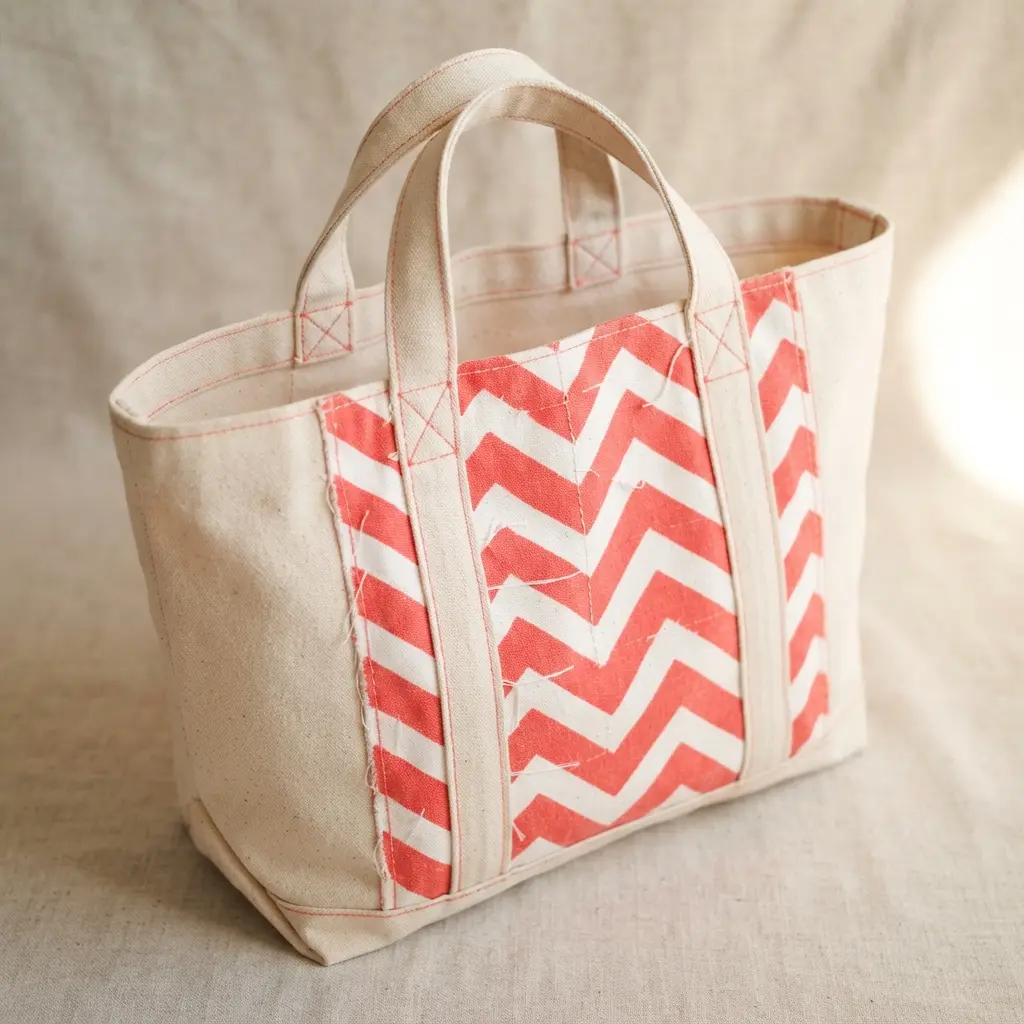
6. Multi Color Striped Chevron Beach Bag – Playful and Spacious Design

Ever feel like your beach bag should be as fun as your day in the sun? This design is pure, cheerful energy. Playful canvas tote bag ideas pair a lively exterior with a bold chevron-patterned canvas for maximum impact. You’ll work with bright stripes of turquoise, coral, and yellow that just make you smile. The trick is pairing that energetic shell with a practical, water-resistant lining. This protects your gear from wet towels or a spilled drink. Securely attach thick rope or webbing handles, reinforcing those seams well for all your supplies. It works because it solves a real problem while looking absolutely fantastic. Try it and feel the satisfaction of having the most eye-catching accessory at the water’s edge.
7. Earth Tone Woven Chevron Carryall – Textured and Tactile Elegance
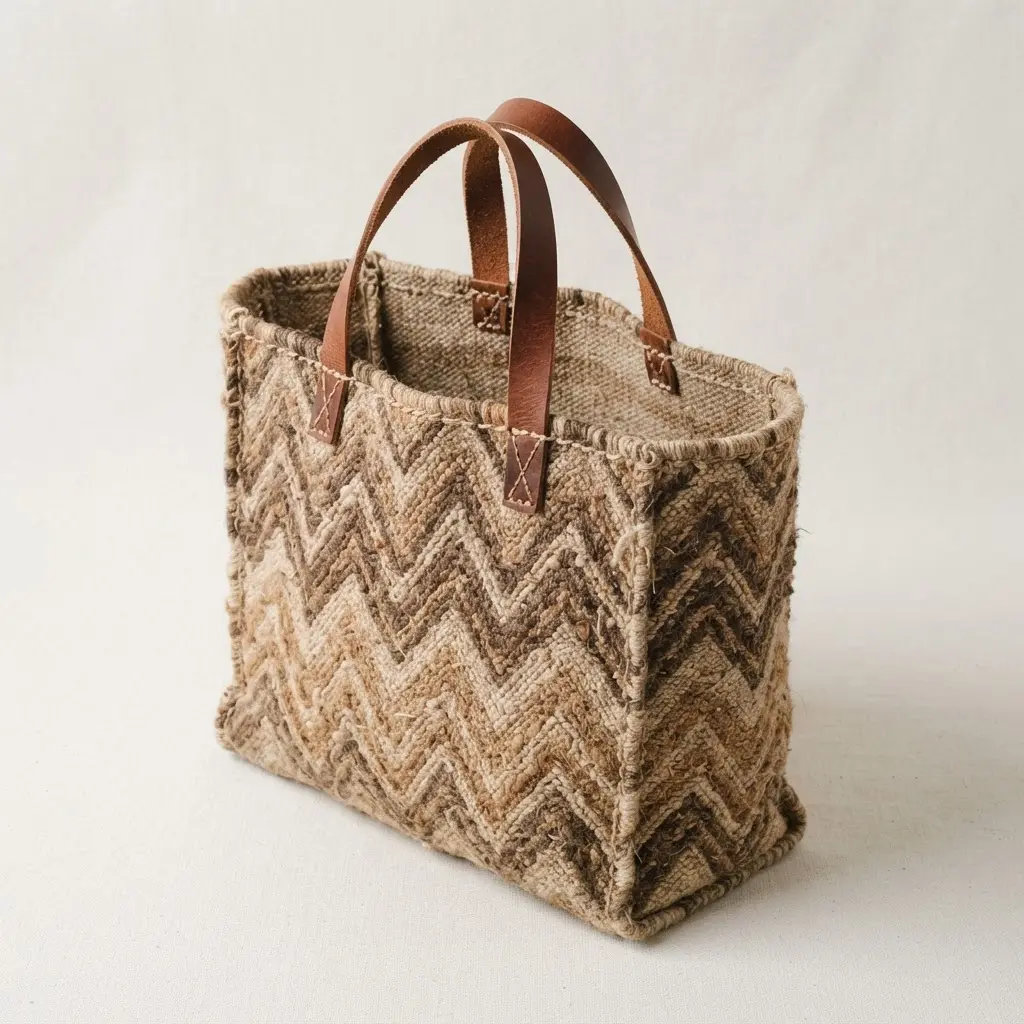
This one surprised me with how a simple pattern can feel so luxurious. Earth-toned canvas tote bag ideas bring warm elegance through natural fiber strips woven into a sharp V shape. Using colors like terracotta, olive, and sand makes for a wonderfully tactile project that begs to be touched. Trust me on this one, taking the time to perfectly match your chevron pattern at the seams makes all the difference for a professional look. A sturdy interfacing acts as your secret weapon to give the bag the structure it needs. Doesn’t that sound like a project you would love to get your hands on? The final carryall is not just practical, it is a piece of wearable art. For another warm-weather accessory project, you can find some great summer hat sewing tutorials that use similar natural materials.
8. Bold Black and White Chevron Tote – High-Contrast Graphic Perfection
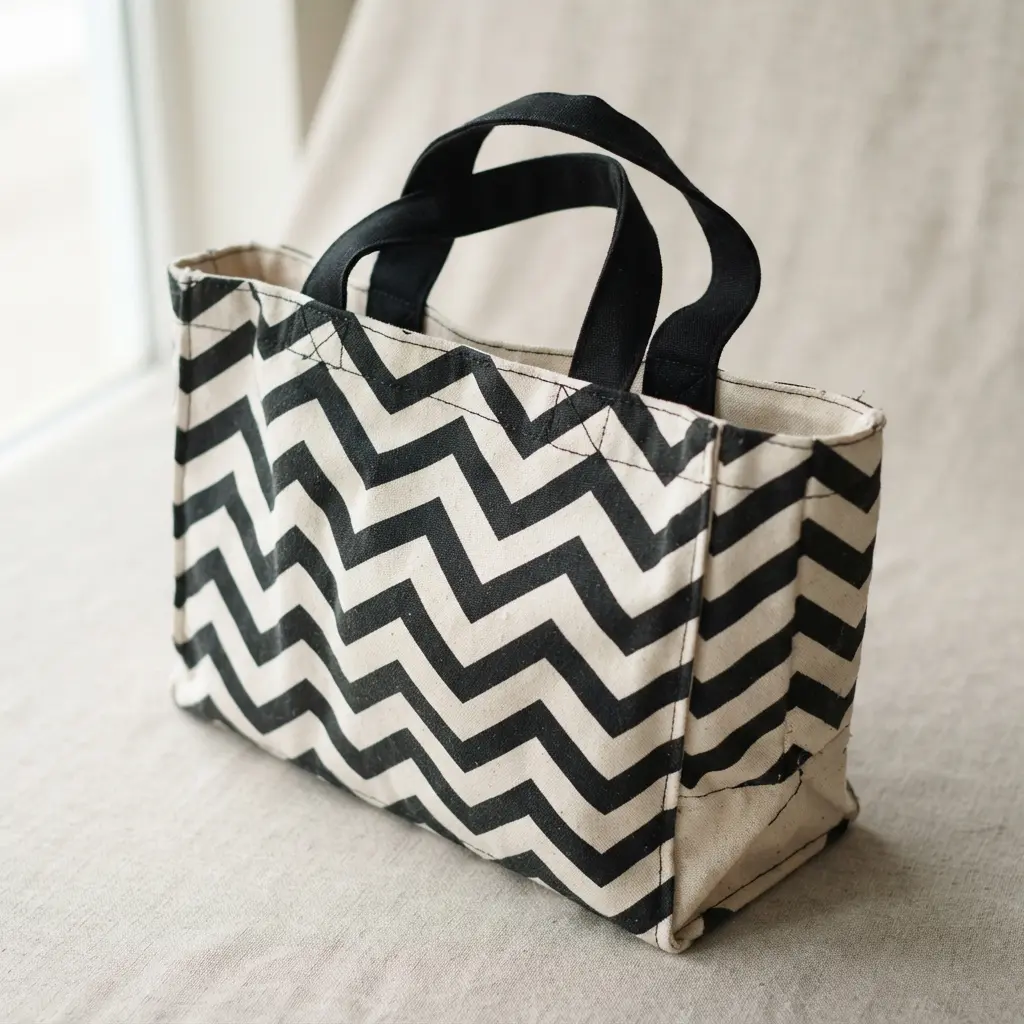
This is the bag you make when you want your outfit to do the talking. That high-contrast chevron pattern is a real head-turner, and trust me, it looks way more complicated than it is. The secret lies in precise pattern alignment and using a fabric with good body so your accessory holds its shape. You will spend a bit of extra time pinning those zig-zag points perfectly, but the payoff is huge. When the lines match up flawlessly, the whole design pops with a clean, modern energy. I love how this graphic style works for both a casual farmers market run and a more polished look. Isn’t that the best kind of versatile? If you are sewing a wardrobe of statement pieces, a project like this ruffle tank dress would be the perfect high-impact companion. Feel that satisfaction when you sling your finished carryall over your shoulder.
9. Chevron Accent Pocket Canvas Bag – Functional Style with a Decorative Detail
You know I love a bag that works hard but looks sharp. Adding a single geometric feature is one of the easiest canvas tote bag ideas for makers who want instant visual impact. You will cut and stitch individual fabric pieces to create that crisp V-pattern, then sew it onto the front as a handy pocket. The key is taking your time with a fabric marker and ruler to get those lines perfect before you pin and sew. Trust me, slow and steady wins the race here. It works because that bold detail elevates a simple accessory into a statement piece you will actually use every day. Plus, having a dedicated spot for your keys or phone makes daily life easier. Before you start, reading up on ABC dress sewing patterns helps you get comfortable with precise assembly.
10. Pastel Modern Chevron Quilted Tote – Soft Hues with Added Dimension
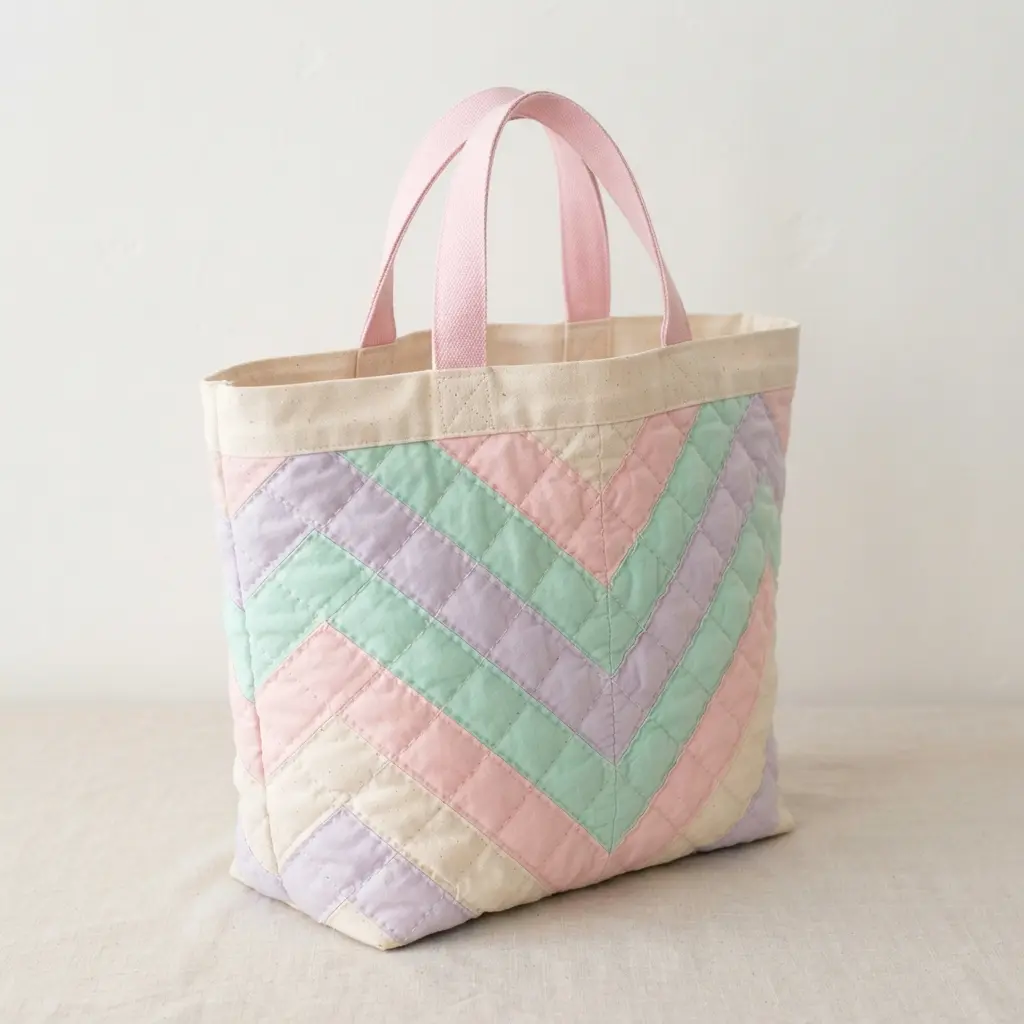
Who would have thought soft pastels and a dynamic chevron could feel so modern? This accessory looks complex, but it really comes together when you assemble fabric strips at a precise angle. After sewing, you layer the chevron top with batting and backing, then quilt the sandwich for a lovely puffy texture. I love how the stitching gives the carryall its own built-in structure and a truly unique feel. The gentle colors keep it versatile, while the dimension adds a high-quality finish. Feel proud when you carry this one, and if you enjoy the cozy result, you might appreciate some knitted beanie pattern ideas for your next soft accessory project.
Applying Protective Finishes for Canvas Fabric Care
A detailed topstitching line with a longer stitch length adds both decoration and serious reinforcement to your stressed seams. Set your machine to a 3.0mm or 3.5mm stitch and run a line 1/8 inch from your seamlines, especially along the sides and base where weight pulls. This extra thread locks everything in place and gives you that lovely, high-end look. For the main fabric, consider a spray-on fabric protector designed for natural fibers before you use the bag for the first time. It creates an invisible barrier against light spills and stains without changing the hand of your beautiful material.
Your finished piece will last for years with this simple, final touch. Regular spot cleaning and avoiding prolonged sun exposure will also keep the fabric vibrant. Store your creation flat or upright with tissue paper inside to maintain its crisp silhouette over time.
Conclusion
So, did any of these patterns spark a creative itch? Look at the variety you have to choose from—each one is a testament to how a classic shape can be endlessly reinvented with a bit of fabric and a sharp eye for design. My best piece of advice is to pick the concept that makes you most excited to get to your sewing machine; that energy always shows in the final piece. When you complete your chosen canvas tote bag ideas, you will feel that wonderful maker’s pride. Now, all that’s left is to choose your favorite palette and start cutting.
FAQs
Q: What is the best weight of canvas for a chevron tote bag?
A: A medium-weight duck canvas or a sturdy home decor fabric works best. It provides enough body to hold the bag’s shape, especially when you add interfacing, without being too difficult to sew through multiple layers.
Q: How do I keep my chevron points sharp and aligned?
A: Accuracy in cutting is key. Use a rotary cutter, a clear quilting ruler, and a fresh blade. Pinning your fabric strips carefully before sewing and pressing each seam open as you go will also help everything line up perfectly.
Q: Do I need to use interfacing on a canvas tote?
A: Yes, using a fusible fleece or medium-weight interfacing is highly recommended. It adds structure and prevents the bag from collapsing, giving your chevron pattern a crisp, professional finish that lasts.
Q: Can I make a chevron pattern without piecing strips of fabric?
A: Absolutely. You can use an appliqué technique, where you cut chevron shapes from one fabric and stitch them onto a base fabric. This is a great way to add a chevron accent without the precision sewing of pieced strips.
Q: What type of handles are most durable for a heavy-use tote?
A: For bags that will carry heavier items, consider using wide cotton webbing, a sturdy leather strap, or making reinforced fabric handles from several layers of your main material. These options distribute weight comfortably and are very strong.


