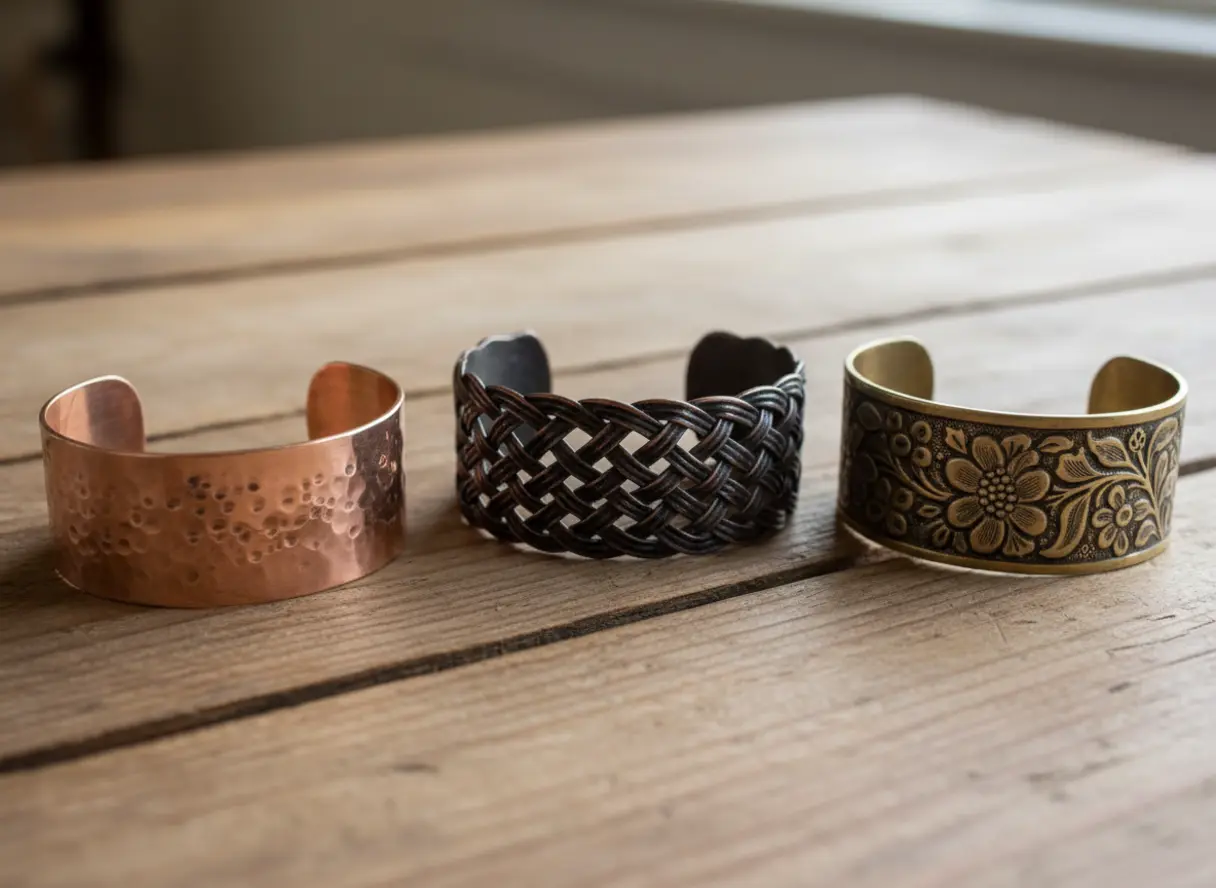
10 DIY Cuff Bracelet Metal Jewelry Projects You Can Start Tonight
We have all held a finished piece of jewelry and wondered how it came to be — the smooth edges, the soft glow, and that satisfying weight in your palm. Sometimes the urge to create something with our own hands hits hard, or should I say, sneaks up on you in the quiet afternoon while you are looking at a plain strip of metal. While we are accustomed to buying accessories off the rack, the world of diy cuff bracelet metal jewelry has opened up a creative path that feels personal and wildly satisfying. This collection is all about giving you ten gorgeous looks you can bring to life with basic tools like a hammer, a steel block, and a mandrel. No expensive machinery, no giant studio — just you, your patience, and some beautiful non-ferrous metal. I love the feeling of pulling a finished cuff from the mandrel for the first time, and I know you will too. Grab your safety glasses and let us look at some projects you can start tonight.
Selecting Metal Gauges for Wrist Comfort
Your wrist will thank you for using 18 to 20-gauge metal, the sweet spot where copper, brass, or aluminum stay comfortable and shapeable. Thinner metal bends too easily and loses its form, while thicker stock fights your tools and feels heavy. The good news is this gauge range gives you that perfect balance of malleability for hammering texture and enough durability to hold its curve. You want a metal that moves with your hammer, not against it, so you can focus on your design instead of struggling with the material. This specific thickness also means your finished bracelet has a pleasing weight, substantial enough to feel like real jewelry but never bulky. Trust me on this, starting with the right gauge makes every step from texturing to shaping flow more smoothly. When you begin exploring diy cuff bracelet metal jewelry, material selection is half the battle won.
Safety Precautions for Metal Filings and Edges
The fastest way to ruin a day of making is a sharp edge that snags your skin, which is why filing is non-negotiable. Those tiny metal shavings from sawing and sanding are more than just messy, they are sharp and will stick in your fingers. Wear safety glasses every single time you use a file or sandpaper, and keep a dedicated shop towel nearby to wipe your piece clean. You must deburr the inside curve of your bracelet with a needle file or sandpaper strip, as that’s the surface that rests against your skin. A quick test is to run a piece of old nylon stocking over the edges, if it catches, you need to sand more. This step takes a few extra minutes but transforms your work from a rough prototype into a polished, wearable piece you will be proud to put on. Every diy cuff bracelet metal jewelry project demands this attention to safety and finishing detail.
1. Hammered Texture Polished Copper Cuff
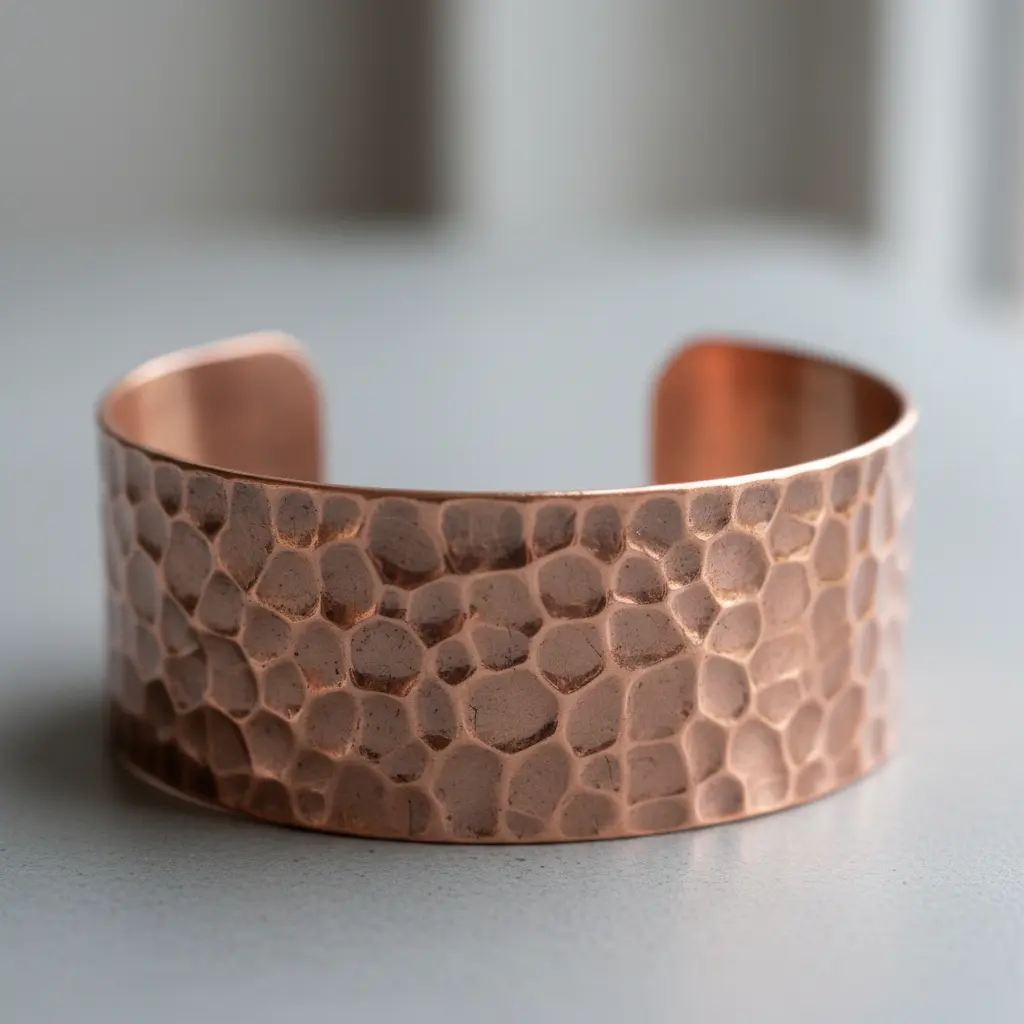
This one surprised me – it looks like a high-end artisan piece, but the technique is wonderfully straightforward. You start with a strip of soft copper sheet, and the magic is all in the ball-peen hammer. You create that beautiful, organic texture by hammering the metal with the rounded end, moving in a random, overlapping pattern.
Isn’t that satisfying? The dents catch the light in different ways. After hammering, you smooth any sharp edges with a file and then bring it all together with a rotary tumbler or some polishing cloths. This step transforms the raw, textured metal into a piece with a warm, glowing shine.
I love how the contrast between the deep hammer marks and the high polish makes the metal look so rich. For a similar look with a more intricate design, the process in this Anthropologie-inspired cuff tutorial follows a great foundational approach. Feel that weight on your wrist and admire your handiwork.
2. Stamped Botanical Pattern Brass Cuff
This one looks so intricate, but trust me, the stamping technique is wonderfully straightforward. You start with a flat strip of brass and a set of botanical metal stamps. With the brass secured on a steel block, you simply place your chosen leaf or flower stamp and give it a firm tap with a hammer. Repeating this across the surface builds a lovely, organic pattern that feels truly handmade.
The real magic happens when you bend that flat, stamped piece around a cuff mandrel. This transforms it into its classic curved shape. I love how the warm glow of the brass makes those stamped details pop, giving it a rustic, vintage look that gets even better as it ages.
Before you start hammering your final piece, practice your stamping pressure on a scrap. Getting a feel for that consistent strike makes all the difference for clean, even impressions. Your finished piece will have that fantastic artisanal quality you just can’t buy.
3. Brushed Matte Finish Aluminum Cuff
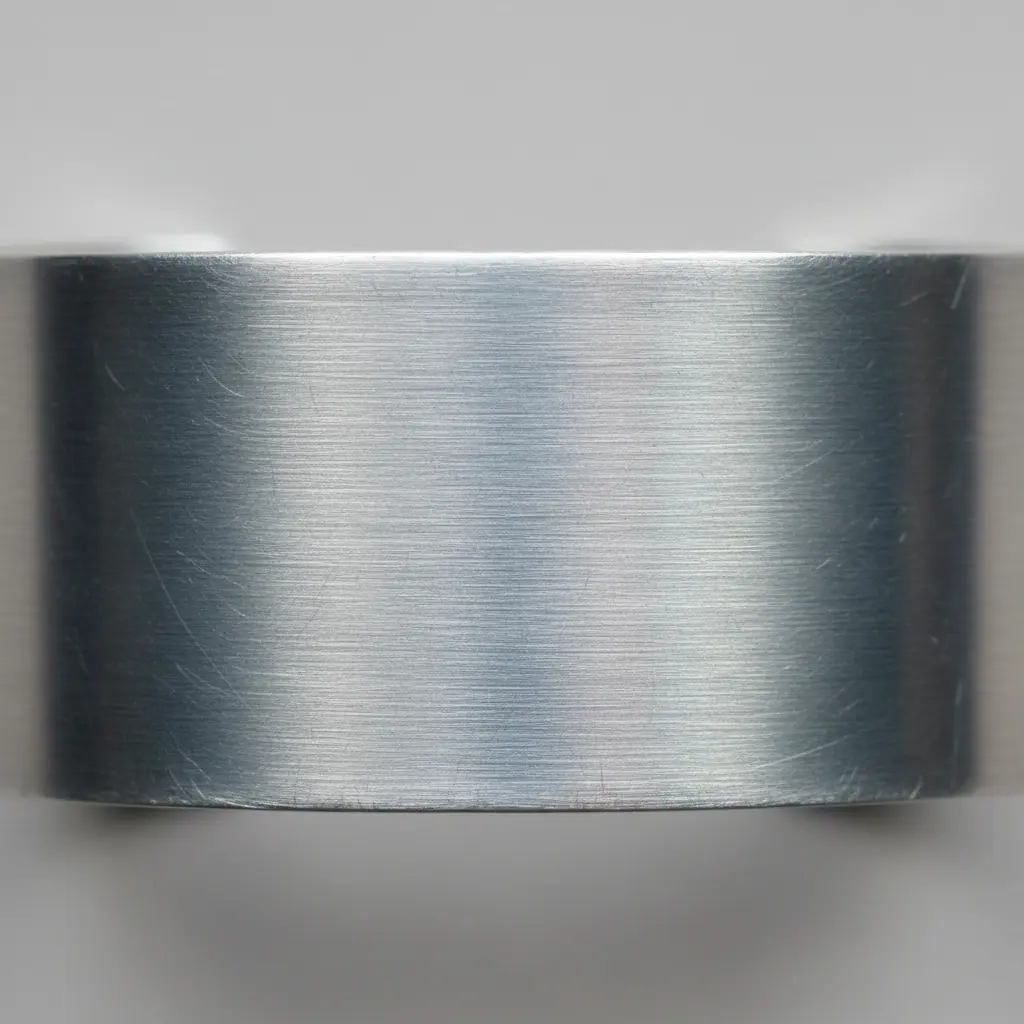
Ever wondered how jewelry can look so sophisticated yet feel incredibly light? This cuff answers that with its brushed matte finish. You create those fine, parallel lines with a wire brush or abrasive belt, which diffuses light for a soft, modern look.
I love how this finish is wonderfully forgiving for beginners, hiding minor scuffs from daily wear. The open-ended aluminum cuff is easy to put on and its malleable nature means you can gently adjust the fit for comfort. It is a perfect first metalworking project because the material is affordable and hypoallergenic.
If you enjoy the process of shaping and finishing raw materials, the skills you build here directly apply to creating a sea glass necklace. Both projects let you transform basic elements into personal, wearable art. This is what makes diy cuff bracelet metal jewelry such a rewarding craft to master.
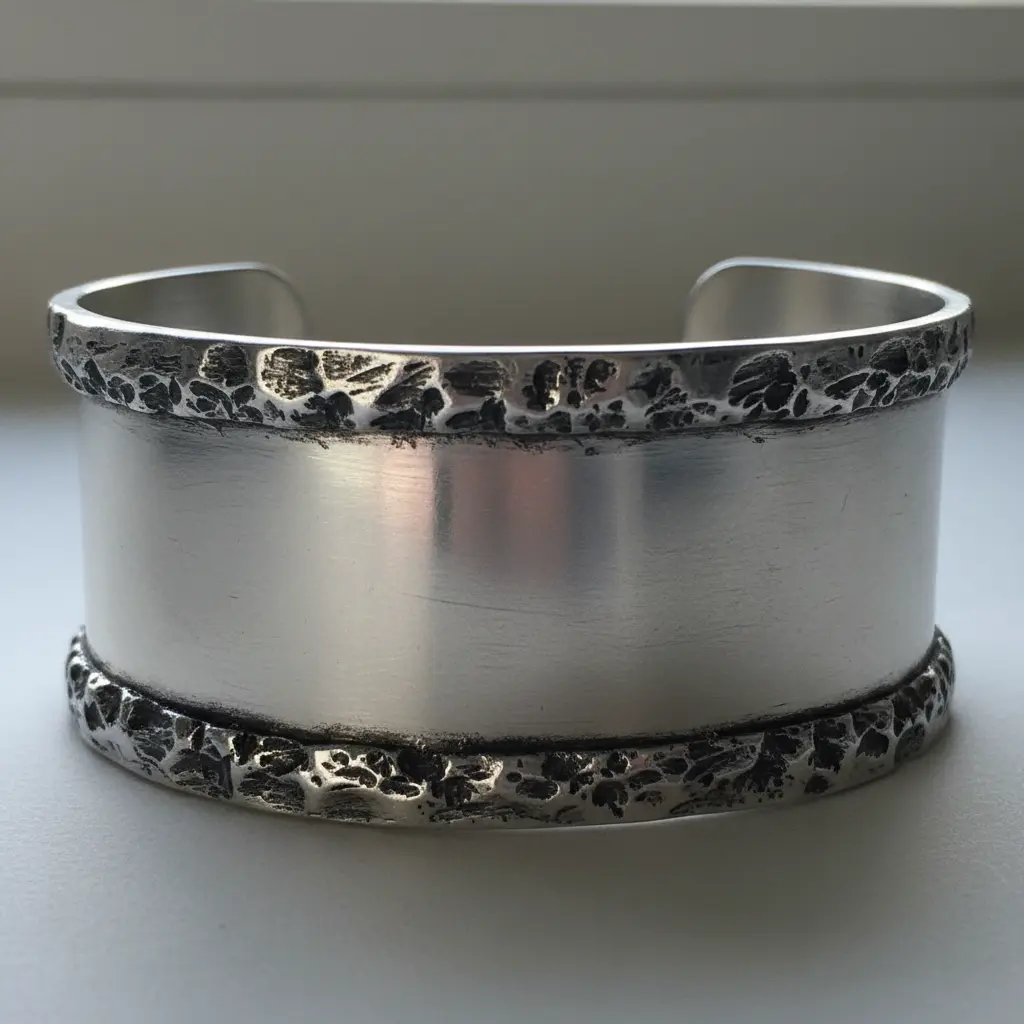
4. Rustic Oxidized Copper Weave Cuff
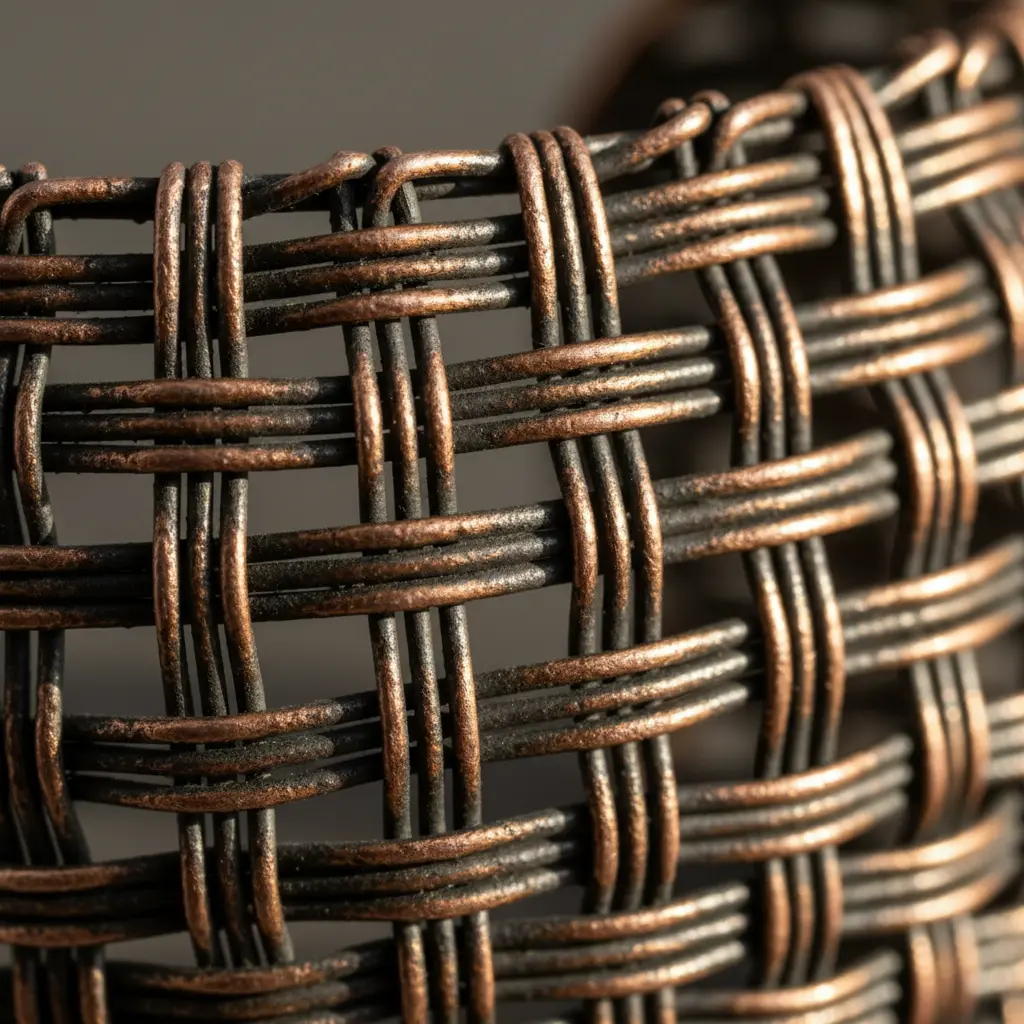
Ever wondered how that gorgeous, aged texture gets into metal jewelry? This cuff looks like an heirloom, but you can absolutely make it yourself. The magic starts with weaving copper wire into a flexible, fabric-like sheet. Then you shape it and give it that rustic character with an oxidizing agent.
I love watching the metal transform during oxidation. You dip the woven piece into a solution like liver of sulfur, and it darkens the copper to deep browns and blacks. The real payoff comes next. You polish just the high points of the weave, leaving the recesses dark. This contrast makes the woven pattern pop and gives it that perfect antique feel. It is a fantastic way to explore DIY copper crafting projects and see how versatile this metal can be.
Doesn’t that finished, substantial piece in your hand feel incredibly satisfying?
5. Minimalist Geometric Cutout Brass Cuff
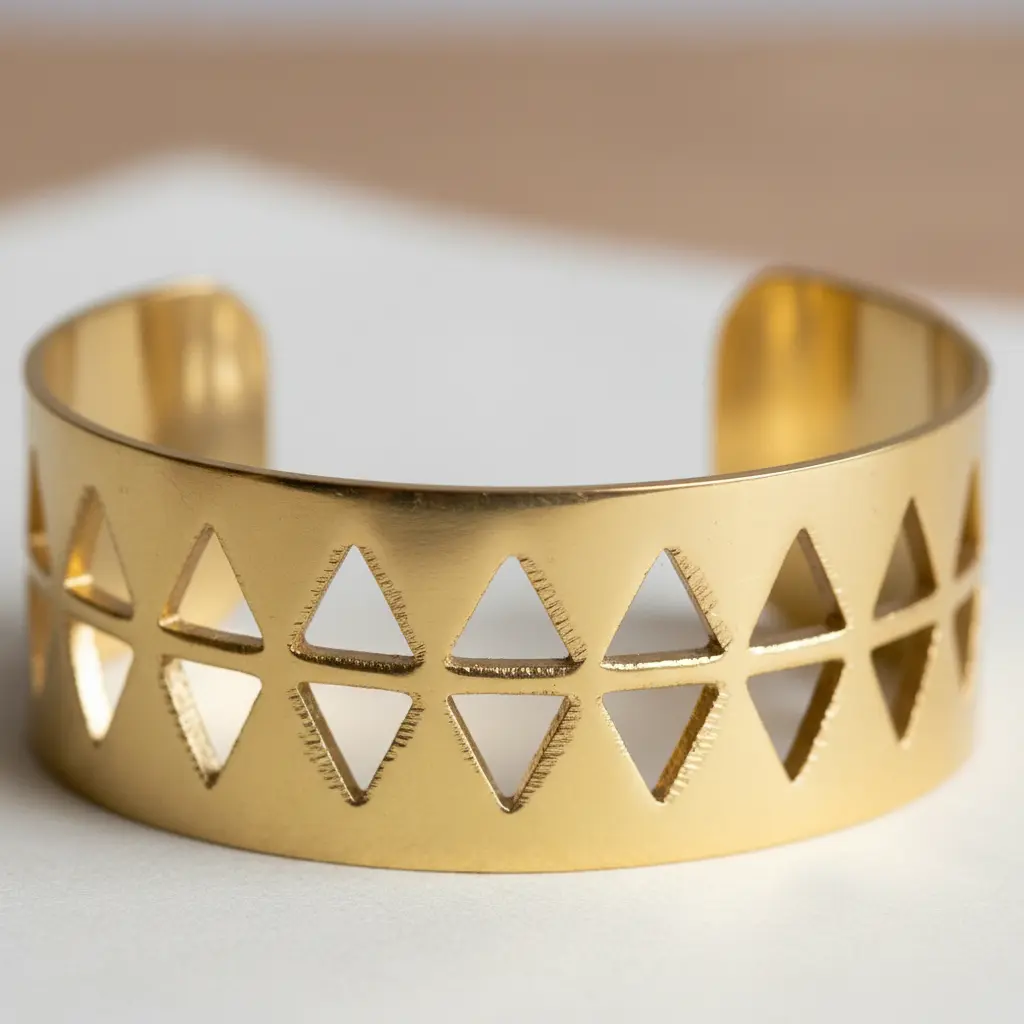
This one looks like modern architecture for your wrist, but it is surprisingly approachable. You start with a flat brass sheet, marking your geometric pattern directly onto the metal. Then, you carefully cut out those shapes with a jeweler’s saw to create the signature negative space. After that, the most crucial step is meticulously filing and sanding every single edge until they are perfectly smooth to the touch.
Why does it work? The clean lines and open cutouts create a lightweight, sophisticated look that feels both artistic and effortless. Trust me, the satisfaction comes from that final polish when the warm brass gleams. For a similar hands-on metal project, the process for crafting with copper metal follows a lot of the same shaping and finishing principles.
6. Silver Plated Minimalist Wire Cuff
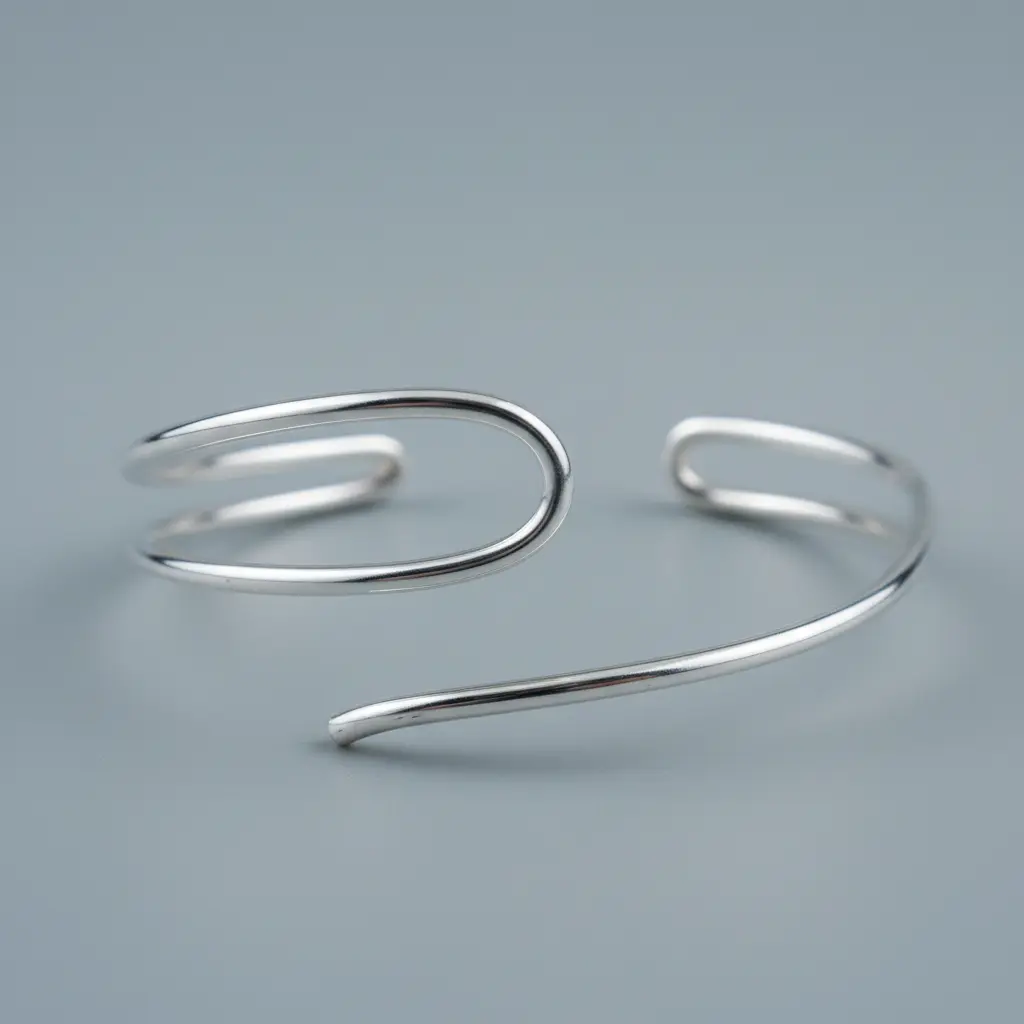
This design is the ultimate test of restraint, and I love it for that. You take a simple length of silver plated wire and bend it into one clean, elegant line. The goal is to shape it so it sits perfectly on your wrist, with no extra fuss.
Its power comes from that simplicity, making it incredibly versatile for everyday wear. You can wear it alone for a subtle touch or stack it with other pieces. This clean aesthetic gives it a timeless quality that never feels out of place.
If you are creating a set, a decorative rolled flower necklace makes a wonderful companion piece for a more complete look. Just remember, gentle handling is key to keeping that beautiful silver finish bright. The beauty of diy cuff bracelet metal jewelry lies in this endless versatility.
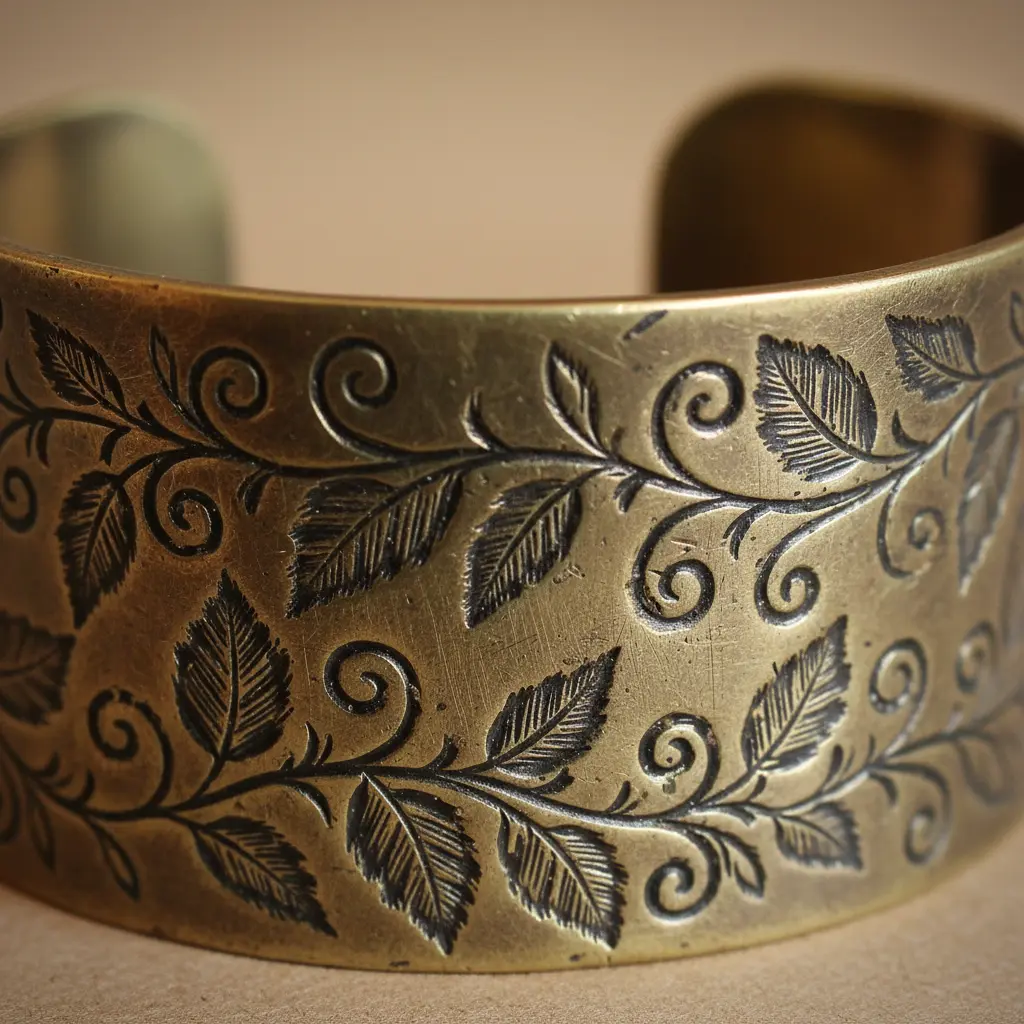
7. Intricate Floral Etched Metal Cuff
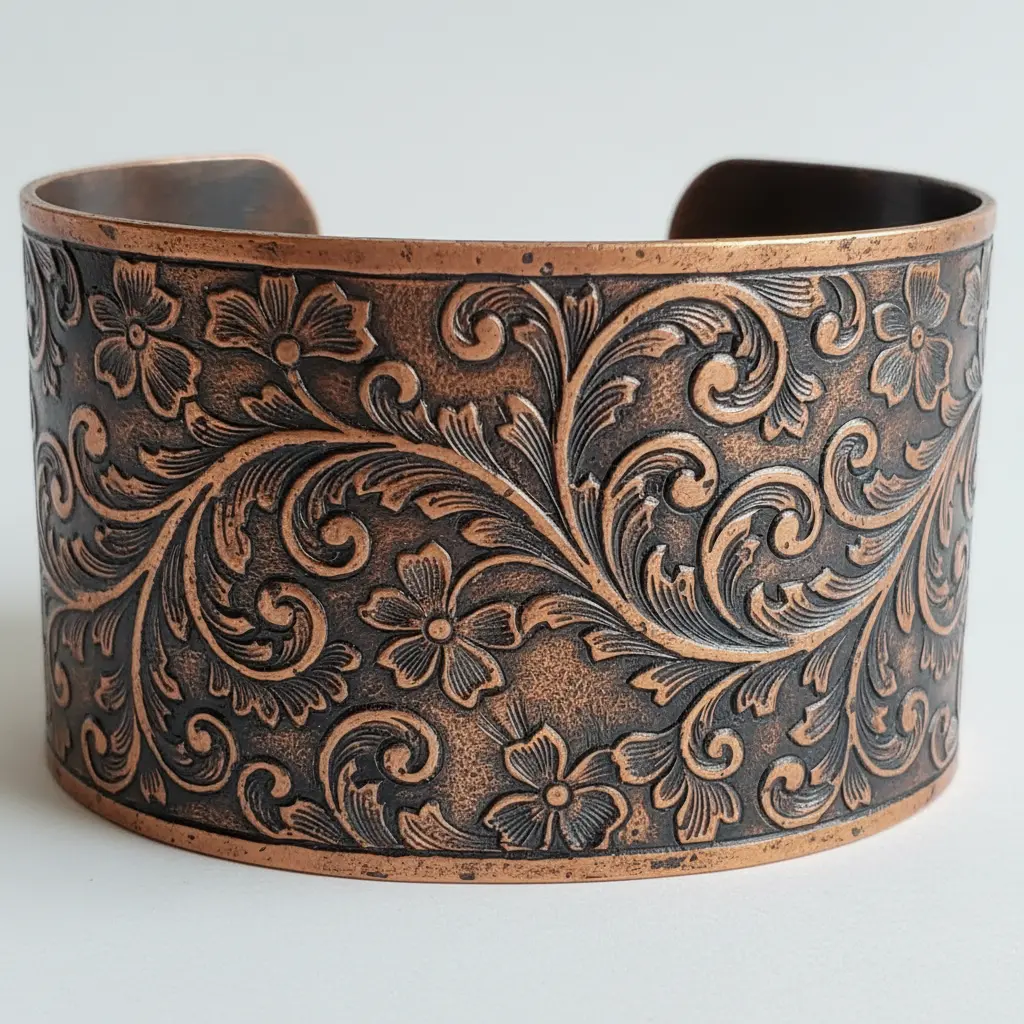
Ever wondered how those beautiful, detailed floral patterns get into metal? The secret is chemical etching. You start by painting your design onto a metal blank with a special acid-resistant wax or lacquer. Then, you submerge the piece in a mild acid bath that eats away the exposed metal, leaving your protected design raised. After a good wash to remove the resist, you are left with a deeply textured, delicate pattern.
The magic is in the finishing. I love to darken the recessed lines with a liver of sulfur patina to make the flowers pop. A quick polish on the high points creates amazing contrast between the shiny metal and the dark, intricate etching. Does that not look stunning? It feels like wearing a tiny piece of textured art.
This is a great first major metal piece, but read up on crafting beaded hoop earrings to get comfortable with essential jewelry-making tools and techniques first.
8. Hammered Edged Wide Aluminum Cuff
Who would have thought a few taps with a hammer could give such a bold, modern piece so much rustic soul? You start by cutting and shaping a wide strip of aluminum sheet, then gently curve it into a cuff form. The real magic happens when you take a texturing hammer to the edges, creating those unique, organic dents and facets.
I love how this technique makes every single bracelet one of a kind. The lightweight aluminum means you get a big statement without any of the heavy weight, and it never tarnishes. Isn’t that the perfect combo for everyday wear?
Just remember, light, even taps are your friend to avoid over-thinning the metal. Your patience with a hand file and sandpaper on the interior and edges is what turns a good piece into a great, comfortable one. For another project that builds your hand-tool confidence, making DIY crafting dream catchers uses a similar rhythmic, hands-on process.
9. Beaded Edge Patterned Brass Cuff
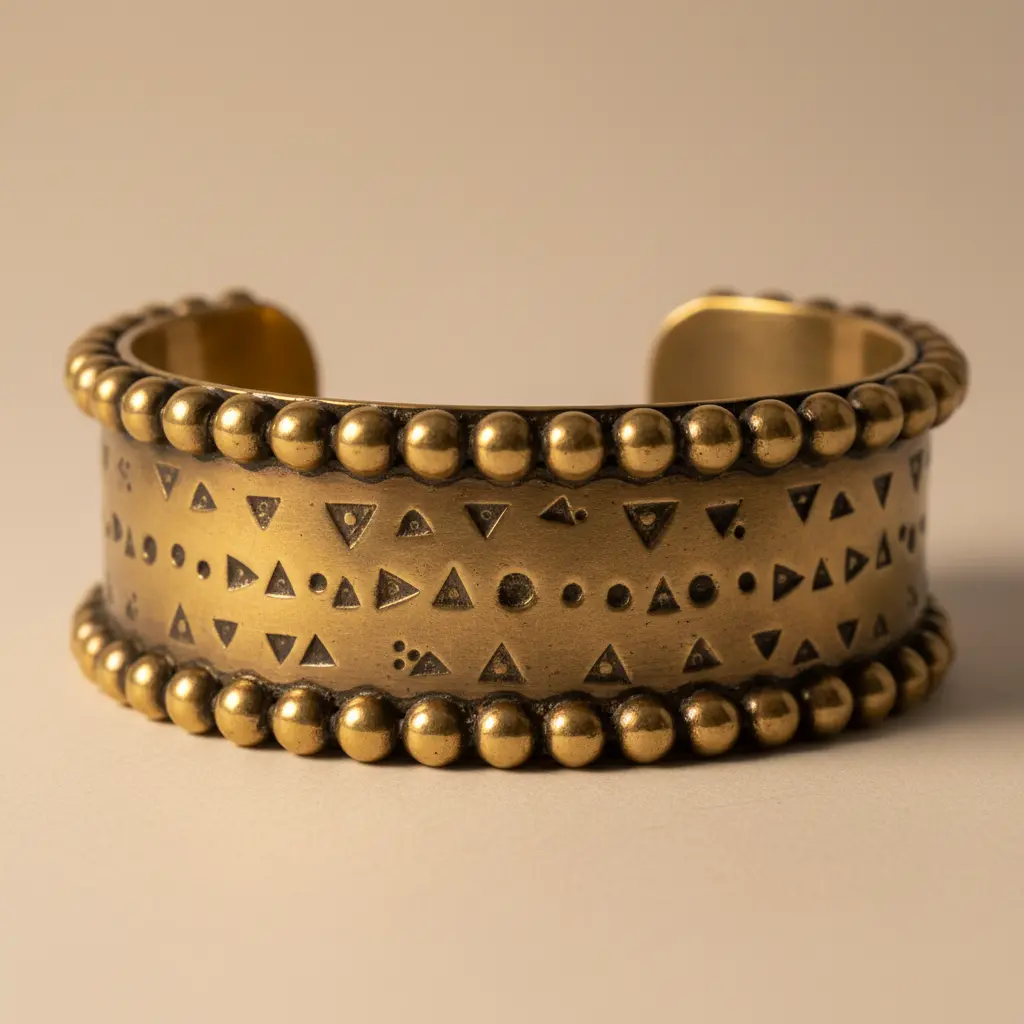
This style looks wonderfully complex, but the secret is that brass is a forgiving and affordable metal to practice on. You start with a brass sheet, cut it to shape, and then anneal it to make it soft enough to work. The beaded edge can be rolled in with a patterned roller or stamped along the perimeter, while the central design gets pressed in with a stamp or etched with acid.
I love how this project lets you combine multiple metalworking skills into one impressive piece. The trick to a professional finish is getting your stamping pressure perfectly even so the pattern is consistent. That satisfying moment when you see those tiny beads line up along the edge is worth the practice.
Getting the fit right is just as important as the decoration. For a comfortable cuff, you need to measure your wrist and plan the opening gap carefully. This is a great first major metal piece, but read up on designing a necklace with closures to understand how different fastenings and sizing work across jewelry types. Does that not look stunning when it is done?
10. Two Tone Mixed Metal Cuff
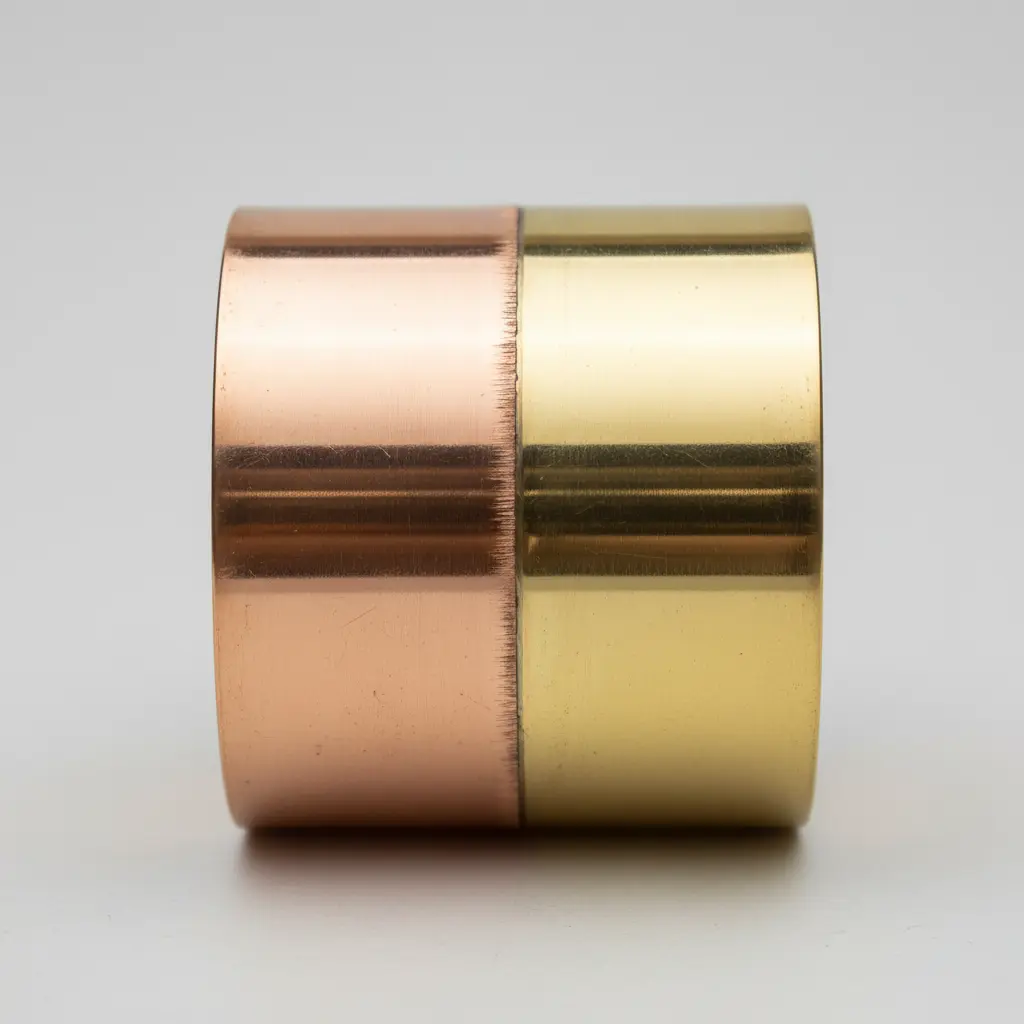
Ever wish one piece of jewelry could go with everything in your collection? A two-tone mixed metal cuff is your secret weapon. You get the visual contrast of two metals, like warm copper and bright brass, in a single statement piece.
This look is often created by soldering or riveting the different metal pieces together. I love how the finished design feels both modern and timeless. It pairs effortlessly with your silver earrings or gold necklaces, so you never have to worry about matching metals.
Once you master this versatile style, try your hand at a delicate bead and wire heart necklace for a softer, complementary project. Does that not open up a world of styling possibilities? It is projects like these that show how diy cuff bracelet metal jewelry can complement every accessory in your collection.
Polishing and Sealing Metals Against Tarnishing
A quick dip in liver of sulfur solution is your secret weapon for making hammer textures pop with contrast. This chemical patina darkens the recesses of your tool marks, adding instant depth and visual interest to your design. After the patina sets, you selectively remove the high points with fine steel wool to reveal the bright metal underneath. The final, critical step is sealing that beautiful finish with a clear lacquer or wax made for jewelry. This protective layer locks out moisture and skin oils that cause tarnish, keeping your bracelet looking as good as the day you made it. Without this seal, copper and brass will quickly darken, losing the crisp definition of all your careful hammer work. Mastering these finishing techniques is essential for anyone serious about diy cuff bracelet metal jewelry.
Conclusion
So, which finish called out to you the most — the warm shimmer of hammered copper or the cool elegance of a brushed aluminum band? There is something undeniably powerful about shaping a flat piece of metal into a wearable piece of art with your own two hands. The best diy cuff bracelet metal jewelry projects are the ones where you let the process slow you down and teach you a new rhythm. Spend generous time on your edge filing after each project, because smooth comfort on the wrist is what makes a handmade piece feel truly professional. Look at what you have the potential to create with just a few simple materials and a steady bench block. Pick a project, gather your copper or brass sheet, and let today be the day you shape your first cuff from start to finish.
FAQs
Q: What Gauge Metal Is Best for a Beginner Cuff Bracelet?
A: 16 to 18 gauge copper or aluminum sheet is a forgiving choice for a first project. These gauges are thick enough to hold their shape after forming but soft enough to cut and shape with a jeweler’s saw and hand tools.
Q: Do I Need a Torch to Make a Metal Cuff Bracelet?
A: Not always. Many cuffs rely on cold-working with a hammer and a steel mandrel to create the curve. You only need a torch if you plan to anneal the metal to soften it or if you are soldering findings.
Q: How Do I Smooth the Edges of My Cuff So They Do Not Scratch My Wrist?
A: Start with a metal file to remove any saw marks and rough spots, then progress through wet or dry sandpaper grits from 400 up to at least 1200. A final polish with a buffing compound on a soft cloth will give you a comfortable, rounded edge.
Q: What Is the Cheapest Metal to Practice DIY Cuff Making?
A: Aluminum is the most affordable non-ferrous metal for practicing techniques like hammering and stamping. It is lightweight, easy to form, and gives you a clear view of your texture work without a big material investment.
Q: How Do I Get a Dark Oxidized Finish on Brass or Copper?
A: You can use a liver of sulfur solution diluted in warm water to darken brass and copper cuffs quickly. Apply it with a brush or dip the piece, then seal the finish with a clear jewelry wax or lacquer to keep the patina from rubbing off.


