
Looking to add a touch of whimsy and charm to your home decor? Look no further than these adorable DIY pom pom paper flowers. These little beauties are not only easy to make, but they’re also a fun way to get creative and add some color to any space. In this blog post, we’ll walk you through the step-by-step process of making your very own pom-pom paper flowers. So grab your scissors and let’s get crafting!
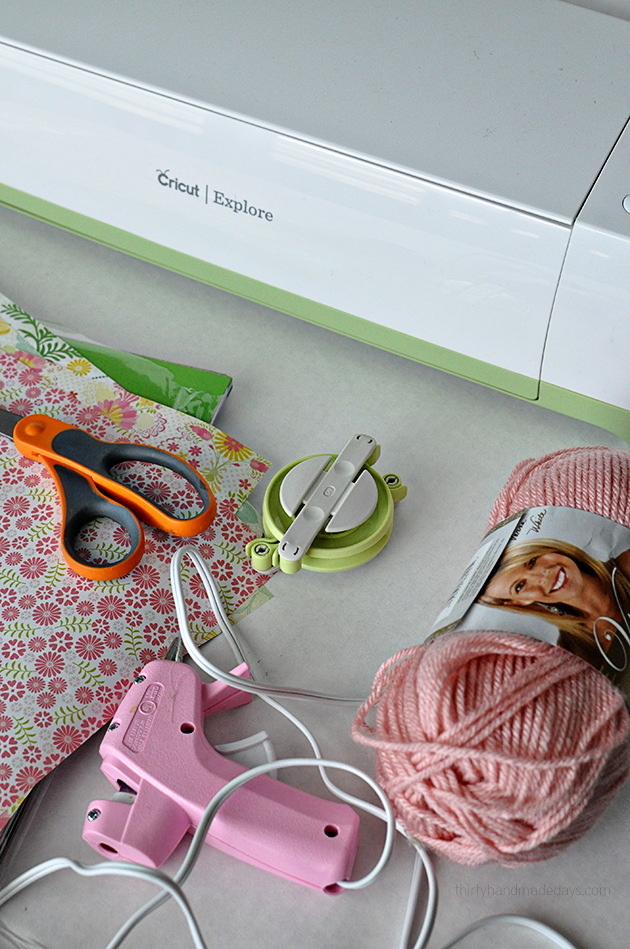
Image Source
In the past little bit I’ve posted a few ideas that I made with my new BFF the Cricut Explore. I loved creating a cute canvas to welcome spring. Just this past weekend I held another Queen Bee Market in Oceanside, CA. (more on that below) I was fortunate enough to partner with Cricut and loved creating some decor.

Image Source
DIY Pom Pom Paper Flowers
These pom pom paper flowers were hung on the wall at the event.
To make these flowers, here’s what you need:
- Sheets of 12×12 paper (can be as many or as few as you want)
- Yarn
- Pom Pom Maker
- Scissors
- Glue Gun
- Cricut Explore
- (or you can make a template and cut it out yourself)
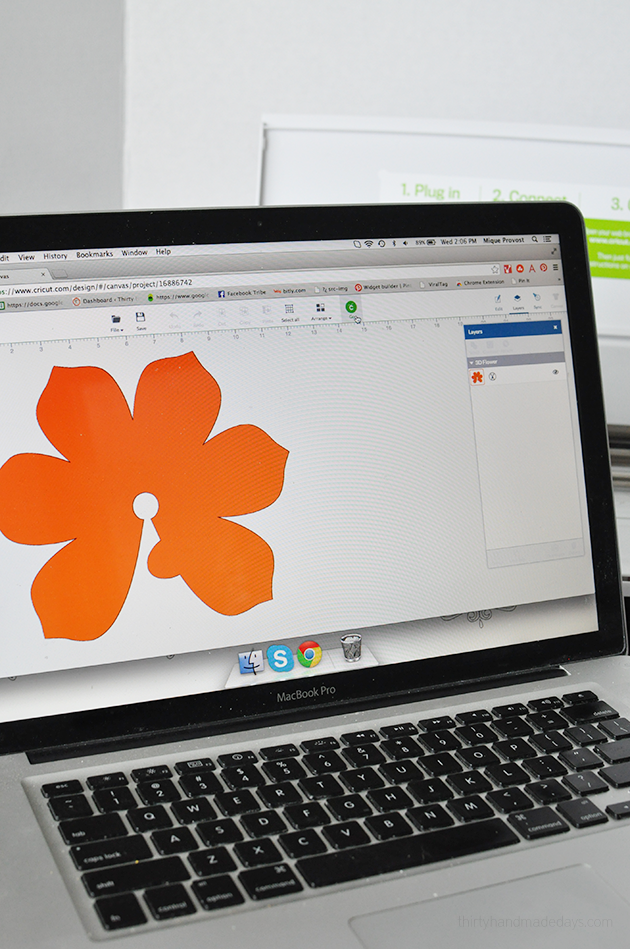
Image Source
I opened one of the 3 D flower designs in Design Space and enlarged it to take up the entire 12×12 canvas. I then fed my paper into the Explore and had it cut the flower. I used one piece of regular 12×12 designed paper and 1 12×12 piece of cardstock to make it a little sturdier.
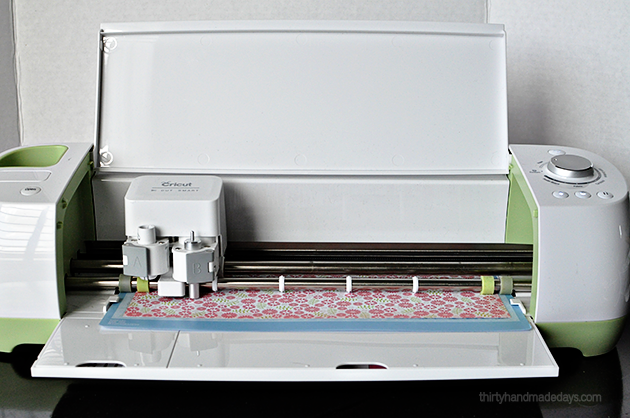
Image Source
I’ve told friends over and over since I got my cutter that it’s the world’s easiest cutting machine. I like that I can design what I want to cut it or pull up a project from the landing page and click “Make it now” and it just goes for it. It’s the best of both worlds. I also love that it can cut all types of materials. I know that Cricut has been known for paper in the past but now we’re able to cut leather, some types of wood, vinyl, duck tape, fabric, felt and more. It’s awwwwwwwesome.
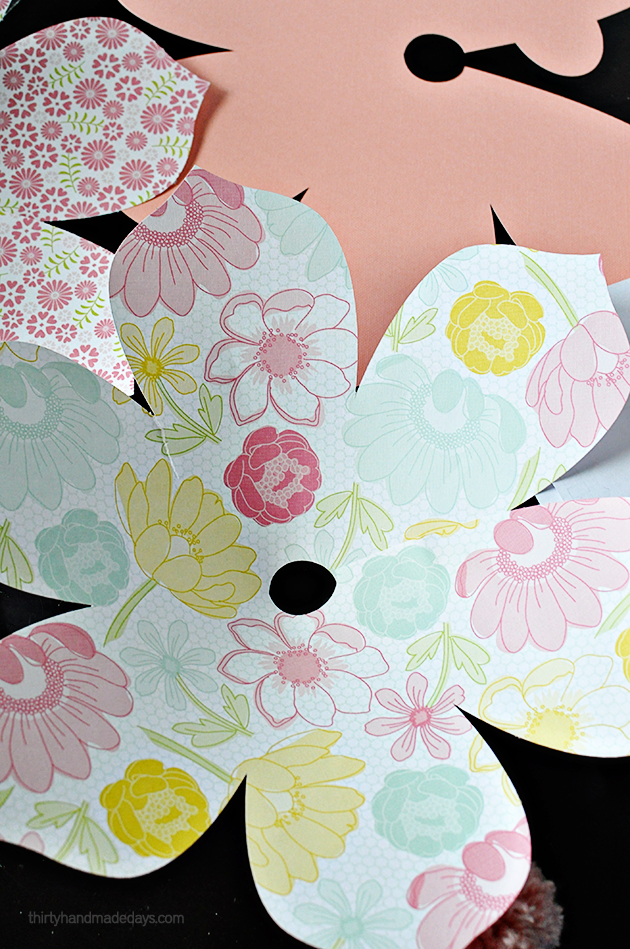
Image Source
So once you cut out the flowers you simply fold them together and I used my glue gun to attach the two sides together. Easy peasy with that little notch there.
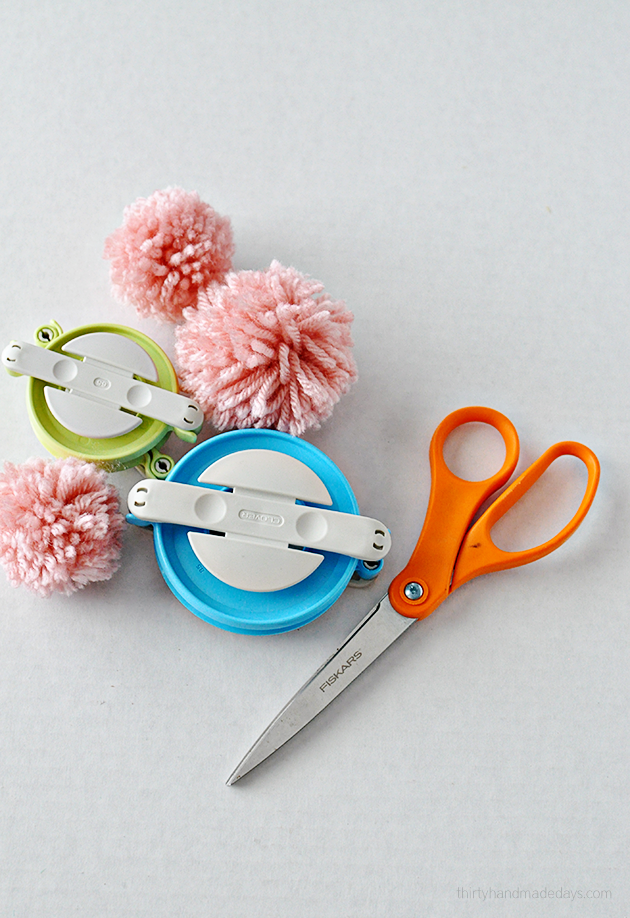
Image Source
I made several
pom
poms using my pom pom maker. Truth- I had to find a video on how to use it but once I made a pom pom, it was easy and quick.
I then used my hot glue gun to attach the pom pom to the middle of the flower. These can be attached to a project, used at a party or baby shower or hung in any room. I love how they turned out. What do you think?
I thought you might want a little peak into the market too:
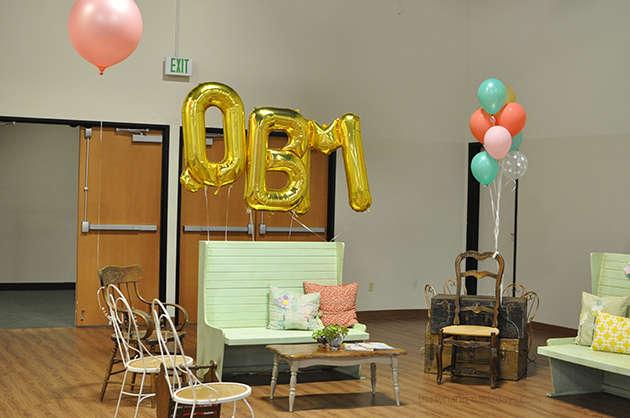
Image Source
We had a sitting area provided by my girl Audra from Smitten. You have to come to CA to grab some of her awesome finds but it is soooo worth it. Every single market I get something from her.
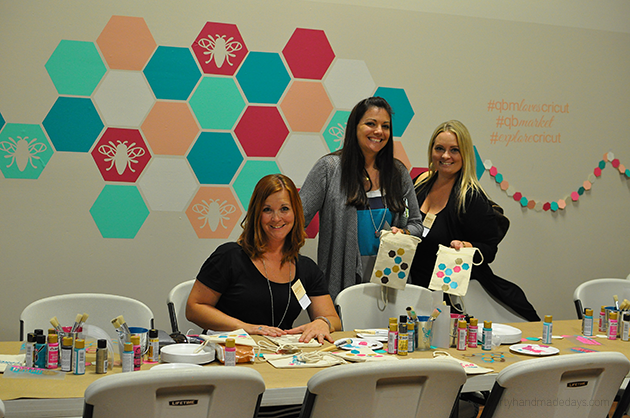
Image Source
Cricut was there to demonstrate the new Explore and a make and take. Shoppers (and vendors- pictured above: Angela from Bubba & Daisy, Heather from sTuck in the Coop, and Crystal from the lil cupcake) were soooo happy to have a little time to sit down and create. Shanon and Natalie were there to help answer questions and cheer everyone on in the creative process. They are the best cheerleaders and such hard worker bees. (yes, pun intended)
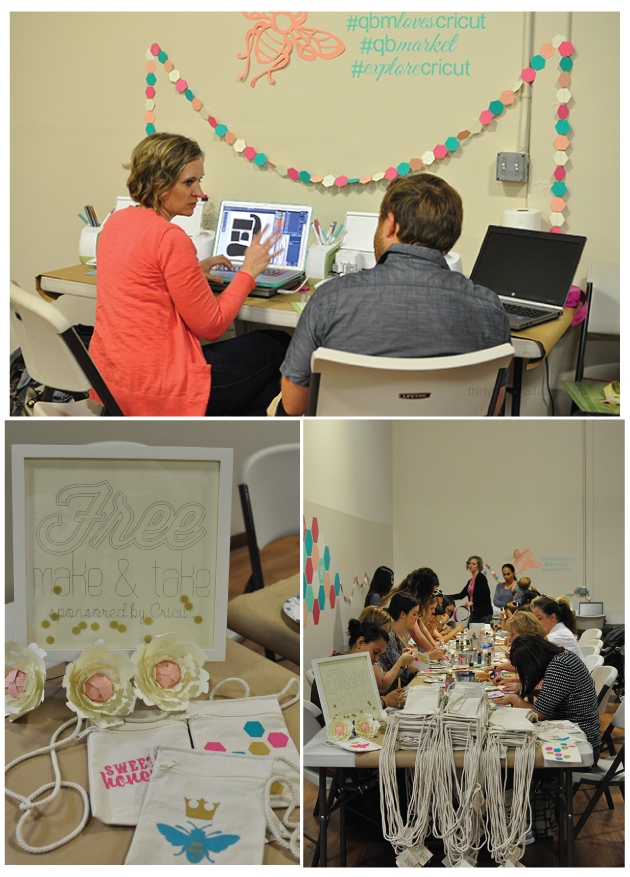
Image Source
Everyone had so much fun shopping and creating. I loved having Cricut at the market and felt like it was a true match made in heaven with shoppers who support handmade and love the creative process.
Creating cute DIY pom pom paper flowers is a fun and creative way to add a touch of charm to any space. These adorable flowers can be used for various purposes, such as party decorations, home decor, or even as gifts. With just a few materials and some simple steps, you can easily make your own pom pom paper flowers that will brighten up any room. Whether you’re a crafting enthusiast or just looking for a fun project to do with the kids, give these cute DIY pom pom paper flowers a try. And if you have any questions or want to share your creations, let us know in the comments below. We would love to hear from you!
FAQs
Q: How long does it typically take to make a DIY pom pom paper flower?
A: The time it takes to make a DIY pom pom paper flower depends on your skill level, the complexity of the design, and the materials you have on hand. On average, it can take anywhere from 15 minutes to an hour. However, if you’re a beginner or working on a more intricate design, it may take longer. It’s important to give yourself enough time and enjoy the process of creating something beautiful with your own hands. Happy crafting!
Q: Can these DIY pom pom paper flowers be used for any specific occasions or events?
A: Absolutely! DIY pom pom paper flowers can be used for a variety of occasions and events. They are perfect for birthday parties, baby showers, bridal showers, weddings, and even home decorations. You can use them as centerpieces, hang them as garlands, or attach them to gift boxes or greeting cards. The possibilities are endless! Get creative and choose colors that match the theme of your event to make it even more special. Enjoy making beautiful pom pom paper flowers for any occasion you desire.
Q: How long does it typically take to make a single pom pom paper flower?
A: The time it takes to make a single pom pom paper flower can vary depending on your skill level and the complexity of the design. On average, it can take anywhere from 10 to 30 minutes to complete one flower. However, with practice and experience, you may be able to make them more quickly. It’s also worth noting that some intricate designs may require additional time and attention to detail. So, don’t be discouraged if it takes you a bit longer at first. With time and patience, you’ll become faster and more efficient in creating these beautiful paper flowers. Happy crafting!


