Grab your favorite cord and let us get started. This approach keeps your crafting sessions joyful and completely stress-free.
Choosing The Right Pumpkin Base For Texture
A matte white or cream craft pumpkin creates the perfect backdrop for your wraps to pop as a clean, graphic element. You know the smooth surface of a faux base is the ideal partner for the organic texture of natural fibers, which guarantees your easy fall twine striped pumpkins look incredibly polished from the start. That smoothness lets the wrapping become the star without any distracting bumps or ridges underneath. Your finished piece will look crisp and intentional, not messy. Trust me on this, the stark contrast between that flat, monochromatic base and the earthy tan of the cord is what makes the entire aesthetic work.
Selecting Twine Diameters For Different Pumpkin Sizes
A thick rope on a miniature gourd will overwhelm the form and look clumsy, but fixing that proportion is incredibly straightforward. For those small gourds, you want a fine, three-ply cotton thread that creates delicate lines without bulk. Standard mid-sized pumpkins pair beautifully with common natural jute twine, giving you that classic rustic look. If you are working with a large statement piece, a chunky twisted rope adds wonderful weight and visual interest to your easy fall twine striped pumpkins.
1. Cream Painted Pumpkin with Vertical Jute Stripes
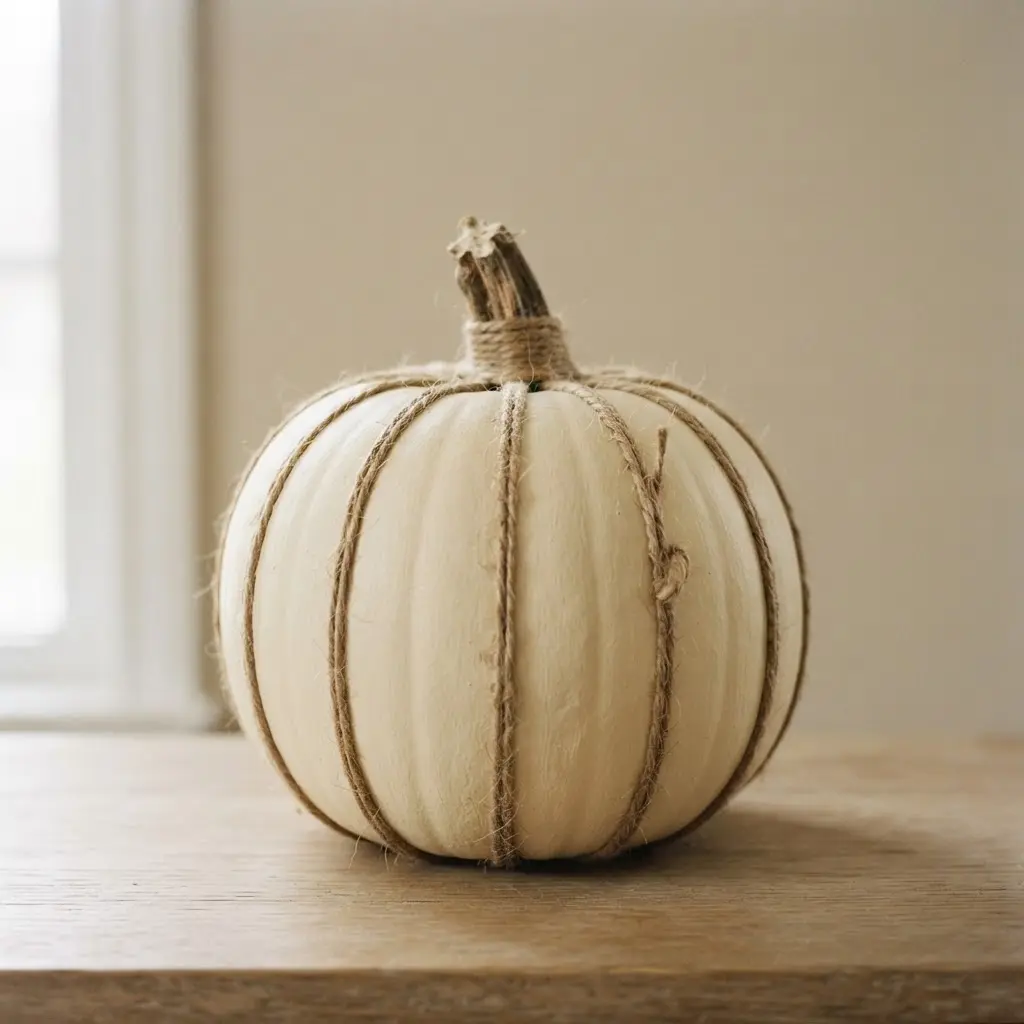
This is the project that made me fall in love with rustic autumn decor because it feels so elegant yet remains incredibly simple to execute. You start with a plain faux gourd and give it a few smooth coats of cream-colored paint to establish the perfect canvas for easy fall twine striped pumpkins.
After that dries, you just glue on strips of natural fiber from top to bottom. I love how the vertical lines add so much texture and visual interest. They turn a simple painted piece into a farmhouse chic statement. Isn’t that satisfying?
For a complete rustic look, you can pair it with some charming DIY fall acorn decorations. Just be sure to plan your stripe spacing before you glue for a clean, professional finish.
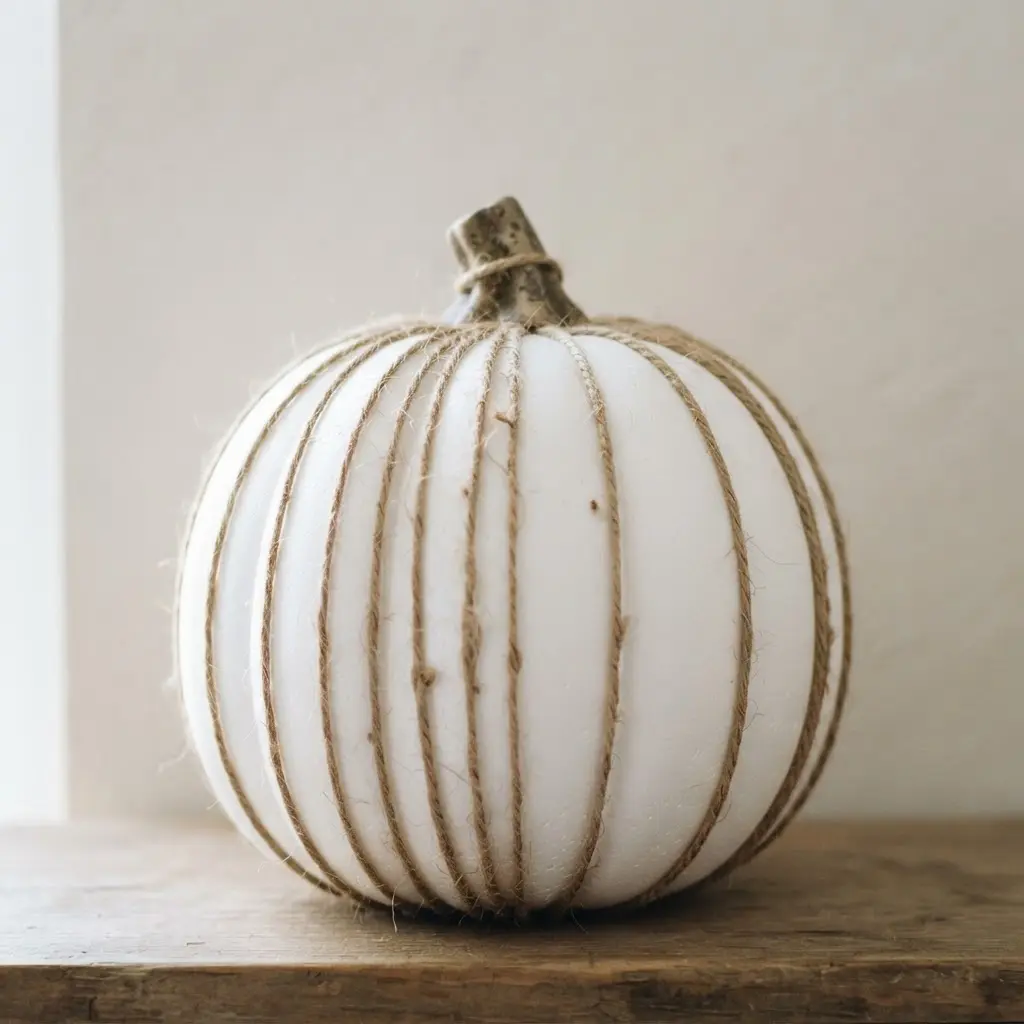
2. Natural White Gourd with Horizontal Thin Twine
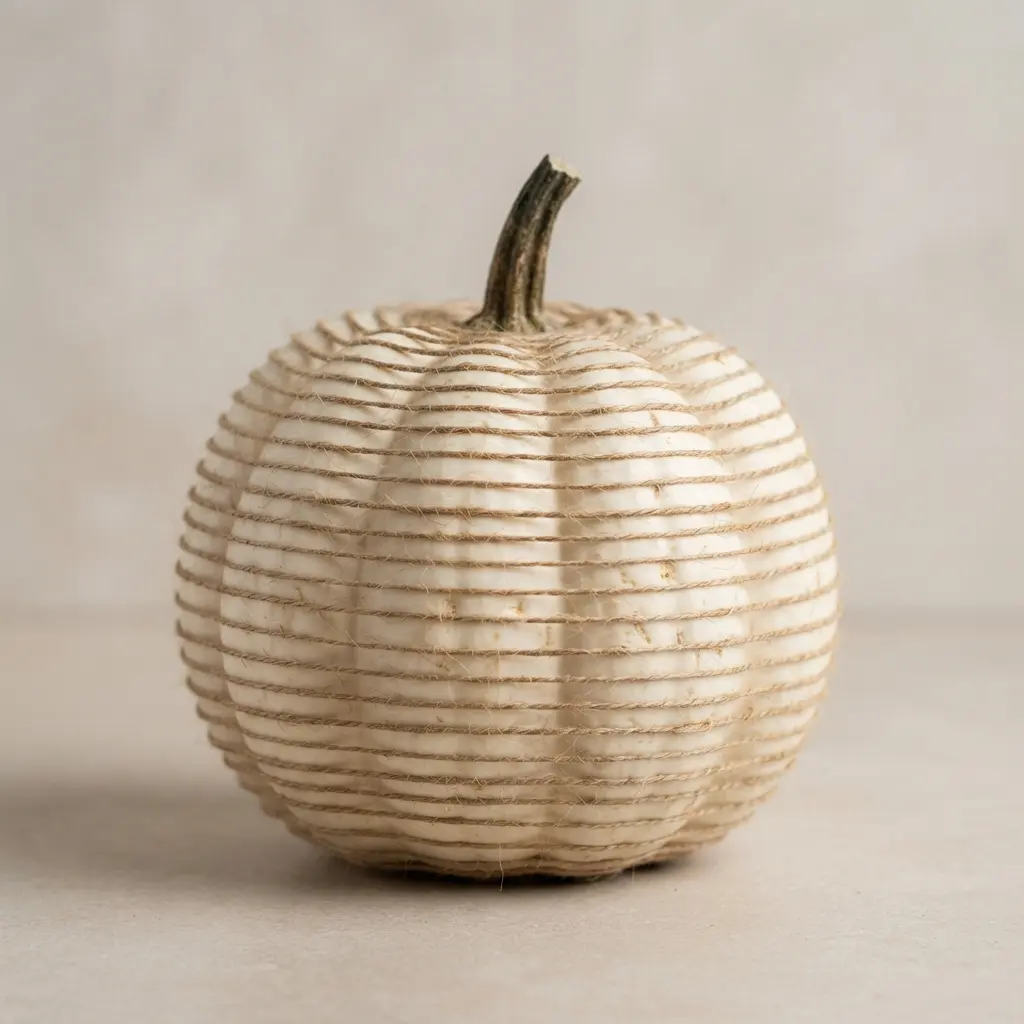
Isn’t it amazing how a simple gourd and some string can look so elegant? The trick here is all in the wrapping method. You will start with a clean, dried natural white gourd and a thin, natural fiber. Apply a small dot of clear adhesive to secure the end, then wrap horizontally around the body while keeping your tension consistent and the rows parallel. This rustic look works because it highlights the shape without covering it up completely, proving that simple wraps form the foundation of all easy fall twine striped pumpkins.
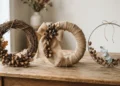
Mastering this wrap gives you a great foundation for many other seasonal projects, like a DIY fall wreath craft where you can apply similar natural material skills. Your key to a clean finish is using adhesive sparingly so it dries clear and does not distract from the natural look. Feel proud when you set this lovely piece on your mantel.
3. Matte Black Pumpkin with Thick Rustic Twine

This one surprised me with its elegance. It looks complex, but the technique remains straightforward. You start by giving a gourd several thin, even coats of matte black spray paint and let it cure completely before adding thick cord for dramatic easy fall twine striped pumpkins.
Then, wrap the natural rope around it, securing with hot glue as you progress. The magic is in the pairing of a sleek, modern finish with rough, organic texture. It creates a sophisticated piece that feels both earthy and refined. I love how it works in so many different autumn styles.
For a cohesive seasonal display, this piece pairs beautifully with a fall acorn wreath on your front door. The shared rustic elements tie everything together perfectly. My top tip is patience. Let that paint dry fully before you touch it. Then, feel proud of your chic, modern harvest decor.
4. Gold Leaf Accent Twine Striped Pumpkin
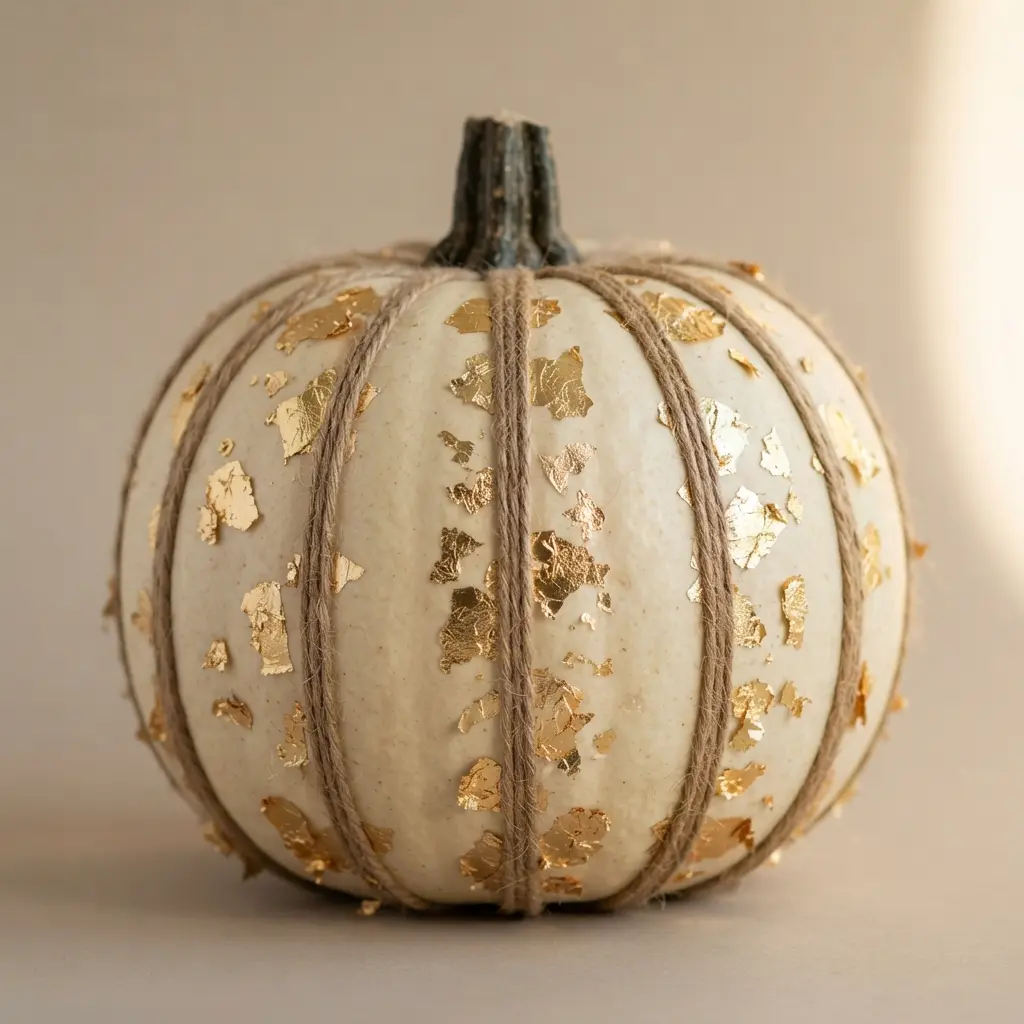
This one looks fancy but is surprisingly simple to pull off. You will wrap natural cord around a faux base to create clean lines, then add little flashes of luxury. The trick is applying a special gold leaf adhesive to the fiber and letting it get perfectly tacky before pressing on delicate sheets for luxury easy fall twine striped pumpkins.
I love how the rustic texture meets that elegant shimmer. It instantly elevates your space from cozy to chic. For a complete autumn look, try placing it near some Thanksgiving leaves decorations on your mantel. My go-to tip? Always use a soft dry brush to gently remove the excess leaf. Doesn’t that final touch feel so satisfying?
5. Mini Orange Pumpkin with a Spiral Twine Wrap
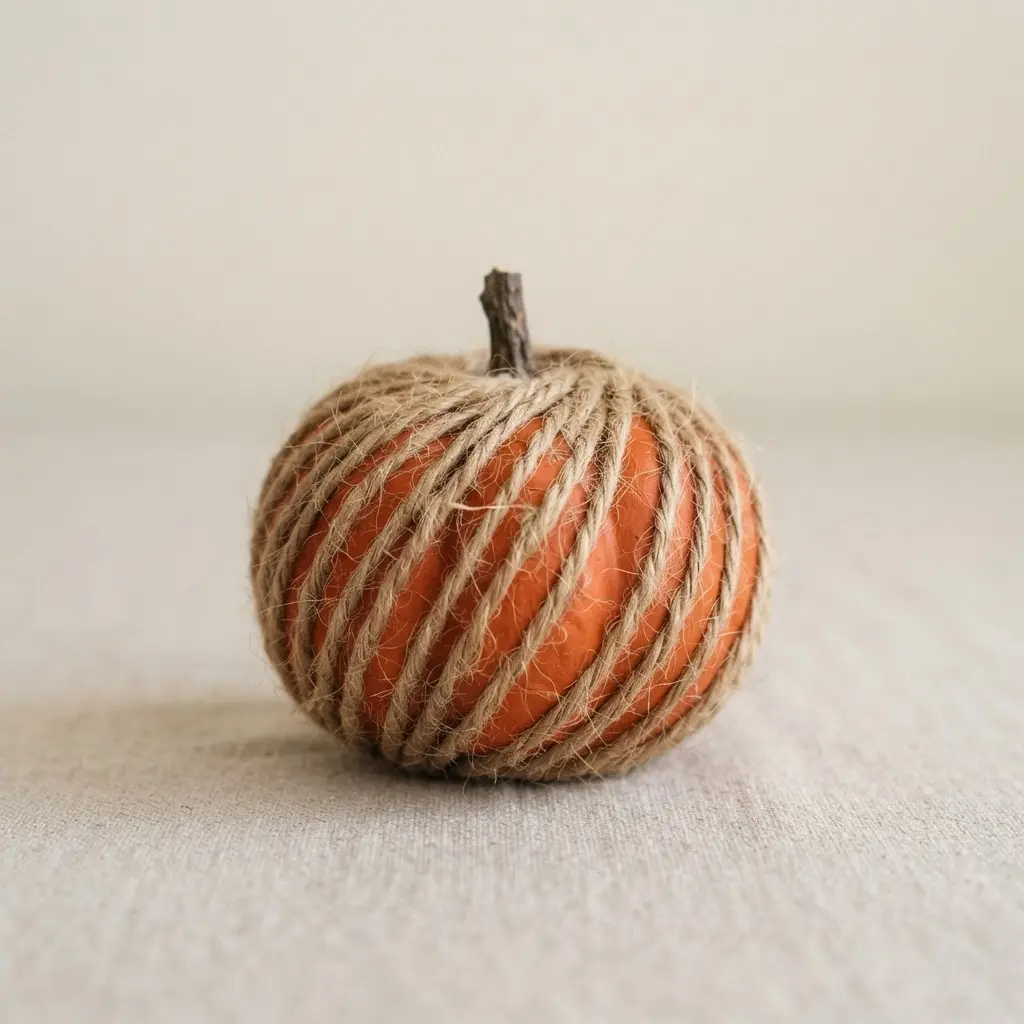
This one is a total charmer. It looks like a rustic boutique find, but honestly, it is just you, a base, and some string. I love how the spiral twine wrap transforms a plain gourd into something with so much cozy texture. This method proves that continuous wrapping techniques are perfect for beginner friendly easy fall twine striped pumpkins.
You start by securing the end of your cord with a dot of hot glue at the base of the stem. Then, working in small sections, apply a thin line of glue in a circle and press down, moving in a steady spiral all the way to the bottom. Keep your coils snug for a neat look, or let them space out a bit for a more organic feel. Isn’t it satisfying to see that textured surface come to life?
It works because it blends natural materials into a simple, elegant accent piece. Your finished piece has that wonderful tactile quality that painted versions just cannot match. This project is a fantastic hands-on activity if you are looking for creative pumpkin crafts for kids to try together on a crisp afternoon.
6. Faux Foam Pumpkin with Irregular Twine Stripes
Ever think a craft needs a little more texture and warmth? This one is a fantastic way to add that rustic touch you are looking for. You will wrap a light-colored faux foam pumpkin with natural cord in vertical lines that are intentionally uneven. The irregular spacing gives it a charming, handmade look that feels perfectly organic for easy fall twine striped pumpkins on a dining table. I love how forgiving this technique is because perfect lines are absolutely not the goal.
Start by securing the end near the stem with a tiny glue dot. Then, just lay the material down the side, securing in place as you go and letting the stripes wander a bit. The key is to use small glue dots and press firmly to avoid any messy lumps. This project works so well because the natural cord transforms a simple base into a cozy, tactile centerpiece. Your finished piece will have so much character and look stunning on a mantel.
For more family friendly crafting ideas, check out these creative pumpkin crafts for kids to share with your little ones.
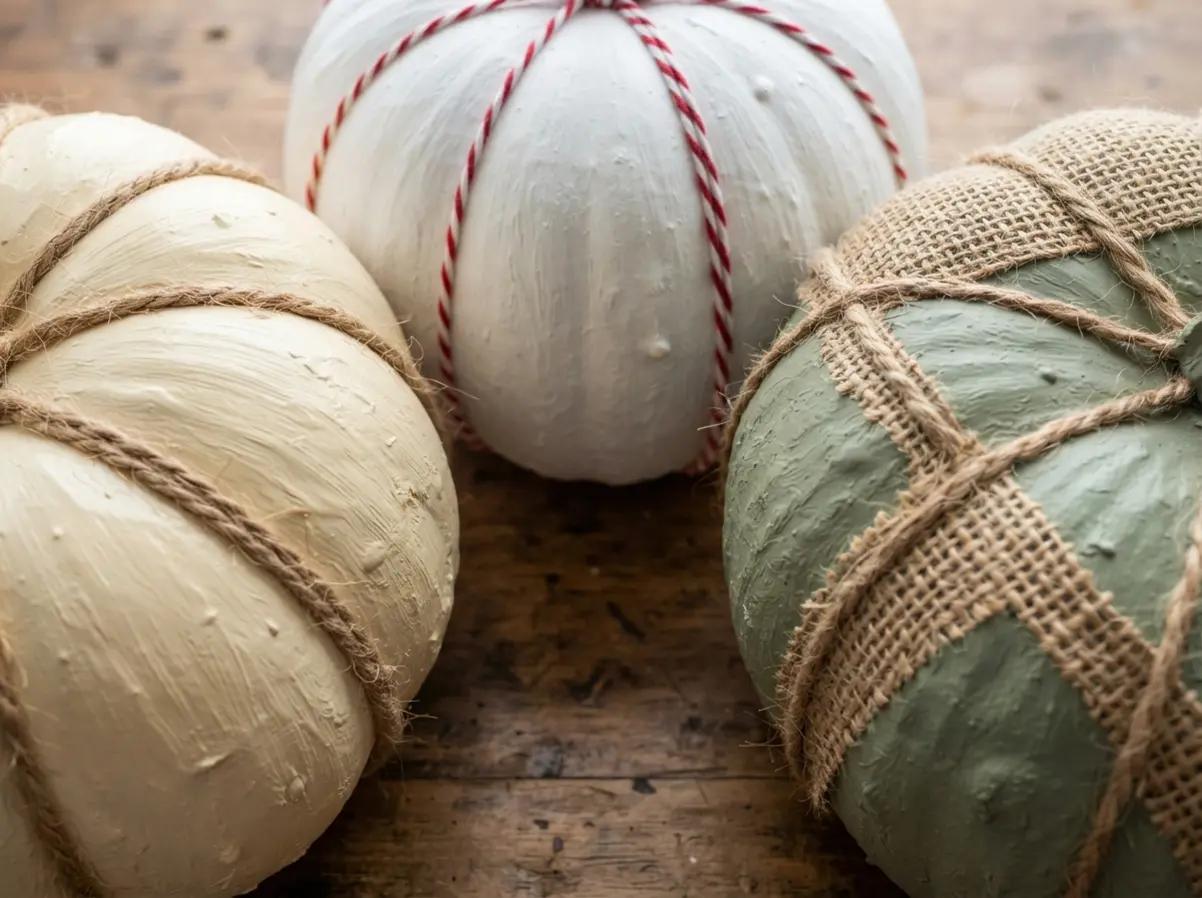
7. Sage Green Pumpkin with an Intersecting Twine Grid
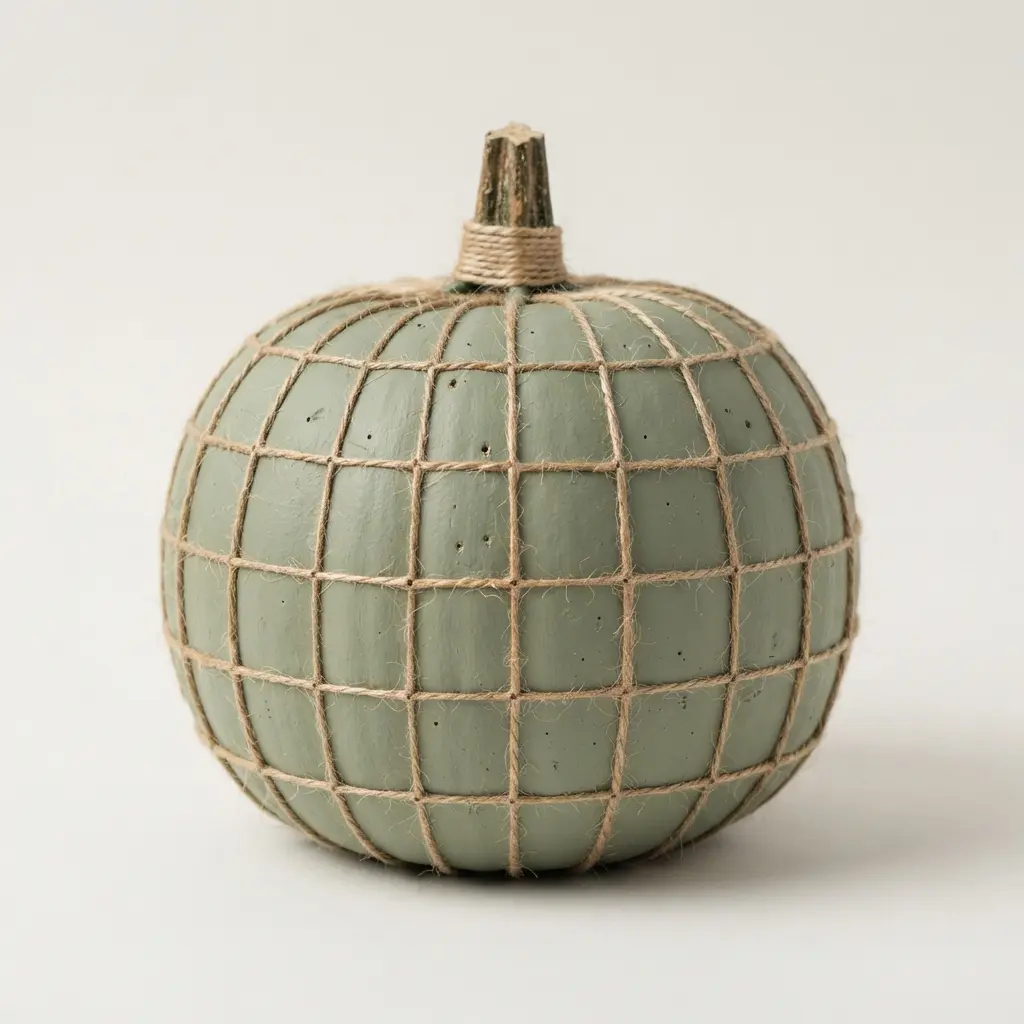
This project looks intricate, but the secret is that the grid pattern is surprisingly simple to map out. You paint the base in a soft sage green acrylic, then lay down a series of intersecting lines with natural cord. I love how the crisp, rustic texture pops against that muted, elegant background. This crisp layout proves that geometric lines instantly elevate standard easy fall twine striped pumpkins.
Why does it work so well? The combination of natural texture and a sophisticated color palette creates a piece that feels both earthy and refined. For the cleanest look, use a tiny, precise dab of hot glue at each intersection. This keeps the focus on your beautiful grid pattern, not on the adhesive. It makes a stunning centerpiece, and you will feel so proud when you see it finished.
8. Bakers Twine Red Stripe Patterned Pumpkin

This one looks like a sweet treat and is surprisingly simple to execute. You just wrap the base with alternating bands of red and white baker’s twine, securing each section with a little hot glue as you go. The key is keeping the material taut and your color changes neat, hiding the ends on the back for a clean look. The cozy, textured bands give a classic shape a whole new personality, making this one of the most cheerful easy fall twine striped pumpkins for holiday hosting.
Why does it work so well? The playful stripes give your table setting a classic autumn vibe. For a fun Halloween pairing, this piece looks adorable next to a DIY “Boo” sign on your front porch. My favorite tip is to start at the stem and work your way down in concentric circles. You will love the festive, handmade feel it brings to your space.
9. Metallic Silver Painted Twine Drip Pumpkin
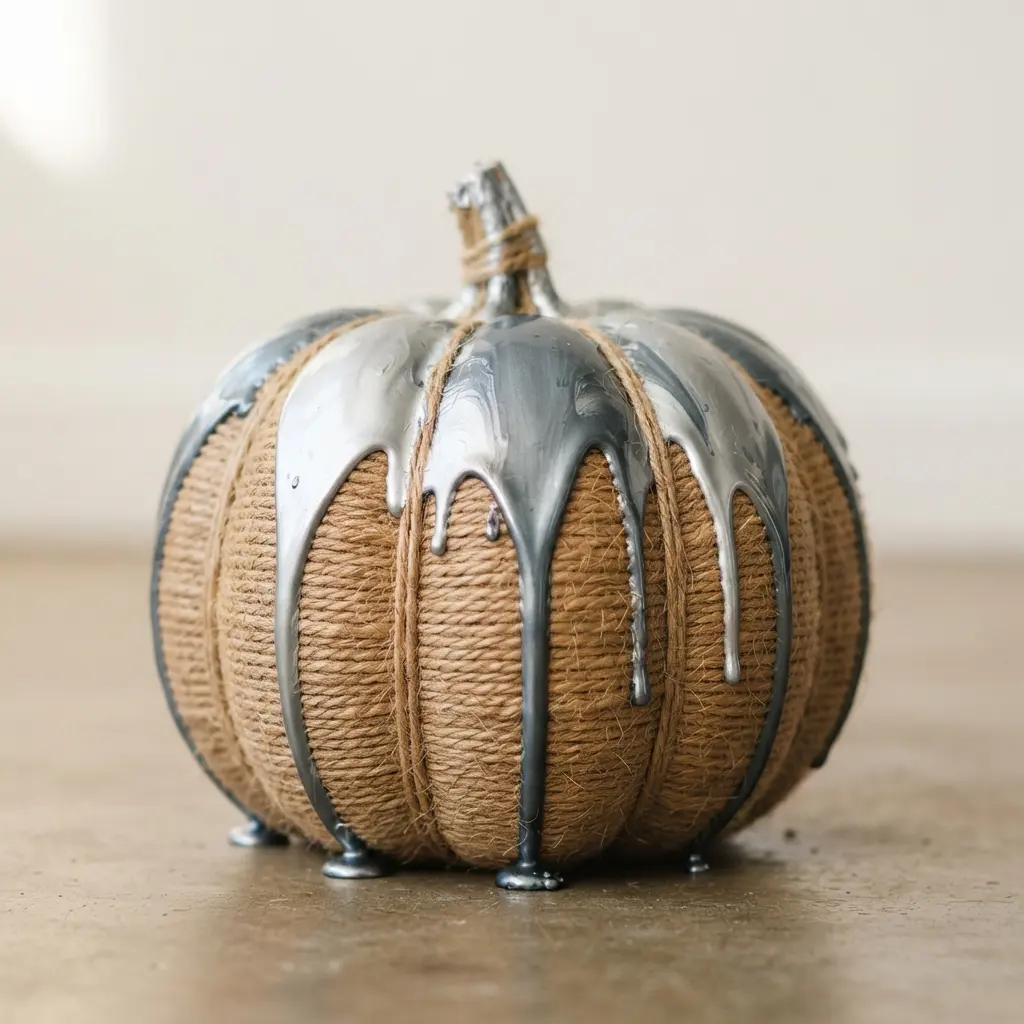
Who says rustic cannot be glam? This base proves it. You start by wrapping a craft piece with jute twine, securing it with hot glue as you go. After a base coat of metallic silver paint, you create the magic by letting extra pigment drip from the top for an organic, tarnished effect. I love how the industrial chic finish plays off the natural texture, showing exactly how metallic techniques instantly update your easy fall twine striped pumpkins.
It is a fantastic way to add a modern edge to your seasonal display. For another quick and eerie project, you could easily make some spooky cheesecloth ghosts to accompany it on your table. My best tip? Practice the drip on a scrap piece first to control the flow. The payoff is a stunning, one-of-a-kind centerpiece.
10. Textured Hessian Covered Stem Twine Pumpkin
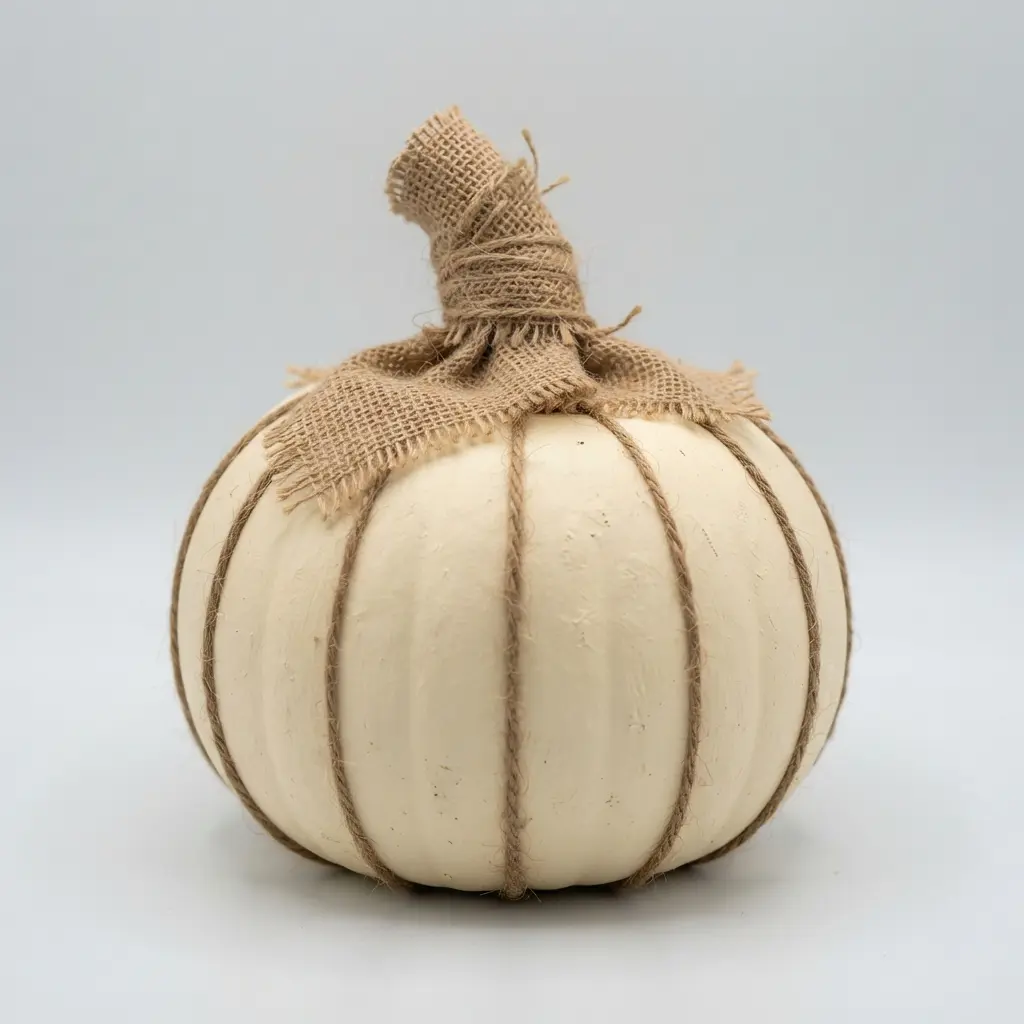
This project looks so rustic and complex, but it remains one of the easiest ways to add handmade charm to a shelf. You start by wrapping a foam base completely in hessian fabric, pressing it firmly into hot glue as you go. The real signature touch is wrapping the stem tightly with jute cord, giving your easy fall twine striped pumpkins a wonderfully cohesive vintage vibe.
It works so well because the natural textures instantly create a cozy, farmhouse feel that is perfect for autumn gatherings. I love how it adds warmth to a mantel or table without any fuss. For an extra vintage touch, you can add some vintage-looking ornament ideas to your display. Does that not look like it came straight from a charming country market?
Staging Finished Pumpkins Within Seasonal Displays
Group your finished pieces in odd numbers on a mantel or dining table for a dynamic, collected look. Layer them with other natural textures like a woven rattan tray, a soft wool throw, or a few dried wheat stalks to build depth. Place your tallest item at the back and angle the others slightly toward the front to create a sense of movement. The graphic lines of easy fall twine striped pumpkins will naturally draw the eye across the arrangement, making the whole display feel cohesive.
A single piece placed beside a stack of vintage books makes a perfect little accent on a side table. This layering technique allows your work to shine as part of a beautiful autumn scene. Let the decor breathe and enjoy the cozy atmosphere.
Conclusion
So, which of these designs caught your eye? Look at the variety you can achieve with such a simple technique, and you will understand the real joy of this crafting journey. Your seasonal decor should feel personal and handmade, a true reflection of the cozy months ahead.
My best advice is to start with your favorite color combination from this list, because having a clear vision makes the process smooth and the results intentional. The beauty of these handmade decorations is how they gather over a season, each one adding its own texture and story to your home. I hope this gallery gives you the confidence to arrange your easy fall twine striped pumpkins in cozy reading nooks and dining corners for years to come.
FAQs
Q: What type of glue works best for twine pumpkins?
A: A hot glue gun provides the strongest and fastest bond for securing cord to a surface. It dries clear and holds the fibers firmly in place while you wrap.
Q: Can I use real pumpkins for this project?
A: You can definitely use both fresh gourds and artificial foam bases. Foam versions are completely reusable and will not rot, while real harvest vegetables offer a natural, organic texture that lasts a single season.
Q: How do I keep the stripes straight and even?
A: Mark light pencil lines as guides before you begin wrapping. Apply a single dot of adhesive at the start and end of each band to secure the material and maintain consistent spacing throughout.
Q: What other materials can I add for embellishment?
A: Dried botanicals like cinnamon sticks or miniature pinecones look lovely glued near the stem. A subtle metallic wash or a touch of matte paint can also elevate the design without overpowering the rustic charm.
Q: How long does it take to make one piece?
A: Most of these projects take between fifteen and thirty minutes to complete. The exact timing depends on your chosen wrap complexity and whether you add extra decorative elements.


