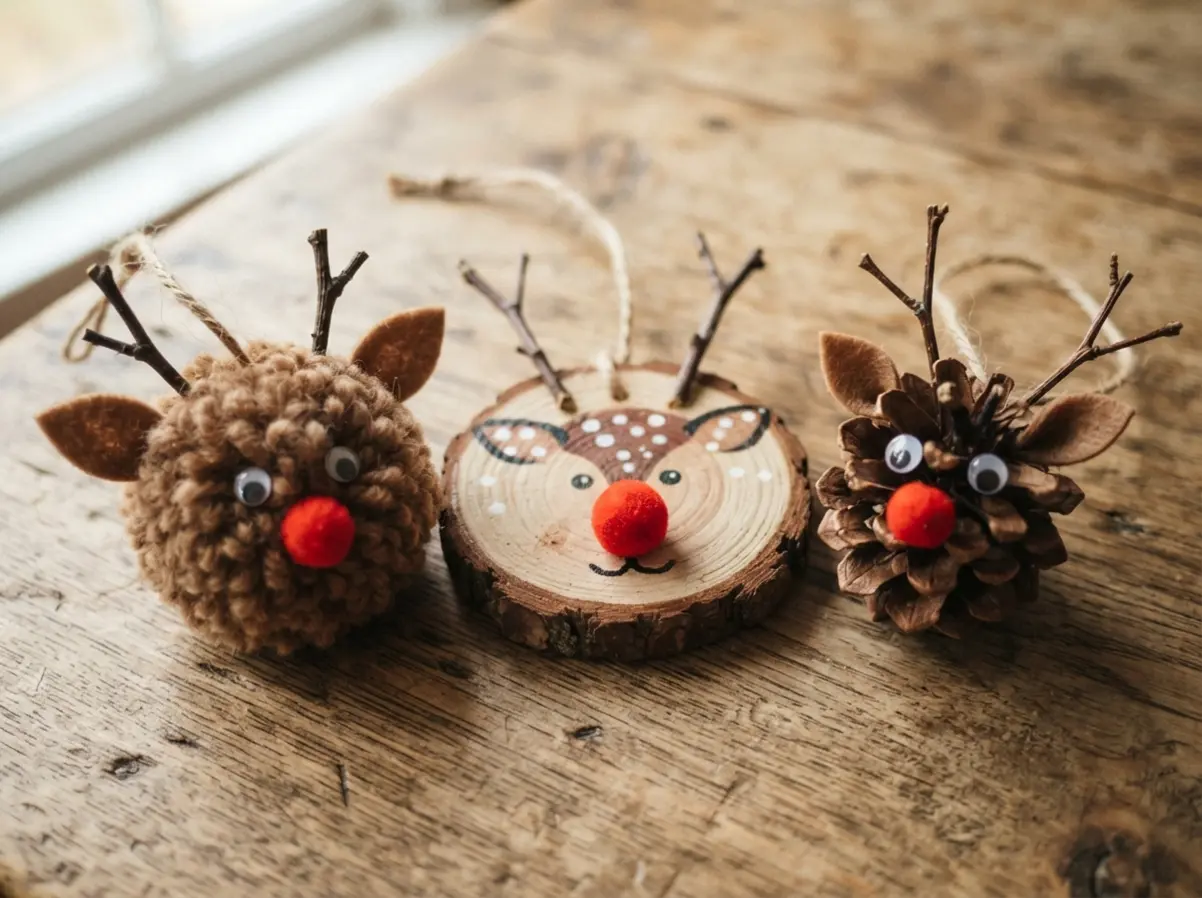
Sourcing Natural Materials for Authentic Reindeer Shapes
The best antlers come from forked twigs found under oak or maple trees, as their natural branching mimics the reindeer silhouette without needing to carve or cut. You want to hunt for pieces that are dry and sturdy, not green and flexible, because they will hold their shape better when glued.
A quick sanding with fine-grit paper removes any rough bark and creates a smooth surface for your hot glue to grip. For the body, a fat pinecone offers that perfect rustic texture, but you need to check its stability by giving it a gentle shake to ensure no loose scales will fall off later. Look for pinecones with a flat bottom so your rudolph ornament ideas hang straight on the tree without tipping forward.
Balancing Facet Proportions for Recognizable Rudolph Features
An oversized red nose made from a large pom-pom will dominate a small wood slice and throw the whole face out of whack, making your reindeer look more like a cartoon clown. The trick is to hold your potential nose material up against the base before you glue anything down.
You will notice that a single, small red bead or a dab of red acrylic paint often gives a more classic and proportional look. This applies to the antlers too, as a pair that is too wide or heavy will cause the ornament to tilt nose-down on the branch. Keep the eyes simple with two small dots placed high on the face, which leaves plenty of room for your rudolph ornament ideas to feature that iconic red nose to shine.
1. Fuzzy Brown Pom-Pom Reindeer Face Ornament
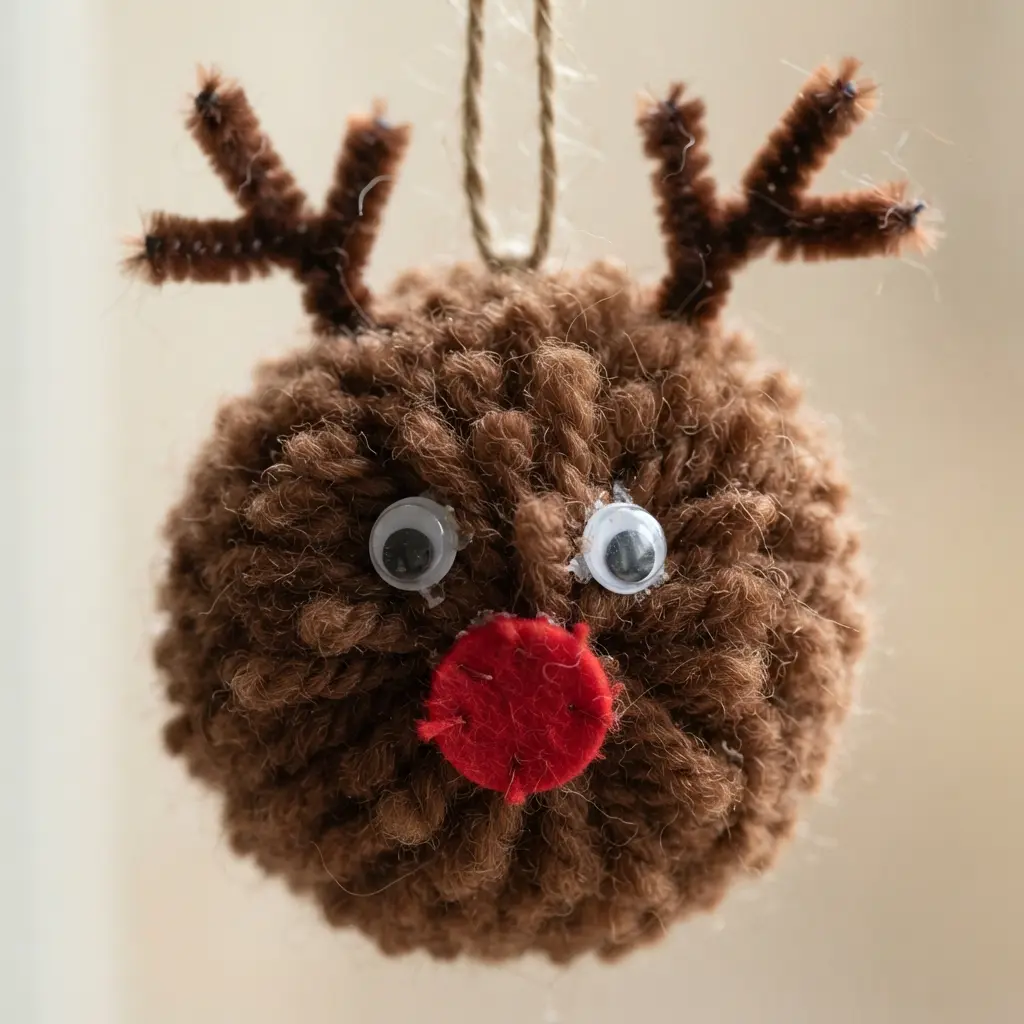
Who knew a simple brown pom-pom could turn into such a charmer? This little guy is all about fuzzy texture and playful personality. You will glue on some googly eyes, a bright red pom-pom nose, and twist pipe cleaners into antlers.
It’s a fantastic project for making a holiday keepsake with kids, as the tactile fun is half the appeal. Trust me, the key is using tiny dots of craft glue so it doesn’t soak through the fuzz. Let it dry completely before you hang it, and you have got an ornament full of handmade cheer. Exploring these rudolph ornament ideas with little hands always brings out joyful memories. For an extra activity, you can start with some printable Christmas ornament pages to get everyone in the crafting mood first.
2. Rustic Wood Slice Painted Rudolph Ornament
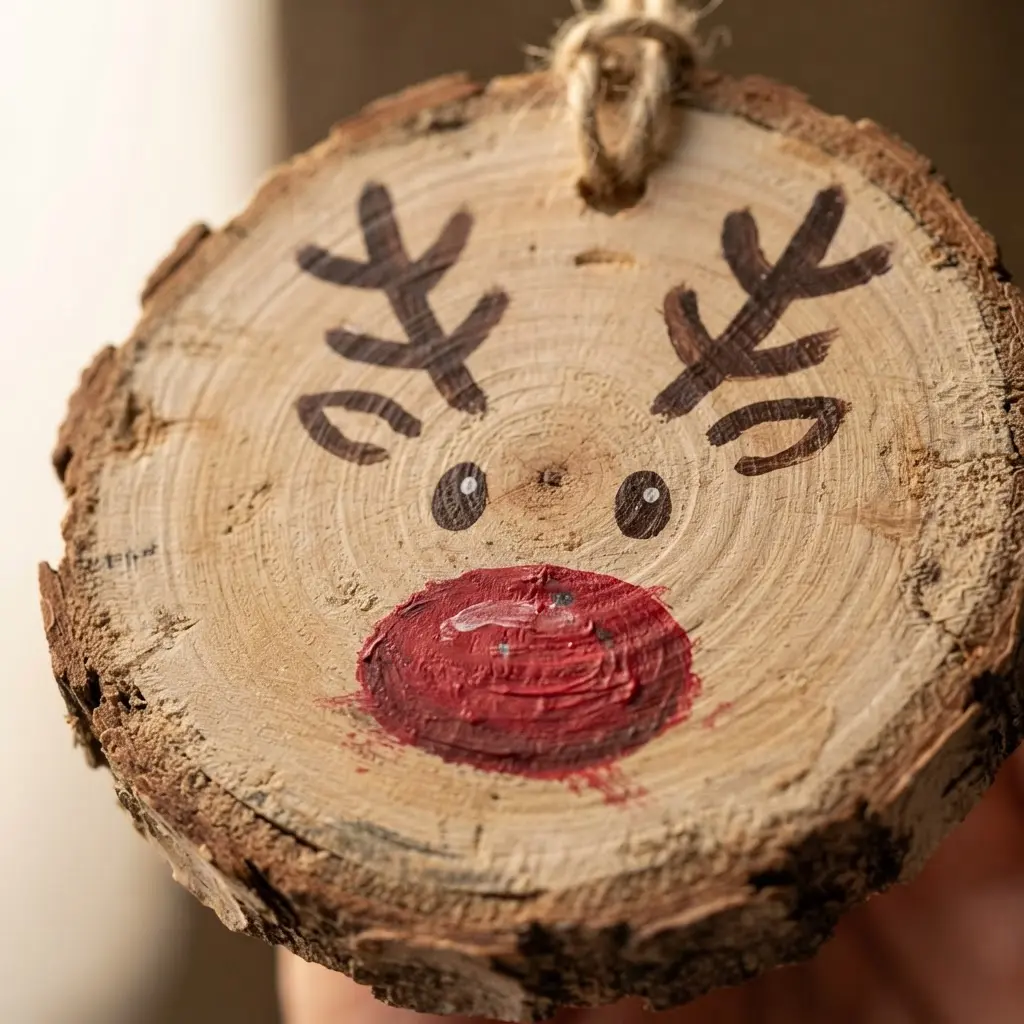
This ornament looks like it came straight from a cozy cabin, doesn’t it? You paint Rudolph’s sweet face directly onto a natural wood slice, letting the grain and bark edge show through for that rustic charm. I love starting with a light pencil sketch to get the antlers and eyes just right before filling in with brown acrylics.
The real magic happens when you add his bright red nose and those expressive black and white eyes with a fine-tip paint pen for crisp details. That combination of natural texture and festive character makes your rudolph ornament ideas a wonderfully personal holiday decoration. It is a perfect project to pair with other cute rustic star ornaments for a cohesive, handmade look on your tree.
3. Classic Red-Nosed Felt Reindeer Keepsake
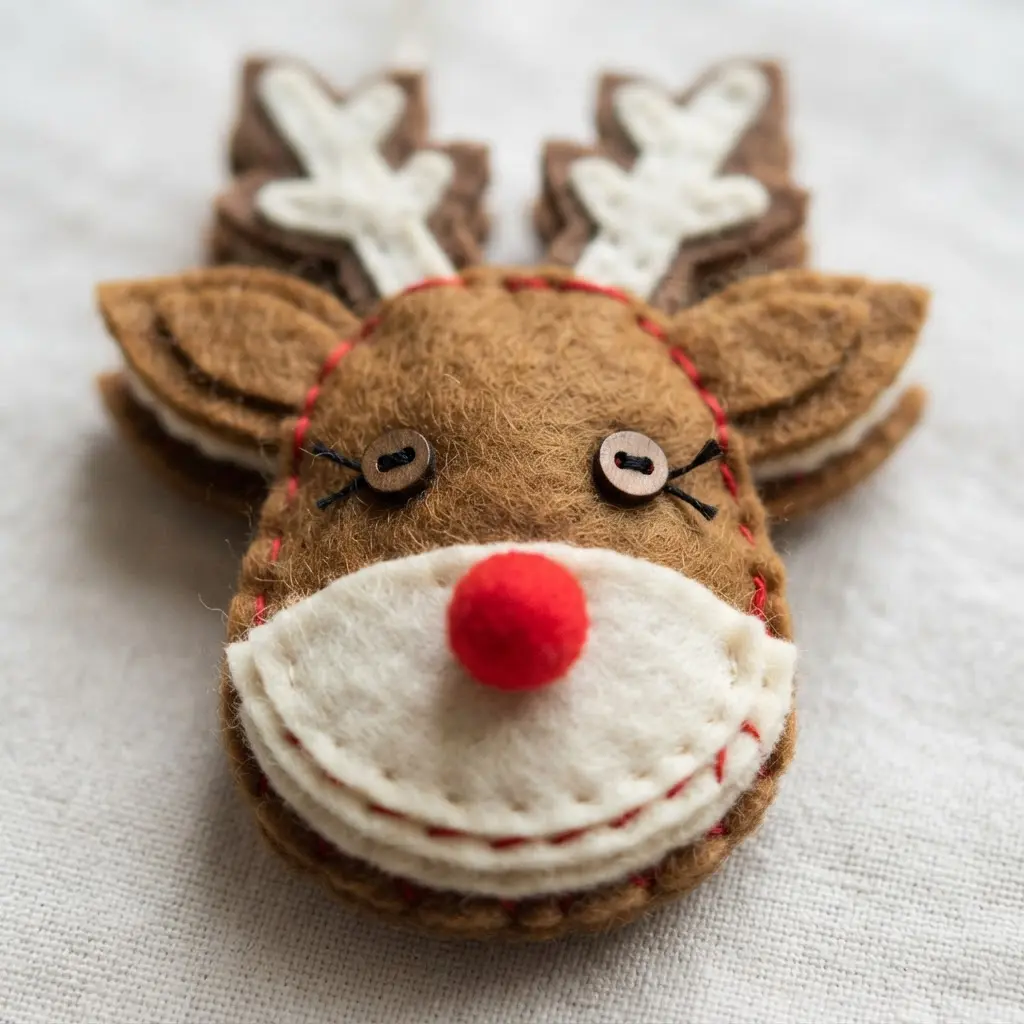
Ever wondered how to make a holiday decoration that feels both classic and personal? You start with two simple shapes cut from brown felt and sew them together, leaving a small opening. Stuff it gently with polyfill until it is plump, then add a bright red pom-pom nose and little black bead eyes.
I love this one because it captures that nostalgic Rudolph magic in a way that is completely handmade. That handmade quality makes it a perfect gift or a treasured tree ornament. Crafting these rudolph ornament ideas never gets old, even on the hundredth year. For a more dimensional display, you could pair it with a unique shadow box ornament to create a little winter scene. Feel the pride when you hang it up each year.
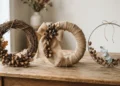
4. Natural Pinecone Reindeer with Twig Antlers
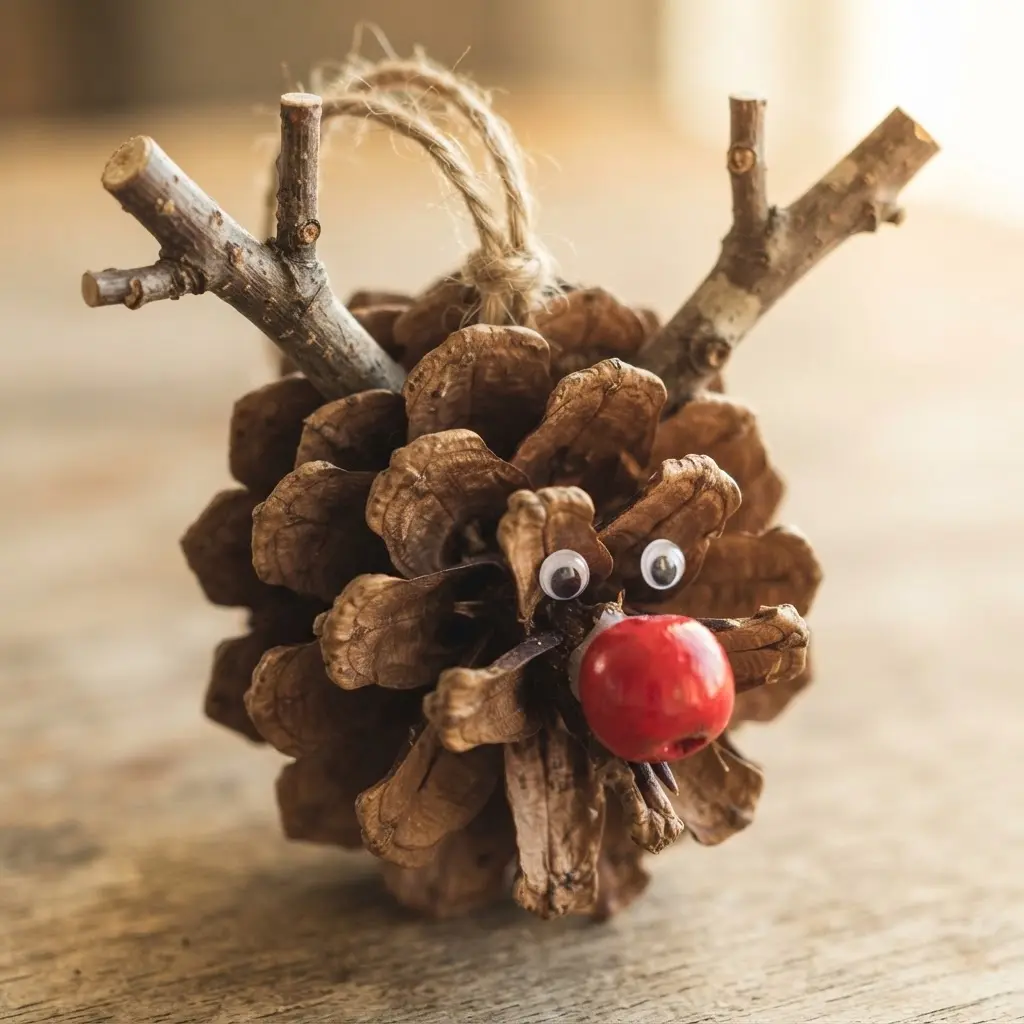
Ever wondered how to turn a simple pinecone into something magical? This project feels like a walk in the woods brought indoors. You start by selecting a great large pinecone for the body and smaller ones for the head.
Then, you get to hunt for the perfect Y-shaped twigs to become those classic antlers. The whole thing comes together with a hot glue gun, attaching the twig legs so your reindeer stands proud. I love how every piece is unique, which means no two reindeer look exactly alike.
The final touch is adding those playful googly eyes and a bright red pom-pom nose. Gathering supplies outside makes all your rudolph ornament ideas feel wonderfully grounded and organic. It is a fantastic way to create handmade Christmas ornaments with a rustic charm. If you enjoy this natural look, you might like exploring more ideas for vintage Christmas ornaments that use similar found materials.
5. Minimalist Wine Cork Reindeer Figure
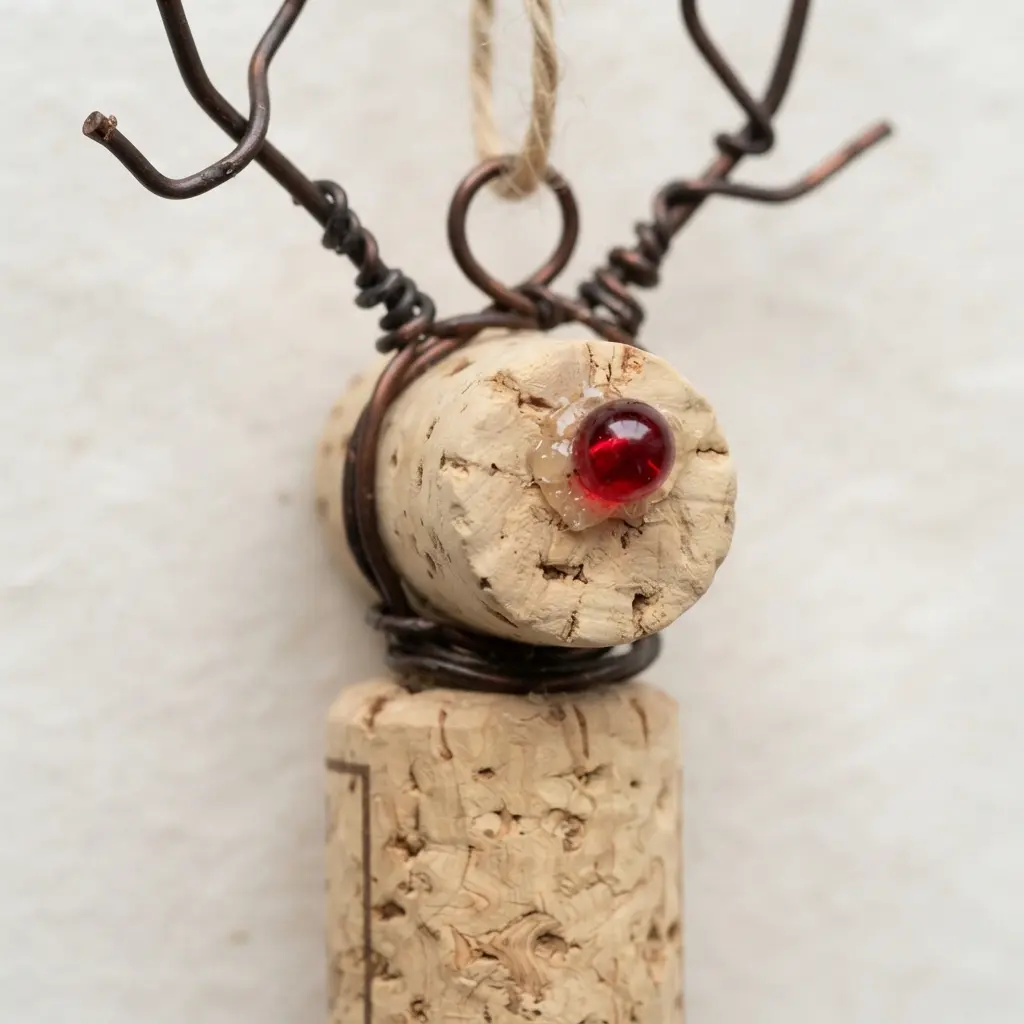
Ever wondered how to make a rustic ornament in under ten minutes? This project uses a single wine cork for the body and delicate twigs for the legs and antlers. You will need a hot glue gun for assembly and an awl to make clean pilot holes so the cork does not split.
I love how it turns a simple cork into a charming little creature. The magic is in the natural materials. The rustic look fits perfectly with modern farmhouse or woodland holiday decor. Testing these minimalist rudolph ornament ideas proves that less really can be more. It is a quick, satisfying project that feels like a little gift to your tree.
6. Sparkly Glittered Clay Rudolph Ornament
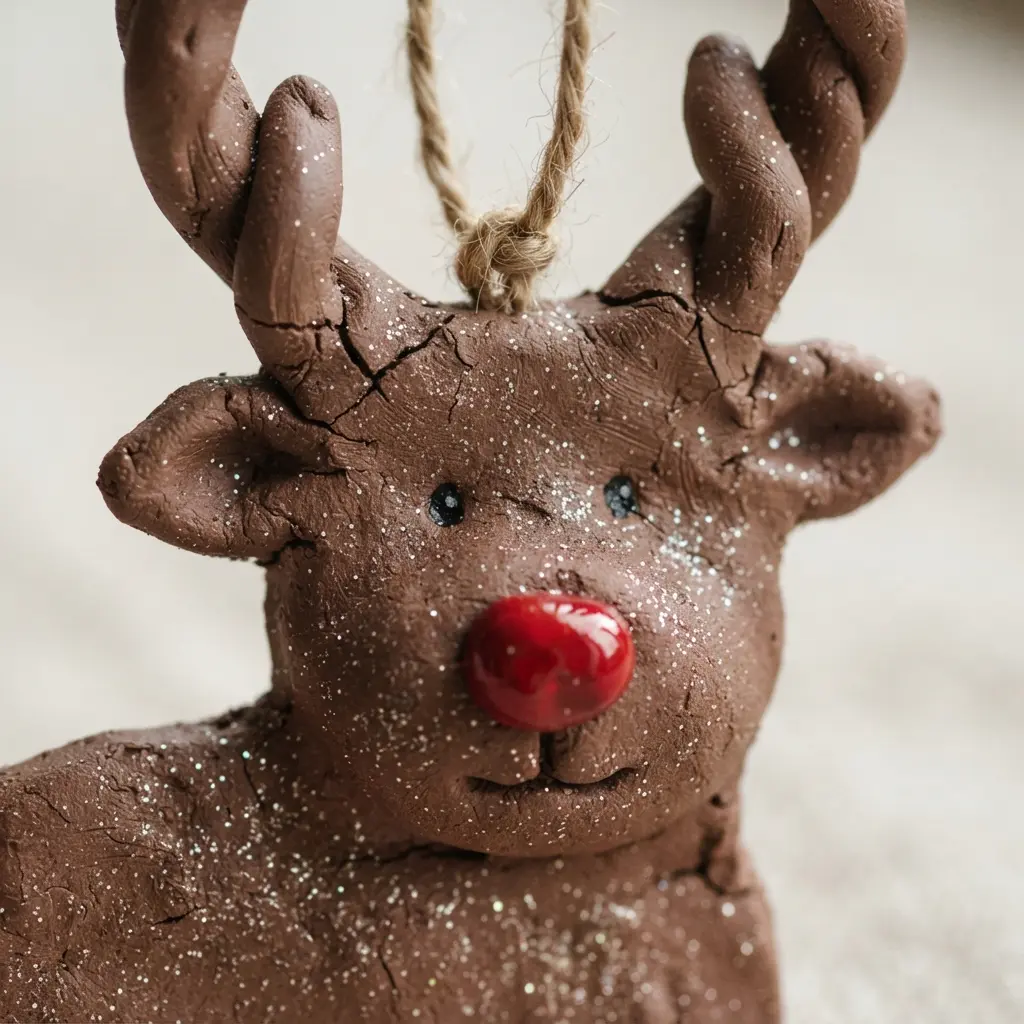
Who says ornaments can’t be both cute and dazzling? This little reindeer brings all the holiday sparkle right to your tree. You start by shaping air-dry or polymer clay into Rudolph’s classic form, complete with oversized antlers and a prominent nose. After it dries or bakes, the real fun begins with generous layers of glitter.
I love how tactile and forgiving this project is. You apply glue to sections, then sprinkle on red glitter for that iconic nose and brown or gold for the body. Isn’t it satisfying to watch a simple clay figure transform into a shimmering treasure? Layering sparkle onto these rudolph ornament ideas catches every light in the room. The key is letting the clay dry completely first, so the glitter adheres smoothly and stays put.
7. Vintage Popsicle Stick Reindeer Frame
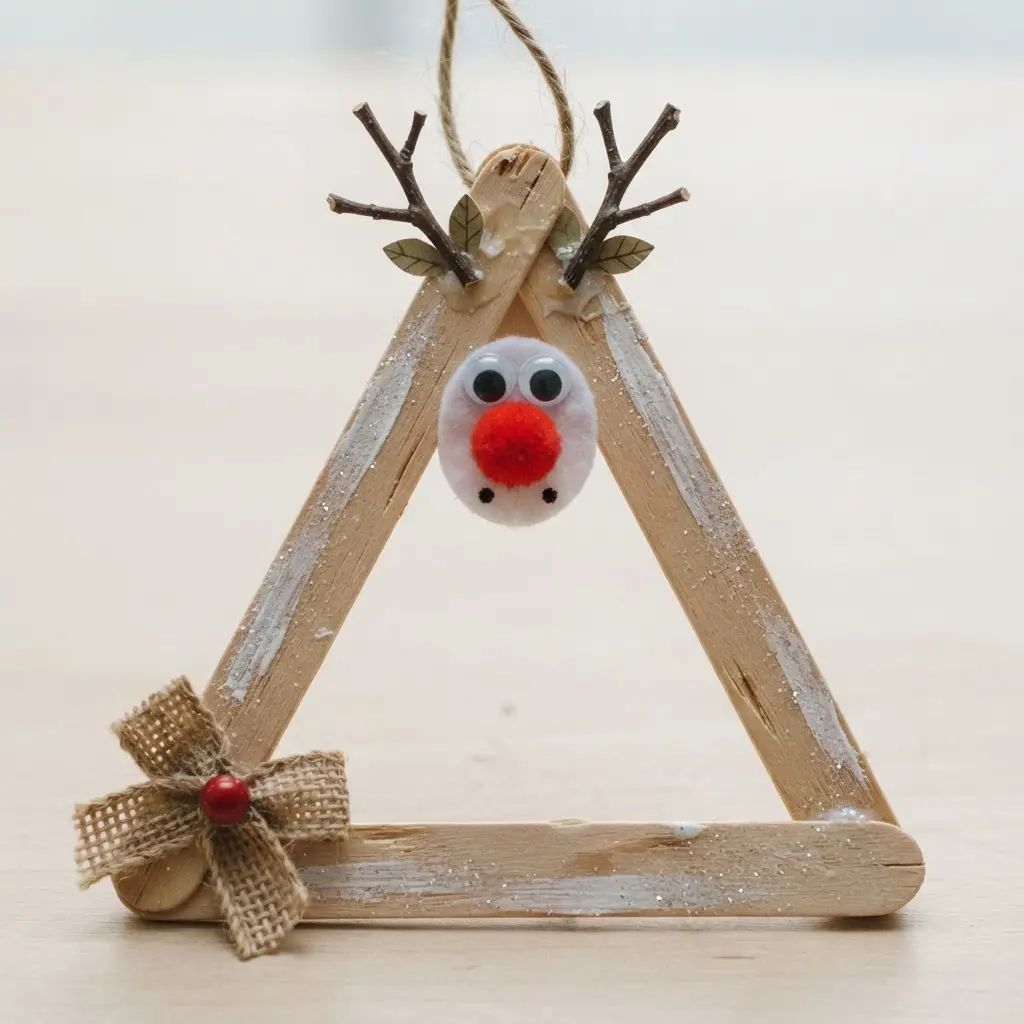
Who would have thought a handful of craft sticks could look so charmingly rustic? You will build the frame by gluing the sticks into a simple square or rectangle, and I love using a muted brown acrylic paint to give it that warm, aged feel. Let that base layer dry completely before adding the reindeer face.
Attach googly eyes and a classic red pom-pom nose, then get creative with antlers made from small twigs or pipe cleaners. For a truly personal touch, you secure a small photo of a loved one right in the center. Framing memories around your rudolph ornament ideas adds a deeply sentimental layer to holiday decor. This project works beautifully because it is a heartfelt way to display a holiday memory, and it makes for a wonderful handmade gift.
8. Pressed Salt Dough Reindeer Keepsake
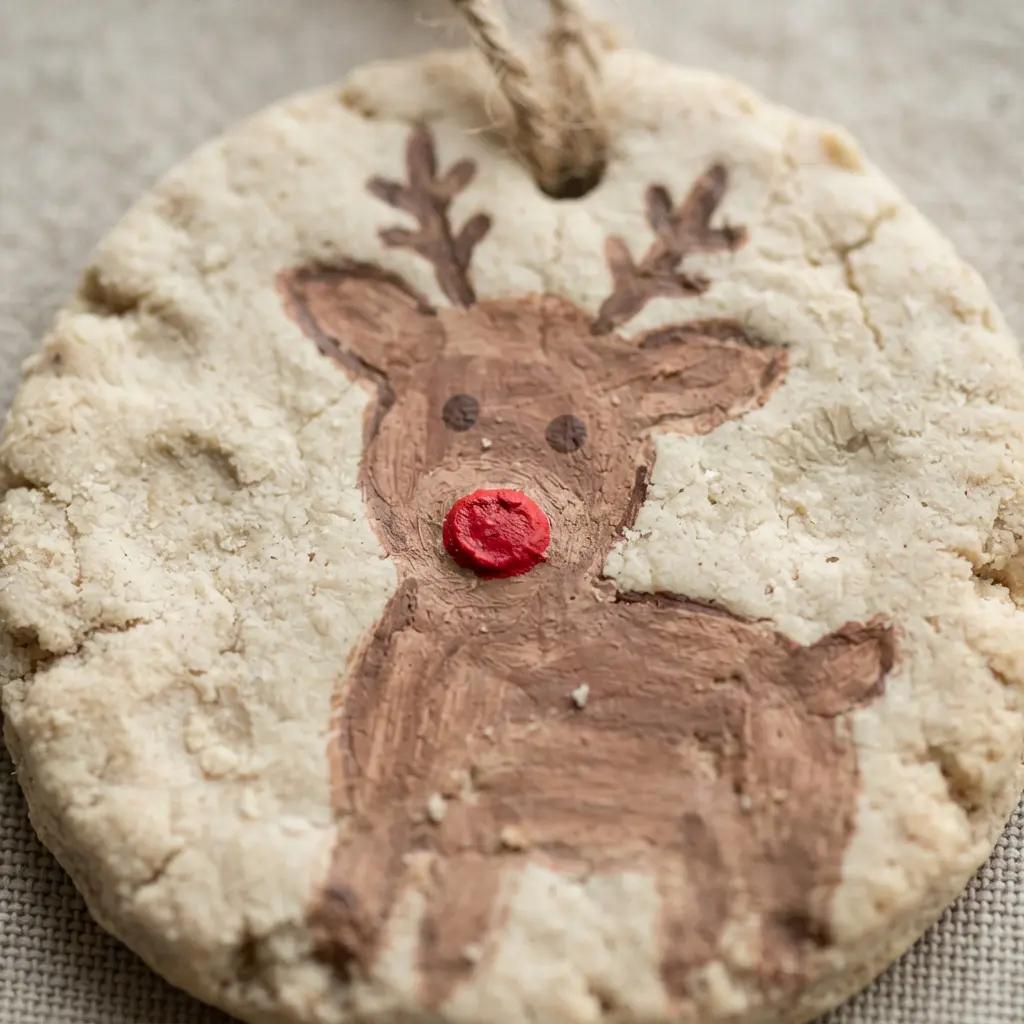
This is the ornament that turns a simple craft into a treasured family heirloom. You will mix a basic salt dough, roll it flat, and press your child’s hand or foot into it to form the reindeer shape. I love how the fingers become the antlers or the heel makes the perfect head.
The magic is in capturing that tiny print, a snapshot of their size you will cherish for years. Once it is baked and hardened, you paint on a cheerful brown coat and that iconic red pom‑pom nose. Preserving tiny milestones through your rudolph ornament ideas creates a living timeline on your mantel. Why does this work so well? It is deeply personal and full of rustic charm, which feels just right for the holidays.
9. Burlap Wrapped Reindeer Head Ornament
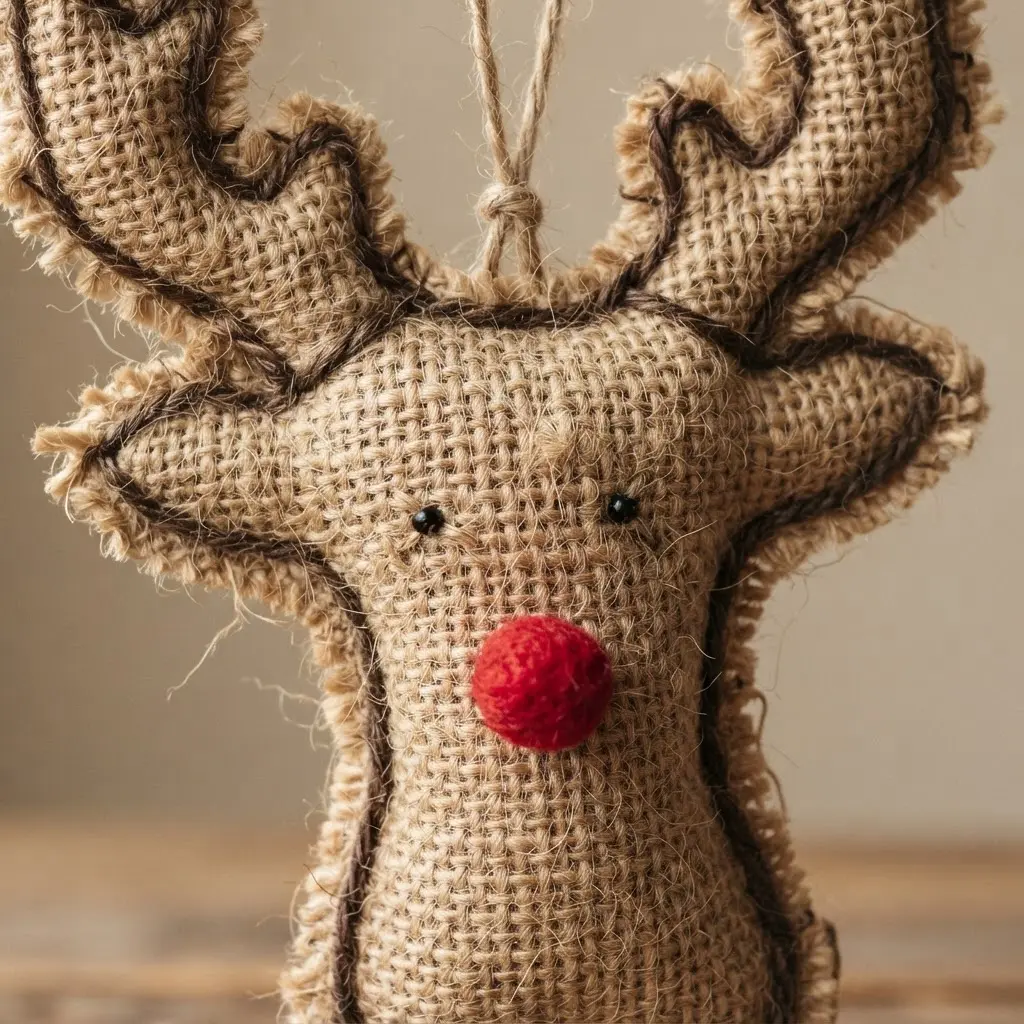
Who would have thought burlap could look so festive? This ornament is a total win for anyone loving a rustic holiday vibe. You start by cutting a simple reindeer shape from thick cardboard and then wrap it snugly in strips of that wonderfully textured fabric.
Here is my go-to tip: use a hot glue gun to secure the burlap as you wrap, which really prevents any loose edges. Then you get to the fun part, adding a little red pom-pom nose and twine for the antlers. Weaving fabric through these rudolph ornament ideas brings a wonderfully cozy farm vibe indoors. The charm comes from that handmade look it gives your tree.
10. Cardstock Paper Cutout Reindeer Silhouette
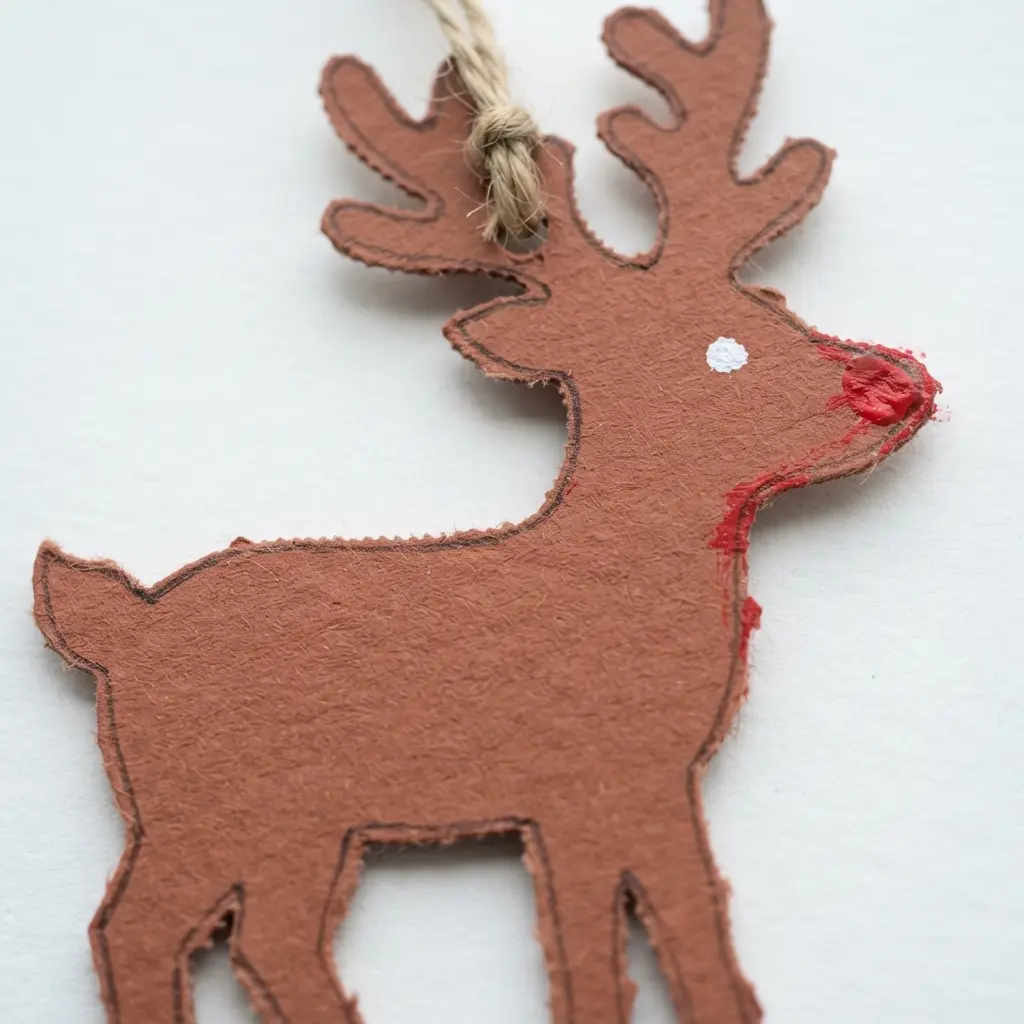
Who would have thought such a classic shape could be so quick and satisfying to make? You trace a simple reindeer outline onto sturdy cardstock and carefully cut it out, focusing on that iconic profile and those detailed antlers. The silhouette style is all about that bold, recognizable shape, and you can make it in festive red, elegant gold, or natural brown.
Cutting sharp lines for your rudolph ornament ideas delivers that clean, modern look everyone loves. This works so well because its timeless simplicity feels like pure holiday charm, and it stores flat in a box for years. I love using these flat cutouts as gift tags or even in a garland, but they look perfect on the tree, too.
Securing Ornaments with Durable Gloss Varnish Coatings
One generous coat of a gloss-finish spray sealant protects your paint and glued elements from dust and moisture while making the colors underneath pop. You need to work in a well-ventilated area and give the ornament a light, even pass from about twelve inches away, making sure to hit all sides. The gloss type is key here because it adds a subtle festive shine that catches the tree lights, unlike a matte finish which can look flat.
Let the first layer dry completely, about thirty minutes, before adding a second light coat for extra durability. Protecting your finished rudolph ornament ideas with this clear coat locks in every detail for years to come. This final step locks in all your hard work and ensures your creation becomes a holiday keepsake you pull out year after year.
Conclusion
I hope these rudolph ornament ideas spark that warm, creative feeling that makes the holidays so special. The best part is not necessarily how they look on the tree, but the memory of making them together—the smell of glue, the concentration on little faces, the proud moment of hanging it up.
My advice is to pick the one that makes you smile the most and just start. Do not worry about perfection. The charm is in the handmade touch, the slightly crooked antler, the extra glitter. However you choose to bring a little Rudolph to your tree this year, it will be a reminder of the joy you create together.
FAQs
Q: What is the easiest rudolph ornament idea for young kids?
A: The fuzzy pom-pom face or the pinecone reindeer are fantastic starters. They involve simple gluing and decorating, which is perfect for little hands. Let them choose the eyes and nose placement for a personal touch.
Q: Can I make these ornaments if I do not have a lot of craft supplies?
A: Absolutely. Many projects use everyday items. The wine cork reindeer needs a cork, pipe cleaners, and a red bead. The cardstock silhouette only requires paper, scissors, and a marker. Look around your home for substitutes.
Q: How do I make sure the ornament is sturdy enough to hang?
A: Use a strong adhesive like a hot glue gun for attaching key pieces like antlers and hanging loops. For lightweight ornaments like felt or paper, a simple knot in the ribbon or string works well before you glue it in place.
Q: What type of paint works best on wood slice ornaments?
A: Acrylic paint is ideal for wood slices. It dries quickly, offers bright colors, and adheres well to the porous surface. Use a fine brush for details and seal it with a clear matte spray if you want extra protection.
Q: How long does it take for salt dough ornaments to dry completely?
A: Salt dough needs to air dry thoroughly, which can take 24 to 48 hours depending on thickness and humidity. Baking them at a low temperature speeds up the process, but air drying prevents cracking for a smoother finish.


