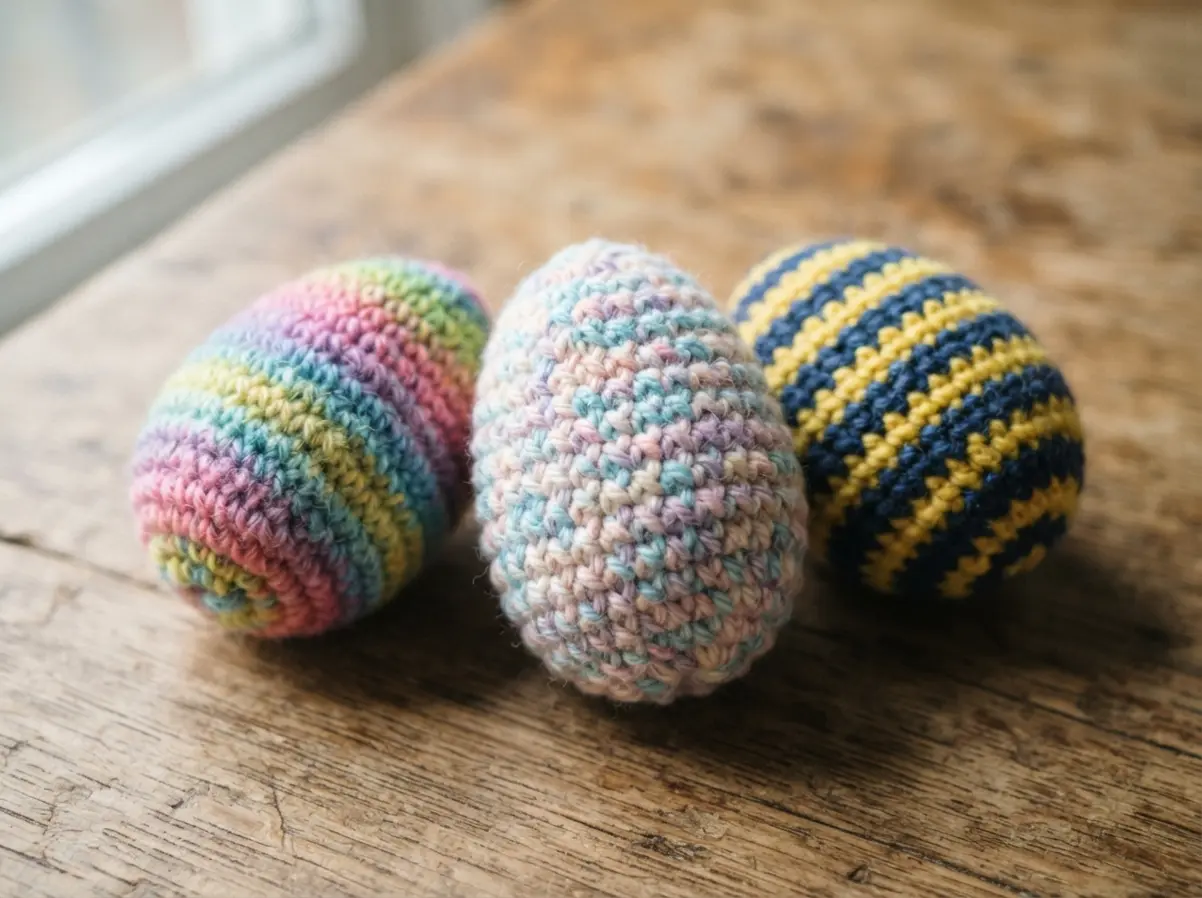
These little treasures are cozy, artisanal, and full of the personal touch that makes a home feel warm. They look incredible in a decorative bowl or nestled in a spring centerpiece. We have gathered ten beautiful variations, from delicate lace patterns to playful textured stitches, that will make your Easter decor truly one-of-a-kind. Let us explore these charming ideas together.
Selecting Ideal Egg Base Surfaces For Adhesion
The perfect base for your sock yarn egg is a smooth plastic egg, because that slick surface creates a clean, strong bond with your glue. You want to avoid any porous material like real eggshells or rough foam, as they absorb adhesive and leave your yarn looking blotchy.
The good news is those inexpensive plastic eggs from the craft store work brilliantly, giving you a consistent shape to wind against. When making DIY sock yarn easter eggs, wooden eggs are a solid second choice, but you must sand them to a glassy finish first. Trust me on this, that initial prep saves you from the frustration of yarn sliding off a bumpy spot. Your finished piece depends on that foundation.
Precision Glue Application Techniques For Smooth Finishes
The fastest way to ruin your texture is with a big glob of glue, which saturates the yarn and leaves a stiff, messy finish instead of that soft, fibrous look. Here is the thing, you need to apply your adhesive in a whisper-thin line directly onto the surface when creating DIY sock yarn easter eggs, not the yarn itself.
I use a small-gauge brush for absolute control, laying down a two-inch path of glue ahead of where I am winding. This method keeps your hands clean and prevents any sticky residue from seeping through to the front. You will notice the nylon in sock yarn helps it hold its shape, but only if the glue stays hidden underneath. Consistent tension as you wind locks everything into place without gaps.
1. Self Striping Variegated Crochet Egg
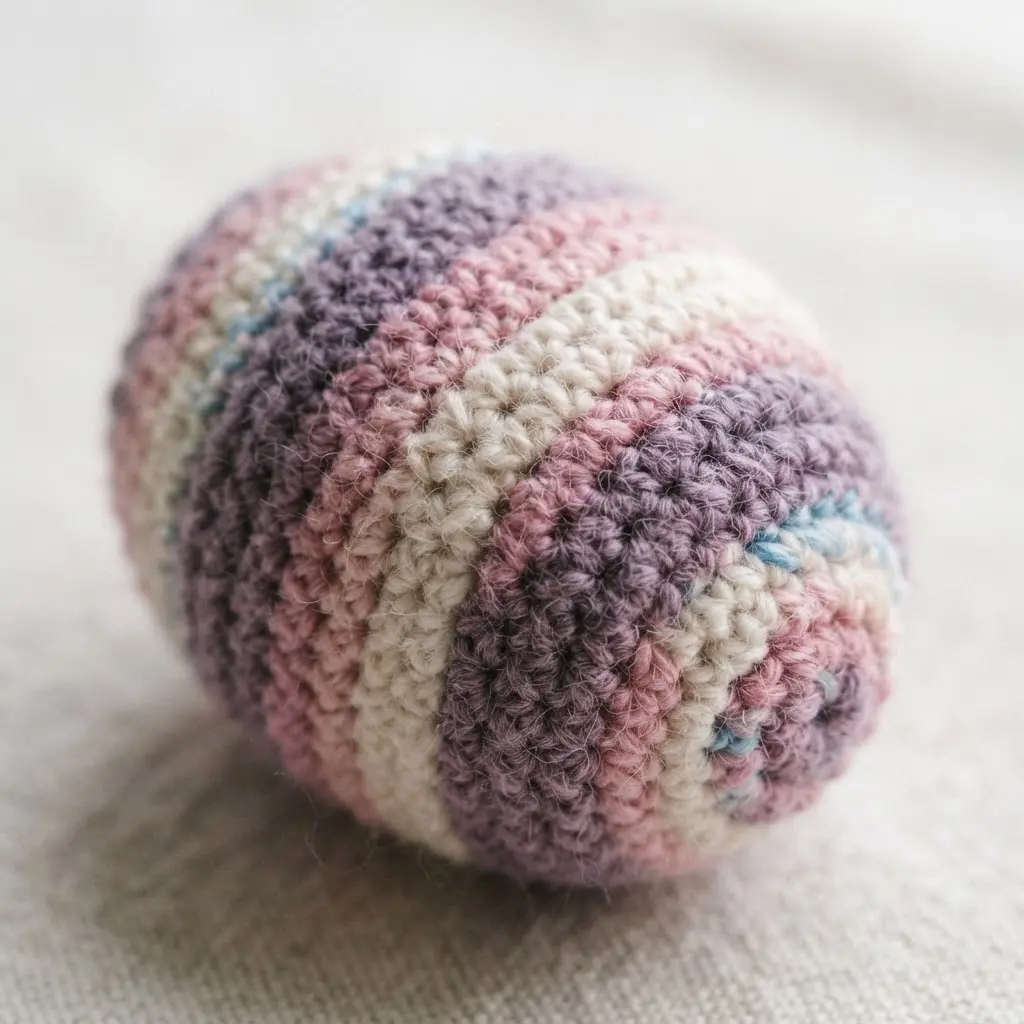
Ever wondered how to get those perfect stripes without changing yarn every few stitches? This project is the answer. You simply crochet with a self-striping variegated yarn and let the colors do all the work.
As you work in rounds, the yarn automatically transitions, creating a beautiful, unique pattern that makes your DIY sock yarn easter eggs stand out. It is so satisfying to watch the stripes appear without any extra effort from you.
The key is using a tight single crochet stitch to keep the stuffing hidden. You start with a magic ring, increase for the bottom, work even rounds to show off the pattern, then decrease and stuff. I love how this uses up small yarn scraps too. Your finished egg will be a lovely, dense little decoration.
Thinking of making a whole set? It is a fantastic way to use leftover yarn from other projects. For a truly stunning collection, pair these with a classic golden Easter egg craft. The metallic and yarn textures look amazing together. Does that not sound like a fun afternoon?
2. Pastel Speckled Knit Texture Egg
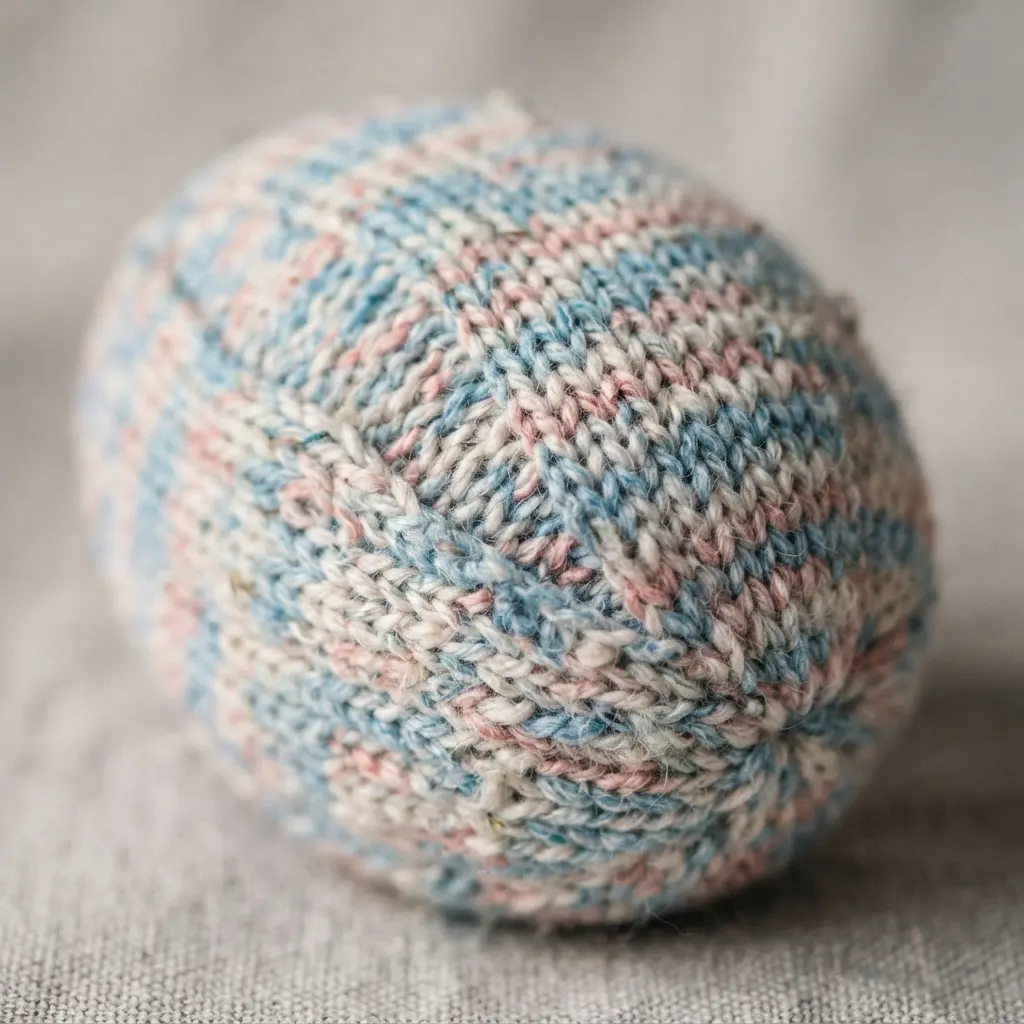
Who would have thought sock yarn could look so much like a bird’s egg? You will love the soft, cozy texture this creates. The secret is in your yarn choice. Using a speckled or variegated sock yarn in soft pastels gives you that delicate, organic look instantly. It is like magic.
Your main job is to wrap the egg tightly and evenly. Start at one end, applying craft glue to a small section at a time, and this technique builds that wonderful knitted feel for all your DIY sock yarn easter eggs. Press each wrap firmly against the last to avoid gaps. Does that not sound satisfying?
I love this one for its tactile charm. It feels like spring in your hands. For a perfect base, make sure you start with clean, sturdy decorated plastic Easter eggs. Trust me, that makes the whole wrapping process smoother and your finished egg more durable. You will feel so proud of your work.
3. Embroidered Floral Sock Yarn Egg
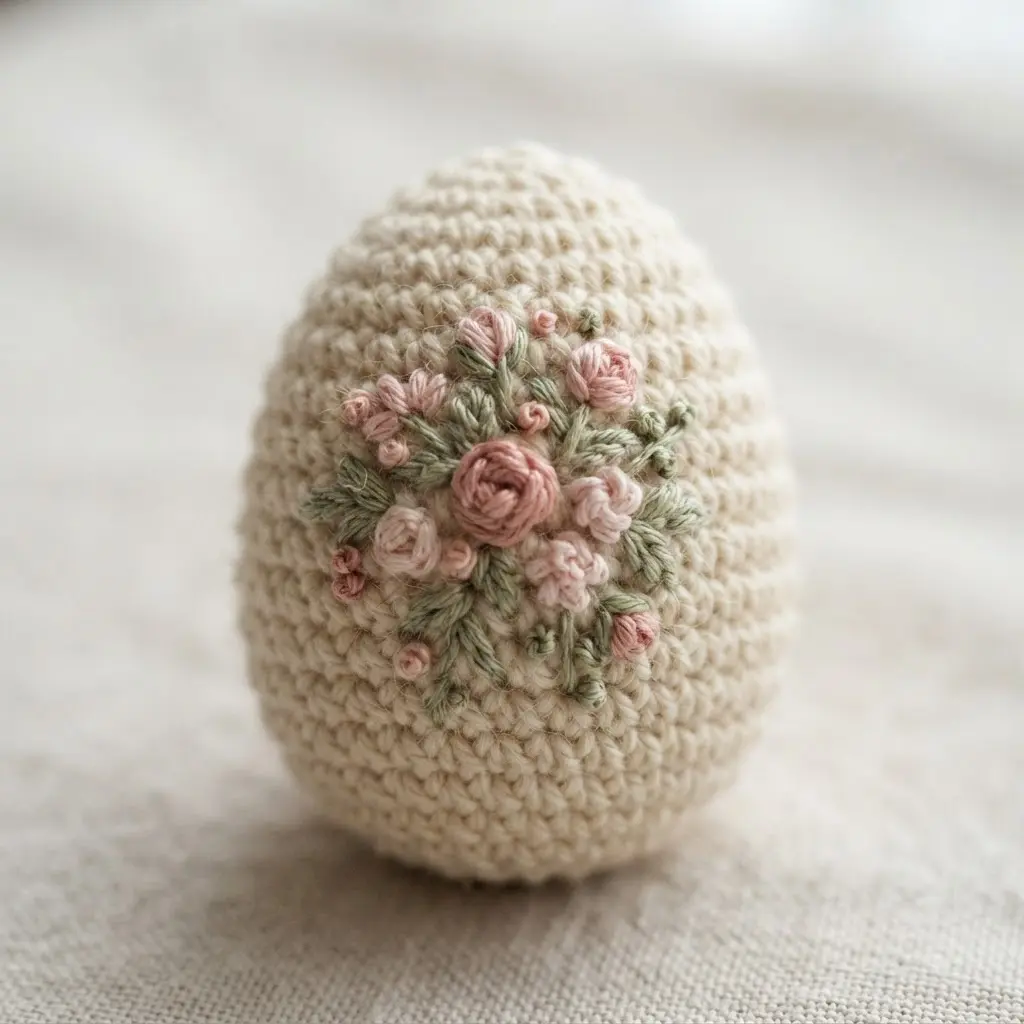
This one looks like a miniature piece of textile art, but trust me, you will make it with simple stitches. You start with a neutral-colored egg cover, then use a sharp embroidery needle and scraps of colored sock yarn to stitch flowers right onto the surface.
You will create little French knots for flower centers, lazy daisy stitches for petals, and straight stitches for stems and leaves. It works so well because the fine gauge of the sock yarn lets you get beautifully detailed flowers without adding bulk to your DIY sock yarn easter eggs. Your finished egg will have this charming, soft texture you truly want to hold.
For a cohesive spring display, these embroidered eggs pair wonderfully with beautiful watercolor Easter egg designs on your mantel. The combination of soft yarn textures and delicate painted washes is absolutely stunning.
4. Contrast Hue Striped Crochet Egg
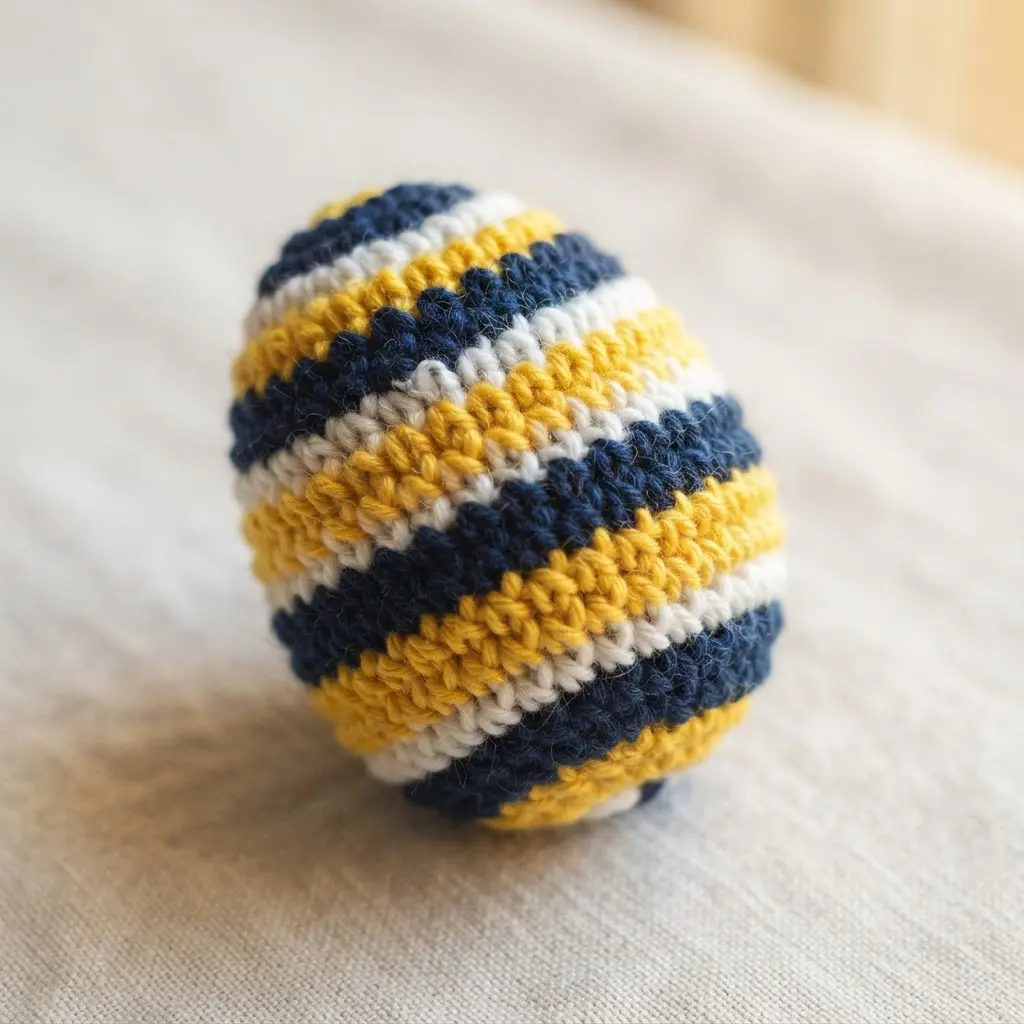
This one looks so much harder than it is. The secret is simply changing your yarn color every round or two to build those bold rings. You will work in a continuous spiral, increasing and then decreasing to shape the egg, and you must stuff it firmly before closing the top. I love how the highly contrasting colors pop against each other, creating a playful and modern take on a classic shape.
It is a fantastic way to use up leftover yarn bits. The most important tip is to pull your new yarn tight during color changes to avoid any gaps, which keeps your DIY sock yarn easter eggs perfectly smooth. That consistent tension keeps your stuffing hidden and your stripes crisp. Feeling stuck on the shape? The same basic crochet egg pattern is a perfect foundation for all sorts of fun monster themed eggs once you get the hang of it.
5. Textured Bobble Stitch Wool Egg
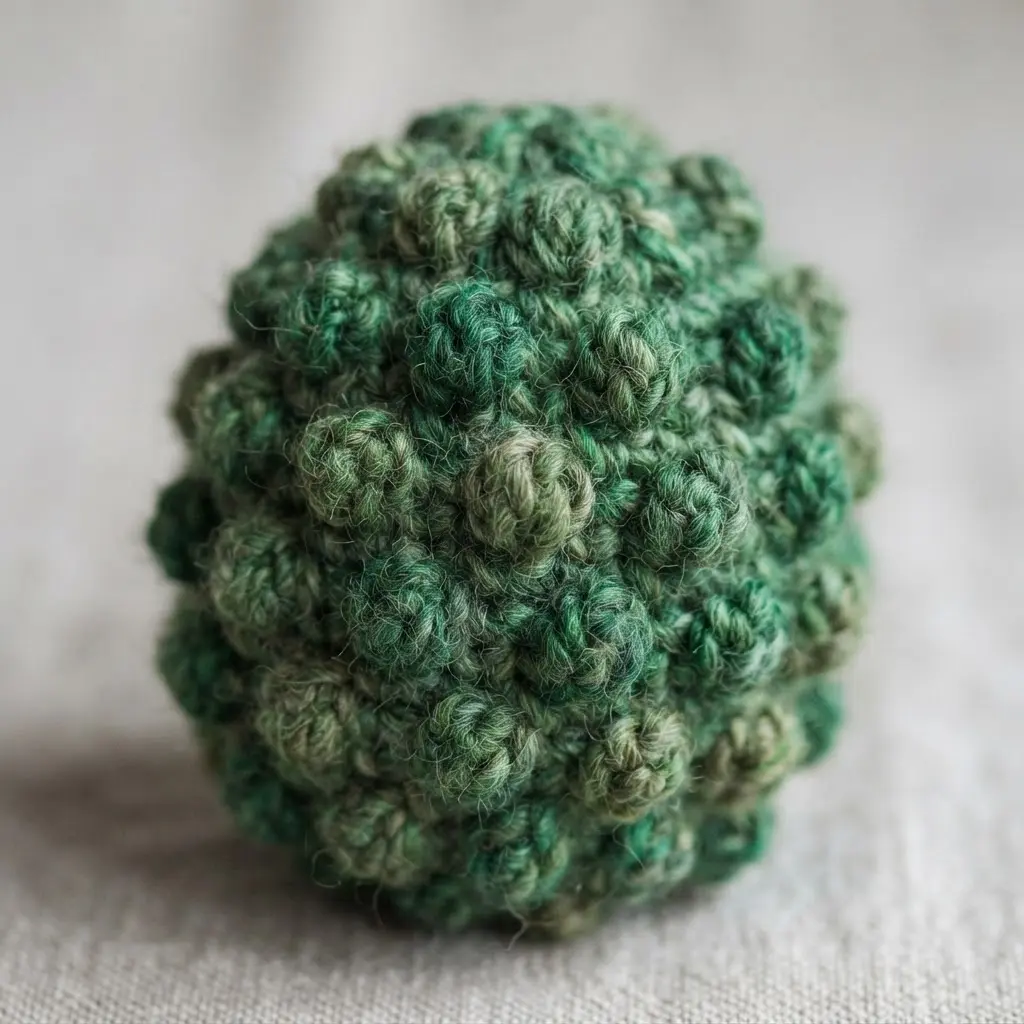
Ever wondered how those charming, bumpy eggs get their cozy texture? The secret is the bobble stitch. You create these plush bumps by working several stitches into one spot before pulling them together, all while shaping the egg in the round.
I love using a soft wool yarn for this because it gives the finished piece a warm, natural feel that acrylic will not match. The process is rhythmic and satisfying once you get the hang of it. You will start with a small circle, increase to form the middle, and strategically place your bobbles as you decrease to shape your DIY sock yarn easter eggs.
Why does this work so well? It turns a simple wool egg into a delightful, squishable object you will not help but touch. For a different but equally lovely handmade look, you might enjoy the process behind making gold dipped newspaper eggs as another unique decor option.
My go-to tip is to stuff your egg firmly and evenly right before you close the final stitches. Feel proud of your plush, textured creation.
6. Ombre Gradient Dyed Cotton Egg
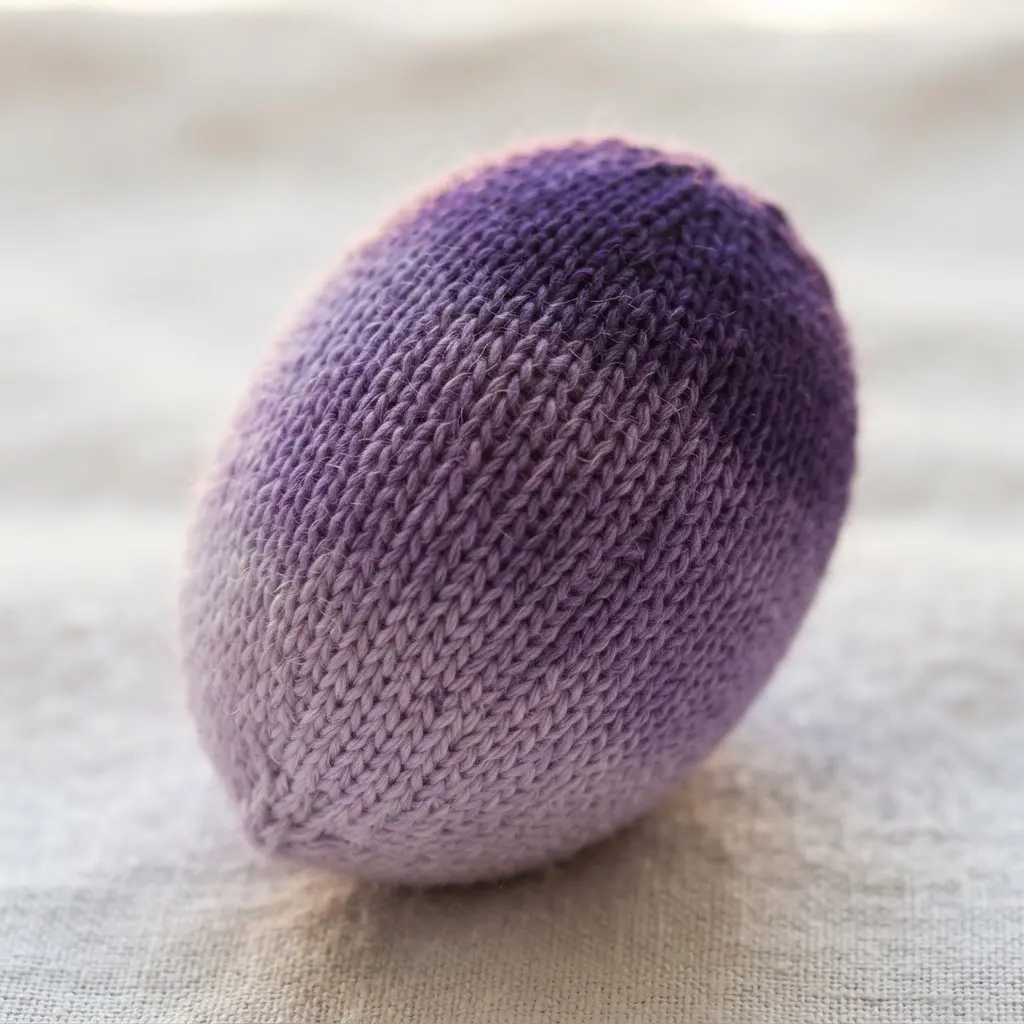
This one surprised me. It looks like a professional artist did it, but the secret is a simple cotton ball. You wrap your egg base with dye-soaked cotton pieces, carefully layering from light to dark shades. The cotton applicator holds the moisture so the colors seep and blend together slowly, creating that gorgeous transition on DIY sock yarn easter eggs.
My best tip is to let it sit overnight. That extended contact time is key for deep, rich color. The payoff is a stunning, sophisticated egg that feels like a true art piece. For another dazzling, budget-friendly option, check out these budget-friendly glitter eggs.
7. Lace Patterned Fingering Weight Egg
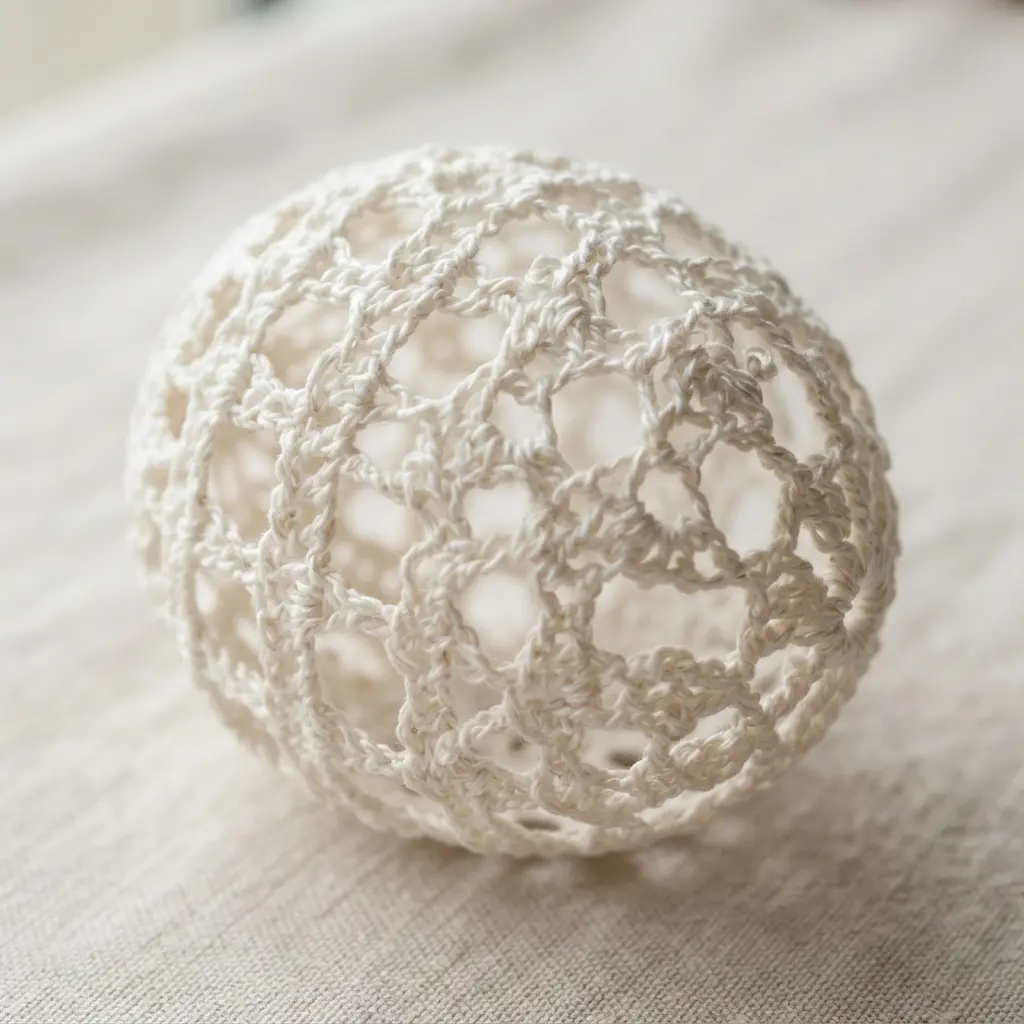
This one looks so elegant and complex, but it is a fantastic small project to try lace knitting for the first time. You knit with fingering weight sock yarn on tiny needles, creating a delicate shell of openwork patterns like eyelets or leaves around an egg form.
The real magic happens when you block it. You gently shape the damp knitting over an actual egg or a foam form so your DIY sock yarn easter eggs bloom beautifully into defined lace. Isn’t that transformation satisfying?
I love how this makes a quick, personal gift. After you finish a few, you might want to display them in some creative Easter egg cup crafts you made earlier in the season. Feel proud of your delicate work.
8. Button Embellished Sock Yarn Egg
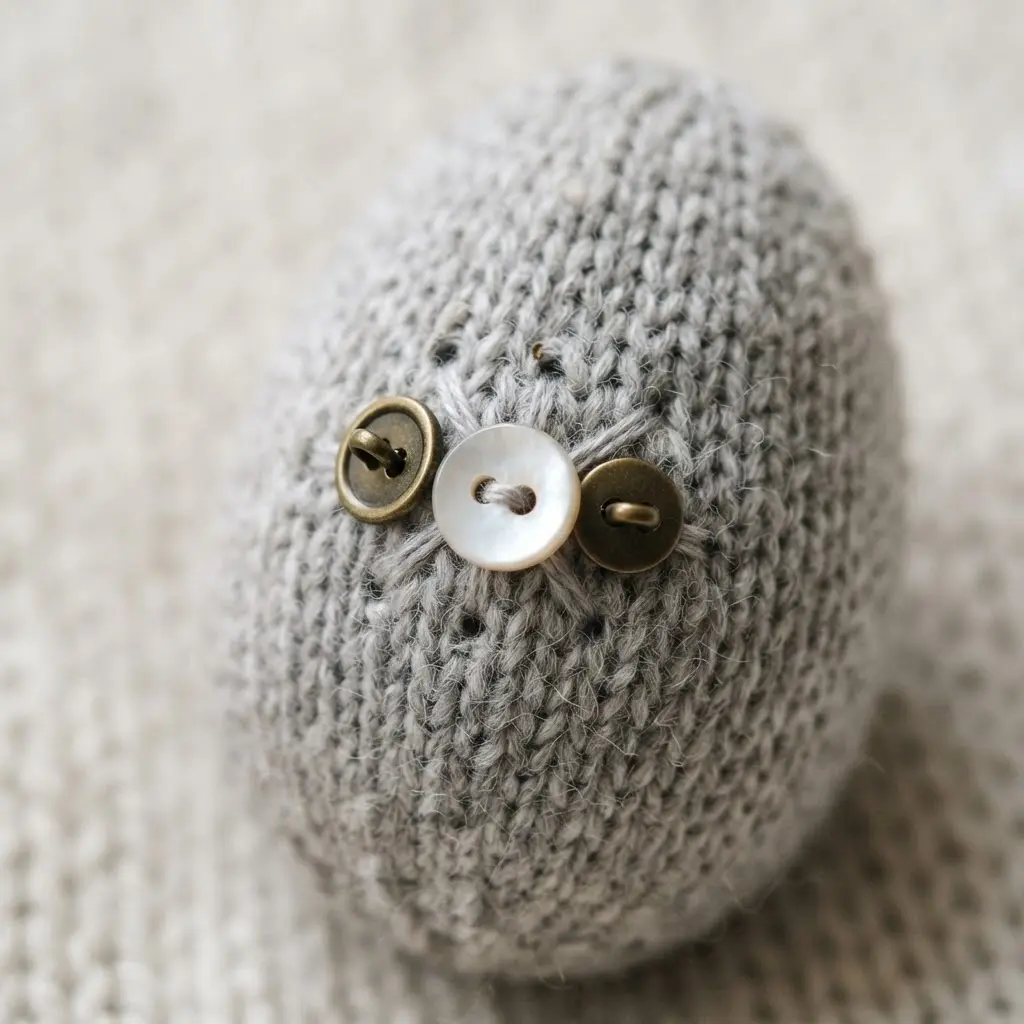
Who knew a stash of mismatched buttons could become the star of the show? This is the perfect project for using up those tiny bits of sock yarn and giving orphaned buttons a wonderful new home.
You will knit or crochet a snug, egg-shaped cover and then sew on your button collection. I love playing with the arrangement before I commit, clustering different sizes and colors for a playful look on your DIY sock yarn easter eggs. Isn’t it satisfying to turn scraps into something so charming?
For a completely different textural effect, pair your yarn egg with a colorful tissue paper Easter egg in your spring display. Remember to knit your cover a little tighter than usual so the form stays perfectly hidden underneath.
9. Metallic Thread Accent Crochet Egg
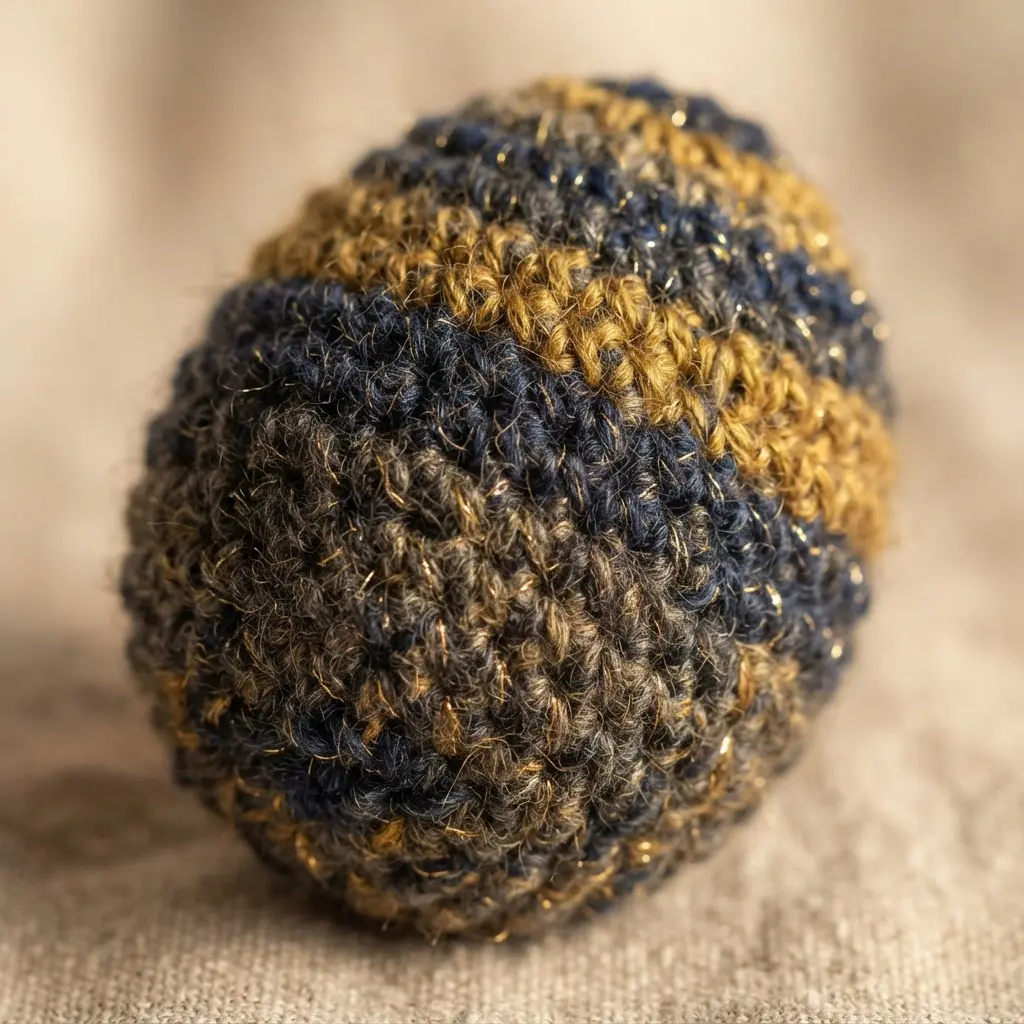
Ever wondered how to make a crochet egg look truly special? This one is my favorite trick for adding instant sparkle. You will crochet a standard egg shape using your main yarn, but for the magic, you will hold a fine metallic thread alongside it for a few rounds.
This creates a subtle, shimmering stripe that catches the light beautifully. The key is keeping your tension even as you work with both strands. Trust me, practice on a small swatch first so your DIY sock yarn easter eggs look professional. This technique instantly elevates your Easter decor.
For a fun companion project, these eggs pair perfectly with some adorable pom-pom chick crafts on the same festive table.
10. Tasseled Sock Yarn Boho Egg
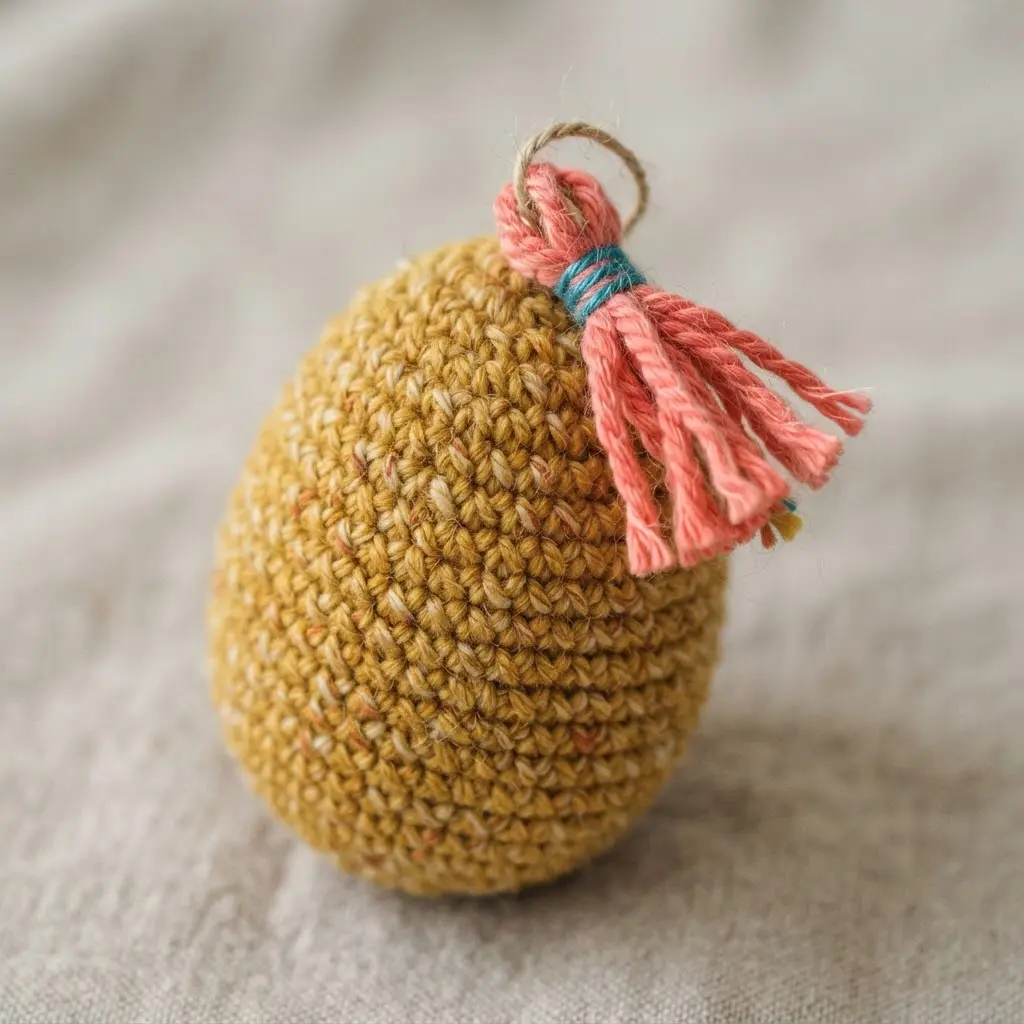
Ever thought a yarn-wrapped egg would have so much personality? This one adds playful movement with its fringe-like tassels, giving it that relaxed, bohemian vibe. You simply wrap your egg base tightly with colorful sock yarn, applying glue in small sections to keep things neat.
The real charm comes from making little tassels from your leftover yarn scraps and attaching them securely at the ends to finish your DIY sock yarn easter eggs. I love how the soft texture of the yarn feels in your hands, and the tassels make it look like a tiny piece of folk art.
It is a fantastic way to use up those beautiful sock yarn bits you have been saving. Once you finish a few, they look amazing grouped together on a mantel or as part of a larger display. For a full seasonal setup, these eggs pair perfectly with the process of creating an Easter banner to tie your decor together. Trust me, the final look is so satisfying and full of handmade charm.
Methods For Displaying And Preserving Textile Ornaments
A single light coat of matte acrylic spray seals your finished eggs against dust and gives the yarn a subtle, protected sheen. Hold the can about twelve inches away and use quick, even passes to avoid any drips or dark spots.
This step is non-negotiable if you plan to store these decorations year after year, as it protects DIY sock yarn easter eggs from fading and wear. For display, a simple glass cloche or a shallow bowl filled with moss makes these heirloom-style pieces the star of your spring mantel. The nylon content in the sock yarn adds durability, but this clear coat is what truly makes them last. Your work deserves that final touch.
Conclusion
Working with your favorite yarns to make seasonal decorations is such a rewarding part of the process. Each DIY sock yarn easter egg you create holds a little bit of that creative joy, turning simple materials into a cherished part of your holiday traditions. My best advice is to play with tension as you go, and a slightly tighter stitch helps keep that perfect oval shape while hiding the stuffing beautifully. Whether you make a whole basketful or only a few special accents, these textile eggs bring a warm, handmade touch to your spring table that you will love bringing out year after year.
FAQs
Q: What is the best yarn to use for these Easter eggs?
A: Fingering weight sock yarn is ideal. Its thin ply creates a smooth, dense fabric that holds the egg shape well. Wool or wool-nylon blends provide excellent structure, while cotton yields a matte finish.
Q: Do I need to use a plastic egg inside?
A: It works, but it is not required. Many makers fill the eggs with polyester filling for a soft, squeezable result. A plastic egg base creates a firmer, rattling result but requires practice to cover evenly.
Q: Are these projects suitable for beginners?
A: Most basic egg shapes are beginner-friendly. Start with a simple single crochet or stockinette stitch pattern. Textured stitches like bobbles or lace require experience but are excellent for intermediate makers.
Q: How do I keep my crochet egg from looking lumpy?
A: Consistent tension is key. Work with a slightly smaller hook than recommended for your yarn to make a tight fabric. Fill the egg firmly and evenly as you go, and decrease stitches gradually for a smooth oval.
Q: Is it safe to wash my yarn Easter eggs?
A: Spot clean them gently with a damp cloth. Machine washing will felt wool yarns or distort the shape. Hand wash in cool water and reshape the piece while damp if necessary.