

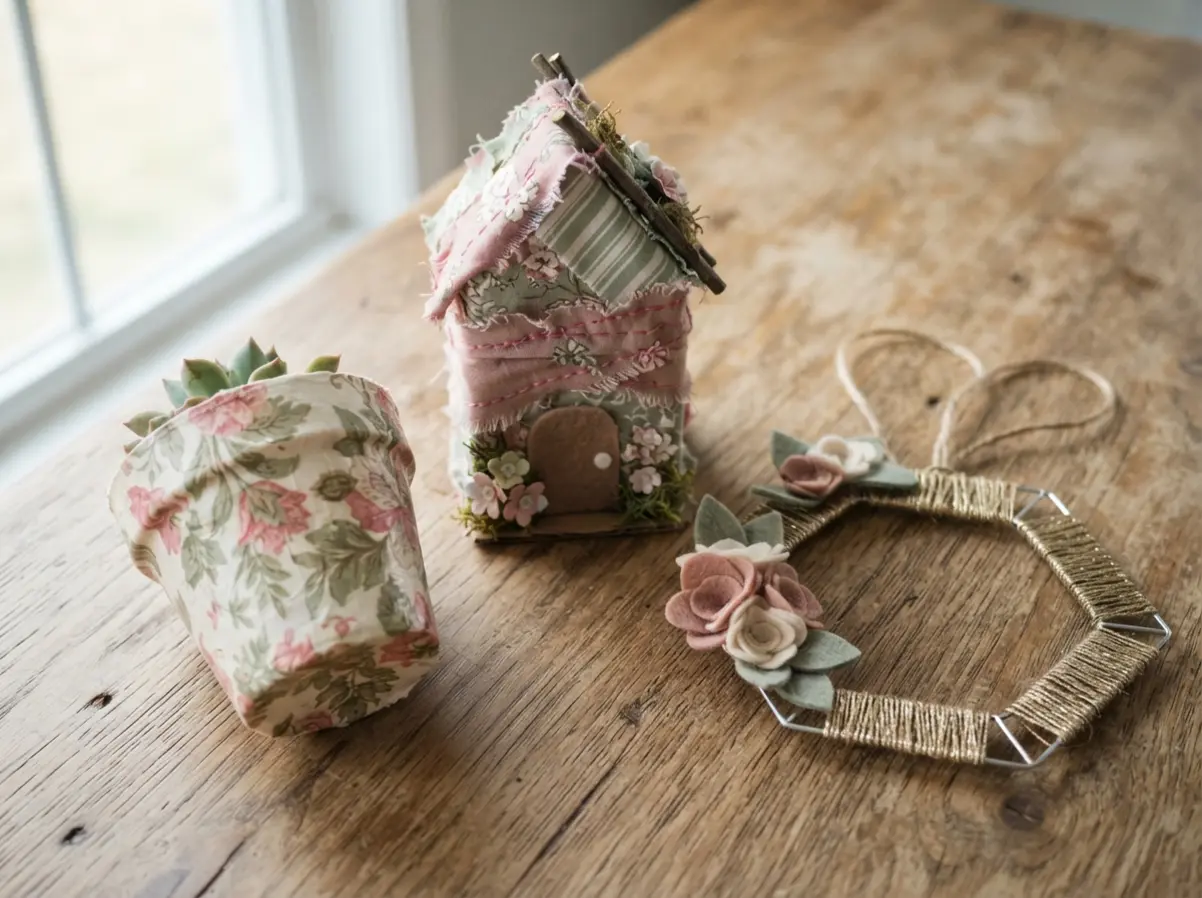
Each idea here takes that smooth shell and transforms it with techniques like decoupage, painting, and fabric wrapping into something beautiful you will want to keep out all year. We are focusing on permanence, using the right adhesives and primers to ensure your creations hold up. Let us explore ten ways to give those shells a beautiful second life.
Surface Preparation Techniques for Plastic Adhesion
A quick wipe with isopropyl alcohol removes the oily film that causes paint to bead up on your DIY plastic easter eggs. That slick surface is polypropylene, which actively resists standard acrylics. The good news is a dedicated plastic primer changes everything.
Look for an automotive adhesion promoter spray designed for bumpers and trim. It etches the surface at a molecular level so your base coat grips tight. Trust me, this one step prevents the heartbreak of peeling paint after all your hard work. A light, even coat is all you need before moving on to your decorative layers.
Selecting Durable Adhesives for Lightweight Shells
Hot glue with a high silicone content creates a flexible, permanent bond that will hold DIY plastic easter eggs together securely. You want that flexibility because rigid glues like super glue will stress the thin plastic and fail. For attaching heavier embellishments like buttons or wooden beads, a two-part epoxy is your best friend.
It cures solid and fills any tiny gaps between your add-on and the curved egg surface. Let the epoxy set fully before you handle the piece. This patience pays off with a finished display that holds together for seasons. The right adhesive choice ensures your decorative work stays put.
1. Decoupage Floral Pattern Mini Planter
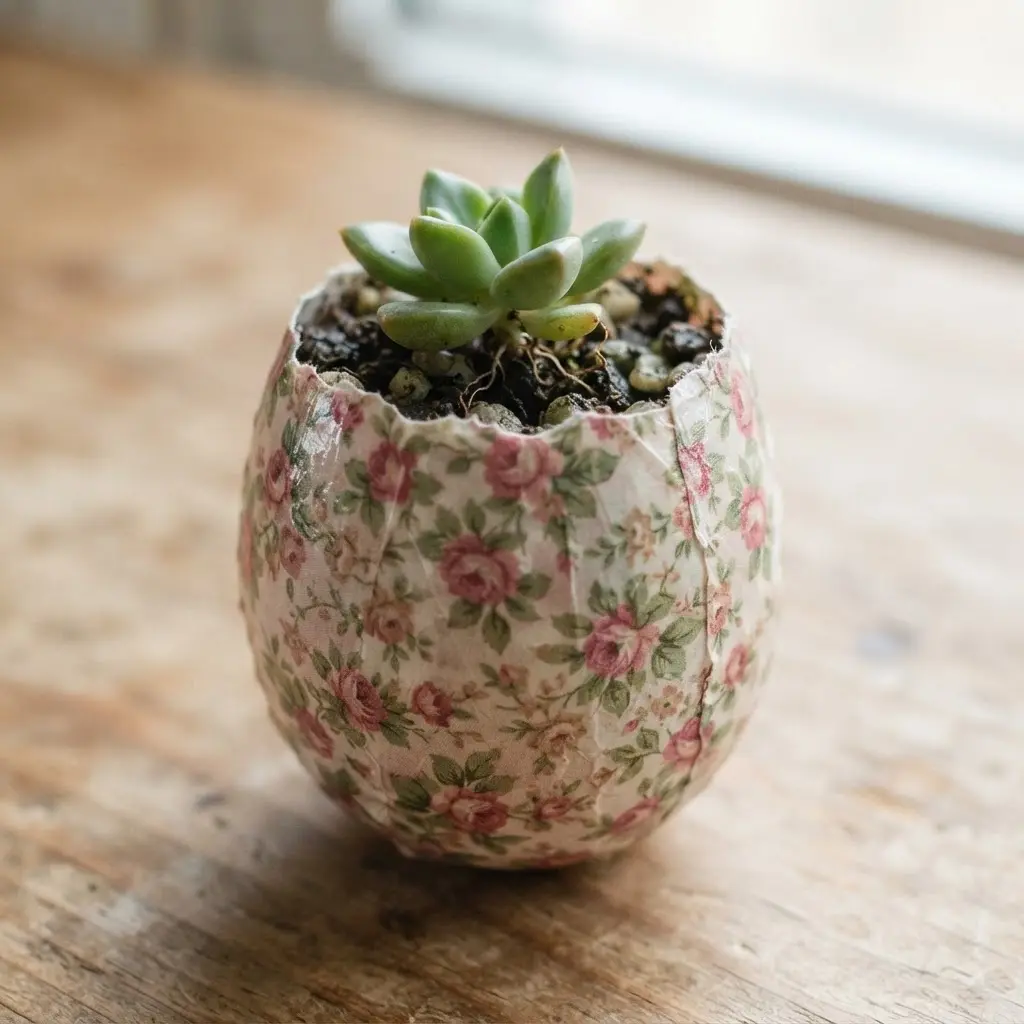
This one looks like a professional vintage piece, but trust me, it is surprisingly straightforward. You start by prepping your DIY plastic easter eggs with a base coat of white acrylic paint to make those floral colors pop. Then, you carefully apply your paper cutouts with decoupage medium, smoothing out every wrinkle from the center outward.
Why does this work so well? The layers of medium fuse the paper to the surface, creating that seamless, painted-on look you love. My go-to tip is to use very thin papers like napkins for your first try, as they conform beautifully without bulky edges.
If you are also thinking about decorating shells, the same smooth, sealed finish is key for a project like DIY watercolor Easter egg designs. That satisfying moment when your last coat dries clear and your planter is ready to hold a little succulent? Pure magic.
2. Fabric Wrapped Spring Fairy House
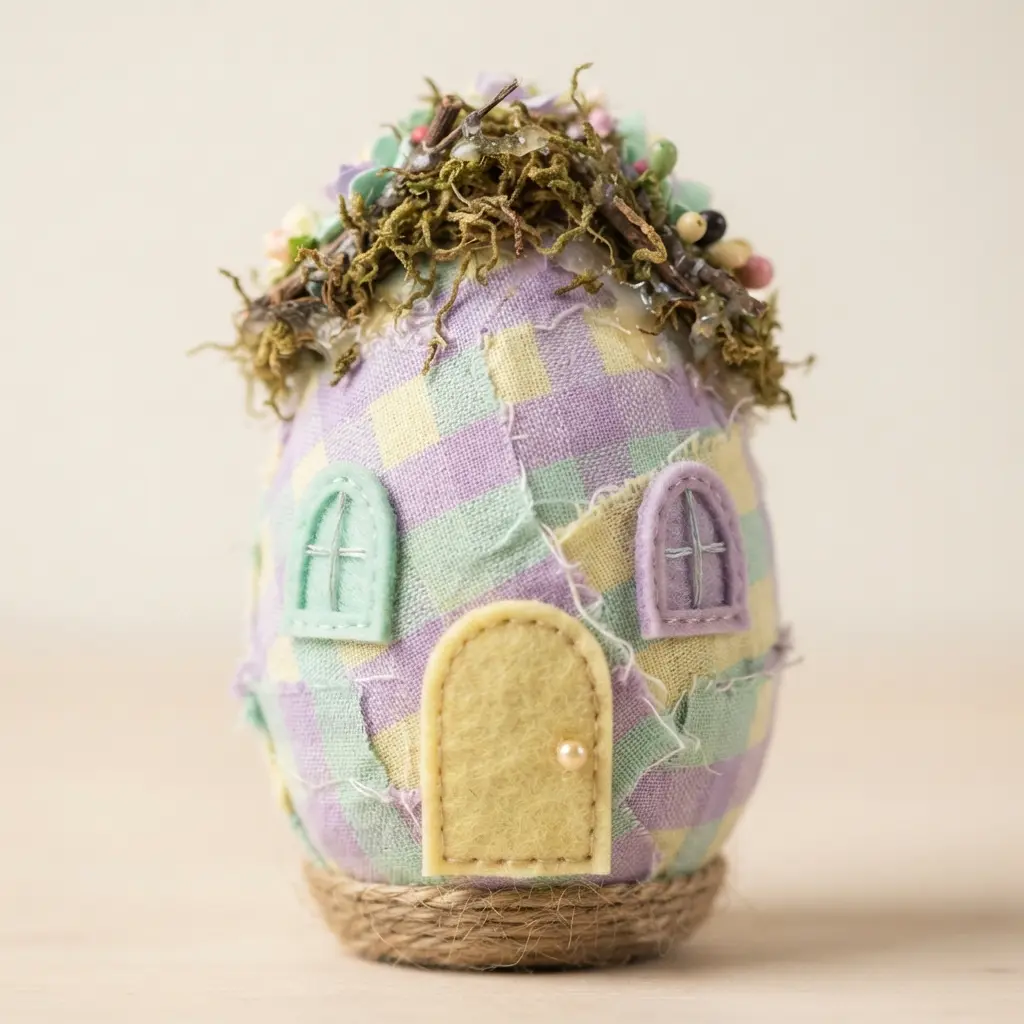
This one looks like a magical cottage that grew from the forest floor, but it starts with a simple bottle. You will wrap the container in crumpled newspaper to get a lovely, organic shape, then cover everything with a patchwork of fabric scraps using fabric glue or Mod Podge. The real charm comes from adding tiny twigs, moss, and buttons to create doors and windows.
What makes this so special is the incredible texture you get from layering different materials. It feels like a little piece of spring you can hold in your hands. A key tip is to let each fabric layer dry completely before adding heavy embellishments, so your fairy house stays sturdy and whimsical.
For a different textural approach, you might look at making sock yarn Easter egg decorations as a softer, cozier companion project.
3. Metallic Geometric Wreath Wall Decor

Ever wondered how to give your plain shells a seriously chic upgrade? This metallic geometric wreath idea is my favorite way to turn DIY plastic easter eggs into a modern art piece. You will arrange your eggs into simple shapes like hexagons or diamonds, then use a metallic spray paint in gold or copper to unify them with a sleek finish.
The open, airy design keeps it from feeling heavy, so it works in any room. I love how the metallic sheen catches the light and makes everything feel more sophisticated. For a perfect final touch, you can learn to make beautiful golden Easter eggs to add a warm, luxurious pop to your creation.
4. Painted Animal Character Desk Organizer
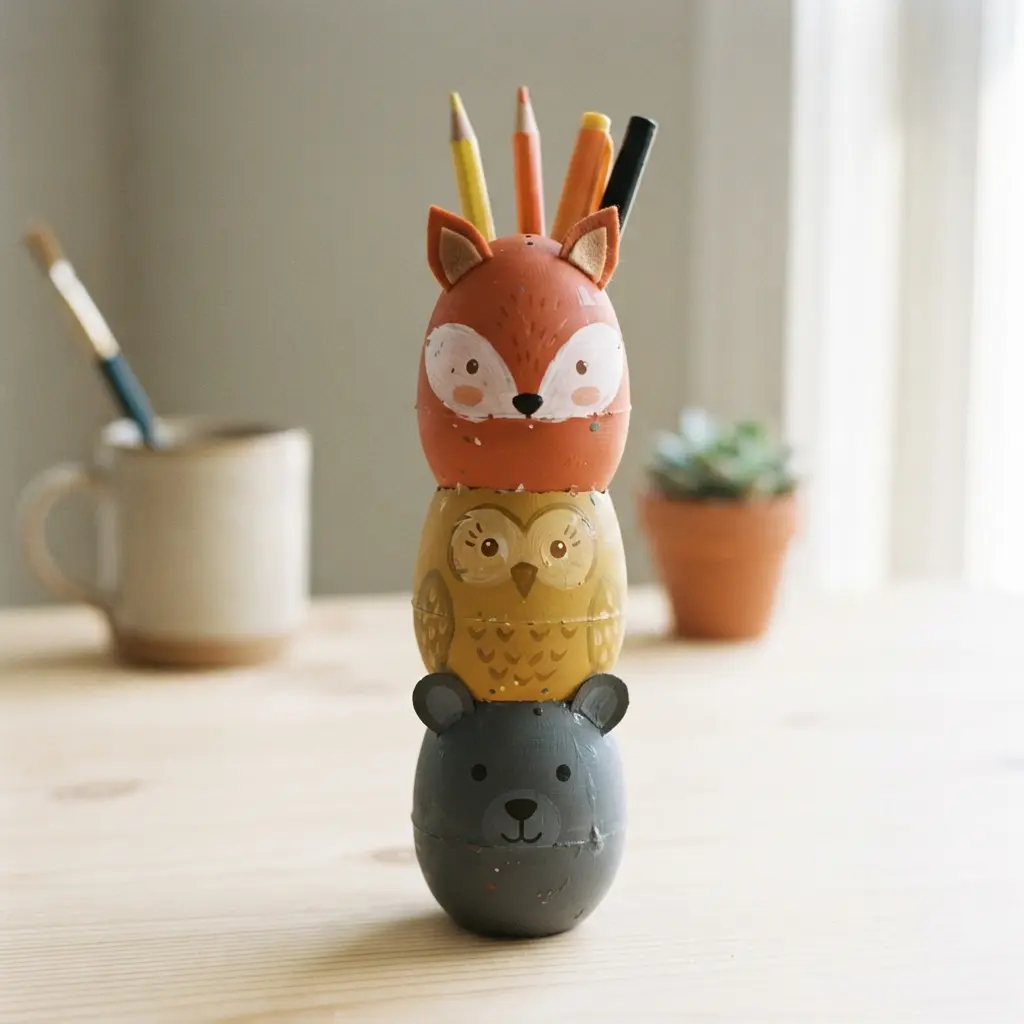
This one feels a bit like magic, turning leftover DIY plastic easter eggs into a friendly desk pal that truly holds your stuff. You start by gluing several clean shells together into a cute animal shape, maybe a penguin or a little bird. Then, a coat of acrylic primer makes sure your paint sticks perfectly to that slick surface.
Once the primer is dry, you can really go wild with your animal colors and features. I love giving mine big, expressive eyes and a sweet little smile. The best part is how this transforms a boring desk into a space that feels personal and happy.
Trust me, sealing it all with a clear acrylic varnish is the key to keeping your new buddy looking fresh for years. If you enjoy giving your creations a functional twist, you might find more inspiration in some creative Easter egg cup designs. It is so satisfying to see your supplies organized by something you made yourself.
5. Beaded Garden Garland Light Strings
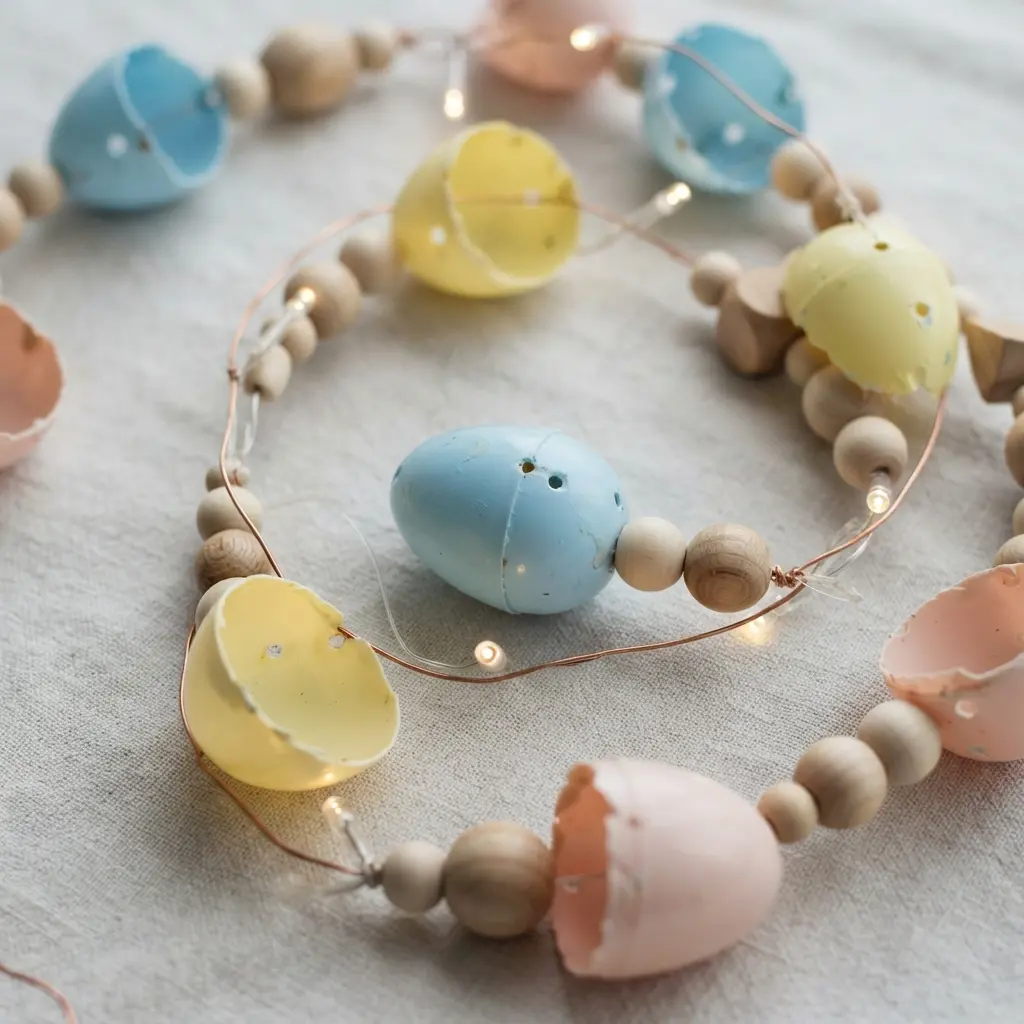
Ever wondered how to make your garden feel a bit more magical at night? These light strings are my favorite trick. You thread decorative beads, often glass or durable acrylic plastic, onto the wire between the LED lights to highlight your DIY plastic easter eggs. It is a simple upgrade that adds sparkle and texture, creating visual interest even when the sun is up.
Your biggest choice is the power source. Plug-in versions offer the most reliable brightness, while solar options give you flexibility. Remember to check the IP rating for outdoor safety. This ensures your beautiful project lasts through the seasons.
I love how versatile this idea is. You can weave them through a trellis or drape them from a pergola. The effect is stunning. For another fun seasonal project, you might want to look at some DIY Easter egg bath bomb recipes after you finish your garden lights.
6. Glittered Ornament Cluster Table Centerpiece
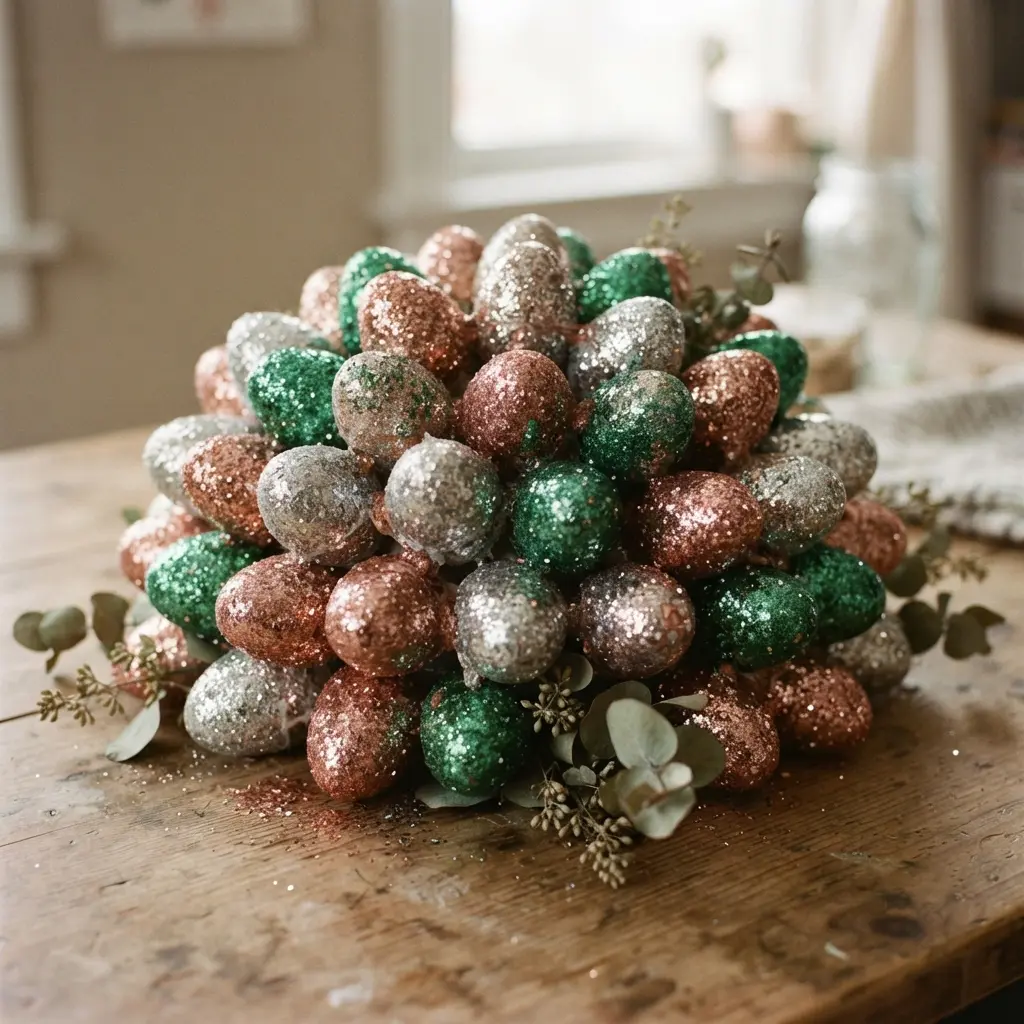
Ever wondered how to get that magical, sparkling glow on your table? This centerpiece is all about the cluster. You start by placing your DIY plastic easter eggs in a decorative bowl or tray to set the shape. Then, you fill every gap with medium and small ones, tucking them in to create a dense, layered look.
The trick is to mix textures. I always add some matte or shiny ornaments alongside the glittered ones. This keeps the arrangement from looking flat and adds a ton of visual depth. It is that contrast that makes the sparkle stand out.
For a dining table, keep the overall height reasonable so it does not block conversation. This piece is so versatile and reusable, you will love pulling it out for every celebration. Feeling festive yet?
7. Miniature Diorama Shadow Box Frame
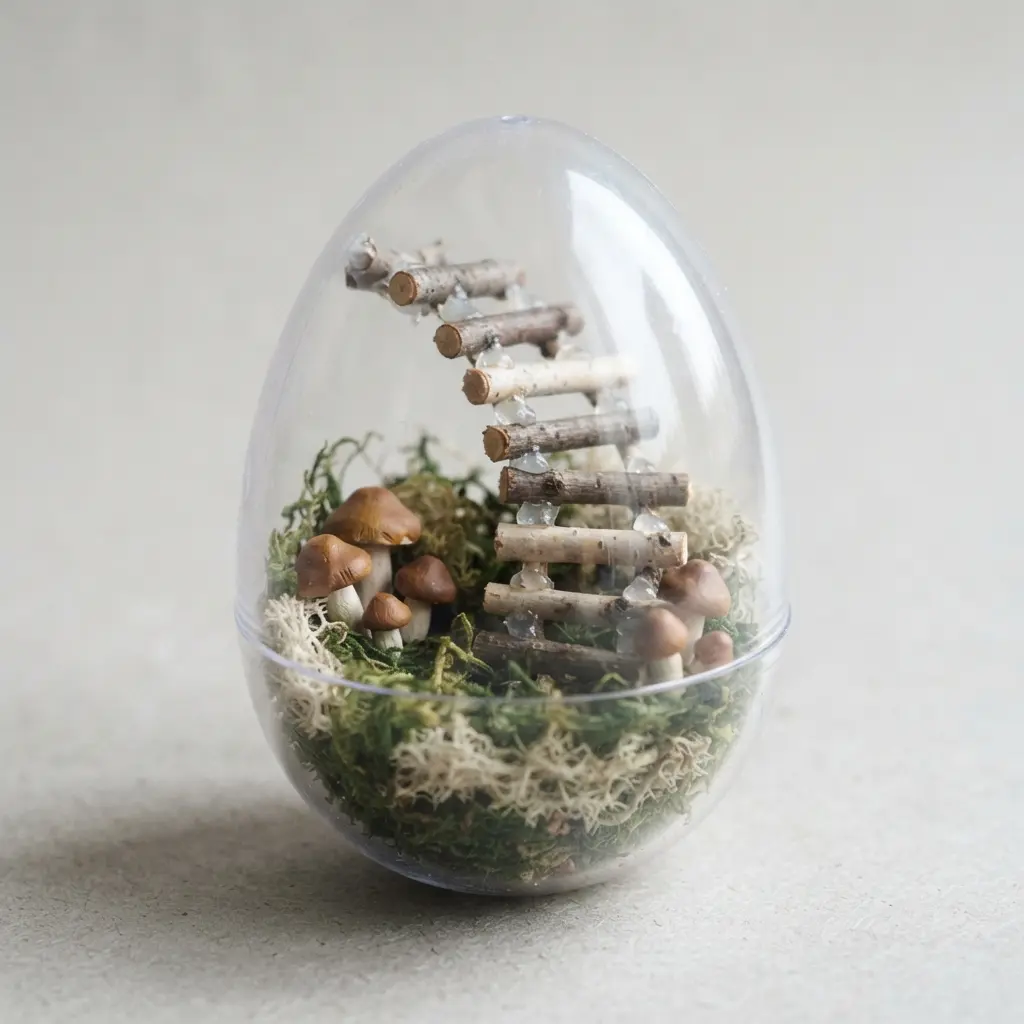
Who would have thought those empty shells could become a whole tiny world? This project lets you build a miniature scene inside a shadow box frame, turning DIY plastic easter eggs into a detailed diorama. I love adding texture with artificial moss and tiny pebbles for a realistic feel.
Getting the scale right is key here. Mixing dollhouse furniture with model train accessories might look off, so stick to one consistent size. Plan your layout before gluing anything down to avoid a cramped look. Isn’t it amazing how much story you might pack into such a small space?
If you enjoy adding colorful details, you might decorate shells with tissue paper first to create a unique backdrop or elements for your scene. The final payoff is a stunning, conversation-starting piece of art that feels incredibly rewarding to complete.
8. Vintage Inspired Lace Covered Bauble
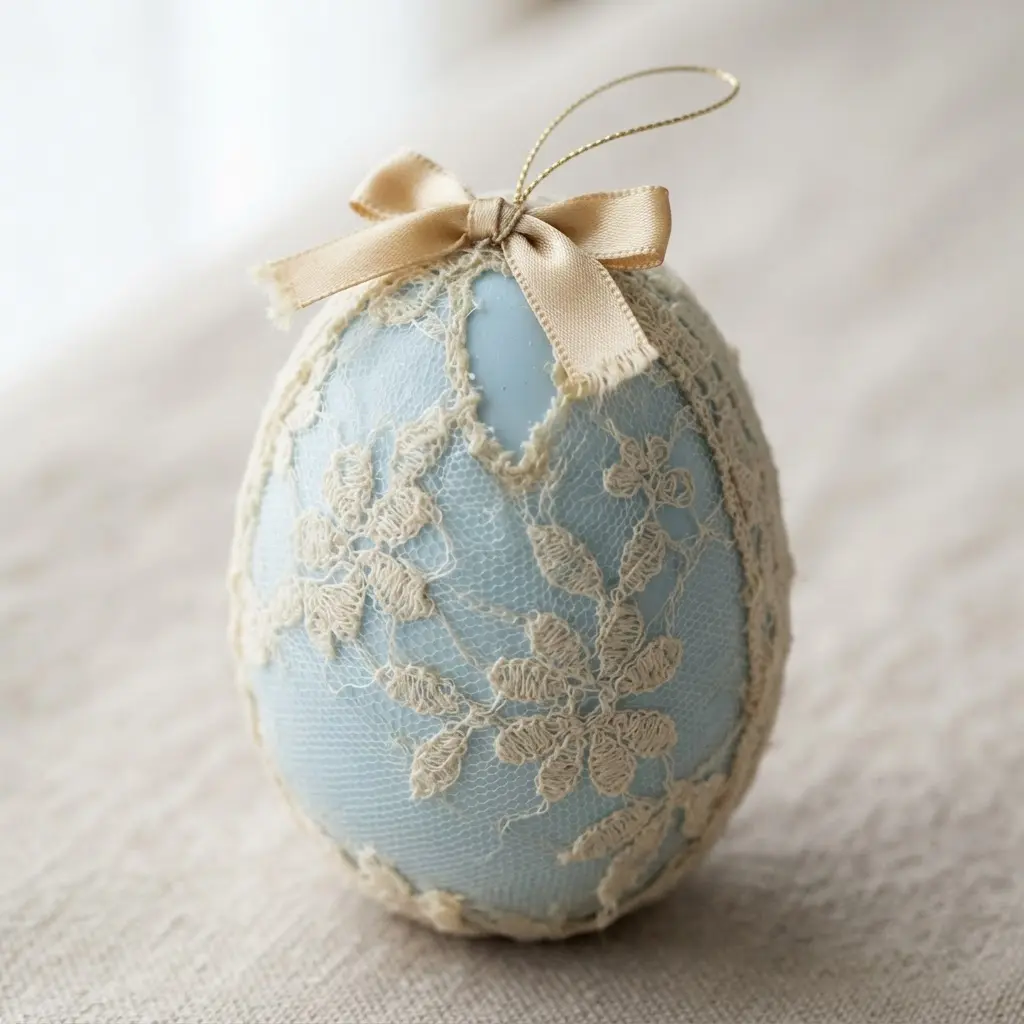
Who knew a plain bauble could feel so romantic and elegant? You simply apply a thin layer of clear-drying fabric glue to small sections, then carefully press pieces of delicate lace onto your DIY plastic easter eggs. I love using individual floral motifs cut from an old doily for a patchwork effect, smoothing out any wrinkles with a craft pick.
It works because the delicate texture completely transforms the smooth sphere into a timeless heirloom piece. For a cohesive holiday look, try pairing this delicate ornament with a gold-dipped newspaper Easter egg on your spring display.
Your tip? Work in small sections and let the glue set a bit before moving on to avoid a sticky mess. Doesn’t that look stunning?
9. Boho Macrame Hanging Air Planter
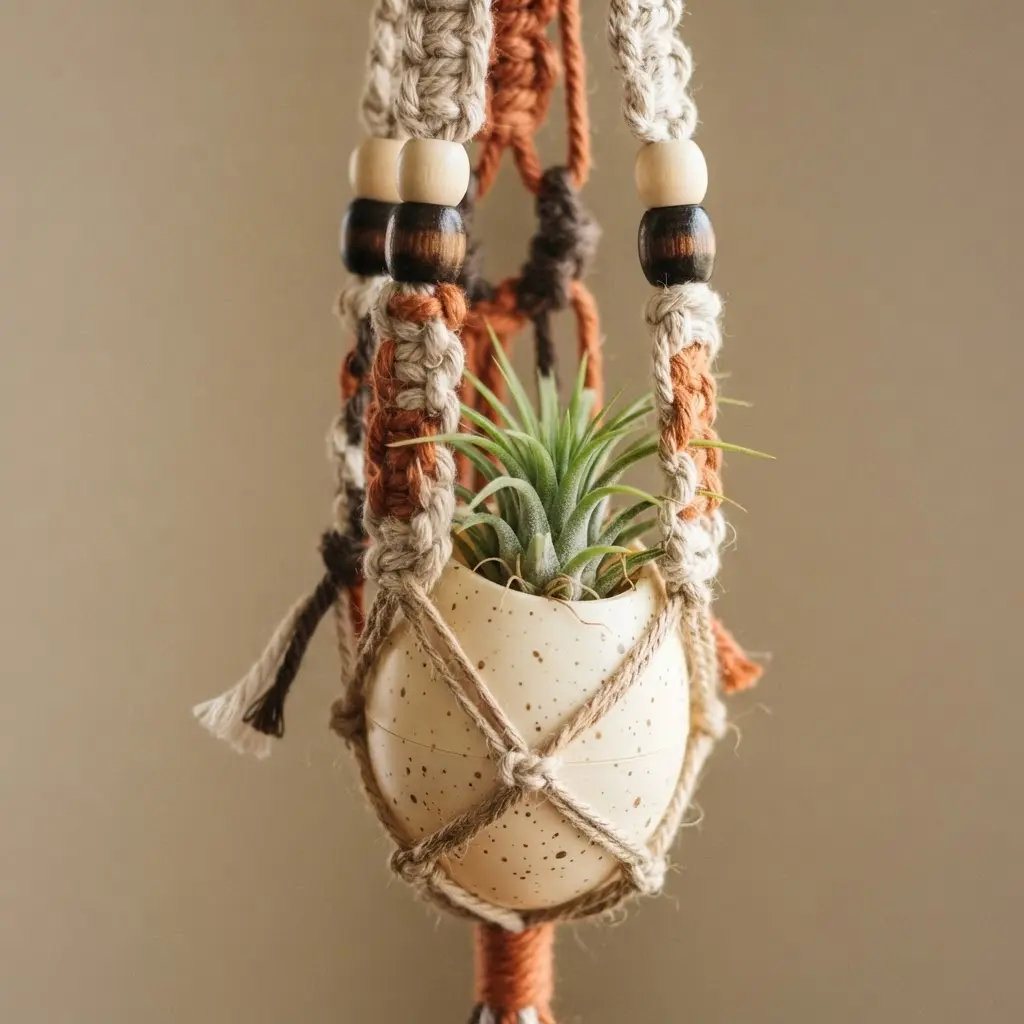
Ever wondered how those gorgeous plant holders are made? This boho macrame planter looks complex, but I promise it is a wonderfully relaxing project. You start by attaching your cotton cord to a ring or dowel with a simple Lark’s Head knot.
From there, you systematically tie a series of square knots to form a soft, netted cradle perfect for suspending your DIY plastic easter eggs securely. It works so well because it gives your plant the excellent air circulation it needs while looking like a beautiful spring craft wreath ideas, handcrafted accent.
A key tip is to practice your knots on a spare cord first to get consistent tension. This ensures your planter hangs straight and your plant sits securely. You will love the organic texture it adds to your space.
10. Felted Woodland Creature Display Figure
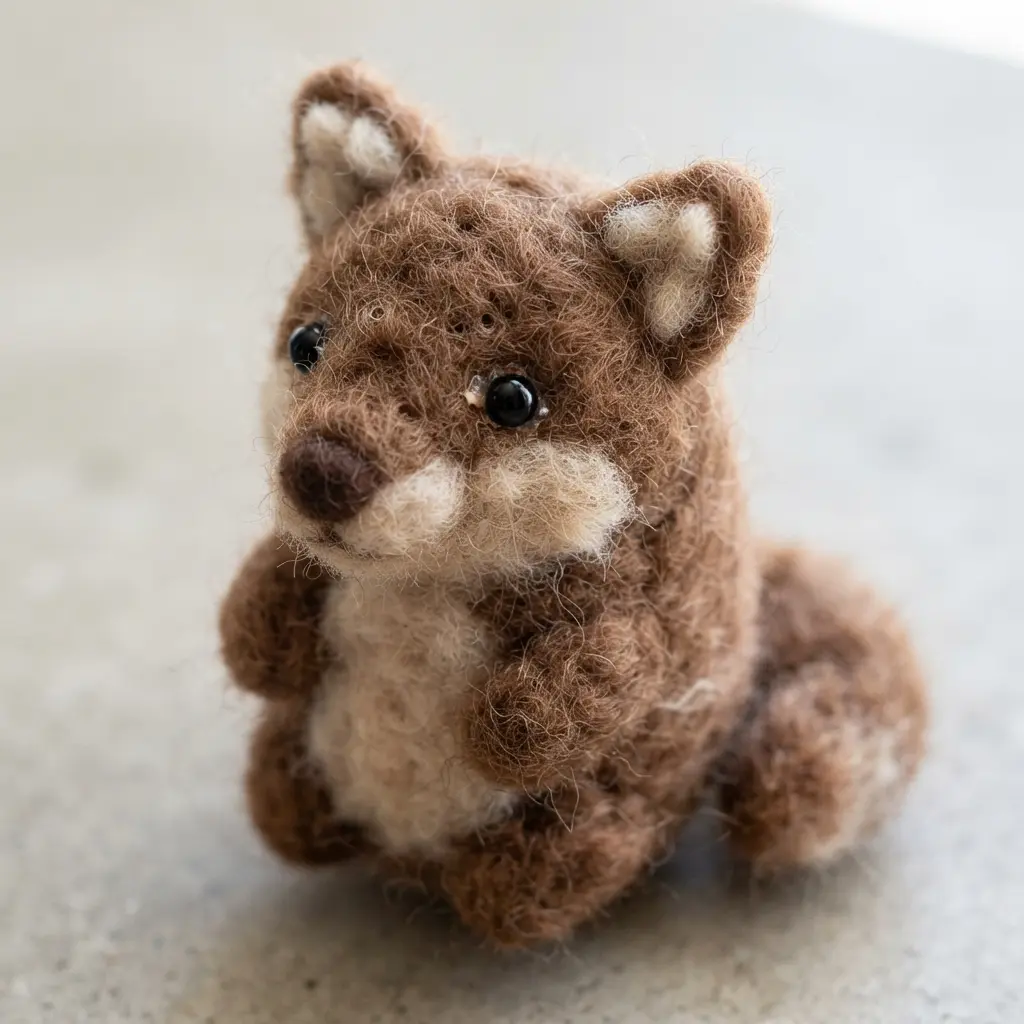
Who says your spring decor needs a traditional approach? This project lets you turn DIY plastic easter eggs into charming, fuzzy woodland display figures. You will start by repeatedly stabbing a bundle of core wool roving with a felting needle to form a firm base shape for the body.
Then, you add colored wool for the fur and details, sculpting ears, a tail, and a sweet expression. It is incredibly satisfying to watch a handful of fluff transform into a creature with personality. The magic is in the texture.
That soft, fuzzy finish feels wonderful and gives each figure a handmade, unique charm that plain materials simply will not match. For a totally different vibe, you might use this same felting technique to make spooky monster eggs for a fun Halloween twist. Trust me, once you get the hang of it, you will want to make a whole forest full of these little guys.
Preservation Methods for Seasonal Craft Longevity
A final layer of clear acrylic sealer locks in every detail and protects your DIY plastic easter eggs from dust and moisture. Choose a spray formulated for plastic surfaces to ensure proper adhesion over your decorated layers. Matte, satin, or gloss finishes each give a different final character to your piece.
Apply the sealer in a well-ventilated area with light, sweeping passes to avoid drips. Let it cure completely before stacking or storing your eggs. This simple step adds years to the life of your project, keeping the colors vibrant and the textures intact. Proper storage in a cool, dry place away from direct sunlight further prevents fading.
Conclusion
Seeing those leftover shells become something you are proud to display is a wonderful feeling. It is about more than recycling; it is about adding a personal, handmade touch to your space that carries a story.
The key to making these projects last is taking that extra moment to prep the surface with a good primer or sandpaper before you start painting or gluing. Once you complete your set of DIY plastic easter eggs, you will likely look at all sorts of packaging with new, creative eyes. Your home becomes a gallery of your own thoughtful making.
FAQs
Q: What is the best way to paint plastic Easter eggs so it does not chip?
A: Lightly sand the entire surface of the egg with fine-grit sandpaper to create a texture for the paint to grip. Then, apply a primer made for plastic surfaces before you add your acrylic craft paint. This creates a durable base layer.
Q: Can I use hot glue for these recycled egg projects?
A: Hot glue works for attaching lightweight elements like fabric or beads. For a permanent bond on heavier items or items that get handled, use a strong adhesive specifically designed for plastic and multiple surfaces.
Q: How do I cut a plastic Easter egg in half cleanly?
A: Use a sharp utility knife or a fine-toothed hobby saw. Score a line around the egg’s middle first, then apply steady pressure to cut through. You can smooth the rough edges with sandpaper after cutting.
Q: Are these projects safe for young children to make?
A: Adult supervision is needed for cutting, using strong adhesives, or handling sharp tools. Simpler tasks like fabric wrapping or applying pre-cut decoupage paper with child-safe glue are great options for little hands with help.
Q: What can I use to add weight to a plastic egg so it does not tip over?
A: Fill the bottom half of the egg with a small amount of air-dry clay, or place smooth pebbles mixed with clear medium before sealing it. This gives your creation a stable, weighted base for display.








