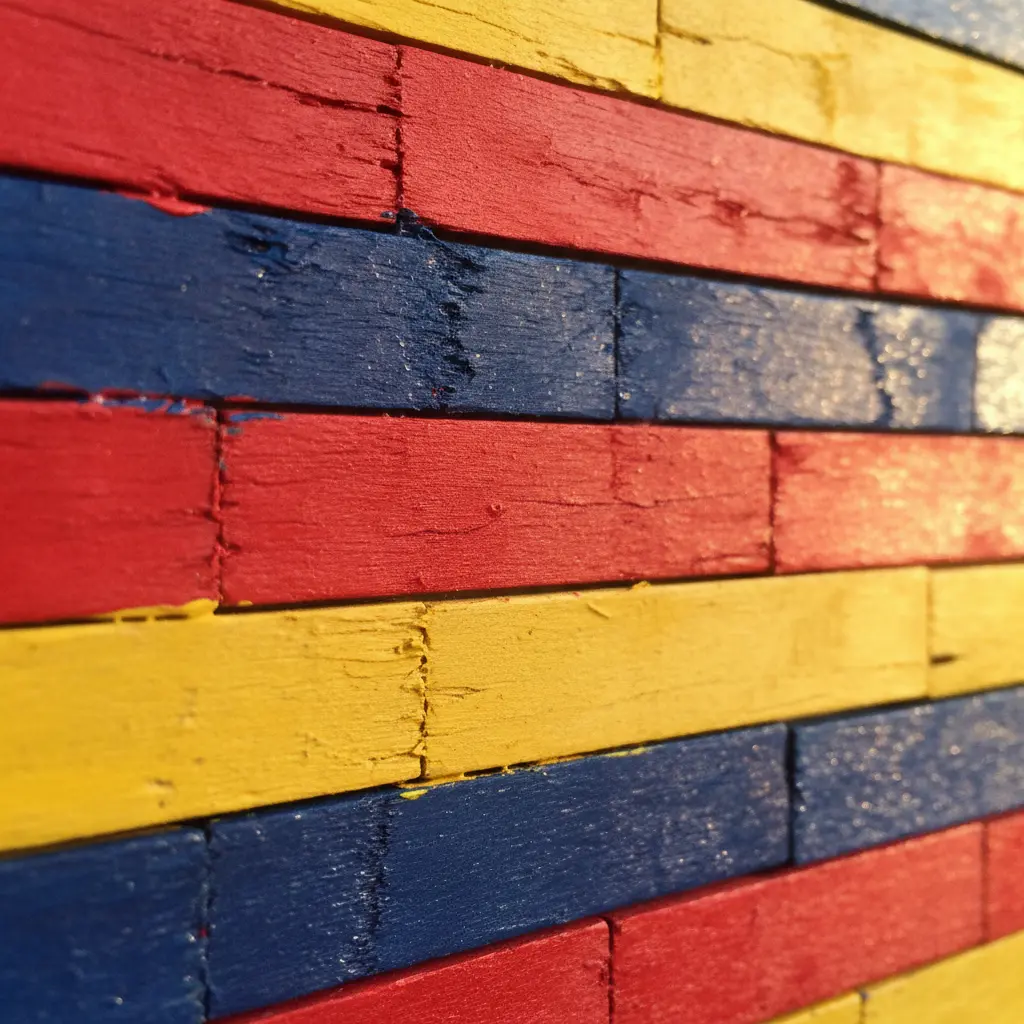
Structural Adhesive Techniques for Wood Stick Assemblies
The fastest way to ruin a finished piece is using school glue, which fails under the weight of larger patterns and swells the porous birch. As you explore popsicle wall art ideas, you will quickly discover the necessity of a high-strength wood glue applied in thin, controlled lines. You might also reach for hot adhesive when seeking instant tack on smaller pieces.
The trick involves hiding adhesive residue by pressing the sticks together firmly. Wipe any squeeze-out immediately with a damp cloth. For any structure wider than a few inches, add a cross-brace behind the main grid to prevent the entire assembly from warping as it dries.
This internal support makes your assembly feel like a solid panel rather than a loose bundle of supplies. Trust me, taking five minutes for this bracing step saves the whole project.
Achieving Professional Finishes through Staining and Sanding
Uneven stain that soaks into the wood grain creates a blotchy look you definitely want to avoid. The good news is you can prevent this with a quick sanding pass using fine-grit paper before any color touches it. As you refine your popsicle wall art ideas, preparing the surface becomes your most reliable step.
For a crisp geometric pattern, apply painter’s tape to the sticks in your desired design before adding color. A light coat of wood conditioner before your stain helps the pigment absorb evenly, giving you that smooth, intentional finish.
If you prefer painted sticks, use acrylic paint instead of watercolors to avoid saturating and warping the material. This approach to material layering elevates your work from a simple craft into genuine wall décor.
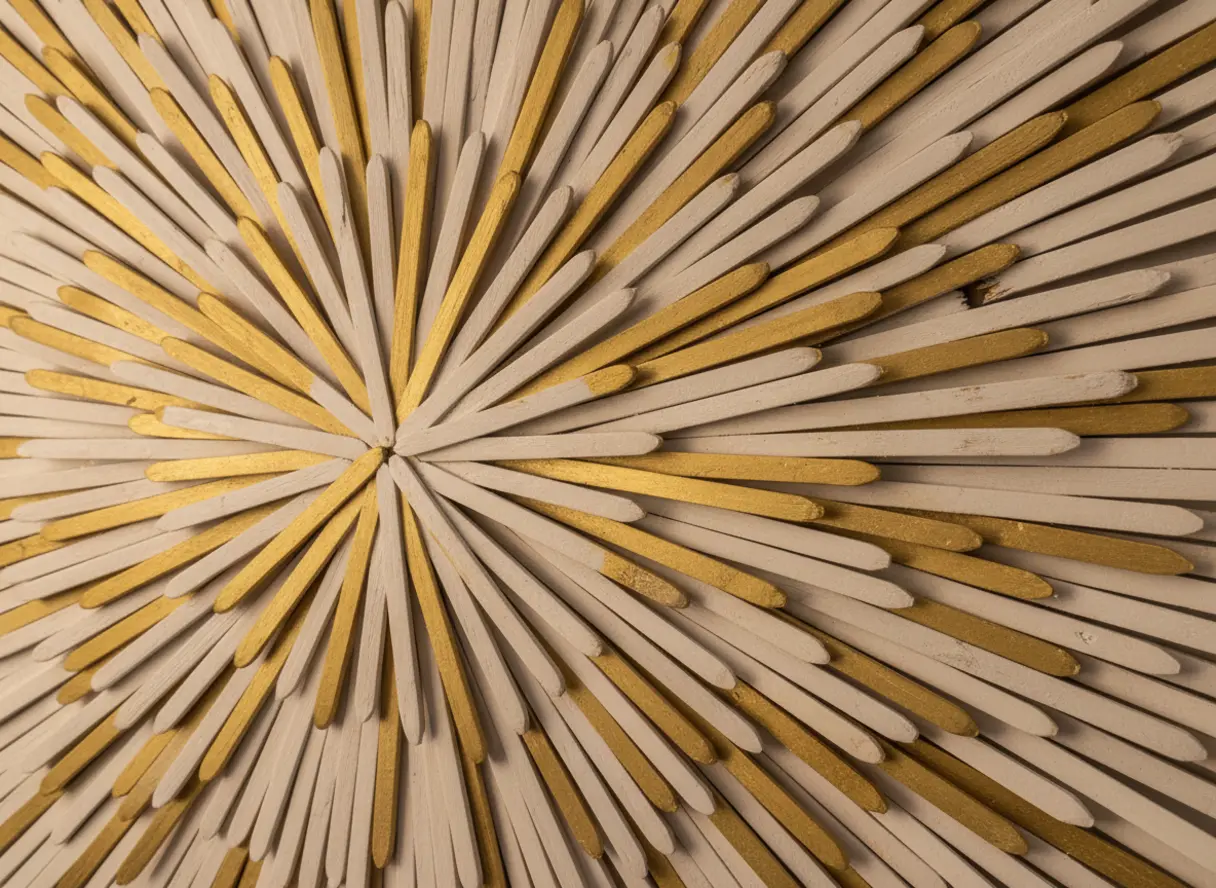
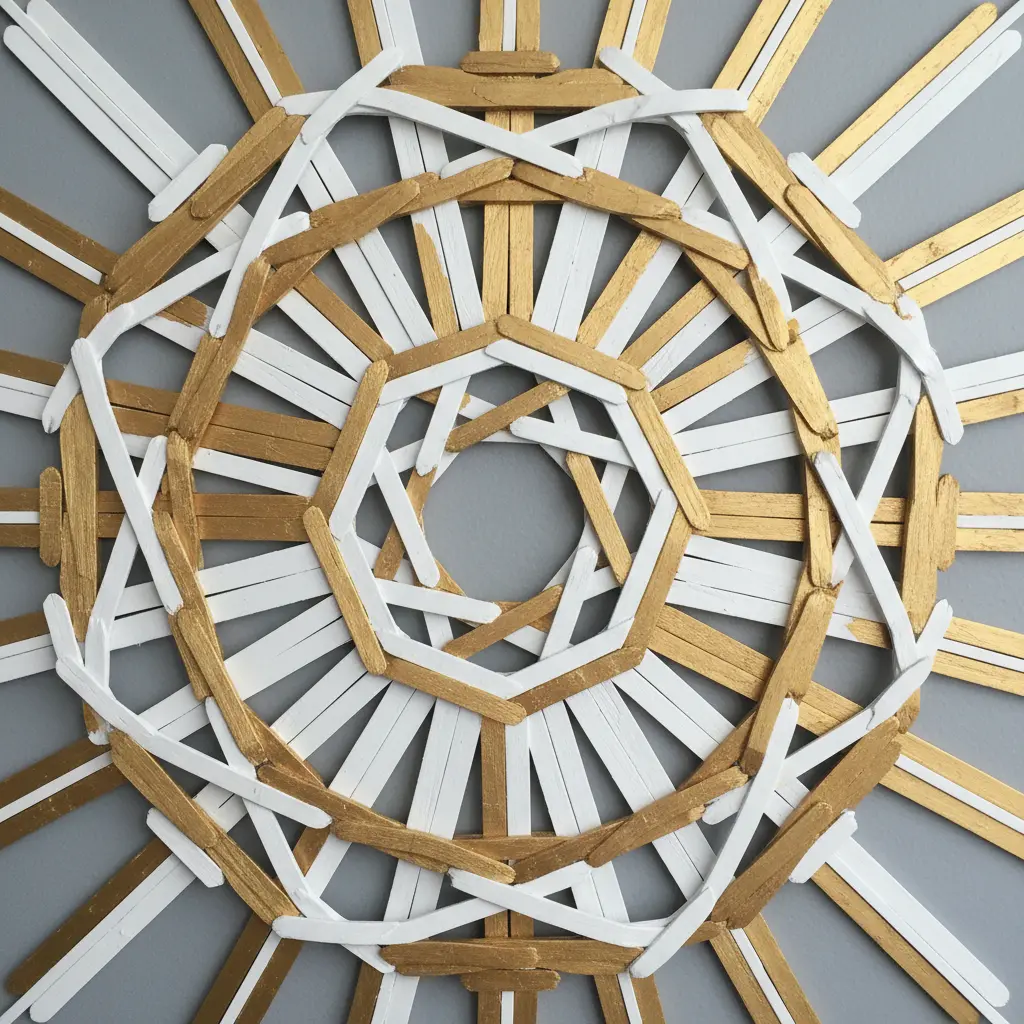
1. Radiant Starburst Sunburst Circular Wall Mirror
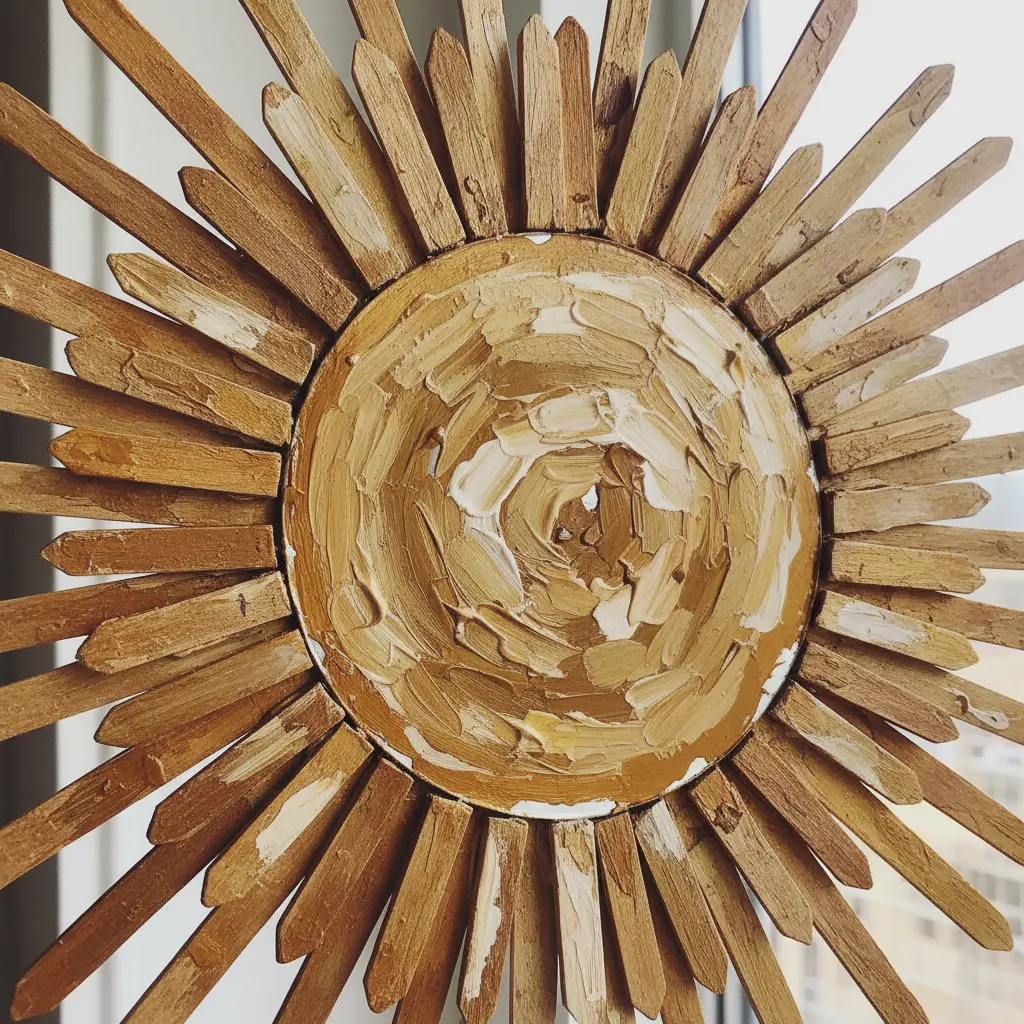
Who would have thought a mirror could be such a showstopper? A sunburst mirror features a round glass center with a frame that explodes outward in rays. That central glass gives you a soft reflection, but the real magic lives in that dynamic, three-dimensional frame. It instantly becomes the focal point of any room you visit.
It works so well because it functions as both gorgeous art and a practical light booster. Those radiating rays scatter and bounce light around, making a space feel brighter and much larger.
Your biggest success tip is to measure your wall space before buying supplies. Use painter’s tape to mark the full diameter on the wall, including all the extending rays. This ensures your new statement piece feels balanced rather than overwhelming, which aligns perfectly with professional popsicle wall art ideas.
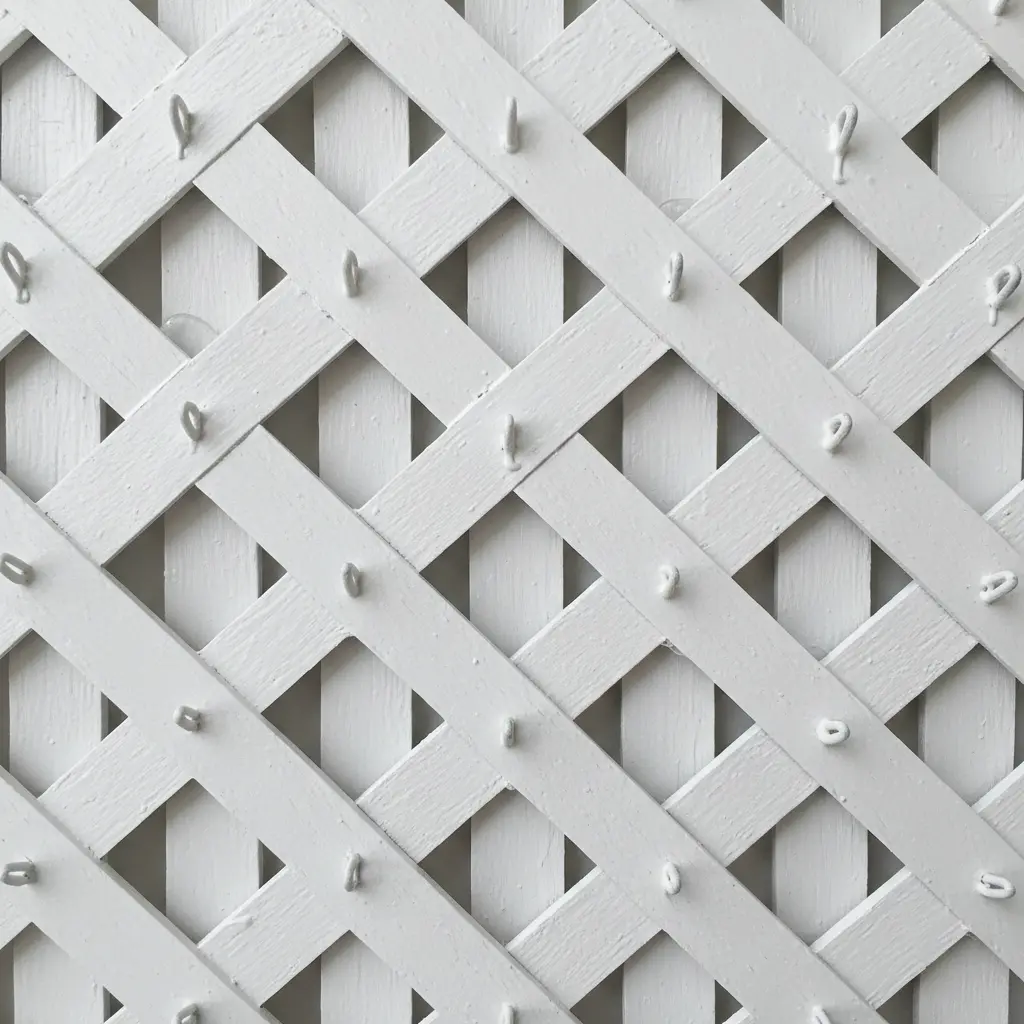
2. Minimalist Geometric Hexagon Wall Mosaic: A Calming Statement
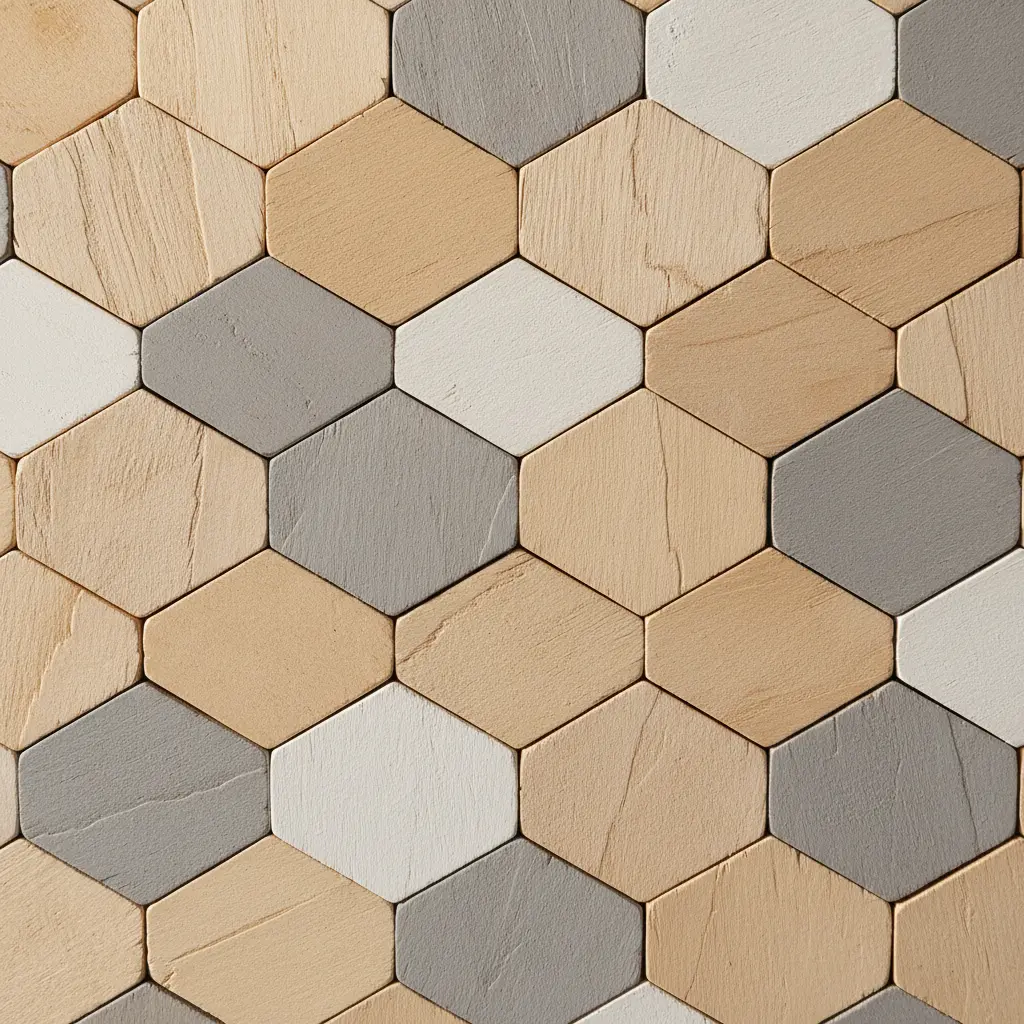
Who would have thought a repeating shape could be so soothing? This project uses basic hexagons arranged in a clean, geometric pattern across your surface. You can build the hexagons from painted craft sticks or use simple ceramic tiles.
The real magic sits in the restrained color palette. I always recommend sticking to soft neutrals or shades of a single hue. I love how this creates a sense of quiet order.
The predictable pattern and muted tones reduce visual noise, making a space feel more open and serene. Isn’t that a lovely feeling for a room? Getting those lines perfectly straight matters most, so spend extra time on your wall layout with a pencil and level.
For a broader look at turning simple shapes into art, a guide to creative wall art ideas can offer more inspiration. Exploring these popsicle wall art ideas will help you lock down a calming aesthetic before you apply a single drop of adhesive.
3. Rustic Woven Basketry Texture Panel — Warmth Without Clutter
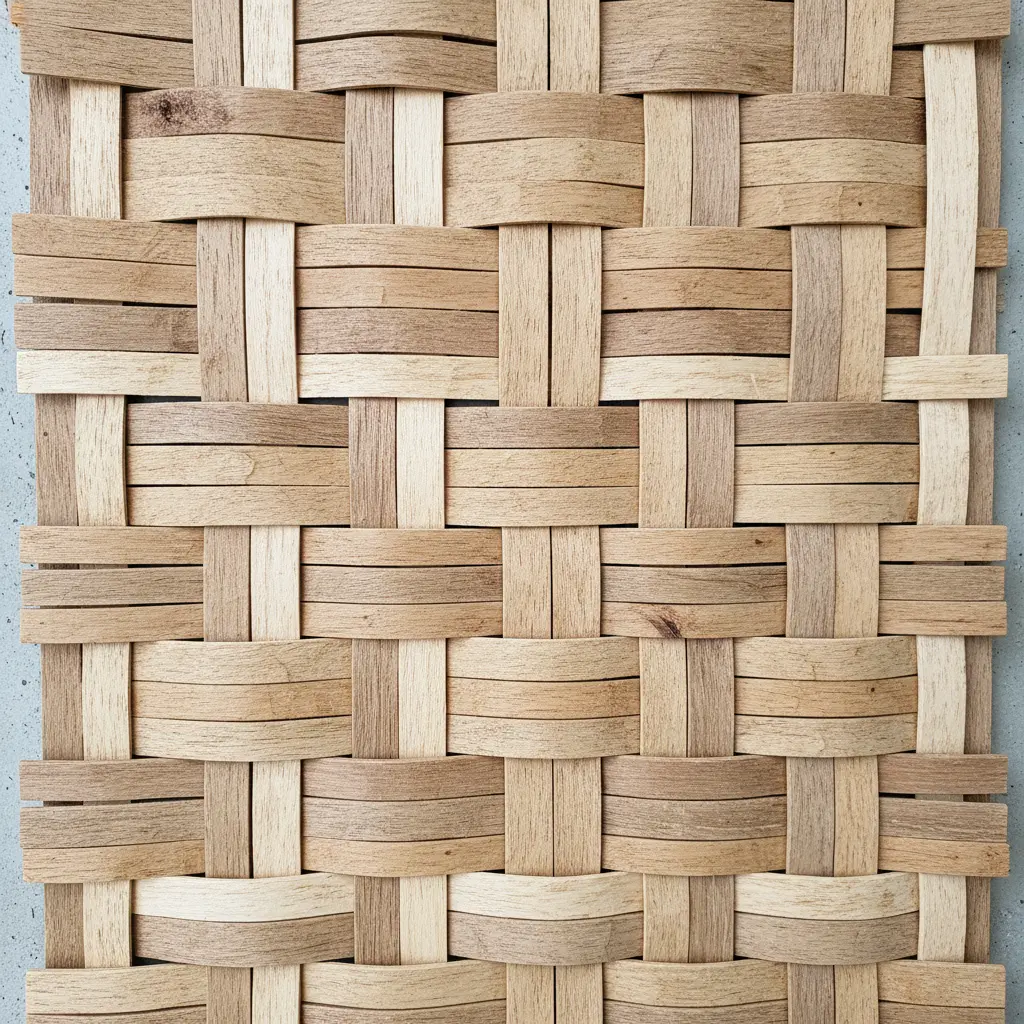
Ever feel like you want a cozy, natural look but dread adding more stuff to dust? This serves as your perfect solution. A woven texture panel delivers organic, handcrafted charm without taking up floor or shelf space.
You can source actual thin rattan pieces or textured wallpaper with a convincing pattern. Installation stays straightforward. Measure your target area, cut the material to fit, and apply it with strong adhesive.
I love how the earthy tones and matte finish instantly warm up a room. The secret rests in choosing a low-sheen finish to keep that authentic, rustic feel intact. Adding texture through these popsicle wall art ideas brings instant calm without overwhelming your design scheme.
4. Layered Color Block Abstract Plaque
This one looks so modern and complex, but trust me, the technique remains straightforward. You begin with a simple wooden plaque or board as your base foundation. Then layer painted geometric shapes on top, building dimension with each new addition.
The magic lives in the bold, solid colors you select and how you arrange those blocks. It works because the physical layers cast real shadows, giving you a depth impossible to achieve from a flat painting.
A quick tip I love involves laying all pieces out before gluing to play with the composition. Exploring these layered popsicle wall art ideas helps you experiment with shadows before committing to adhesive.
5. Intricate Radial Mandala Wall Sculpture
Ever feel drawn to a piece that seems to radiate calm and complexity at once? That defines the magic of an intricate radial mandala sculpture. The process starts with a precise digital design, then moves to a laser cutter or CNC router for carving detailed patterns into your chosen material.
You will assemble these pieces in carefully aligned layers to build up three-dimensional depth. I love how the finished piece creates a dynamic play of light and shadow on your wall, shifting throughout the day. The symmetry offers a focal point that feels both stimulating and deeply harmonious.
Getting alignment perfect matters most, so take your time and use strong adhesive. For a simpler starting point before tackling a full sculpture, try some easy painting project ideas to practice radial patterns on flat paper. Working through these popsicle wall art ideas prepares you for advanced layering techniques.
6. Modernist Scandinavian Style Stick House: Simple Wood Silhouette
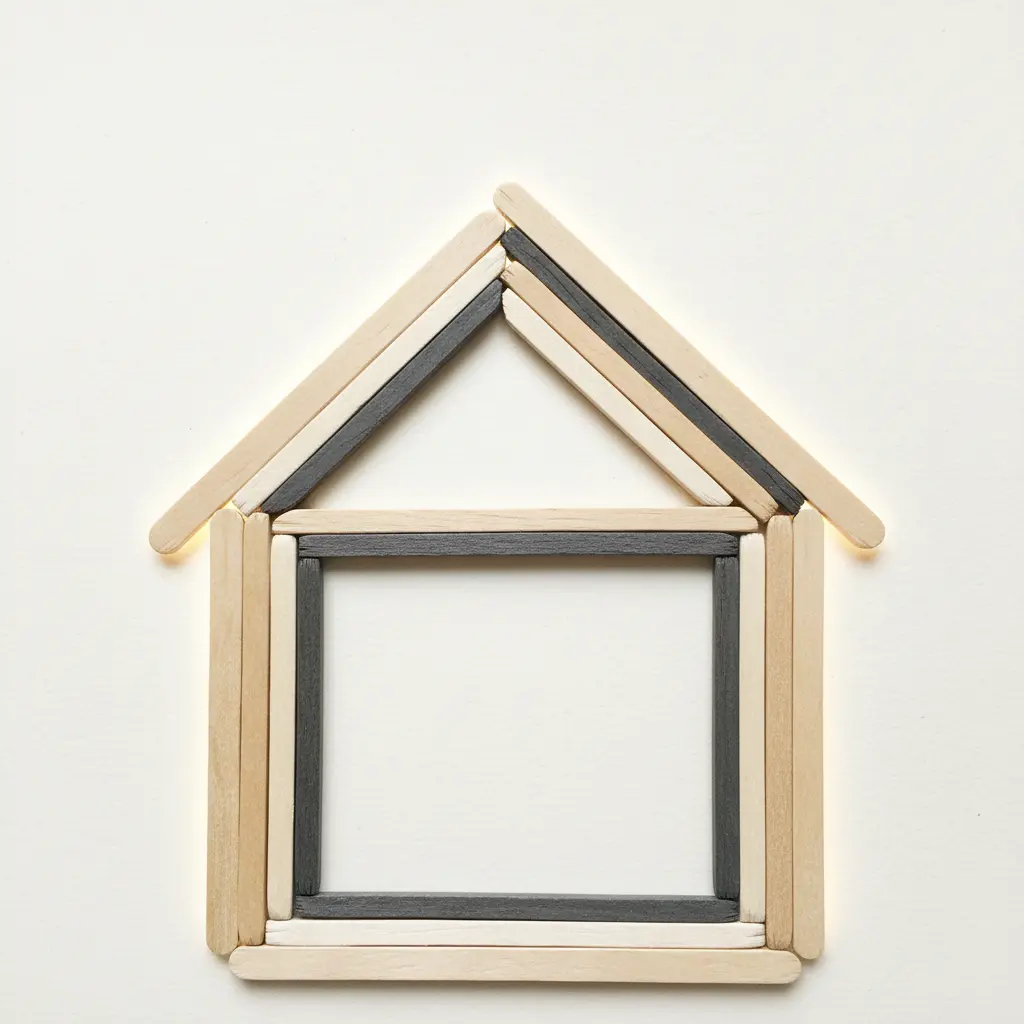
This one arrives like a breath of fresh air. The design strips a house down to its absolute essentials, creating a simple graphic silhouette against your surface. You will focus on a minimalist form, like a clean gable or flat roof, and let the exposed structure shine as the star.
You will use light-colored wood for both the frame and siding, often leaving it natural or stained in a muted tone. The magic sits in those large, unadorned openings that flood the space with airiness. I love how this style feels honest and calm.
Your key to nailing this look demands strict simplicity. Skip ornamentation and focus on precise construction. The quality of your materials will speak loudly, and your result will stun viewers. Exploring these popsicle wall art ideas gives you a clean baseline for pairing with other wood projects, like some patriotic popsicle stick crafts.
7. Bold Vertical Abstract Chevron Tapestry
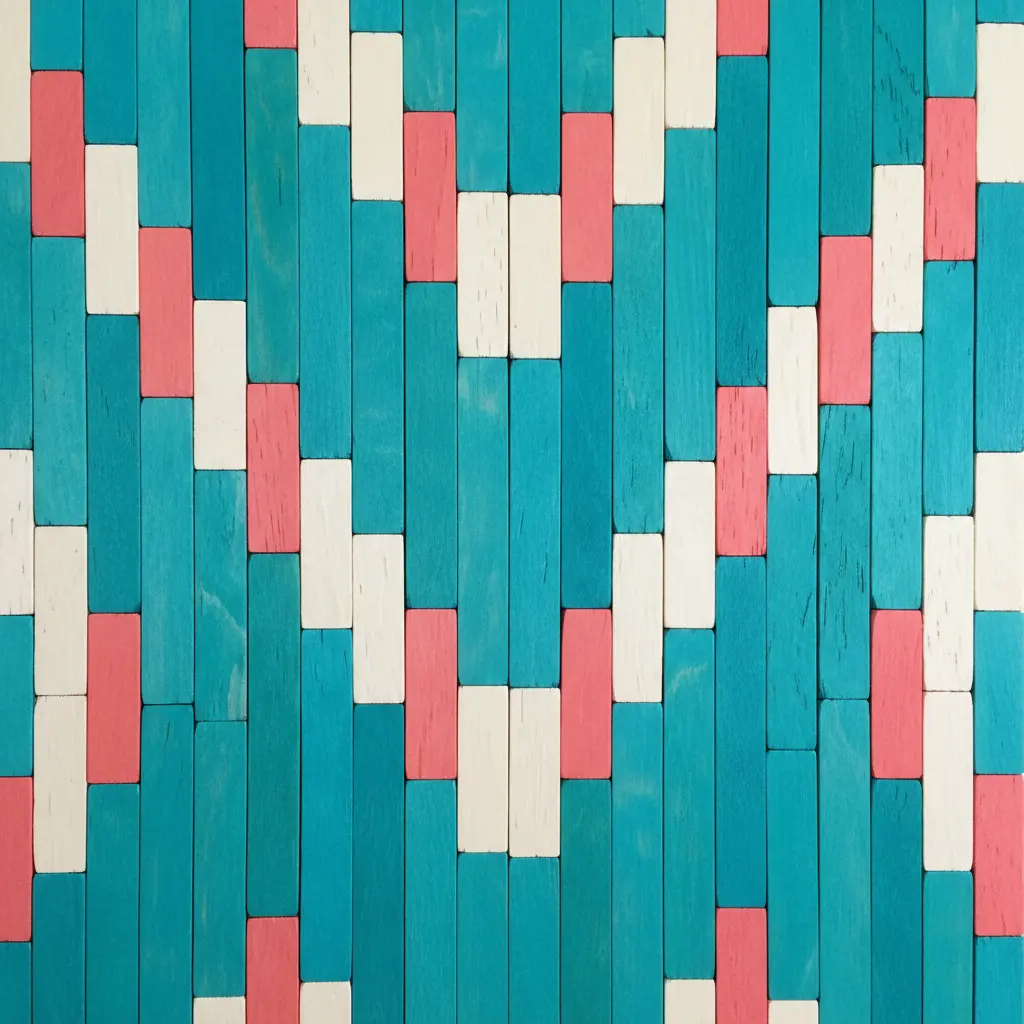
Ever feel like a room needs a jolt of energy without adding physical clutter? This answers your call. A bold vertical abstract chevron piece delivers graphic punch through a strong zigzag pattern running top to bottom. It makes your walls feel taller and your space more dynamic.
The magic relies on your vertical orientation and sharp, contrasting colors. Think deep navy paired with bright mustard, or stark black and white for maximum impact. The abstract approach means the chevrons vary in size, keeping the design modern rather than rigid.
It works because it functions as a statement piece that never overwhelms. Your eye follows those lines upward, creating a fantastic sense of height. Testing these popsicle wall art ideas helps you build similar visual rhythm that you might later apply to simple paper collage projects with your kids.
8. Layered Lattice Grid Wall Organizer — Functional Art Piece
Ever feel like your wall storage needs a visual upgrade? This transforms a simple grid into a sculptural element. You design overlapping layers using different patterns and depths. Attach metal standoffs to mount these grids at varying distances from your surface, creating incredible shadow play.
I love how you can secure hooks, clips, or tiny shelves directly onto the layers. This shifts the piece from a basic organizer into a dynamic, functional sculpture. The key to success involves experimenting with your grid materials and mapping spacing before committing.
Trust me, the final effect delivers daily satisfaction. Building these functional popsicle wall art ideas turns everyday organization into a visual feature you actually enjoy using.
9. Textured Bohemian Fringe Yarn Tassel Art
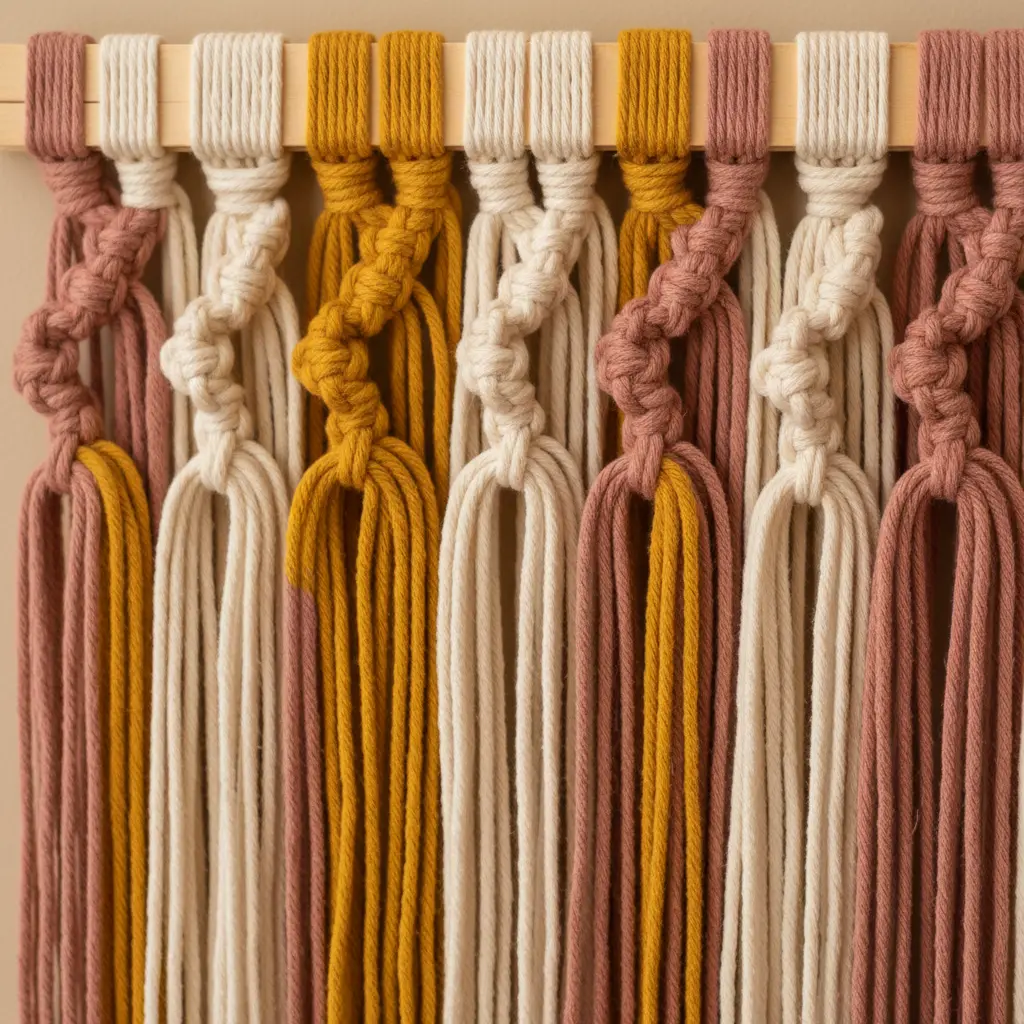
This one looks wonderfully complex but remains surprisingly simple to assemble. Start by selecting a wooden dowel or natural branch as your anchor. Cut various yarns to different lengths and attach them using lark’s head knots to build lush, layered fringe.
I love adding wooden beads or feathers into the mix for extra personality. All those different textures create incredible depth and movement across your surface. The best trick involves using a pet brush to gently fluff yarn ends after knotting.
This delivers that soft, full bohemian aesthetic you are chasing. It serves as a fantastic project for kids since the process stays tactile and forgiving. Gathering these tactile popsicle wall art ideas makes your weekend crafting feel relaxed and deeply rewarding.
10. Charming Miniature 3D Stick Farmhouse Facade
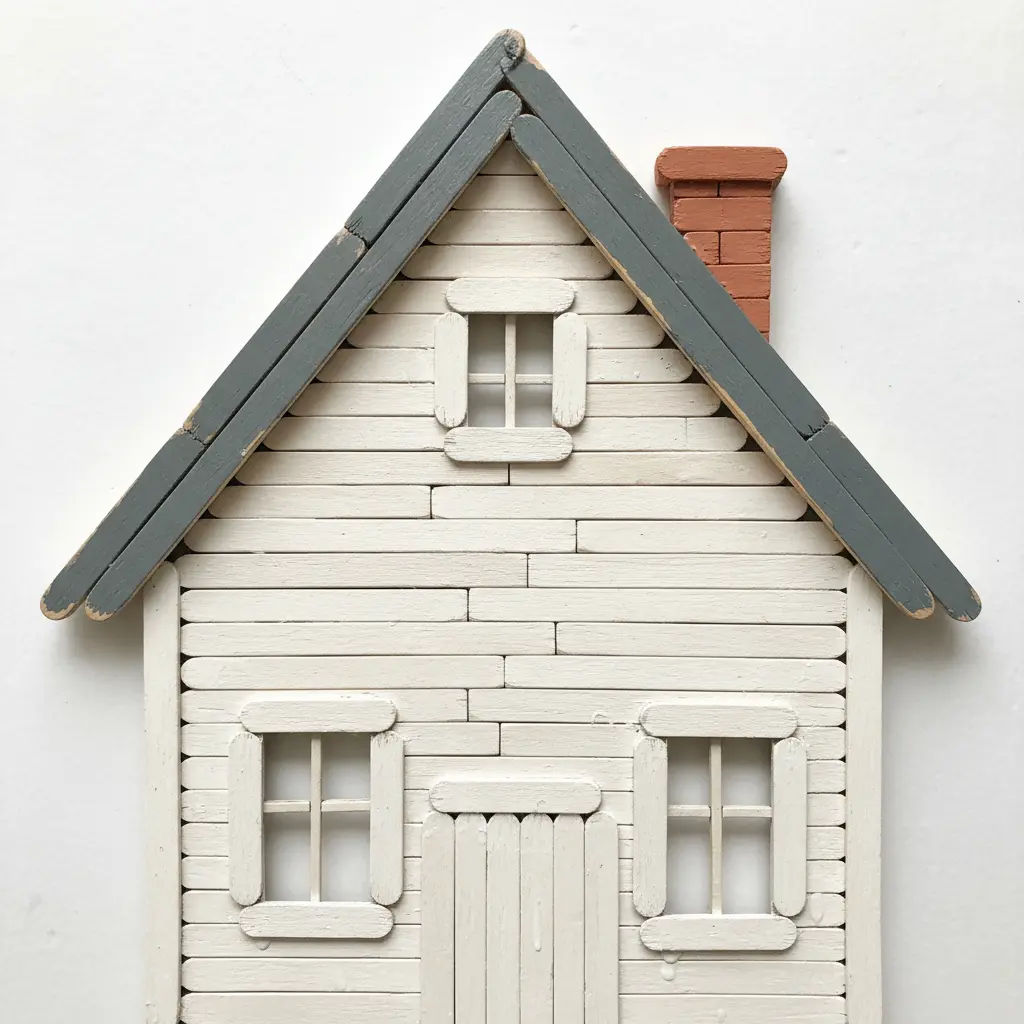
Who would have thought you could build a complete house front from a pile of sticks? This looks intricate, but the construction stays straightforward. Glue craft sticks side-by-side to form the main walls, carefully opening gaps for windows and doors. Then assemble a tiny porch with railings and cap it with a classic gabled roof.
I love how this converts basic materials into a detailed, nostalgic scene. The real magic happens during the final coating. A sweep of muted blue or classic cream makes it feel authentic.
Sound complicated? It is not. Take your time with the adhesive so every piece holds firmly. Once your little facade dries, it sits perfectly as a shelf accent. Trying out these structural popsicle wall art ideas prepares you for pairing it with unique popsicle stick puzzles on the same shelf.
Mounting and Hardware Strategies for Lightweight Wall Art
A finished piece feels surprisingly dense, so standard picture hooks often lead to crooked results. You need hardware rated for twice the assembled weight, like small D-ring hangers driven into a cross-brace with short screws.
For larger formats, install two hooks on the wall and run wire between the D-rings to distribute load evenly. This keeps everything level and secure. Before you finalize installation, add felt pads to each bottom corner to protect your surface and prevent shifting.
Understanding the mounting side of popsicle wall art ideas guarantees your geometric construction stays perfectly aligned. This final step transforms your project into a permanent part of your room’s daily view.
Conclusion
Watching simple wooden sticks merge into a piece that feels intentional and personal brings deep satisfaction. These popsicle wall art ideas remind us that creativity does not require expensive supplies or expert training, only a willingness to play and a little patience.
After finishing your project, seal it with matte varnish to preserve crisp lines for years, and never rush the glue drying stages. No two pieces ever look exactly identical, so your wall will always carry a story uniquely yours. Scale up your favorite design next time, or mix techniques like weaving and painting into a single layout. Enjoy the process and the quiet pride that comes with hanging something shaped by your own hands.
FAQs
Q: What type of glue works best for popsicle stick wall art?
A: A strong wood glue or clear-drying craft glue designed for porous surfaces delivers the best results. Avoid school glue, as it struggles under the weight of layered sticks. For extra durability, use a hot glue gun for quick assembly and reinforce with wood glue for long-term strength.
Q: Can I use painted or colored craft sticks for these projects?
A: Yes, you can paint sticks before or after assembly. Acrylic paint adheres tightly and dries quickly. If you prefer stained wood, use a water-based wood stain, then seal with varnish to lock the finish.
Q: How do I hang popsicle stick wall art without damaging the wall?
A: Lightweight designs stay secure with adhesive picture-hanging strips. For heavier pieces, attach a sawtooth hanger to the back with strong glue or small screws, then use a standard wall nail. Always test the total weight before final mounting.
Q: Do I need to seal the finished popsicle stick art?
A: Sealing with matte or satin varnish shields against dust and moisture, especially in humid rooms. Apply two thin coats with a foam brush, letting each dry fully before applying the next.
Q: What are some creative ways to add texture without using extra materials?
A: Try scoring shallow lines into the sticks with a craft knife to mimic wood grain, or lightly sand selected sections for tonal contrast. Arranging sticks at varying angles or overlapping them creates subtle shadow lines that boost visual depth.


