
Looking for a fun and creative project to do with your kids? A DIY Mason Jar Aquarium Lamp is the perfect craft! This easy, hands-on activity lets children explore their artistic side while creating a beautiful, glowing “aquarium” that doubles as a nightlight. With just a few simple materials, you can make a unique lamp that sparks imagination and adds a calming underwater ambiance to any room.
My kids have been wanting another fish lately. So, instead of going the live fish route. I decided to create a faux fish aquarium out of a mason jar and also made it a working lamp. This DIY lamp is so simple to create. You can make a couple of lamps in no time, and you just might want to, because if you have a couple of kids… they will ALL want one.

DIY Mason Jar Aquarium Lamp for Kids
With just a few simple supplies you will have a fun and very real looking, DIY fish aquarium lamp.
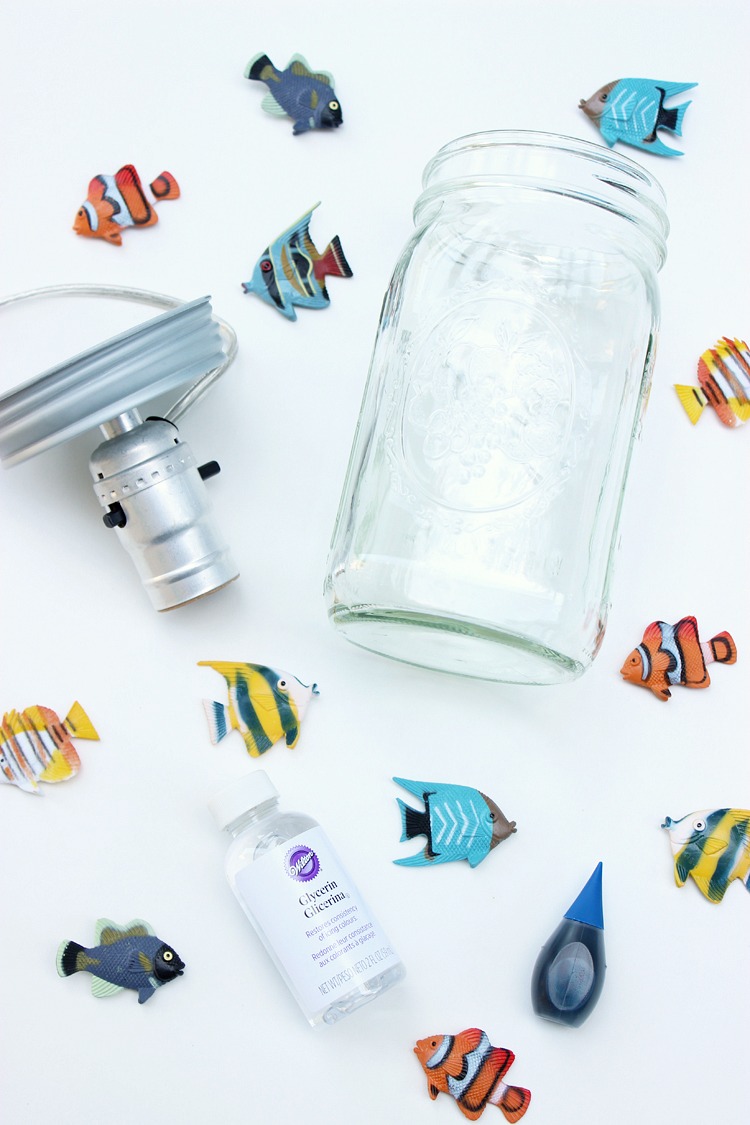
Aquarium DIY Lamp Supplies:
- Large Mouth Mason Jar
- Darice Canning Lamp Adapter
- Darice Plastic Tropical Fish
- 10″ Lamp Shade
- Light Bulb
- Blue Food Coloring & (2) Packages of Knox Gelatin
- Hot Glue & Hot Glue Gun
- Piece of Press n’ Seal
- Tweezers
Step 1: Fill the mason jar with water. Add two drops of food coloring and stir.
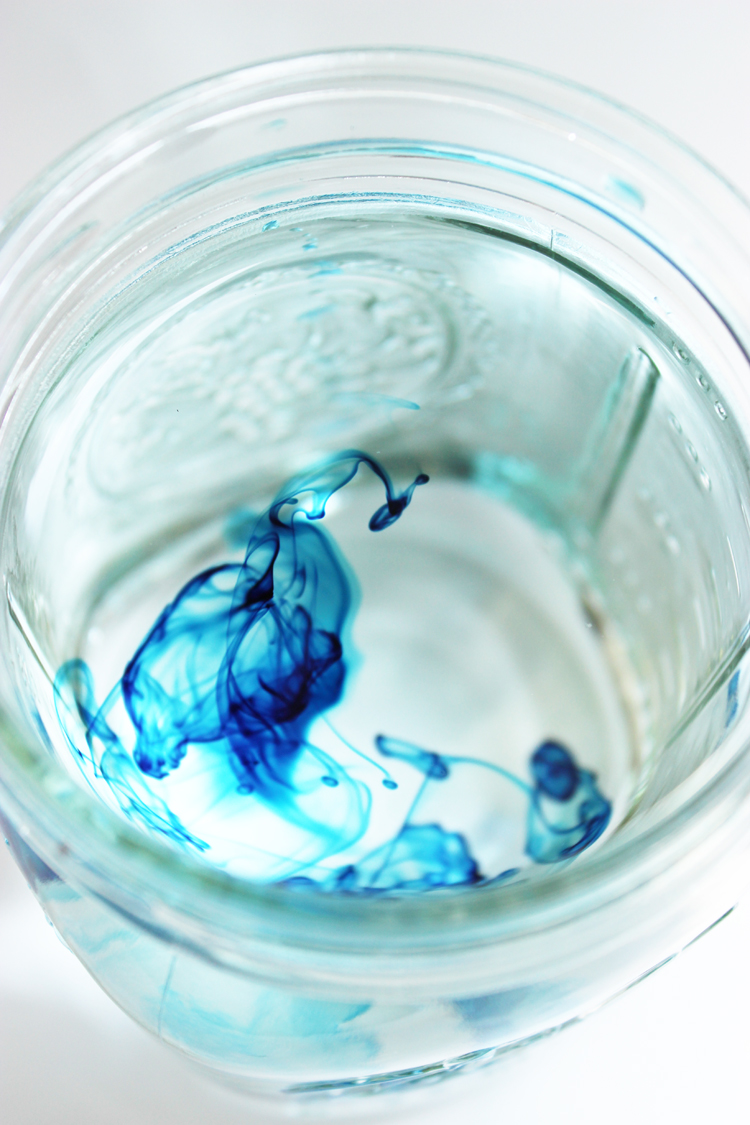
Step 2: Next, pour this into a pot. Add just a little extra water to account for evaporation when boiling. Add two packages of Knox Gelatin. Whisk the mixture until the gelatin has dissolved. Bring to a boil. Once the mixture has been brought to a boil, let it cool. Transfer to to the mason jar once it has cooled off considerably.
Step 3: Place in the fridge. Let this cool for about an hour to two. Check on the progress of the gelatin. Don’t let it to get too firm. Otherwise, it will be very difficult to insert the fish.
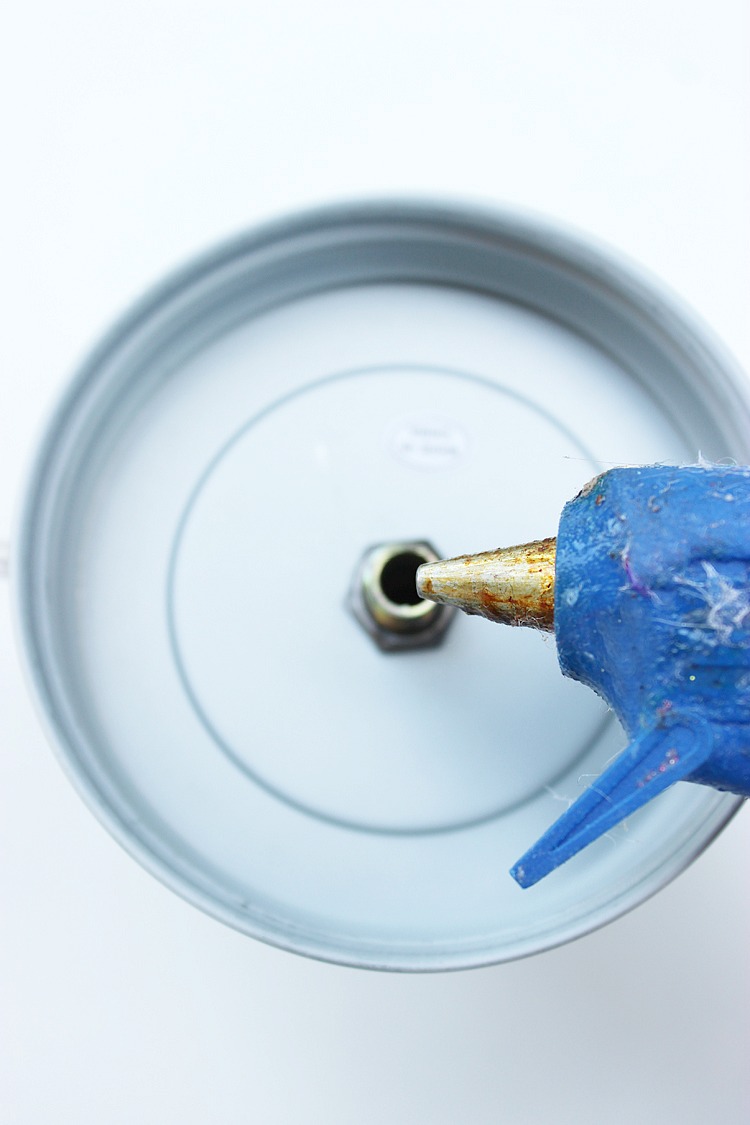
Step 4: While the gelatin is cooling, place a little amount of hot glue in the hole of the canning lamp adapter. This is for safety. It will seal the opening and make sure no liquid gets into the actual DIY lamp.
Step 5: Once the gelatin has set up, but is not completely firm, take and insert the plastic tropical fish.
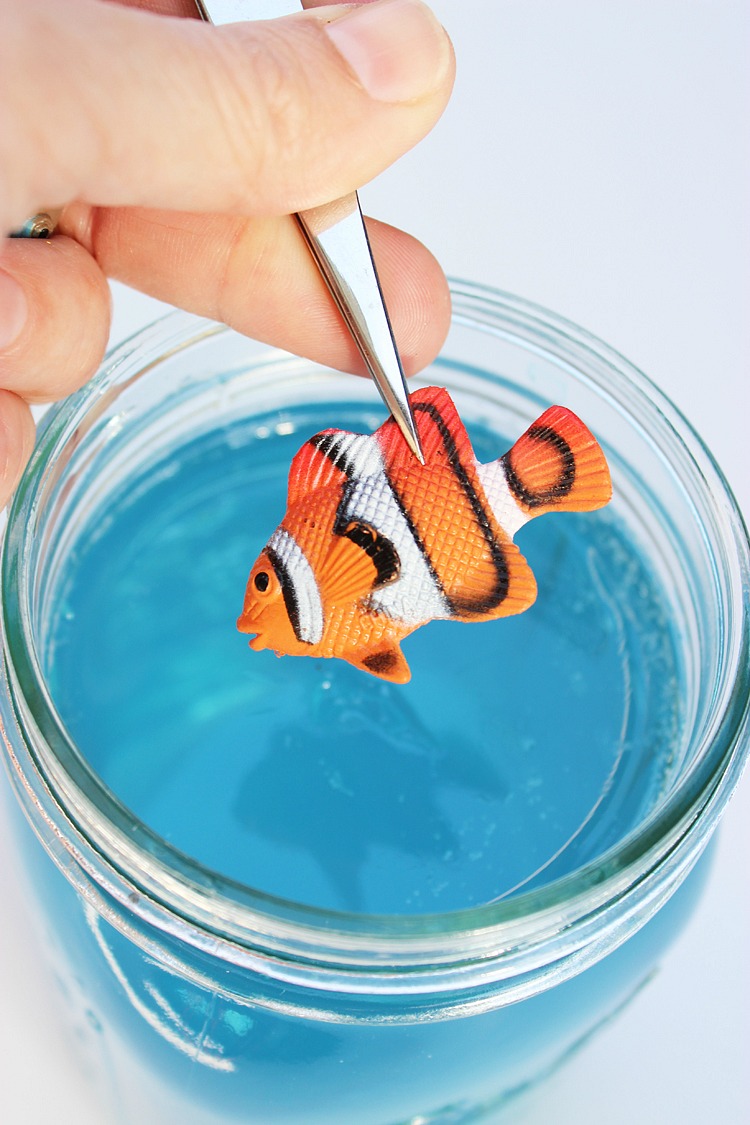
Step 6: Cut a piece of Press n” Seal wide enough to cover the opening of the jar. Cover the top, and trim if necessary.
Step 7: Screw the canning DIY lamp adapter onto the jar. It will screw in place with the Press n’ Seal on it. If you want to insure that the lid doesn’t come off, super glue under the rim to keep it in place.

If you move the DIY lamp, the fish actually jiggle like they are moving.
My kids love this lamp! I now have to make another because both of my girls loved this one so much. The best part… maintenance free and the fish won’t die! ![]()
Creating a DIY Mason Jar Aquarium Lamp is a rewarding project that brings creativity and fun together. It’s a fantastic way to bond with your kids while making a functional and decorative item they’ll love. Try it out and share your experience! Let us know in the comments how your aquarium lamp turned out—we’d love to see your creations.
FAQs
Q: What Is a DIY Mason Jar Aquarium Lamp?
A: A DIY Mason Jar Aquarium Lamp is a creative project where you use a mason jar, LED lights, and decorative items like fish figurines or seashells to create a glowing, aquarium-themed lamp.
Q: How Do You Make a Mason Jar Aquarium Lamp for Kids?
A: Making a DIY Mason Jar Aquarium Lamp is simple! Fill a mason jar with water or decorative gel, add small plastic fish, seashells, and LED lights, then seal the jar. It’s a fun and easy craft for kids.
Q: Is the DIY Mason Jar Aquarium Lamp Safe for Kids?
A: Yes, the DIY Mason Jar Aquarium Lamp is a safe project when using kid-friendly materials like plastic figurines and battery-operated LED lights. Always supervise young children during assembly.


