Choosing Sturdy Bases for Active Trick or Treating
A tall milk carton makes a perfect body for a friendly monster because its rigid construction holds up to a full load of candy. The secret here is that exploring halloween treat boxes ideas means your base material must support the weight of treats plus all the decorations you add. You want a recycled cereal box for a shorter, squarer shape or a small juice carton for a triangular witch’s hat design.
Trust me on this, the weight-to-support ratio is everything when your child is running from house to house. A common mistake is picking a box that looks cute but feels flimsy in your hands before you even start decorating. A solid foundation like a clean milk carton ensures your creation survives the night and becomes a keepsake, not a casualty.
Selecting Adhesives for Secure Multi Material Construction
A low-temperature glue gun is your best friend for attaching googly eyes and felt scraps because it creates a bond that won’t fail when the box gets jostled. The problem with standard glue sticks is they struggle with mixed materials, like securing a pipe cleaner to a painted cardboard surface. Hot glue forms a flexible, strong hold that easily manages the textures required for most halloween treat boxes ideas, from fuzzy pom-poms to slick plastic accents.
You will notice that decorations stay put, which is crucial for maintaining that spooky character you worked so hard to create. For optimal results, apply adhesive to the entire back of your embellishment, not just the center, to prevent curling edges. This method locks down those 3D elements so your little ghost or pumpkin looks fantastic from every angle.
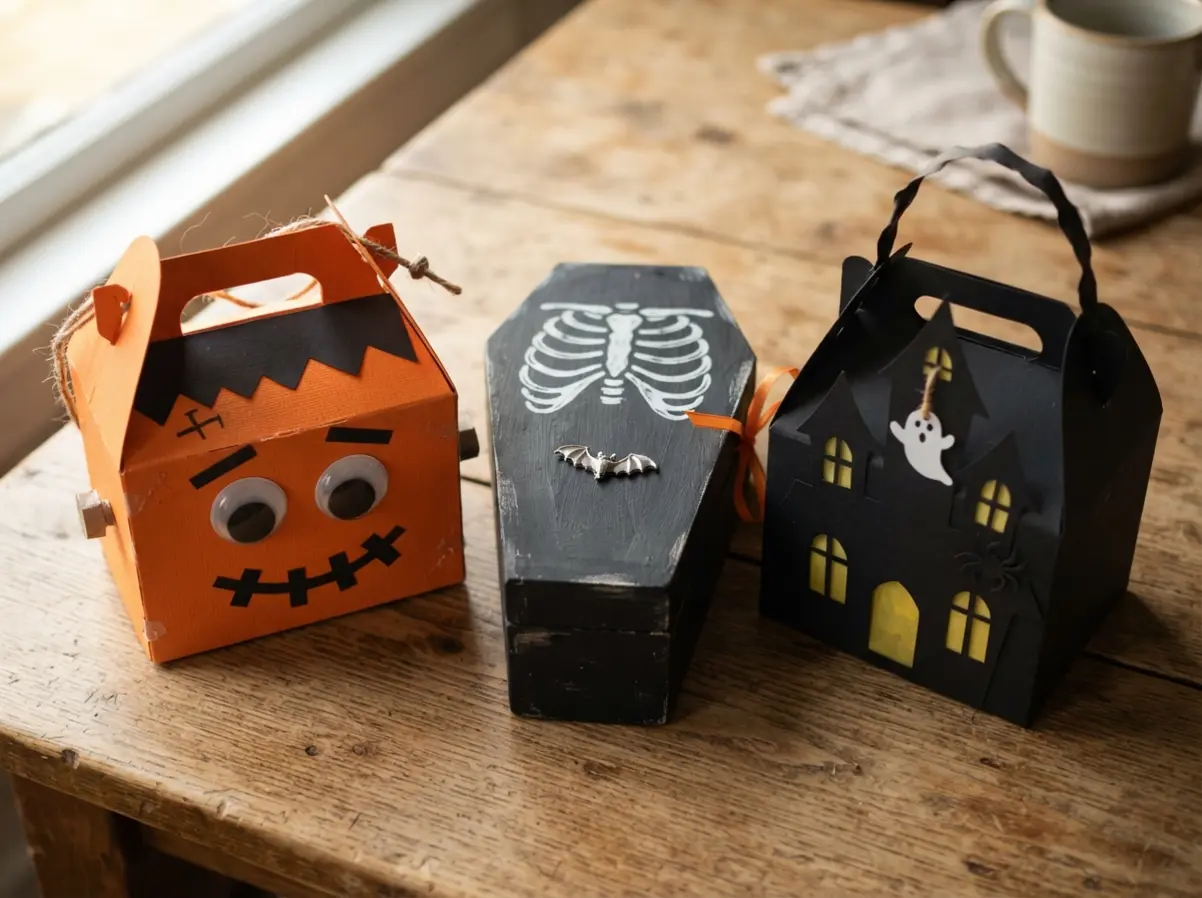
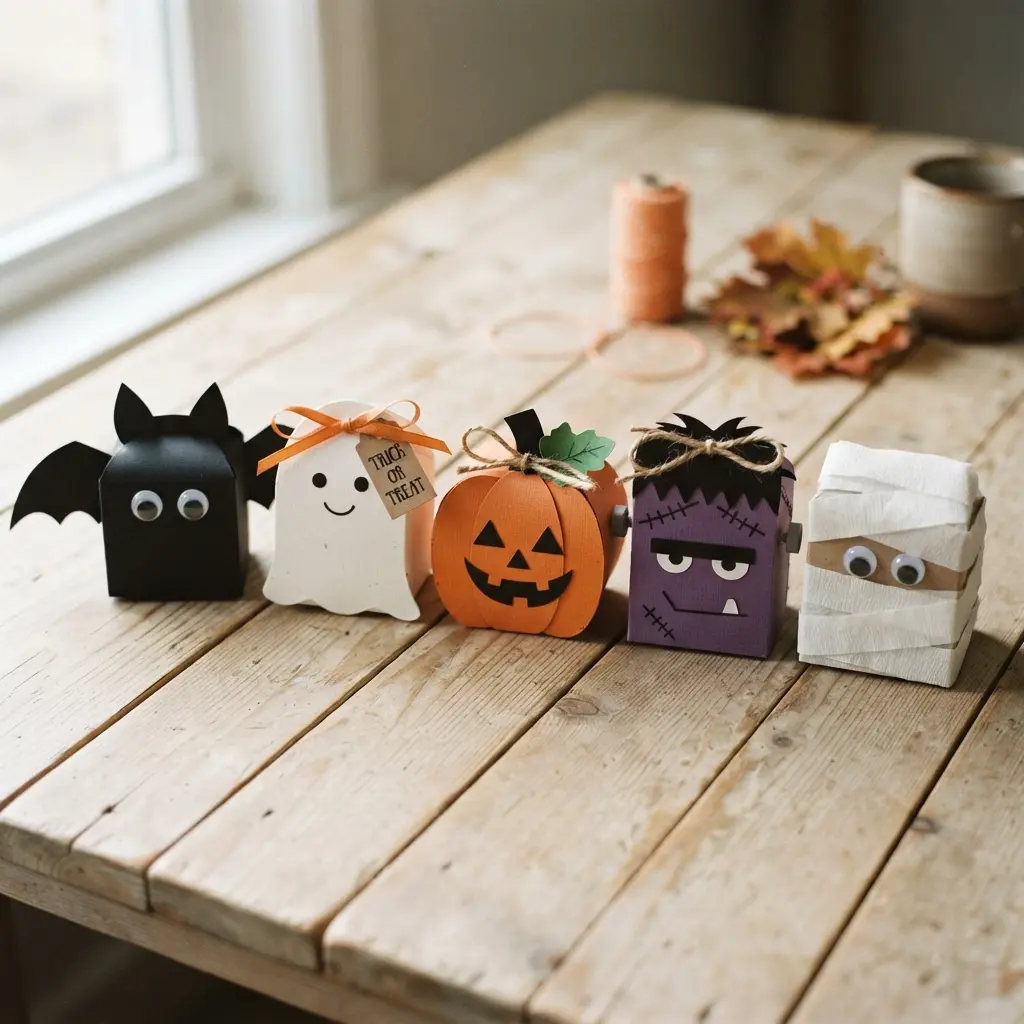
1. Gable Box Paper Monster Faces — A Playful Classic
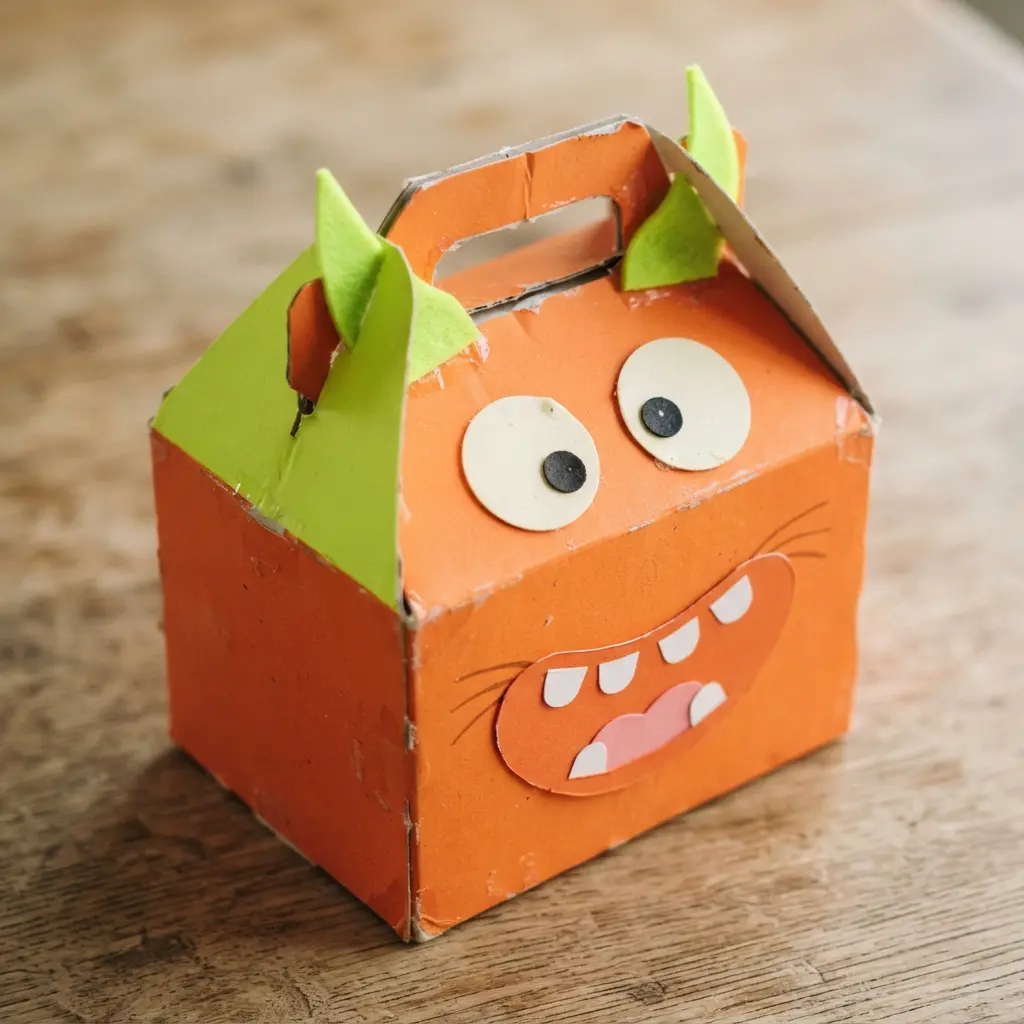
Who would have thought a plain box could become such a perfect canvas for a friendly monster? You start with a simple gable box and some colored paper, then let your imagination run wild. Cut out big, silly eyes, a toothy grin, and maybe some wild hair or horns.
I love how this project turns a basic container into a playful character you can actually use to hold treats. The best part is that there is no wrong way to approach these halloween treat boxes ideas. This open-ended creativity works because it builds artistic confidence, especially for kids.
They get to make a unique monster toy that also stores their little treasures. Sound complicated? It is not that hard when you keep your shapes bold and your glue stick ready.
This makes a fantastic first project before you try more intricate seasonal decor, like a DIY Halloween wreath craft ideas. Feel proud when you see your silly creation come to life.
2. Hand-Painted Wooden Coffin Keepsake Boxes
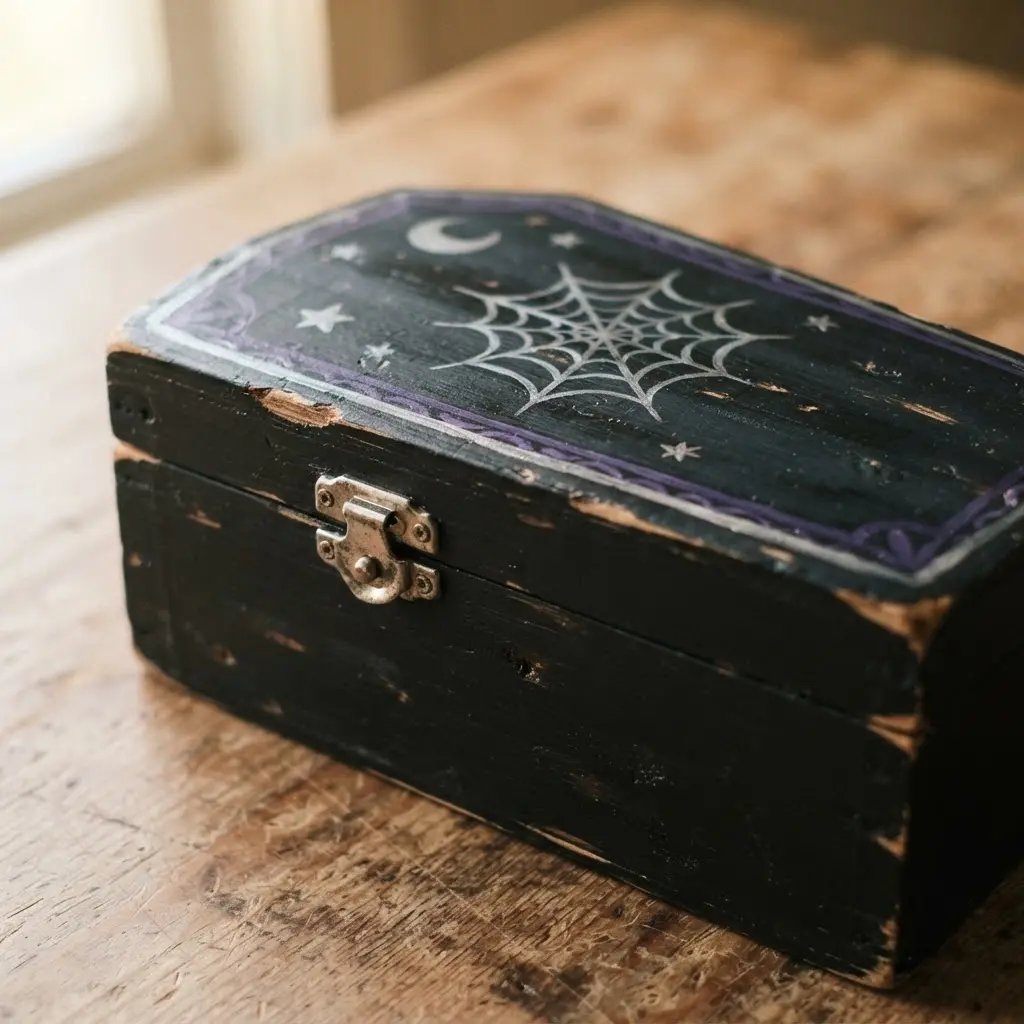
This one looks so intricate, but diving into popular halloween treat boxes ideas is incredibly approachable for beginners. You start with a simple wooden box and transform it with your own acrylic paints. The process is all about building layers, from a smooth base coat to those detailed skulls or floral patterns you sketch out first.
What makes it so satisfying is the dual purpose. It is a perfect, personalized trick-or-treat container that becomes a cherished keepsake afterward. I love that it holds memories long after the candy is gone.
Pro tip: the key to a lasting finish is applying several thin coats of a clear sealant. For a lovely finishing touch, tuck a few printable Halloween gift tags inside with a special message.
3. Black Cardstock Haunted House Carriers
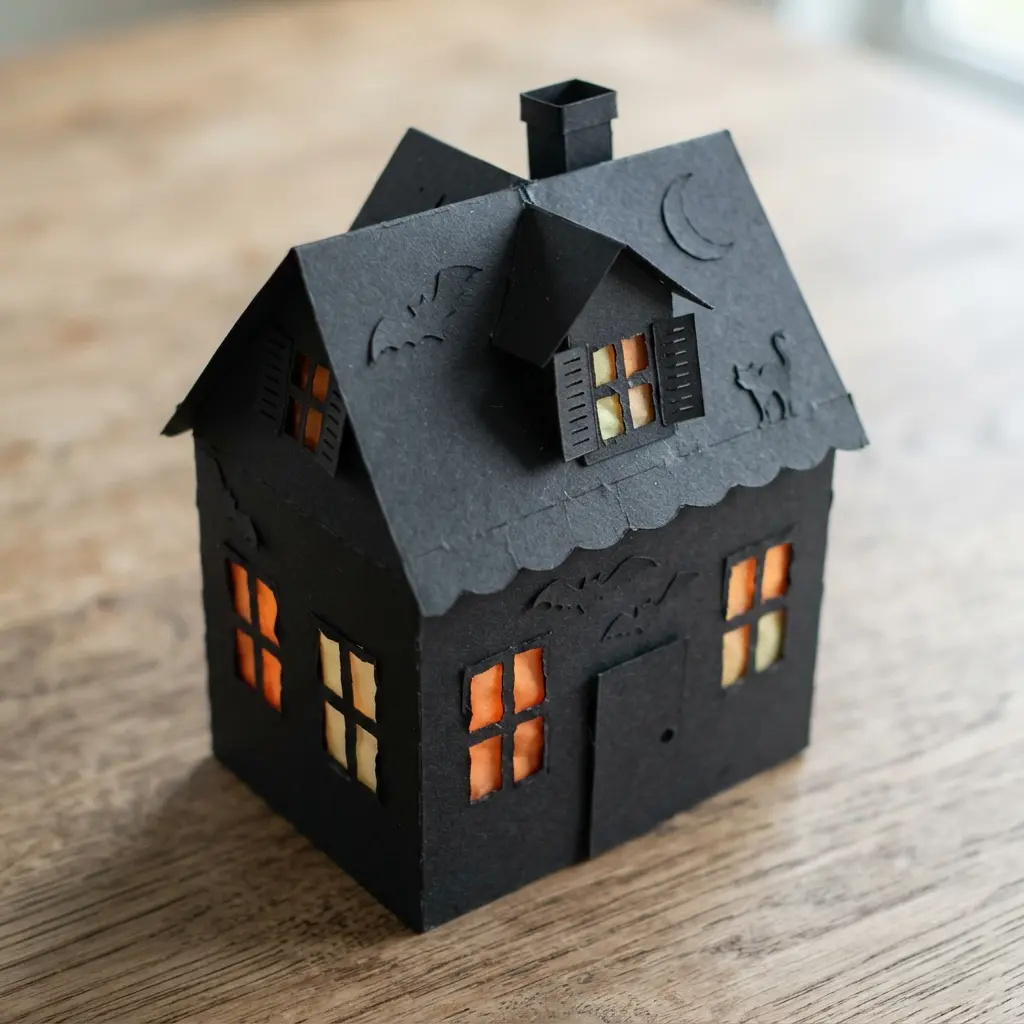
This design looks so intricate, but it is surprisingly quick to put together when exploring halloween treat boxes ideas for beginners. You will cut the main shape from black cardstock and score the fold lines for a crisp house shape, then glue the tabs to assemble it. I love adding contrasting paper details for windows and doors to make it pop.
These carriers work because they feel like a special, handmade part of the holiday, not just a plain bag. A pro tip for a clean finish is to use a bone folder on every scored line before you glue. If you are making these with younger crafters, pairing them with some easy Halloween costumes for kids makes for a fantastic, coordinated project day.
The final look is so spooky and satisfying. Your porch will instantly look like something out of a storybook. These handmade pieces bring a cozy, personalized vibe to any front step.
4. Felt Bat Wing Embellished Boxes
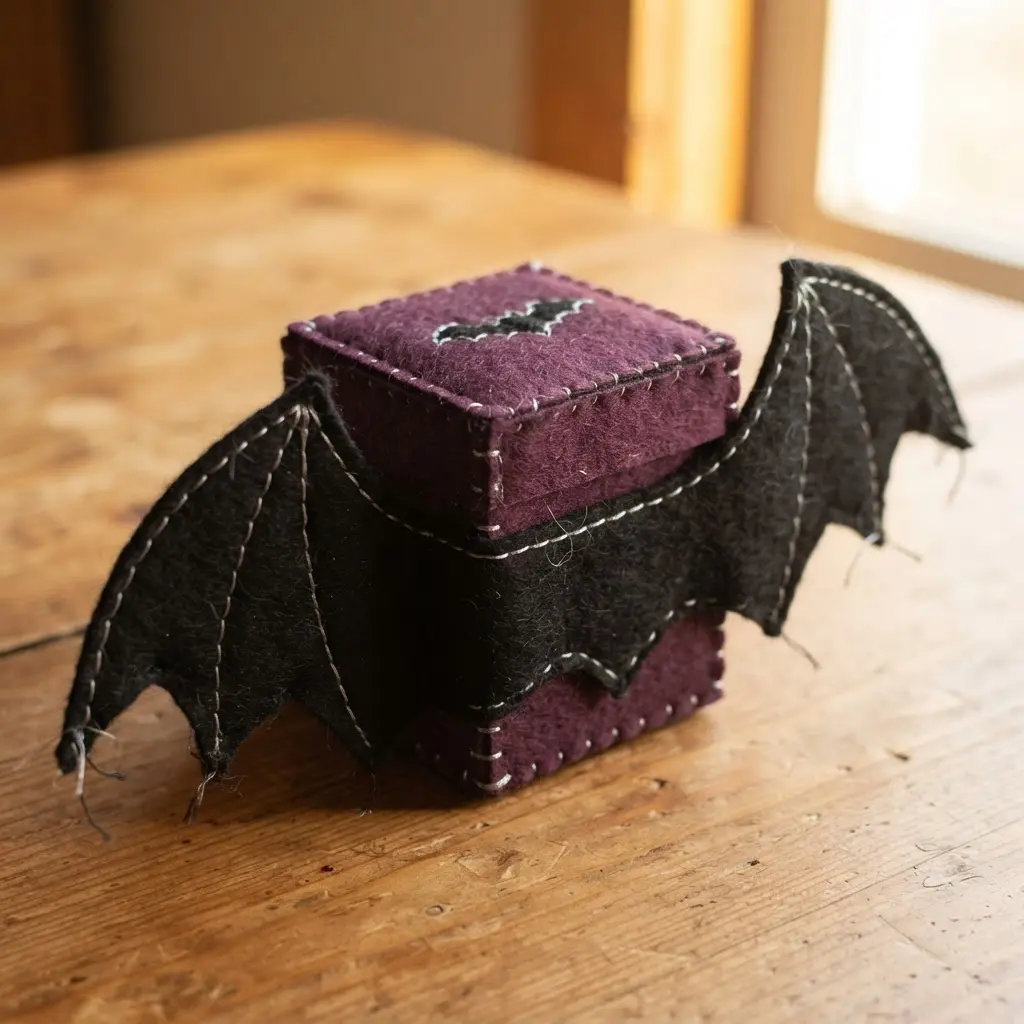
Who says treat boxes have to be plain when exploring fun halloween treat boxes ideas? This idea is all about creating a spooky silhouette with some soft felt. You take a simple cardboard box and glue on a pair of felt bat wings, instantly transforming it into a little creature ready for Halloween night.
It is surprisingly easy and lets you play with colors like deep purple or grey for a different look. Your main task is cutting the wing shapes cleanly from the felt. I love using a hot glue gun for this because it gives a strong, instant bond to the box.
For a truly memorable party favor, fill your bat-winged box with candy and pair it with some magical witch crafts for Halloween on your table. The combination makes for a wonderfully thematic display your guests will adore.
5. Witch Cauldron Decorated Gift Pails
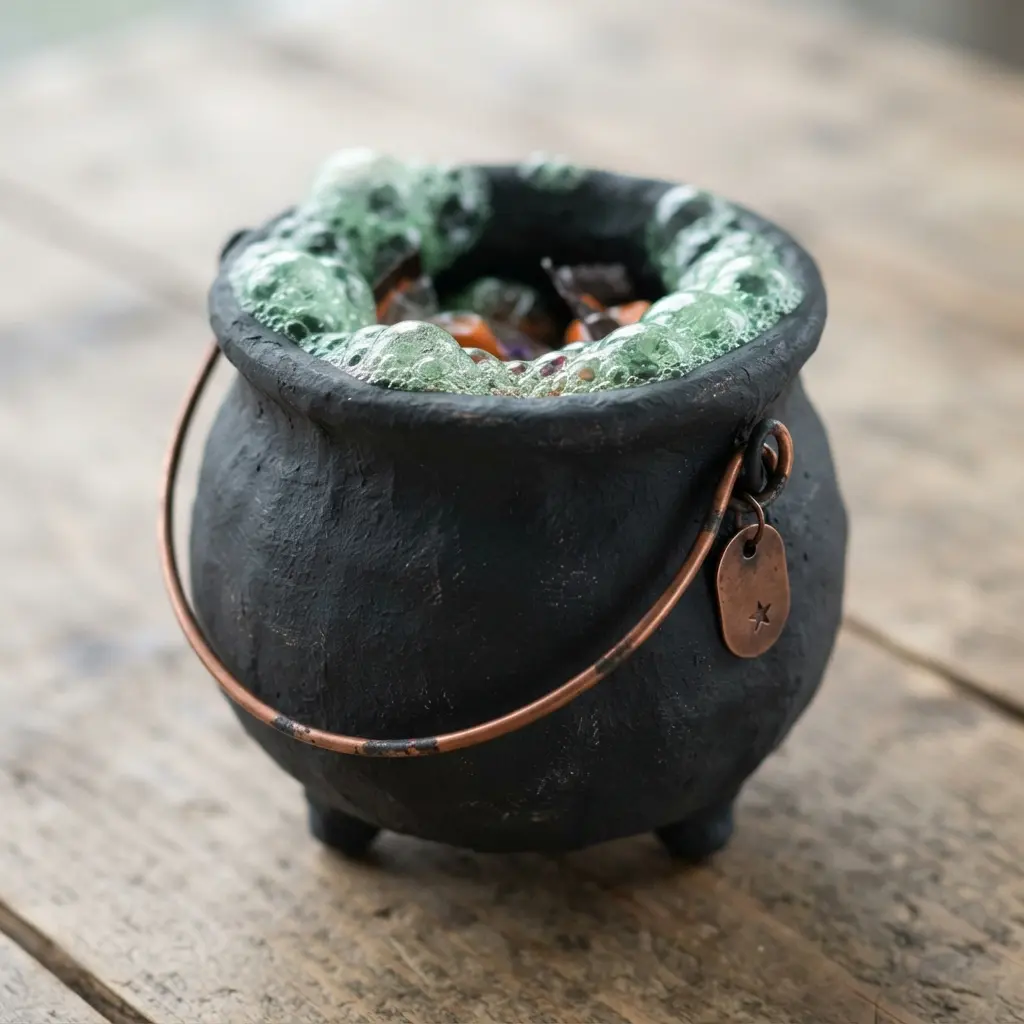
This one looks like it takes a ton of skill, but trying classic halloween treat boxes ideas is actually the definition of a quick win. You start with a plain black plastic pail, which you can find at any craft store. Then, you go wild with simple adhesive decorations for instant results.
I love sticking on googly eyes and plastic spiders for instant personality. Why does it work so well? The classic cauldron shape is instantly spooky and fun, making it perfect for handing out treats.
It is also a reusable gift container, which adds a nice bit of value. For an even easier start, you can find pre-decorated pails and simply fill them with candy. If you are new to Halloween projects, this is a fantastic first step before tackling more involved simple Halloween crafts for adults.
You will love how festive your table looks with a few of these bubbling away. The vibrant displays keep the holiday spirit alive long after trick-or-treating ends.
6. Mummy Wrapped Paper Treat Boxes
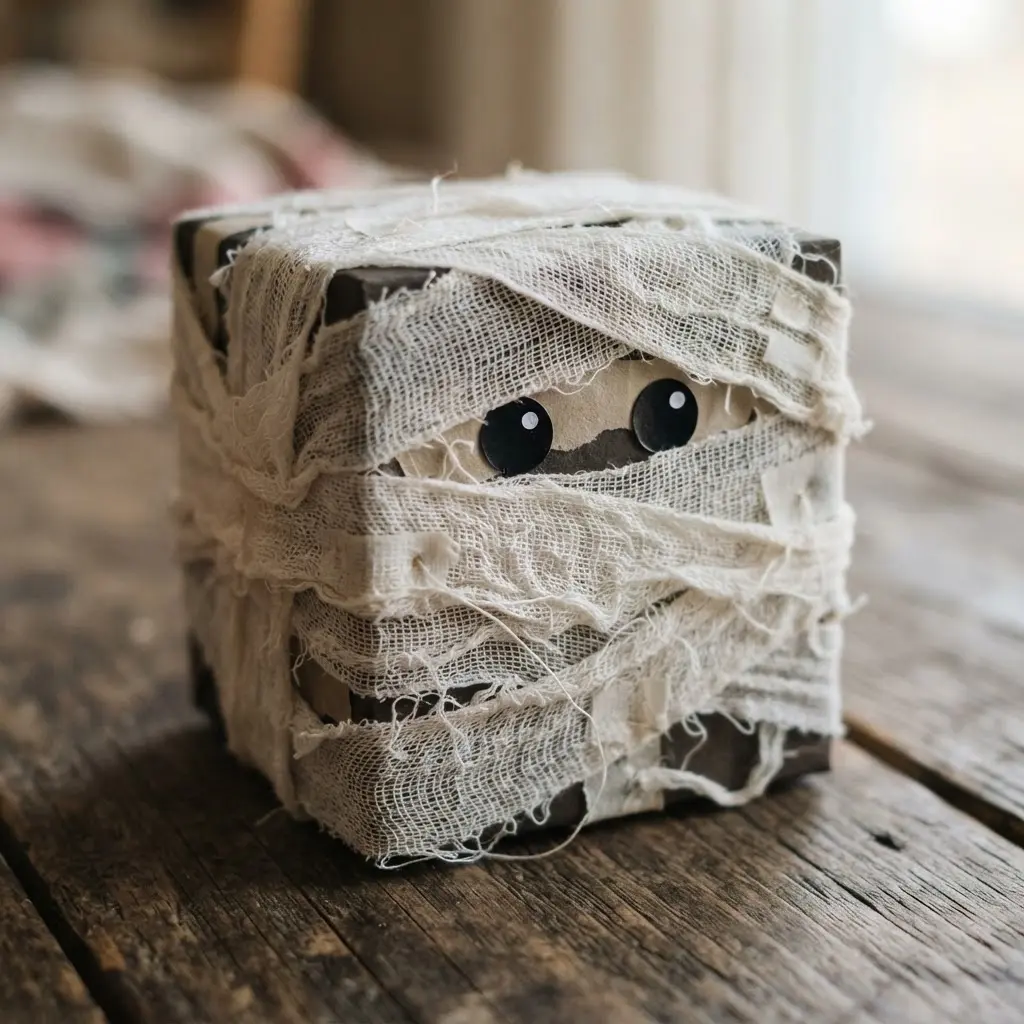
When you try unique halloween treat boxes ideas like this wrap, the project is wonderfully simple to put together. You take a small box and wrap it in irregular strips of white crepe paper or even torn fabric scraps, leaving a little gap for the eyes. The key is to let the strips overlap in a messy, random pattern so it looks authentically ancient.
It is incredibly satisfying because you get a cute, functional container from such basic supplies. I love letting kids add the googly eyes themselves for a personal touch. It is a fantastic activity to pair with other spooky spider crafts for kids for a full afternoon of Halloween fun.
7. Spiderweb Lace Washi Tape Containers
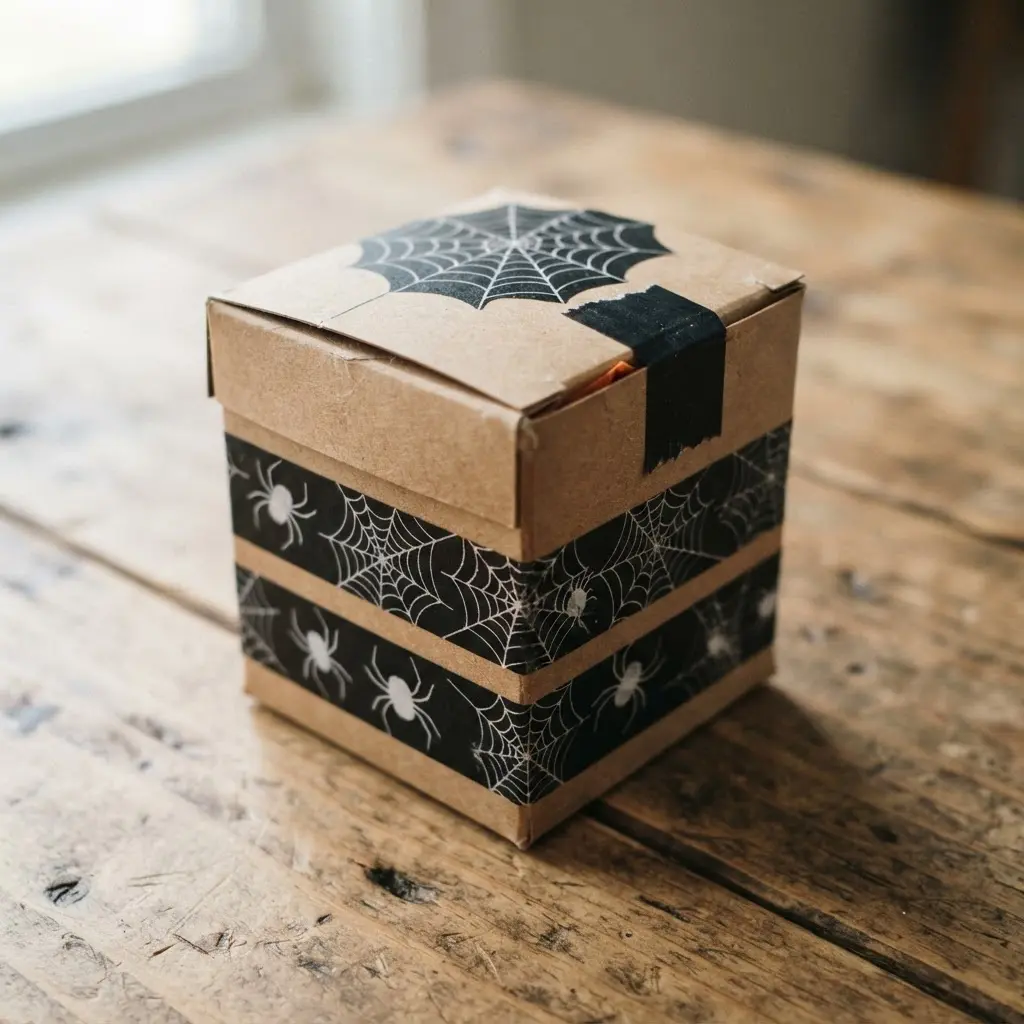
This approach ranks among my favorite halloween treat boxes ideas for turning any plain jar into a spooky centerpiece in minutes. You start by wrapping a base layer of solid tape, then add strips of lace-patterned washi tape in criss-crossing bands to build the web effect. For a more durable finish, I always seal everything with a clear topcoat.
The beauty of this project is its accessibility. It is a low-mess way to create something that looks intricate and elegant, perfect for gifting treats or holding decorations. Your finished containers have that perfect blend of spooky and chic.
After you fill your containers, you might want to add a thematic touch to your other Halloween reading materials. Learning a few creative Halloween bookmark crafts is a fantastic way to extend the festive fun.
8. Miniature Pumpkin Shaped Cardboard Boxes
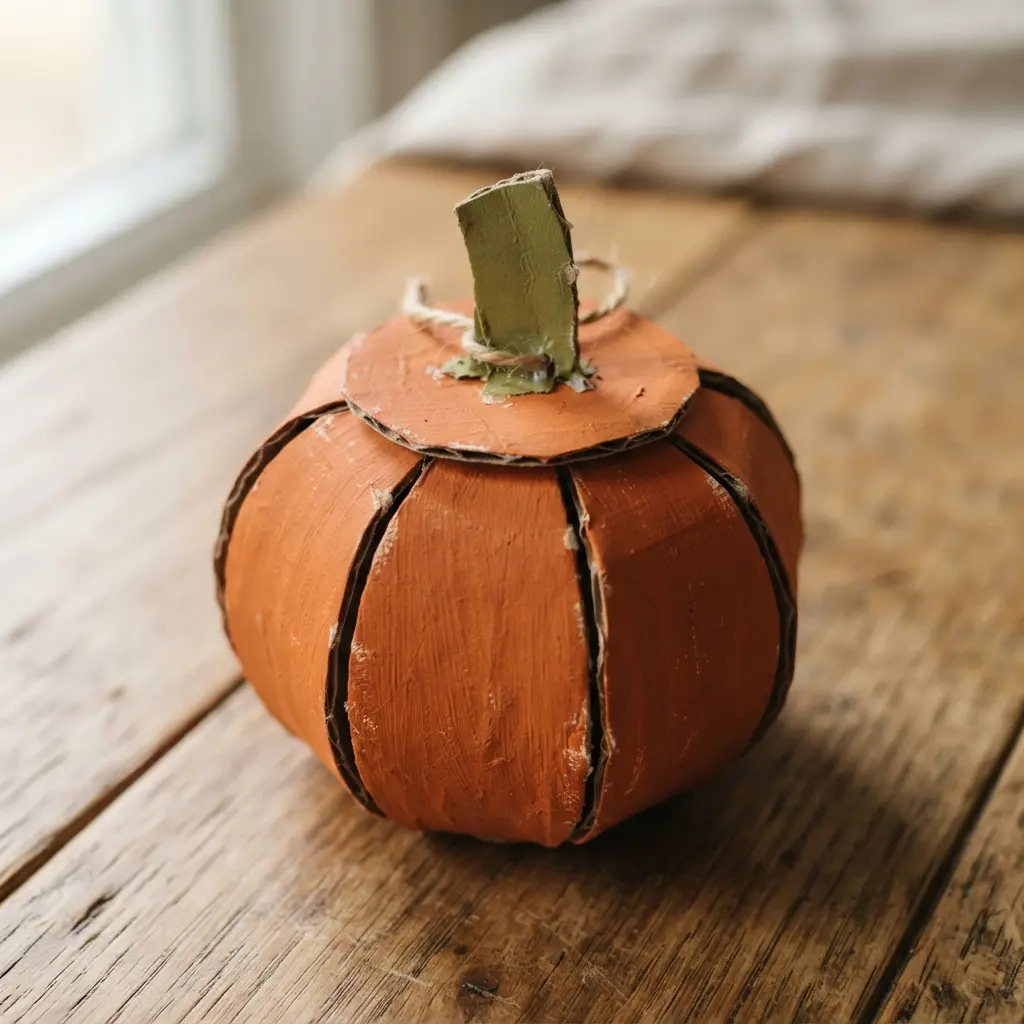
This pumpkin-shaped design looks like a fancy bakery find, but crafting halloween treat boxes ideas like this at home requires only some basic supplies. You will trace and cut a shape from orange cardstock, then score and fold it into a little box. I love adding a tiny green stem on top for that perfect autumnal touch.
These tiny boxes are ideal for party favors or individual candy portions. Their miniature size makes them so charming, and they are a fantastic craft project to do with kids. You can even set out some free Halloween coloring pages for them to work on while the glue on your boxes dries.
Always use a scoring tool for crisp folds. Trust me, it makes the whole structure look neat and professional. Feel how satisfying it is to hand out your homemade Halloween treats!
9. Vintage Halloween Graphic Print Boxes
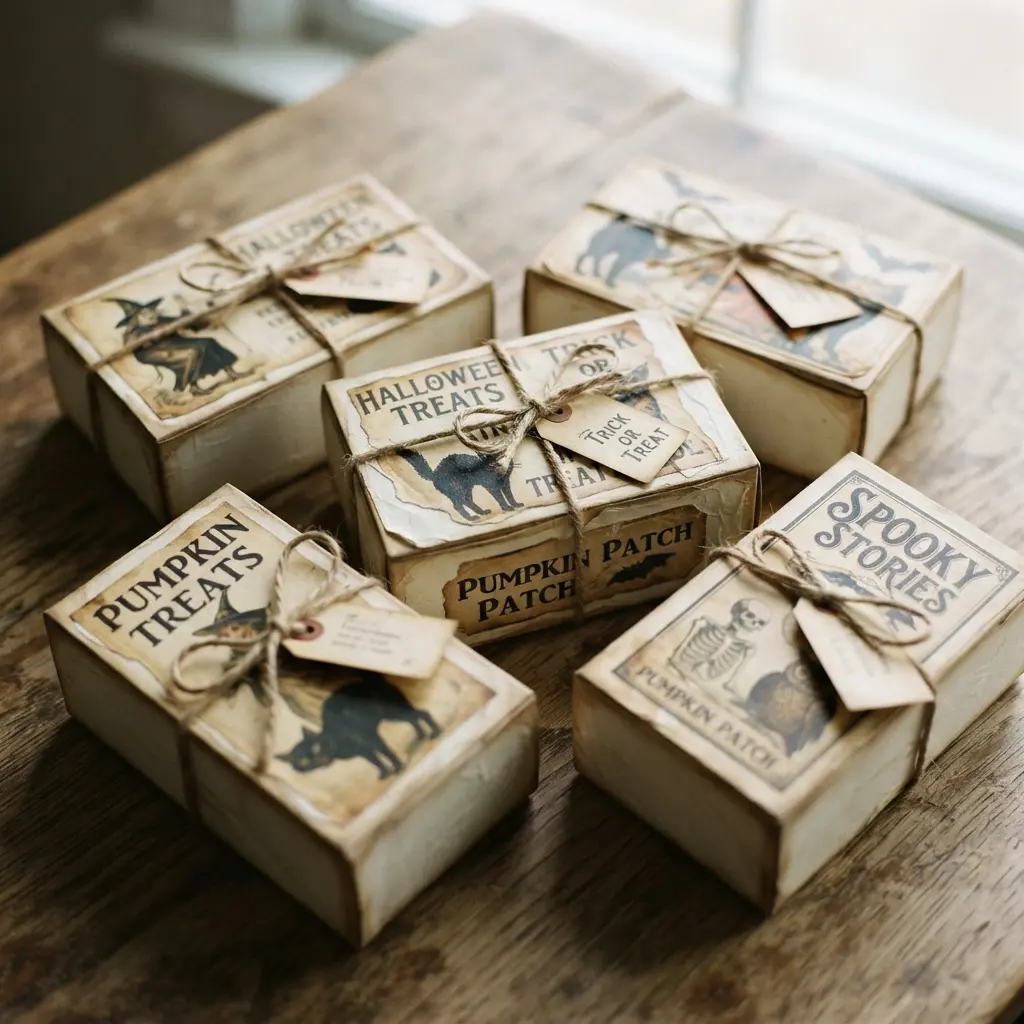
Ever wish you could give trick-or-treating that classic, nostalgic feel? Incorporating vintage prints into your halloween treat boxes ideas captures the charming art from the mid-20th century perfectly. You start by finding a high-resolution scan of a vintage graphic with friendly ghosts or cheerful witches.
Then you print it onto sturdy cardstock, cut out your box template, and assemble it. The result is a functional container that doubles as a wonderful decoration. I love how it instantly adds a layer of vintage charm to your holiday setup.
A word of caution: always test your print on scrap paper first to avoid wasting your good cardstock on a blurry image. For another project that uses bold Halloween colors in a fun way, you could make some fun Halloween eyeball rings craft as party favors.
10. Glowing Ghost Face Lantern Boxes
Is there anything more perfectly spooky than a softly glowing face? Creating luminous halloween treat boxes ideas brings an atmospheric twist to your decor. You cut out simple shapes on the sides of a sturdy box made from heavyweight cardstock and place an LED light inside.
The light shines through the cutouts, creating that iconic, eerie glow that defines Halloween night. It works because it transforms a basic box into an atmospheric light source. I love using a craft knife for the cleanest face cutouts, which makes the light really pop.
For an extra layer of spooky fun, you can pair these with some classic spooky cheesecloth ghost decorations on your mantel. The combination of glowing and floating ghosts is pure magic. Trust me, seeing those faces light up for the first time is the best feeling.
Your porch or table will look incredible. They add a warm, inviting glow to any autumn gathering.
Adding Durable Handles and Carrying Straps
Punching holes and threading a length of grosgrain ribbon gives you a handle that is comfortable for small hands and strong enough for the job. You need to reinforce the attachment points on the inside of the box with extra cardboard or a sturdy fabric patch to prevent tearing. Practicing proper reinforcement is essential for halloween treat boxes ideas that will see heavy use.
A wide strap distributes the weight of the treats much better than a thin piece of string, which can dig into fingers. We all know a dropped treat box is a tragedy, so taking this extra step is worth it. Secure the ends of your ribbon or strap with strong packing tape on the inside before you add your final decorative layer.
This hidden reinforcement is the trick to a box that looks great and functions perfectly throughout the whole Halloween adventure. It keeps your hard work intact while moving from porch to porch.
Conclusion
Putting together these halloween treat boxes ideas has been a wonderful reminder that the magic is often in the details. The look on your child’s face when they receive a treat from a box you made together is worth every minute spent with scissors and glue.
My best advice is to pick one project that speaks to you and make it your own, swap colors, add a personal drawing, or use materials you already have at home. The goal is not perfection, but creating a little piece of Halloween joy that feels special. I hope these ideas spark your creativity and help you build traditions that your family will look forward to every October.
FAQs
Q: What basic supplies do I need to get started?
A: You will need cardstock or sturdy paper, a good craft glue, scissors, and a ruler. Most projects also use simple embellishments like acrylic paint, felt, twine, or patterned tape.
Q: Are these boxes sturdy enough for actual candy?
A: Yes, the designs focus on structure. Using cardstock, cardboard, or small wooden boxes creates a container that holds candy securely. Reinforce corners with extra glue for heavier treats.
Q: Can I make these with my young children?
A: Absolutely. Many projects have simple steps like wrapping, sticking on pre-cut shapes, or painting. Prepare pieces in advance for younger kids to assemble and decorate safely.
Q: How long does one box typically take to make?
A: Most take between 20 to 45 minutes once you have your materials ready. Simpler designs like the mummy-wrapped box are quicker, while detailed painting takes a bit longer.
Q: Where can I find the templates or patterns?
A: Basic box templates are easy to find with a quick online search for ‘gable box template’ or ‘pencil box template.’ You can adjust the size and then decorate it with your chosen Halloween theme.


