

I love to create crafts that make my girls giggle and shriek! So I made these Hairy Halloween Eyeball Rings for the spooky season. They’re big and fuzzy and fun to make! You can create one for yourself or make a few for a friend.
Hairy Halloween Eyeball Rings: Supplies
Before you shop for materials or place an order online, check your craft stash. You might already have some of these items on hand.
- 1-inch wood bead (or two sizes if you want variety)
- White acrylic paint plus other creepy and bright colors like blue or black
- Medium paint brush and small detail brushes
- Ring form (adjustable bases work best to fit any finger)
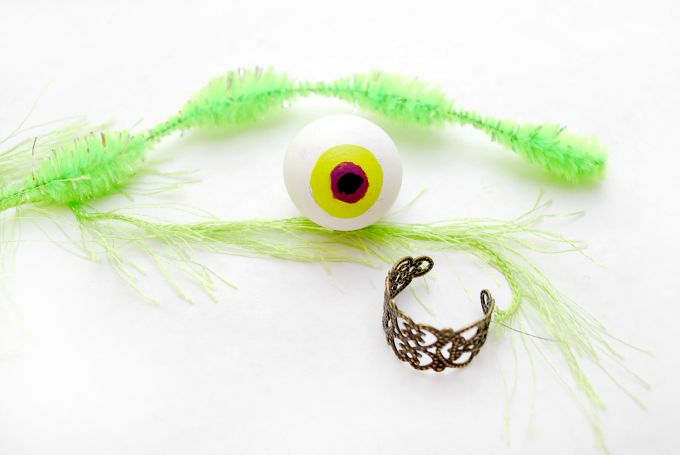
- Pipe cleaner
- Fringy yarn (often called “eyelash yarn” or Fun Fur)
- Hot glue gun and glue sticks
- Scissors
- Pencil
Directions: Painting the Eyeball
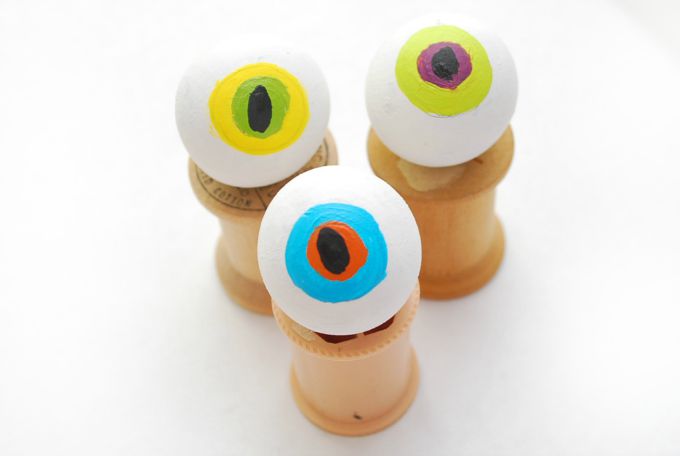
Paint 2-3 coats of white paint onto a wood bead. Allow to dry. Next, use a pencil to lightly sketch the pupil and iris shape onto the eyeball. The outer color is about the size of a penny. Paint creepy color combinations for your eyeballs using small detail brushes. I perched them on some spools so they wouldn’t roll around. If necessary, erase your pencil marks when the paint has fully dried.
Next, use hot glue to attach the ring form, pipe cleaner, and the fringy yarn to the eyeball. You can use regular pipe cleaners or the wavy ones shown below. The fringy yarn looks like this. The fringe is attached to a cord which I’ll call the “spine” from here.
Assembling the Monster Eyeball
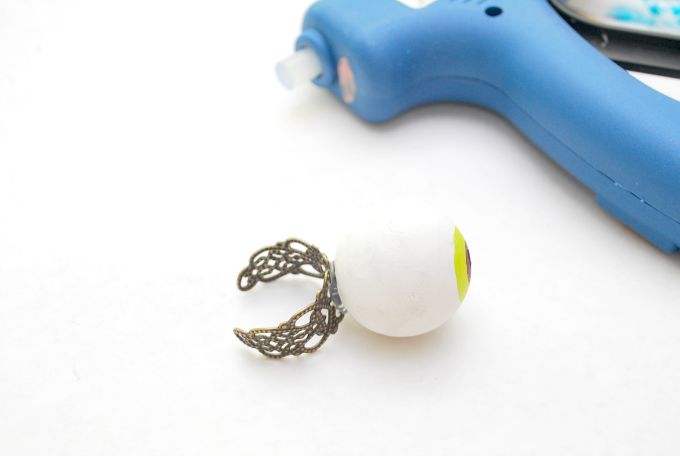
Apply hot glue to the ring form, and place the eyeball on top of it, with the pupil facing up. This forms the base of your jewelry.
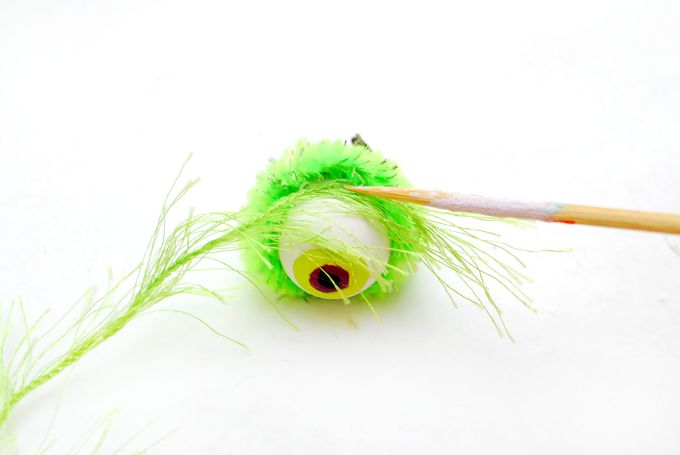
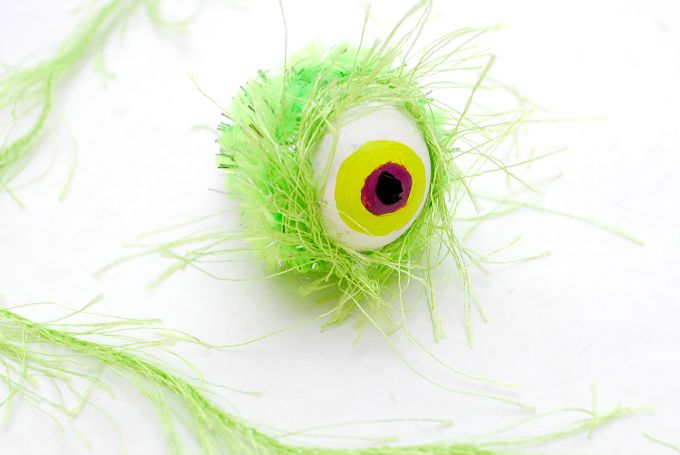
Now, wrap the bottom half of the eyeball with the pipe cleaner. Start at the “equator” of the eye with a thin bead of hot glue and keep wrapping it around the eye, applying glue as you go. Stop when you reach the ring form.

Next, start gluing the fringy yarn, right above the pipe cleaner. Apply a very thin bead of hot glue, and try to glue just the spine of the yarn and not the fringe. Go little by little as you’ll have to straighten the yarn and move the fringe out of the way as you glue. You can use a wood skewer to help push the yarn into place and avoid burning your fingers. Go around two times or so, allowing some of the white of the eye to show and without overlapping the colored parts of the eye.
Trim off the yarn, then if you like, you can trim the fringe a little bit shorter if it’s too long. All done!
I made three rings, all slightly different from one another. Again, you can trim the fringe or leave it long. You can match the pipe cleaner color to the yarn, or use two different Halloweeny colors like orange and black.

Conclusion
I love how big and exaggerated my rings are! And yes, my girls did shriek and run away giggling when I showed the rings to them! And then they asked for one in purple and one in pink, as always! I hope this blog helps to inspire you this season. Do you love Halloween but hate the hassle of making your own costumes? Well, not to worry! We’ve got you covered! In this post, we taught you how to make your very own Hairy Halloween Eyeball Ring. Not only are they super easy to make, but they’re also hilariously scary! So what are you waiting for? Get started and let us know how it turns out in the comments below!
FAQs
Q: What are hairy halloween eyeball rings and why are they popular?
A: Hairy Halloween eyeball rings are novelty rings designed to look like eyeballs with faux hair or hairy accents for a spooky effect; they feature exaggerated textures and bright colors that make them a standout accessory for Halloween costumes, themed parties, or year-round collectors who see the appeal of quirky jewelry.
Q: Where can I buy hairy halloween eyeball rings?
A: You can buy hairy Halloween eyeball rings online from specialty costume shops, independent jewelry designers, and major marketplaces; search product listings, check seasonal stores near Halloween day, or see listings from creators like see vanessa craft for unique handmade options.
Q: What features should I look for when choosing a hairy halloween eyeball ring?
A: Look for durable materials, secure settings for any faux hair or embellishments, comfortable band sizing, and waterproof or tarnish-resistant finishes—these features ensure the ring lasts beyond a single day and can be enjoyed for years if cared for properly.
Q: Are hairy halloween eyeball rings comfortable to wear and adjustable?
A: Many designs prioritize comfort with adjustable bands or ergonomic shapes; if you plan to wear a hairy Halloween eyeball ring all day, choose rings that specify adjustable sizing or soft inner bands to avoid irritation while you show off the spooky feature.
Q: How should I care for and store my hairy halloween eyeball ring so it lasts a year or more?
A: To keep the ring in good condition for a year and beyond, avoid prolonged exposure to water, store it in a cool, dry place, gently dust any faux hair with a soft brush, and remove the ring during activities that could snag or damage the feature.


