Selecting Cardstock Weights for Stable Paper Structures
When exploring DIY flower pot card ideas, the single best defense against a floppy, sad-looking card is using 80-pound cardstock for your base. This heavier weight gives your flower pot structure the spine it needs to stand up straight, especially when you add all those wonderful, dimensional flowers on top. You will notice that lighter paper curls under the weight of buttons or layered petals, ruining your clean lines. Trust me on this, that extra bit of thickness makes all the difference for creating a crisp fold without jagged edges, a common beginner mistake. It forms a solid foundation, so your beautiful floral arrangement pops without the whole thing wilting in your hands.
Adhesive Techniques for Dimensional Craft Embellishments
When applying DIY flower pot card ideas, liquid glue warps thin decorative paper and makes a mess of your clean flower pot design. The good news is, foam adhesive squares are your secret weapon for creating that lovely, floating shadow and depth we all want. They lift your paper blossoms and leaves right off the page, giving your card a professional, multi-dimensional look. You want to avoid flat, two-dimensional construction, and these little squares provide the perfect amount of lift without adding bulk. They also hold strong, so your pipe cleaner stems and button centers stay put, keeping the entire floral arrangement secure and visually balanced.
1. Simple Classic Terracotta Paper Folded Card

Ever feel like DIY flower pot card ideas look intimidatingly elegant, but the execution is actually one of the easiest? This classic terracotta folded card proves that point beautifully. The entire project hinges on choosing a gorgeous piece of heavyweight terracotta cardstock and making one perfectly clean fold. You will cut your paper to size, score a crisp line, and fold it over to create a beautiful, rustic card base.
Why does it work so well? The rich, earthy color does all the decorative work for you, creating a natural and timeless feel. Its clean lines make it the perfect blank canvas for any occasion. For a final touch of rustic charm, you could add a tiny sprig of dried lavender or a simple loop of jute twine. This card is a fantastic foundation for many other handmade card designs, especially if you want to later make pretty pom pom flowers to place on top.
My go-to tip for absolute beginners is to always use a scoring board and bone folder for that fold. It makes all the difference between a professional-looking crease and a messy, cracked one. Give it a try and feel that satisfying crispness when the fold snaps into place.
2. Dimensional 3D Pop-Up Tulip Garden: A Blooming Surprise
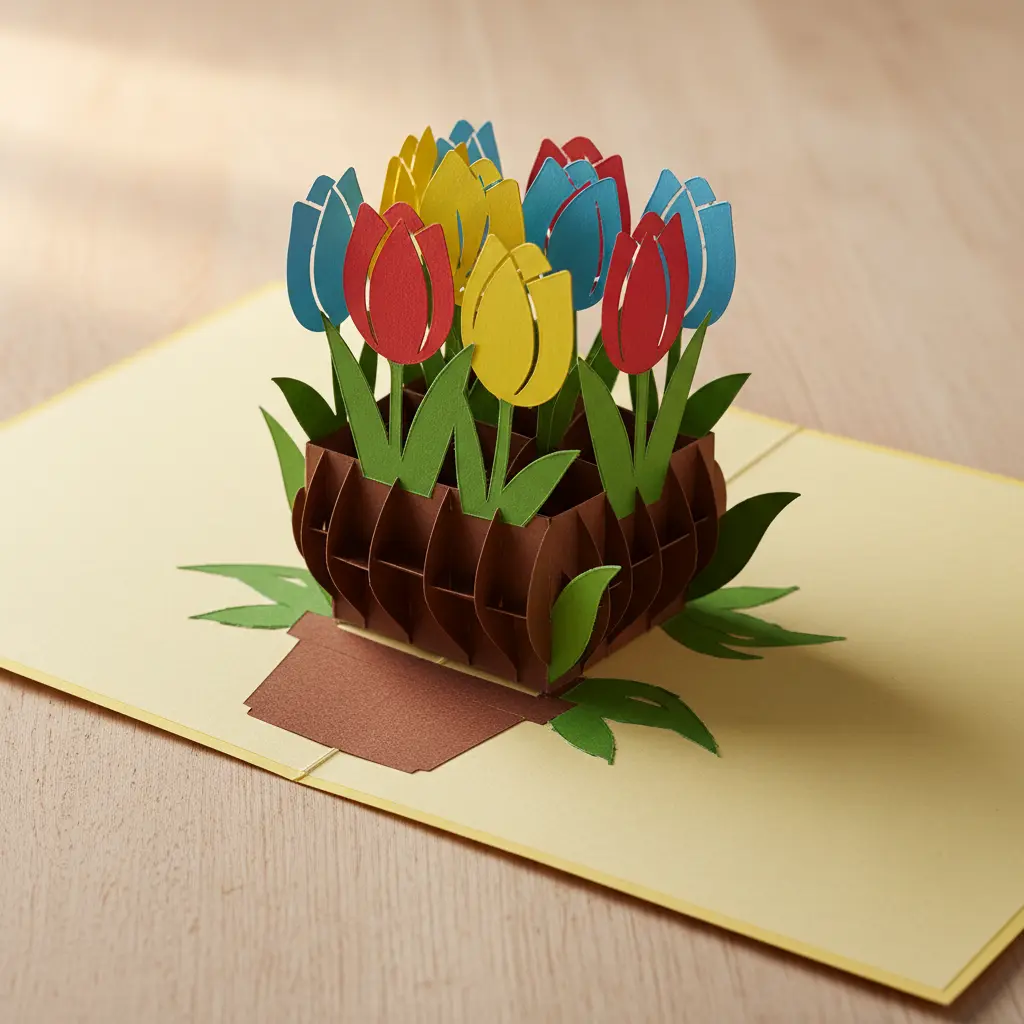
I promise this approach to DIY flower pot card ideas looks intimidating, but it really is not that difficult. The secret is in building your garden from the ground up with precise V-folds. You start with a sturdy cardstock base, then cut and fold colored paper into those iconic tulip shapes.
You will attach them to thin green stems and layer them on different pop-up planes. Suddenly, you have a whole blooming scene with incredible depth when the card opens. It works because that sudden, colorful reveal feels like springtime magic in your hands. Trust me on this one, take your time with a scoring tool for crisp folds, and you will feel so proud of your little paper garden.
3. Personalized Handprint Flower Bouquet Construction Card
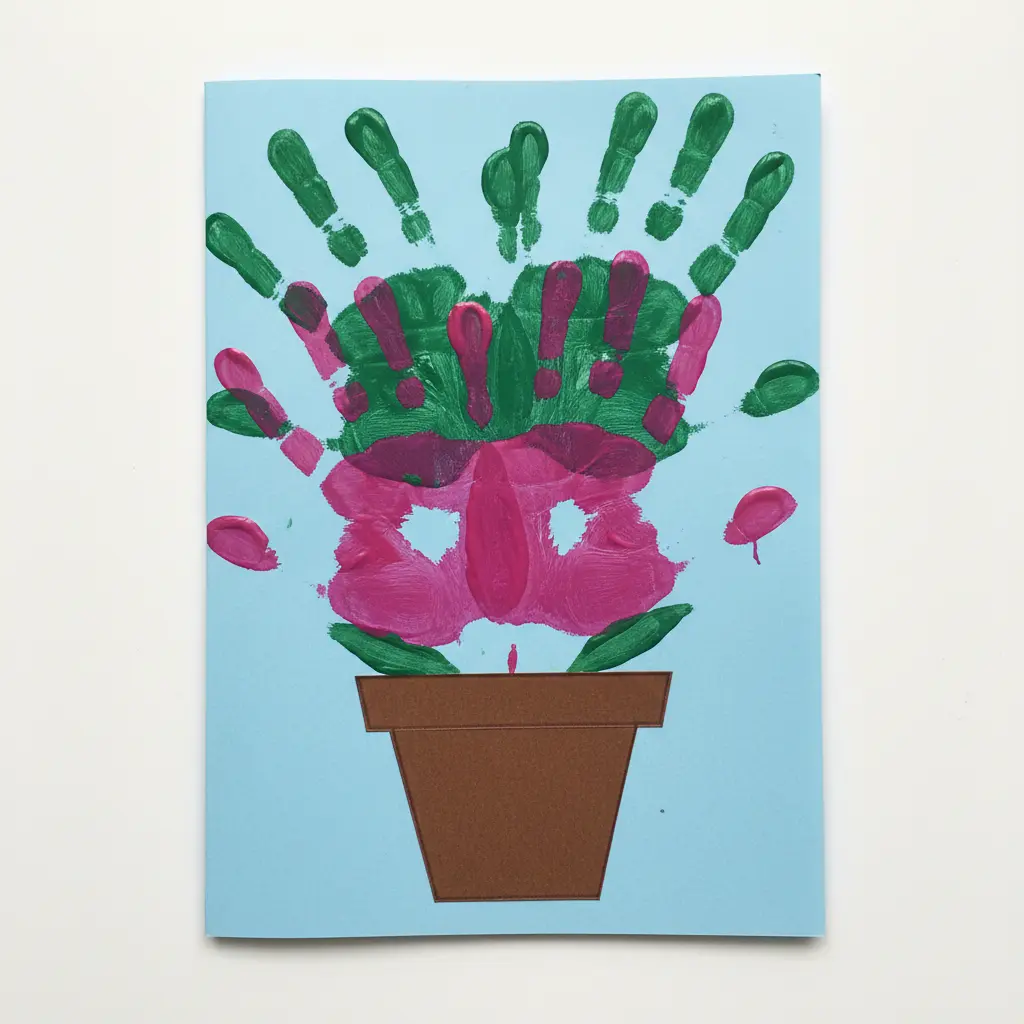
Among all the DIY flower pot card ideas on this list, this one is a guaranteed heart-melter. You trace a child’s hand to create the petals and often the vase itself, turning a simple card into a cherished keepsake. I love using bright construction paper for the handprint flowers and gluing them onto green stems.
The result is a wonderfully tactile, 3D bouquet that feels personal. It is perfect for a grandparent’s birthday or Mother’s Day. The process is fantastic for developing a child’s fine motor skills too. For a fun variation, you could add some charming flower pockets to the front to hold a secret note. That extra touch makes the gift even more special. Does that not look stunning when it all comes together?
4. Soft Felt Flower Pastel Pot Collage

If you love soft textures in DIY flower pot card ideas, this project is your answer. You will arrange layers of hand-cut pastel felt flowers so they spill from a felt pot shape on your card. I love how tactile and gentle the final piece feels. The magic happens when you layer the pieces with fabric glue instead of overusing hot glue, which keeps everything delightfully soft. Planning your layout before gluing makes a huge difference for a balanced composition. It is a wonderfully satisfying way to add a handmade touch to a gift. This collage is a fantastic gift on its own, but you could also use the same technique to decorate with flower birthday banners for a coordinated party theme.
5. Fingerprint Butterfly Floral Pot Card — A Whimsical Touch

When testing DIY flower pot card ideas, this becomes my go-to project when I want a card that feels truly personal. You create a simple paper pot at the bottom, draw a few green stems, and then make the butterflies. Each one is two fingerprints pressed together at an angle. Once they are dry, you draw on a little body and antennae with a fine-tip marker. The result is a burst of colorful, whimsical butterflies that look like they just landed on the page. It works so well because it captures a tiny, physical piece of the person making it. Trust me on this one. Let the prints dry completely before adding details, and feel the joy of creating something so uniquely sweet.
6. Button Embellished Sunflower Clay Pot: Rustic Charm
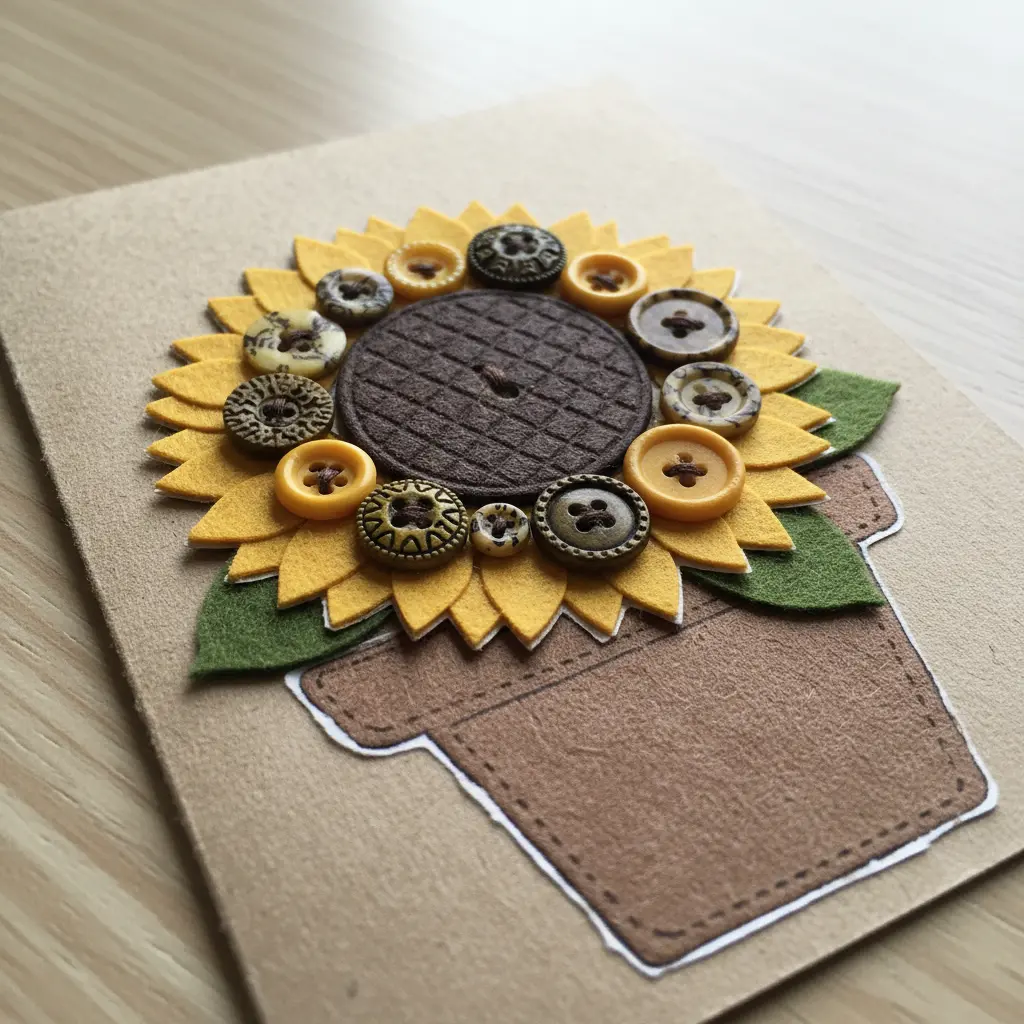
Most DIY flower pot card ideas look intricate, but trust me, it is surprisingly forgiving. You start with a clean terracotta pot, sketching a simple sunflower outline before painting the base colors. The real fun begins when you arrange your button collection, dry-fitting them into the petals and center before you glue anything down. I love how the mix of button sizes and textures adds such a playful, three-dimensional feel. It is a fantastic way to use up spare buttons and create a piece with genuine rustic charm. For a cohesive seasonal display, you might design a holiday card wreath to hang nearby, as both crafts share that warm, handmade quality. My go-to tip is to let everything dry fully, especially the glue, before you apply the final clear sealer. That extra patience makes your cheerful pot last for seasons.
7. Rustic Twine Wrapped Paper Pot — Natural Texture Delight

This rustic wrap from our DIY flower pot card ideas collection looks so intricate, but trust me, it is surprisingly straightforward. You will start with a simple paper pulp pot and completely cover it by winding natural jute twine tightly from the base to the rim. The trick is applying a solid bead of hot glue just ahead of your wrapping point, pressing the twine down firmly as you go. I love how this project transforms a plain pot into something with so much handmade character. The finished texture is wonderfully tactile and brings a cozy, rustic warmth to any space. Try it and feel that satisfying click when you snip the final thread.
8. Sparkling Sequined Daisy Garden Greeting Card

You might think this card from our list of DIY flower pot card ideas looks complex, but trust me, the sparkle is what makes it so approachable. The magic happens when you cluster small, iridescent cup sequins in the center of each daisy you arrange on the card. I love using a mix of sizes for depth and a little clear glitter on the petal tips for extra shimmer. It works because the sparkle feels special and celebratory without being overwhelming. A great tip is to get comfortable with watercolor heart painting techniques first if you want to create that soft, blended background sky and grass. Focus your sequins on the flower centers and let your garden feel whimsical and fresh.
9. Pom-Pom Bloom Springtime Planter Card: Fluffy Fun
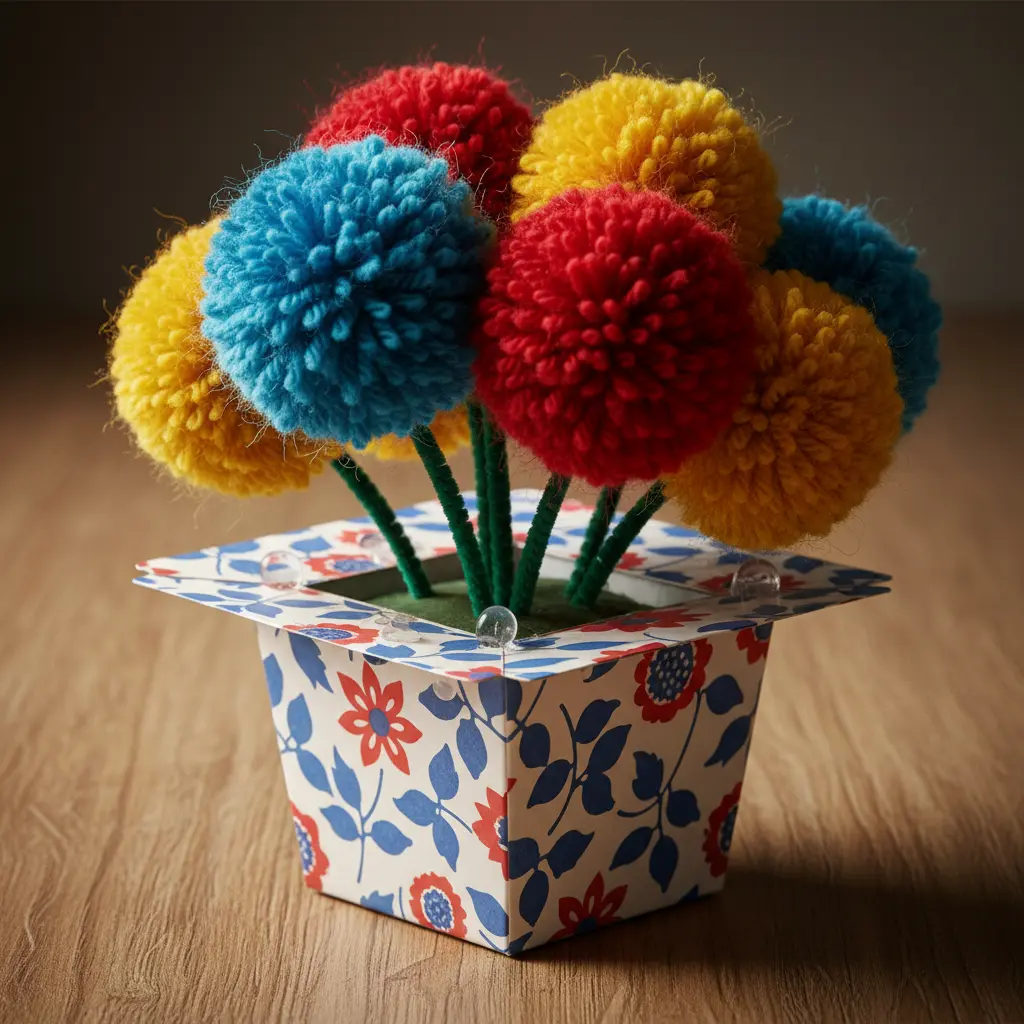
This pom-pom bloom surprises everyone trying DIY flower pot card ideas. It looks complex but takes under ten minutes. You start by cutting a simple planter shape from brown cardstock and sticking it to your folded card base. Then, make your fluffy blooms using yarn and a pom-pom maker. The real trick is giving them a final, dense trim with sharp scissors. It works because the three-dimensional, textured flowers create a cheerful, springtime feel you cannot get with flat paper alone. Your recipient will love the playful, handmade touch. Pro tip: Use a strong liquid glue to make sure those pom-poms stay put forever. This is a fantastic project if you are also looking for simple paper collage crafts for kids to try, as it shares that same fun, tactile energy.
10. Layered Tissue Paper Carnation Card — Delicate Blooms

This layered tissue carnation ranks highly among DIY flower pot card ideas. It looks like an intricate, delicate flower, but you create it with simple tissue paper circles. You start by stacking several sheets and cutting out a pile of circles in varying sizes, using either scissors or a circle punch. Then, you secure a small stack of them with a tiny dot of glue right in the center. Once that glue sets a bit, the magic happens. You gently pull and crinkle each individual layer upwards to form those soft, ruffled petals. The three-dimensional effect is stunning and gives you a beautiful, handmade card. I love how using two or three shades of the same color creates such a realistic, gradient look. Isn’t it satisfying to see those simple circles transform into a gorgeous bloom? Your finished card will have a wonderfully ethereal, delicate texture.
Personalizing Envelope Liners for Handcrafted Stationery
To complete your DIY flower pot card ideas, a handmade card deserves a special home, so cut a liner from your leftover decorative craft paper to surprise the recipient before they even open it. Trace your envelope’s flap onto the pretty paper, cut it out with a slight trim, and attach it inside using a thin, even layer of glue stick. This final touch shows you considered every detail, transforming a plain envelope into part of the gift. It protects your card during mailing and adds a burst of color or pattern that hints at the creativity inside. Your finished piece feels complete, from the sturdy cardstock base to this thoughtful, polished closure.
Conclusion
So how did your little artist enjoy making these DIY flower pot card ideas? I am willing to bet there are a few extra glue smudges and pom-poms stuck to the table, but the smiles were worth it. These handmade creations are more than paper and glue — they are tiny time capsules of a child’s love, ready to be handed to a grandparent or teacher. Next time you have a rainy afternoon, pull out the construction paper and let your child pick a favorite from this list. A small tip: let them lead the design choices, even if it means a purple sunflower or a glitter explosion. The best cards are the ones that look completely, adorably messy. Your child’s creativity is the real star here, and now you have ten new ways to let it shine.
FAQs
Q: What basic supplies do I need for making flower pot cards with kids?
A: You will need construction paper in various colors, a glue stick, child-safe scissors, and whatever embellishments you have on hand such as buttons, pom-poms, or tissue paper. A simple cardstock base works best, and washable markers let kids add their own drawings without worry.
Q: Can a preschooler make these flower pot cards independently?
A: Most of these projects suit primary school children, but preschoolers join in with a little extra help. Pre-cutting the shapes and using glue sticks instead of liquid glue makes the process easier. An adult will need to handle detailed steps like folding a pop-up mechanism.
Q: How long does it take to complete one flower pot card?
A: Each card usually takes about 20 to 30 minutes, depending on the complexity. Simple folded cards might be done in 15 minutes, while a pom-pom planter card takes a little longer because of the gluing time. It is a perfect activity for a short craft session after school.
Q: Do recycled materials work well for flower pot card ideas?
A: Recycled materials work wonderfully. Old cereal boxes make sturdy pot shapes, leftover wrapping paper adds bright petals, and bits of yarn or fabric from around the house become stems and leaves. Crafting with what you already have encourages creativity and reduces waste.
Q: How can I help my child make the card look neat and tidy?
A: The secret is preparation. Pre-cut the larger shapes and let your child focus on assembling and decorating. Using a glue dot roller instead of a squeeze bottle cuts down on mess, and placing your shapes on the card before gluing helps check the layout. A little crookedness adds charm.