Let us look at ten stunning examples that prove a custom container can be a beautiful focal point.
Sourcing And Evaluating Suitable Vintage Luggage Pieces
Your best starting point for a vintage train case wedding card box is a case with minimal structural damage to its latches and hinges, as these are difficult to repair and essential for a functional keepsake. Look for the beautiful, aged character of scuffed leather or a mid-century fabric lining, but pass on pieces with deep cracks or missing hardware. The good news is, a little surface wear adds to the charm and gives you a perfect foundation for your embellishments.
Focus your search on pieces that feel solid when you open and close them, because a sturdy frame makes adding your mail opening so much easier later. Trust me, this initial check saves hours of frustrating repair work.
Structural Considerations For Adding Card Access Slots
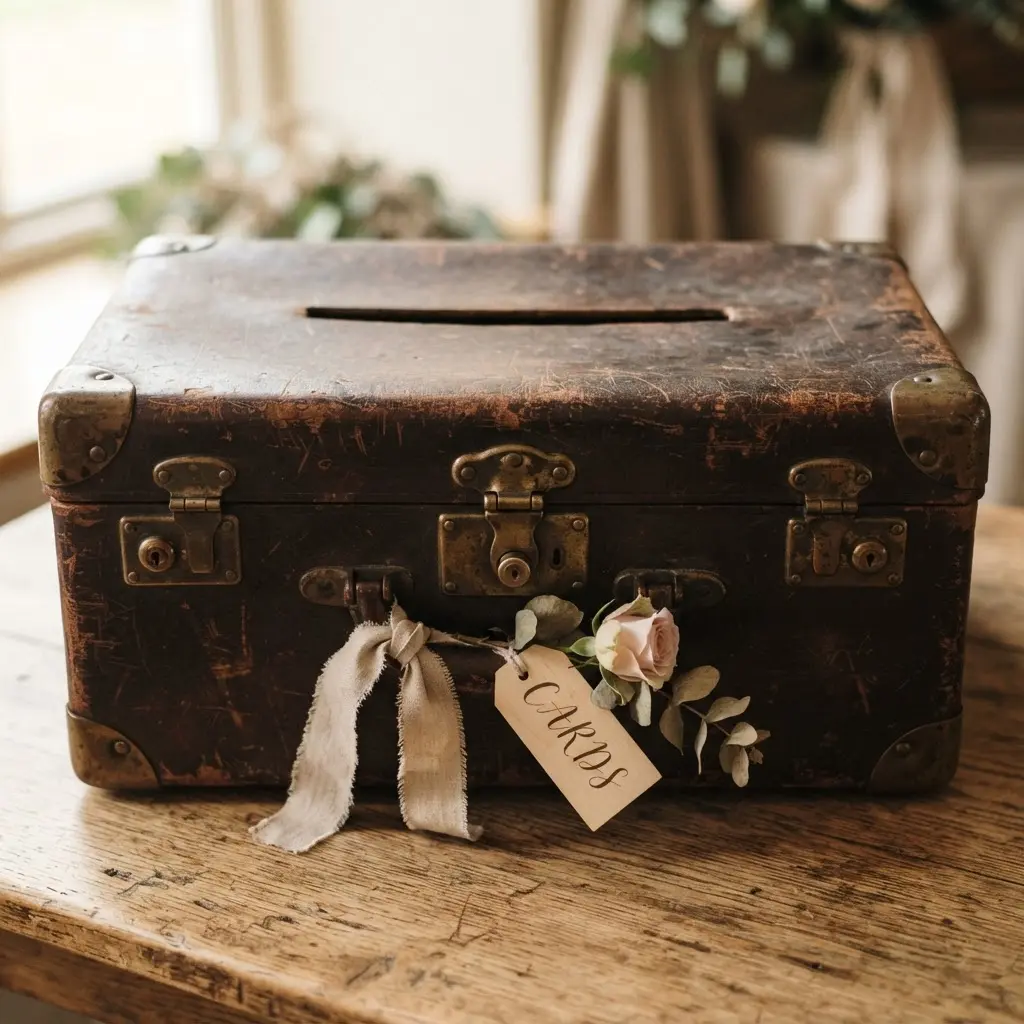
The most common beginner error when modifying a vintage train case wedding card box is cutting a slot too narrow for standard 5×7 envelopes, so always trace and measure your opening first. For a hard-shell design, a Dremel tool gives you the cleanest, most controlled cut through the material. If you are working with a reinforced fabric suitcase, a sharp utility knife will do the job, but you must reinforce those cut edges with a strong fabric glue or a thin strip of lining material to prevent fraying.
This reinforcement step is what separates a professional-looking finish from a ragged one. You will notice that taking this extra minute ensures your decorative piece lasts beautifully through the reception and beyond.
1. Monogrammed Leather Train Case Display
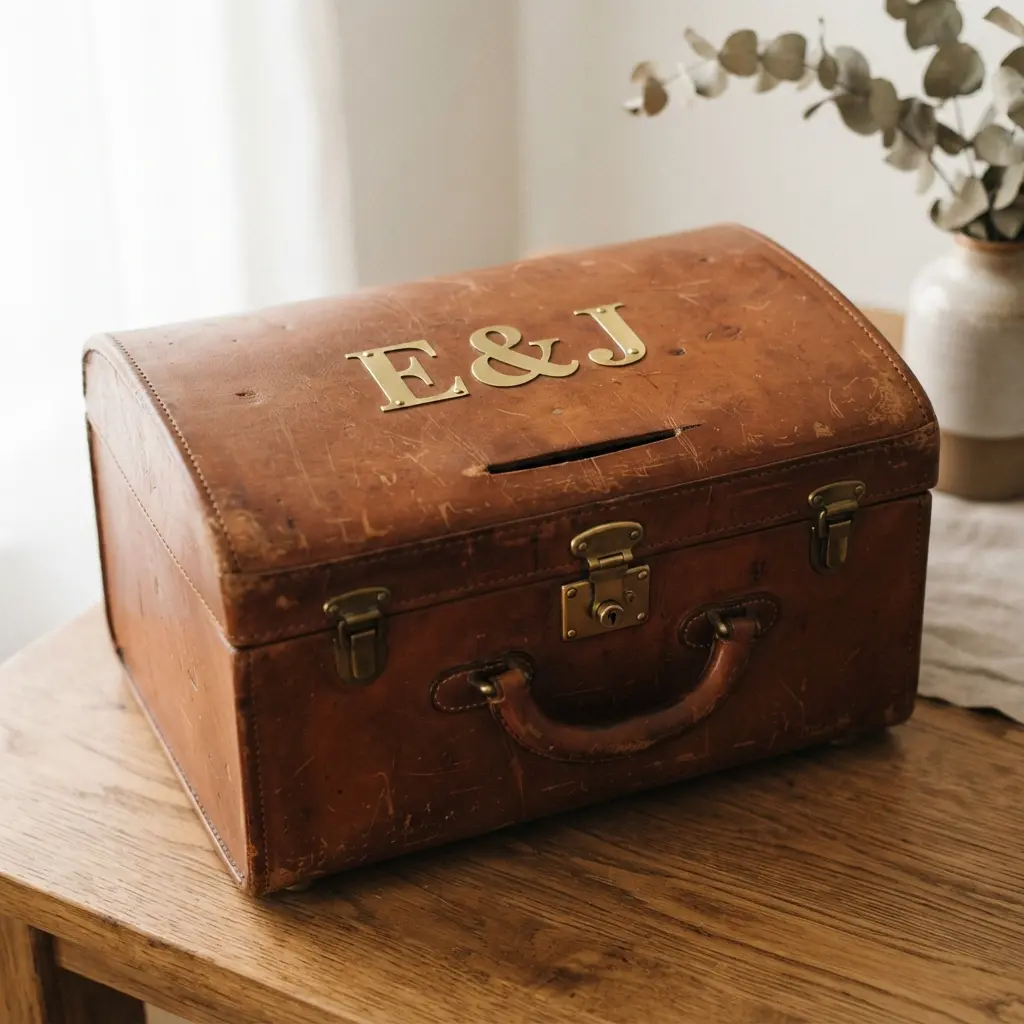
Ever wanted a display piece that feels both deeply personal and elegantly timeless? This is it. You start with your monogrammed leather train case, letting its rich patina and brass hardware take center stage. I love to place my finished vintage train case wedding card box on a sideboard or bookshelf, slightly ajar to hint at the beautiful interior. The key is keeping the surrounding decor minimal so the container itself remains the star.
That personalized touch makes all the difference. It is not just a storage item; it is a story about you or your family. The warmth of the leather adds a cozy, sophisticated layer to any room. For a cohesive vintage look, you could draw inspiration from creating vintage-inspired ornaments to place nearby. Your space will feel curated and full of character.
2. Floral Embellished Pastel Beauty Case
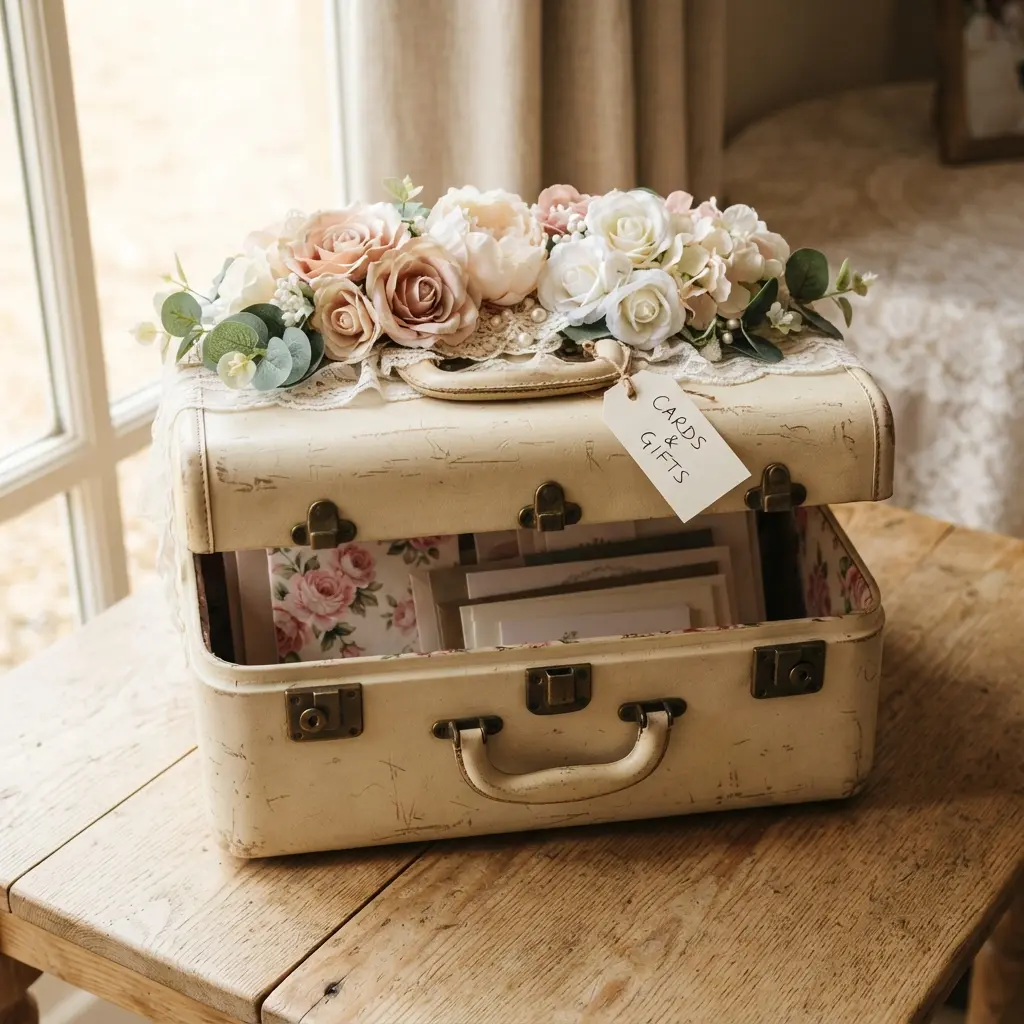
Ever wondered how a soft pastel vintage train case wedding card box becomes a romantic centerpiece? This version takes a gentle hue and adds gorgeous floral details. You might see delicate embroidery or printed blossoms across the lid, creating that vintage charm instantly. I love how these pieces mix function with serious style. The interior is lined with a soft, protective fabric to keep your mail safe, while the outside tells a beautiful story.
It feels less like a container and more like a cherished heirloom. For a cohesive look, match the floral theme to your other decorations. A great starting point is working on simple DIY spring wreath crafts to get comfortable with arranging blooms.
Trust me, that practice makes designing your floral arrangement for this vintage train case wedding card box so much easier. The final look is absolutely dreamy.
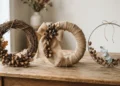
3. Burlap Wrapped Vintage Travel Case
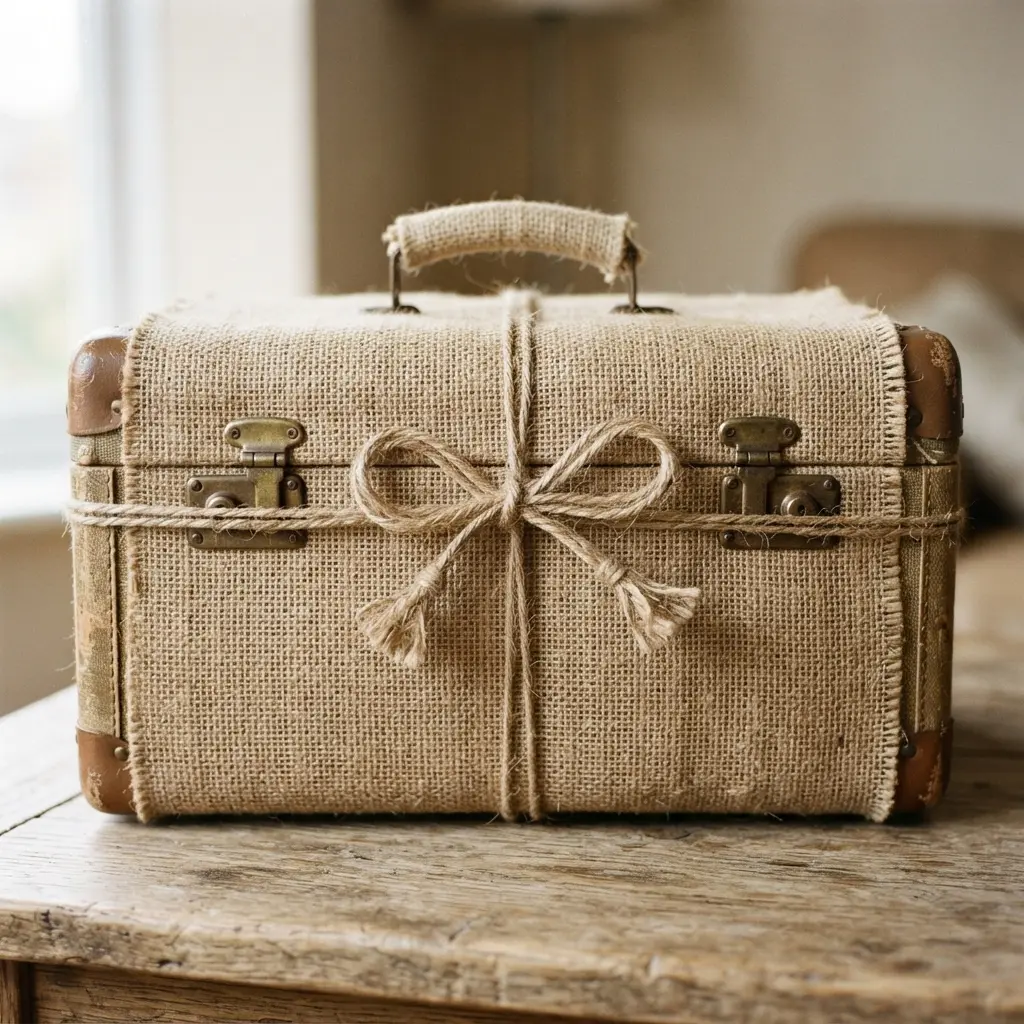
Ever wondered how to give a worn-out suitcase a whole new personality? This project takes a forgotten piece and wraps it in a layer of rustic charm. You cut a piece of burlap fabric to size and carefully adhere it over the old exterior, tucking it neatly around the hardware. It is a fantastic way to cover any scuffs or outdated patterns while adding wonderful texture to your custom vintage train case wedding card box.
I love how the natural, earthy tones of the fabric instantly warm up the piece. That rough, tactile feel brings so much character, making it a standout for a rustic or farmhouse wedding. The transformation is incredibly satisfying, turning a thrifted find into a unique treasure you will adore.
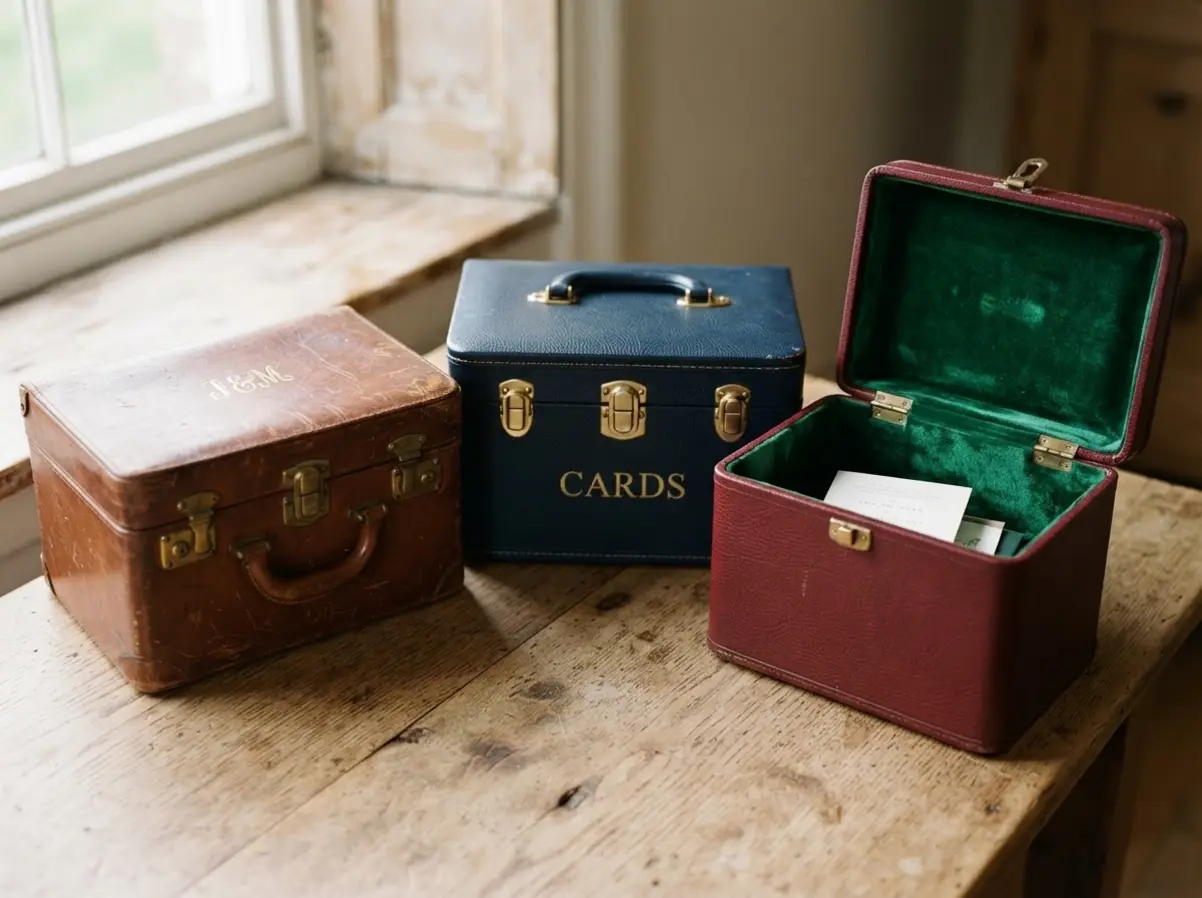
4. Gold Lettered Navy Vinyl Case
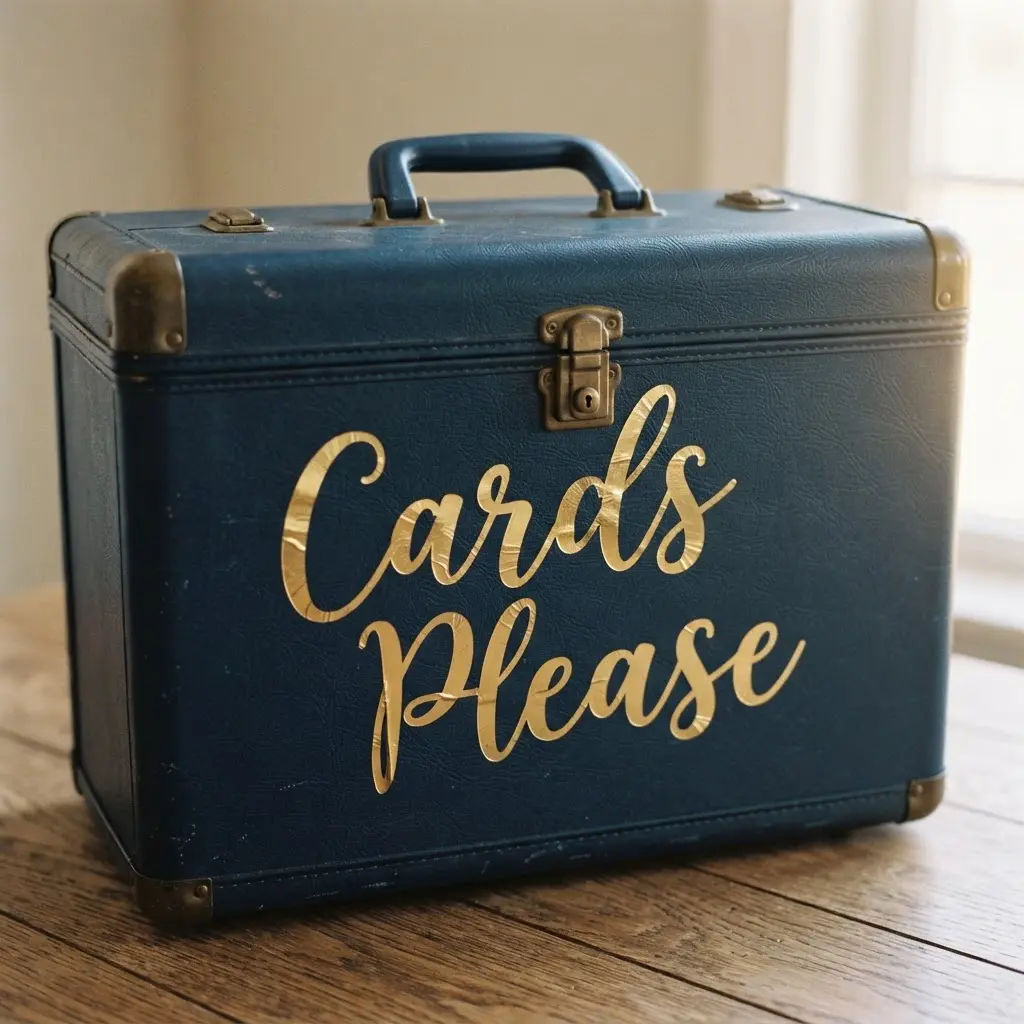
Who would have thought a vintage train case wedding card box could feel so luxurious? This style uses a deep navy vinyl as the base, which is then stamped with shimmering gold lettering. The process, often called foil stamping, heats a custom die to press the metallic foil perfectly onto the surface. It creates that crisp, personalized look you are after.
The contrast is what makes it so special. That rich blue background makes the gold lettering pop, giving it a formal and timeless feel. It is a durable and elegant choice for your wedding day. For another way to create a beautiful keepsake container, you could look into making decorative shadow box crafts as a complementary project. My top tip is to choose a clear, classic font for your lettering.
5. Lace Trimmed Cream Hard-Sided Case
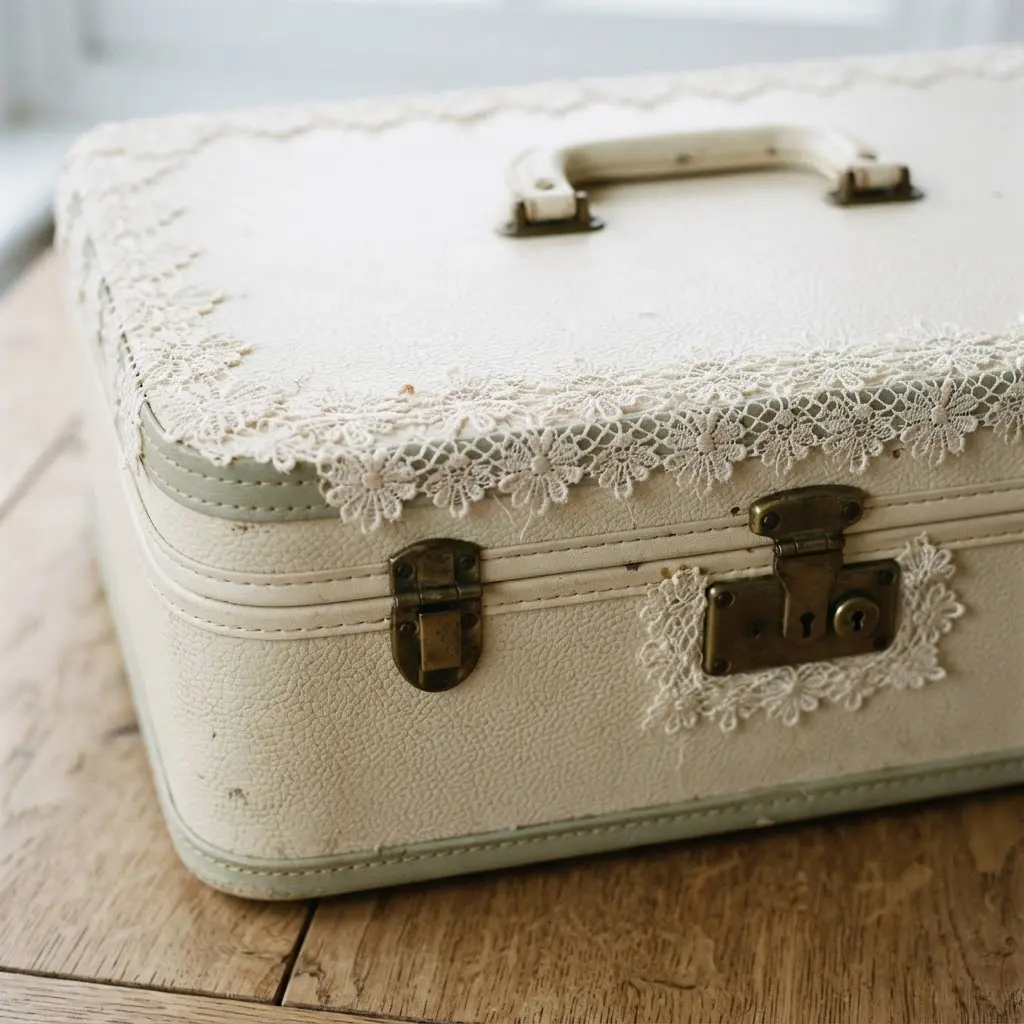
This one surprised me. It looks intricate, but attaching the lace is simple to execute. You start with a clean, dry case in a soft cream color. Measure your chosen lace trim, then use a small brush to apply a thin layer of fabric glue directly onto the shell where you want the lace to sit. Press the lace down firmly and smooth it out, working in small sections so the adhesive does not dry too fast.
The key is using a light touch with the glue to prevent any messy seepage. I love how this project blends durability with a delicate, romantic look for your vintage train case wedding card box. It makes a perfect, personalized container for holding wedding mail.
For another project that adds a handmade touch to your celebration, you need a tutorial for unique dream catcher crafts. Feel the satisfaction of creating something both beautiful and useful.
6. Art Deco Mirror Topped Case
Ever wanted to add a serious dose of old Hollywood glamour to your reception table? This Art Deco style is your ticket. Its defining feature is that stunning mirrored glass top, which reflects light and sparkle all around it. The body is all clean lines and bold geometric shapes, often made from polished woods like ebony or lacquered in a sharp black finish.
I love how the metal hardware, usually chrome or brass, adds that perfect period detail to a vintage train case wedding card box. It works because it is pure, unapologetic luxury that makes your mail collection feel like a treasure. For a softer, more textural counterpoint to all that shine, you could pair it with some making decorative doily bowls for a lovely display mix.
7. Rustic Stag Motif Travel Case
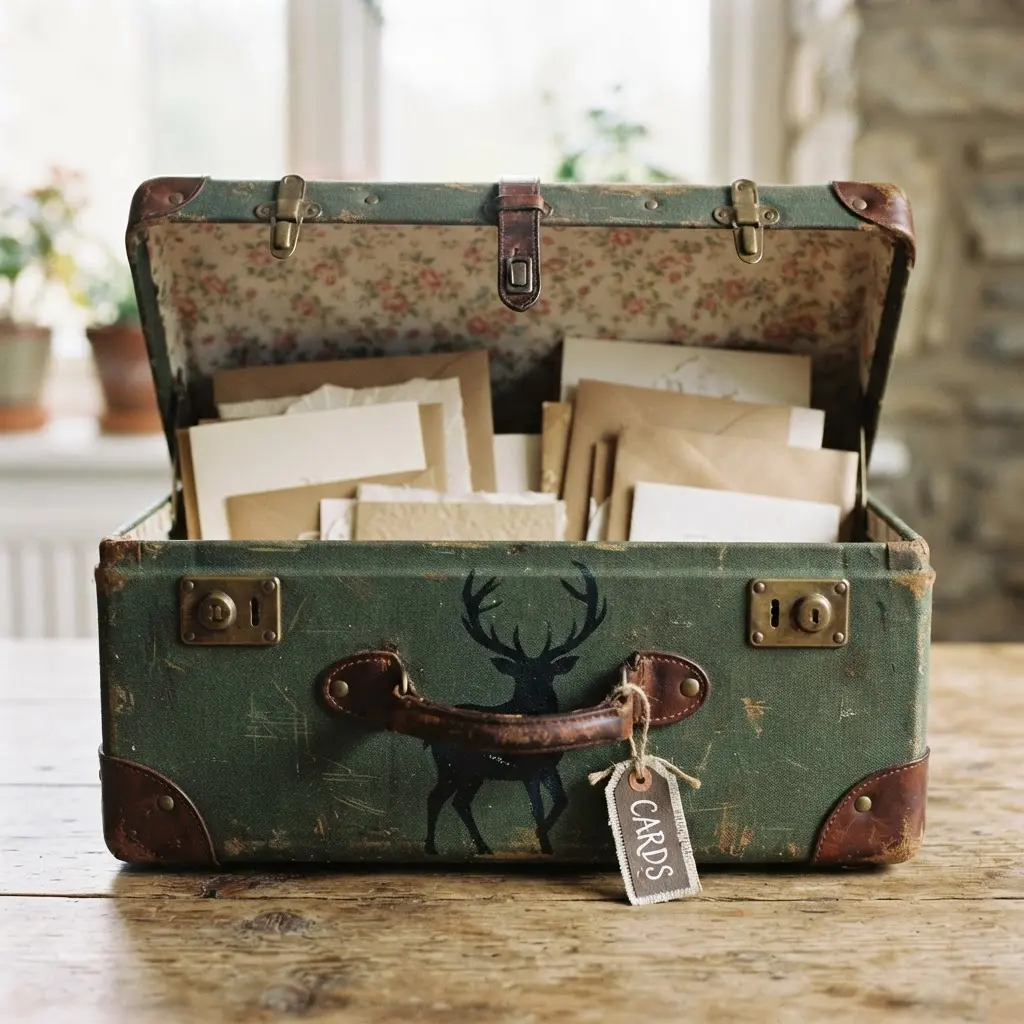
Who says a vintage train case wedding card box has to look like a traditional container? This one always catches my eye because it feels like a genuine heirloom piece. You start with a pre-made wooden travel case or a sturdy leather trunk. I love applying the stag design with a simple wood-burning tool or a metal emblem for an easy, impactful look. It works so well because the rustic textures and natural motif create a sense of adventure and timeless strength.
Your guests will be drawn to its unique, handcrafted feel. For a cohesive rustic theme, you could even pair it with crafting inspirational felt banners using the same earthy color palette. Trust me, the final result feels incredibly special and personal.
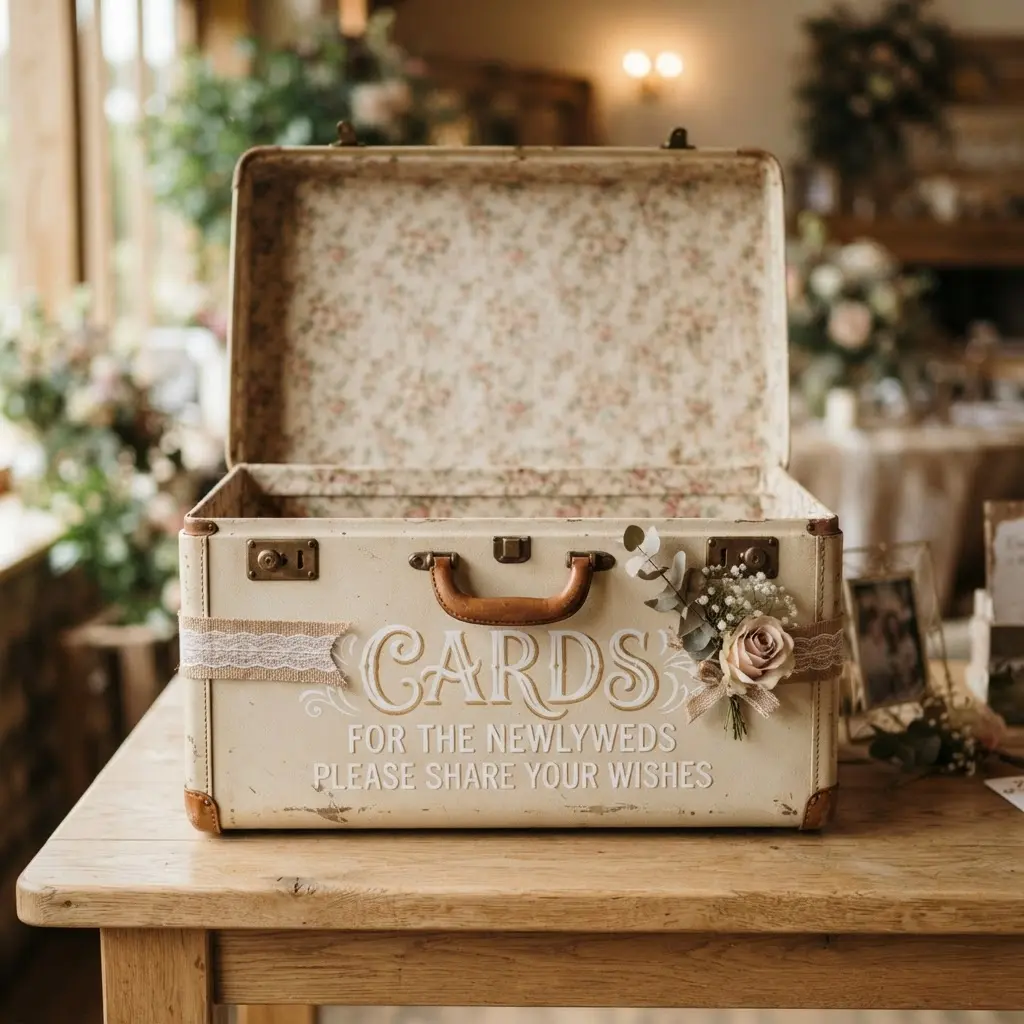
8. Velvet Lined Oxblood Vanity Case
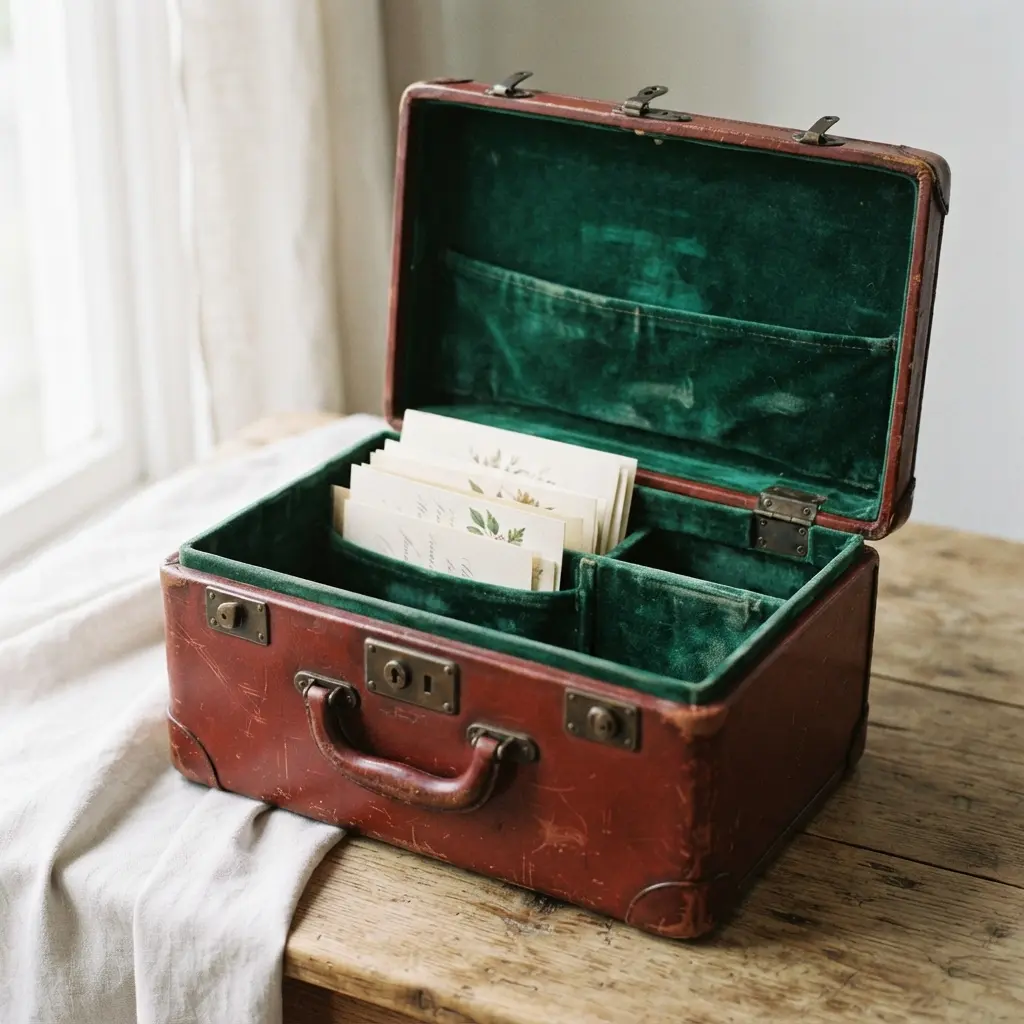
Have you ever found a hidden gem at an antique shop? This is it. The deep oxblood leather and soft velvet interior turn any plain shell into an instant vintage train case wedding card box. You will use a hard-sided vanity case with secure clasps to keep all your mail safe and sound throughout the celebration. I love how this choice combines glamour with pure practicality.
The rich color and plush lining protect your gifts beautifully, making it feel like a special part of your decor. Trust me, the weight of a quality piece in your hands feels wonderfully substantial. Just be sure to check the interior for any wear on the velvet lining before your big day. A quick inspection ensures your beautiful holder looks perfect. Does that not feel like the perfect elegant touch?
9. Travel Sticker Covered Train Case
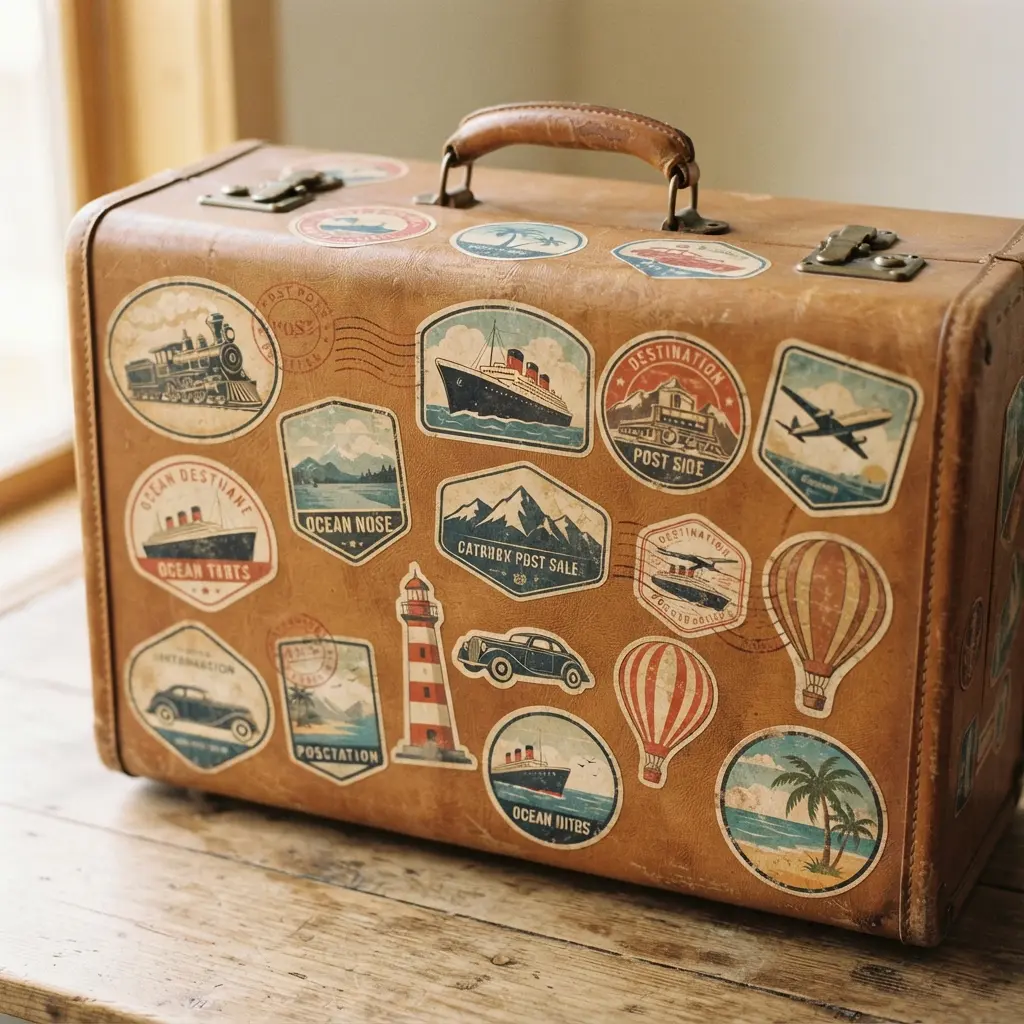
Ever see one of these and feel a sudden urge to pack your bags? That is the magic when you style a vintage train case wedding card box with wanderlust themes. It is a hard shell covered in a collage of colorful stickers from hotels, airlines, and destinations. The layered, lived-in look tells a visual story of adventure, which is why it works so beautifully for mail collection.
It becomes a functional keepsake that perfectly captures the feeling of starting your own journey together. You could find authentic pieces with their original patina, or create your own with a plain shell and reproduction travel stickers. For a DIY version, my go-to tip is to lay all your stickers out first to plan your composition before sticking anything down.
This avoids a cluttered mess and lets you balance colors and sizes for that perfect travel charm. Getting the surface ready is key, so always start with a thorough cleaning. A simple project like this pairs wonderfully with other personalized decor, like crafting some easy no-sew placemat ideas for your reception tables. Both add a handmade, cozy touch without overwhelming effort.
10. Brass Hardware Antique Cosmetic Case
Ever wondered how to add a touch of classic elegance with your table setup? This antique style is a gorgeous choice. Its defining feature is the warm brass hardware, which provides a beautiful contrast against the leather or wood body. The interior is often lined with sumptuous silk or velvet, complete with little compartments and a mirror.
I love how it blends function with timeless style. It feels like a piece of history you could use, which makes it so much more special than a standard container. That beautiful patina on the metal tells a story all its own, so be sure to preserve it with a gentle clean. Once your mail is collected, polish your vintage train case wedding card box before setting it out as a display piece.
For another way to give old containers a new purpose, look at some creative jar lamp crafts. Feel that sense of curated, personal charm.
Preserving And Displaying Keepsakes After The Wedding
A light dusting and a soft cloth are all you need to care for your case, preserving that lovely patina you chose it for. The real magic is in how you repurpose it; this piece transitions perfectly into a storage box for your most precious wedding mementos like dried flowers or your guest book. Choose a spot away from direct sunlight to prevent any delicate silks or fabrics in your decor from fading over time.
This approach lets your unique mail holder remain a functional part of your home, telling the story of your day every time you see it. Your finished piece deserves this simple care to last as a true heirloom.
Conclusion
Your wedding day is a collection of moments and details that feel uniquely yours. Choosing a vintage train case wedding card box is a wonderful way to add a layer of personal history and tactile beauty to your celebration. It is a piece guests will notice and remember, sparking conversations about its story. As you look for yours, think about the textures and colors that make your heart sing—whether it is the softness of velvet, the gleam of brass, or the story told by travel-worn stickers.
The perfect piece is out there waiting to become a cherished part of your day. Let its character inspire you and add that final, personal touch to your reception tables.
FAQs
Q: What size piece works best for a wedding card box?
A: A medium-sized container is ideal. It should be large enough to hold all your mail comfortably but not so big it dominates the table. Look for one roughly the size of a large hardcover book.
Q: How do you make a slot for cards in a vintage train case?
A: The simplest method is to use a craft knife to cut a neat horizontal opening in the lid. You could reinforce the edges inside with strong tape or a thin piece of metal for a clean, durable finish.
Q: Where is the best place to find a vintage train case?
A: Check local antique shops, thrift stores, and estate sales. Online marketplaces for vintage goods are also excellent sources. Be patient and look for one with solid hardware and a lining you love or replace easily.
Q: You line the inside of a vintage case yourself?
A: Absolutely. You might use adhesive-backed velvet, scrapbook paper, or fabric with craft glue. Measure the interior panels, cut your material to fit, and smooth it into place for a custom look that matches your wedding colors.
Q: How do you secure a card box at the reception?
A: Place it on a sturdy table in a well-lit, attended area. You might use a small amount of museum putty underneath to prevent slipping. Assign a trusted friend or family member to keep an eye on it and collect it at the end of the night.


