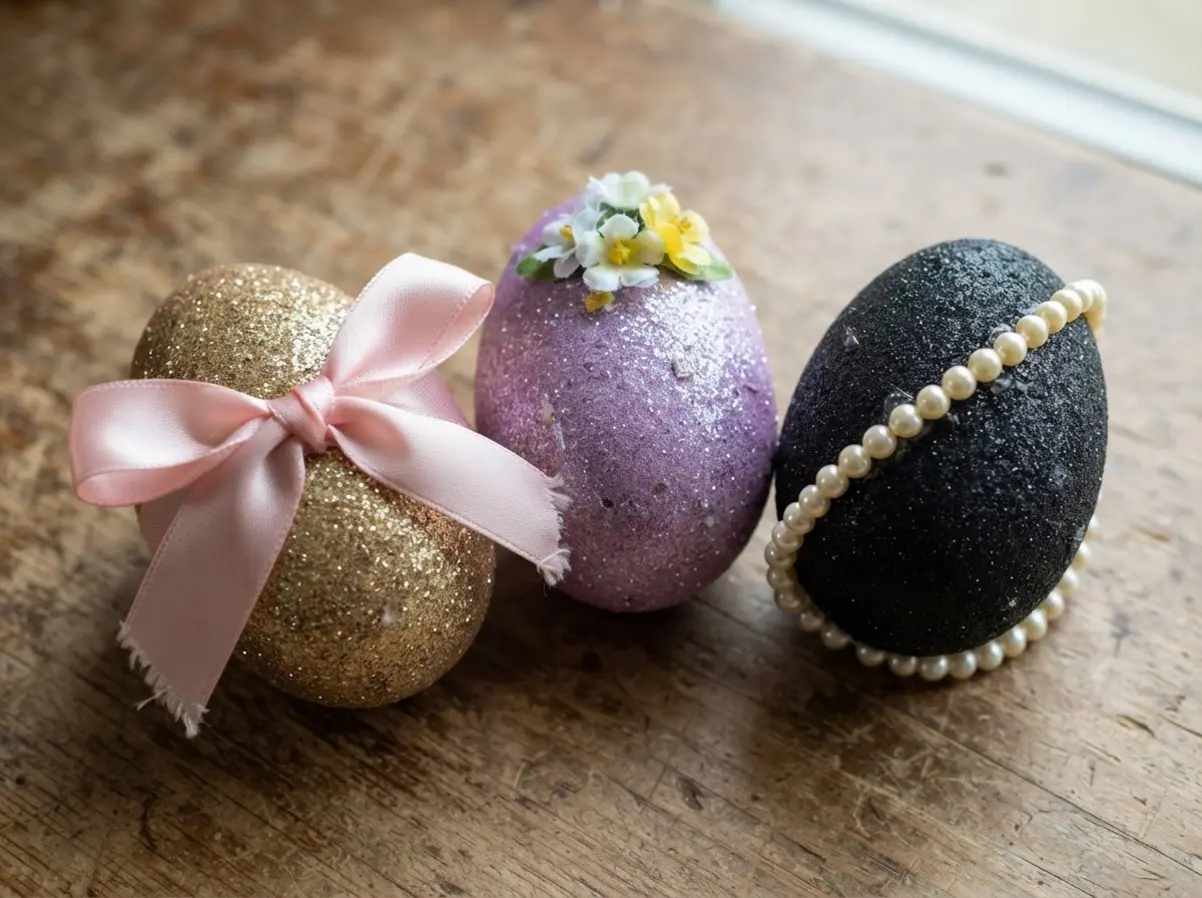
I love seeing how a simple twist of ribbon or a few tiny flowers can completely change their character. I have gathered ten of my favorite ways to dress them up, focusing on clean designs that use materials you can find nearby. You will find ideas ranging from rustic twine wraps to glamorous pearl accents, all designed to give you a quick, gorgeous result.
Adhesive Selection For Different Egg Base Materials
The type of plastic your dollar tree glitter eggs are made from determines which glue prevents glitter from peeling off in sheets. For slick, high-gloss plastic eggs, you need a decoupage medium like Mod Podge or a thick liquid school glue to create a surface the glitter can grab onto. That tacky white layer is perfect for a full-coverage look, while the thinner medium works better for smooth, precise stripes or patterns.
The good news is you likely have what you need already. A thicker adhesive means a longer drying time, but it also gives you a stronger bond. For items with a slightly matte finish, a thinner craft glue might work, but I always go for the stronger option to avoid disappointment.
Strategic Setup For Minimising Craft Room Mess
Your first dollar tree glitter eggs project will teach you that micro-particles travel everywhere. Your initial move should be lining your entire work surface with a disposable craft mat or sheets of parchment paper. Trust me on this, you will want to create a dedicated glitter-catching station.
Place the piece on a foam block or stick a skewer into a box to hold it vertically while you work. Use small paper cups to hold your colors, and keep a large sheet underneath to funnel every single spilled speck back. A fine-bristle brush helps with precise glue lines and keeps your hands clean, making the process feel orderly.
1. Satin Ribbon Bow Glitter Egg
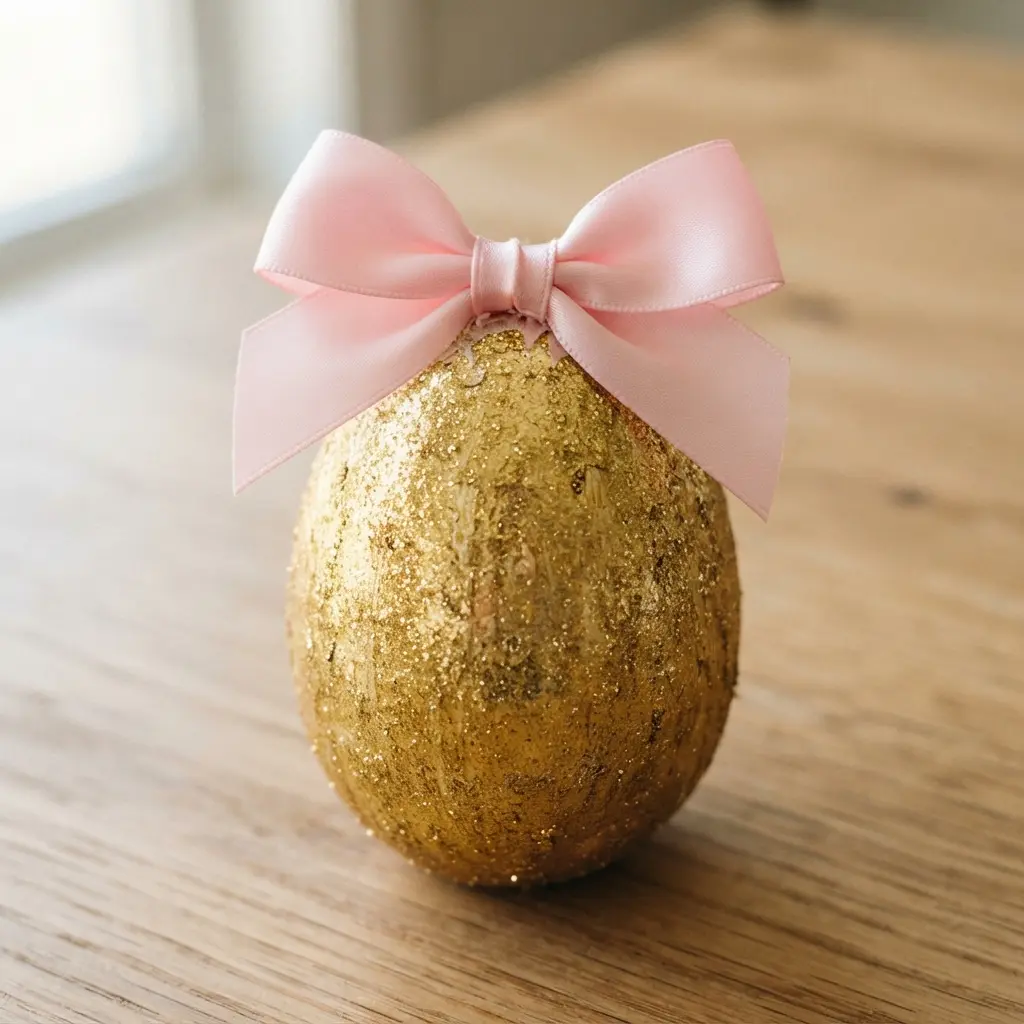
This one is a classic for a reason. It makes plain dollar tree glitter eggs look like fancy store-bought decorations, yet stays simple to make. You only need a clean blank, some craft glue, and your favorite sparkle.
Apply the adhesive in thin sections and roll the piece for even coverage. Let it dry completely before moving on. That is when you add the elegant touch.
Tie a small bow from a piece of satin ribbon and attach it to the top. I love using a hot glue gun because it holds instantly. The smooth ribbon against the sparkly surface creates a beautiful contrast.
2. Rustic Twine Wrapped Glitter Egg
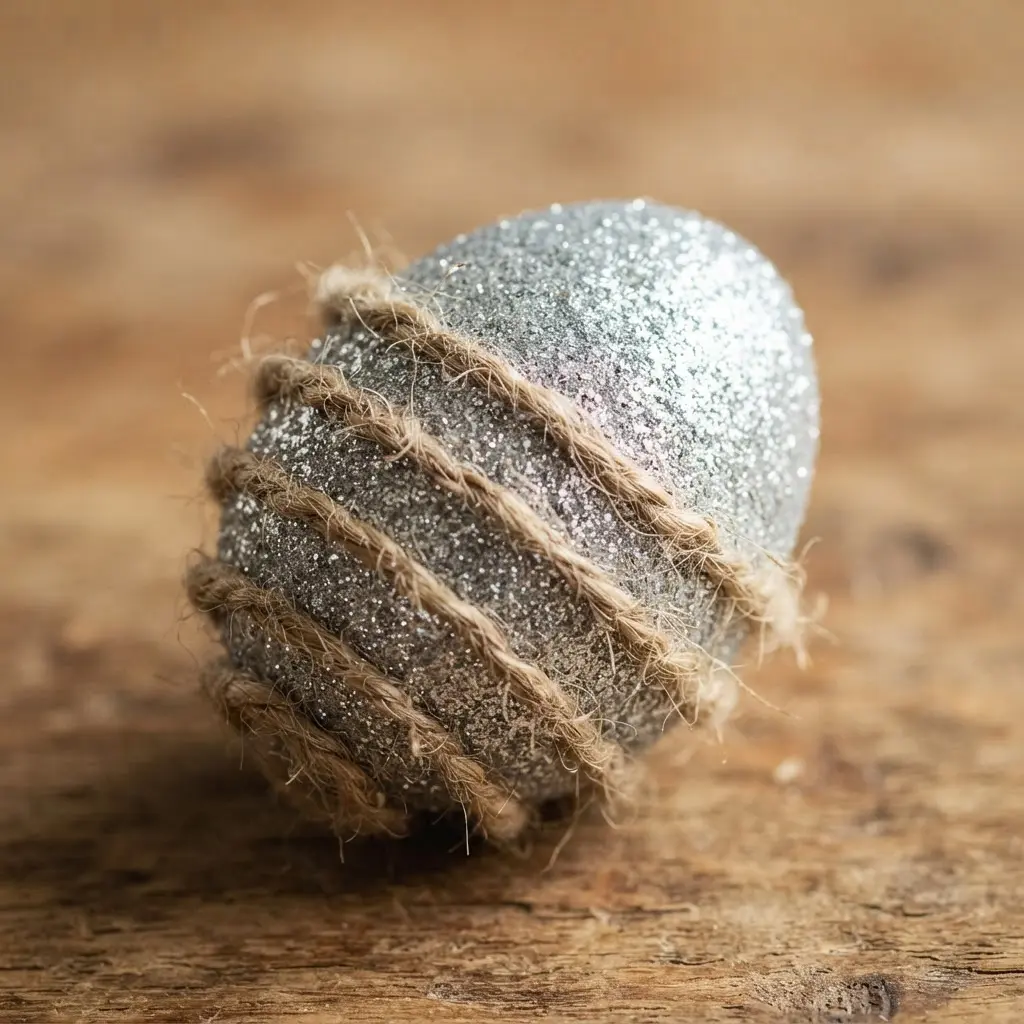
This rustic approach looks detailed but stays surprisingly quick. It transforms basic dollar tree glitter eggs with an earthy, textured finish. You start by wrapping a plastic egg with jute twine, securing it with a dab of glue.
Once the whole form is covered, brush on another layer and immediately sprinkle your sparkle. What makes it satisfying is the contrast between the coarse wrap and the glamorous shimmer. A little pro tip I love is to insert a toothpick to hold the piece while you work.
3. Floral Embellished Pastel Glitter Egg
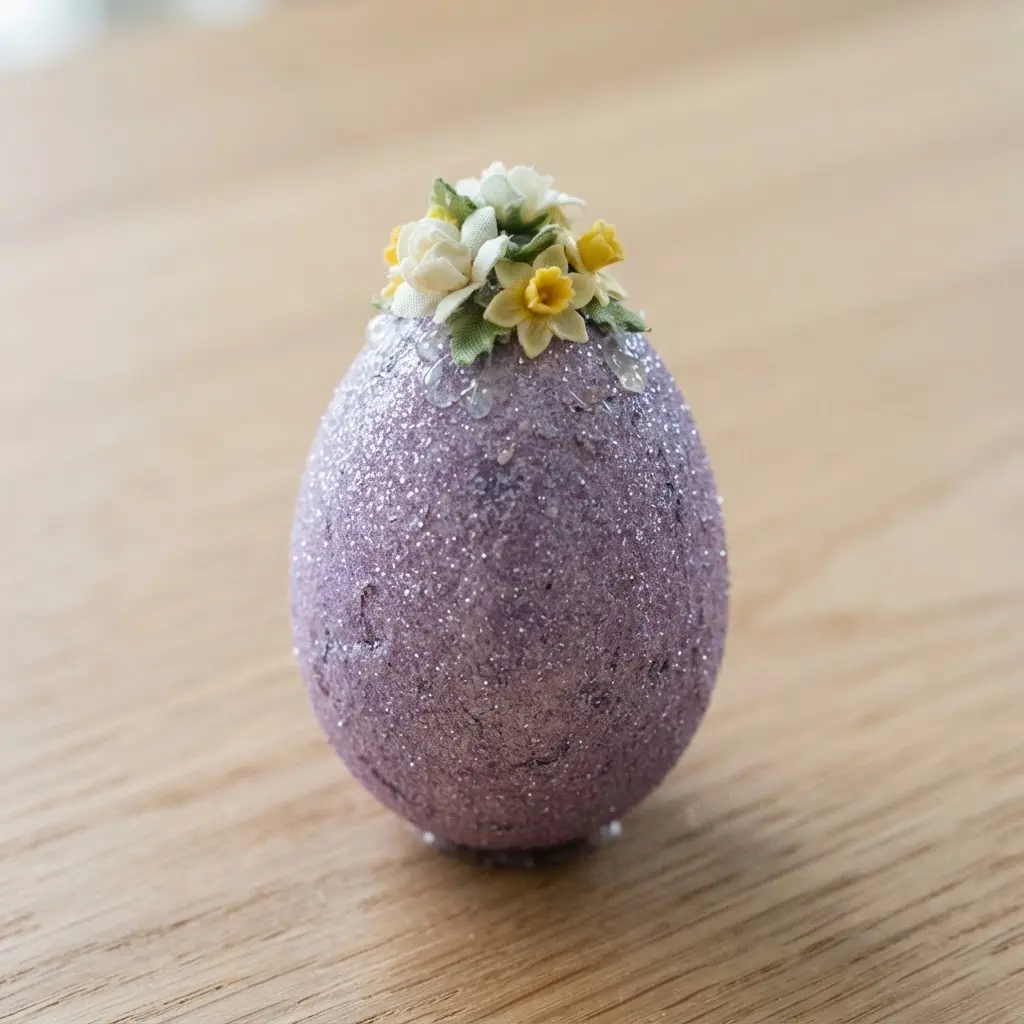
Doesn’t this look like something from a fancy boutique? It is surprisingly simple to create on dollar tree glitter eggs. Start with a soft pastel base and roll the item in a tray of fine glitter while the glue is wet.
I love how the sparkle catches the light beautifully. Once the surface is sealed, use a tiny dot of glue and your tweezers to place delicate little flowers. The soft colors let the floral details pop without overwhelming the base.
The process is very forgiving, so it is perfect to try alongside other projects. You can practice this method while crafting music shaker eggs for a full set of spring decorations.
4. Elevated Wooden Skewer Egg Pick
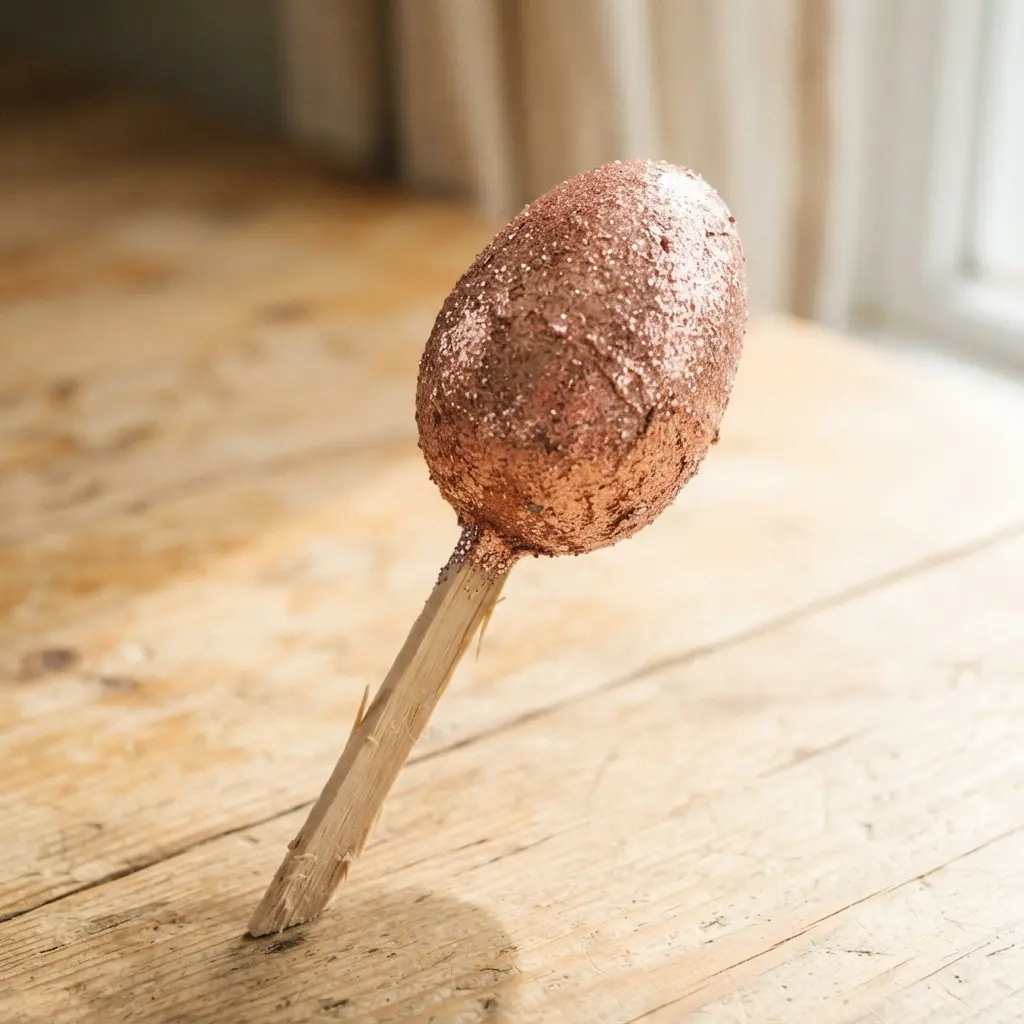
This simple tool is my secret for handling delicate dollar tree glitter eggs without smudging a single sparkle. You gently push a bamboo skewer into the bottom of your finished piece. It gives you a clean, sturdy handle while the glue dries.
You get total control for precise decorating, and your fingers never touch the wet surface. The sharp point goes in easily without cracking the shell. Place it perfectly in a display and watch your project stay completely pristine.
5. Polka Dot Paint Glitter Egg
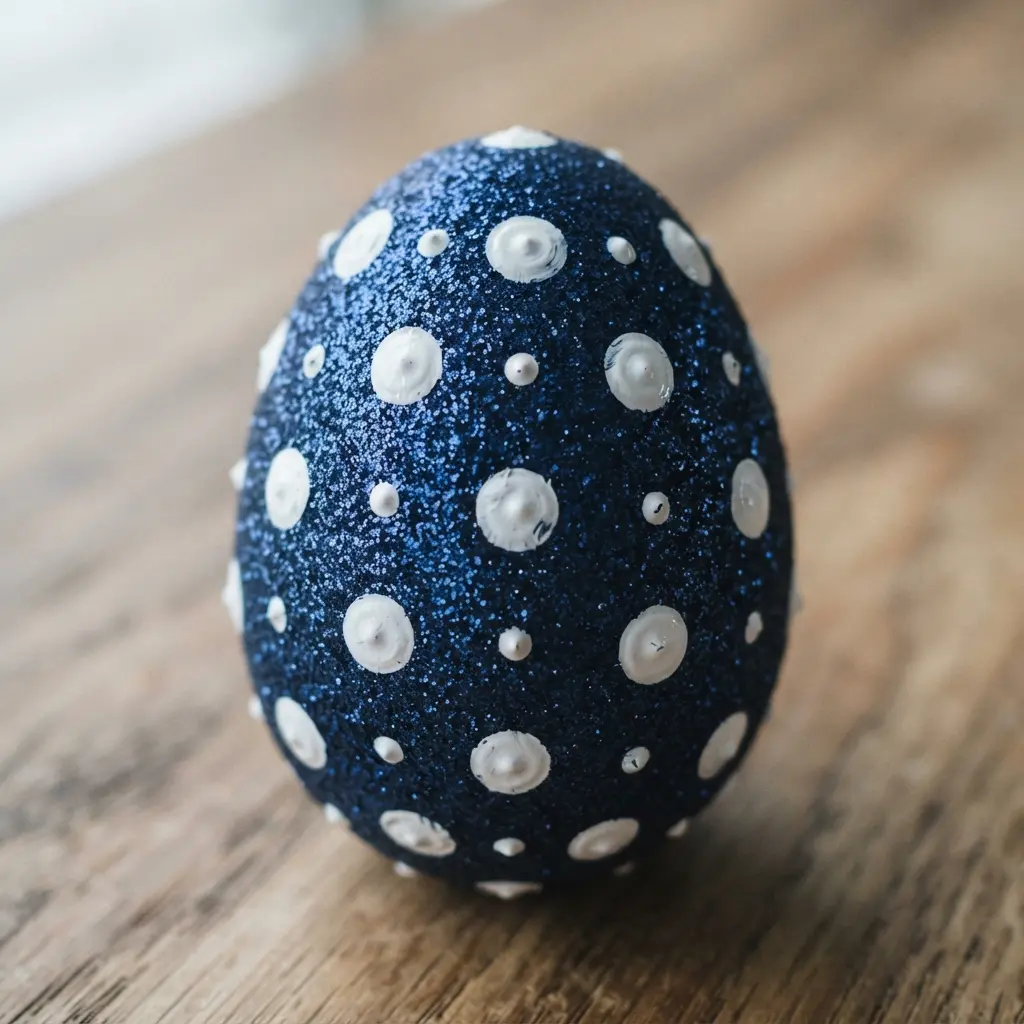
Doesn’t that classic polka dot pattern look so cheerful on dollar tree glitter eggs? This one is a crowd-pleaser because it stays so simple. Give the base a solid color coat, then use the back of a pencil eraser to dab on contrasting dots.
I love this method because it gives you perfect circles without stress. Once those dots dry completely, brush a thin layer of clear adhesive just over them. Sprinkle on your sparkle immediately and tap off the excess.
You instantly transform a cute painted piece into a sparkling little gem. That immediate payoff makes this project so fun for a group. The finish gives your egg a fantastic tactile and visual appeal.
6. Vintage Lace Trimmed Glitter Egg
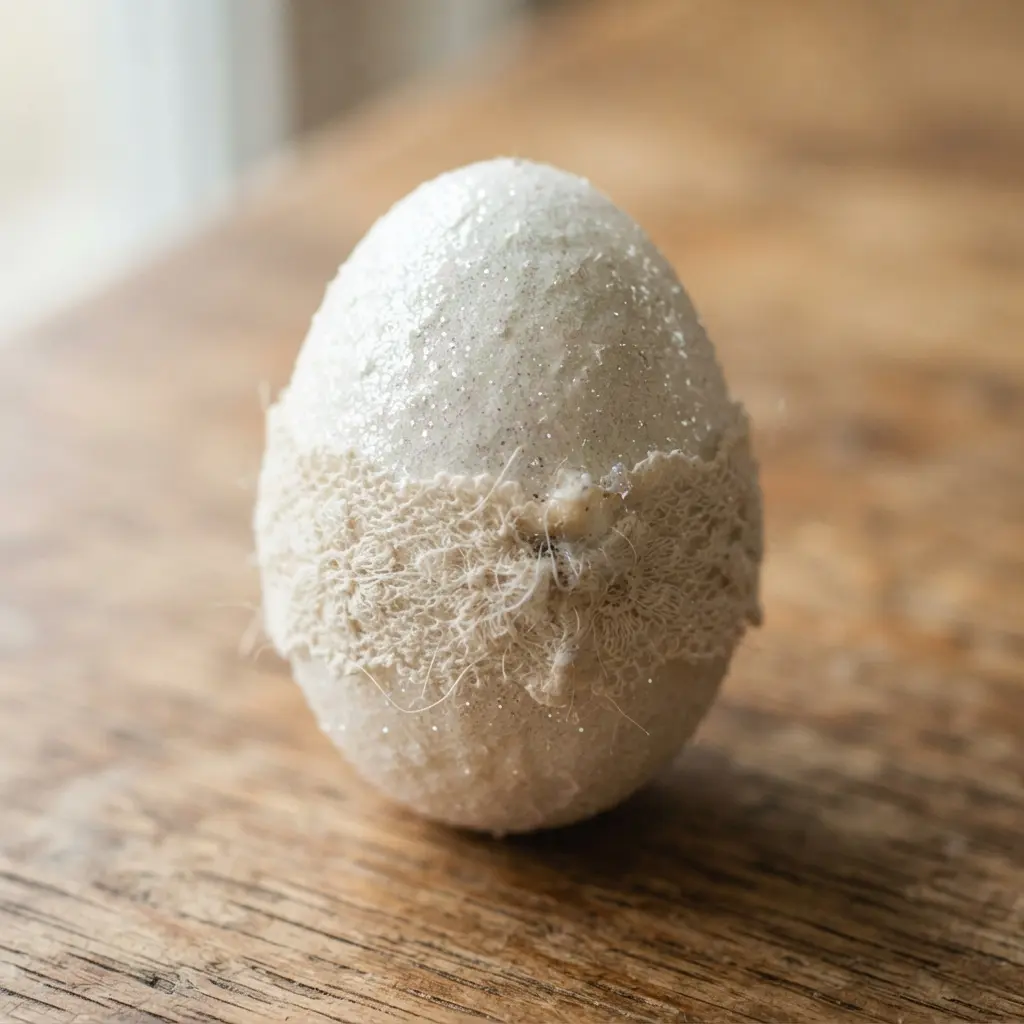
This elegant style looks like it came straight from a grandmother keepsake box, even on basic dollar tree glitter eggs. You start by wrapping delicate lace trim around the center. Cover the exposed areas with Mod Podge and sprinkle on a soft, fine sparkle.
The magic is in the contrast between the intricate fabric and the smooth shine. I love how this feels both nostalgic and festive. Use a thin layer of glue to avoid a clumpy finish and let it set undisturbed.
Your finished piece will have a lovely, heirloom quality. For another sophisticated look, you need a proper guide to elegant golden Easter egg crafts to round out your collection.
7. Preserved Sheet Moss Glitter Egg
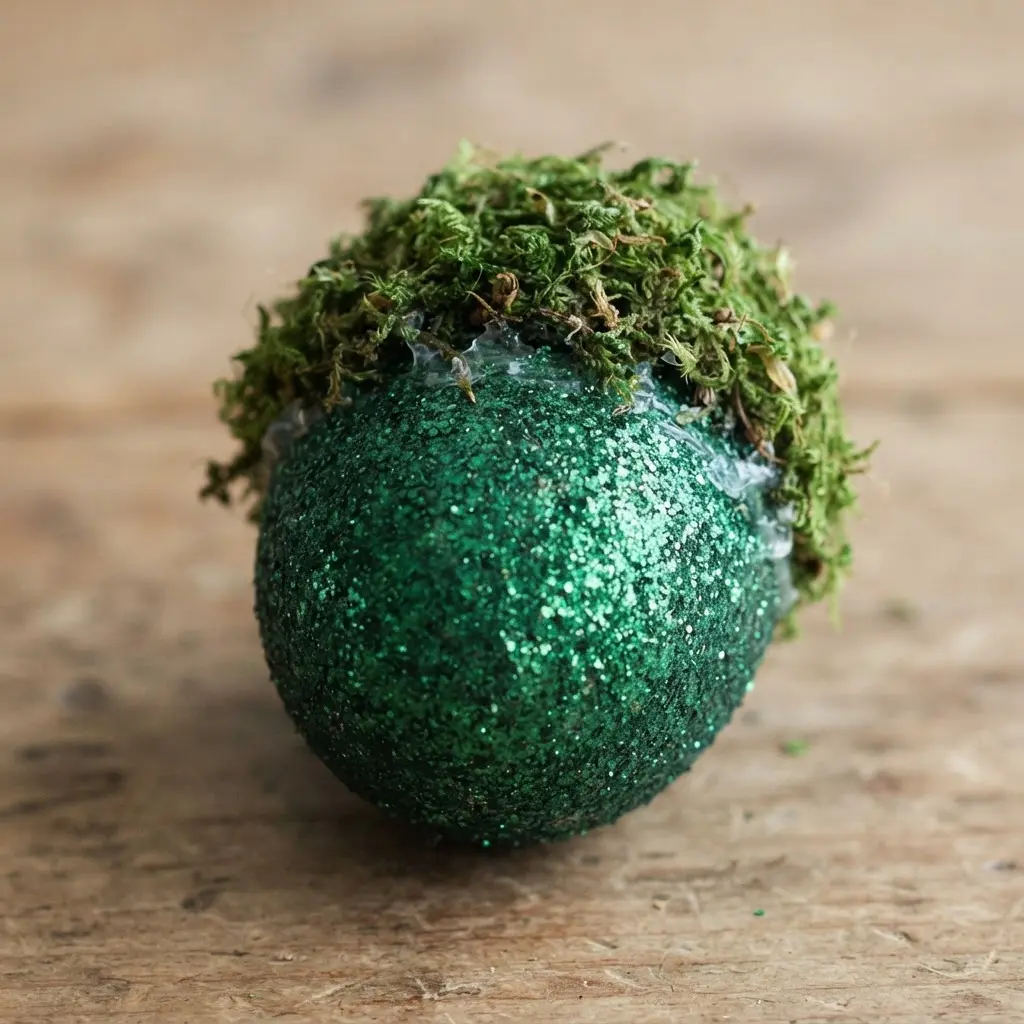
This one feels like bringing a magical forest indoors, even with store-bought dollar tree glitter eggs. Cover your form with preserved sheet moss, pressing each piece into strong craft adhesive. It creates a wonderfully soft, textured surface.
Add your sparkle with a light coat of spray adhesive or Mod Podge. A generous sprinkle of glitter transforms the base from earthy to enchanting. The unexpected mix of natural fibers and celebratory shine looks completely delightful.
For a clean finish and to keep everything securely in place, use clear acrylic sealant. A quick spritz makes your creation durable and ready to display. It pairs beautifully with other outdoor craft ideas.
8. Miniature Pom Pom Glitter Egg
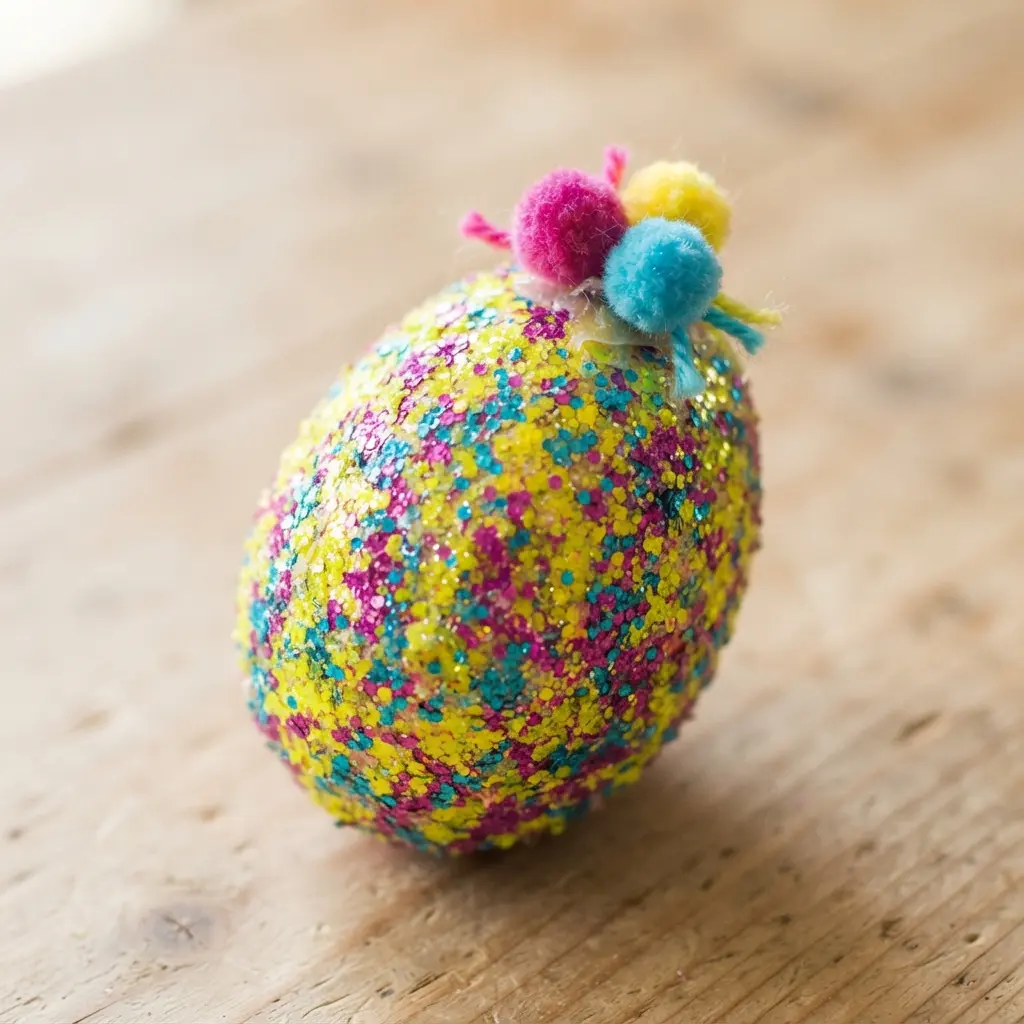
Who knew adding fluff to dollar tree glitter eggs could feel so wonderful? The trick is using those tiny pom-poms and applying glue in small sections. Pack them tightly while the adhesive stays wet.
Sprinkle a generous coat of fine glitter over everything. You get two beloved textures in one cute package. Use tweezers for placement and work over a paper plate to catch extra pieces.
This makes a fantastic accent for a spring centerpiece. It is a cute addition to your diy bunny Easter themed items. The playful combination brings a fresh, joyful energy to any display.
9. Pearl Embellished Glam Glitter Egg
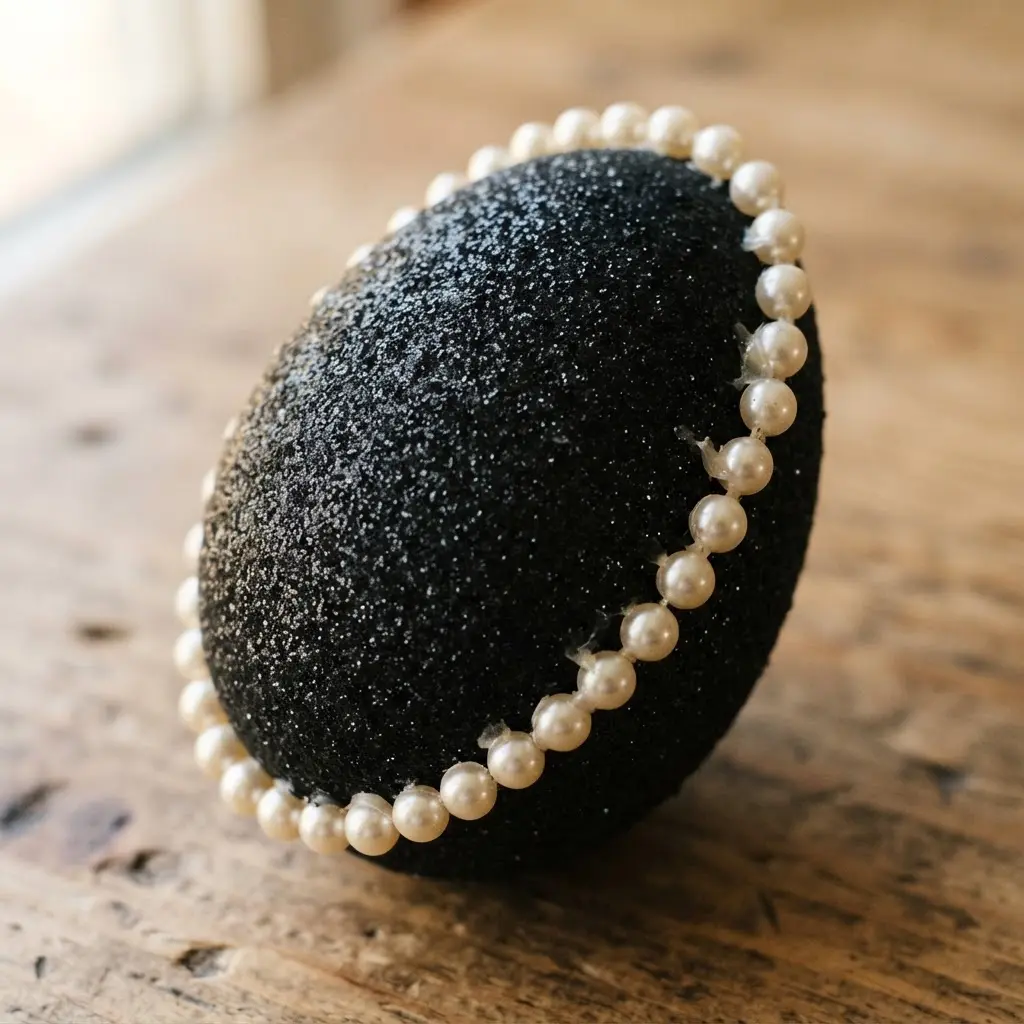
This one looks surprisingly fancy but stays easy to execute on dollar tree glitter eggs. Coat the base with a generous layer of Mod Podge and cover it completely with sparkle. Use a stick in the bottom to hold it while you work.
The combination of shine catches the light from every angle. After the sparkle dries, it is time to place the pearls. A gem picker tool makes arranging flat-backed pieces in a pretty pattern straightforward.
Let each layer dry completely before moving forward. This step prevents smudges and makes the final piece look professionally made. You will feel proud when it sits perfectly beside other decorative accents.
10. Felt Flower Topped Glitter Egg
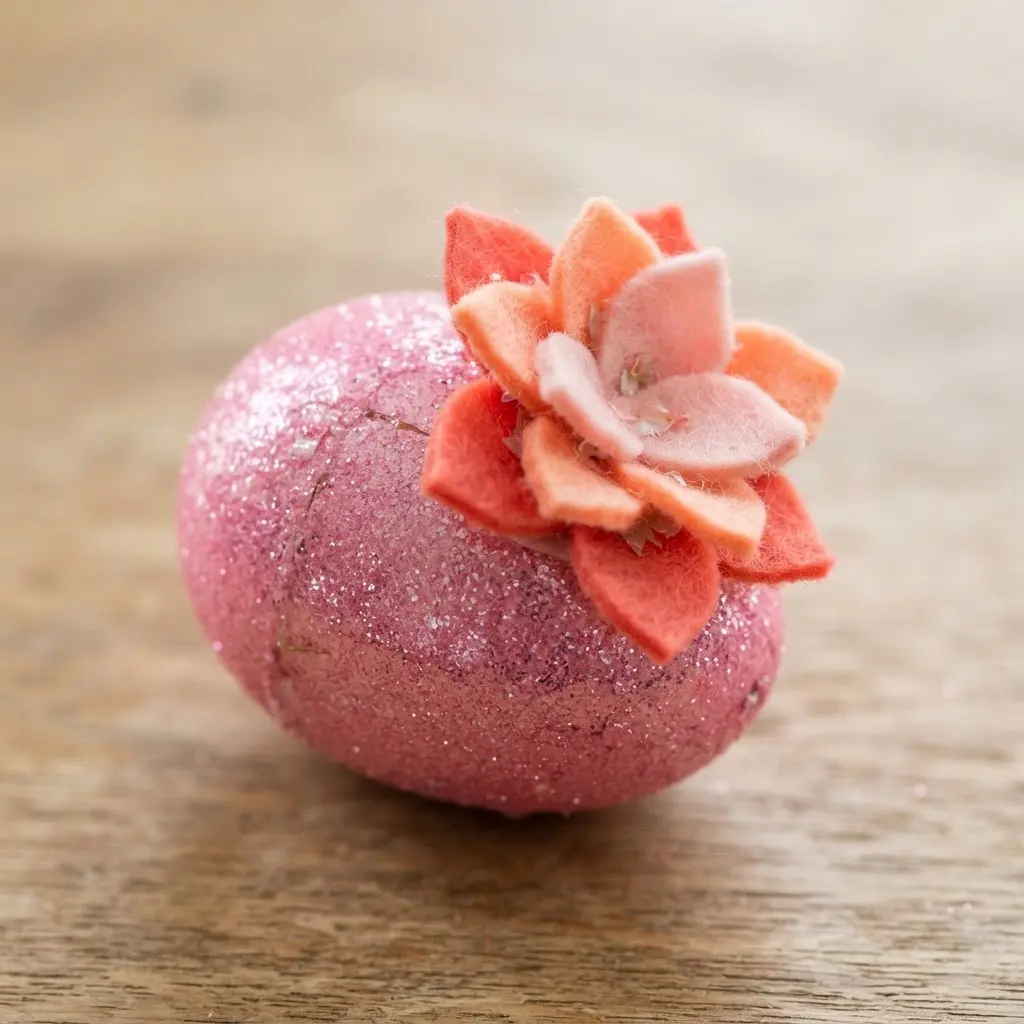
This project covers standard dollar tree glitter eggs with an incredibly simple, cozy touch. Apply a generous layer of mod podge and your favorite sparkle, letting it dry completely. Then cut simple shapes from colorful craft felt to build sweet little flowers.
The magic is in the wonderful mix of textures. The sparkly base catches the light, while the soft felt adds a handmade quality you cannot resist. Use a wooden stick as a handle during the sparkling phase to keep fingers clean.
Once finished, the piece makes a perfect spring centerpiece. You can even use the same felt technique to decorate a seasonal holiday wreath later in the year. It is a versatile skill that translates beautifully across different crafts.
Techniques For Sealing And Reducing Shedding
Skipping the sealant step ruins most dollar tree glitter eggs quickly. You must lock in all that sparkle with a protective clear coat. After your adhesive is completely dry, take the project outside and apply a light mist of industrial acrylic sealant.
Hold the can about ten inches away and use quick, sweeping motions to avoid drips. One light coat bonds the loose particles to the adhesive underneath. This final layer creates a durable shell that handles gentle dusting and storage.
Conclusion
The best part of working with dollar tree glitter eggs is how quickly your vision comes together. They provide a forgiving canvas that lets you play with texture and style without pressure. My advice is to pick one or two ideas that speak to you and make a small batch. Seeing your handmade pieces on a mantel feels rewarding and uniquely personal. I hope these concepts give you a fun starting point for your own dollar tree glitter eggs this season.
FAQs
Q: What is the best glue to use on plastic glitter eggs?
A: A low-temperature hot glue gun works very well. It creates a strong bond quickly without damaging the plastic surface. For lighter items like tiny pearls or loose sparkle, a thick craft glue is a reliable alternative.
Q: Can I paint directly onto the glitter surface?
A: Yes, acrylic craft paint adheres nicely to the coated surface. For best results, use a small brush and apply thin, even layers. Allow each coat to dry completely before adding another to prevent muddying the design.
Q: How do I attach a skewer to make an egg pick?
A: Use a small drill bit to make a pilot hole in the bottom. Apply a generous amount of hot glue into the hole and insert the wooden stick. Hold it straight until the adhesive sets firm.
Q: Will ribbon and lace stay on without glue?
A: For a secure hold that lasts through the season, adhesive is necessary. You can place a thin line of hot glue along the back of the ribbon as you wrap it around the center.
Q: Are these decorated eggs reusable for next year?
A: With careful storage, they absolutely last. Place them in a sturdy box with tissue paper between layers to prevent crushing. Avoid extreme heat or dampness to keep the plastic and glue intact.