
Dreamcatchers have been around for centuries, and they’re still popular today as a way to add a bohemian touch to any room. But what if you could make your own dreamcatcher that’s not only unique but also functional? Enter the DIY Doily Dreamcatcher!
In this blog post, we’ll guide you through the step-by-step process of creating your very own dreamcatcher using a doily as the base. Not only is this project fun and easy, but it also allows you to customize your dreamcatcher with your favorite colors, beads, and feathers. So get ready to channel your inner artist and create a one-of-a-kind piece to hang in your bedroom or living room.
I’ve been wanting to make my own DIY Doily dreamcatcher to hang in my craft room for sometime now. I just love how they look. I love the crocheted looked of the doilies combined with lace and leather. The best part about making a DIY Dreamcatcher is that you can put your own personal spin on these. You can add feathers, beads, shells, and I’ve even seen pieces of driftwood.
If you like a particular color, the doilies are also very easy to dye. I decided keep my dreamcatcher the original color of my doily because I wanted to stay to more of the earthy colors and creams. Do you have a vintage doily from a Grandmother or Aunt and you just don’t know what to do with it? Don’t get rid of it, a DIY dreamcatcher is the perfect project for it. Let’s get started!

Diy Doily Dreamcatcher
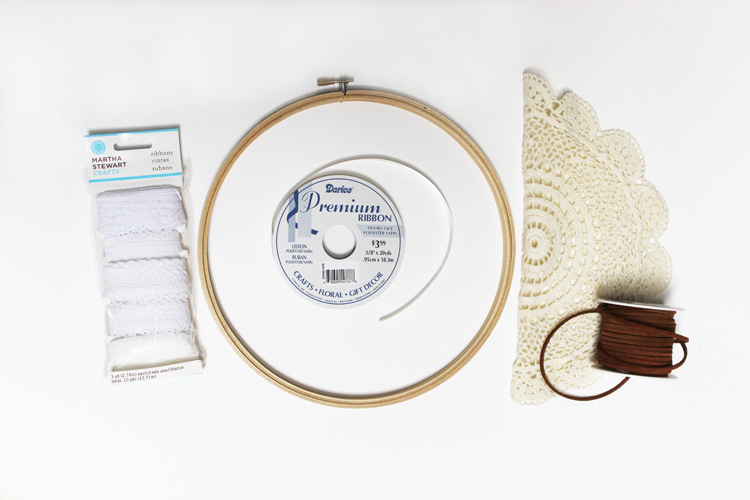
Supplies
- Darice Doilies
- 12″ Darice Embroidery Hoop
- Hot Glue & Hot Glue Gun
- Martha Stewart White Doily Lace and/or Trim
- Darice Suede Lace
- White Satin Ribbon & Cream Satin Ribbon
- Scissors
- Scrap Pieces of Leather
- Gold Wire – Optional
Direction
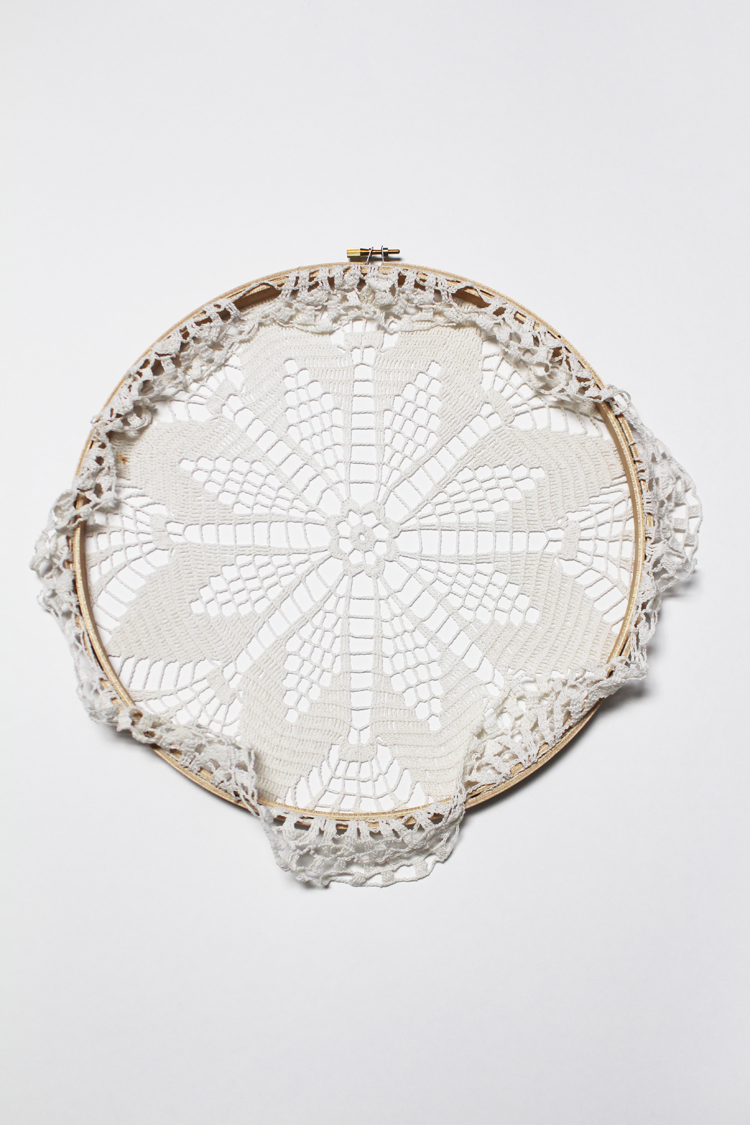
Step 1. Stretch the doily over one piece of the embroidery hoop frame. Secure the doily by placing the second piece of the embroidery hoop over and around it. Turn the tightening device at the top of the frame as tight as it will go.
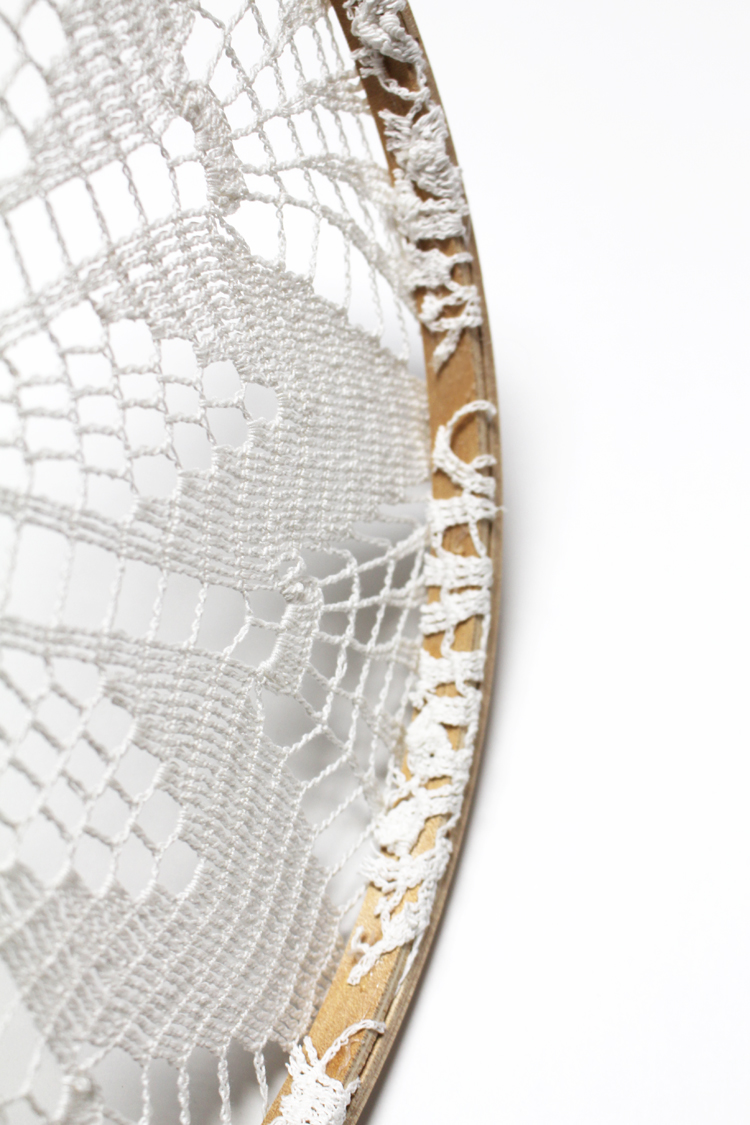
Step 2. Trim the doily leaving roughly a 1/2″. Hot glue the ends to the inside of the embroidery hoop.
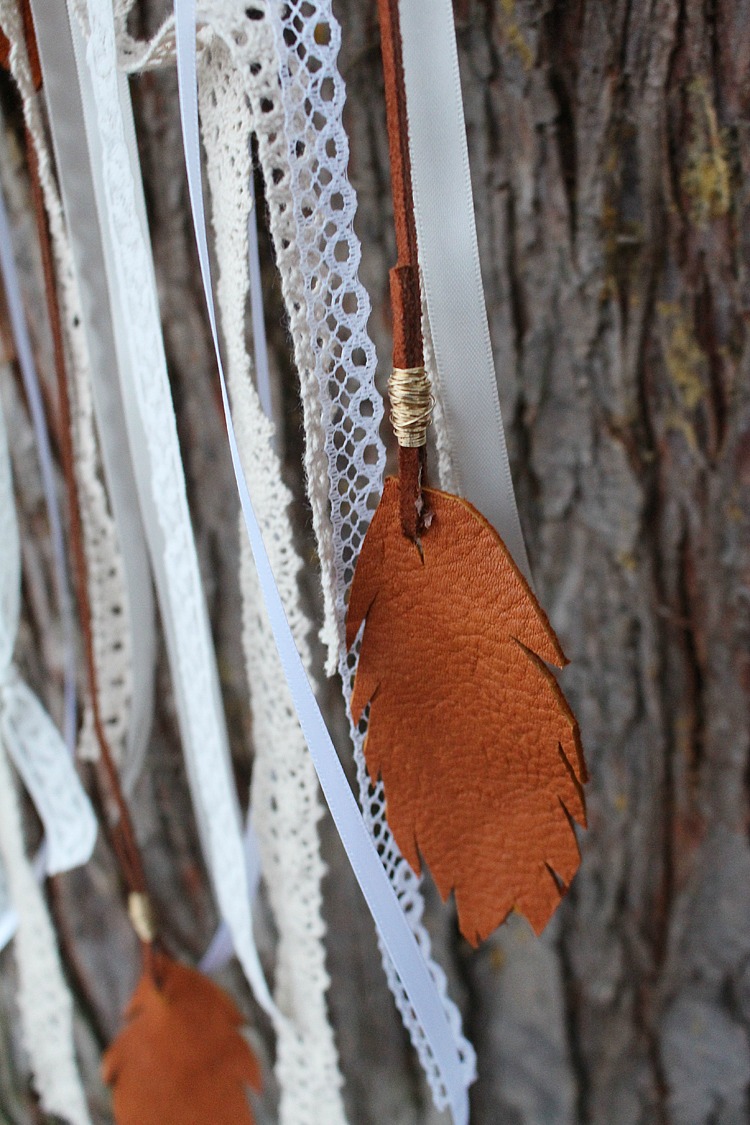
Step 3. Hot glue or tie any items you wish to add to your dreamcatcher. I added the satin ribbon, doily lace, various trim, and suede lace. Add as much as you like, depending on how full you want your DIY Doiley Dreamcatcher to look.Here’s one of the leather feathers I cut by hand. I used some really nice leather scraps that I have been hanging on to and they worked great. I also took a little gold wire and just wrapped it around the suede lace. Like I said, there are just endless creative possibilities to what you can add to a dreamcatcher.
I hope you enjoy making this DIY Doiley Dreamcatcher and explore the many endless possibilities. I know you’ll just love it. I am head over heals for mine!
Creating a DIY doily dreamcatcher is a fun and easy project that can be enjoyed by crafters of all skill levels. By following the simple steps outlined in this blog, you can create a beautiful and unique decoration that will add a touch of whimsy to any room. Whether you’re looking for a new hobby or simply want to add a personal touch to your home decor, making a doily dreamcatcher is a great way to get creative. If you decide to try this project out for yourself, be sure to let us know in the comments how it turned out! We’d love to hear about your experience and see pictures of your finished product.
FAQs
Q: Which thread is used for dream catcher?
A: You may try suede string, embroidery floss, bulky or worsted-weight yarn, or even artificial sinew thread, which is available in most craft stores. You are entirely in charge. Beautiful dreamcatchers have been woven with thread made of butcher’s twine, hemp cord or soft cotton that has been sliced into thin strips.
Q: Which colour is best for dream catcher?
A: The majority of people think that white and blue, which stand for purity and hope, are the finest colours to use for dream catchers. White is the finest choice because it also stands for goodness, freshness, lightness, simplicity, and coolness.
Q: What is the symbolism of the dreamcatcher?
A: One of the Native American culture’s most lasting and well-known symbols is the dream catcher. The recognisable hoop-and-web form is thought to protect sleepers from unpleasant dreams by “catching” them while allowing happy dreams to pass through, hence the name.


