You know that corner in your childs room, the one that needs a spot for them to sit, play, or stash their toys? Finding a piece that fits just right, feels inviting, and can handle the daily adventures of childhood can feel like a puzzle. Thats where planning your diy upholstered bench becomes your secret weapon. Its a project that balances a beautiful finish with the heavy-duty reality of life with kids. This gallery is filled with ten cheerful ideas, each chosen for its beginner-friendly approach and focus on durable, easy-clean materials. Lets find the perfect starting point for your next family-friendly makeover.
Safety Standards For Child Room Furniture Frames
Start every diy upholstered bench with a base made from 3/4 inch Baltic birch plywood cut with rounded corners. This material provides a flat, rigid surface for stapling without splintering, and those smooth edges are non-negotiable for safety. You want to avoid any frame with sharp angles or flimsy construction, as kids will climb on this piece. The good news is, this sturdy plywood base also prevents the foam from compressing unevenly over time. We tend to skip this step, but taking the time to sand every edge until it feels completely smooth in your hand is what makes a project truly child-ready. Trust me on this, it is the foundation that makes everything else possible and durable.
Selecting Performance Textiles For High Traffic Areas
Choosing the right textile for a diy upholstered bench means skipping beautiful but fragile fabrics that stain immediately. Here is the thing: you need a material rated for repetitive use, like a high-rub-count canvas or a performance fabric such as Crypton. These fabrics are designed with a tight weave that resists pilling and a built-in barrier against spills, which is perfect for a child’s play area. You will notice they feel more substantial in your hands than decorative linen. Look for patterns with vibrant color blocking or whimsical motifs that hide everyday smudges. This focus on durability ensures your finished piece looks great after countless snack times and art projects, maintaining its playful character without constant worry.
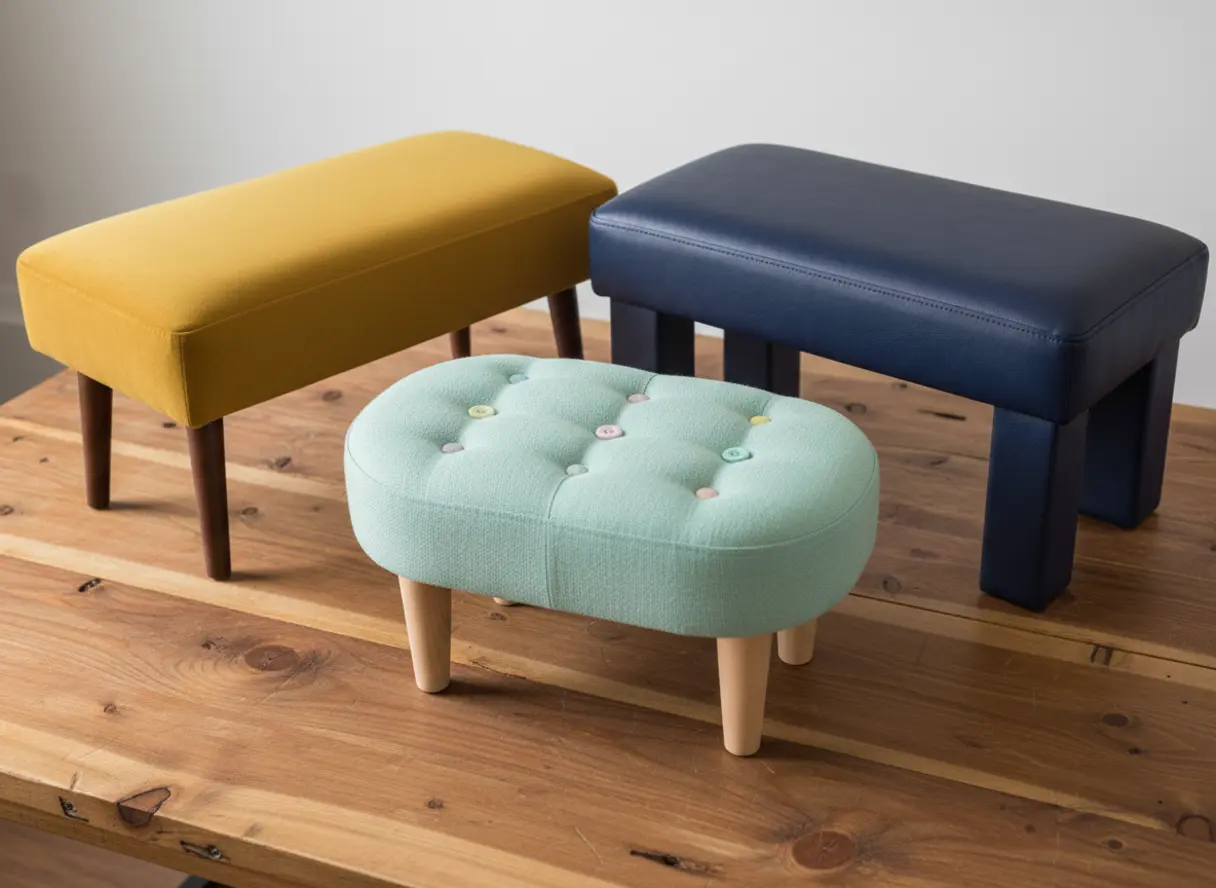
1. Mustard Velvet Modern Low Bench
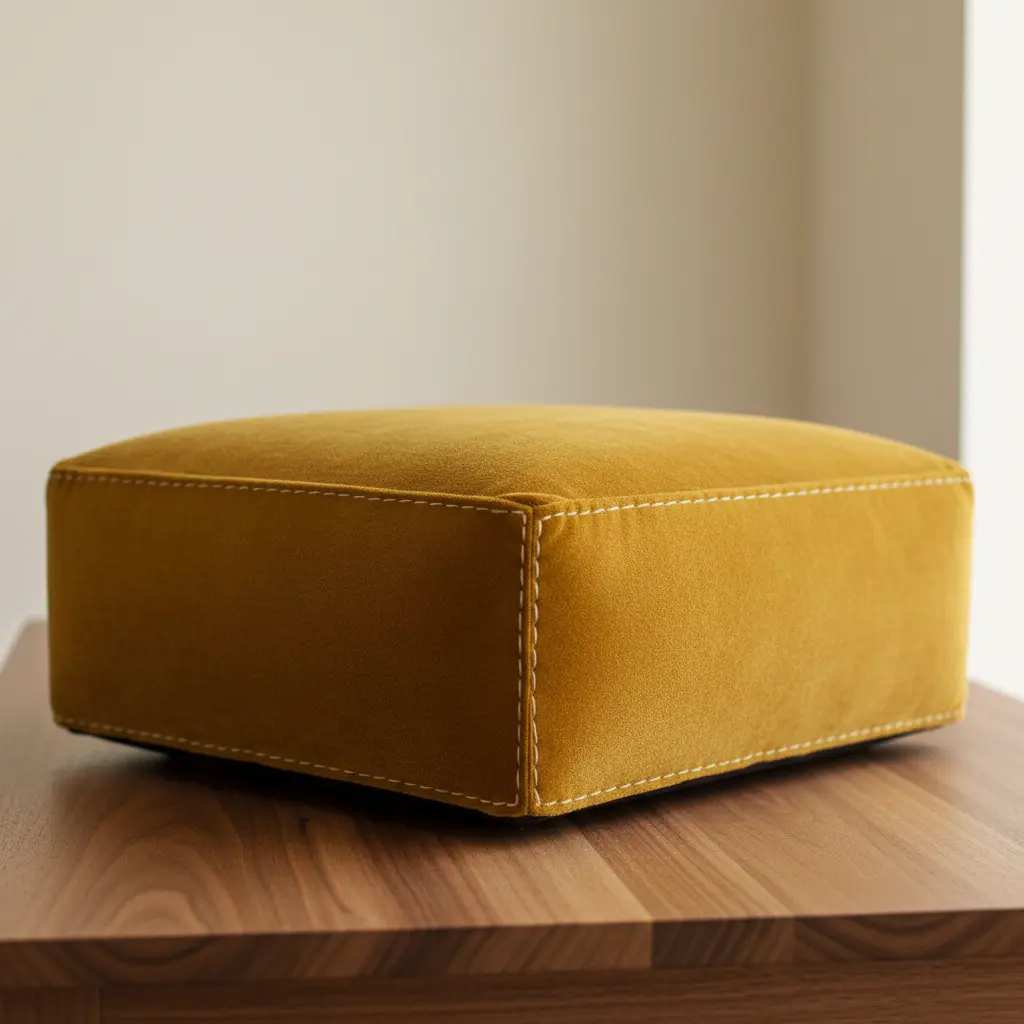
Who says luxurious has to be complicated? Building a modern diy upholstered bench looks like a high-end boutique find, but you can absolutely make it yourself. Start by building a simple, sturdy wooden frame. Then, attach a layer of high-density foam for the seat cushion. The secret to that smooth, professional finish is wrapping everything tightly with upholstery batting before you even touch the velvet.
Now for the star of the show. Drape your mustard velvet over the padded frame and begin stapling from the center of each side, pulling the fabric taut as you work outwards. This technique is satisfying because you literally watch a flat piece of fabric transform into a plush, structured seat. I love how the rich color instantly becomes a focal point. It is a fantastic first project for extra seating or some ideas for bedroom decor at the foot of your bed. Feel that luxurious texture under your hands.
2. Whimsical Patterned Canvas Reading Bench
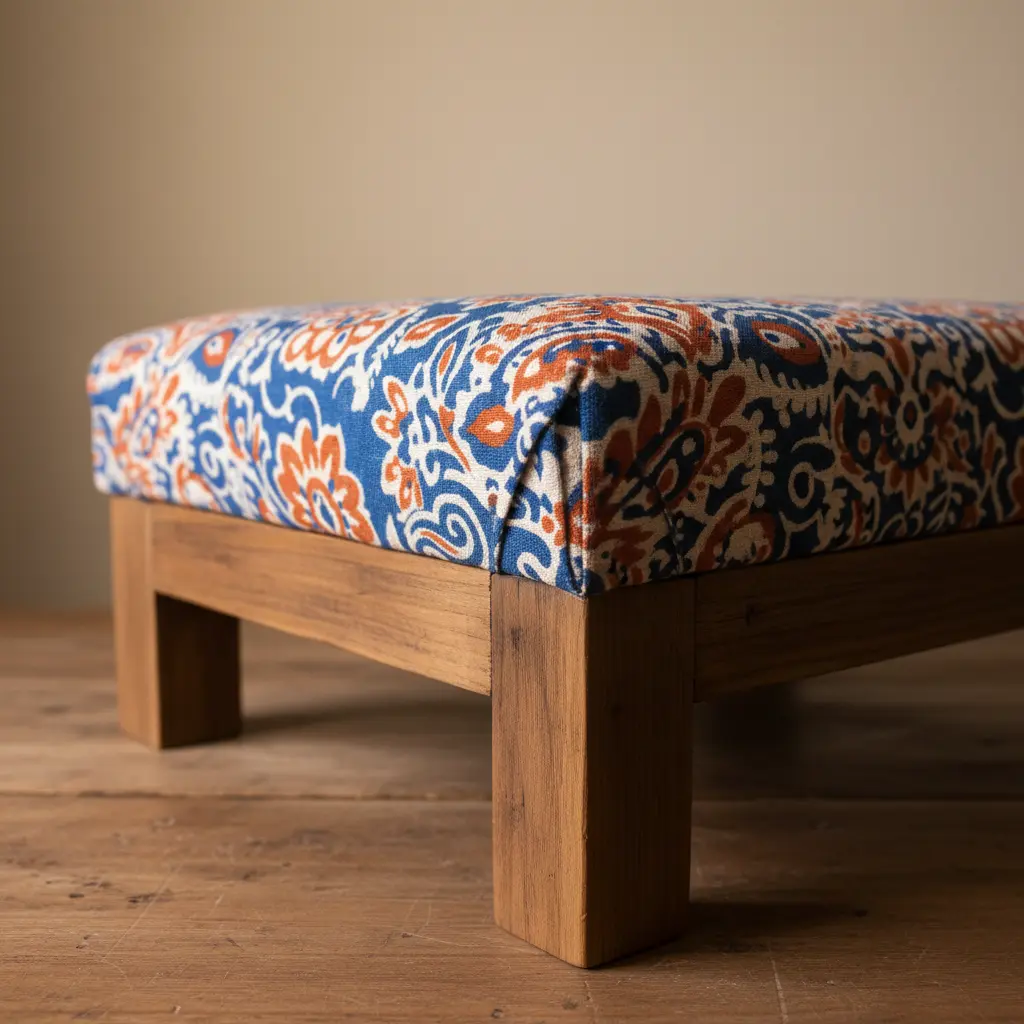
Does a reading nook need to be plain? Not at all! Crafting a whimsical diy upholstered bench brings joyful patterns and cozy comfort right into your reading corner. You start by wrapping thick foam with batting to create a soft, plump cushion. Then, you carefully stretch your chosen patterned canvas fabric over it, stapling it firmly to the wooden frame. The trick is keeping the pattern straight and the tension even as you work from the center out.
I love how this project turns a simple bench into a vibrant, imaginative spot. It works so well because those cheerful designs make a childs space feel inviting and special. Try it and feel the pride of creating a dedicated little haven for stories.
3. Classic Grey Tweed Storage Bench
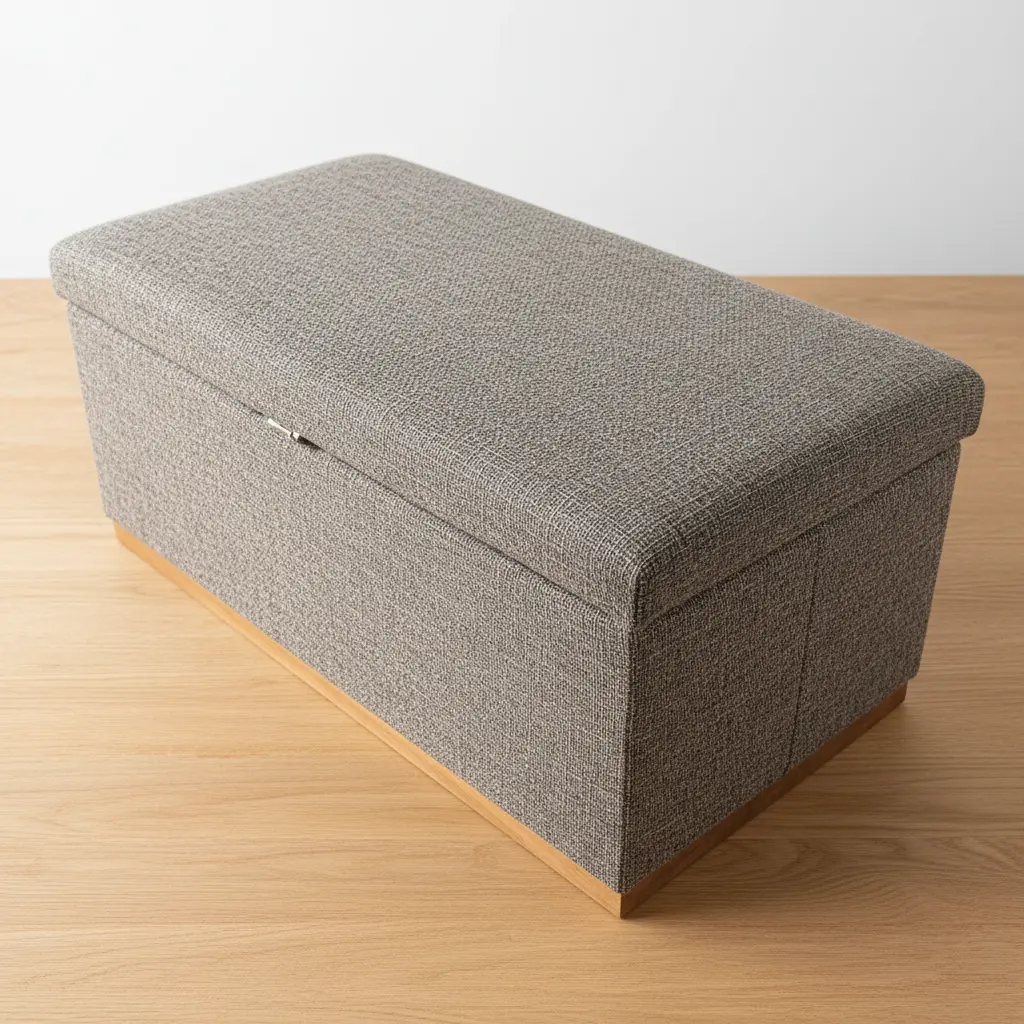
Ever feel like you need a place to sit and a place to hide your stuff? This piece solves both problems with classic style. You build a sturdy frame and add a high-density foam seat for comfort, then wrap it all in that beautiful, textured grey tweed. I love how the flecked fabric brings a bit of cozy, traditional charm to any room.
The best part is the hidden storage inside the hinged lid. It is perfect for tucking away extra blankets or seasonal decor. Just remember to measure your space first to make sure it fits your spot perfectly. Try it and feel so organized.
4. Pastel Button Tufted Nursery Bench
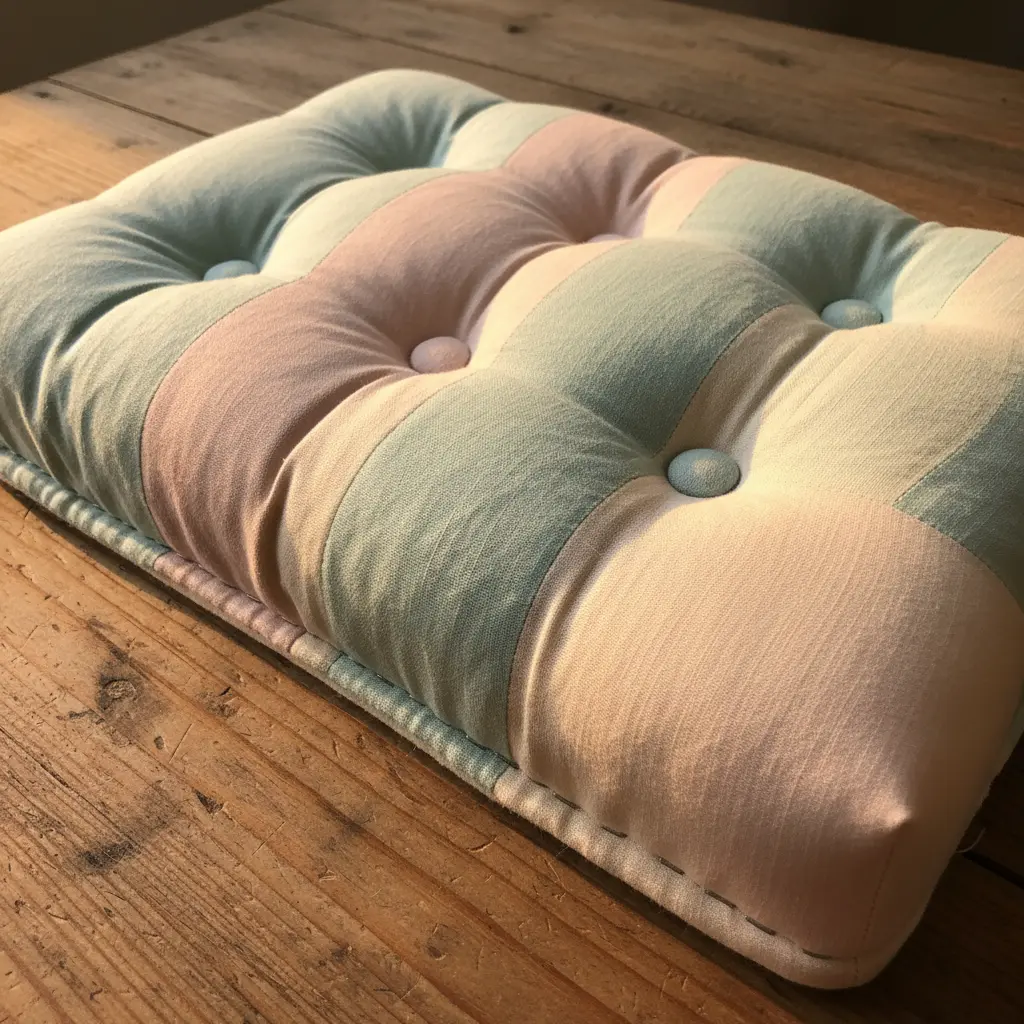
Does a nursery need a fancy bench? Absolutely, and this pastel diy upholstered bench delivers style and comfort in one gorgeous package. The magic lies in the button tufting technique, where you pull fabric-covered buttons through the padding to create that classic diamond pattern. I love how it adds instant texture and a touch of elegance to a simple bench.
Why does it work so well? That tufted surface is not only beautiful but also wonderfully soft for little ones and tired parents. Your biggest win here is choosing a stain-resistant performance fabric in a sweet pastel shade to keep it looking fresh through all the nursery adventures.
5. Boho Rattan Frame Padded Bench
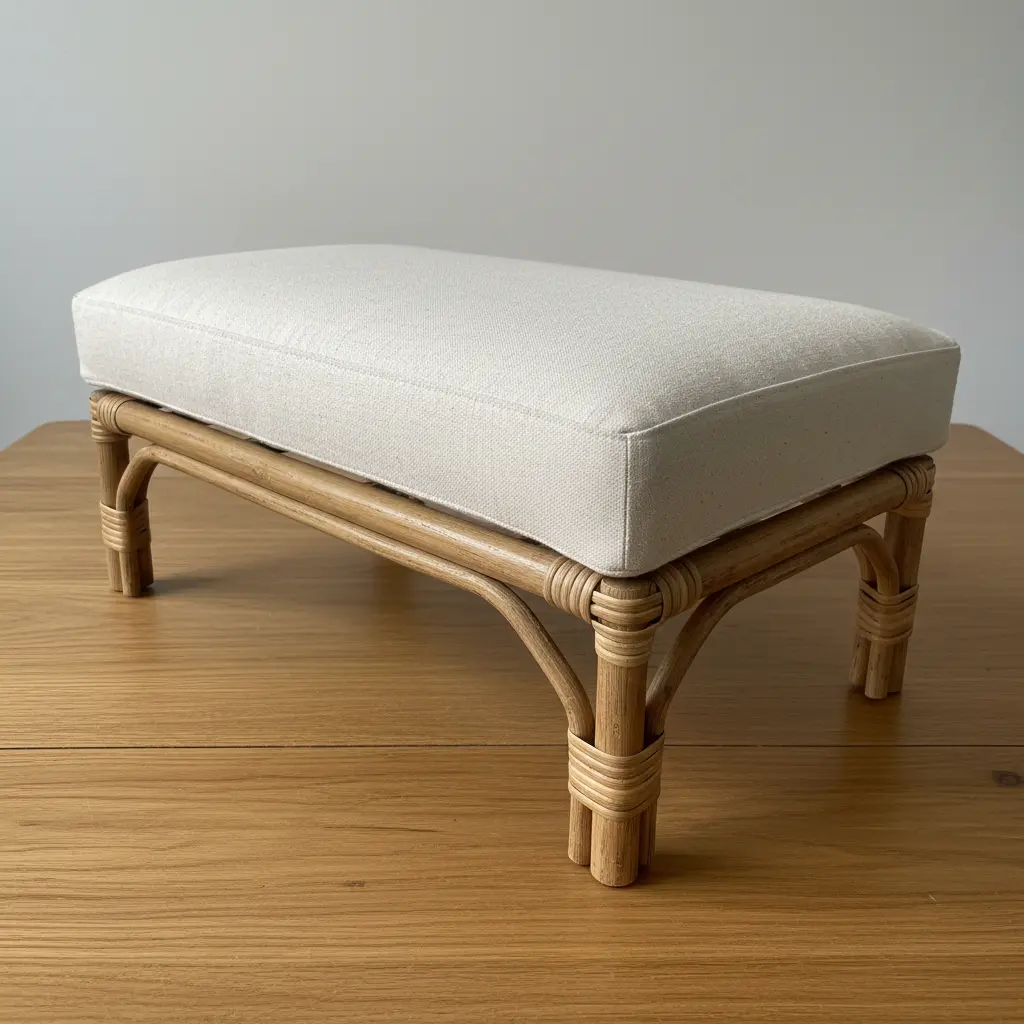
Who would have thought combining a natural rattan frame with a plush seat could feel so effortless? This design brings the best of both worlds: the organic texture of rattan and the cozy comfort of a padded cushion. You start with a beautiful natural rattan frame, which you can often find ready-made. Then, you create a simple padded seat by wrapping high-density foam with your chosen fabric and securing it underneath with a staple gun.
The magic happens when you attach that soft seat to the airy rattan base. I love how this instantly adds warmth and a relaxed vibe to any corner. The trick is to choose a durable, neutral-toned fabric like a linen blend and pull it drum-tight as you staple. This ensures a smooth, professional finish that lasts. Try it and feel your space transform with that perfect boho touch.
6. Industrial Minimalist Denim Covered Bench
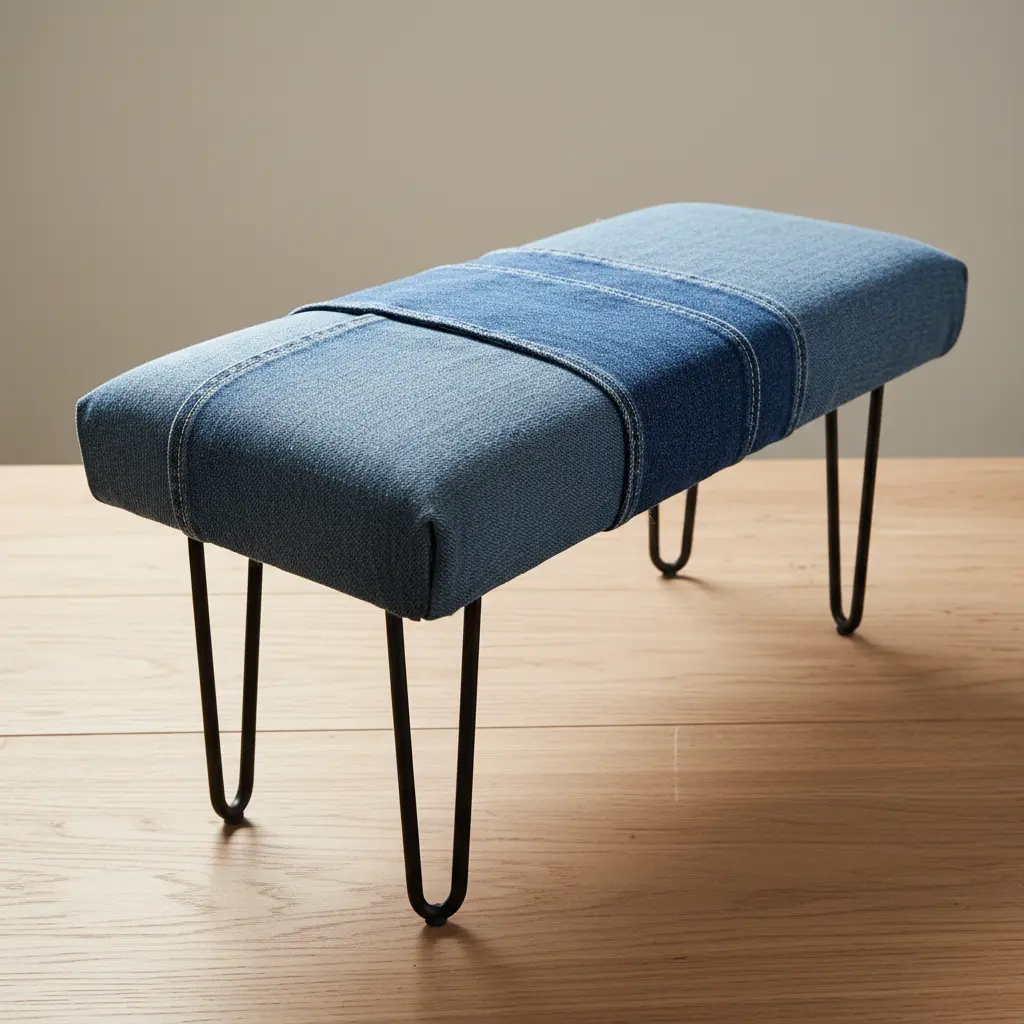
Who would have thought denim could feel so right on a piece of furniture? Building this diy upholstered bench starts with a simple frame made from steel tubing, which you can weld or bolt together for that raw industrial vibe. I love the contrast of that hard metal against the soft, familiar feel of heavy denim stretched over a thick foam cushion.
Your main job is pulling the fabric drum-tight over the foam-wrapped seat base before stapling it underneath. Trust me on this, using heavyweight denim makes all the difference for durability and that perfect lived-in look. Isn’t it satisfying when those clean lines meet rugged texture?
7. Faux Leather Wipeable Playroom Bench
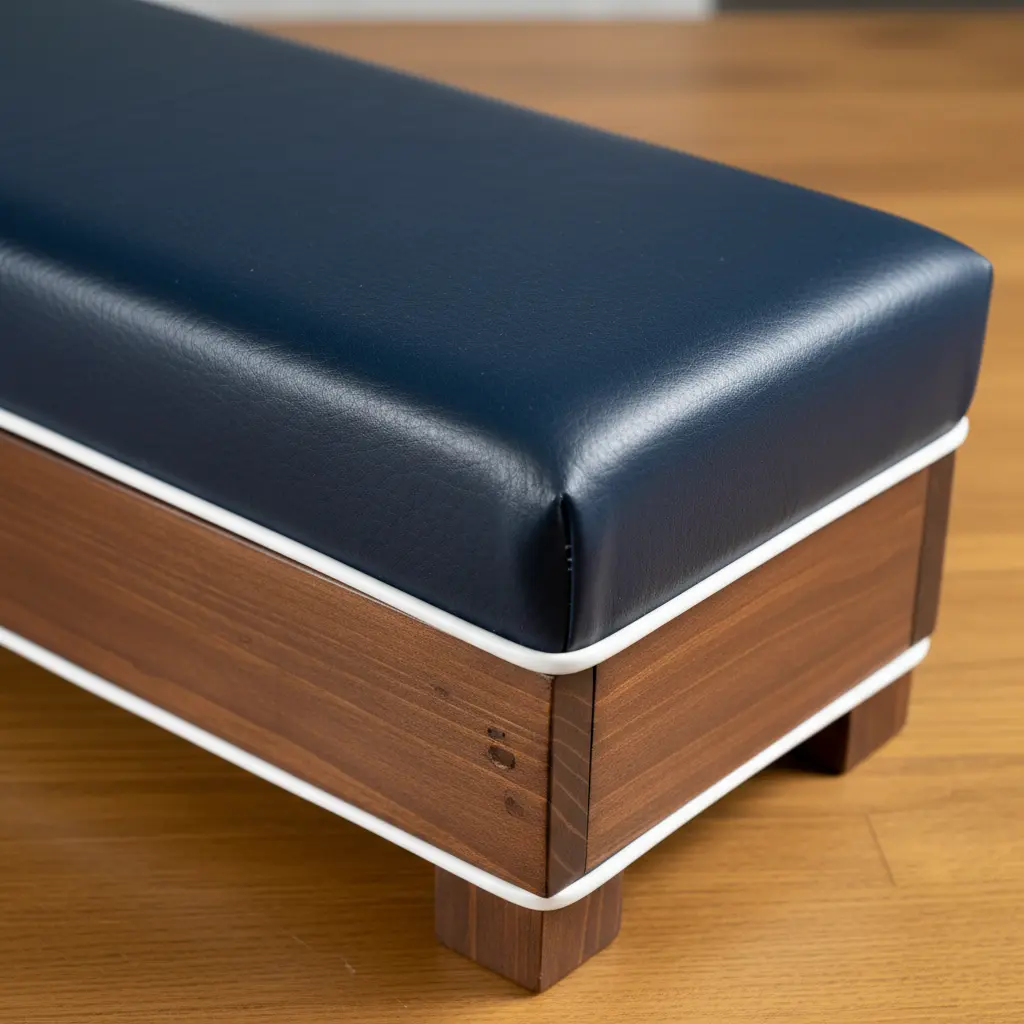
Ever wondered how to add stylish seating that can survive a playdate? A durable diy upholstered bench becomes your secret weapon. I love how it looks sleek but can handle juice spills and marker doodles without a fuss. You simply wipe it clean with a damp cloth and mild soap, and it is good as new.
Focus on finding PU leather for better durability. It is more breathable and less prone to cracking than cheaper vinyl. Look for a sturdy frame with rounded corners and safety hinges on any lift-top storage. This keeps the little ones safe while providing a spot to stash all their toys.
Is not that the kind of peace of mind every parent wants? Feel proud of a space that is both organized and easy to maintain.
8. Patchwork Quilt Inspired Bedroom Bench
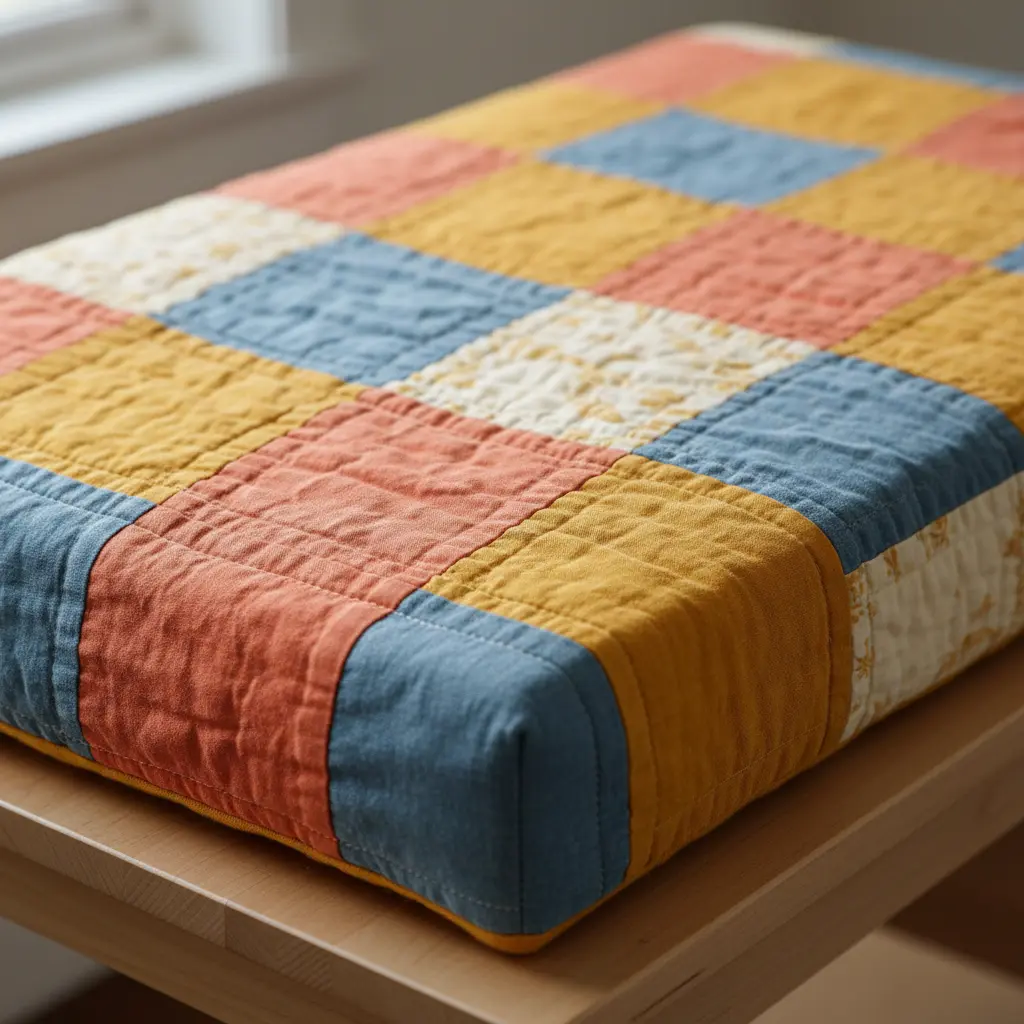
Who says quilts are just for beds? This idea brings that cozy, handmade quilt look right to your feet as a charming bedroom piece. You can use actual fabric scraps to sew a quilt top, or save time with a quilt-patterned upholstery fabric that does the visual work for you. I love how this instantly adds warmth and a personalized touch to a room that might feel a bit plain.
Once your patchwork piece is ready, the process is similar to any bench project. You will pad the seat, then carefully pull the fabric taut as you staple it underneath. The trick is working from the center of each side out to the corners for a smooth, wrinkle-free finish. Does that not look like a cozy, welcoming spot to sit?
9. Plush Faux Fur Entryway Bench
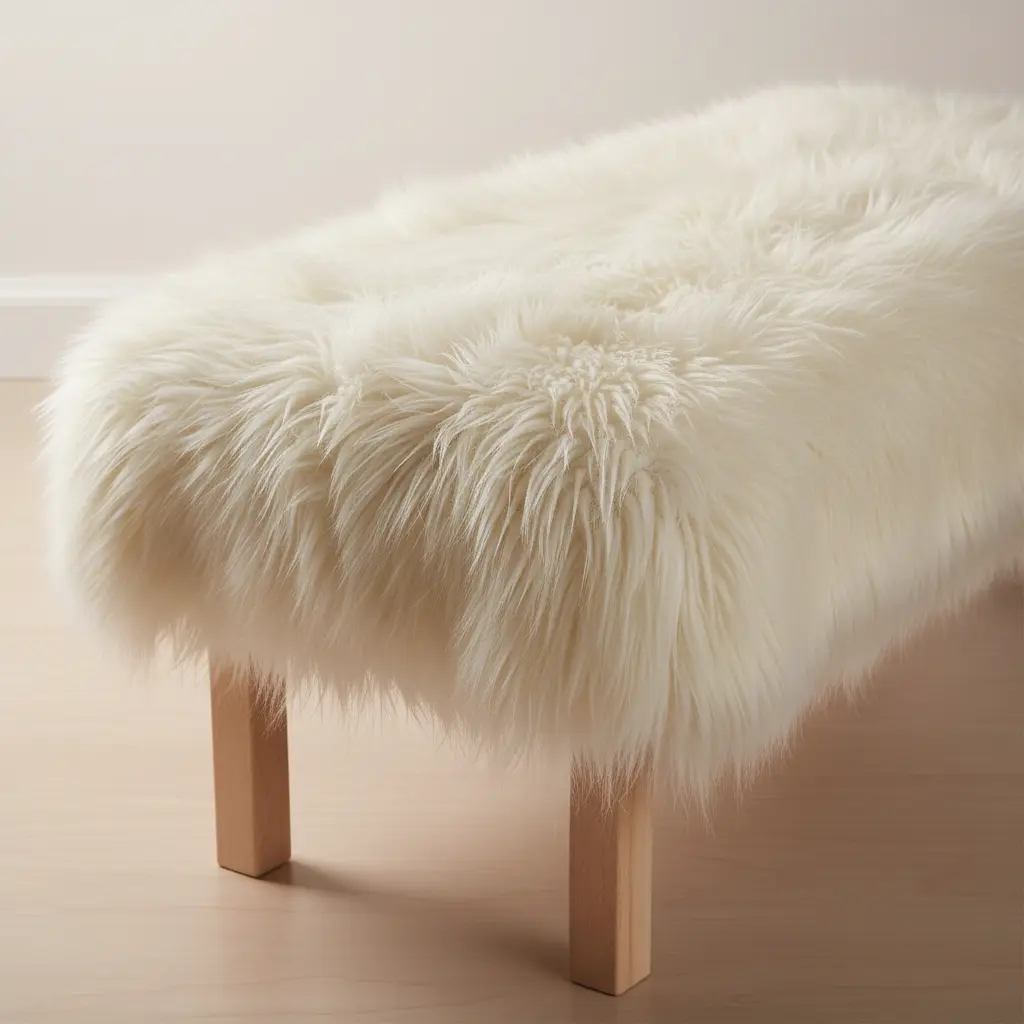
Who would have thought synthetic fibers could bring such instant glamour to your front door? Creating a plush diy upholstered bench is all about building a soft, luxurious landing spot. You will wrap a sturdy bench frame with thick foam padding, then carefully stretch and staple your chosen faux fur fabric over the top. Work from the center of each side outward to get a taut, smooth finish without any wrinkles.
It works because that plush texture is irresistibly inviting and practical. You get a comfortable perch for putting on shoes while adding a rich, tactile element that warms up the whole entry. Trust me, stretching the fabric firmly is the key to a professional look that lasts.
10. Striped Duck Cloth Window Seat
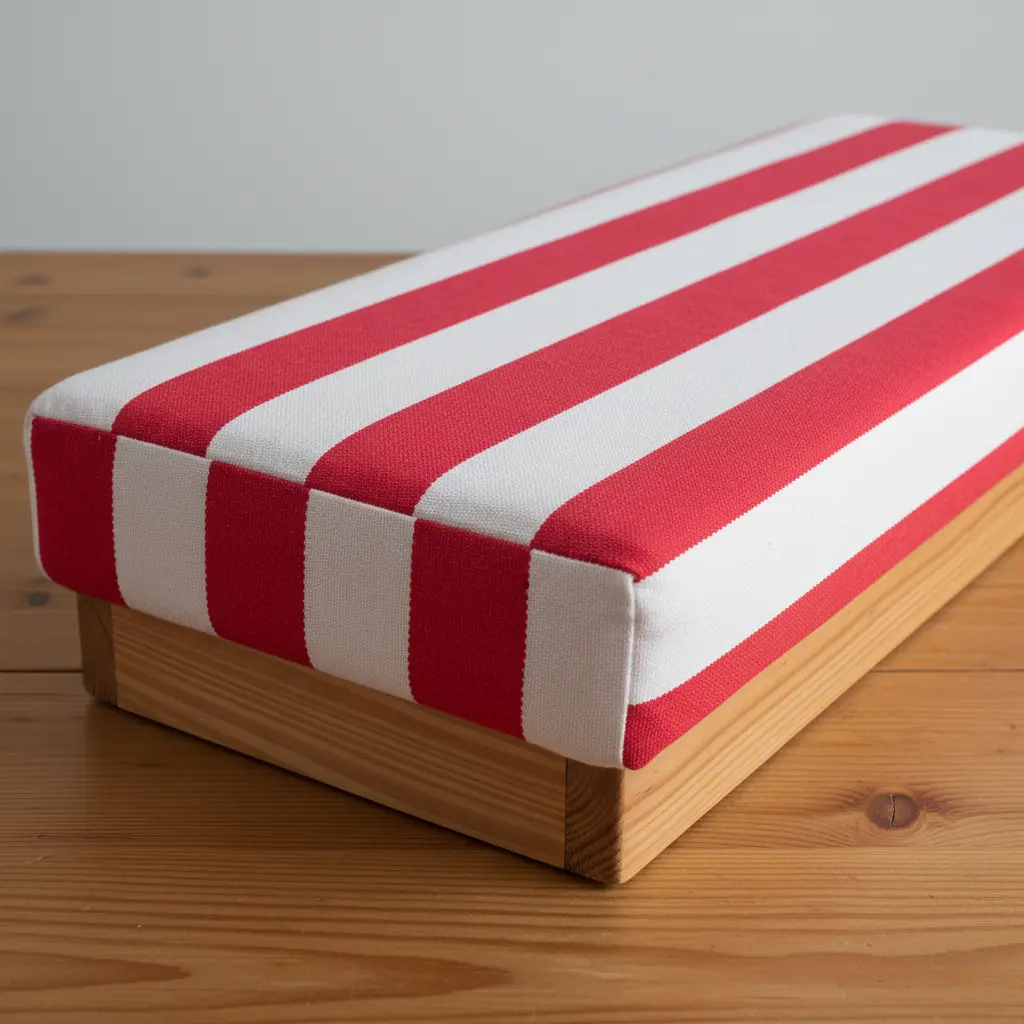
Who says a window seat needs to be fancy? A classic diy upholstered bench covered in bold stripes is a wonderfully durable and cheerful choice. You will sew a simple cushion cover, paying close attention to keeping your stripes perfectly aligned, then wrap your foam and batting before securing everything. I love how this classic pattern works in everything from a coastal nook to a traditional reading corner.
It is so satisfying because the fabric is tough enough for family life but still looks crisp and inviting. For a polished finish, always pull your fabric taut when you staple it to the frame to prevent any wrinkles.
Applying Protective Finishes To Fabric Surfaces
Spraying a clear sealant on your finished diy upholstered bench is your best friend for long-term defense. I recommend a product specifically formulated for performance textiles, as it bonds without altering the color or texture of your chosen material. Apply it in a well-ventilated space, holding the can about six inches away and using even, sweeping motions to cover the entire surface. Let the first coat dry completely, then add a second for thorough coverage. This final step creates an invisible shield that causes juice or paint to bead up on the surface, allowing you to wipe it away with a damp cloth. That professional tension you worked so hard for stays crisp and clean, protecting weeks of work from real-life messes.
Conclusion
The best part of building a diy upholstered bench for your childs space is seeing how a single piece can transform a room from just functional to truly theirs. It becomes the spot for putting on shoes, the quiet corner for a book, or the perfect perch for watching the world outside. My best piece of advice? Choose the fabric that makes you smile and feels right for your family’s life a good, sturdy cotton or polyester blend will serve you well. Once you have that first project finished, you will look at every bare corner and see potential. That feeling, that maker’s spark, is what makes these projects so rewarding.
FAQs
Q: What is the best fabric for a beginner’s upholstered bench?
A: Look for a medium-weight cotton canvas, a durable polyester blend, or a sturdy indoor-outdoor fabric. These materials are forgiving to work with, resist stains, and clean up easily, which is perfect for a childs room.
Q: How do I make sure the bench is safe for my child?
A: Ensure the wooden frame is sturdy and all joints are secure. Use a dense foam for the cushion so it does not collapse easily. Always attach the bench to the wall if it is tall or could tip, and sand any sharp corners smooth before you start upholstering.
Q: Can I use a regular sewing machine for this project?
A: Yes, a standard home sewing machine with a heavy-duty needle can handle most upholstery-weight fabrics. Go slowly, especially when sewing through multiple layers like fabric, batting, and foam. A walking foot attachment can be very helpful.
Q: What type of foam should I use for the seat cushion?
A: Select a high-density upholstery foam, at least 4 inches thick for a good seat. This density provides comfort but also maintains its shape under frequent use, preventing the cushion from sagging quickly after your child sits on it.
Q: How do I attach the fabric to the bench frame securely?
A: A staple gun is the essential tool. Start by pulling the fabric taut in the center of each side, then work outwards towards the corners. Fold and pleat the fabric neatly at the corners for a clean finish, and use plenty of staples for a hold that will last.


