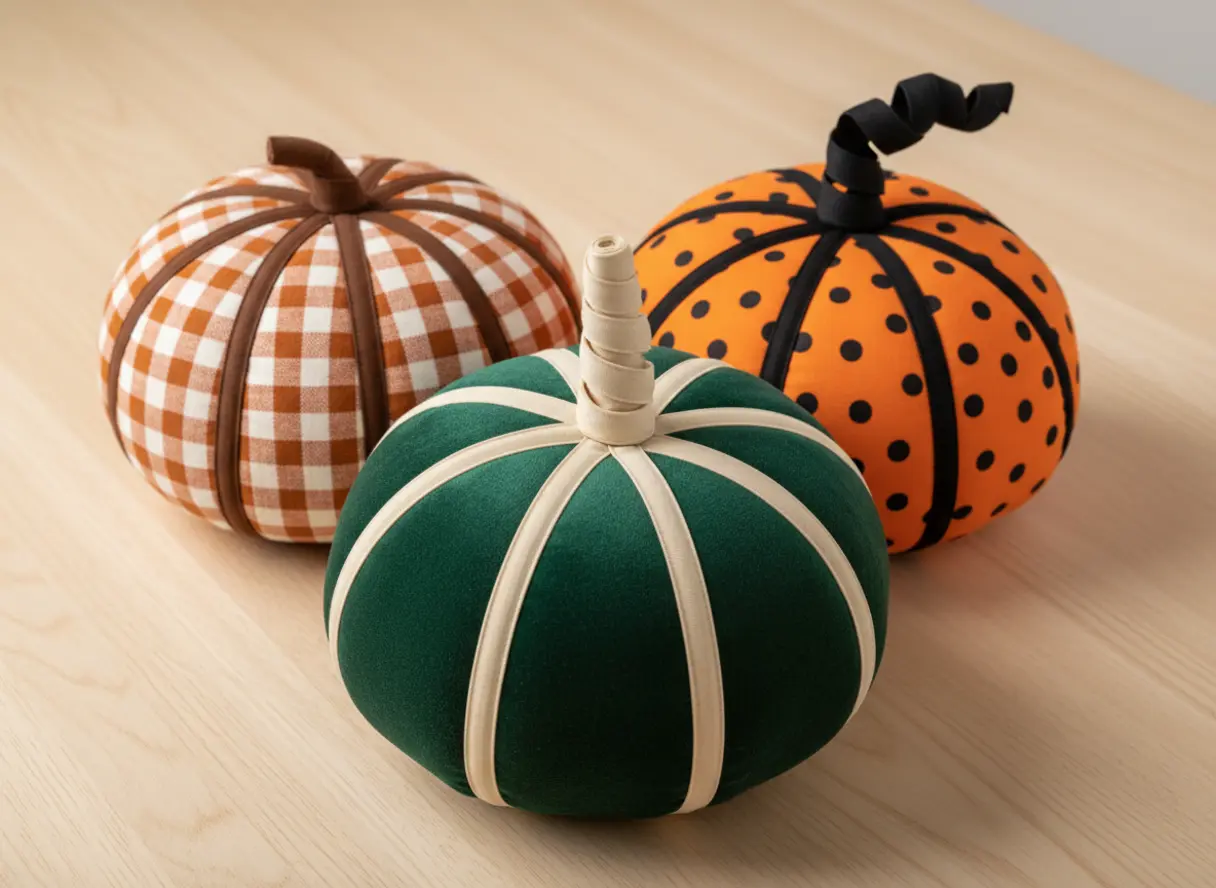
Finding a fall project that feels fresh and fits right into your cozy home decor remains a challenge. We have all stitched our share of simple shapes, but there is something special about the crisp, graphic lines of a bias tape pumpkin pillow. That clean contrast between fabric and ribbon turns a basic form into a real statement piece for your sofa or chair.
I love how a single roll of tape completely transforms a pillow’s personality. This list features ten distinct looks, from rustic to glam, to spark your next sewing session. So, let’s find your perfect harvest accent and get those creative gears turning.
Selecting Fabric Weight and Bias Tape Width
A lightweight quilting cotton or linen face fabric paired with low-loft cotton batting creates the perfect flat canvas for your bias tape pumpkin pillow project. You want to avoid heavier decor fabrics because they tend to bunch up under the tape and make those curves difficult to sew smoothly. The good news is the ribbon width itself determines your final visual depth.
Narrow tape gives you a delicate, modern silhouette, while wider tape makes a bold, rustic statement. Your best bet for easy handling is lightweight double-fold tape, as it presses flat and feeds through your machine without twisting. This combination of materials ensures your decorative stitching lies perfectly on the surface.
Marking Symmetrical Pumpkin Ribbing Curves
The fastest way to achieve a professional look with a bias tape pumpkin pillow involves drawing vertical segments with a washable fabric marker before you touch your materials. You will notice that spacing your drawn lines evenly from the center stem down to the base is the most important step. We tend to rush this part, but trust me on this, taking a few minutes to measure and mark prevents your design from looking lopsided.
The trick for natural depth relies on making each curve taper gently as it nears the top and bottom edges. Use a dinner plate or a flexible curve ruler as a guide to keep your lines smooth and consistent. This prep work makes the actual sewing process feel effortless.
1. Rustic Gingham Pumpkin Farmhouse Style
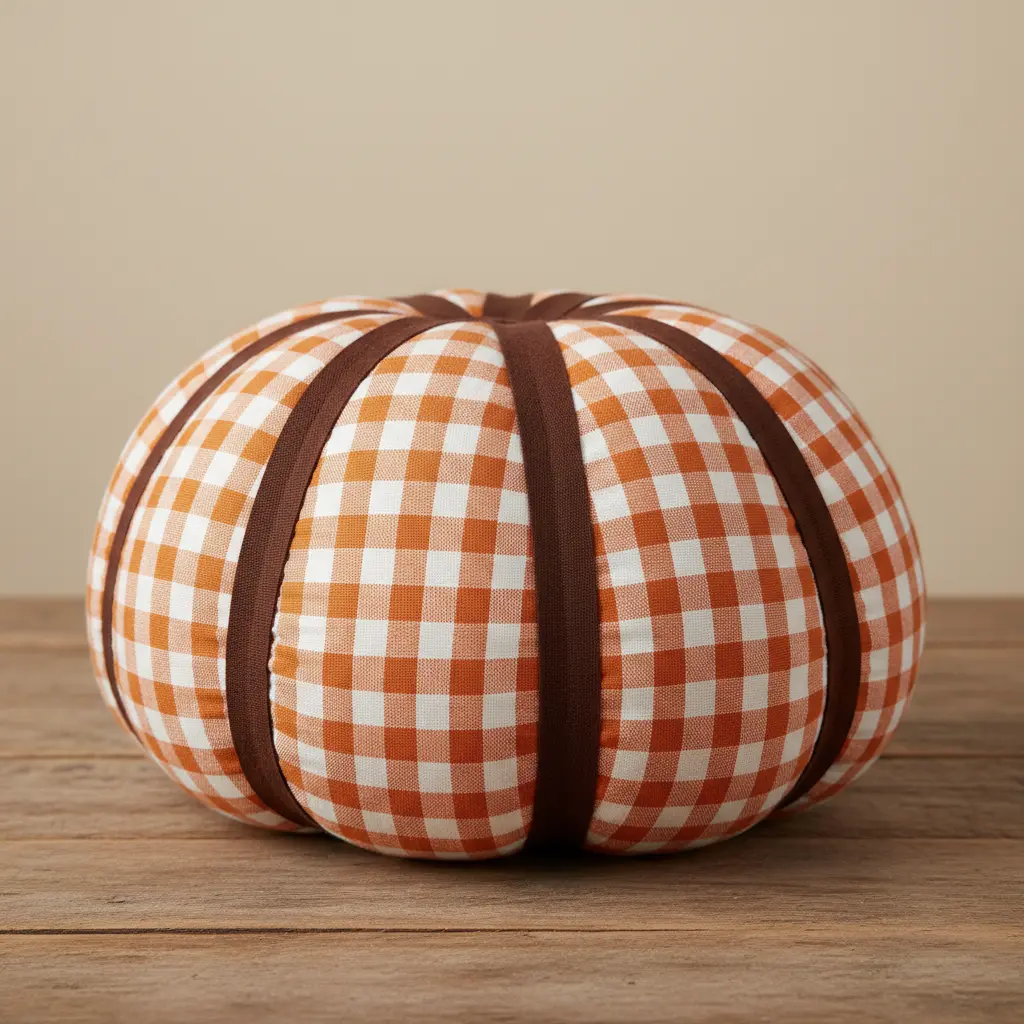
Doesn’t the thought of a cozy autumn afternoon truly make you want to wrap up in a blanket? This style captures that exact feeling when you design a bias tape pumpkin pillow. It centers on blending the classic, cheerful check of gingham fabric with the warm textures of a rustic farmhouse.
You layer in natural wood tones, perhaps a galvanized metal accent, and plenty of harvest accents. It works because the atmosphere feels nostalgic and welcoming, like a hug from your favorite season. My best tip is to start with a neutral base and add your gingham in small doses, like on a table runner.
Then, bring in those rustic shapes. Before you gather all your fall decor, it is smart to know how to create easy fall twine pumpkins for a perfectly handmade touch. The result creates a space that feels collected over time, not bought in a single trip. Isn’t that the coziest goal?
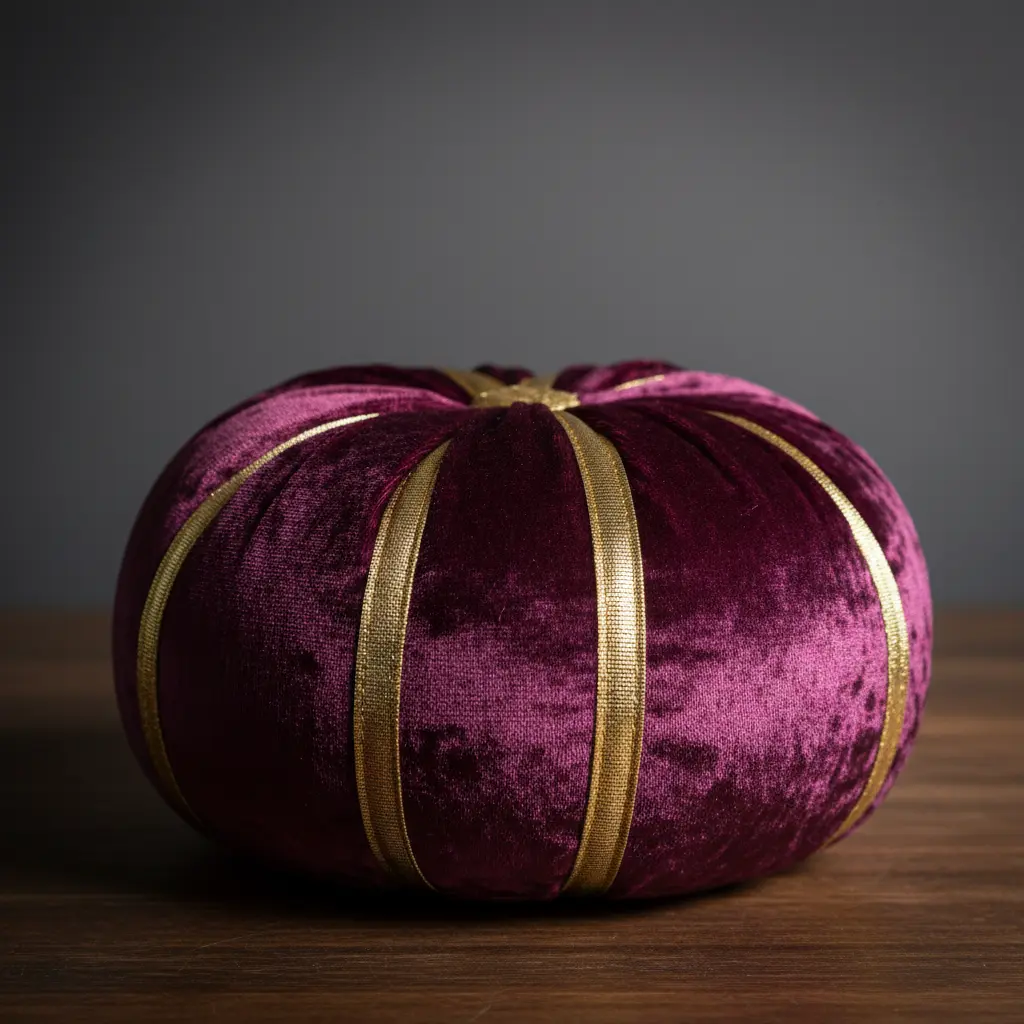
2. Velvet Textured Modern Minimalist Pumpkin
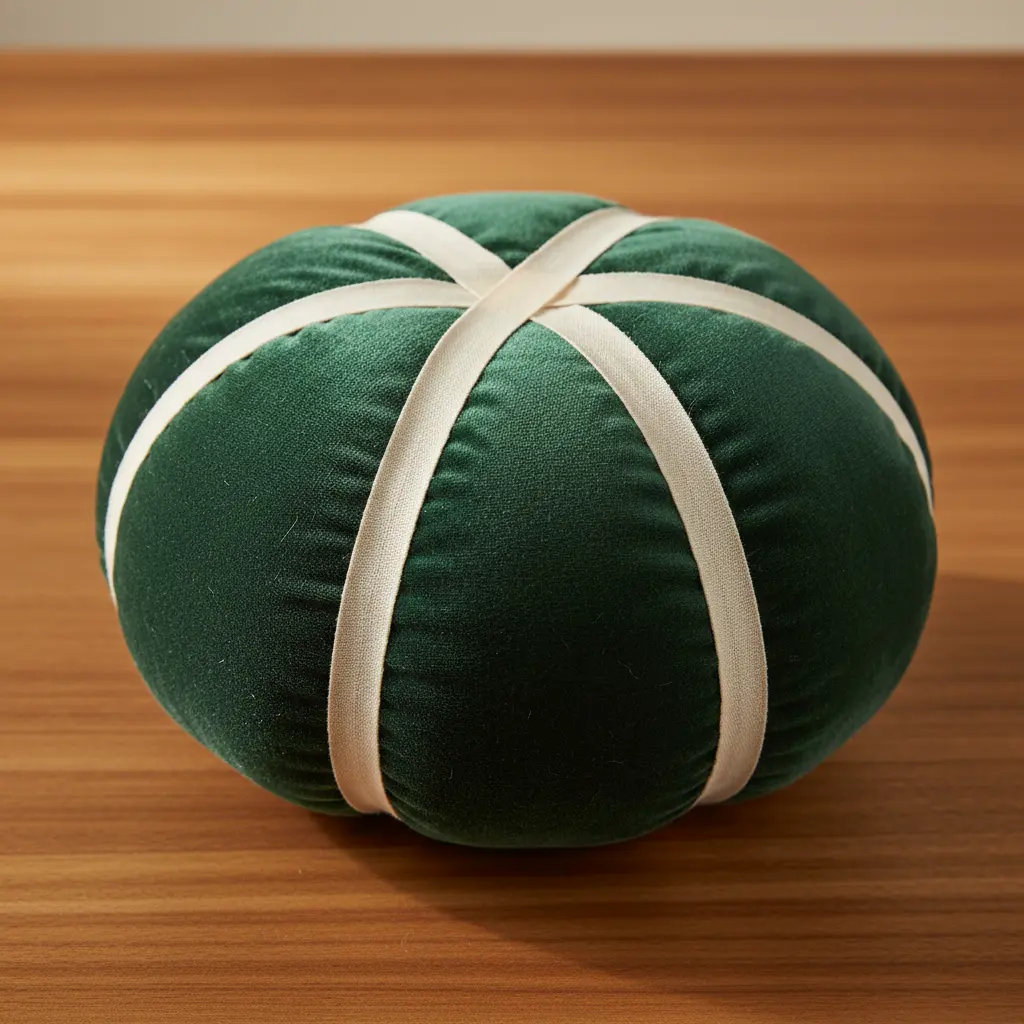
Who says a harvest accent has to be bright orange and lumpy? This version focuses on a smooth, rounded shape and the gorgeous feel of high-quality velvet. You create the simple form first, then wrap it in that lush, soft fabric for a look that reads as pure modern luxury.
It works so well because the rich texture does all the talking against the clean silhouette. I love choosing a sophisticated, muted color like charcoal or sage green to keep it elegant. For a cohesive seasonal display, try decorating with a mini pumpkin tree decorate with a mini pumpkin tree using similar velvet shapes. Doesn’t that feel like a chic, grown-up way to decorate?
3. Floral Print Cottagecore Pumpkin Pillow
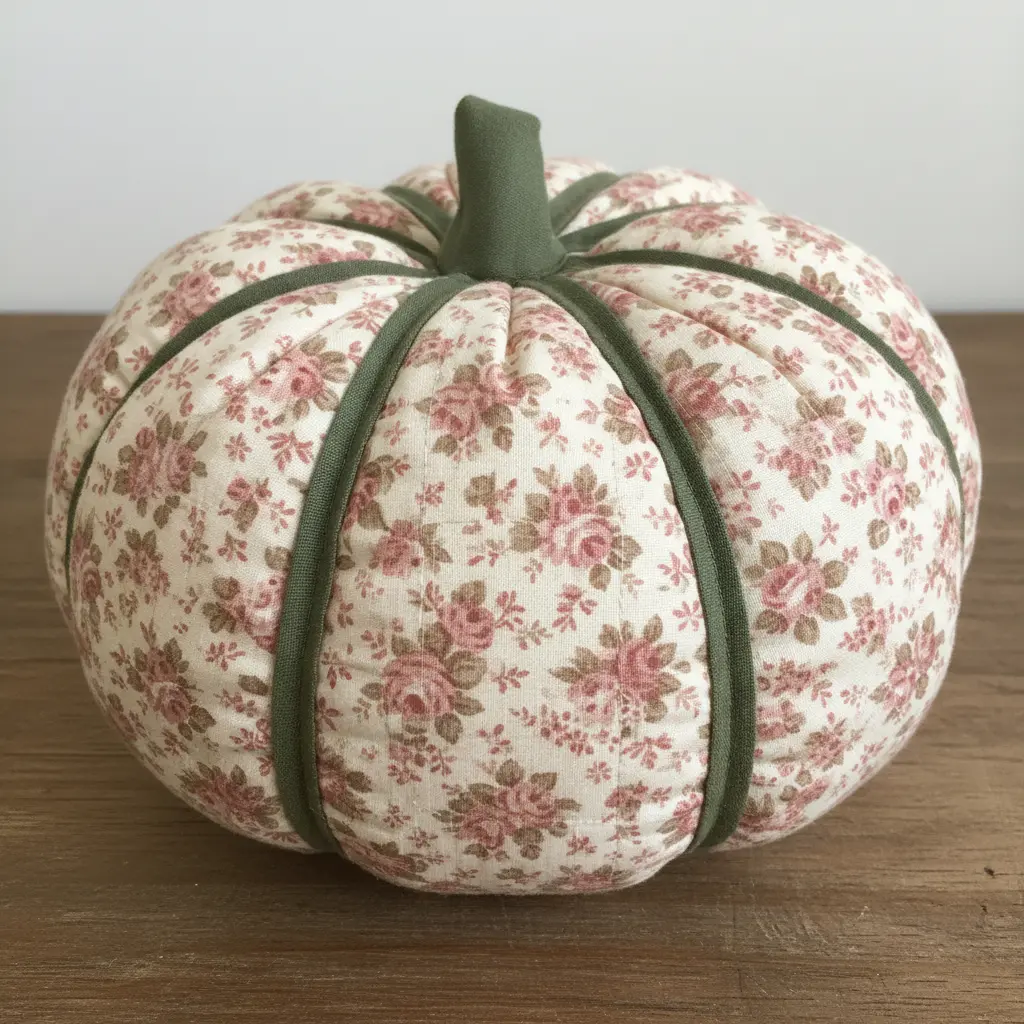
This one brings a little piece of the garden indoors. You start with two pieces of floral print fabric cut into a round shape, sew them together, and leave an opening for stuffing. The real magic sits at the top.
I love making a simple fabric tube and stuffing it lightly before attaching it between the pieces. Once you turn it right side out, add fiberfill gradually until it feels plump and cozy. For that classic look, you create soft indentations by cinching thread around the middle to shape a bias tape pumpkin pillow.
Your home will feel instantly warmer with this handmade touch. Feel proud when you see it resting on your couch.
4. Burlap Patchwork Autumn Harvest Pumpkin

Ever wished for a harvest accent that looks freshly picked from a rustic farm stand? This burlap patchwork version delivers exactly that result. You will sew together scraps of burlap in different natural shades to create your main fabric panel.
Then, cut and sew your shape, leaving a gap to pack it firmly with polyester fiberfill before closing it up. The real fun arrives with the finishing touches. I love pushing a sturdy twig into the top for an authentic stem and then adding fabric leaves or artificial berries.
The patchwork technique uses up leftover textiles beautifully, and the coarse weave gives it that perfect, warm autumn vibe. It feels satisfying to create a unique decorative piece that belongs in a cozy harvest display alongside any bias tape pumpkin pillow. Planning your seasonal decor means you are able to learn how to make a pumpkin yarn hoop wreath as a perfect companion project for your mantel or front door.
5. Satin Ribbon Striped Elegant Pumpkin
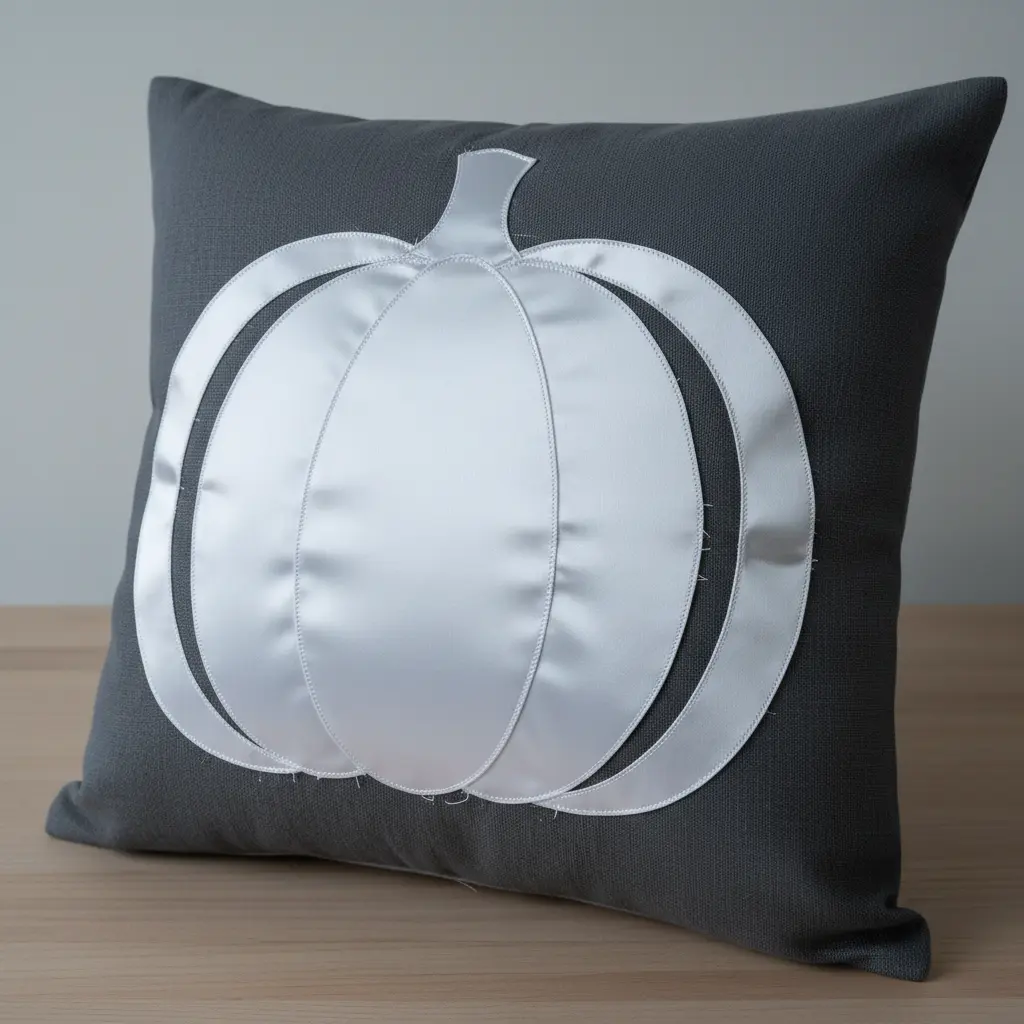
This is the one I love for a sleek, no-carve look. You simply glue strips of satin ribbon in neat lines from the stem to the base, pulling each one taut for a crisp finish. The smooth, lustrous texture creates a gorgeous contrast against the natural surface, making it feel more like a decorative vase than a seasonal gourd.
It works because the simple stripes remain easy to execute, yet the final effect looks polished and versatile for any room’s color scheme. A low-temperature hot glue gun serves as your best friend here to avoid lumps. If you want to keep the Halloween spirit going, consider making a set of spooky cheesecloth ghosts to place right beside your elegant design. This approach delivers a sophisticated twist to a traditional bias tape pumpkin pillow.
6. Distressed Linen Neutral Toned Pumpkin
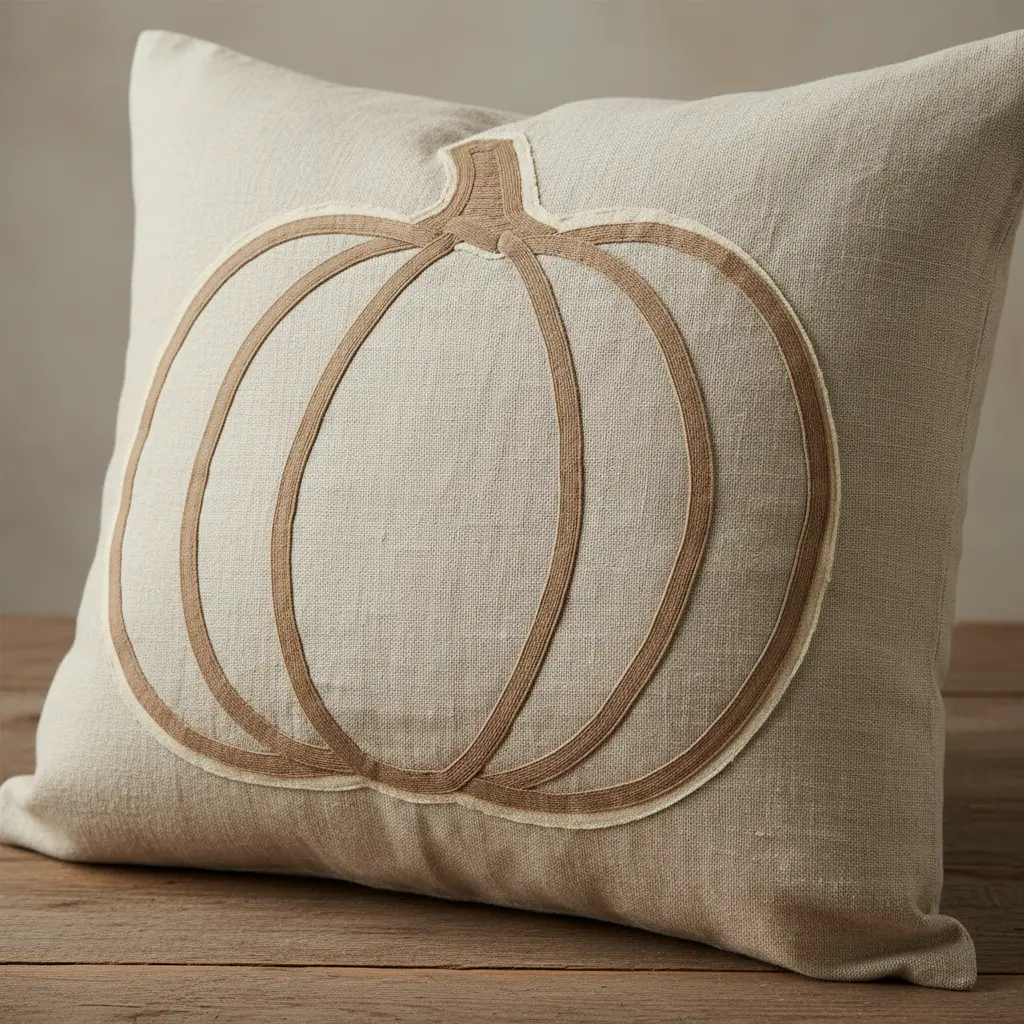
Ever wondered how to achieve a perfectly cozy, lived-in feel for fall? This linen style answers that question directly. You start with a neutral linen fabric, which already brings wonderful texture. I love using a fine-grit sandpaper to gently distress the edges after stitching for an authentic worn feel.
The neutral palette means it fits right in with your existing shelving. The real magic happens when you fill it appropriately and cinch the sides to form those plump ribs. A twig or cinnamon stick makes the perfect rustic topper. This project succeeds because it feels handmade and sophisticated simultaneously, offering a quiet counterpoint to a busy bias tape pumpkin pillow. Try it and feel proud of your elegant, understated autumn accent.
7. Polka Dot Whimsical Halloween Pumpkin
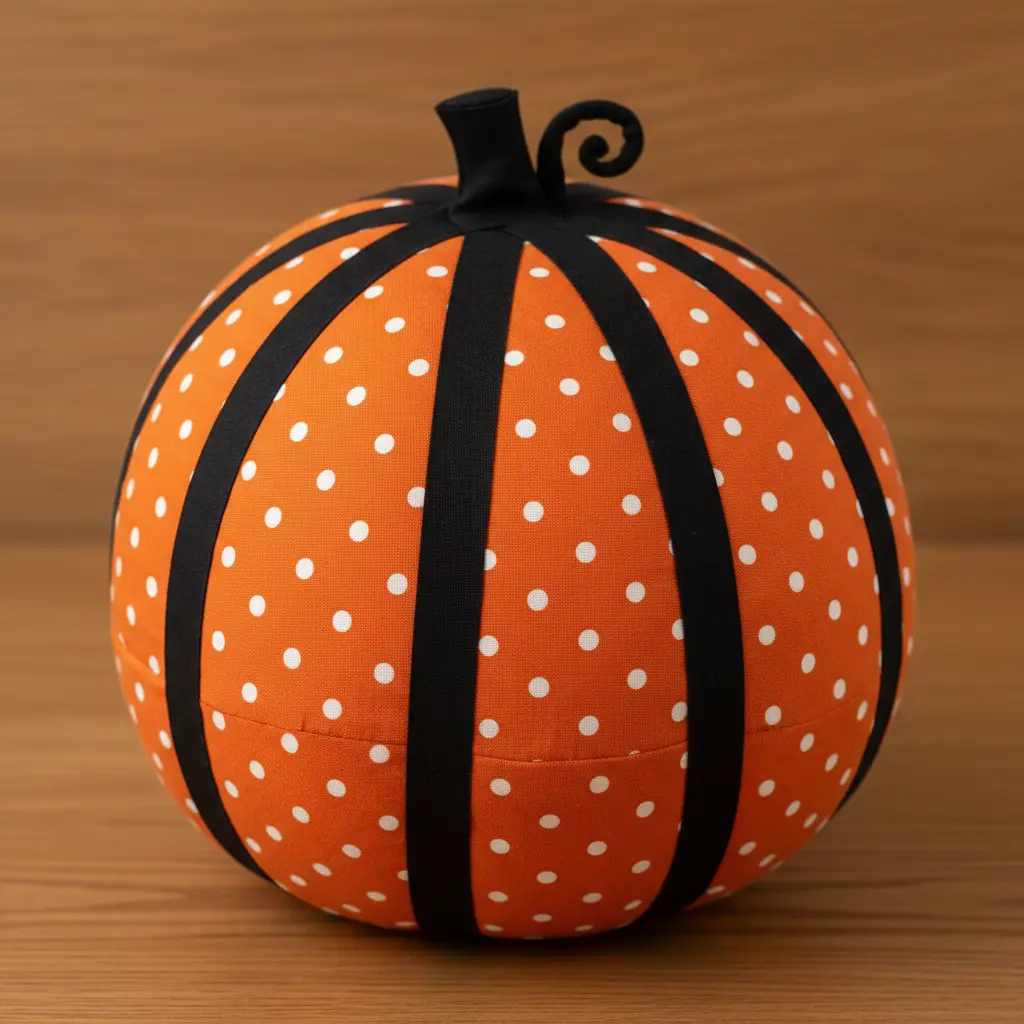
Ever wished for a Halloween accent that feels more like a cheerful friend than a spooky ghoul? This playful design relies on using acrylic hobby paint and simple dotting tools to create bright, scattered patterns. Begin with an orange base or cover a whole new foundation color first.
The real fun arrives from mixing dot sizes and choosing unexpected color combos, like teal on white or gold on black. Adding this flair gives personality to every bias tape pumpkin pillow you finish. What makes this project so satisfying is its instant whimsy.
It offers a fantastic way to add a retro, family-friendly vibe to your space without any scary elements. My go-to tip is to practice your dots on scrap paper first to nail the paint consistency and spacing. Keeping leftover fabric scraps comes in handy when you plan to sew an inspirational felt banner later, creating a coordinated handmade look. Trust me, seeing those perfect dots come together brings pure joy.
8. Felt Applique Ornate Woodland Pumpkin

Who says textile projects need to be simple? This ornate woodland design is pure autumn magic, built with layers of colorful felt cutouts. You will stitch your plush base first, then hand-stitch a detailed scene of felt leaves, mushrooms, and acorns right onto the front.
The real joy comes from playing with depth and texture, stacking those tiny pieces to create a lush, dimensional woodland scene that elevates any bias tape pumpkin pillow. It succeeds because felt remains forgiving and tactile, letting you build up detailed art without needing a sewing machine. Trust me, using a tiny dot of hot glue to hold those fiddly pieces in place before you stitch acts as a total lifesaver.
The final look feels rich and cozy, perfect for pairing with other handmade autumn decor like a spooky ‘Boo’ sign for your seasonal display.
9. Denim Upcycled Decorative Pumpkin Pillow
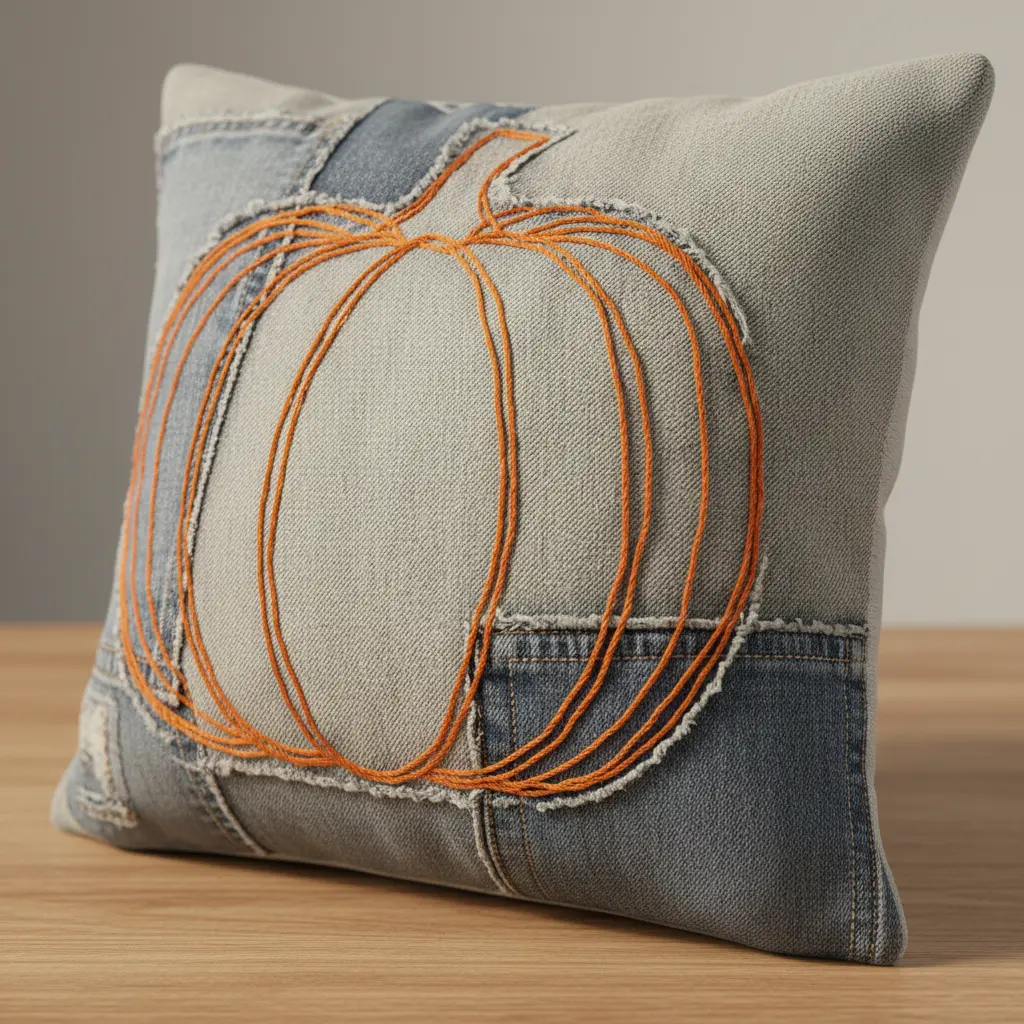
Who knew old jeans would transform into such a charming piece of seasonal decor? This approach focuses on giving those worn denim scraps a fresh purpose. You trace and cut a set of petal-shaped segments, then sew them together to form the central body.
The key relies on using a heavy-duty needle on your machine to handle the thick fabric layers without snagging. After you turn it right side out, stuff it firmly to get that perfect, plump silhouette. I admire how the natural fades and variations in the denim give each piece a unique, rustic character. It feels satisfying to create something beautiful and durable from materials already resting in your sewing room.
If you enjoy this hands-on approach, explore learning how to construct no-sew placemats as another simple way to decorate your dining table. Remember to cut all your segments with a consistent seam allowance for the best shape. That durable fabric creates a unique twist on a traditional bias tape pumpkin pillow.
10. Metallic Threaded Glamour Pumpkin Design
Who says harvest themes need to look rustic? This design embraces shimmering, sophisticated glamour. You will create complex patterns by carefully adhering metallic embroidery floss or cord directly onto the surface.
I love starting with a simple geometric layout sketched in pencil, then applying strong adhesive glue in small sections to lay the thread perfectly. The trick requires using tweezers for precise placement and letting each part dry completely before moving forward. The result delivers a stunning, textured piece that catches every bit of light.
It works because that touch of metallic luxury elevates the whole look from simple fall decor to a true statement piece. Trust me on this one, the payoff feels like pure magic when you watch it gleam on your shelf. Your guests will certainly admire a metallic variation alongside your standard bias tape pumpkin pillow. This kind of opulent project pairs beautifully with other elegant sewing endeavors. For a similarly chic and detailed garment, try learning how to sew a ruffle tank dress to match your glamorous autumn decor.
Stuffing Techniques for Structural Pumpkin Volume
A firm, overstuffed pillow form serves as the secret to making your bias tape pumpkin pillow look plump and dimensional rather than flat. You want to pack the casing tightly, especially into the corners, to support the rounded silhouette your stitching creates. Polyester fiberfill works admirably, but for a truly structured finish, consider buying a pre-made insert that measures one size larger than your cover.
The final step involves gently kneading and shaping the stuffed piece, pushing the filling toward the center to mimic a natural bulge. This careful shaping makes all your decorative topstitching pop with authentic depth. Your finished design will hold a satisfying heft and a professional, polished appearance.
Conclusion
So, did any of these bias tape pumpkin pillow designs catch your eye? Look at the variety you are able to achieve simply by playing with fabric textures and ribbon colors. That remains the real joy of a project like this.
My best advice is to start by pairing a favorite fabric from your stash with a contrasting ribbon. A clean, straight stitch where the tape meets the base material makes all the difference for a polished finish. Your perfect autumn accent waits to be stitched, so pick your favorite combination and make something wonderful for your living space.
FAQs
Q: What type of fabric works best for a bias tape pumpkin pillow?
A: Medium-weight quilting cotton remains an excellent choice. It provides enough stability to support the ribbon without stretching or puckering. Linen, velvet, and canvas also perform well for different textures.
Q: Should I use single-fold or double-fold bias tape?
A: Double-fold tape offers much better results for this project. The folded edges arrive pre-finished, so you simply pin it down and stitch along both sides. This approach creates a clean, professional look with less effort.
Q: How do I keep the bias tape ribs evenly spaced on the pumpkin?
A: Lightly mark the center line of your shape first. Then, use a ruler or a quilting guide to mark parallel lines on either side before you pin the material. Taking this extra minute to measure ensures a symmetrical, balanced design.
Q: Is making my own bias tape an option for this project?
A: Absolutely. Creating your own strips allows for perfect color matching. Run a coordinating fabric through a bias tape maker tool. This serves as a great way to use a special print from your main pillow material for the ribs.
Q: What is the best stitch for attaching the bias tape?
A: A straight stitch works perfectly. Set your machine to a medium stitch length. Sew slowly along both edges of the ribbon, keeping the stitching close to the inner fold for a neat finish that secures the material firmly.


