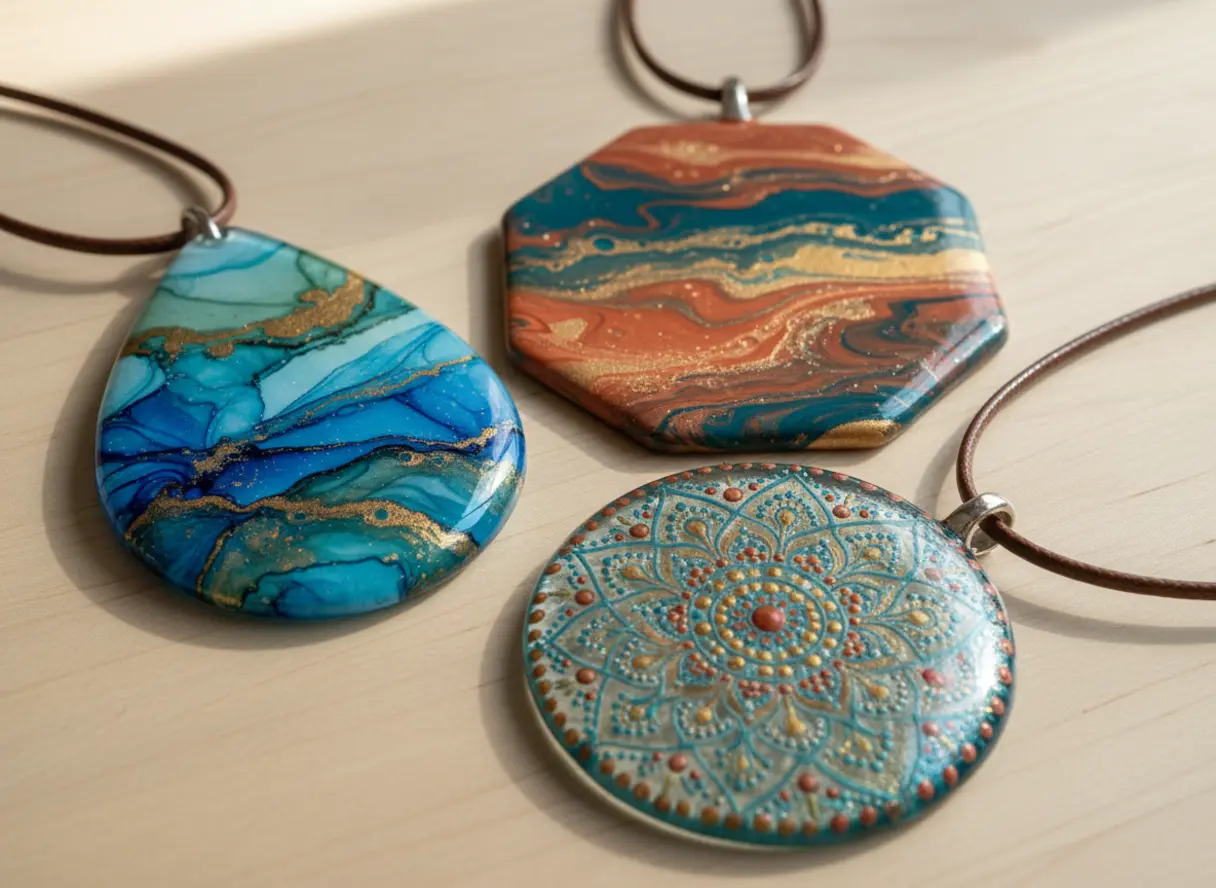
I still remember the first time I coated a glass cabochon with deep blue paint and watched it dry into a glossy little window of color. If you are anything like me, that thrill never really fades. That is why a DIY painted glass statement necklace is such a satisfying project — it combines fast, playful painting with genuinely bold results you want to wear right away.
Degreasing Glass Surfaces For Professional Paint Adhesion
Your paint will slide right off if you skip wiping your glass blank with isopropyl alcohol. Trust me on this, every single fingerprint or bit of dust creates a tiny barrier that stops the paint from sticking.
You need to get the surface completely free of any oils when building a durable DIY painted glass statement necklace. A quick wipe with a paper towel soaked in alcohol is the pro trick, and let it air dry completely before you even think about picking up a brush.
That clean slate is what makes the difference between a design that lasts for years and one that starts to peel after a few wears. It is a two-minute step that protects weeks of creative work.
Selecting Durable Glass Blanks For Wearable Art
A thick glass cabochon with a slight dome gives you a stable, professional canvas that feels substantial as a statement piece. You want to avoid thin, flat pieces that can feel flimsy and are harder to frame securely.
The weight and curve of a good cabochon also help with the visual impact, allowing light to play across your painted design in a beautiful way. Look for blanks with a smooth, consistent edge, as this makes setting the finished piece into a metal finding much easier and gives a polished final look.
This focus on the blank itself is what elevates a craft project into wearable art you will be proud to show off. Taking the time to choose the right shape guarantees your DIY painted glass statement necklace feels balanced from day one.
1. Iridescent Alcohol Ink Ocean Teardrop Pendant — A Swirling Seascape in Glass
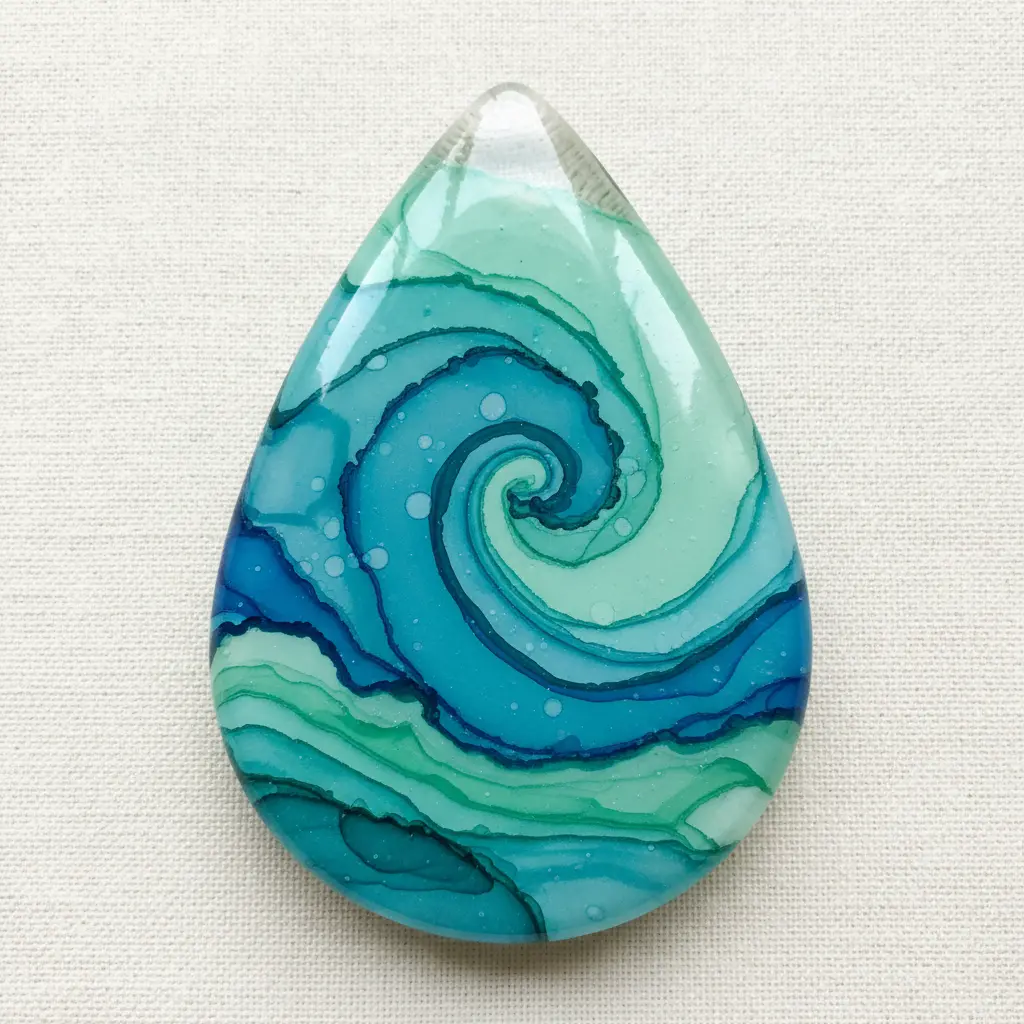
Who would have thought you could wear a piece of the ocean? This one surprised me. It looks like a complex little artwork, but the technique is wonderfully fluid.
You start by pouring a base of clear epoxy resin into a teardrop mold. Then, you simply drop in a few colors of alcohol ink and watch the magic happen. The inks will swirl and blend on their own, creating those beautiful, organic waves and currents.
It works because the fluid nature of the inks perfectly captures the motion of the sea. Before you attempt a DIY painted glass statement necklace, a solid DIY sea glass necklace project is a great way to get comfortable working with similar coastal colors and resin.
2. Minimalist Gold Leaf Geometric Square Necklace: Clean Lines and Bold Shine
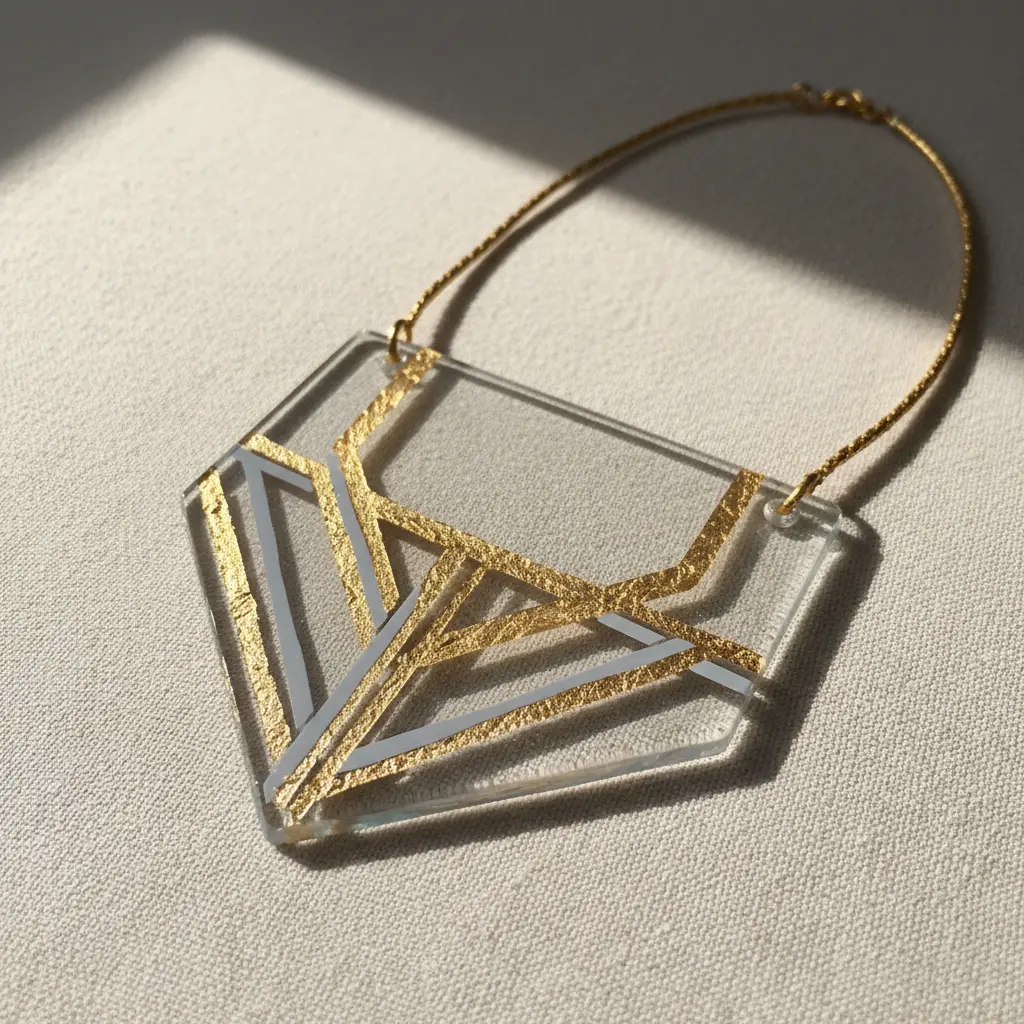
Who would have thought a simple square could feel so luxurious? This piece is all about that stunning contrast between sharp, clean lines and the wild, organic shimmer of real gold. You will suspend genuine gold leaf flakes within a clear resin base, creating a pendant that catches light from every angle.
I love how this modern shape gets a touch of warmth and texture from the metal. It works because the geometric form grounds the design, making it versatile enough for any outfit. A common beginner mistake is letting dust settle into the resin, so work in a very clean space to protect that perfect finish.
For a different but equally rewarding textural project, you could also craft a rolled flower necklace using similar assembly techniques. Feel that satisfaction when your crisp, shiny DIY painted glass statement necklace hangs perfectly around your neck.
3. Floral Patterned Enamel Domed Cabochon Choker
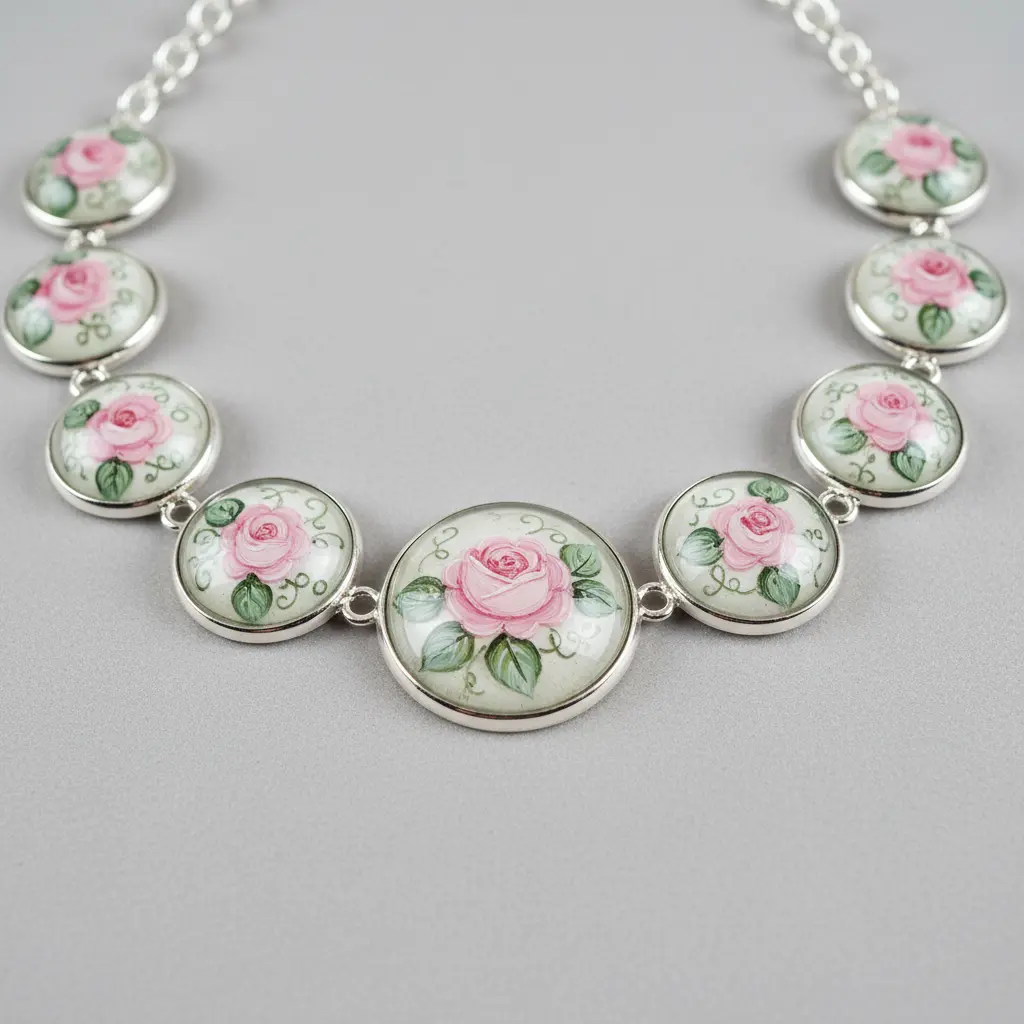
Does this project sound intimidating? The secret is in the stunning, glossy results. You will start by shaping your metal base into a gentle dome, which I love because it makes the piece comfortable to wear.
Then comes the magic: applying vibrant enamel powders to create your floral pattern. You can paint it on or use the cloisonné wire technique for a classic look, then fire it in a kiln to fuse the glass. That glossy, domed surface makes the floral colors pop with a beautiful, vintage feel when you build a DIY painted glass statement necklace.
Your final step is securing the cooled cabochon to your chosen choker base, which is where knowing a few solid necklace closure techniques ensures your creation stays put. Try it and feel the satisfaction of wearing your own miniature work of art.
4. Abstract Fluid Acrylic Pour Hexagon Statement Piece
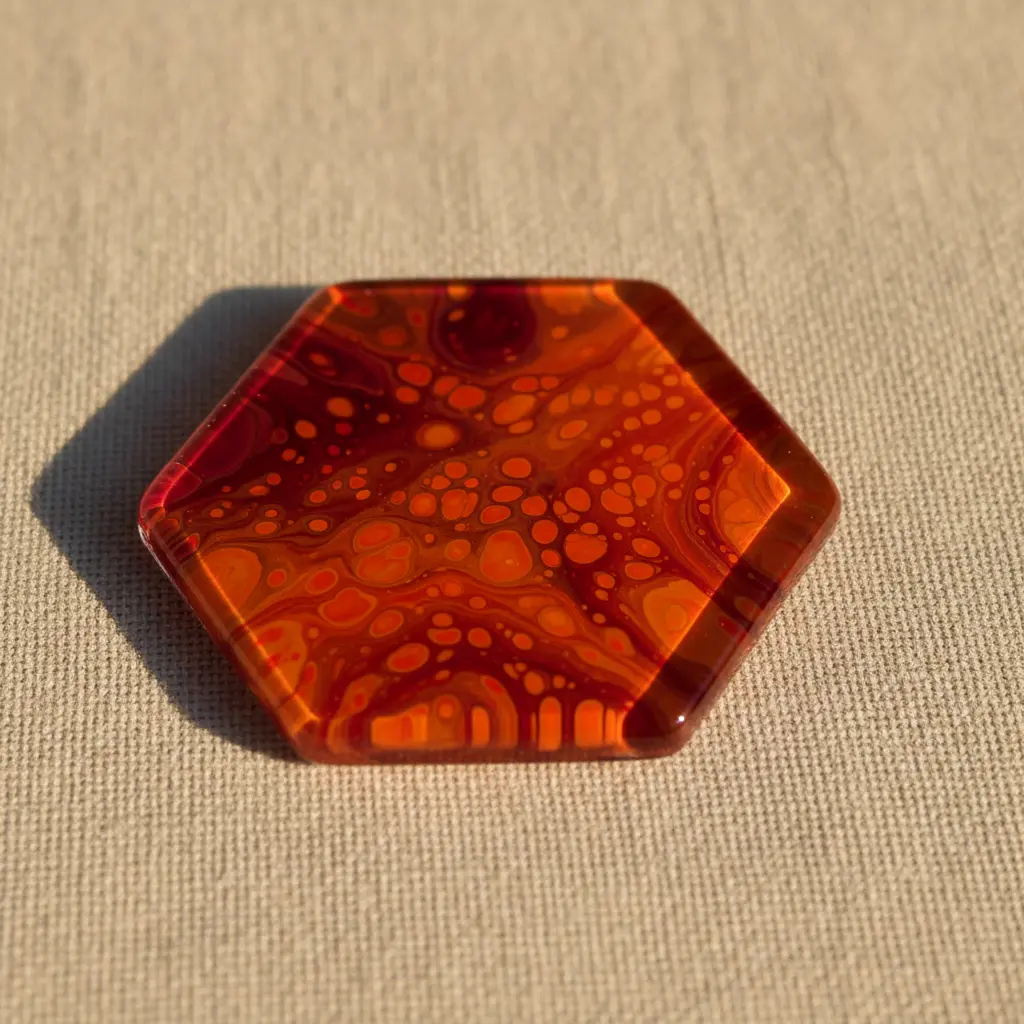
Ever wondered how those stunning, swirling abstract patterns are made? This technique looks complex, but it is surprisingly approachable. You mix your chosen acrylics with a pouring medium to a creamy consistency, then layer them in a cup and pour them onto your hexagonal surface.
Tilt the panel gently to let the colors flow and merge into one-of-a-kind designs. I love how the structured hexagon shape contains the wild, fluid movement. It creates a beautiful contrast that feels modern and bold.
The process is genuinely meditative to watch unfold as you shape a DIY painted glass statement necklace. My top tip is to practice your paint consistency on a small tile first. Getting that flow right makes all the difference for a stunning, cell-filled finish. For a simpler, more structured project, you could always create a charming heart necklace as a lovely alternative.
5. Hand-Painted Celestial Moon Oval Charm: Soft Glowing Night Sky
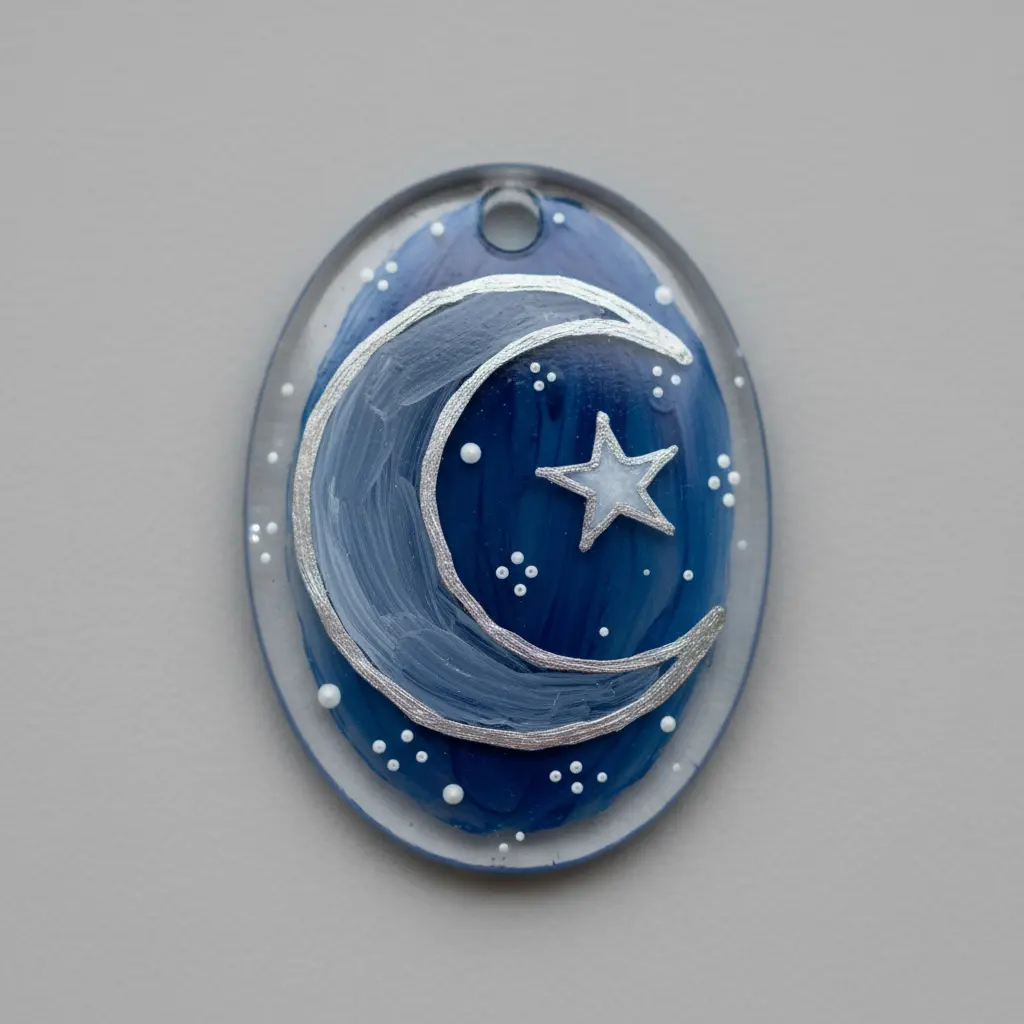
Who would have thought a tiny oval could hold so much peaceful magic? The secret is in the layers. You start with a deep, velvety blend of indigo and violet for your night sky, letting it dry completely.
Then, with a fine-tipped brush, you layer on a creamy ivory crescent until it looks like it’s glowing from within. I love adding the final twinkling stars with a bright white paint, making sure they are all different sizes. This works because that soft, inner light effect feels like a personal little talisman.
Applying multiple thin layers yields a gentle, comforting luminescence you will adore. It is a fantastic stepping stone before tackling a full DIY painted glass statement necklace design. You will love seeing that glowing charm catch the room’s light.
6. Vintage-Style Botanical Pressed Glass Medallion
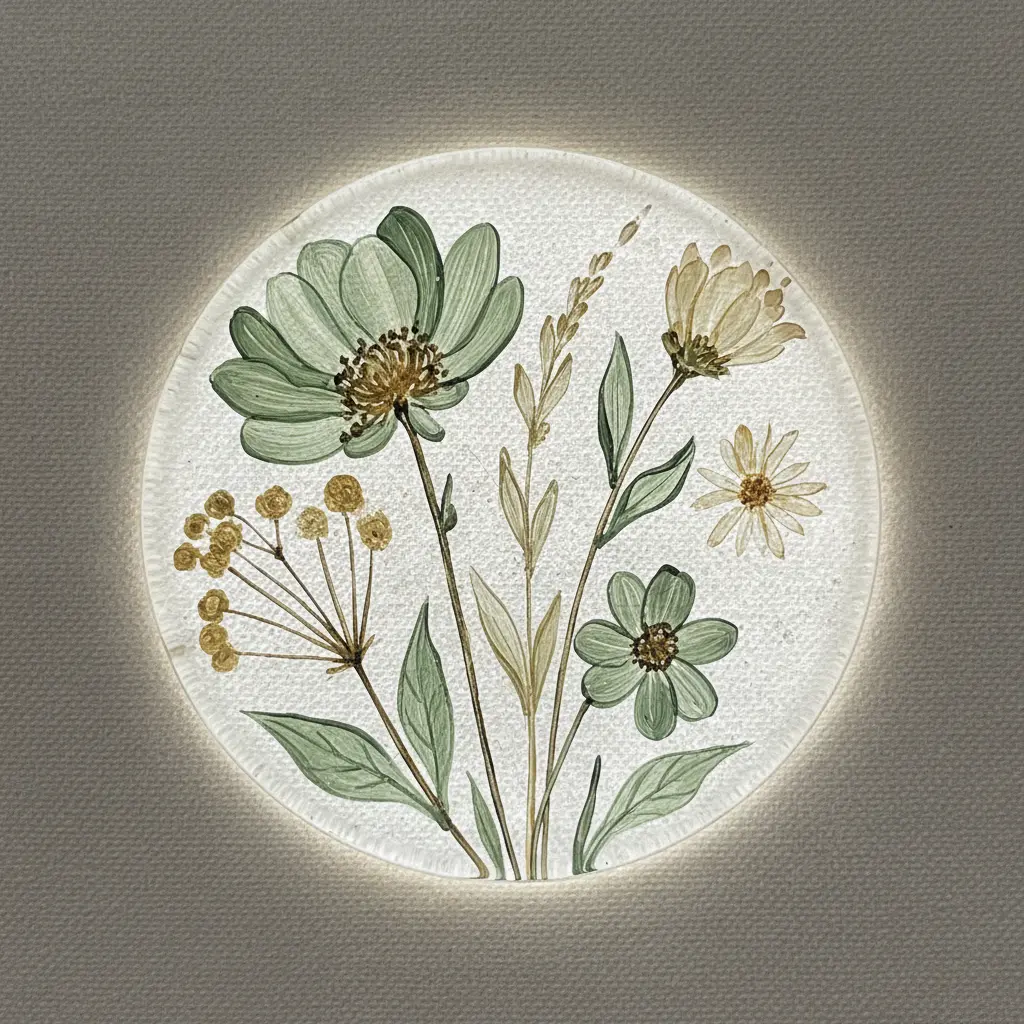
Ever wondered how those beautiful, intricate glass pendants with flowers trapped inside are made? The magic comes from pressed glass. A precise amount of molten glass is dropped into a detailed mold, and a powerful press forces it into every leaf and petal.
Once it cools slowly in an annealing oven, you have a stunning, three-dimensional piece of natural art. I love how the light catches the raised botanical patterns, creating shadows and highlights that make the design pop. This technique gives you a tactile, vintage charm that feels both timeless and personal.
Feeling the solid weight in your hands guarantees your DIY painted glass statement necklace will stand up to daily wear. For a cohesive look that echoes this antique style, browse some Anthropologie inspired necklace designs to see how they frame similar focal pieces.
7. Bohemian Mandala Detail Round Glass Necklace
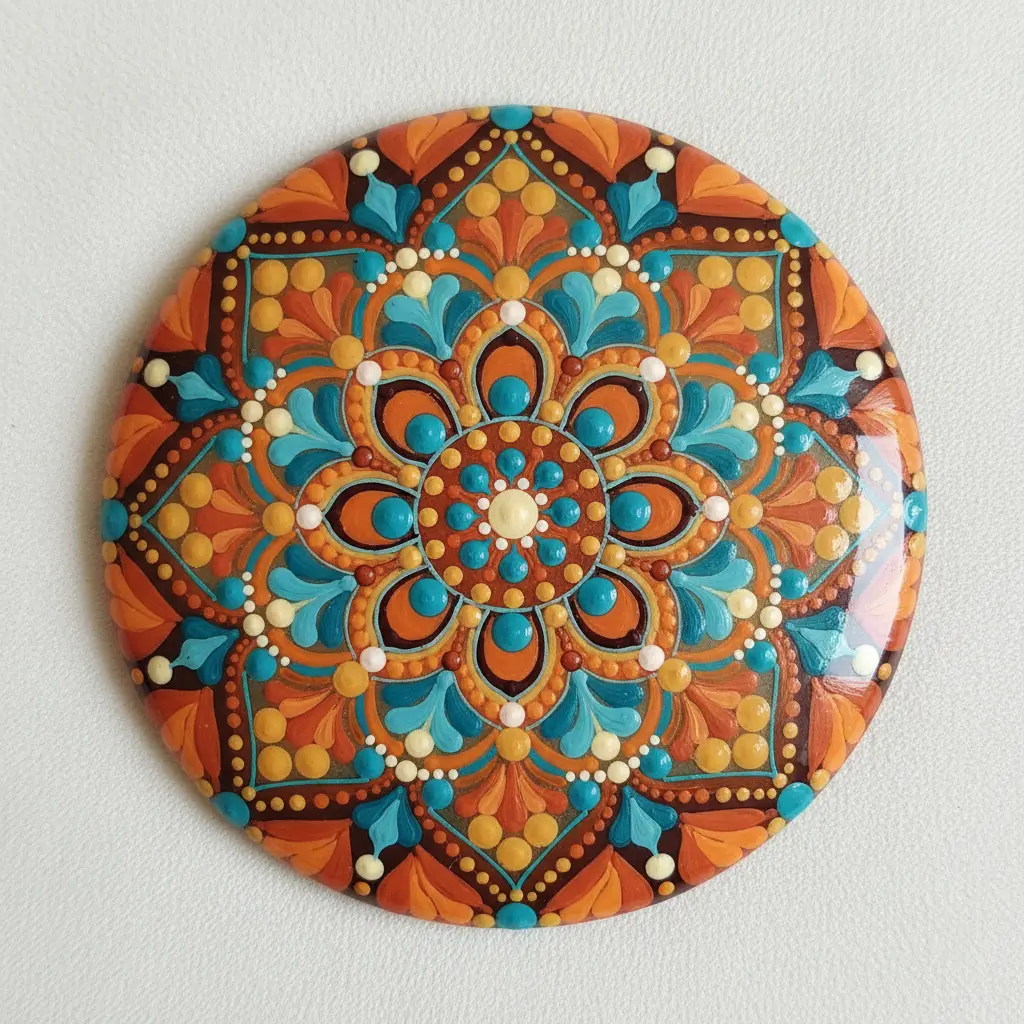
Have you ever seen one of those intricate mandala pendants and wondered how it’s made? The secret is a clear glass cabochon. You simply adhere your chosen mandala print to its flat back. The domed glass magnifies the design beautifully and protects it from wear.
The real magic happens when you pair your pendant with the right chain. For a true bohemian vibe, a long leather cord is my go-to choice. It gives you that free-spirited, layered look that feels artistic and personal.
This project is incredibly satisfying because you create a piece with personal meaning. To avoid bubbles and get a perfect seal, I love using a strong, clear adhesive like E6000. Does that not feel amazing when your DIY painted glass statement necklace is finally ready to wear?
8. Modern Metallic Splatter Design Glass Piece
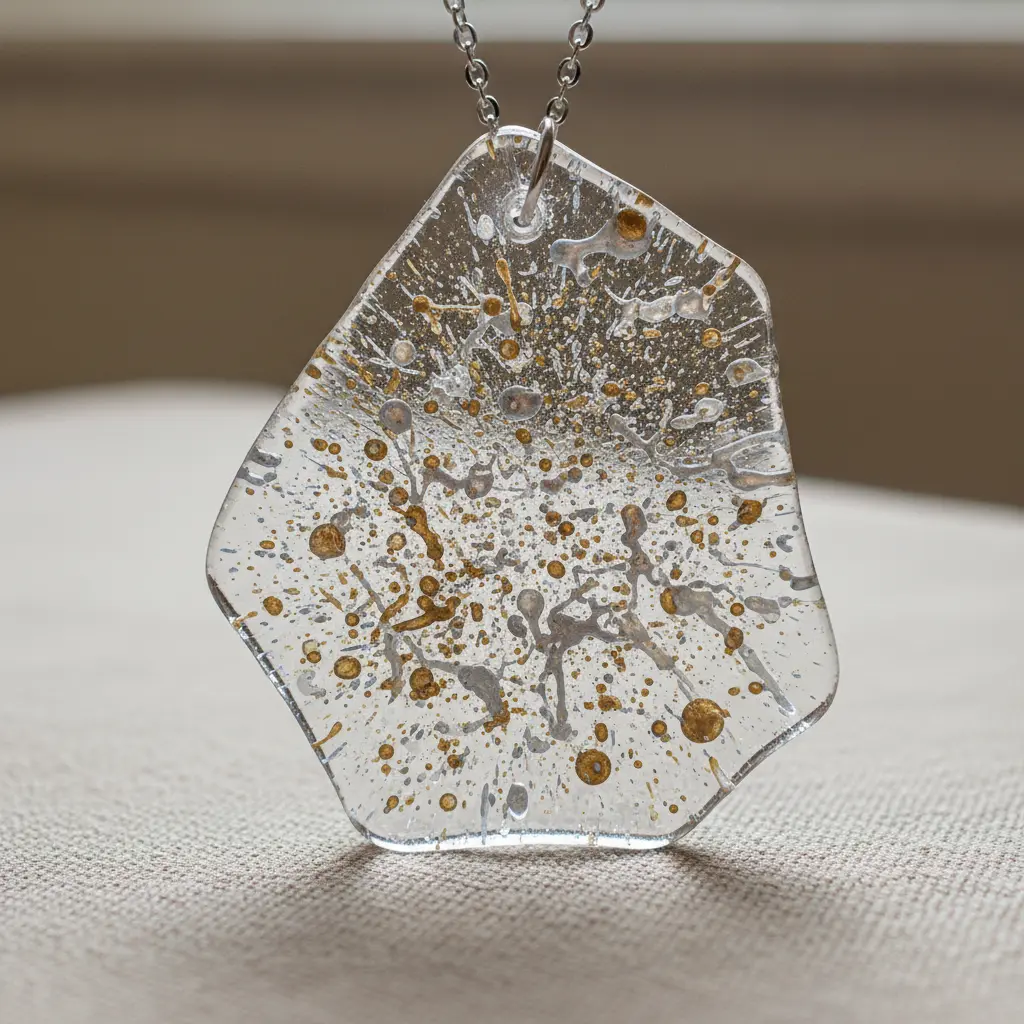
This one looks like high-end abstract art, but trust me, you can create it with a few simple materials. The magic comes from applying metallic glass paint in a loose, energetic way onto your glass piece before firing it in a kiln. I love using a stiff brush to flick the paint, creating those dynamic spatter patterns.
You get to control the density, from a few delicate speckles to a full-on metallic storm. It feels wonderfully spontaneous, yet the result is a polished, permanent accessory. For a softer, layered look, you could combine this technique with a cute felt sparrow necklace craft as a charming, textural companion piece.
The contrast between the hard, shiny glass and soft felt is surprisingly delightful. Your DIY painted glass statement necklace will truly catch the eye when light hits all those tiny metallic flecks. Isn’t that exactly what you hoped for?
9. Solid Neon Pigment Inverted Glass Slab Pendant
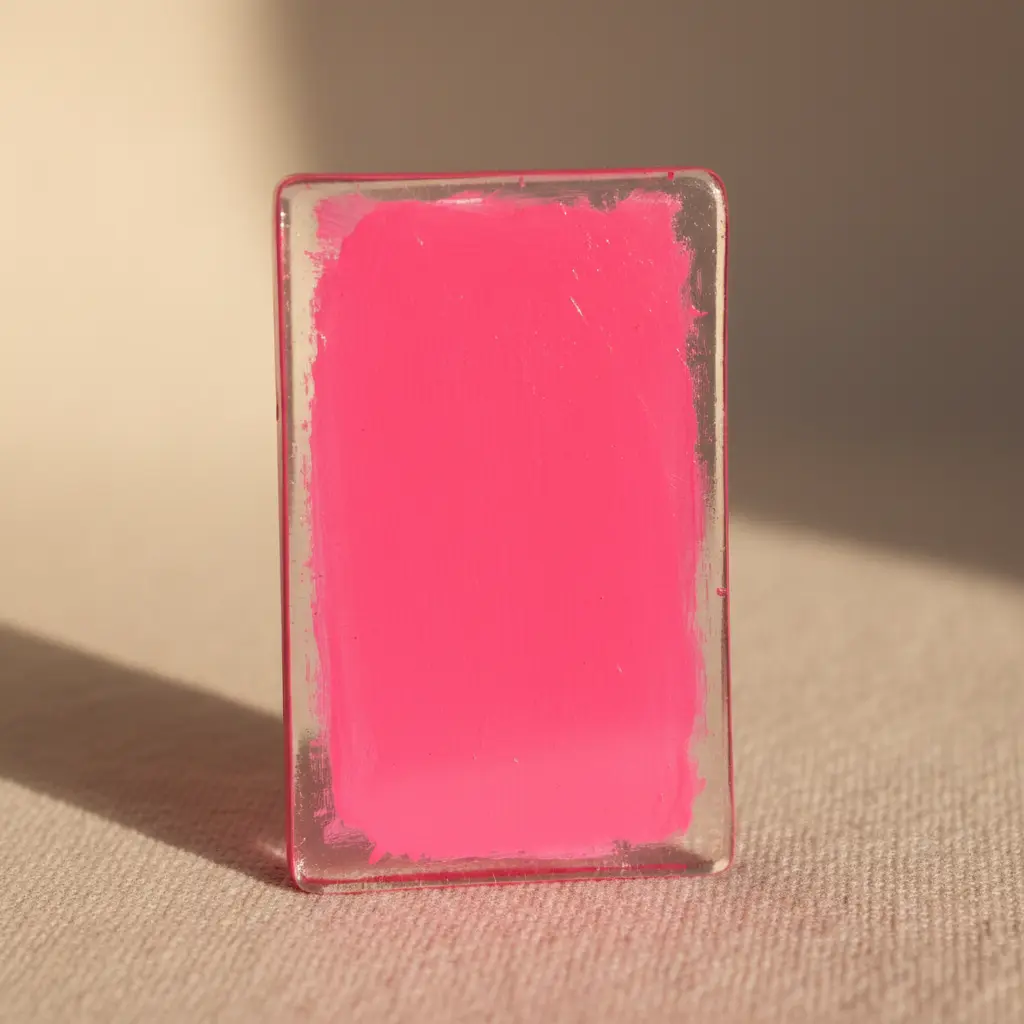
Ever wondered how those bold, glowing pendants are made? This one is all about the inverted bevel grind. You start with a flat slab of glass saturated with a single, intense neon pigment.
Then, using a wet grinder, you carefully shape the edges inward at a precise angle. That inward cut is what makes the light behave so beautifully, creating a deep, almost liquid glow from within the solid color. I love this process because the payoff is immediate and stunning.
That perfect, polished edge transforms a simple colored slab into a striking DIY painted glass statement necklace. It works because the clean geometry and pure color feel so intentional and confident. For a fun contrast in texture, you could pair this sleek piece with a handmade playful pom-pom necklace to mix modern and cozy vibes.
10. Stained Glass Style Mosaic Pattern Pendant
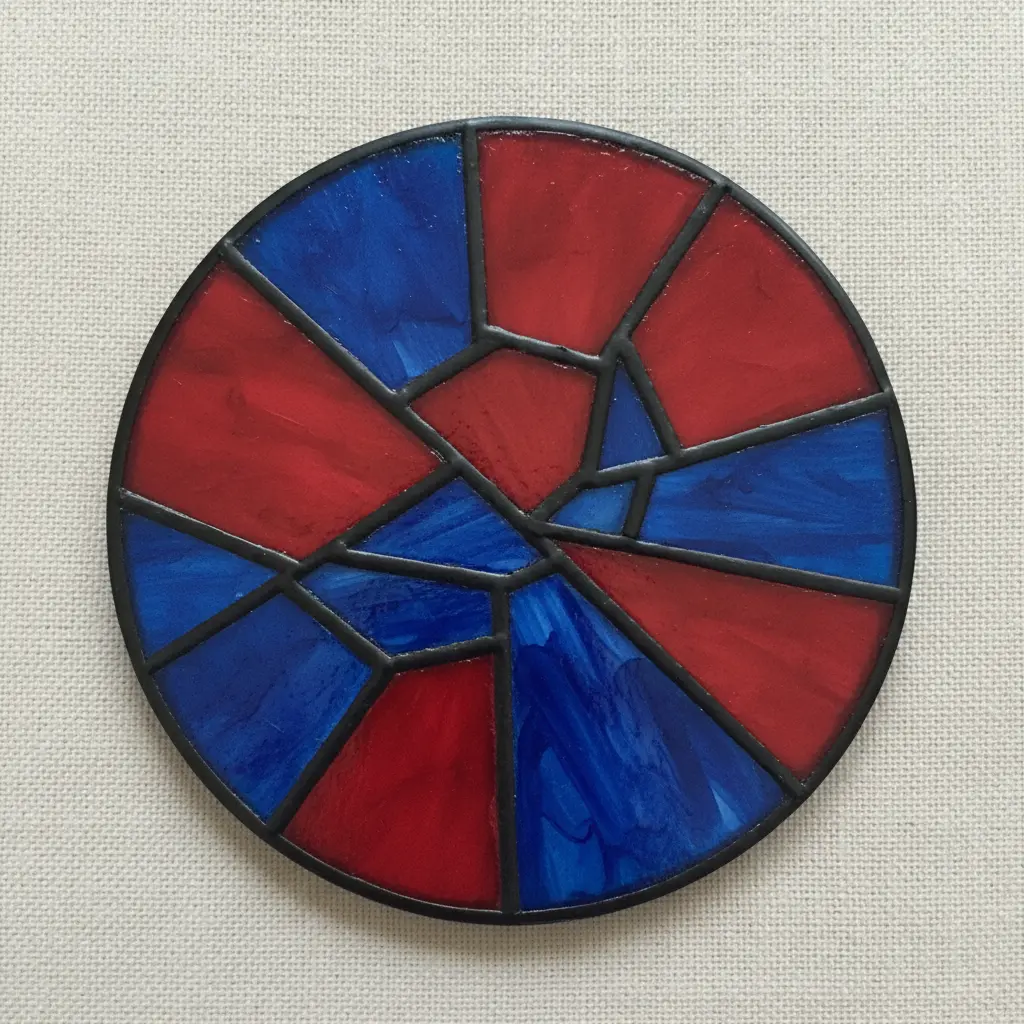
This is the one that looks incredibly complex, but the technique is wonderfully forgiving. You arrange small, colored pieces of glass or resin inside a metal bezel to form a pattern, like a tiny mosaic.
Then, you carefully fill the gaps between the pieces with a dark epoxy to create those classic leaded lines. It works because the light catches the translucent pieces, making the whole design glow. Does that not look stunning when it is finished as a complete DIY painted glass statement necklace?
For a super fun and approachable project that also lets you play with color and pattern, I often recommend people try to craft popsicle stick necklaces first to get comfortable with the assembly process. Feel that pride of making something so luminous.
Heat Setting And Varnishing Techniques For Longevity
Follow the manufacturer’s instructions for heat setting your specific enamel or acrylic paint to bake that bond right into the glass. This step is non-negotiable for preventing chips and scratches from daily wear.
Once that is done, applying a protective clear varnish over your back-painted design locks everything in place and adds a final layer of defense. I prefer a matte finish for a modern look, but you can choose gloss if you want that extra shine.
This sealing process is your final safeguard, turning your beautiful painted glass into a durable DIY painted glass statement necklace ready for the world. The right primer coat makes your work last through many wears and stays vibrant.
Conclusion
So, did you find your next weekend project among these 10 bold designs? Every painted piece starts as a simple glass blank, and seeing that transformation is the real reward. When you attach the finished pendant to a chain, you hold a little world of color that you made yourself.
One practical tip: always test your paint adhesion on a scrap piece of glass before sealing your final piece — it saves heartache later. Pick your favorite idea, gather your materials, and watch your own DIY painted glass statement necklace come to life. The light catching the paint will remind you why you started creating.
FAQs
Q: What type of paint works best for painted glass jewelry?
A: High-quality glass enamels or acrylic paints with a special glass medium give the most durable finish. Alcohol inks also work beautifully for fluid effects and bond well when sealed with resin.
Q: How do I prevent the paint from scratching off my glass pendant?
A: Seal your finished piece with a clear UV resin dome or a tough acrylic sealer designed for glass. This creates a protective layer that resists everyday wear and keeps colors vibrant.
Q: Can I use regular craft acrylic paint on glass for a necklace?
A: Yes, mixing it with a glass medium is necessary to prevent peeling. Without a medium, the surface needs thorough cleaning and proper curing under a sealant to hold up over time.
Q: What is the best way to attach a bail to a painted glass cabochon?
A: Glue the bail to the back of the pendant with strong jewelry adhesive or epoxy before or after painting, depending on your design. For inverted glass painting, attach the bail first so you can paint the opposite side.
Q: How long should I let my painted glass necklace cure before wearing it?
A: Cure times vary by paint type: most glass enamels need 24 hours to fully harden, while UV resin seals instantly under a lamp. Always follow the manufacturer’s instructions for the best long-term result.