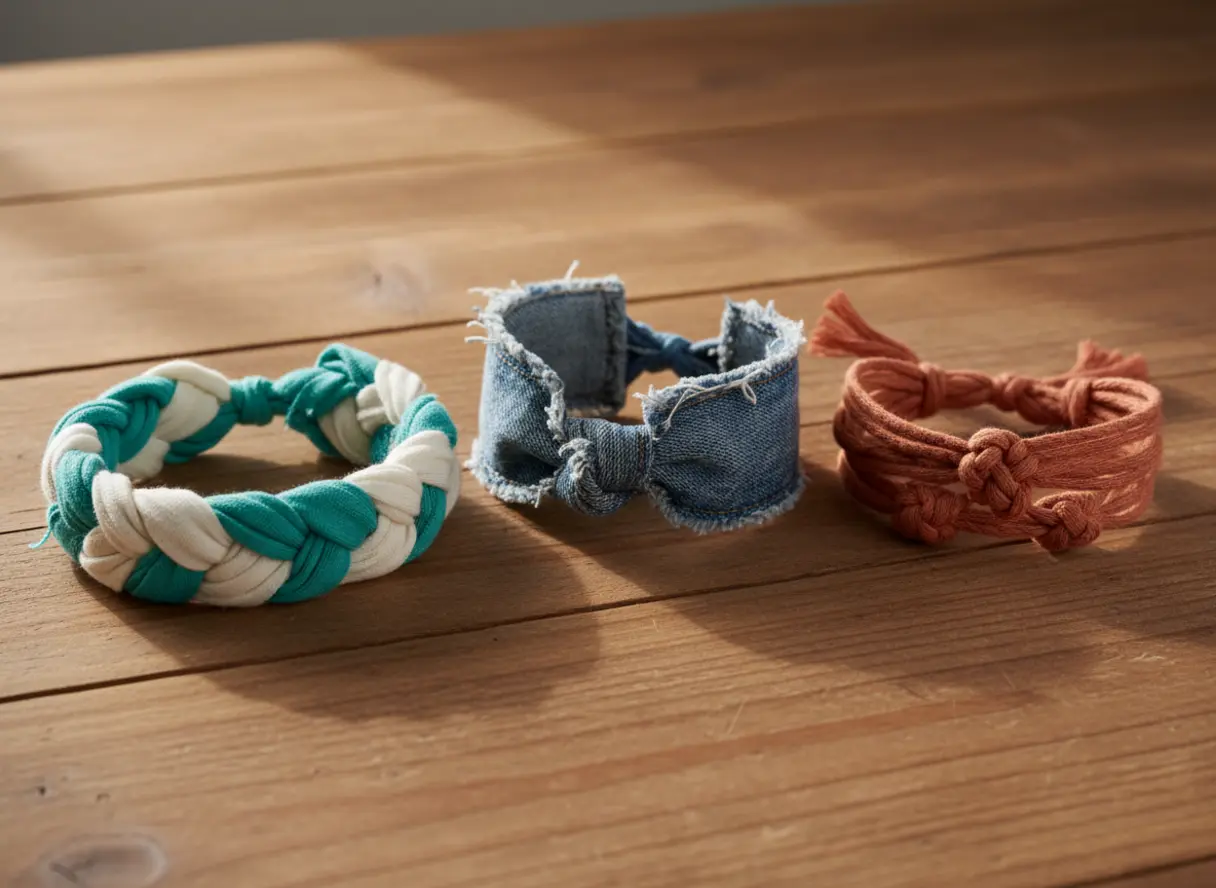
I still remember the first bracelet I ever knotted from a strip of old cotton — it was crooked, but it felt like treasure. That is the magic we are chasing here. From soft jersey braids to rustic linen knots, these 15 projects prove that gorgeous fabric bracelets are completely no-sew or only require a stitch or two.
And the best part? Chances are, you already have most of the materials at home. Each bracelet feels like a tiny work of art. Let us gather those scraps and make something beautiful.
Sourcing Durable Scraps From Old Clothing
Your best fabric bracelet material is already in your closet. Worn denim jeans and thick cotton t-shirts provide the ideal weight and texture for no-sew projects. As you explore DIY fabric bracelet tutorials, the good news is these textiles are tough enough to withstand folding and knotting without tearing, which is a common beginner mistake with lighter, flimsier fabrics.
You want to look for sections without heavy seams or fading, as these areas offer consistent color and a clean surface for your design. Trust me on this, the structural integrity of your final piece starts with a solid base material. A salvaged denim waistband or the side panel of a t-shirt gives you that professional, finished look because the fabric was made to last.
Selecting Reliable Closure Mechanisms For Fabric Jewelry
A strong lobster claw clasp attached with a jump ring is the most secure closure for a fabric bracelet that will see daily wear. Here is the thing, we all know a beautiful design feels cheap if the fastener pops open or snags on clothing. You need a clasp rated for light jewelry that is able to handle the slight pull from the soft textile loop on the other end.
Magnetic closures are tempting for ease but they lack the necessary security, while simple buttons work only if your thread attachment is extremely robust. Following the right DIY fabric bracelet tutorials will teach you that your finished piece should feel confidently snug on your wrist, not loose or precarious, and that reliable click of a quality clasp makes all the difference.
1. Soft Braided Jersey Fabric Bohemian Bracelet
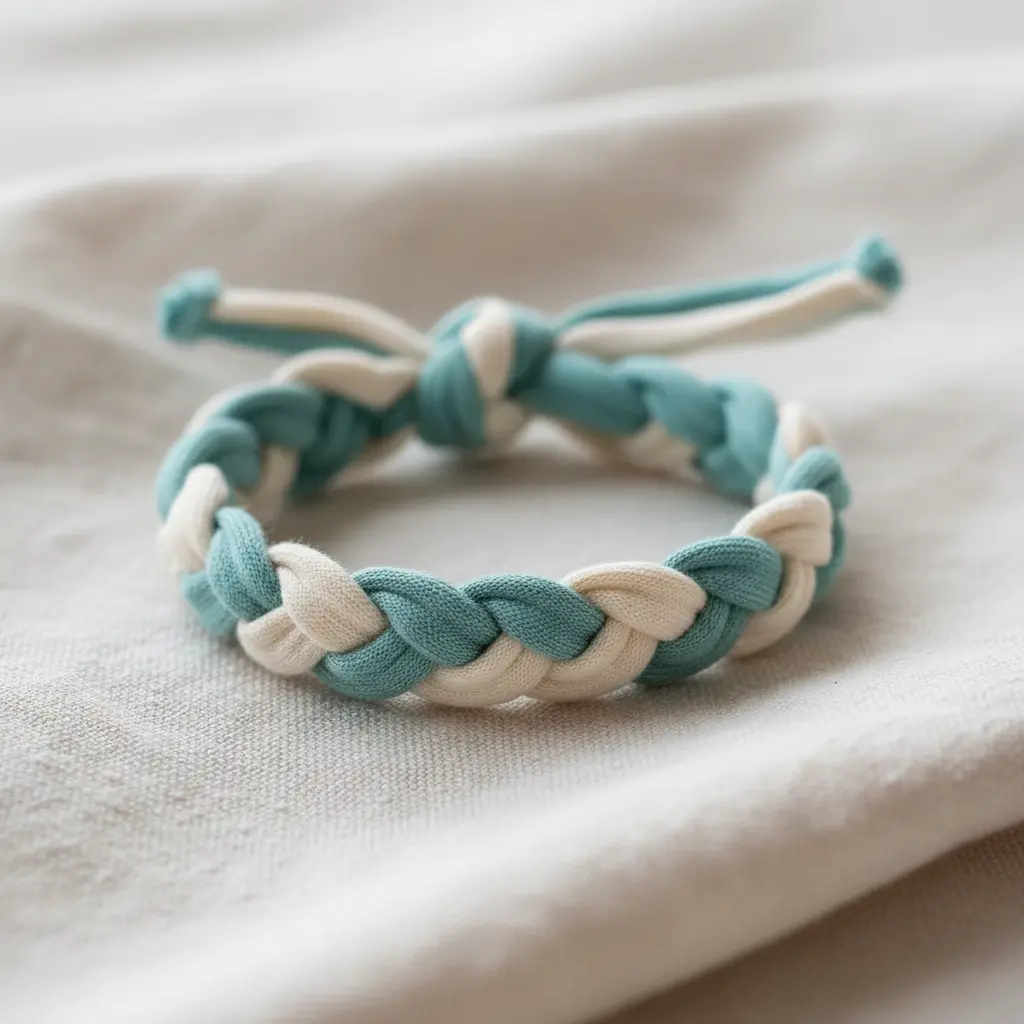
This one is my absolute favorite for comfort. It looks intricate, but you only need a few strips of an old t-shirt and your hands. When following DIY fabric bracelet tutorials, the technique stays simple: cut the jersey into strips, stretch them so the edges curl inwards, and then use a three-strand braid. It works because the soft fabric feels amazing all day, and you will make it look totally unique.
Pro tip: secure the starting end to a pillow with a safety pin to keep your braid nice and even. If you are new to this style, getting comfortable with some basic braided jewelry techniques first will build your confidence.
2. Frayed Edge Denim Wrap Bracelet: A Casual Statement
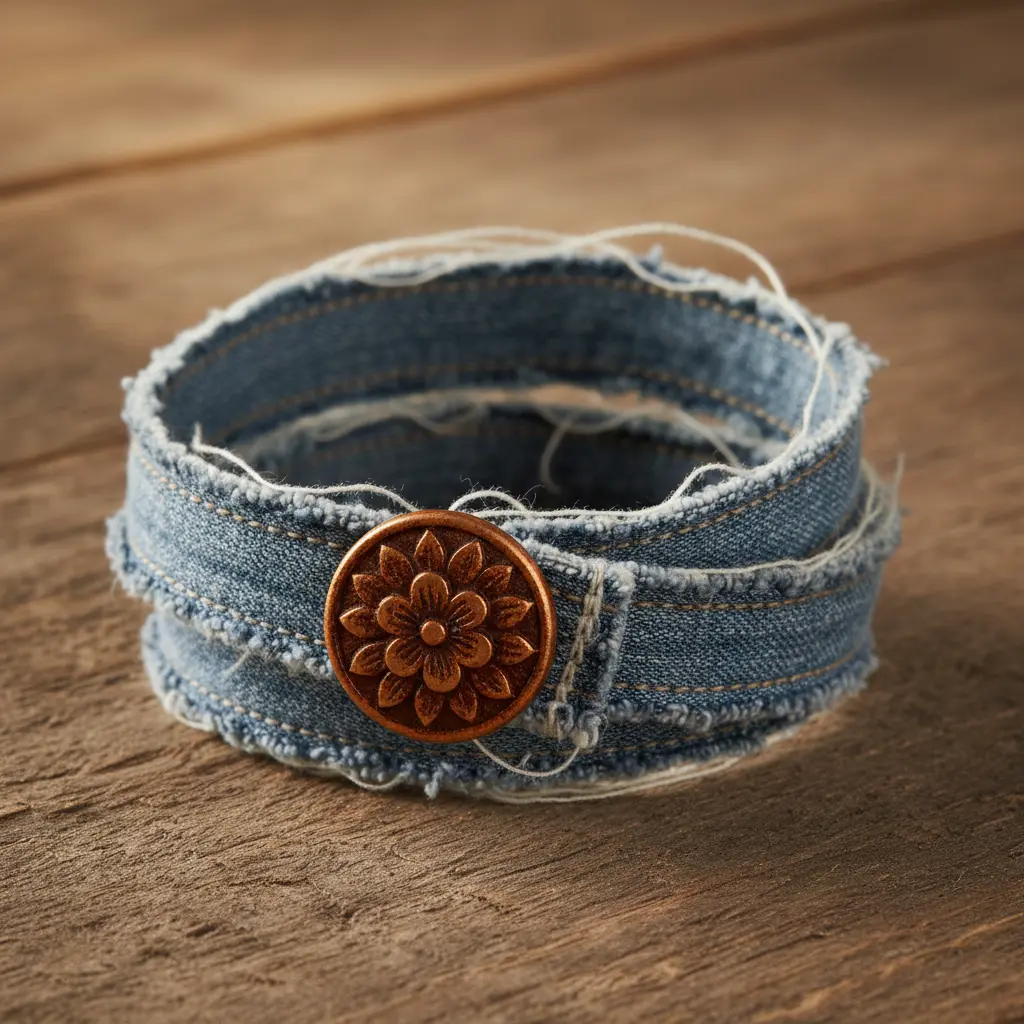
Who would have thought your old jeans could become your favorite accessory? Most DIY fabric bracelet tutorials agree this is a wonderful way to upcycle fabric scraps into something effortlessly cool. You start by cutting a strip of denim and then carefully fraying the long edges with fabric scissors and tweezers.
You will wrap it around your wrist a few times and secure it with a simple button or a magnetic clasp. What makes it work is that perfect blend of casual comfort and chic style. It feels personal and lived-in, like a piece of your favorite weekend outfit.
I love how the frayed edges soften the look, giving it that bohemian charm. Try it and feel that relaxed, confident vibe it brings to any outfit.
3. Knotted Cotton Scraps Charm Bracelet with Personal Touch
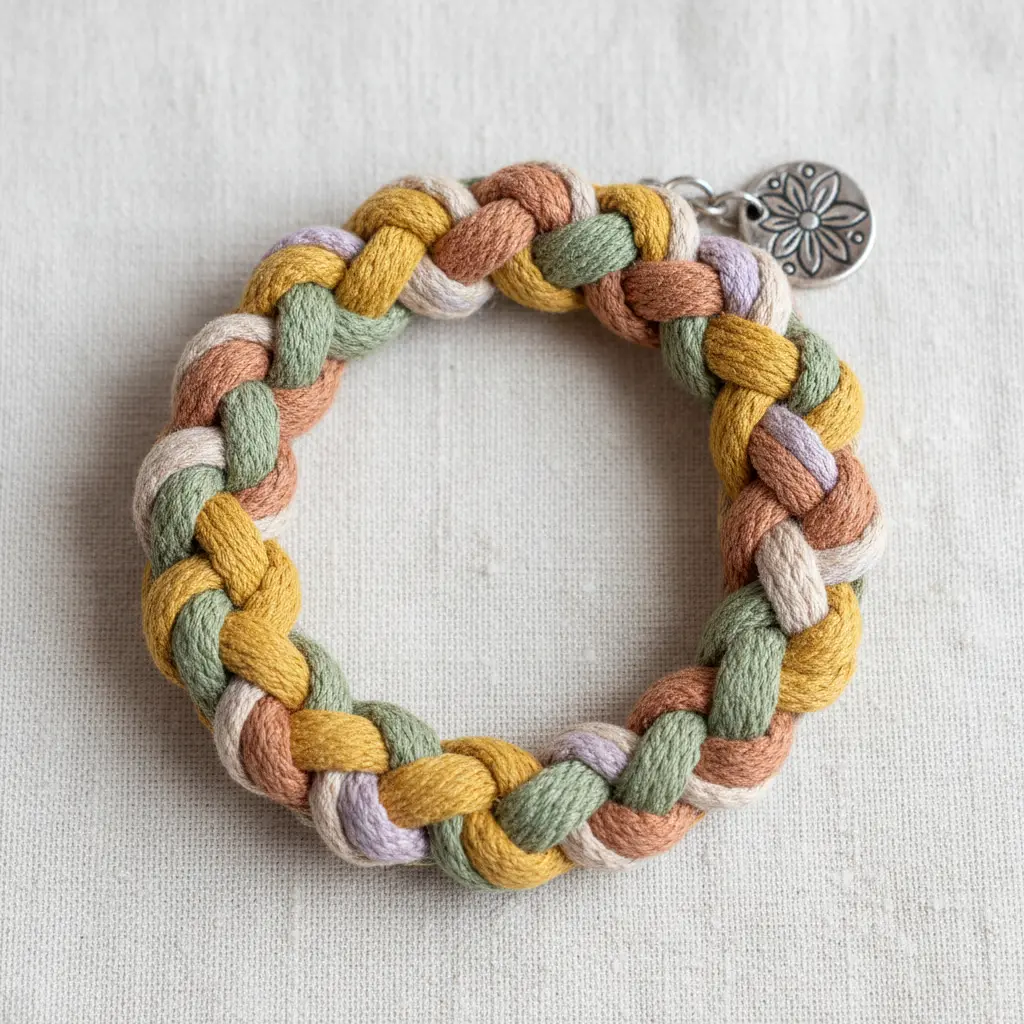
Ever wondered how to turn fabric scraps into something you would actually wear? This project feels like a hug from your favorite old t-shirt. You start by tearing or cutting cotton scraps into strips, then knot them together into a soft chain. I love how you can weave in tiny charms as you go, attaching them with jump rings for a secure hold.
It works because every knot and frayed edge tells a story. The variation in strip width and color adds to that handcrafted charm, so do not worry about making everything perfect. Your finished piece will be a comfortable, personal accessory that feels special every time you put it on.
For a different base structure, you could look at some cuff bracelet inspiration to mix up your designs. Reading detailed DIY fabric bracelet tutorials shows how adaptable this style really is.
4. Silk Ribbon Beaded Cuff Bracelet — Elegant and Easy
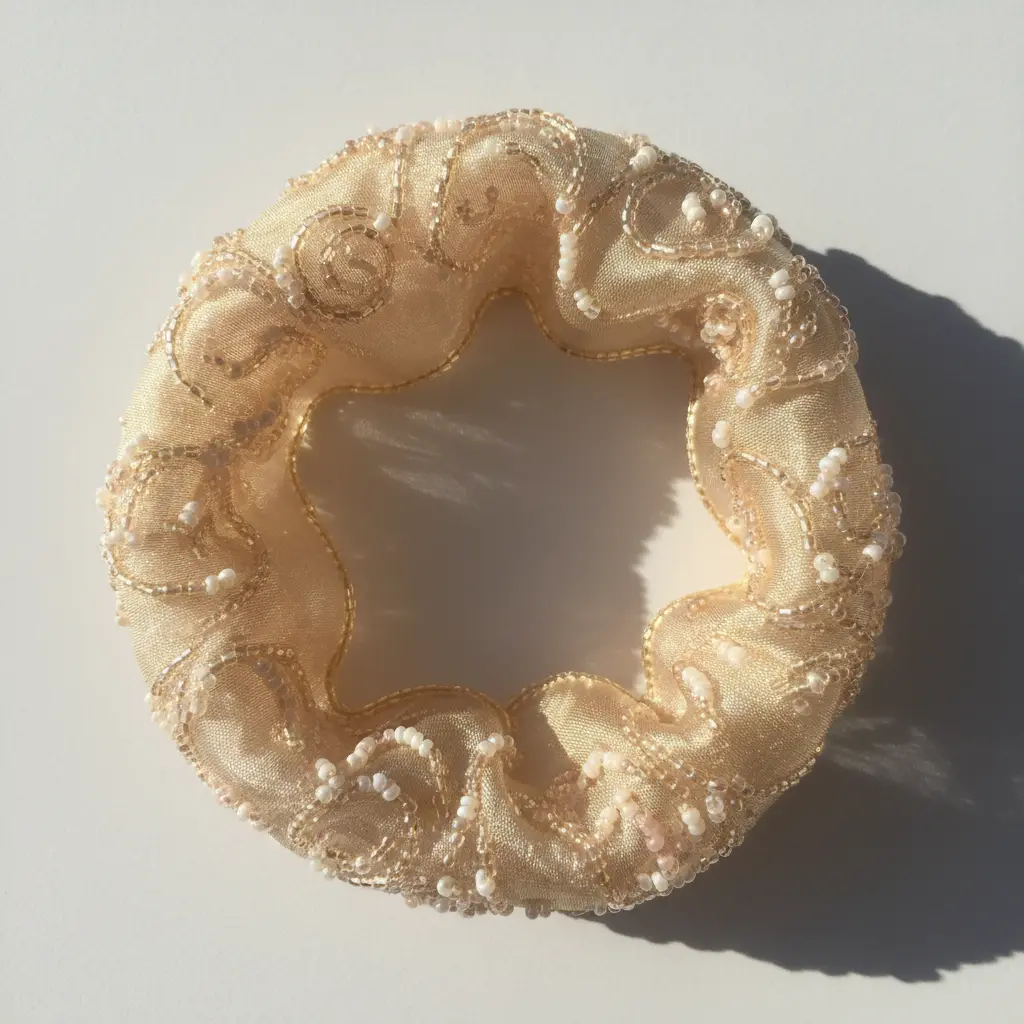
This one surprised me. It looks so delicate and expensive, but the technique is wonderfully simple. You thread your chosen hand-dyed silk ribbon with beads, securing each one with a firm knot on either side. The ribbon’s soft drape does all the elegant work for you.
I love how forgiving this method is. If you mess up a knot, you should untie it and try again. The trick is to make sure your bead holes are large enough for the ribbon to pass through easily. That is the one mistake I see beginners make all the time.
For a more structured look, you will create individual beaded links on headpins and attach those to the ribbon instead. This is a fantastic way to incorporate more complex bead combinations. Once your beads are in place, finish the ends with ribbon ends and a clasp for a professional look, or tie it into a bow. It feels so luxurious to wear something you made yourself.
5. Woven Tartan Plaid Pattern Bracelet for Cozy Style
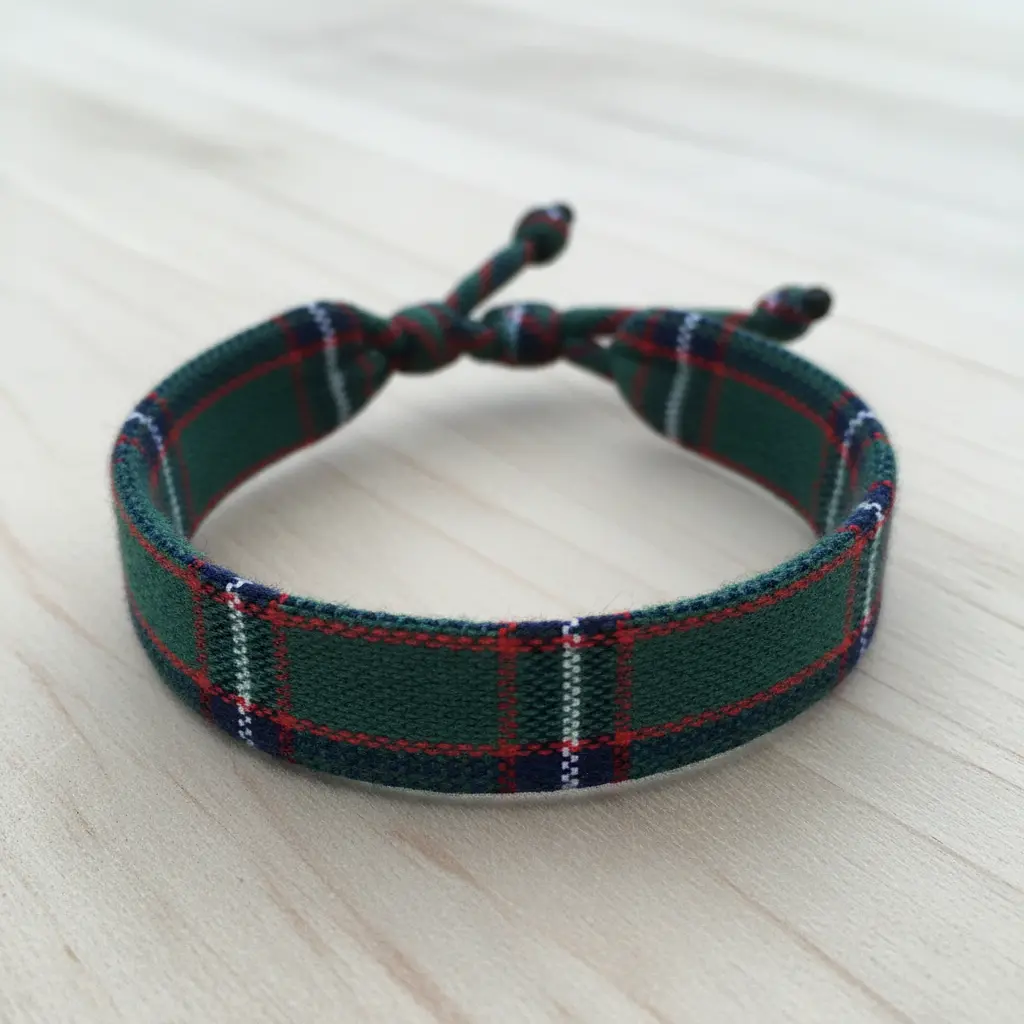
This is the one you will want to wear with your favorite flannel shirt. It looks complex, but you will create that classic criss-cross pattern with simple tartan ribbon strips and a basic braiding technique. You weave three or four strips together, focusing on keeping your tension even for a neat finish. I love adding a small wooden toggle clasp to the ends for a rustic touch that feels perfectly cozy.
The charm is all in the texture and that timeless plaid look. It works because it brings a tangible piece of that warm, heritage style right to your wrist. Trust me, getting those ends secured properly makes all the difference. Feel proud when you slip it on and see how it completes your relaxed outfit.
6. Floral Print Lace Edge Bracelet with Romantic Detail
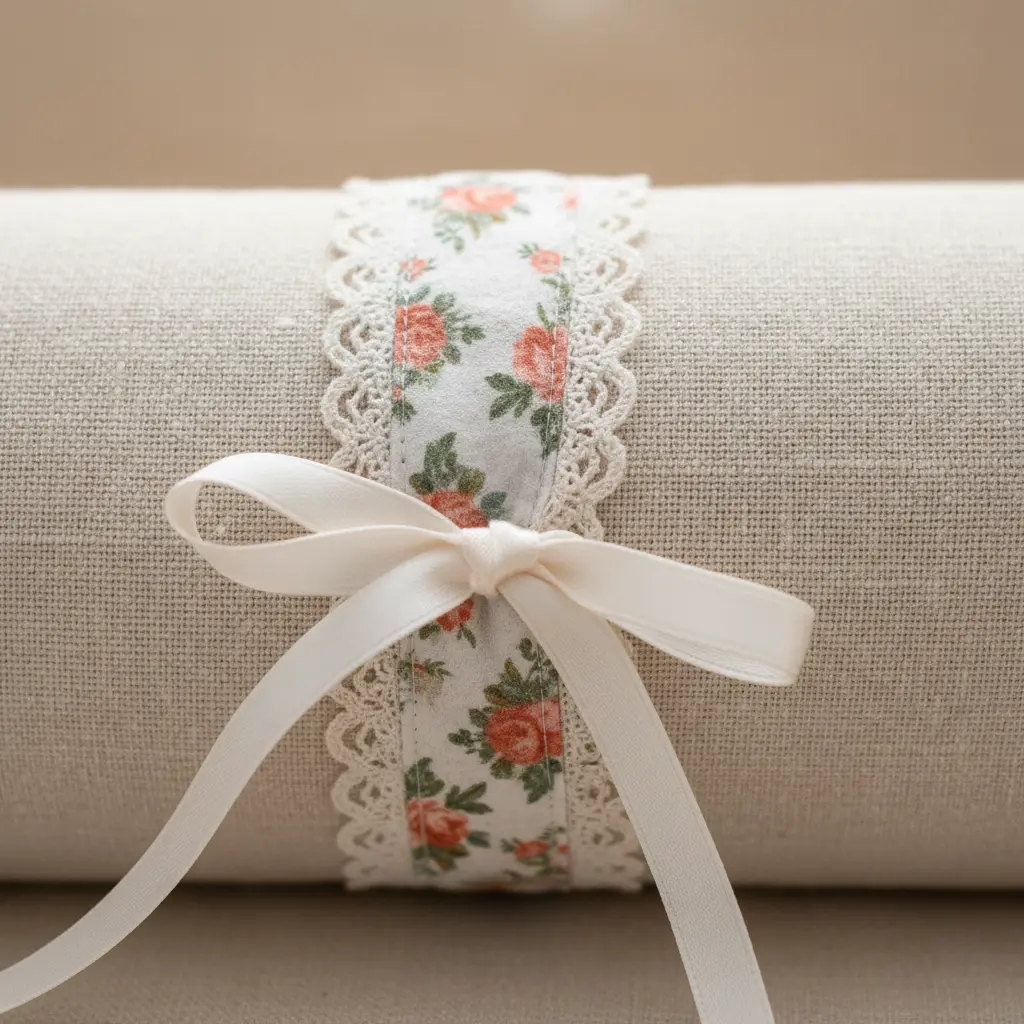
Ever wondered how to get that soft, vintage look with minimal effort? This project looks delicate, but it is surprisingly straightforward. The key is pairing your favorite floral print fabric with a delicate lace trim. You will simply cut your fabric to size, then neatly attach the lace along the edges using fabric glue or a quick stitch.
I love this because it lets the materials do the talking. The combination of organic florals and intricate lace creates a piece that feels both charming and elegant. It is perfect for adding a feminine touch to an outfit.
For the most polished finish, take your time pinning the lace in place before you secure it permanently. This ensures everything stays straight and even. The result is a beautifully romantic accessory you will be proud to wear or gift. Does that not sound lovely?
7. Velvet Ribbon Pearl Embellished Bracelet: Vintage Glamour
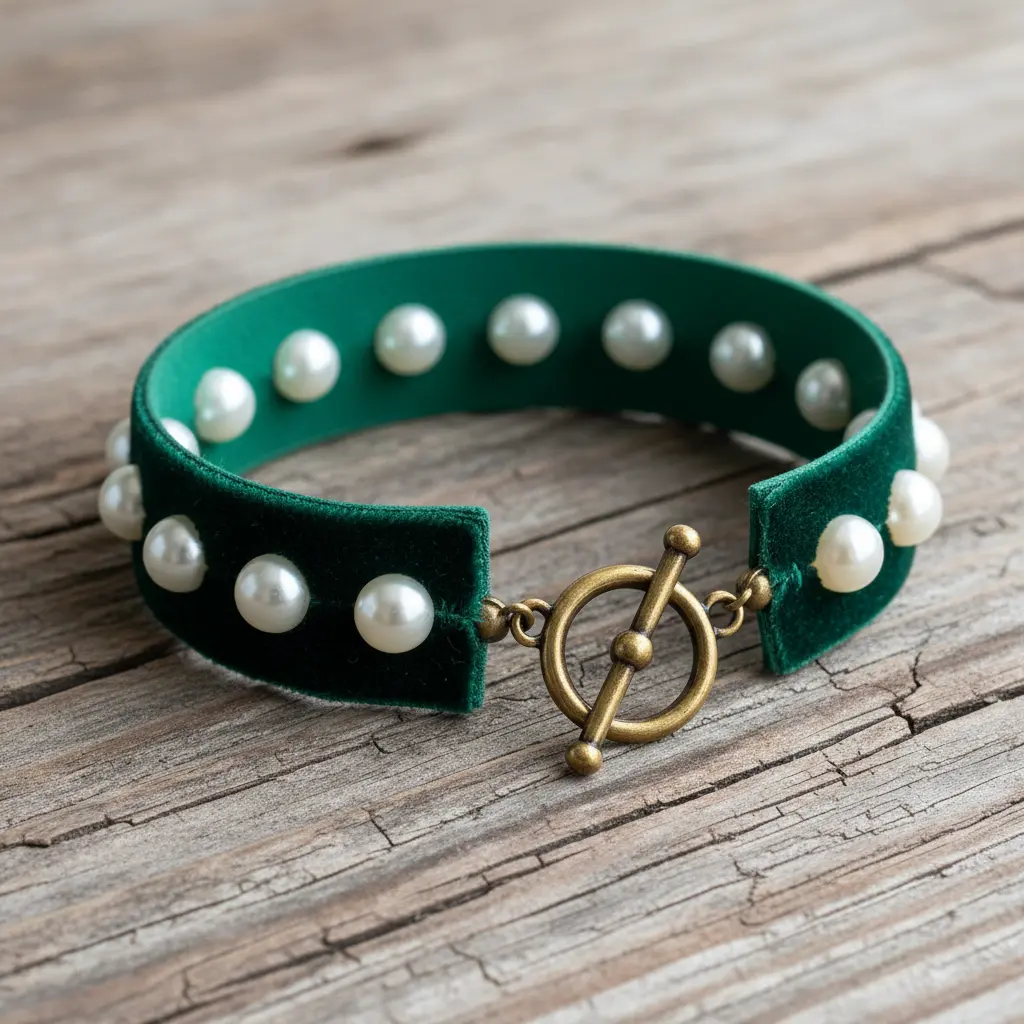
This project feels fancy, but it is surprisingly simple to put together. You will take a length of velvet ribbon in a rich color and hand-sew pearls directly onto it. I love how the soft texture plays against the pearls gentle shine. It creates a piece that feels instantly classic and elegant.
The key is using a strong beading thread to secure each pearl. This keeps everything in place without distorting the ribbons beautiful drape. You should scatter the pearls or line them up neatly along the center. Either way, the result has that lovely, romantic vintage vibe.
This design works because it is all about luxurious textures meeting timeless style. It is perfect for dressing up an everyday outfit or for a special occasion. For a more structured finish, you will learn how to attach a simple clasp by reviewing some easy leather bracelet designs that use similar hardware techniques. Trust me, you will feel so proud wearing your handmade glamorous accessory.
8. Geometric Print Bangle Wrap Bracelet — Modern and Minimal
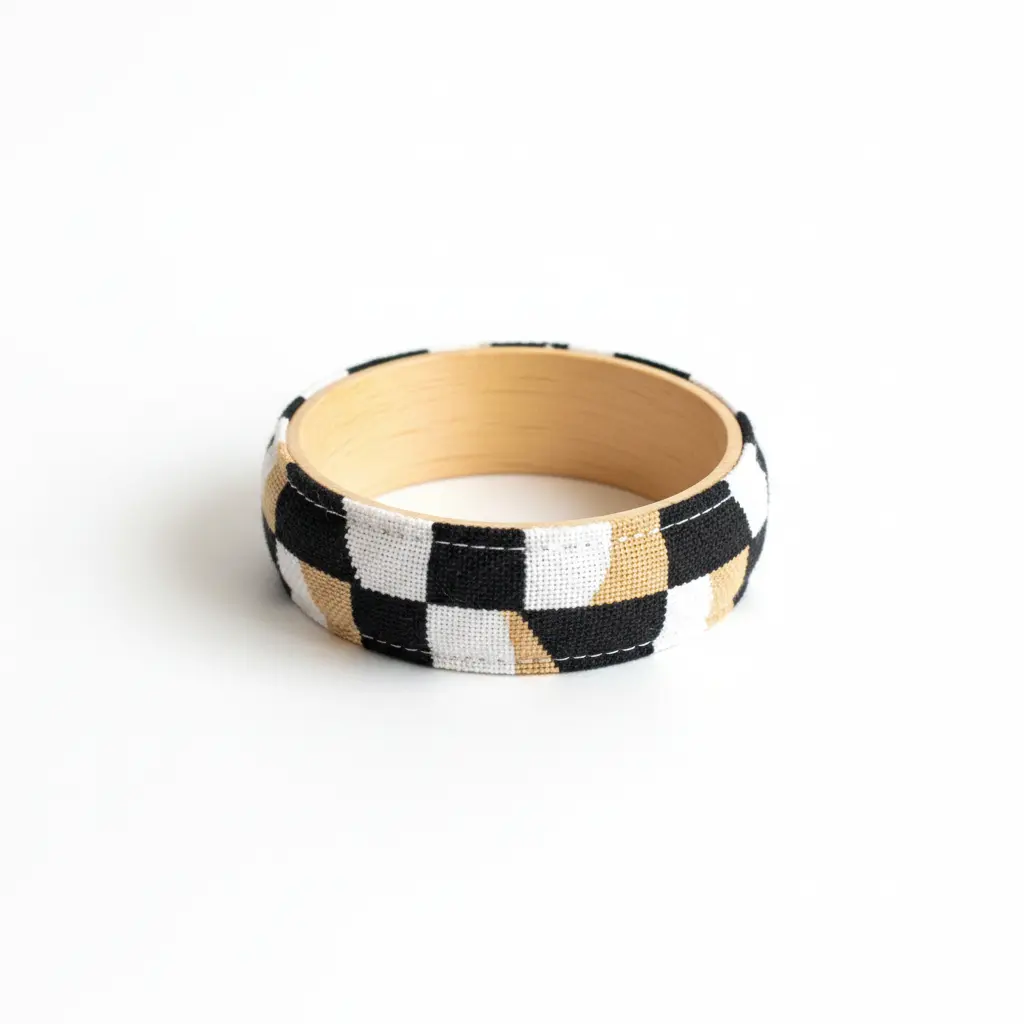
Ever wanted a bracelet that looks like a stack of chic bangles but is one piece? This wrap design gives you that clean, layered effect without any bulk. You will cut a strip of printed fabric, fold and glue the edges neatly, and often add a strip of fusible interfacing inside for that perfect structure. It wraps snugly around your wrist two to four times for a modern look.
I love how this project turns simple printed cotton or linen into such a sharp accessory. The limited color palette keeps it minimal, letting the geometric shapes do all the talking. It works because the structure makes it feel intentional and polished, not like a casual fabric tie.
Your biggest friend here is that interfacing. It is the secret to getting that bangle-like shape instead of a floppy ribbon. Try it and feel how satisfying it is to create something so sleek and wearable.
9. Vibrant Multi-Colored Corded Fabric Twist Bracelet
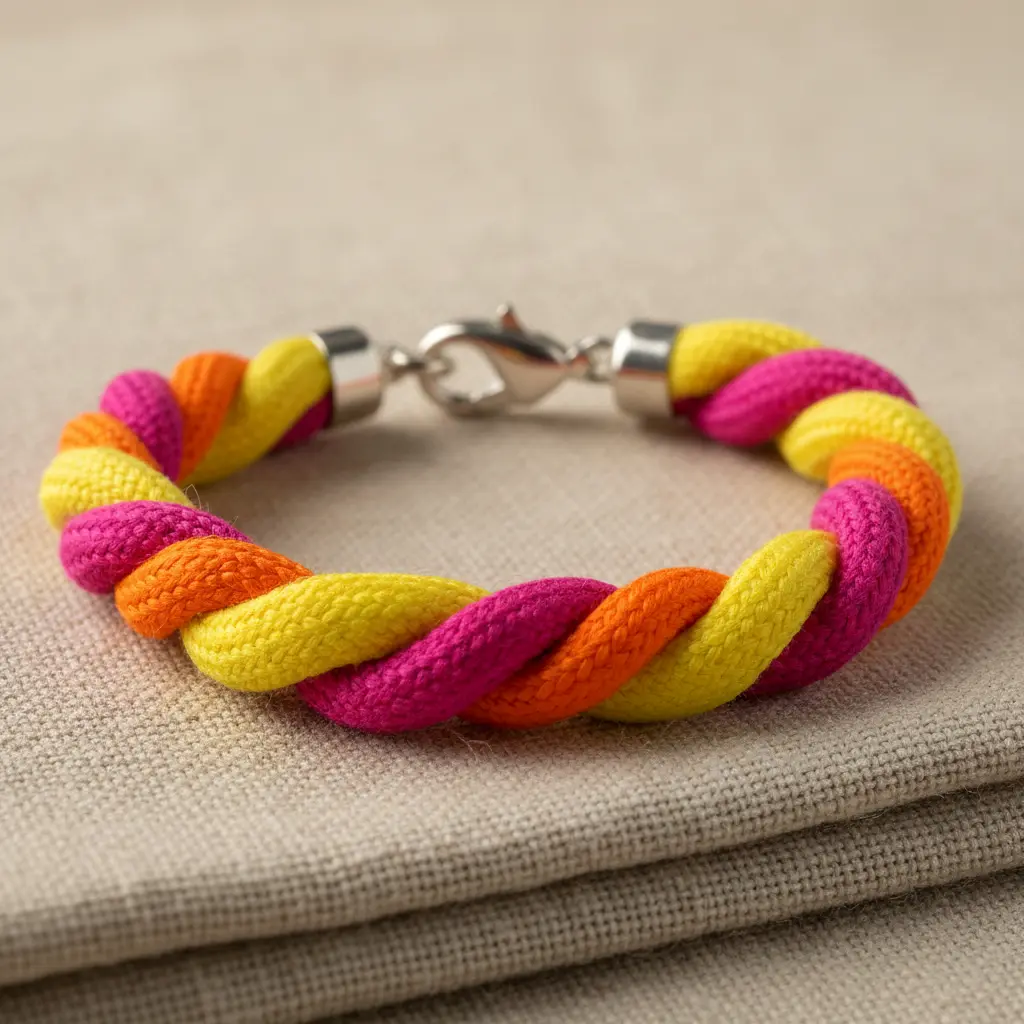
Who knew a few simple cords would create such a joyful accessory? This is my go-to project when I want to add a burst of color to my wrist. You start by gathering your chosen vibrant fabric cords together and securing one end. Then, twist them around each other until you reach your desired length before securing the other end.
It works because the twisting action locks the cords together, giving you a sturdy and textured piece. The magic is in the color combination. Try pairing a jewel tone with a bright pastel, or go for a full rainbow effect. Isn’t it satisfying when those colors blend as you twist?
A common hiccup is making the twist too loose, which leads to unraveling. Keep a consistent, firm tension as you work. For a secure and adjustable finish, you might look into a memory wire bracelet closure. Feel that pop of personality when you slip it on.
10. Distressed T-Shirt Yarn Woven Bracelet with Rustic Charm
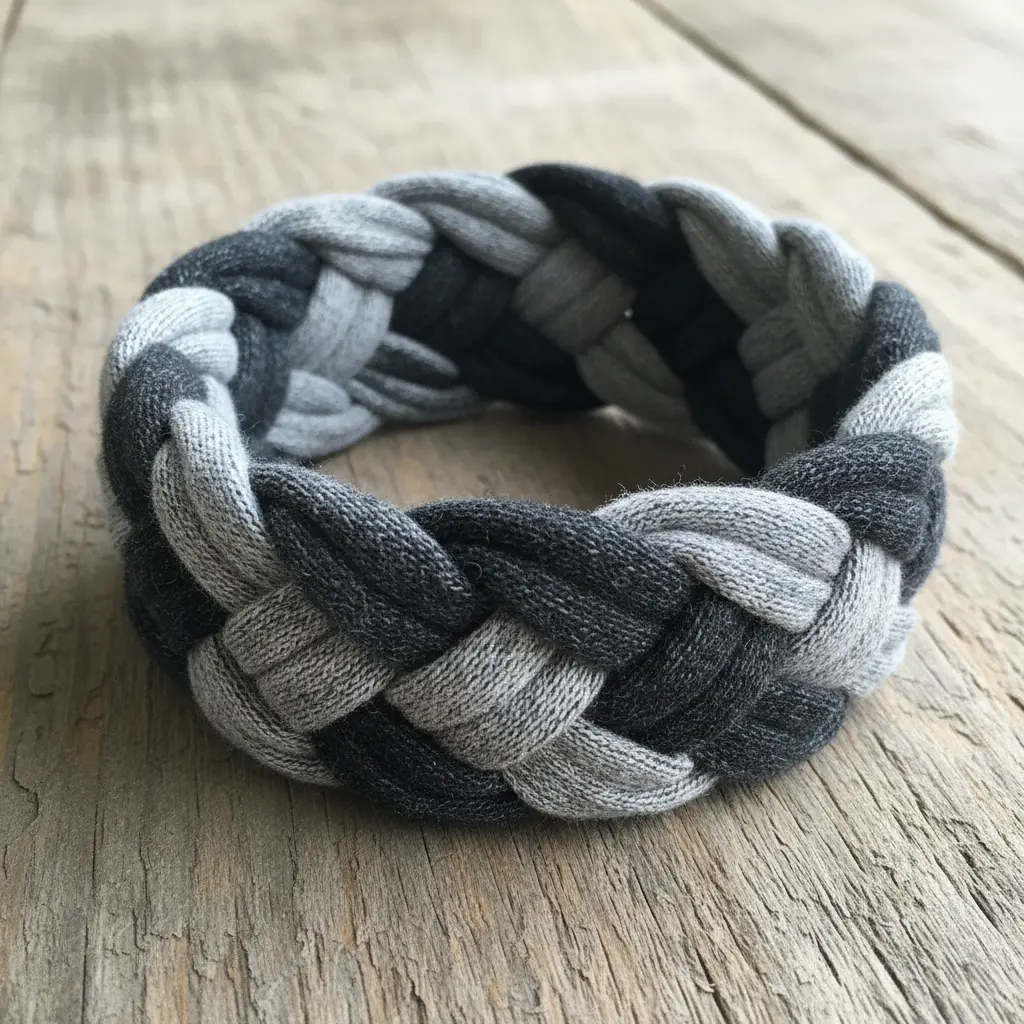
Ever thought you needed special supplies to make a great bracelet? This project proves you do not. The whole look comes from your distressed t-shirt yarn. I love how you simply give old fabric a little sanding or snipping to get that perfectly worn-in texture.
Cut three long strands, tie them together, and start a simple braid. The uneven weave is the whole point, so do not worry about perfection. That organic, slightly undone feel is what gives it such a unique, lived-in charm. It works because it looks effortlessly cool and has a story, since you upcycled the materials yourself.
Getting the fit right is key, so measure your wrist and add plenty of extra length for knots. A classic wooden toggle clasp is my favorite finish for that rustic vibe. You could even pair this casual look with more delicate heart-themed bracelet designs for a fun mix of styles. Trust me, you will feel so clever wearing this handmade piece.
11. Leather Cord Mixed Fabric Bracelet: Edgy and Earthy
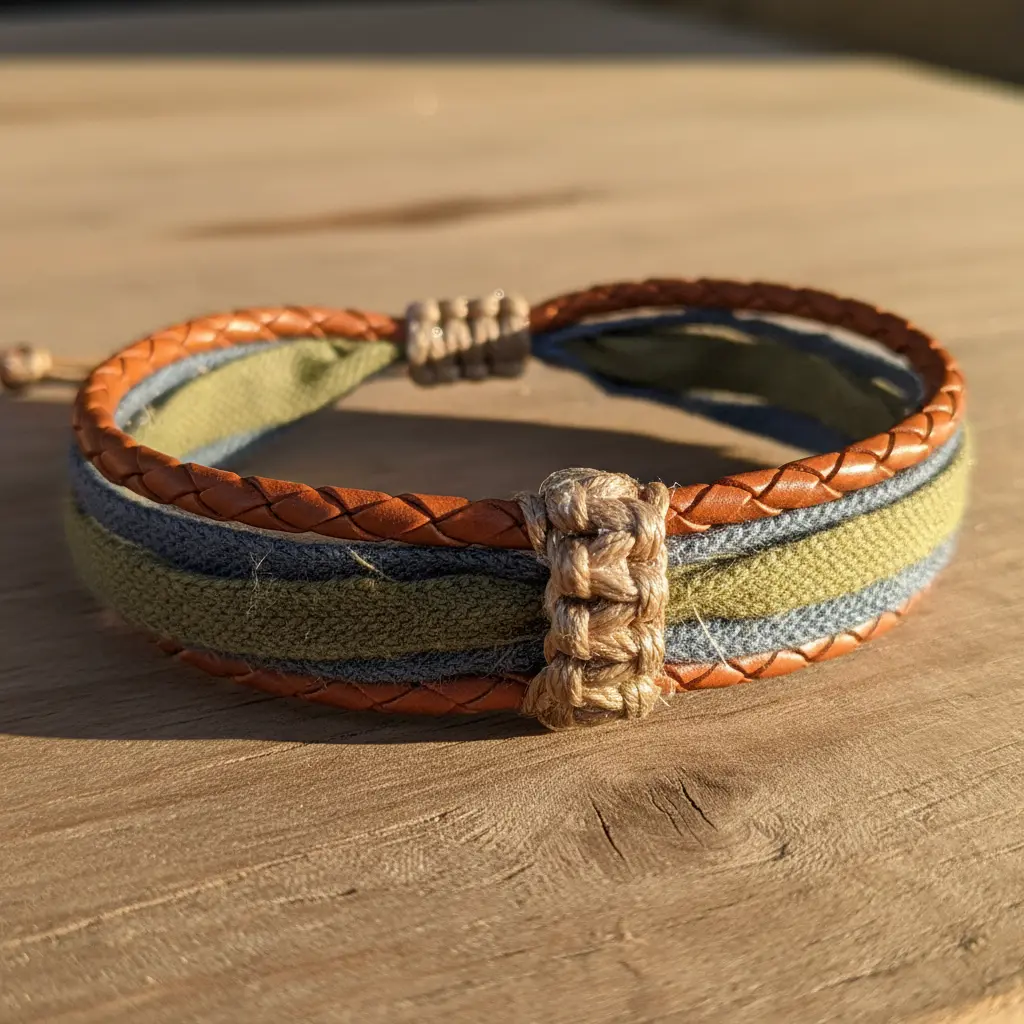
This one is a personal favorite because it looks complex but is wonderfully simple to put together. You start by cutting your leather cord to wrist length, plus a few extra inches. Then, you wrap or braid strips of your chosen fabric around it, securing the ends with a knot and a dab of strong glue. Isn’t it fun to see those contrasting textures come together?
The magic happens in the mix of rugged and soft. I love pairing a natural brown cord with a vibrant floral cotton strip. It creates a tactile piece that feels both bold and grounded. That is the real payoff of this project.
My best tip is to practice your wrapping tension on some scrap pieces first. You will get a smooth, professional finish every time. Feel proud of your unique, handmade accessory.
12. Chiffon Ruffle Texture Layered Bracelet — Soft and Feminine
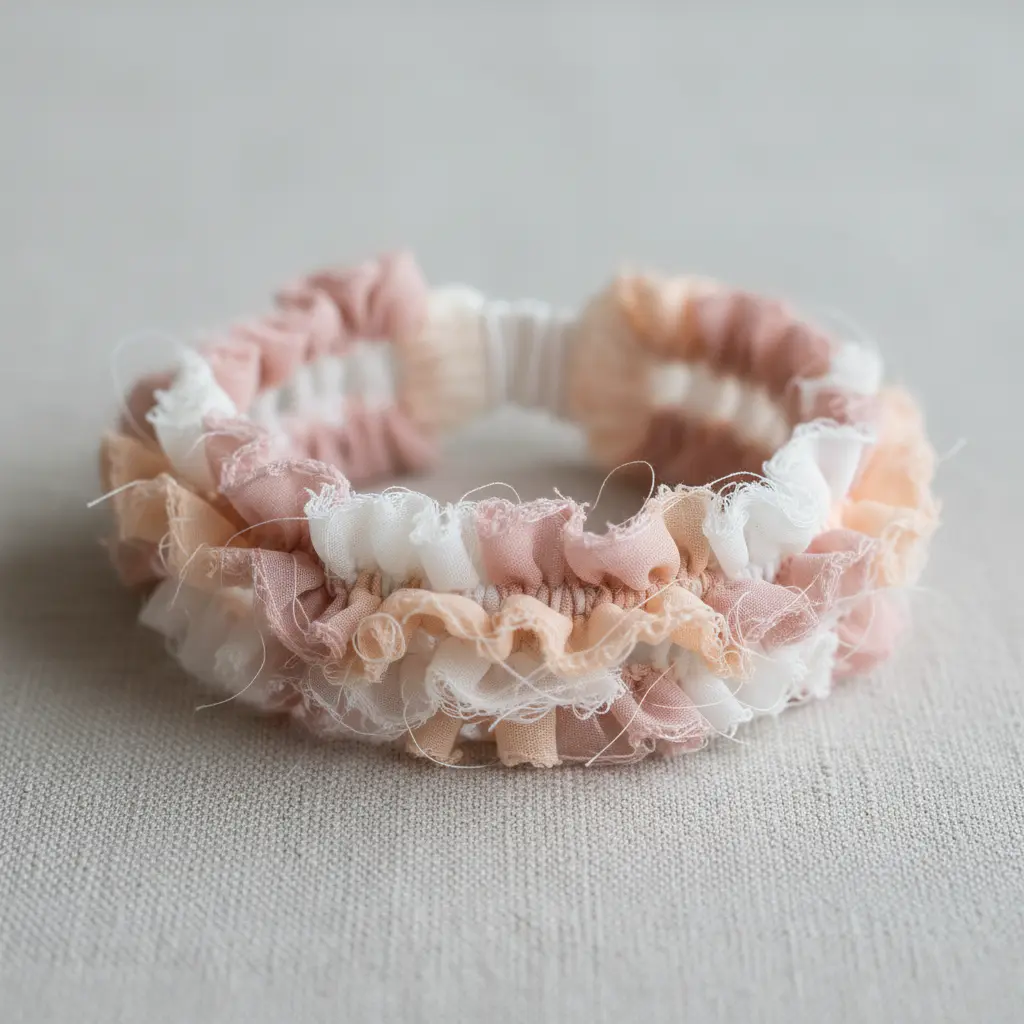
Doesn’t this look like a soft little cloud for your wrist? The secret to its dreamy volume is all in the gathering. You will cut long strips of sheer chiffon fabric and run a simple running stitch down the center of each one. Gently pull the thread to gather the fabric into soft, even ruffles, then layer several of these strips together.
I love this project because it feels so light and romantic when worn. The sheer layers catch the light beautifully, creating a subtle, ethereal texture that is purely feminine. For a completely different but equally bold look, you should study unique Navajo bracelet styles to see how they build structure.
My top tip is to be generous with your fabric. More chiffon means a fuller, more luxurious ruffle that drapes perfectly. Does that not sound lovely?
13. Sequin Embellished Fabric Strip Bracelet for a Touch of Sparkle
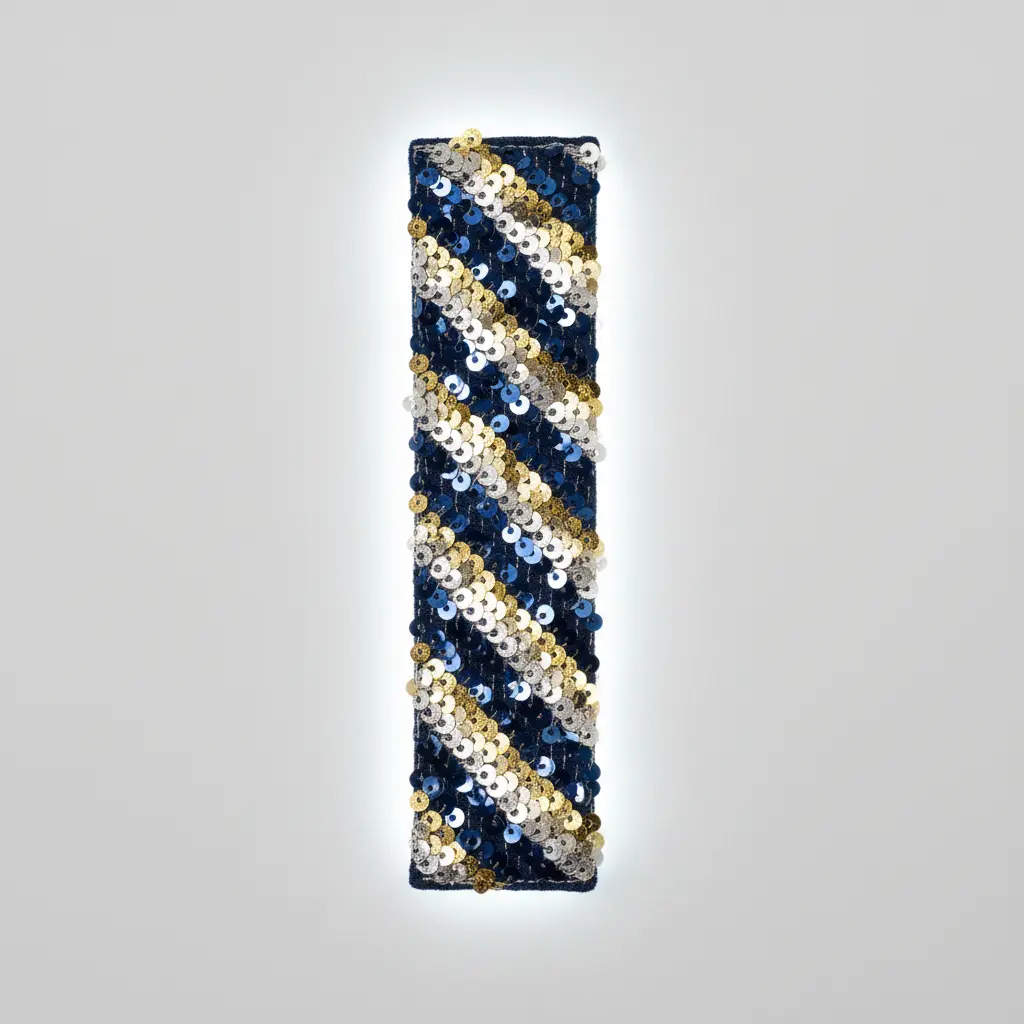
Who says glamour has to be complicated? This project looks fancy but is so simple to put together. You start with a soft fabric strip as your base, folding or gathering it to the width you like. Then comes the fun part, adding the sparkle with your chosen sequins.
I love using a little fabric glue to hold each sequin in place before I sew it down. It keeps everything from sliding around while you work. You will sew them on with a fine needle and some invisible thread for a seamless, shiny finish.
This works because it mixes everyday comfort with a little party-ready dazzle. The final step is adding your closure, and you have a completely personalized accessory. For another quick project that focuses on playful color, try making a fun jelly bean bracelet with a similar cheerful vibe.
14. Polka Dot Bow Tie Bracelet: Sweet and Playful
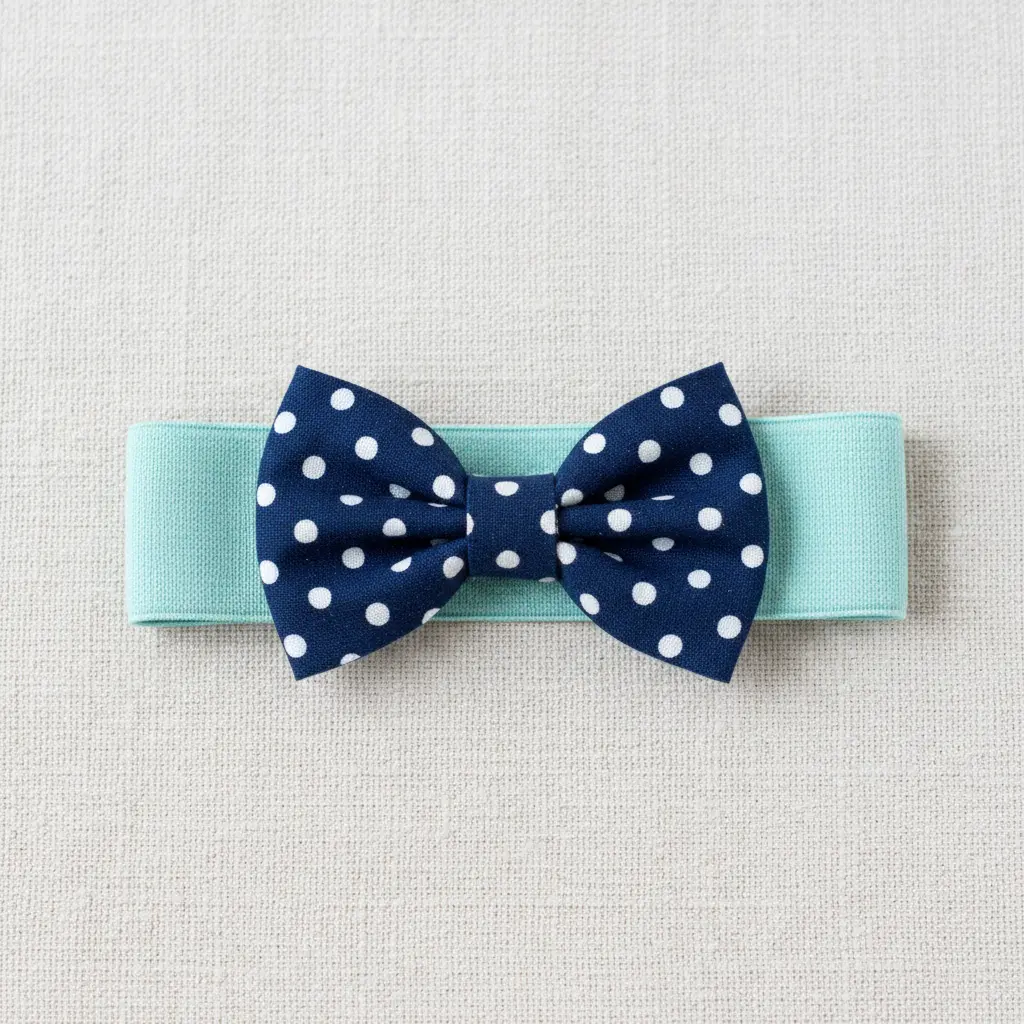
Who says a bracelet has to be serious? This one feels like putting a happy little party on your wrist. You start by making a tiny, adorable bow tie from your favorite polka dot ribbon. Fold and pinch the center, then secure it with a small thread wrap. I love using a pre-made ribbon here because it guarantees a neat, crisp shape.
Next, you attach that sweet little bow to the center of a simple bracelet chain or cord. You should stitch it on or use a tiny dab of fabric glue for a quick hold. The charm comes from keeping everything dainty and proportional.
It works because it taps right into that nostalgic, cheerful feeling polka dots always bring. Try it and feel that instant mood lift.
15. Monochrome Linen Rustic Knot Bracelet — Understated Elegance
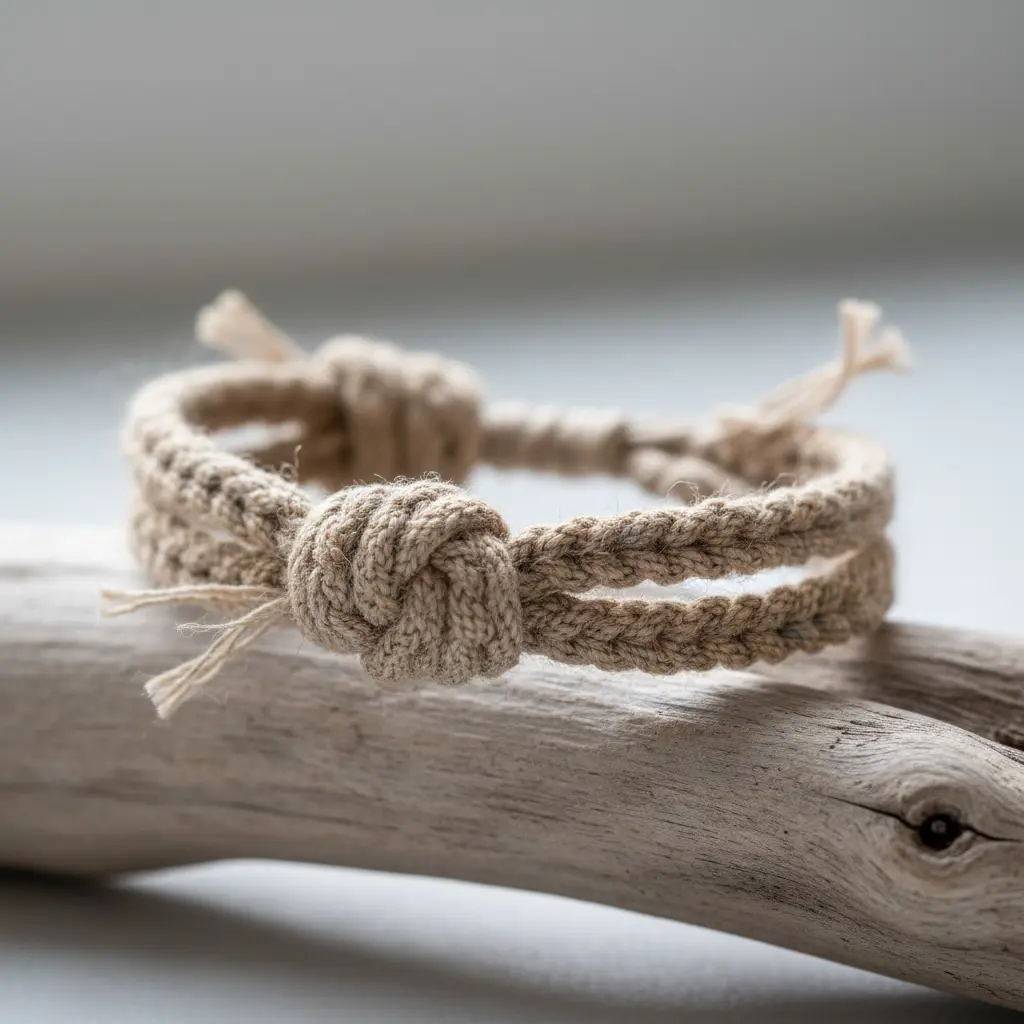
Ever feel like you need a project that is calm and simple? This bracelet is exactly that. You will focus on tying a series of rustic knots along a single length of linen cord, creating texture and shape with only your hands. It looks wonderfully handmade because it is, and those slight imperfections in the knots are what give it character.
The magic is in the material. Linen has a beautiful, natural texture that feels substantial and looks elegant in a solid color. I love how versatile this piece becomes, easily dressed up or down. Always practice your knots on a scrap piece first to get the tension consistent. Once you have mastered that, you will explore other natural fiber crafts, like straw weaving bracelet crafts, which share that same organic, hands-on feel.
When you finish, you will have a piece of understated elegance that feels quietly proud of itself. Isn’t that a lovely feeling?
Implementing Permanent Fabric Fray Prevention Techniques
A thin line of fabric glue applied to the raw edges of your cotton or denim strips stops fraying before it starts, which is the professional secret to a clean silhouette. You will notice that even the tightest braid or knot puts stress on those cut edges, and without a sealant, your work will unravel in days. The trick is to let the glue dry completely before you begin assembling your bracelet, creating a flexible but permanent barrier.
This one simple step elevates your project from a cute craft to a piece of jewelry that looks intentional and lasts. Heat-sealed edges are another excellent option for synthetic ribbons, but for most upcycled clothing fabrics, a clear-drying adhesive is your best friend.
Conclusion
So, did you find a design that makes your heart sing? Making your own fabric bracelet is about more than just a pretty accessory — it is a little piece of your personality, woven together from scraps and memories. The best DIY fabric bracelet tutorials are the ones that inspire you to try something new, with whatever you have on hand.
Start with the braided jersey or the knotted cotton charm bracelet, and see where your creativity leads. Remember, no two handmade bracelets are ever alike, and that is exactly what makes them special. Look at what you have made — that is real skill right there. Keep experimenting, and soon you will have a whole collection of wearable art. Pick your favorite project from this list and get started right away.
FAQs
Q: What is the easiest fabric bracelet for a complete beginner?
A: The braided jersey fabric bracelet is the easiest. It requires only cutting strips of old t-shirt and braiding them together. No sewing or glue needed.
Q: Can I make a fabric bracelet without sewing?
A: Yes, many designs use knotting, braiding, or wrapping around a bangle base. Projects like the knotted cotton scraps charm bracelet are entirely no-sew.
Q: What materials do I need for DIY fabric bracelet tutorials?
A: You will use fabric scraps, old t-shirts, ribbons, lace, or even shoelaces. Plus, basic findings like jump rings, clasps, or bangles, and sometimes glue or thread.
Q: How do I finish the ends of a fabric bracelet neatly?
A: You will fold the raw edges under and secure them with fabric glue, or use crimp ends and jump rings for a professional look. A simple knot also works well.
Q: Are these fabric bracelets durable enough for everyday wear?
A: With proper knotting and secure closures, they hold up well. Avoid getting them wet, and store them flat to maintain their shape.