This project blends rustic charm with a touch of elegance, letting you create a focal point that feels both curated and personal. I love how each variation tells a different story, from cozy farmhouse to modern glam. So, are you ready to bring a little autumn magic indoors?
Let’s explore these ten delightful ideas to find your perfect match.
Sourcing Sturdy Branches for Proper Weight Distribution
The fastest way to watch your pumpkin tree tip over is choosing a branch with a dense, weighty center instead of one with a lightweight, open silhouette. You want branches that offer plenty of negative space between their forks, like manzanita or twisted willow, because this airy structure lets you hang your mini gourds without overloading any single point.
Trust me on this, that architectural shape is what creates those beautiful tiers you see in professional displays. A good rule when planning a diy mini pumpkin tree is to hold the branch at its base and see if it feels top-heavy; if it does, put it back and keep looking.
The right armature will feel sturdy at the trunk but visually light toward the tips, giving you a perfect canvas for your pumpkins.
Selecting Stable Containers for Decorative Branch Anchorage
Your container needs to act as a solid counterweight, and that means filling the bottom third with a heavy material like plaster or clean river stone before you even think about adding your branch. This creates a low center of gravity that anchors the entire structure, preventing any wobble once you add the decorative elements on top.
The good news is you can use almost any vessel you love for your diy mini pumpkin tree, as long as you have that weighted base system locked in place. I often use a two-part method: first, I set the branch into the wet plaster, and once that’s rock solid, I cover the surface with moss or dried lentils for a finished look.
This approach guarantees your decorative piece stays upright and secure through the whole season.
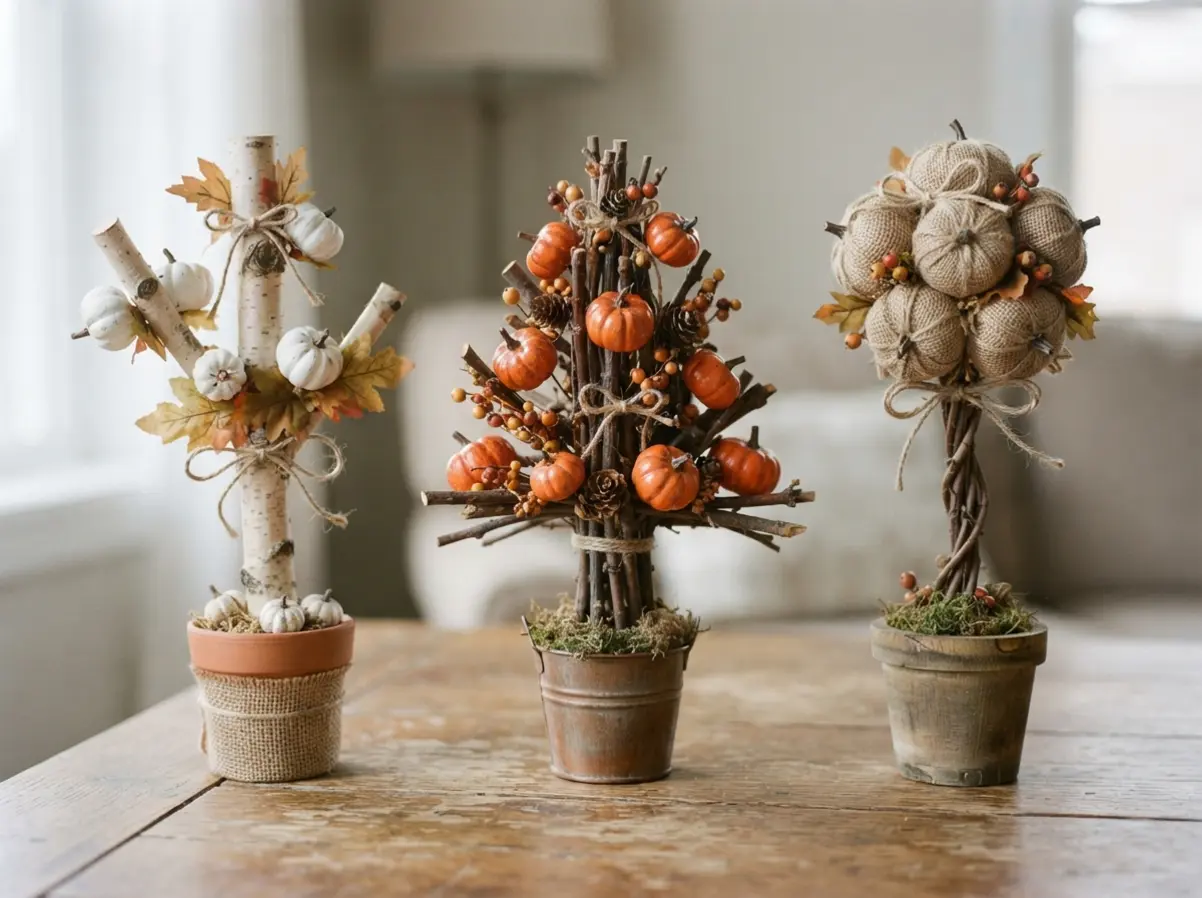
1. Rustic White Pumpkin Birch Branch Tree
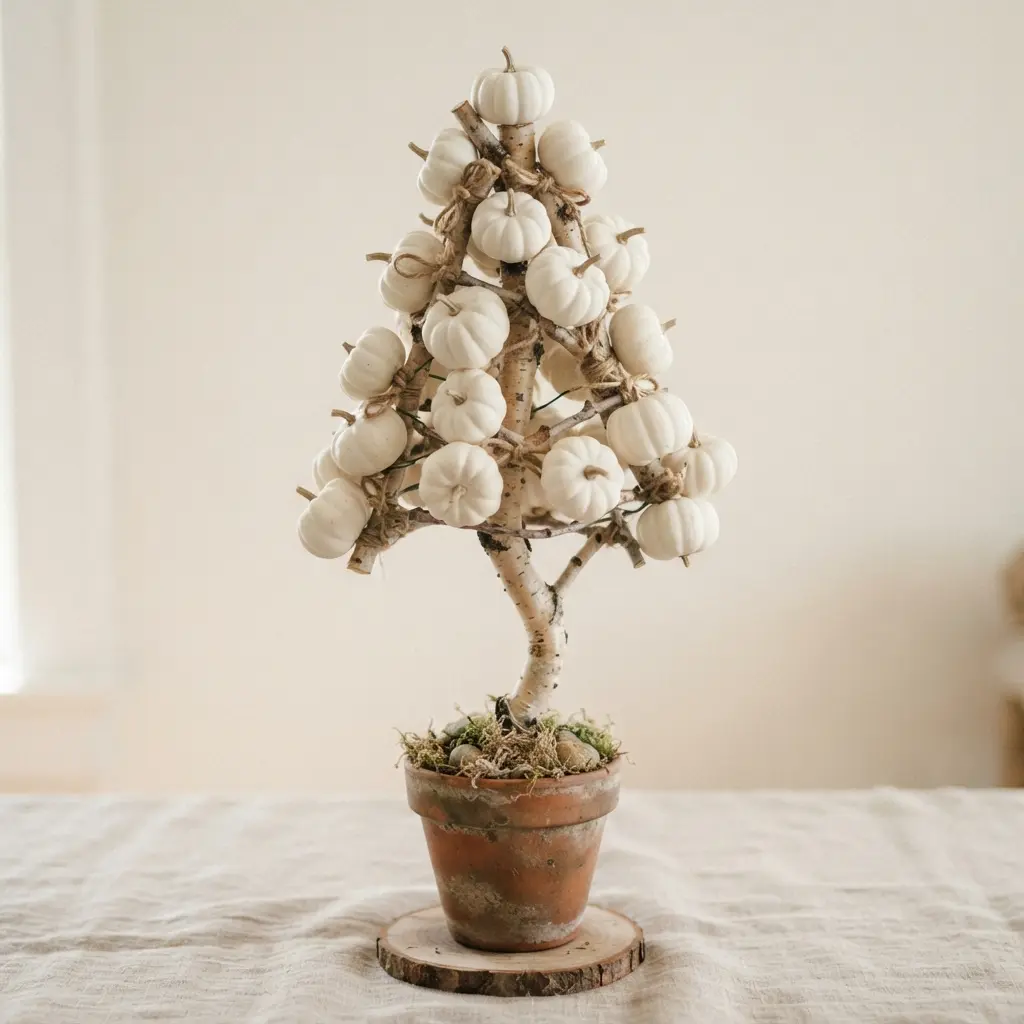
Ever wonder how to get that cozy, modern rustic look without a ton of clutter? This project nails it. You start with a single, sturdy birch branch anchored in a heavy pot filled with sand or pebbles for your diy mini pumpkin tree.
Then, you hang miniature white pumpkins from its natural curves using simple twine. The magic is in the contrast. The raw, peeling texture of the birch plays perfectly against the smooth, sophisticated white of the gourds.
It feels elegant but still wonderfully earthy. I love how this piece brings a bit of the outdoors in without feeling too seasonal. Before you hang your first pumpkin, it is a good idea to browse some creative pumpkin crafts if you are working with little helpers.
That way everyone can have their own small project while you build the main tree. The final look is so serene and inviting. Feel that warm, autumnal charm fill your space.
2. Modern Metallic Gold Gourd Centerpiece Tree

Who would have thought you could make something this glamorous from simple gourds? The trick is in the finish. You apply a few thin coats of metallic gold spray paint to either dried real gourds or lightweight faux ones, letting each layer dry completely.
Then, you arrange them on a central, often abstract, gold-finished rod or stand to create that dynamic, branching silhouette. A diy mini pumpkin tree blends the rustic charm of natural forms with a sleek, contemporary opulence. It feels celebratory without being over the top.
For a balanced look, start with larger gourds near the base and work your way up with smaller ones. Before you begin attaching your gourds, ensure your display is stable by securing your DIY pumpkin hoop wreath base properly.
This foundational step prevents any wobbling and lets you focus on creating that perfect, organic flow.
3. Minimalist Eucalyptus and Cream Pumpkin Arrangement
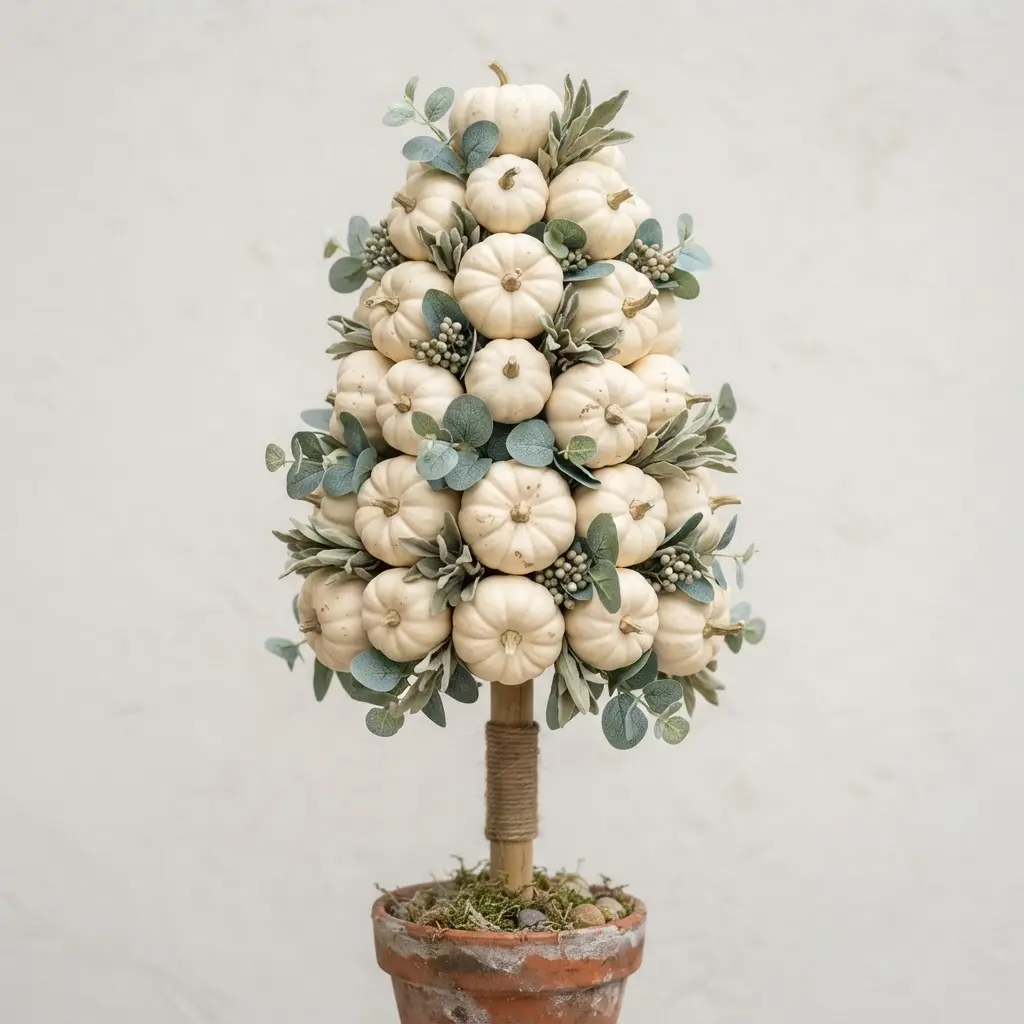
Ever wanted fall decor that feels calm instead of chaotic on a diy mini pumpkin tree? This arrangement is all about that serene, modern vibe. You will group a few cream-colored pumpkins on a simple wood tray or ceramic plate.
Then, tuck in some fresh or realistic faux eucalyptus sprigs around them, letting the soft grey-green leaves drape naturally. Why does it work so well? The muted palette and clean lines create a sophisticated look that fits right into a cozy, contemporary space.
My go-to tip is to leave plenty of negative space. It feels fresh and elegant, and it is a perfect project if you also want to create a pumpkin pillow for your sofa later. Trust me, you will love the peaceful feeling it brings to your room.
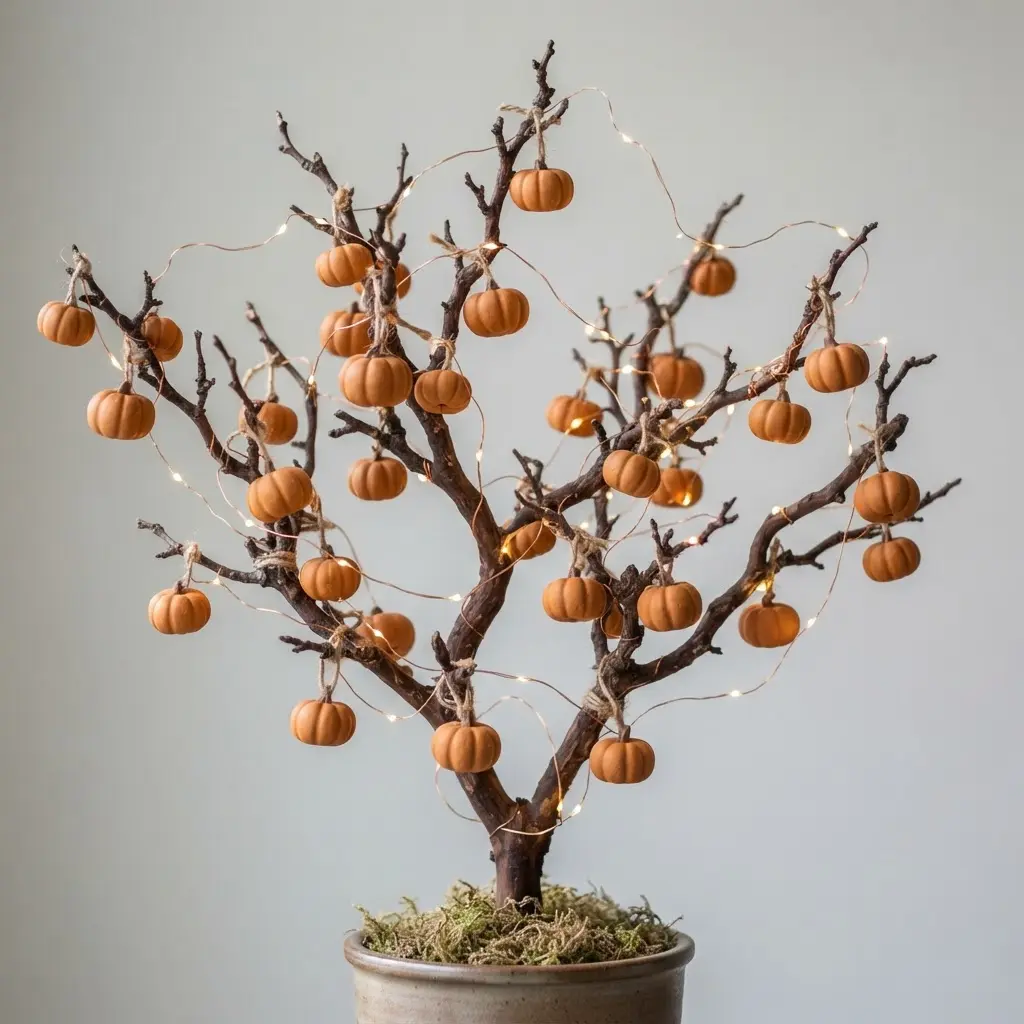
4. Classic Orange Pumpkin Farmhouse Twig Tree
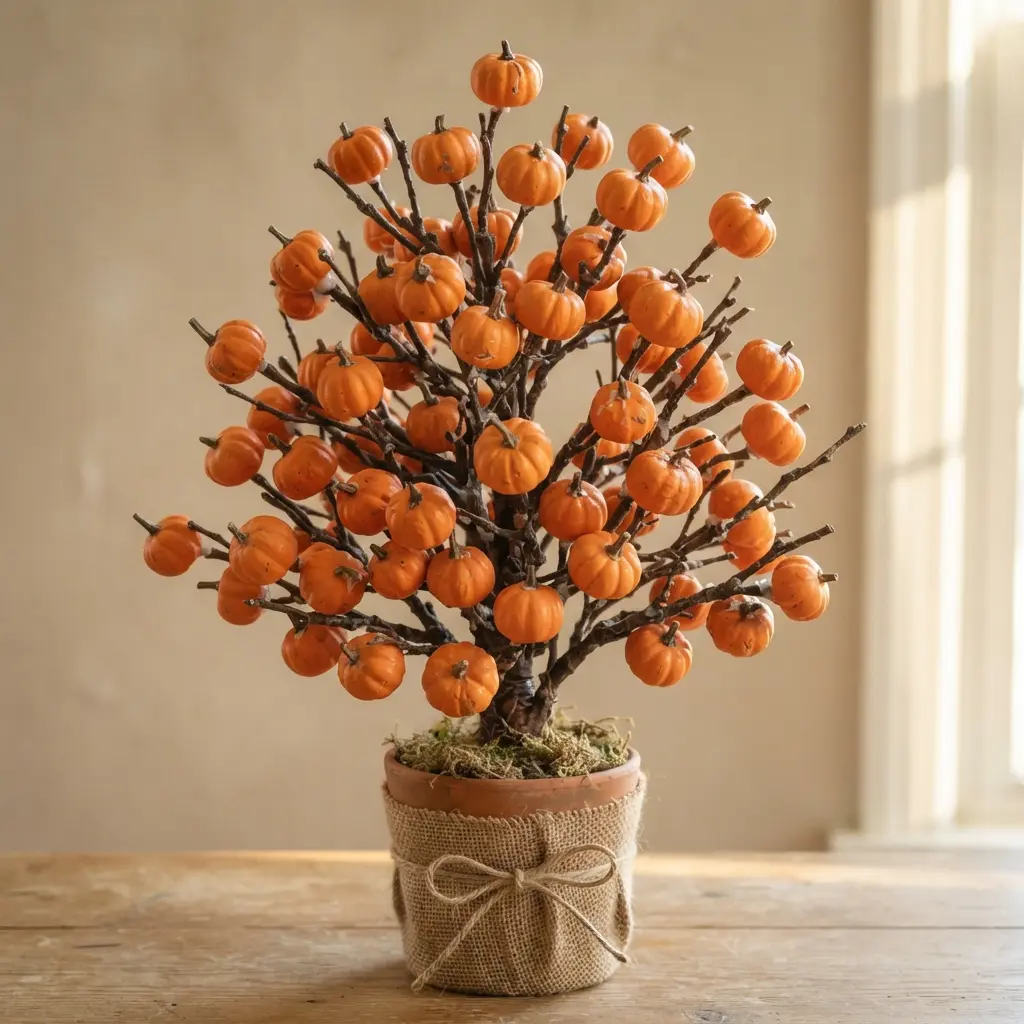
Ever wondered how those adorable diy mini pumpkin tree projects come together so perfectly? The magic is all in the balance. You start with your pre-made twig tree base or create one by arranging natural branches in a pot.
Then, you strategically hang or wire your miniature orange pumpkins onto the branches. I love this project because it feels so rustic and warm without being messy. The trick is to step back often as you work, making sure the pumpkins are spread out evenly for a stable, beautiful look.
Too many clustered in one spot can make your whole tree feel clunky. For a fun variation, you could even decorate fall striped pumpkins to mix in with your classic orange ones for extra visual texture. The final result is a charming, reusable centerpiece that brings instant farmhouse coziness to any room.
5. Boho Chic Burlap and Pumpkin Topiary

Ever wondered how to get that effortlessly chic, layered look? This topiary is your answer when designing a diy mini pumpkin tree. The trick is all about stacking your pumpkins onto a wooden dowel for stability first, then wrapping and gluing on your burlap ribbons.
Once that rustic base is secure, you get to play artist, layering on lace, faux eucalyptus, and pinecones until it feels perfectly balanced. I love how this project works because it lets you build a stunning focal point without any advanced skills. The best part?
You can make it as simple or as embellished as you feel that day. For a super-secure finish, especially on taller designs, always use a generous amount of hot glue when attaching those natural elements. This style pairs wonderfully with other autumn displays.
If you find yourself with extra pumpkins and burlap after this project, you could use them to create a stunning Halloween wreath for your front door with the same cozy vibe.
6. Luxe Velvet Pumpkin Crystal Glass Tree
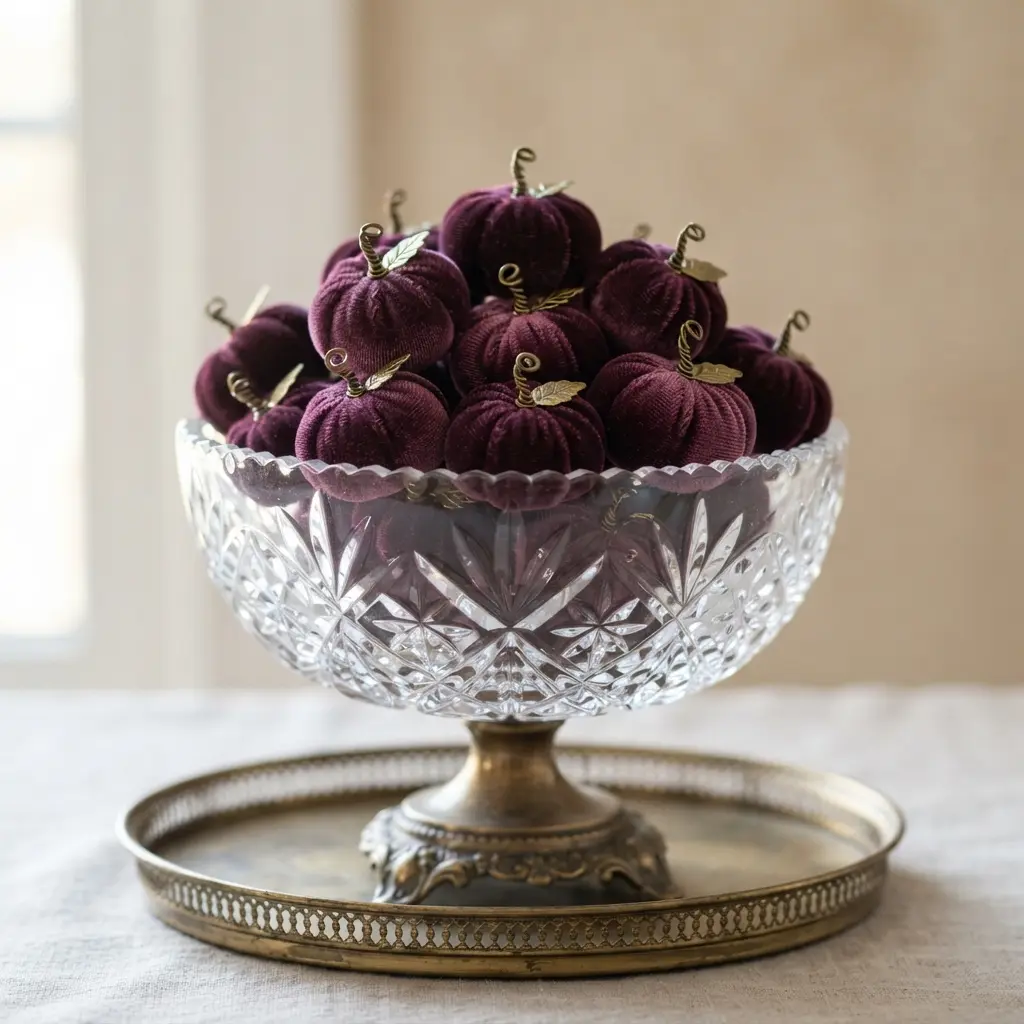
Who says fall decor has to be rustic? This is where you get to play with pure opulence. You are essentially building a stunning centerpiece by combining plush velvet pumpkins with sparkling crystal glass. You can either use the velvet pumpkin as a weighted base for crystal branches in your diy mini pumpkin tree, or hang miniature velvet pumpkins as ornaments on a crystal tree form.
That rich contrast between soft velvet and hard, brilliant glass is what makes it feel so luxe. I love using a strong, clear-drying adhesive like E6000 to securely bond these different materials. Let everything cure fully before you move your masterpiece.
This project creates a sophisticated vibe perfect for a mantel or dining table. It is a gorgeous way to add some grown-up sparkle to your autumn display. For a different kind of ethereal Halloween touch, you can learn to make spooky cheesecloth ghosts as a complementary project.
7. Whimsical Fairy Light Pumpkin Branch Light
This diy mini pumpkin tree looks magical but is surprisingly simple. You take a thin, bendable wire branch and carefully weave a strand of warm fairy lights along its length.
Then, you pop tiny pumpkin covers over each bulb. It creates a soft, glowing display perfect for a mantel or shelf. What makes it so charming is that combination of natural texture and gentle light.
It feels festive without being over the top. A pro tip is to hide the battery pack behind a pot or a book for a cleaner look. It is a wonderful project to do with a friend, and you could even craft a fun Boo sign to place beside it for a complete Halloween vignette. You will love the cozy, whimsical glow it adds to your room.
8. Spooky Painted Black Pumpkin Skeleton Tree
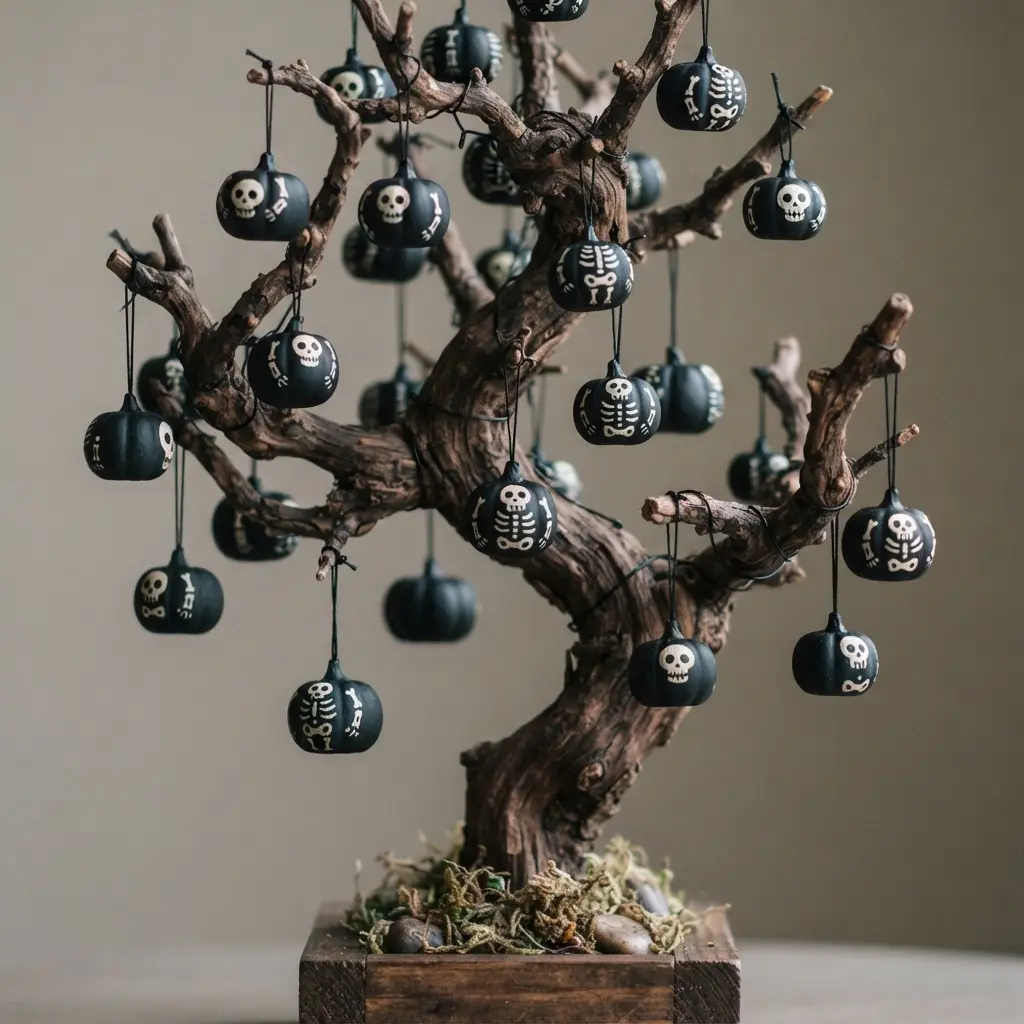
This one is a classic for a reason. It looks complex, but the core idea is simple. You start with a bare branch or artificial tree and give it a solid coat of matte black spray paint. This creates that stark, silhouetted look that feels so eerie at night.
Then, attach your pumpkins and skeletons to complete your diy mini pumpkin tree. I love using a mix of sizes for the pumpkins, and I hang a few from the branches with wire.
The skeletons are the best part. Position them like they are climbing or peering out from the black limbs. It works because the matte black background makes every single element pop, telling a spooky story without a single word. My go-to tip is to avoid overcrowding.
Let that silhouette breathe. For a fantastic autumn vibe that pairs well with this project, you can get inspired by some Thanksgiving leaf craft ideas. Does that not look stunning when you flip on some purple lights?
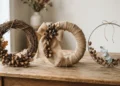
9. Natural Pinecone and Mini Gourd Tree
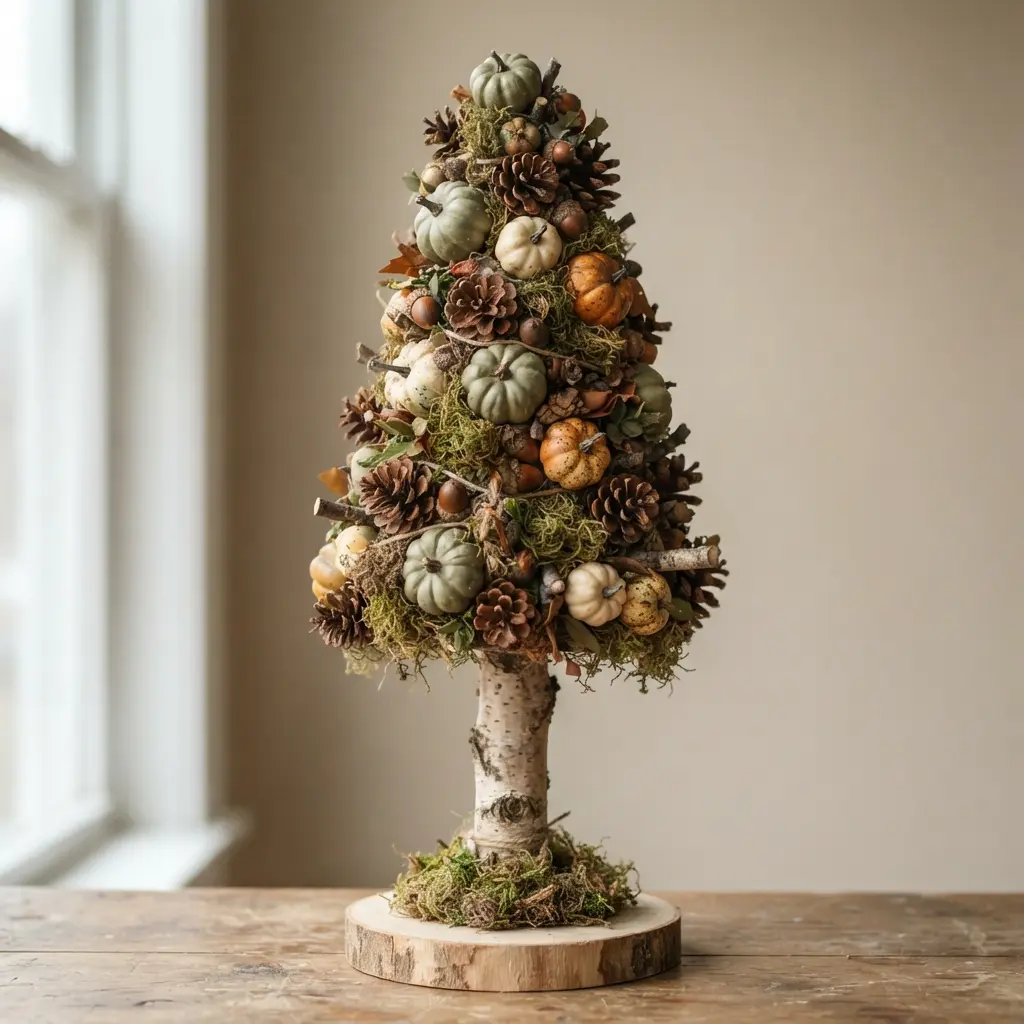
This one has such a cozy, rustic charm you can almost smell the forest. You start by hot gluing your largest pinecones around the base of a styrofoam cone, then work upwards in rows to build the shape.
Fill all the gaps with smaller cones and your mini gourds to shape your diy mini pumpkin tree, mixing their colors and textures for a playful, natural look. It works because the earthy textures feel warm and inviting, a perfect nod to the season.
My go-to tip? Give your pinecones a quick bake first to ensure they are clean and fully opened for the best coverage. This is a fantastic project to try after you have mastered some easy Halloween crafts, as it uses similar natural materials for a more elegant, long-lasting display.
10. Cozy Plaid Ribbon Pumpkin Accent Tree

Ever wondered how to get that warm, layered look without spending a fortune? This tree is your answer. You start by draping or tying your chosen plaid ribbon around the branches to set the color flow.
Then, you just add your miniature pumpkins to your diy mini pumpkin tree, clustering a few together for depth and hanging others individually. I love that you can tuck in a few pinecones or berries to fill any gaps and boost the texture.
It works because the classic plaid and pumpkin combo feels instantly nostalgic and inviting. Your whole space gets that cozy, rustic farmhouse vibe from a single tabletop piece. Once you have the basics placed, step back and tweak until it feels balanced from every angle.
You will love how this little tree becomes an instant autumn focal point.
Preservation Techniques for Longer Lasting Seasonal Displays
Spraying your foam craft pumpkins with a clear matte sealant is the single best thing you can do to lock in their color and protect them from dust and fading. This thin layer acts as a barrier, ensuring your harvest orange or monochromatic cream palette stays vibrant year after year, which is perfect if you like to unpack the same cherished pieces each autumn.
For the wooden branches, a light coat of furniture wax applied with a soft cloth will enhance their natural grain and prevent them from drying out and becoming brittle. Store your finished diy mini pumpkin tree in a cool, dry place away from direct sunlight, and you will notice it looks as fresh next fall as the day you made it.
This simple care routine turns a seasonal project into a lasting part of your home’s tradition.
Conclusion
So, which diy mini pumpkin tree sparked your imagination? Look at the ideas you have gathered, that is real creative potential right there. The beauty of this project is how it lets you translate a personal autumn feeling into a tangible, charming object for your home.
My best advice is to start with a sturdy base and choose pumpkins that bring you joy, whether that is a classic orange or a muted cream. The process of assembling your display itself is half the fun, a quiet moment to welcome the season.
Pick your favorite design, gather your materials, and create a little fall magic of your own.
FAQs
Q: What is the best way to secure pumpkins to the branches?
A: Use floral wire or a small dot of hot glue. Wire gives flexibility to adjust placement, while glue offers a strong, permanent hold for lighter craft pumpkins.
Q: Can I use real miniature pumpkins for this project?
A: Real pumpkins are charming but heavy and will rot. For a lasting decoration, lightweight craft pumpkins made from foam or fabric are a more stable and durable choice.
Q: How do I make sure my pumpkin tree does not tip over?
A: A weighted base is essential. Use a sturdy pot filled with sand, rocks, or floral foam to anchor your branch armature before adding any decorations.
Q: What type of branch works best for the tree structure?
A: Look for branches with interesting forks and a thickness that can support weight. Manzanita, birch, or any sturdy, dried branch with a stable base will work well.
Q: How can I add lights to my mini pumpkin tree?
A: Weave a string of battery-operated micro-LED lights through the branches before attaching pumpkins. Secure the wire discreetly and ensure the battery pack is hidden in the base.


