Sizing Requirements for Standard Gift Card Inserts
Your snowflake pocket needs to measure exactly 3.5 inches by 2.25 inches to snugly fit a standard gift card without it rattling around. The good news is that adding a quarter-inch flap on one side creates a secure closure that holds the card firmly in place. I find using a lightweight cardstock template first helps you test the fit before cutting into your good decorative paper for a proper DIY snowflake gift card holder build. This precision prevents the card from sliding out when someone picks up your finished project. Trust me on this, that internal pocket dimension remains the single most important factor for a professional-looking result.
Structural Paper Weights for Intricate Snowflake Designs
A 65-pound cardstock provides the minimum rigidity needed to support a gift card’s weight while still allowing you to cut fine snowflake details. The thing is, if you go any lighter, those delicate arms will bend every time the card is inserted or removed. For a truly sturdy holder that maintains its shape, step up to a 110-pound cardstock which offers excellent structural integrity when constructing each DIY snowflake gift card holder. This heavier weight gives you a crisp fold for any pocket edges and resists tearing at the points of your design. Your finished piece will carry a substantial, quality feel that makes the gift inside seem even more special.
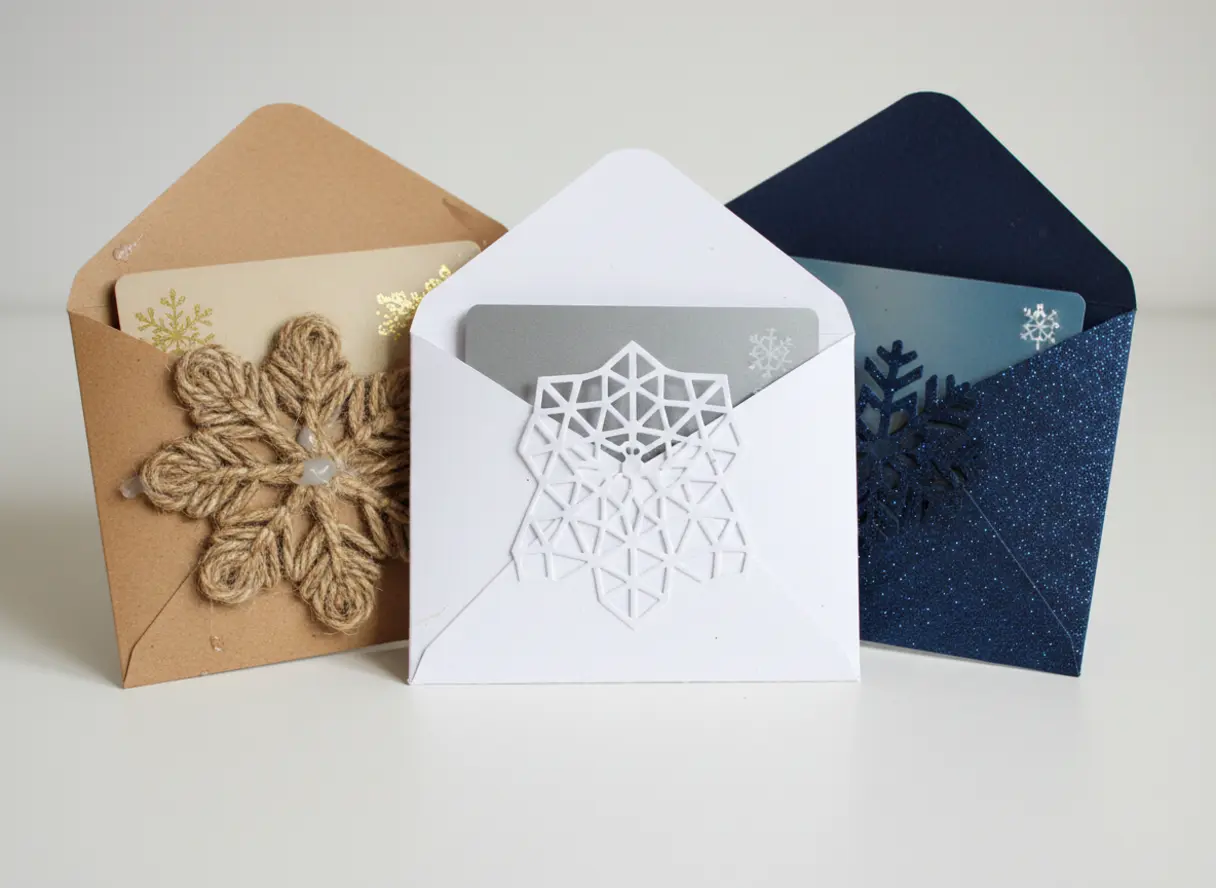
1. Minimalist White Cardstock Pocket Holder
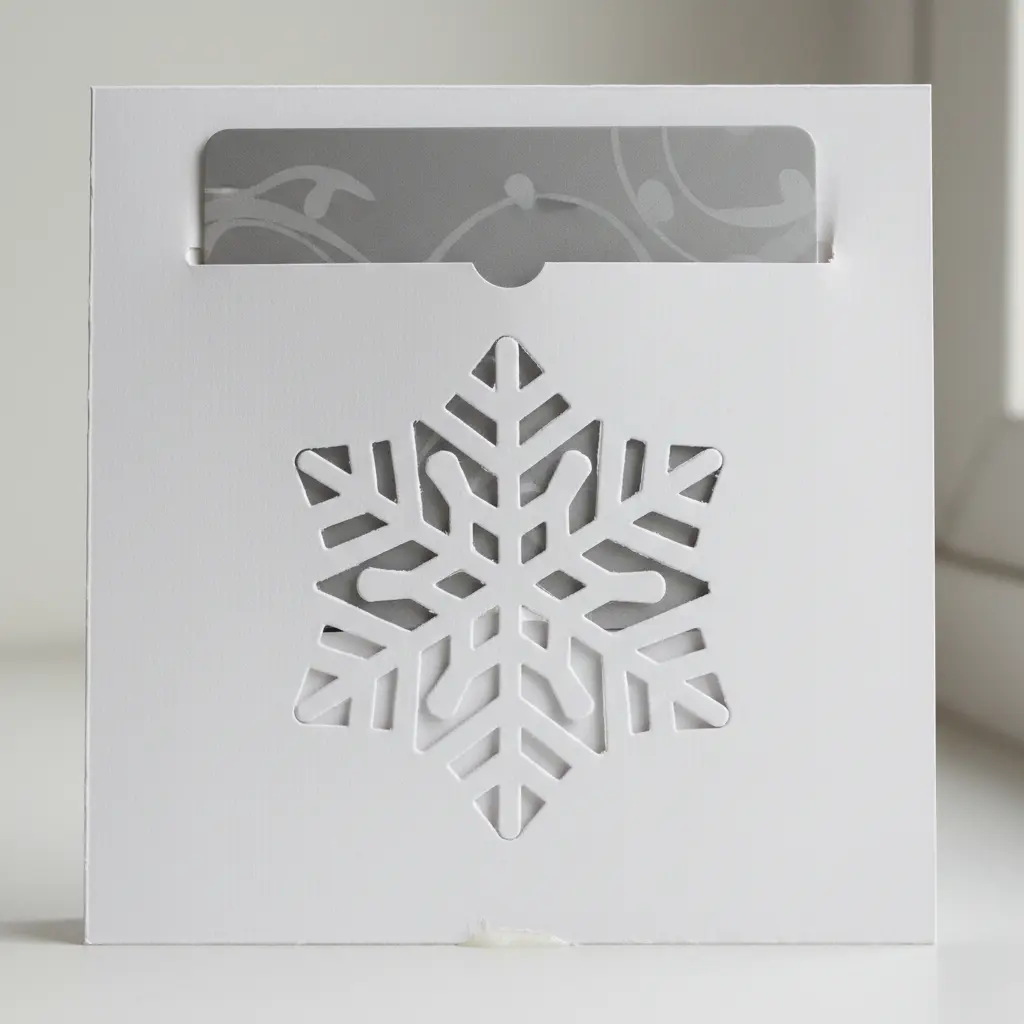
Ever felt a gift card presentation could look a bit more elegant? This simple pocket holder delivers exactly that. You start with a sheet of sturdy white cardstock, cut and score it into a neat rectangle with a fold-over flap. A bit of adhesive along the sides creates a clean pocket that perfectly frames your DIY snowflake gift card holder. I love how this project proves that less truly is more.
The beauty lies in its clean lines and pure color. There are no patterns to distract the eye, just a crisp finish. It turns a simple plastic card into a thoughtful DIY snowflake gift card holder that stands out. Your recipient will appreciate the extra care you took during the folding process.
For a cohesive holiday look, pair it with some handmade holiday gift tags using the exact same cardstock. That clean, unified style makes your whole presentation feel intentional and special. Trust me, the finished look proves incredibly satisfying.
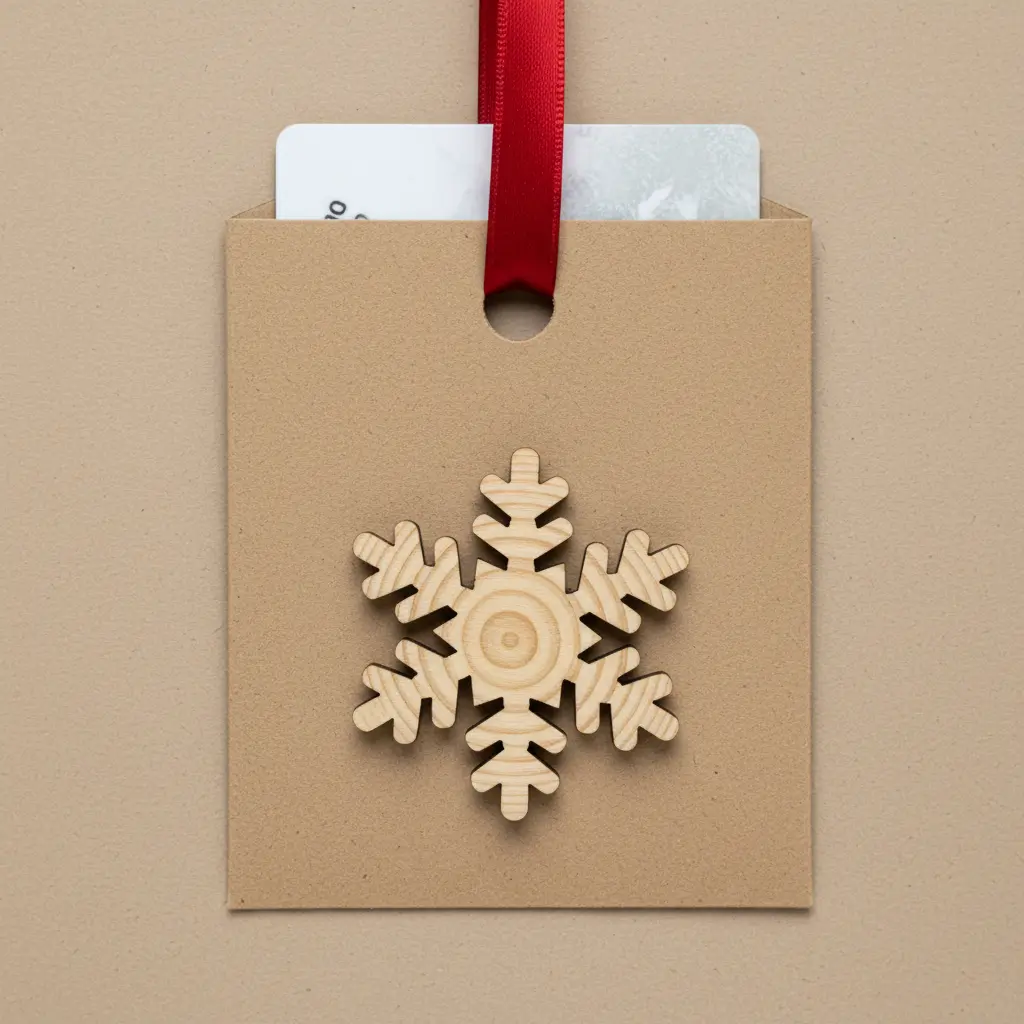
2. Rustic Kraft Paper Snowflake Sleeve: Earthy and Cozy
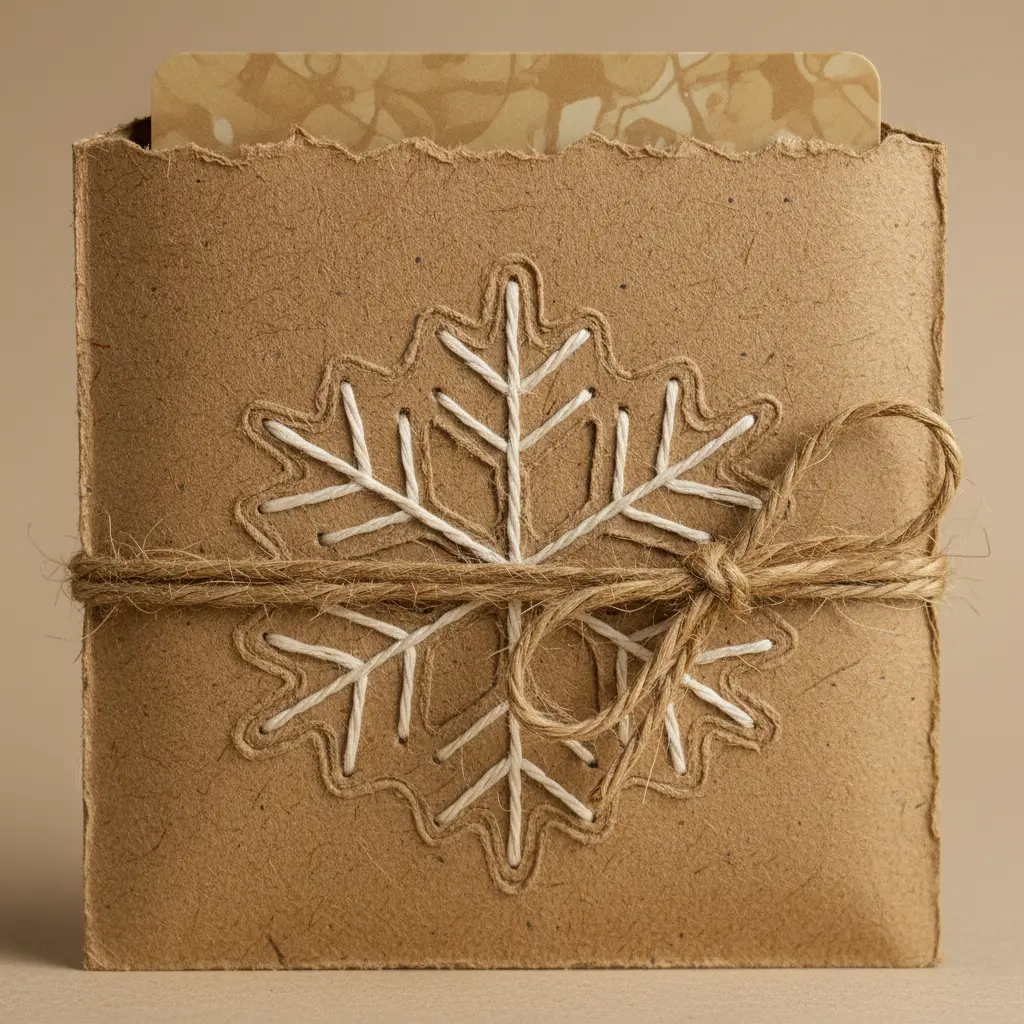
Who knew humble brown paper could look so festive? This rustic sleeve brings an earthy and cozy vibe to any table setting. You start with a sheet of kraft paper, then print simple snowflake designs in white or cream ink while shaping your DIY snowflake gift card holder. I love how the natural texture shows through, making every piece feel unique.
Cut and fold the printed paper into a simple sleeve shape, securing it with a bit of craft glue. The real charm comes from those optional finishing touches, like tying it with a piece of jute twine. It feels warm and handmade, which matches the entire aesthetic perfectly.
This is a fantastic project to do after creating a festive card wreath, as you already have your paper and simple tools out. Trust me, the result brings so much personal satisfaction to your winter crafting sessions.
3. Navy Blue Glitter Layered Cardstock Holder

This one looks incredibly high-end, but the secret sits in the sturdy layers. You will start by precisely cutting your navy blue glitter cardstock and coordinating solid pieces, then scoring crisp fold lines with a scoring board. The magic happens when you glue those layers together for the final DIY snowflake gift card holder, preventing any warping. It gives the finished project satisfying depth and rigidity.
It remains a fantastic project for holding gift cards because it looks beautiful on display. I love how the glitter catches the light without being messy if you choose a low-shed variety. For a fantastic way to present small presents, look into creating some unique DIY gift containers to expand your wrapping skills.
4. Embossed Silver Foil Snowflake Envelope — Elegant Metallic Touch
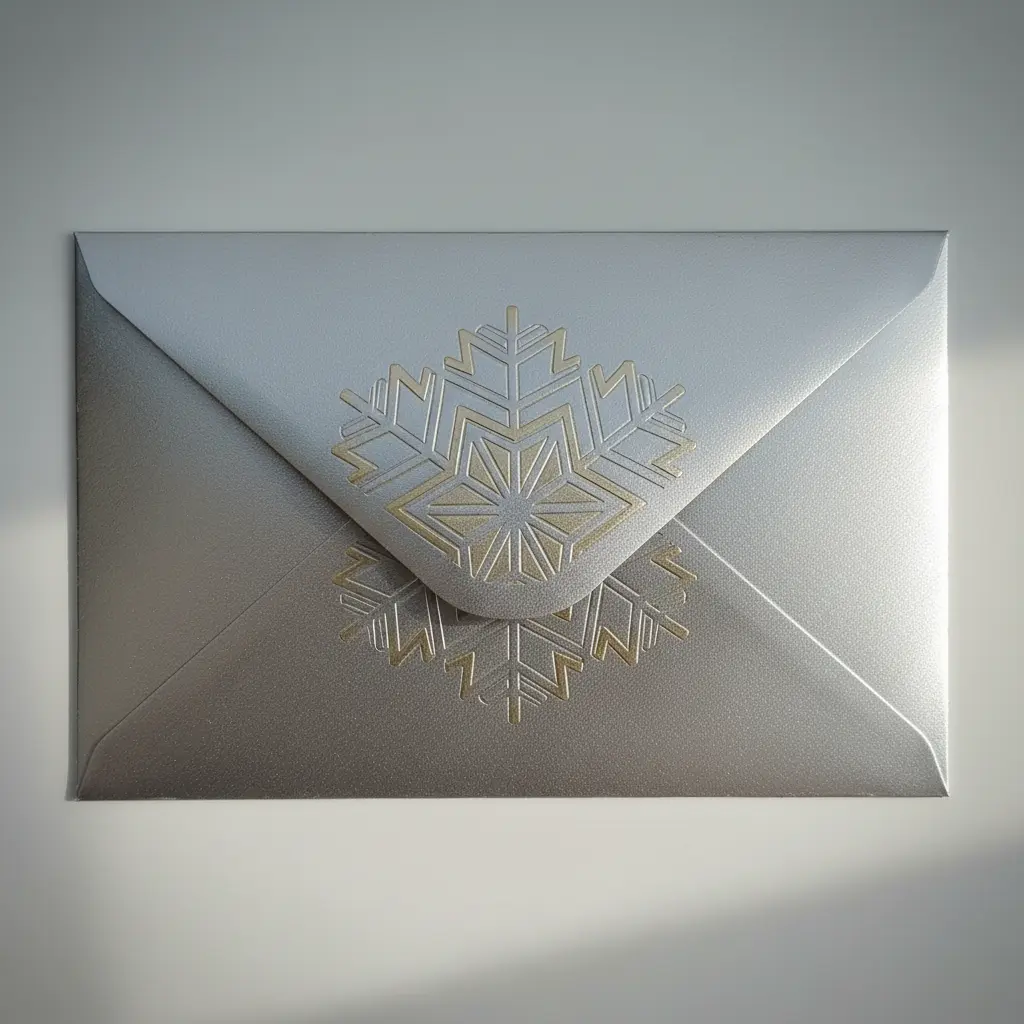
Ever wondered how to make a presentation feel truly special? This design adds a luxurious, tactile element that standard envelopes lack. You start with a heavy cardstock envelope, which acts as the sturdy foundation for your DIY snowflake gift card holder. A heated machine presses a metal snowflake die into the paper through a sheet of silver foil, leaving a raised pattern.
The result captures the light and begs to be touched by curious hands. I love how this transforms a simple card holder into a lasting keepsake. It works because it engages both sight and touch, creating a memorable presentation. For a complete gift ensemble, these elegant envelopes pair wonderfully with creative handmade gift tags.
Trust me, using that sturdy base paper makes all the difference for a crisp finish. Feel that elegant winter magic when you hand it over.
5. Rustic Twine Wrapped Gift Card Pocket

This project surprised me with how simple it feels to assemble. It looks like something you would find in a cozy country store, yet requires minimal supplies. You start by folding a piece of kraft cardstock into a neat pocket sized perfectly for your card. Then wrap natural twine around your DIY snowflake gift card holder a few times and tie a simple knot.
I love how this transforms a generic plastic card into a gift that feels genuinely thoughtful. The rustic aesthetic adds so much warmth to the final package. You easily customize it further with a stamped tag or a tiny dried flower tucked under the string. Ever worried a gift card feels impersonal? This offers your perfect solution.
For a truly festive touch, consider pairing it with a set of festive paper mache Santas as part of a larger handmade gift ensemble. Your recipient will adore the personal, handcrafted feel.
6. Quilled Paper Snowflake Decorative Holder: Intricate Detail
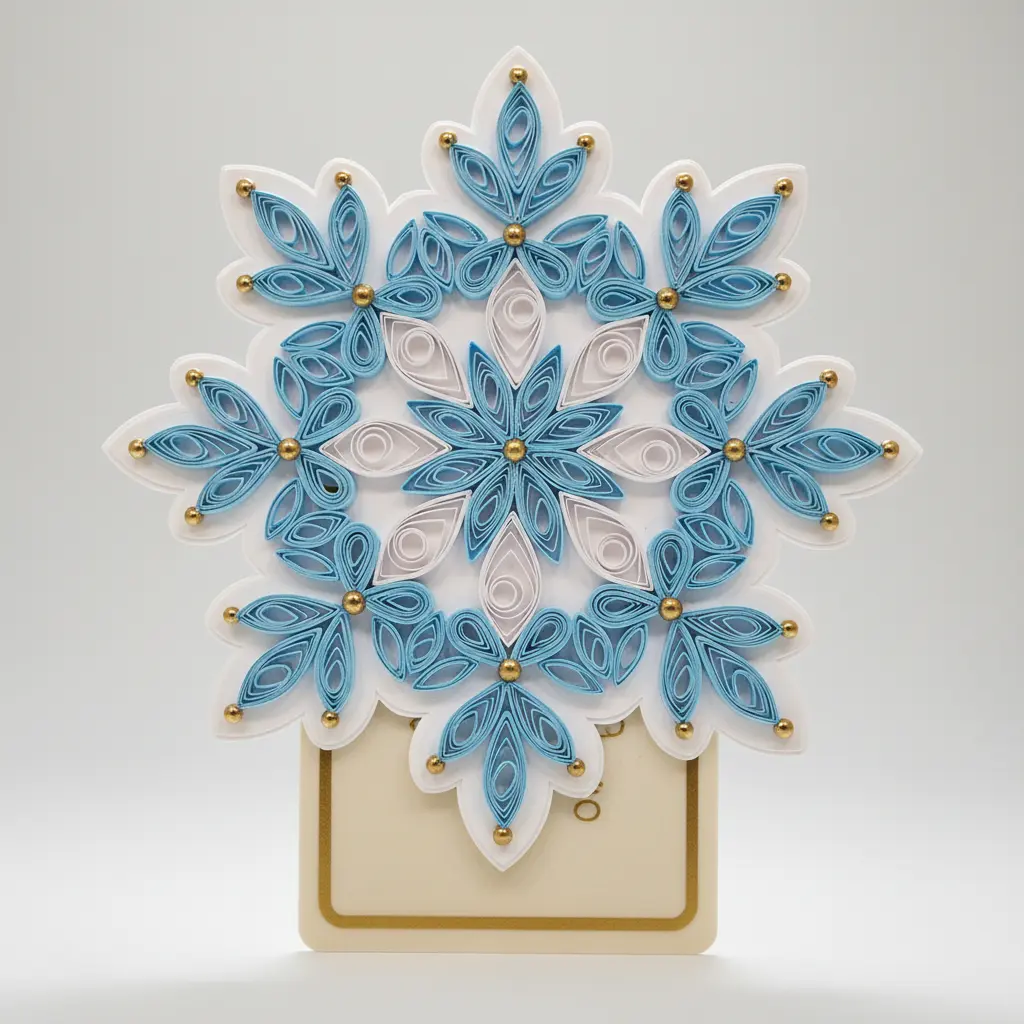
Does paper art seem intimidating at first glance? I love this method because it assembles small, simple pieces into a stunning whole. You roll and pinch strips of paper into shapes like tight coils using a slotted quilling tool, then arrange them into a symmetrical pattern while building a detailed DIY snowflake gift card holder. It remains a wonderfully meditative process from start to finish.
Why does it work so well? The delicate, lace-like structure perfectly captures the fragile beauty of winter. Trust me on this one, the payoff is immense when you see the finished piece holding your card. That makes it a perfect accent for your holiday table, and it pairs beautifully with other handmade decorations like crafting rustic Christmas ornaments.
7. Translucent Vellum Snowflake Overlay Holder
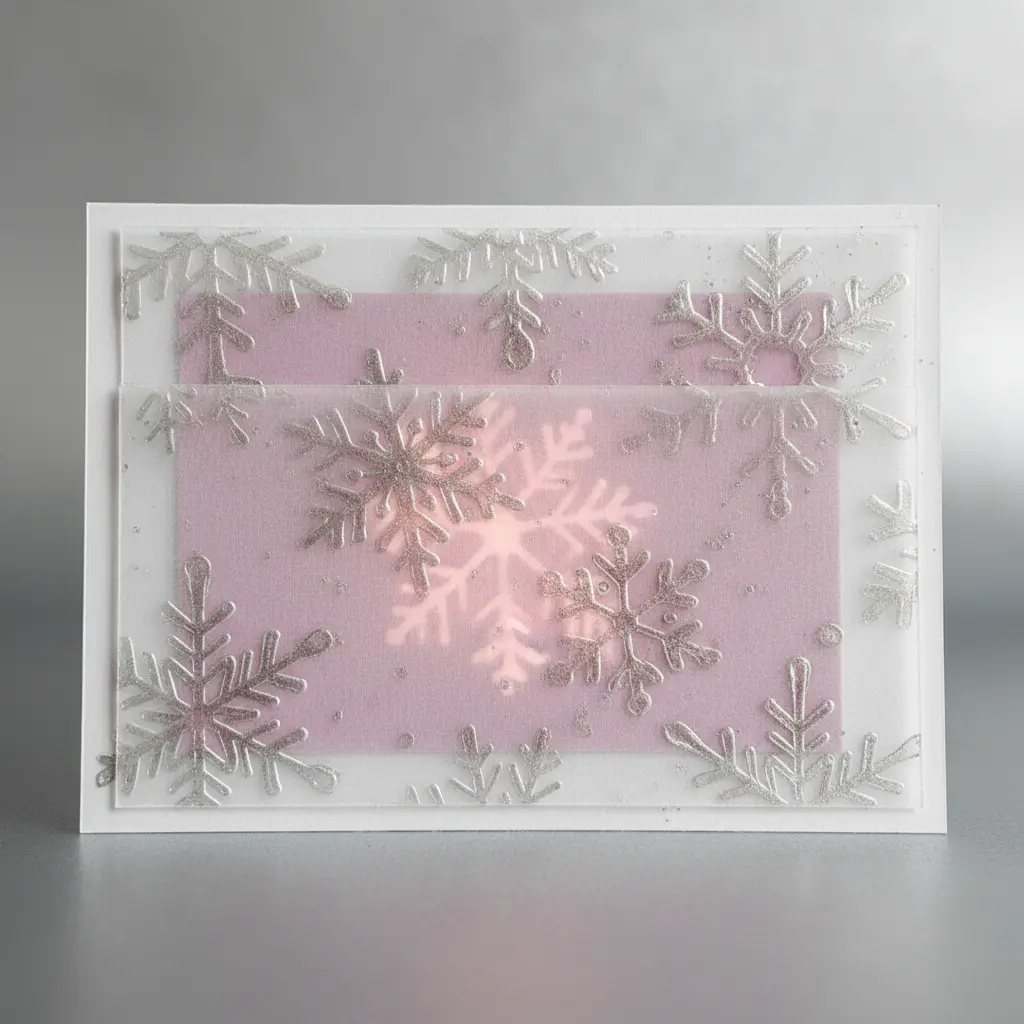
This approach stands as my favorite way to protect delicate paper treasures. It acts as a specialized sleeve that lets you safely store and admire your overlays without handling them directly. You will use clear plastic sleeves or a box with soft lining, ensuring the overlays stay pristine while backing your DIY snowflake gift card holder. The translucency means the light catches the designs beautifully during display.
It works because it addresses the fragility of vellum, preventing tears and creases along delicate edges. The most important practical tip remains picking acid-free materials to keep your creations safe for years. This pairs wonderfully with your stitched Christmas tree decorations for a complete holiday collection. Does that not feel satisfying?
8. Dimensional Foam Layered Snowflake Design — Maximum Texture
Ever wondered how to make a shape you can truly feel? This design focuses on creating a mini landscape of texture using adhesive layers. You cut shapes from different thicknesses of foam, stacking them from largest to smallest while assembling your DIY snowflake gift card holder. Before gluing them together, press patterns into each layer with an embossing stylus to add visual depth.
The genuine depth makes it look expensive and carefully handcrafted. I love using a mix of white and iridescent foam to get that frosty glow. For a fun twist, pair this project with a printable Christmas ornament coloring activity for an afternoon of festive fun. Trust me, seeing those layers come together remains the best part.
9. Rustic Burlap Snowflake Gift Card Pouch
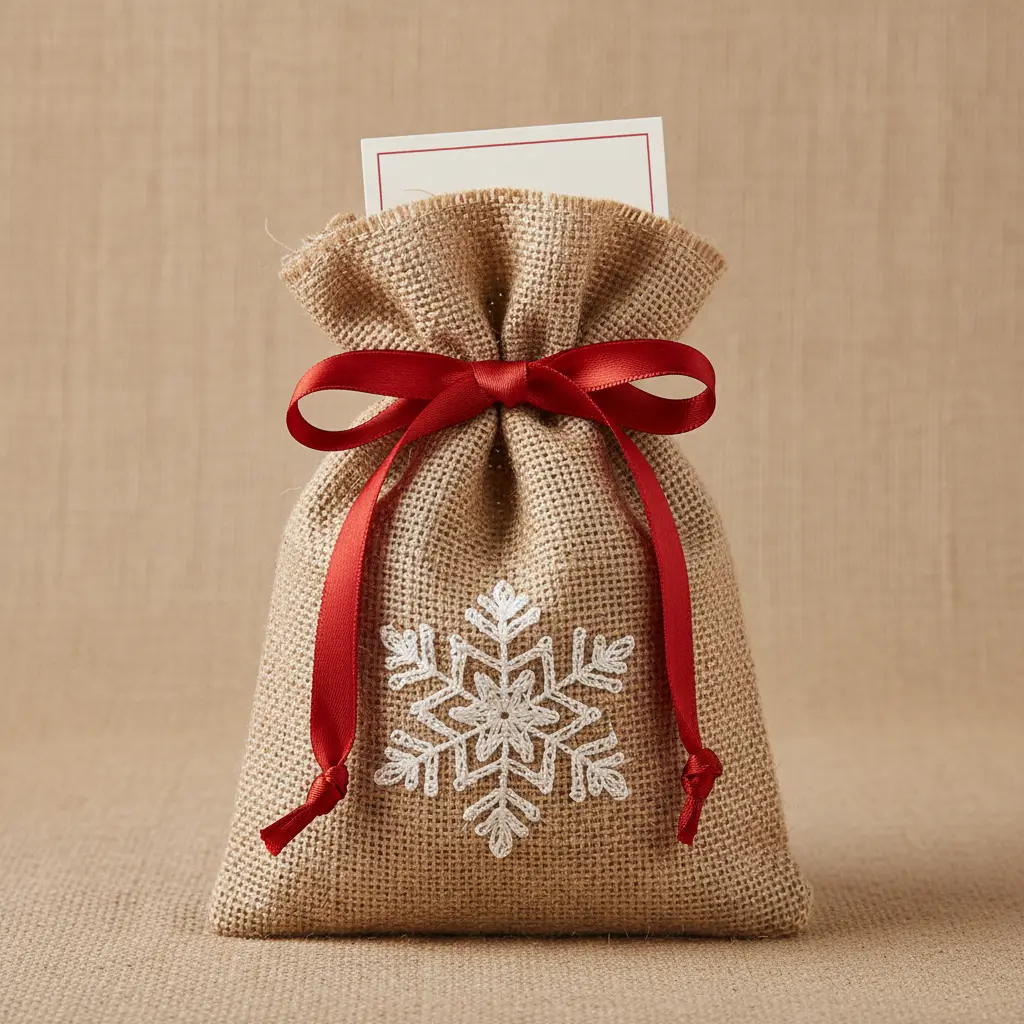
This project looks wonderfully detailed, yet remains a quick and forgiving craft for beginners. You will take a piece of natural burlap, cut it to size, and sew or glue the sides into a simple pouch. The magic happens when you attach a felt or lace snowflake to the front of your DIY snowflake gift card holder with fabric glue. It takes minimal preparation but yields major charm.
Why does it succeed so well? The rustic texture makes a gift card feel substantial and thoughtfully presented, turning a modern convenience into a cozy treasure. I love finishing mine with a simple loop of twine for secure closure. You have got this, and the happy look on your friend’s face will be totally worth the effort.
If you are making this as part of a holiday display, think about displaying shadow box ornaments alongside it for a coordinated look on your mantel.
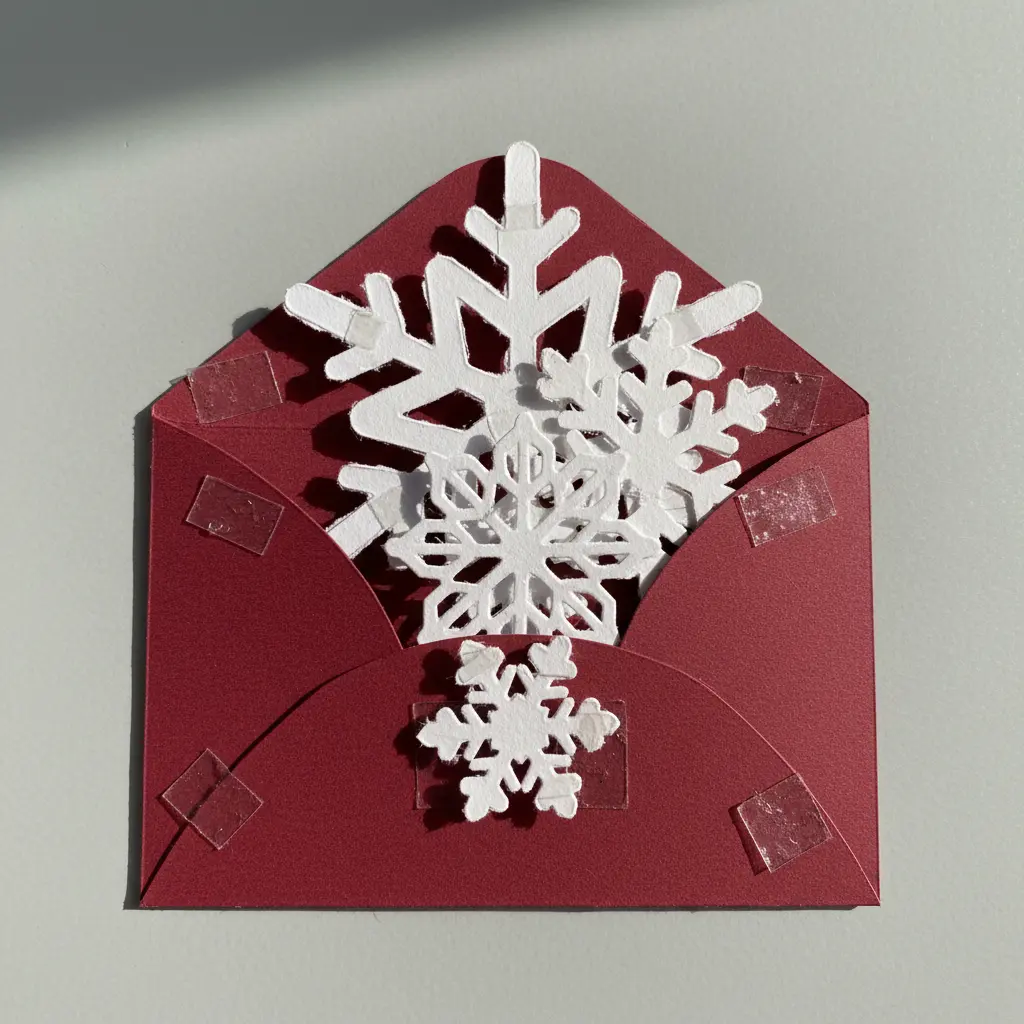
10. Hanging Snowflake Ornament Holder Card: Double Duty Decor
Ever wish a gift card felt more personal from start to finish? This project solves that by turning it into a keepsake ornament. The trick involves creating a window frame on a sturdy folded card and suspending your decorative piece inside your DIY snowflake gift card holder. I love how this gives the gift a second life as holiday decor the moment it gets unwrapped.
Always use heavyweight cardstock so the structure holds its shape with the ornament attached. You find a wonderful selection of crafting vintage style ornaments to match your aesthetic perfectly. Secure your snowflake with strong glue or thread it with ribbon for a floating effect.
Protective Sealing Techniques for Paper Craft Keepsakes
A single light coat of matte acrylic spray sealant applied in a well-ventilated area protects your paper from fingerprints and seasonal humidity. Here is the thing, you want to hold the can about twelve inches away and use a quick, sweeping motion to avoid drips on intricate cutwork. This clear barrier locks in your work and prevents colors from fading, especially if you used any metallic inks. Your paper creation will keep its crisp appearance and remain a keepsake long after the gift card is spent. Wait for the sealant to dry completely before you tuck the card inside for gifting.
Conclusion
Handmade present sleeves do more than carry a barcode, as they say you cared enough to spend an afternoon creating something beautiful. A carefully built DIY snowflake gift card holder adds a layer of thoughtfulness to any present, turning a routine exchange into a moment the recipient remembers. Before you glue anything down, test-fit the barcode to make sure it slides in and out of the pocket smoothly to prevent frustration later. The joy lives in the giving, and these little handmade details make every package feel extra special. As you work through your winter list, you might find yourself making extras for last-minute visits. That stack of snowy paper soon becomes a pile of tiny, love-filled vessels ready to spread cheer.
FAQs
Q: What is the best paper weight for a snowflake gift card holder?
A: Cardstock between 80 lb and 110 lb works best. It holds crisp cuts without being too thick to fold easily. Lightweight scrapbooking paper tears under pressure, so stick to sturdy cardstock for the main structure.
Q: How do I keep the gift card from slipping out of the holder?
A: Ensure the pocket is sized with a snug friction fit before gluing edges. Adding a small adhesive dot or a strip of double-sided tape inside the pocket secures the card temporarily. For sleeves, a slight overlap in the design helps.
Q: Can I use a cutting machine like a Cricut for these snowflake designs?
A: Yes, using a cutting machine saves time and gives precise cuts for intricate patterns. Import an SVG file and adjust the size to match your stock. A light grip mat prevents tearing delicate paper.
Q: What type of adhesive works best for layered paper holders?
A: Double-sided tape or a fine-tip liquid glue works well for paper layers. For foam dots, use strong craft glue dots. Avoid wet glues that warp the paper, since a tape runner gives a clean finish.
Q: Are these holders sturdy enough to mail?
A: Yes, if you choose heavy stock and secure all edges, these projects travel safely in a padded envelope. Avoid loose embellishments like large bows or heavy sequins that catch during transit. A standard sleeve around the piece adds extra protection.


