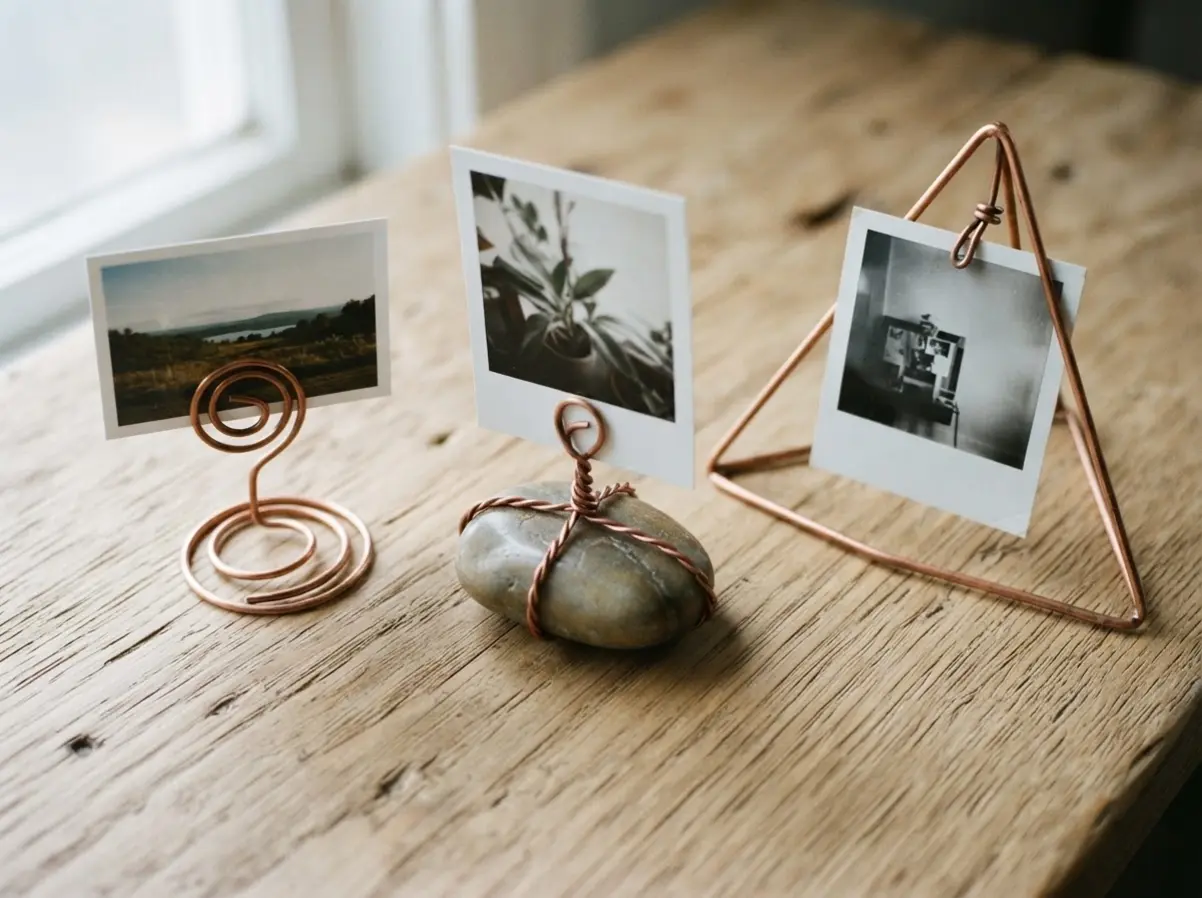
Each project serves as a starting point for your own workshop session, using techniques which range from simple bending to intricate metal wrapping. Let’s find the perfect inspiration for your next creative session.
Choosing Appropriate Wire Gauge and Metal Finish
Your finished display will sag or snap if you start with metal strands too thin for the intended silhouette. I learned this the hard way with a delicate vine design which collapsed under the weight of a single picture. When building DIY wire photo holders, aim for an 18 or 20-gauge piece to guarantee structural integrity.
Dead-soft aluminum proves wonderfully forgiving for hand-bending initial shapes, while standard metal supplies offer extra permanence for intricate details you expect to hold their form. Trust me on this, a dead-soft aluminum wire in 18-gauge delivers the best balance of workability and strength. The surface treatment, whether a bright copper or matte steel tone, becomes an active part of your room decor, so select a metal appearance you will enjoy seeing daily.
Mastering Pliers Technique for Consistent Tension Loops
A display without a proper tension loop acts as a decorative metal sculpture which drops your pictures. The secret to perfecting DIY wire photo holders lies in using the precise tip of your round-nose pliers to form the initial bend, then switching to chain-nose pliers to gently compress the final coil. You must avoid heavy-duty serrated pliers from your hardware toolbox, since those aggressive jaws will mar the beautiful finish of your material.
Smooth-faced jewelry pliers allow you to apply steady pressure without leaving ugly tool marks. Many beginners skip this verification step, yet a quick test with your chosen photo card stock proves whether the metal grip remains secure. A consistent tension loop technique guarantees every individual clip you shape functions properly.
1. Polished River Stone Wire Wrap Stand
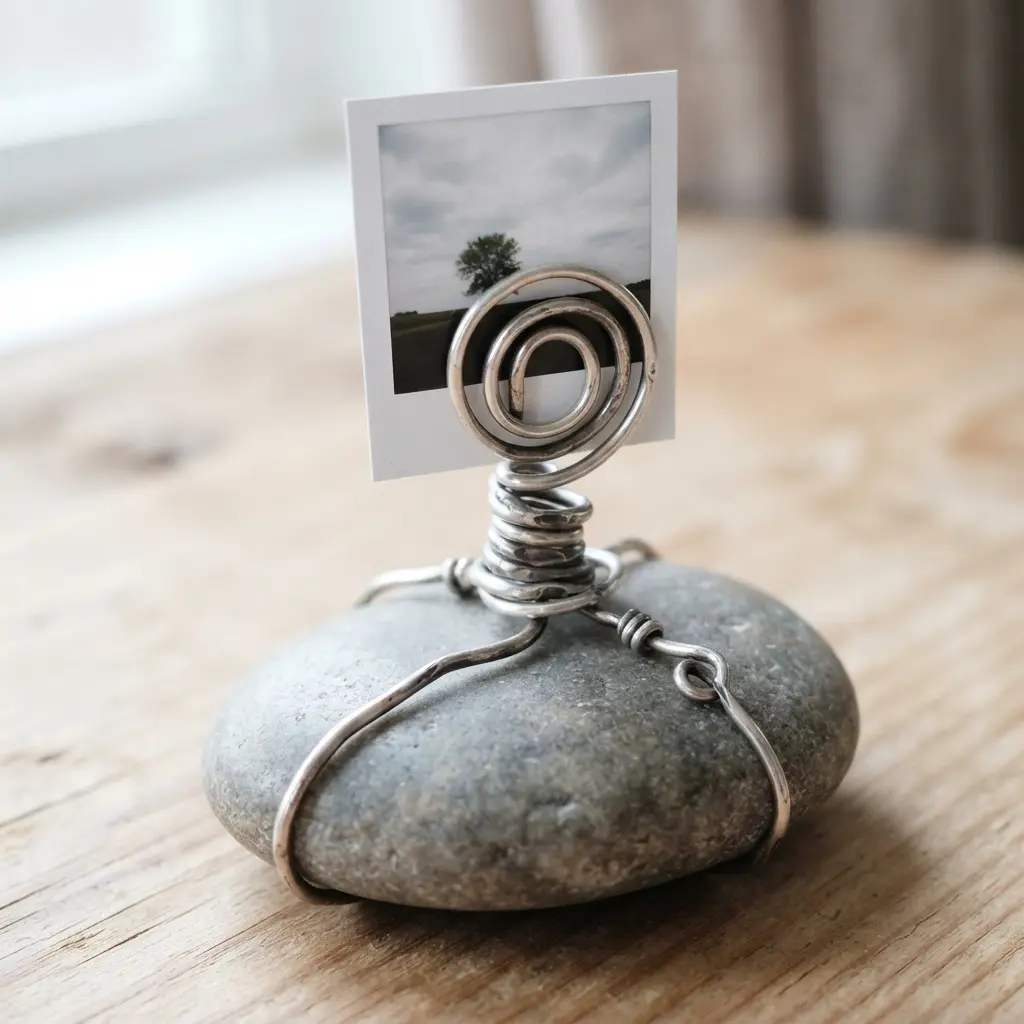
Ever find yourself wishing your favorite little treasures had a proper place to shine? This specific build remains my absolute favorite for combining raw nature and practical function. You begin by securing a polished river stone as your stable, earthy anchor. Then, you carefully bend and wrap your metal strand around the rock, sculpting upward branches or side hooks which easily grip small frames or jewelry.
The heavy stone base prevents tipping, while the pliable metal grants endless design freedom. Trust me, the moment you lock the initial wrap in place, you will recognize why this design ranks highly among favorite DIY wire photo holders. You will feel a deep sense of accomplishment watching your handmade creation stand proudly. Before starting the wrap, it is a smart move to browse some creative photo collage project ideas for inspiration on what to showcase. A common error involves leaving the base wrap too loose, which causes wobbling during drying. Take extra time with the foundational coils, file any sharp tips smooth, and step back to admire your unique art.
2. Minimalist Copper Coil Desk Photo Holder
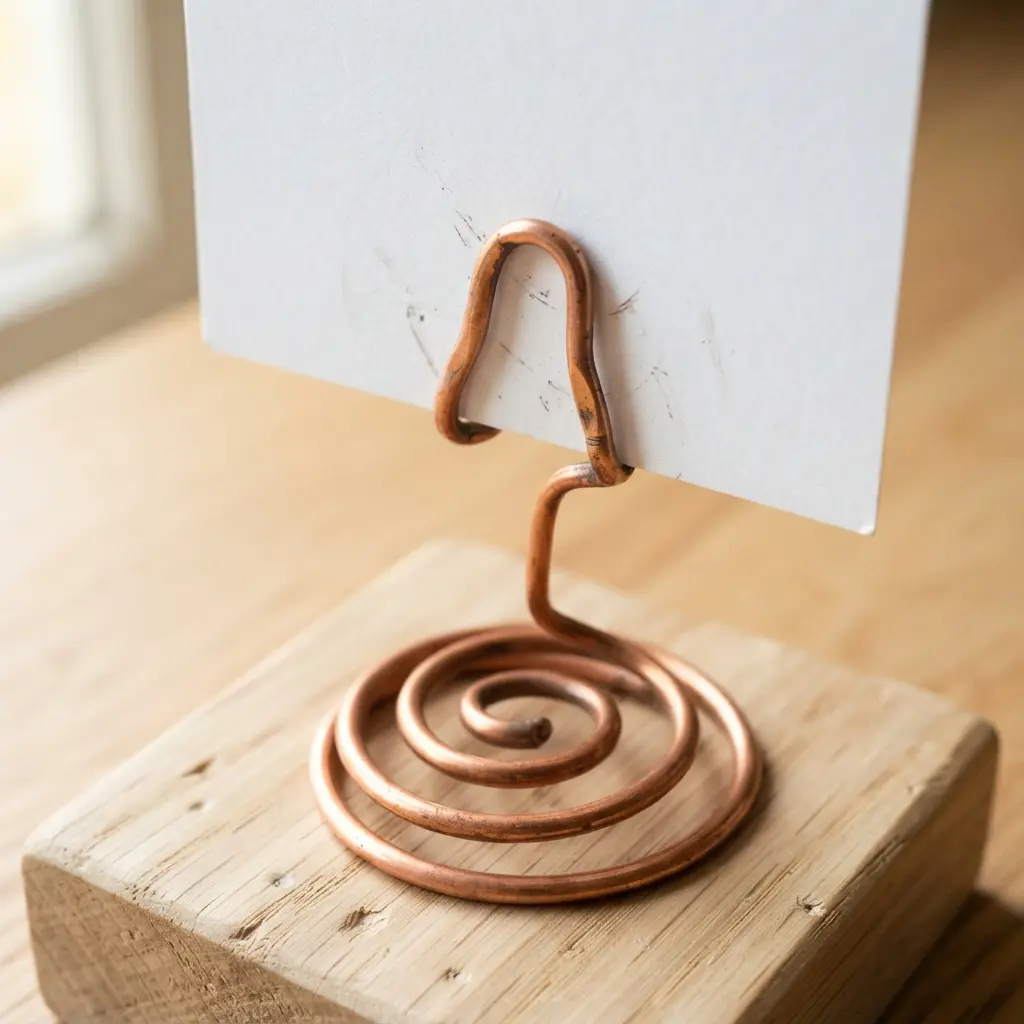
Ever want a display setup which resembles modern gallery art rather than desk clutter? This straightforward project delivers exactly the desired aesthetic. The magic stems from forming a tight, flat spiral using a single length of bare copper wire to establish a solid foundation. You simply bend the trailing end straight upward and finish the curve with a tiny loop which safely cradles your picture.
I appreciate how this build highlights your snapshot instead of overwhelming it. The warm metallic tone introduces sophisticated, industrial charm to any workspace. Using a consistent cylindrical object like a thick marker as your mandrel guarantees perfectly even spacing across the coil. That structural consistency proves essential for reliable display. When crafting refined DIY wire photo holders, this spiral technique remains a timeless favorite for keeping your desk organized.
3. Geometric Pyramid Wire Frame Display
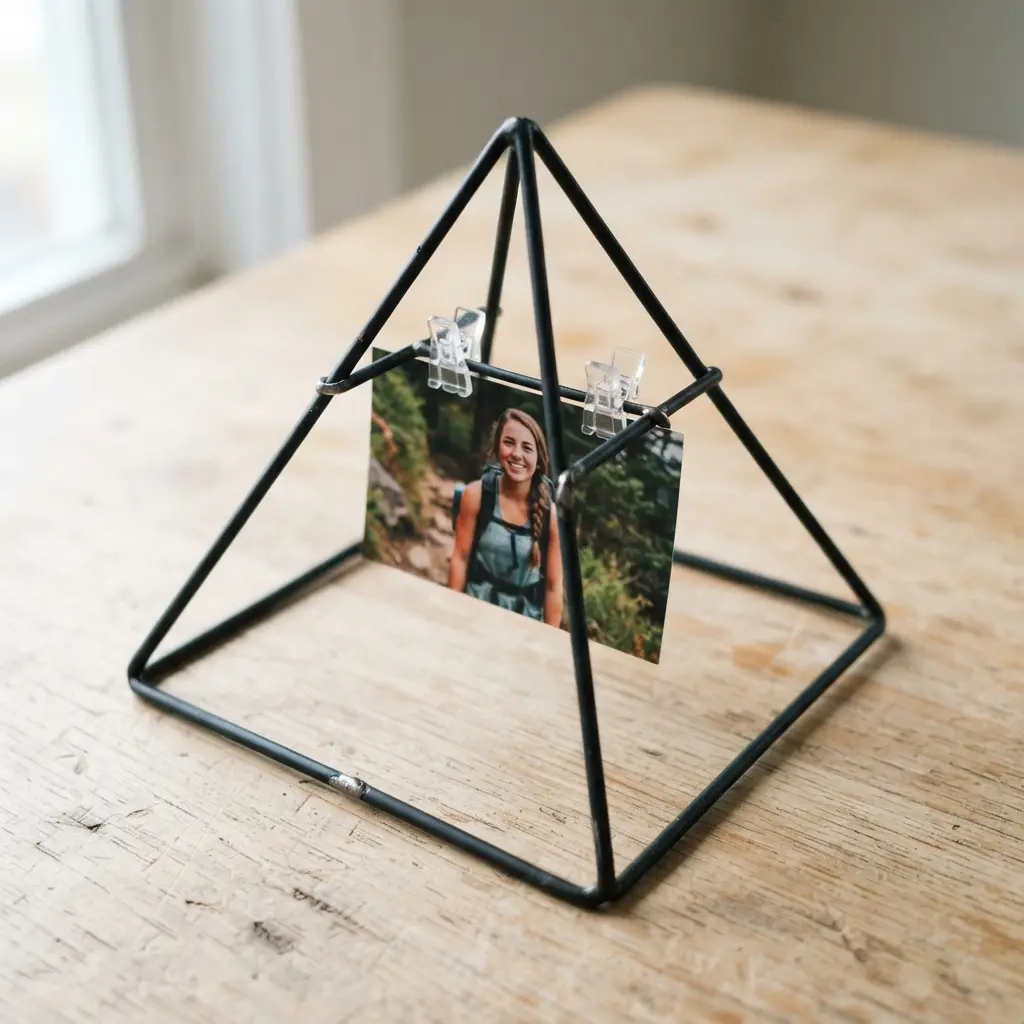
Ever assume a pyramid silhouette proves too complex to attempt from your own workbench? This particular design breaks such myths with a surprisingly straightforward assembly, delivering remarkably modern results. You start by measuring and cutting your base and slant edge wires to identical lengths, guaranteeing perfect geometric alignment.
Employ your pliers to join them at each corner, twisting the metal tightly for rigid joints before gathering all peak points together to seal the apex. I adore how this open framework channels ambient light directly through the structure, transforming standard snapshots into gallery pieces. The design flexibility allows you to mount clips anywhere along the frame or weave them directly into the metal intersections. When experimenting with bold DIY wire photo holders, this geometric approach consistently turns heads and organizes multiple memories in a compact footprint.
4. Rustic Driftwood Multi Photo Wire Line
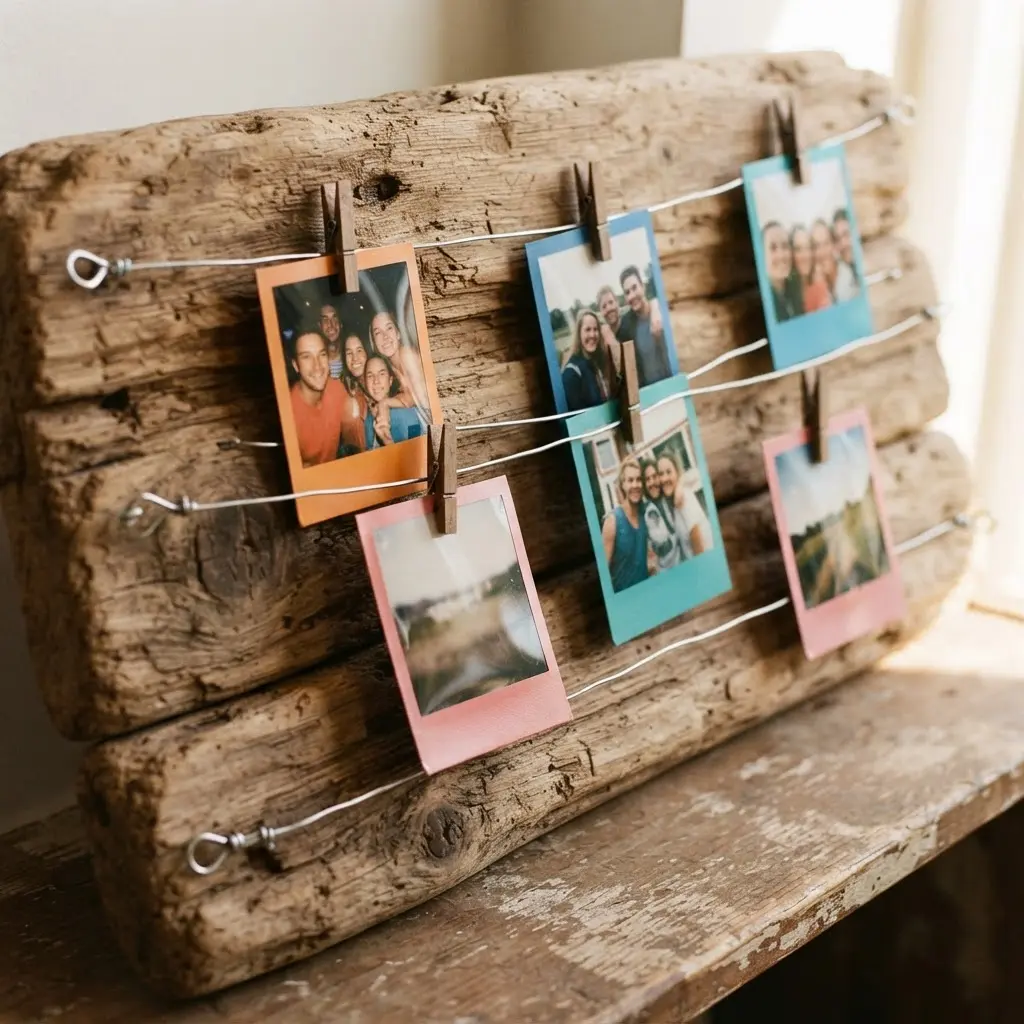
Ever wondered how to capture a perfectly organic, coastal atmosphere for your wall decor? This coastal-inspired project nails such aesthetics by anchoring parallel tension lines across a naturally aged wooden piece. You attach several straight runs of sturdy metal to the timber, securing your snapshots with miniature clothespins. I love how the raw timber grain contrasts beautifully against sleek metal lines.
The arrangement thrives because the weathered wood instantly warms up any blank wall, while the multiple suspension lines create an entire memory gallery you can rearrange in seconds. For the attachment points, feel free to personalize other clothespin crafts for display to match your interior style. Simply verify your chosen metal strand holds enough tension to prevent mid-air sagging. Assembling rugged DIY wire photo holders this way guarantees a relaxed, personalized charm which fits effortlessly into beach houses and cozy reading nooks alike.
5. Industrial Concrete Cube Photo Stand
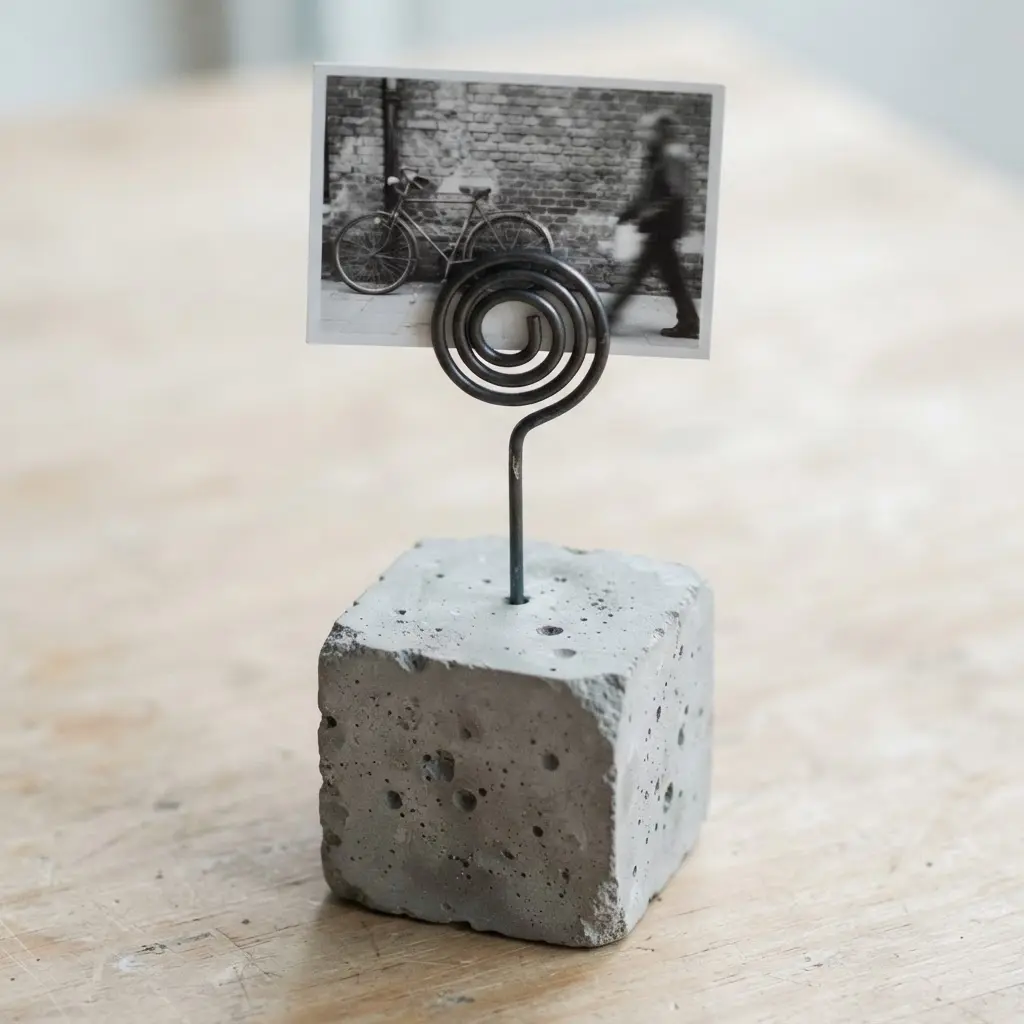
Who expected a poured cement block to look so elegant resting on a nightstand? This modern concept focuses entirely on mixing a high-strength concrete batch, filling a cubic mold around a pre-placed insert, and waiting for the material to cure into an immovable foundation. The raw texture becomes an immediate design feature.
I adore how the substantial weight lends a permanent, grounded presence, keeping your featured snapshot strictly front and center. That industrial aesthetic blends with nearly every interior style, staying ideal for anyone who enjoys rotating images frequently. When assembling heavy-duty DIY wire photo holders, pairing slender metal arms with dense concrete bases creates a striking contrast. If you enjoy casting decorative objects, look into clever display methods using similar minimalist principles.
6. Delicate Spiral Heart Wire Holder
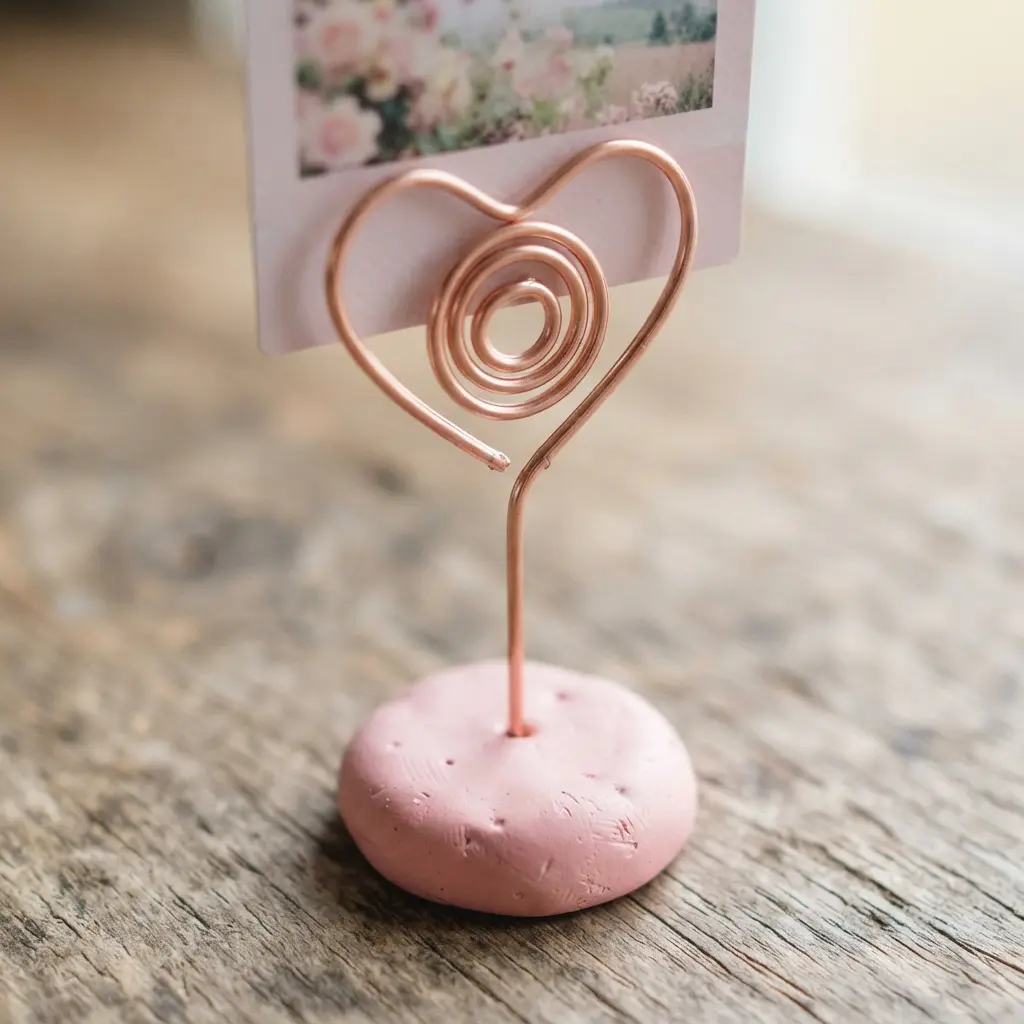
This design appears highly intricate at first glance, yet it unfolds into a wonderfully straightforward evening project. The real magic unfolds when you coax a continuous strand of fine craft wire into a tight, flat spiral foundation, then allow the remaining metal to curve gracefully upward into a romantic silhouette. You rely on round-nose pliers to shape the top loop, which naturally forms the ideal pinch point for small cards or polaroids.
I appreciate how one unbroken line establishes both structural support and delicate beauty. The spiral foundation provides unexpected stability, guaranteeing your cherished image stays perfectly vertical. Attempting these delicate DIY wire photo holders rewards you with the deep satisfaction of creating something undeniably pretty and genuinely functional.
7. Pressed Flower Polymer Clay Base Holder

Ever wondered how to preserve those fragile summer petals indefinitely? This artistic project allows you to permanently seal botanical treasures inside a polymer clay base, creating a miniature slice of nature which withstands daily handling. You simply flatten the dough, press your dried arrangement smoothly into the surface, and bake it until hardened into a durable disc.
The method succeeds because it transforms a fragile seasonal keepsake into personalized art which stands proudly on any shelf. For a completely different but equally hands-on method to refresh your space, explore options to discover tape art for wall decor alongside your favorite DIY wire photo holders, expanding your creative toolkit.
8. Wall Mounted Floating Wire Photo Grid
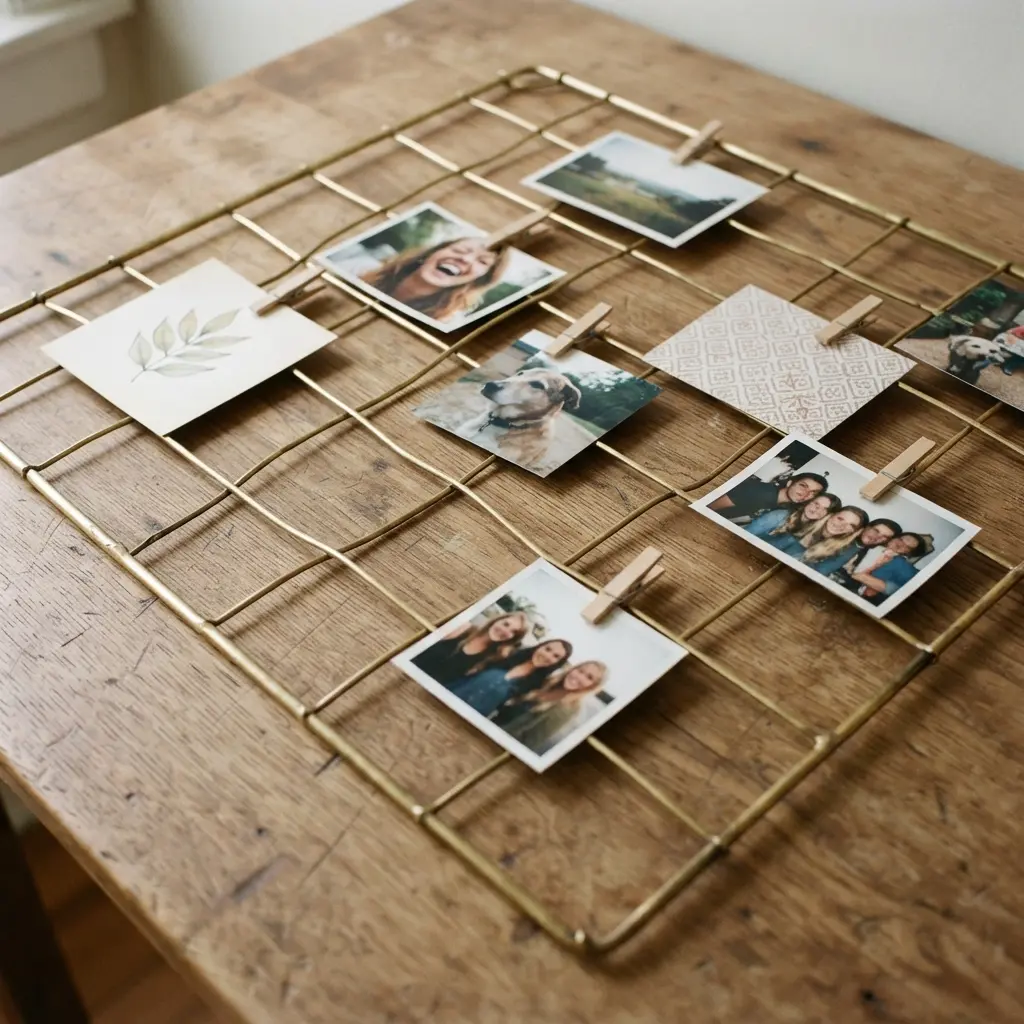
Ever wanted a gallery setup you could rearrange instantly without patching drywall? This tension-based solution mounts a sleek framework a few inches away from your wall surface. You simply suspend prints and tiny artworks using mini metal clips or rare-earth magnets, generating an incredibly light and airy aesthetic. I love how this architecture lets you layer vintage postcards over fresh prints while tucking dried sprigs into the background grid.
The open layout succeeds because it stays endlessly adaptable, unlike rigid static frames. You can even weave heavy jute twine through the metal intersections to hang bulkier items securely. For a truly refined presentation, match your clip tones with the frame finish, exactly like you would when selecting foil techniques for mixed media. Trust me, assembling versatile DIY wire photo holders this way results in a living gallery wall which evolves alongside your personal collection.
9. Whimsical Balloon Shape Wire Stand
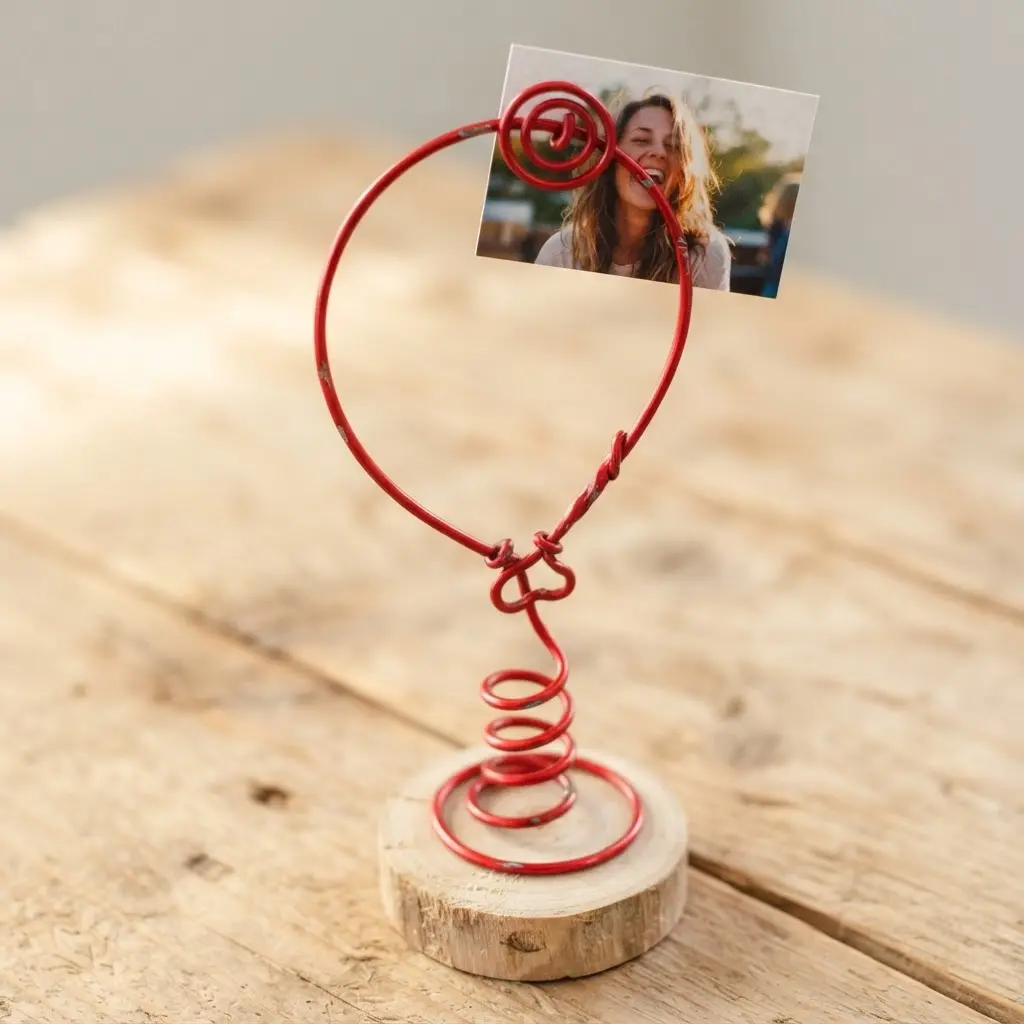
Ever wanted to inject a genuine spark of joy onto your workstation? This playful concept delivers exactly the desired mood-lifting effect. The real magic centers on shaping one continuous strand into a recognizable balloon outline, letting a delicate string trail downward to ground the display. I prefer using a thicker gauge wire for the primary balloon curve and weighted base to guarantee solid footing.
Then you switch to thinner strands for the detailed string illusion. That lighthearted silhouette instantly brightens any corner, making the simple act of displaying a snapshot feel distinctly special. Trust me, finishing the metal with bright enamel paint creates the perfect final touch for cheerful DIY wire photo holders which instantly lift your daily workspace.
10. Upcycled Wine Cork Base Holder
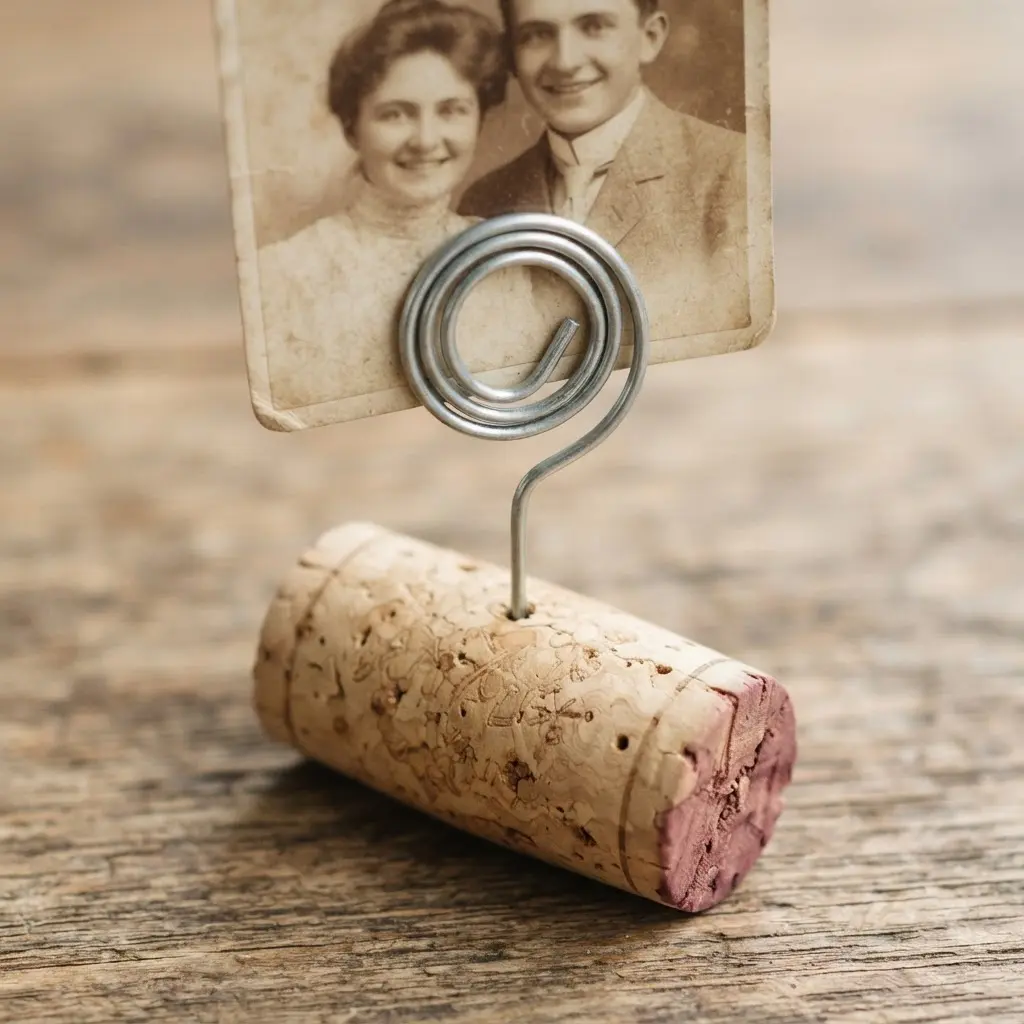
Ever notice a drawer accumulating leftover corks with zero practical purposes? This clever concept transforms those forgotten stoppers into a highly functional anchor for your next build. You arrange them into a dense rectangular block, slicing into uniform coins if you want a mosaic pattern before gluing. You will permanently fuse the assembly using a strong adhesive like E6000 to ensure waterproof resilience and long-term durability.
I love how this recycling trick converts a simple kitchen scrap into a rustic, completely unique piece. The natural surface provides excellent grip for metal legs. Once cured, install your armature and pair the setup with new pieces to create diy hoop art for walls. Building eclectic DIY wire photo holders from reclaimed materials sounds incredibly rewarding, leaving your home filled with personalized history.
Styling Photographs for Maximum Visual Balance
The quickest method to make your metal frame vanish into the background involves pairing it with images which aggressively fight for attention. You want the slender framework to gracefully complement the shot, never overpowering your central memory. Start experimenting with simple, high-contrast prints or monochrome snapshots, since muted palettes allow clean metal lines to stand out properly.
Always evaluate the physical scale of your picture relative to the surrounding frame. A tiny snapshot resting inside a large, airy framework generates lovely negative space, whereas a bold graphic demands a heavier, reinforced loop to feel properly anchored. For a unified gallery wall, maintain the exact same metal finish and enforce consistent visual balance across all your curated DIY wire photo holders to maintain cohesive gallery styling.
Conclusion
The absolute best aspect about constructing your own displays lies in how each finished piece weaves into your home’s personal narrative, keeping memories safely upright and visible. Every project mentioned here began with identical raw material yet developed entirely unique personalities, reflecting true artistic freedom. When selecting a blueprint to attempt, always picture your target images alongside the room where they will reside, letting those factors dictate your gauge and base selection.
The most deeply rewarding moment occurs when you step backward and watch a priceless moment supported entirely by metal you shaped yourself. This collection aims to spark fresh energy for your next workshop session, proving handmade DIY wire photo holders bring unmatched character to everyday decor.
FAQs
Q: What is the best wire gauge for a photo holder?
A medium gauge strand, specifically 16 or 18 gauge, delivers optimal results for most display stands. It provides enough stiffness to support standard prints without bending but remains pliable enough for hand manipulation.
Q: How do I make sure my wire photo holder is stable?
True stability stems from a weighted foundation and proper center-of-gravity distribution. Select a heavy anchor material like river stone or cured cement, or flatten your metal base wider than the upper frame. Always perform a dry test with your actual picture before finalizing permanent curves.
Q: Can I use any type of wire for these projects?
Stick to standard craft metal, copper, or aluminum strands for optimal handling. Avoid extremely soft floral stems for load-bearing sections, since those lack necessary structural integrity. Copper and aluminum remain highly malleable while retaining attractive finishes, and coated craft strands introduce instant color variety.
Q: How do I attach the wire to a base like wood or stone?
Drill a small pilot channel into timber substrates, insert the metal tip, and secure the joint with heavy-duty craft glue. For rock or cement foundations, rely on two-part epoxy systems formulated specifically for metal-to-masonry bonding.
Q: What tools do I need to get started?
Keep a fresh pair of needle-nose pliers for sharp bends and round-nose pliers specifically for smooth loop formation. Sharp side cutters remain absolutely essential. A metal ruler and permanent marker help track accurate measurements before shaping. Thick work gloves protect your hands when wrestling heavier strands.