Selecting Optimal Materials For Soap Film Retention
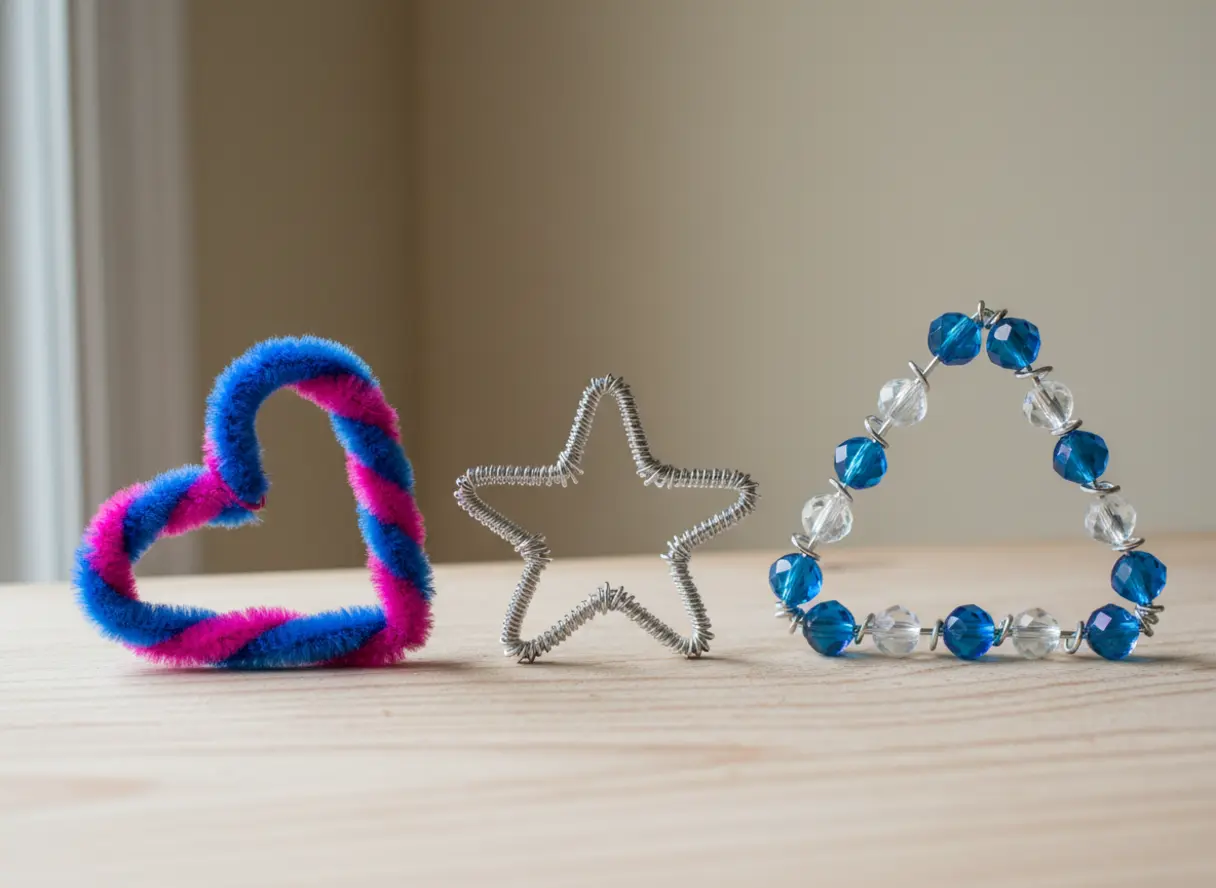
The right wire is everything because the soap film needs a textured surface to cling to. Thin craft wire between 18-24 gauge holds the solution perfectly due to its metallic texture, creating that strong, unbroken film you need for a great bubble. Pipe cleaners work on the same principle, their fuzzy fibers acting like tiny reservoirs for the soap mixture, and studying diy bubble wand ideas shows exactly why rough surfaces matter. You want to avoid slick plastics that let the film slide right off, as a consistent, smaller aperture gives the surface tension its best chance to work.
Ensuring Grip Comfort With Waterproof Handle Wraps
A wobbly handle is the quickest way to spill your bubble solution and frustrate a small user. The primary mistake is using a thick, smooth material that becomes impossible to hold when wet, which is why secure grip techniques top every checklist of successful diy bubble wand ideas. Wrapping the base with waterproof electrical tape or a thick rubber band gives little fingers a firm, dry grip. Always double-check that any twisted wire ends are completely covered by your wrap to keep playtime safe from scratches.
1. Colorful Pipe Cleaner Heart Wand
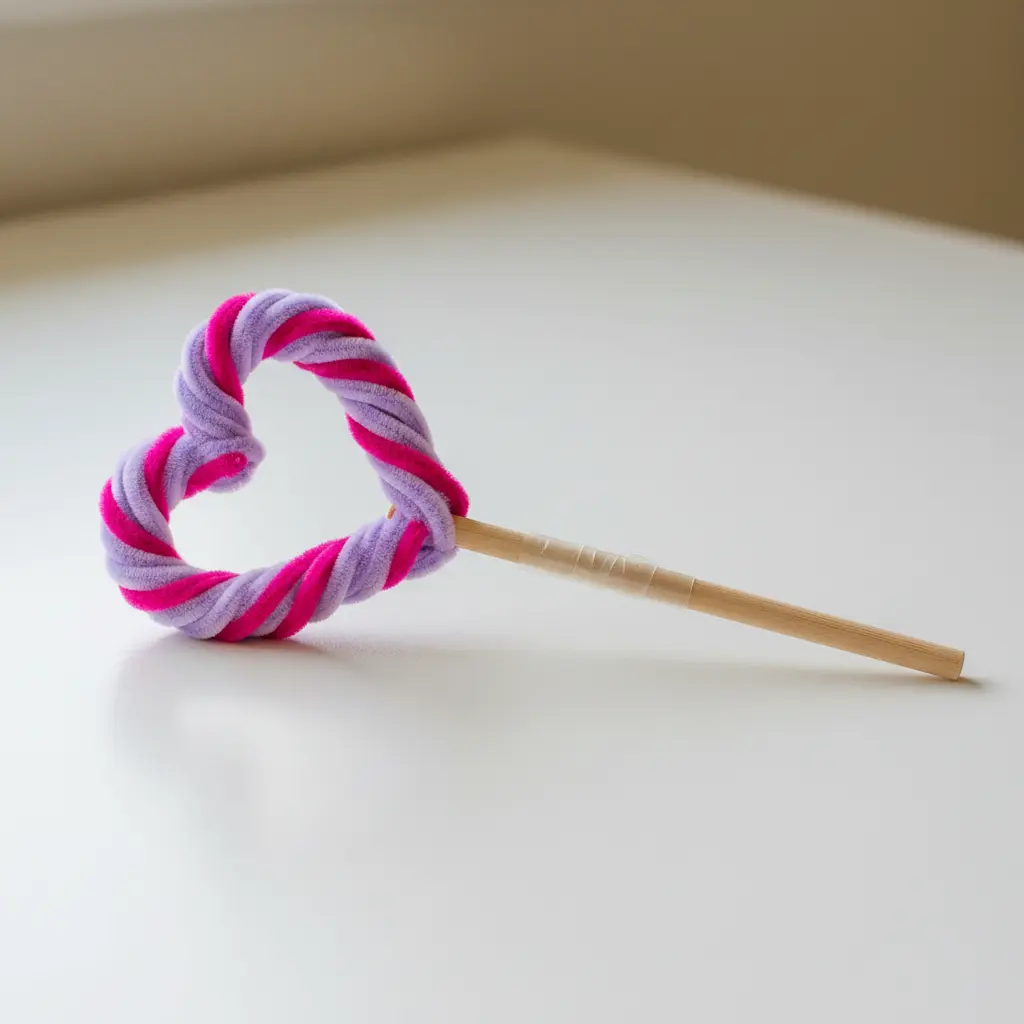
This is my absolute favorite starter project because it looks like a sweet little magic wand but shapes so easily. You only need a few colorful pipe cleaners and your hands to get started immediately.
Twist two or three together for the heart, bending them into those soft curves. The trick is making sure you get a tight twist at the bottom point so it holds its shape. Then, attach your handle and keep twisting it all the way down.
It works perfectly because testing diy bubble wand ideas shows the fuzzy texture holds bubbles so well. I always tell friends to mix up some homemade bubble solution recipes to use with it. Your kids will love how cheerful it looks blowing bubbles in the sunshine.
2. Recycled Plastic Bottle Ring Wand
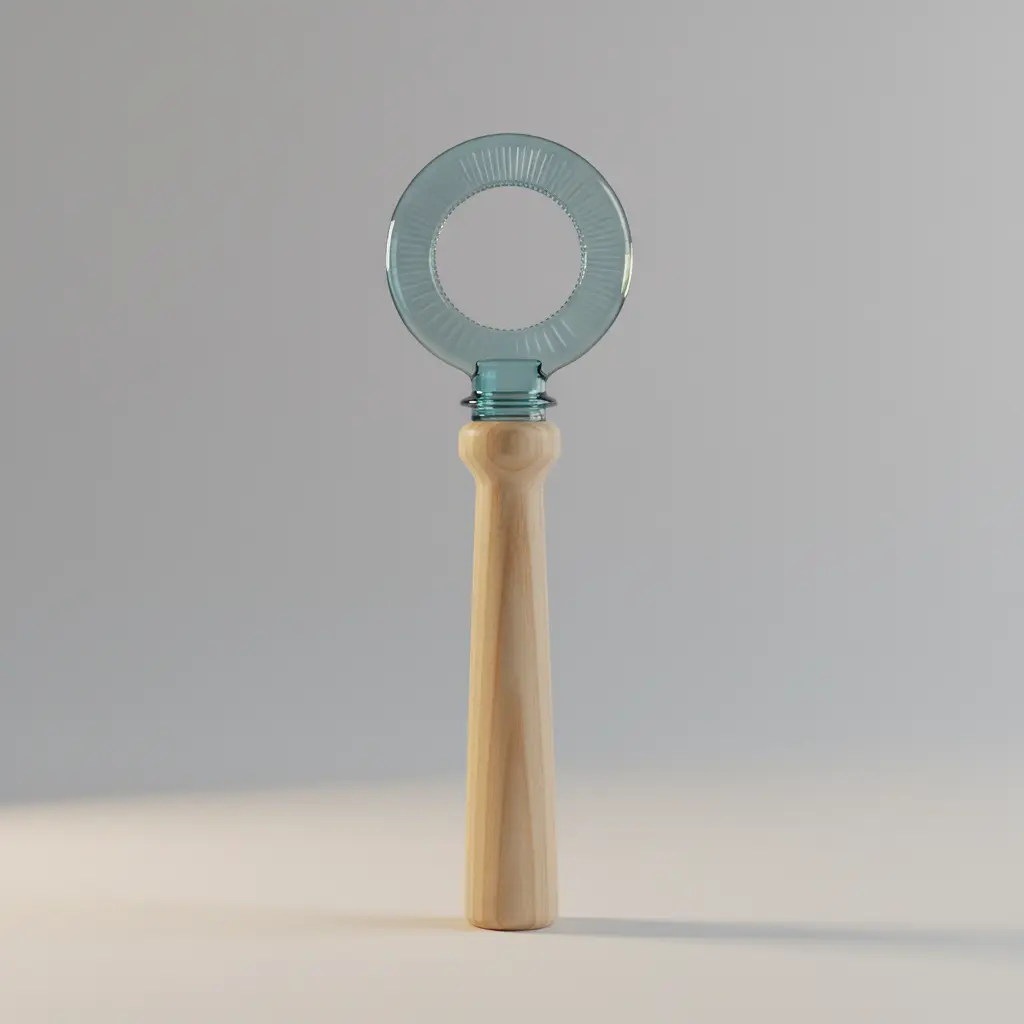
Ever feel a little thrill turning trash into treasure? This project gives you exactly that feeling by sliding plastic rings from bottles onto a wooden dowel or chopstick. I love how the rings create a fantastic, chunky texture for the wand head, perfect for painting or wrapping with ribbons, and this approach captures the true spirit of creative diy bubble wand ideas while keeping plastic rings out of the landfill. Your kids will adore customizing their own unique design, and you will appreciate the satisfaction of the final reveal.
3. Twisted Wire Star Bubble Wand
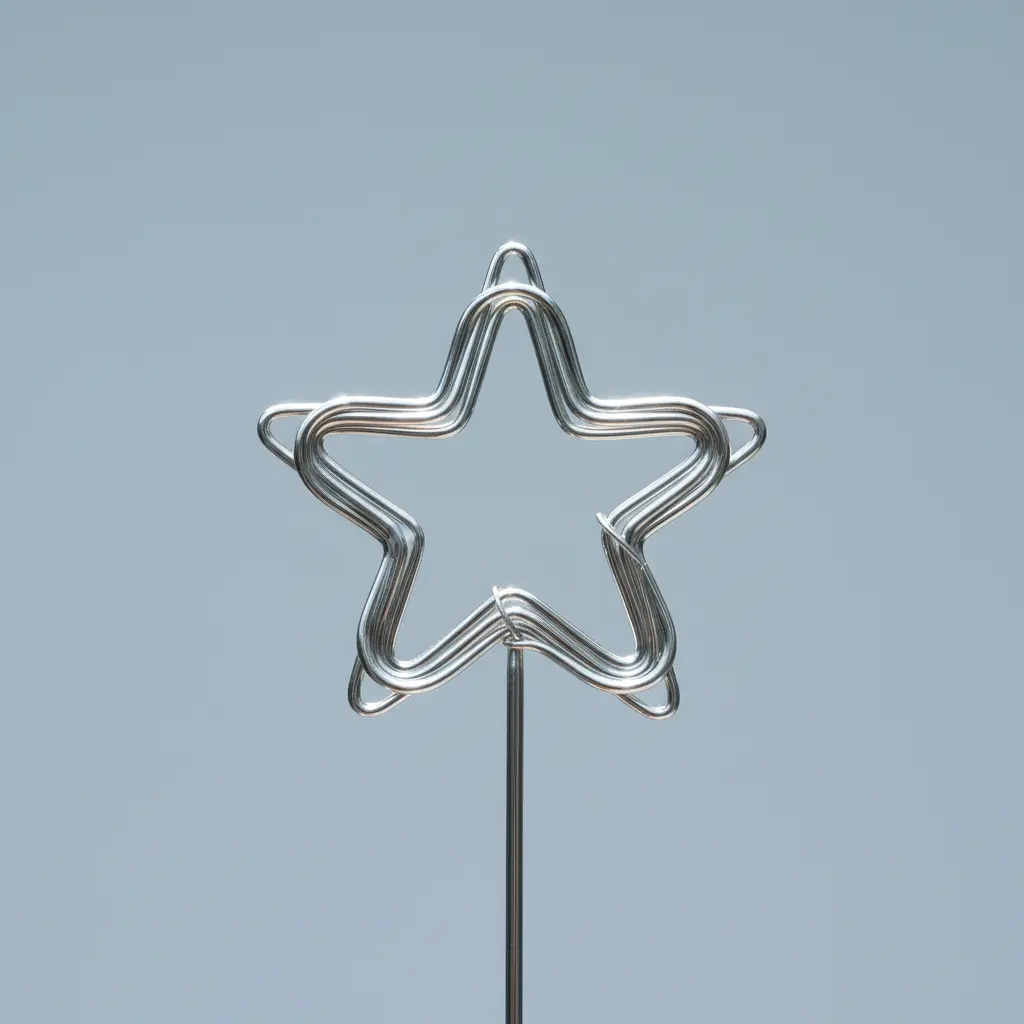
This one looks fancy, but honestly, it is one of the most straightforward wands to make. You just need some 20-gauge craft wire and a pair of pliers to get started.
Bend the wire into five points to form your star, then twist the long ends together for a sturdy handle. I love how the twisted handle feels in your hand, and dipping that star shape into the solution creates a whole cluster of bubbles at once. Is not that more fun than a single circle? When exploring diy bubble wand ideas, the key is keeping your star points even, so your bubbles look uniform. It is a perfect project to try alongside other fun craft ideas for kids on a sunny afternoon.
4. Beaded Wire Geometric Figure Wand
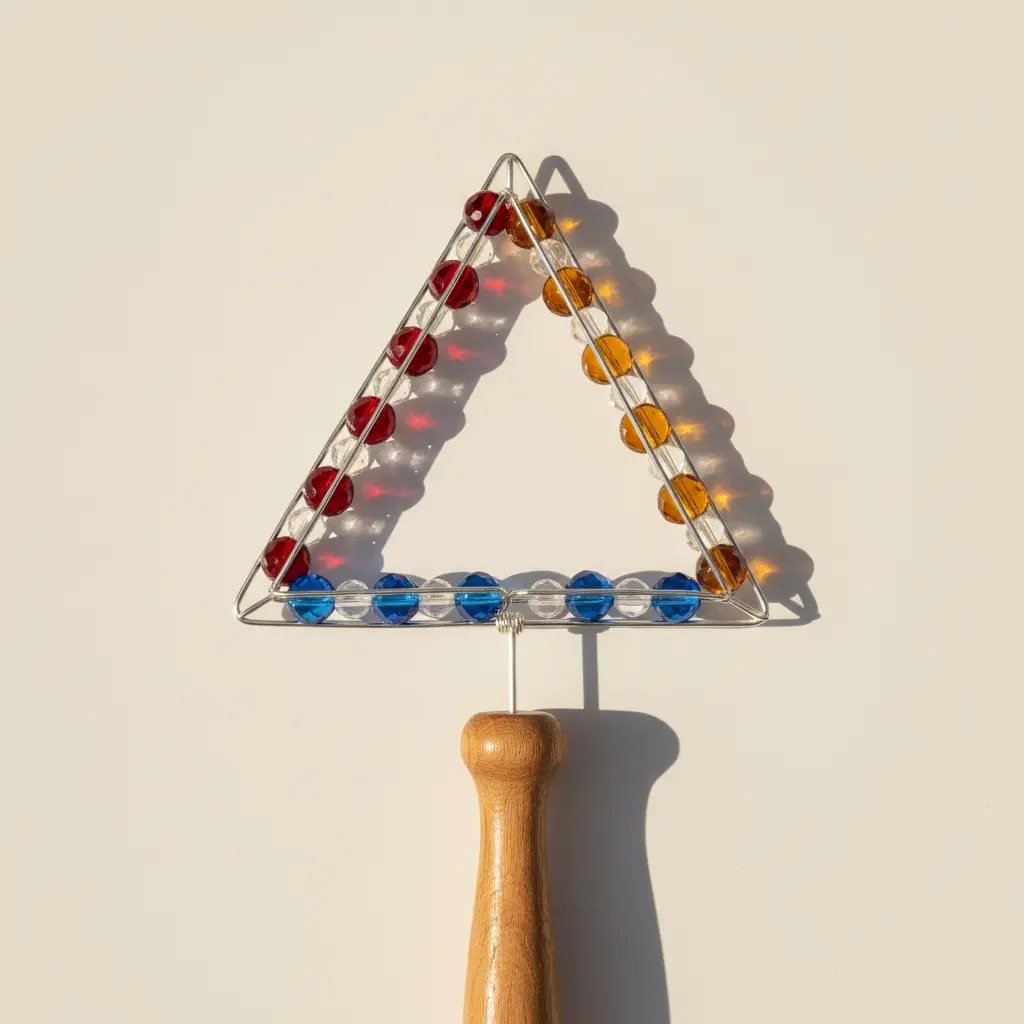
This one looks so intricate, but trust me, you can build a stunning shape in about ten minutes. The trick is using thicker gauge wire for your main structure, then bending it with pliers to form a simple triangle or cube. You string colorful beads along the edges before you close each shape, which adds a magical sparkle. It works because the clean lines of geometry create a perfect frame for the light to catch your beads, proving why diy bubble wand ideas double as hands-on shape lessons for kids.
Your finished wand feels like a tiny sculpture, and once you get the hang of the technique, you can expand your skills. Try pairing this build with creative puffy paint projects from creative puffy paint projects for indoor decorations.
5. Drinking Straw Multi Loop Wand
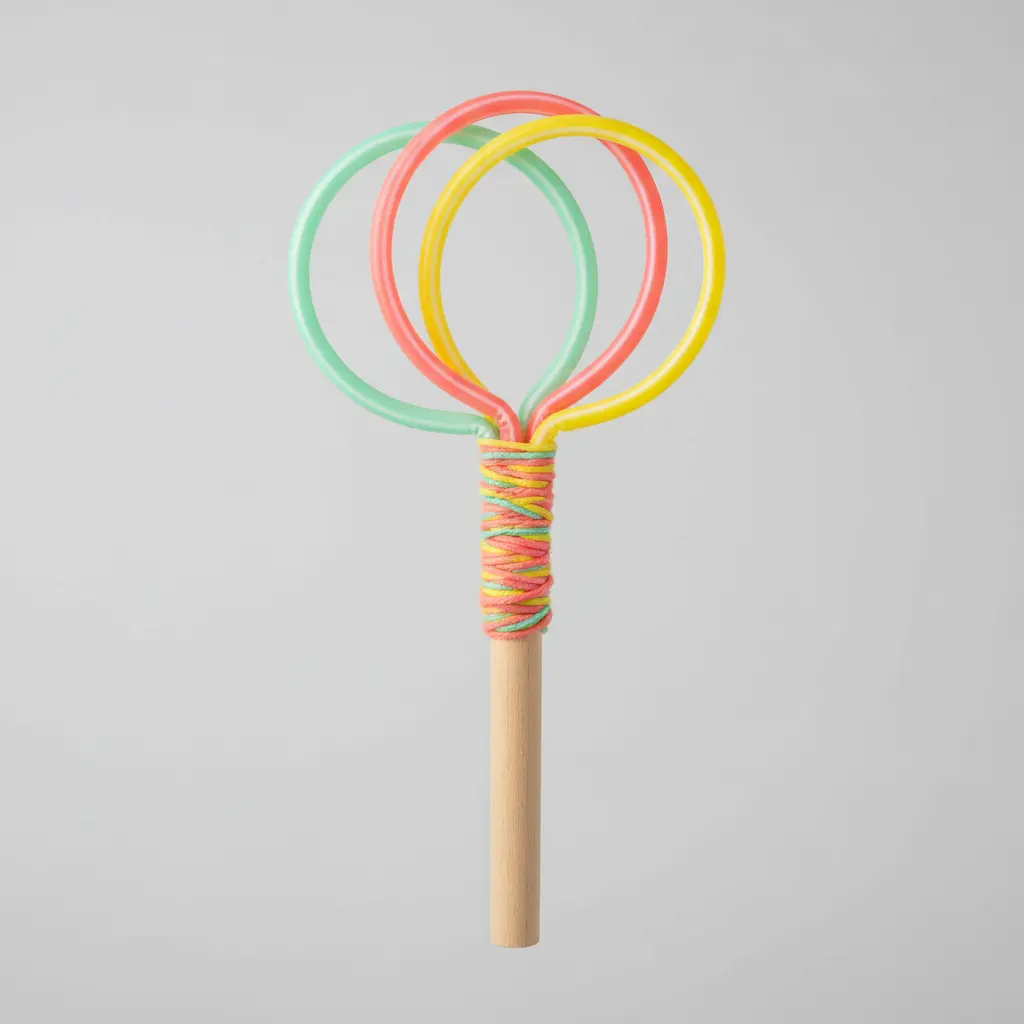
This one looks intimidating, but trust me, it is far easier than it seems. You start by bending a few plastic drinking straws into loops and taping the ends together securely. Then you connect those loops into a cluster or a simple grid pattern with more tape.
The magic happens when you dip the whole thing and see how clustered diy bubble wand ideas give you a fantastic yield. You will see multiple bubbles floating out from each loop at once, creating an instant wave of floating spheres. I love this for satisfying results, which shows why quick diy bubble wand ideas always win on busy afternoons. Just remember to use a gentle, steady breath instead of a hard puff to keep those delicate films from popping too soon.
6. Metal Cookie Cutter Frame Wand
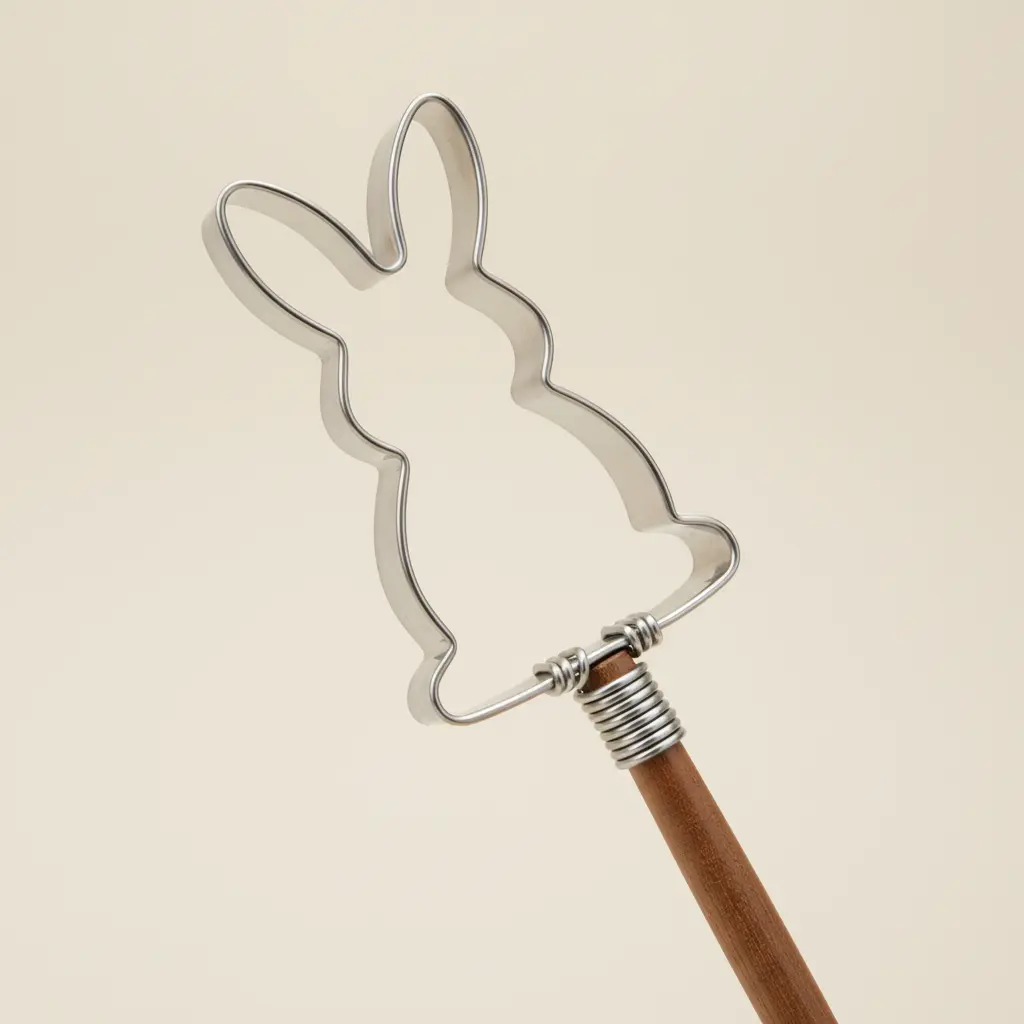
Who would have thought a kitchen tool could make such a fantastic bubble wand? This one is a personal favorite because it uses the metal frame of a cookie cutter dipped straight into your solution. The open center of the cutter creates a soap film that forms the bubble, and proven diy bubble wand ideas reveal that solid metal holds the solution perfectly and gives you that crisp outline. You will love seeing a stream of hearts or stars floating away.
Trust me on this one, the key is a good, thick bubble mix. If your kids are getting messy with the solution, having some simple watercolor painting ready as a backup craft is a smart move.
7. Ribbon Embellished Wooden Stick Wand
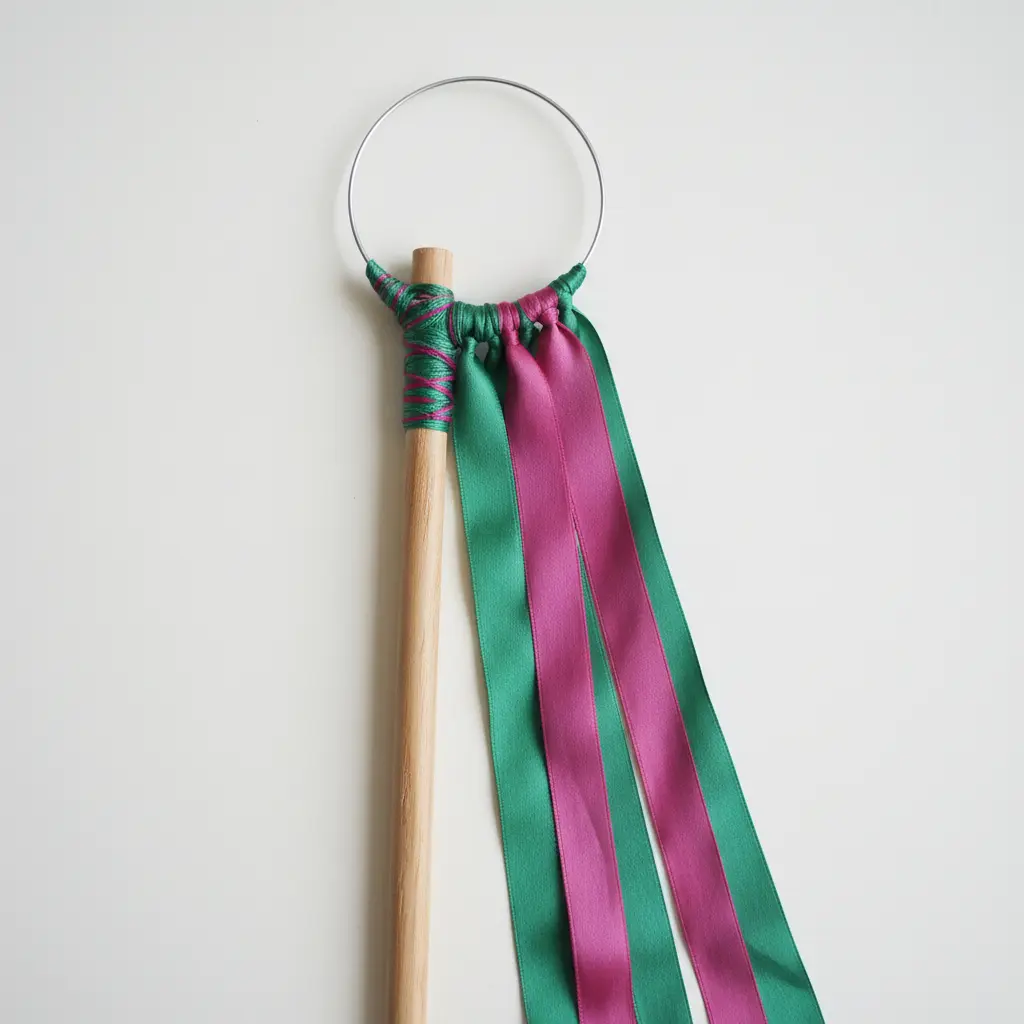
This wand surprised me with how much personality it has. It looks like a magical find from a storybook, but you make it from a simple wooden stick and a handful of ribbons. Start by cleaning and optionally sealing your stick, then choose your favorite ribbons to wrap, tie, or let trail from the handle.
I love how the ribbons add a wonderful sense of movement, but mastering diy bubble wand ideas means securing those ends well so they never unravel during play. Try mixing different widths and textures for a truly unique look that feels wonderfully whimsical.
8. Sturdy Coat Hanger Giant Wand
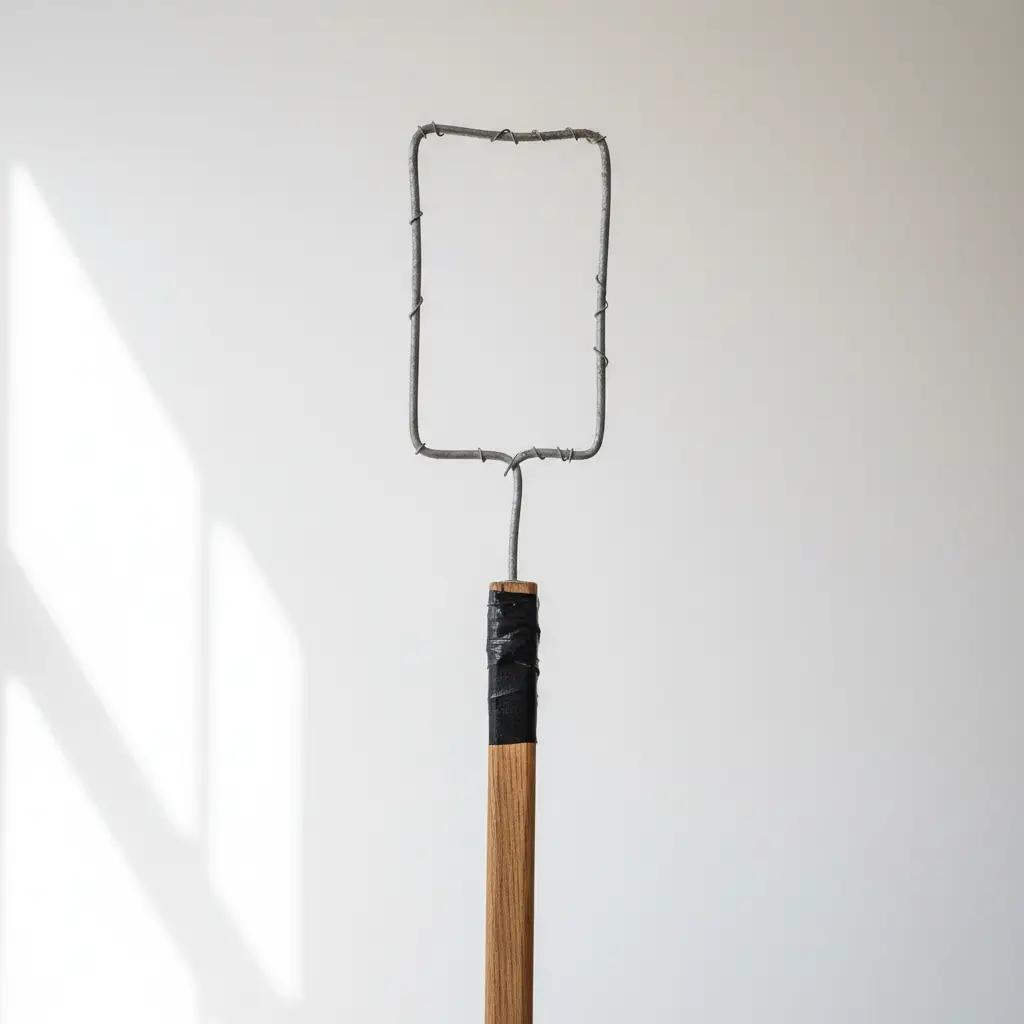
Ever wondered how heavy-gauge diy bubble wand ideas yield a giant frame that will not bend or break? This one is my go-to because it uses something you probably already have in your closet. Grab a sturdy wire coat hanger and some pliers, then straighten and bend that wire into a large, simple loop. The key is using a thick hanger so your frame stays rigid when it is wet.
Once you have your big circle shape, twist the leftover wire into a comfortable handle and wrap it with duct tape for safety. I find it super satisfying to see how sturdy materials turn closet clutter into durable outdoor fun. Trust me, your family will have a blast with this wand, and if you are looking for another fun project to do together, check out creative pumpkin crafts for kids for more autumn inspiration.
9. Woven Yarn Wrapped Wire Wand
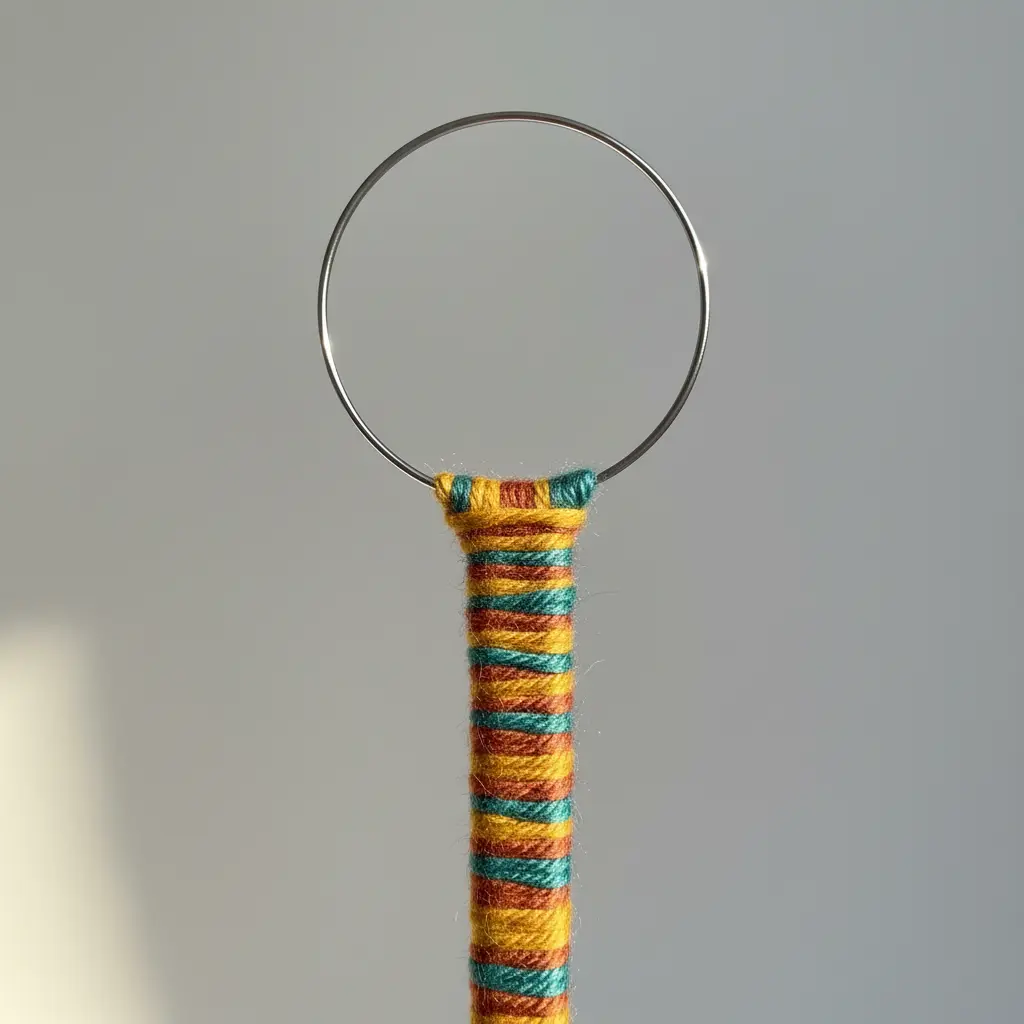
This one looks intricate, but it is surprisingly simple to make. You start by bending your wire core into whatever shape you love, then you wrap it tightly with yarn. The real magic happens when you introduce a second color and weave it in. That wire skeleton means your structure stays rigid, and that durability separates premium diy bubble wand ideas from fragile crafts. It feels so personal when you finish.
Pro tip: secure all your yarn ends with a dab of craft glue to keep everything neat. The final touch is adding beads or charms, which reminds me of the joyful colors you see in colorful rainbow handprint art.
10. Foam Sheet Shaped Silhouette Wand
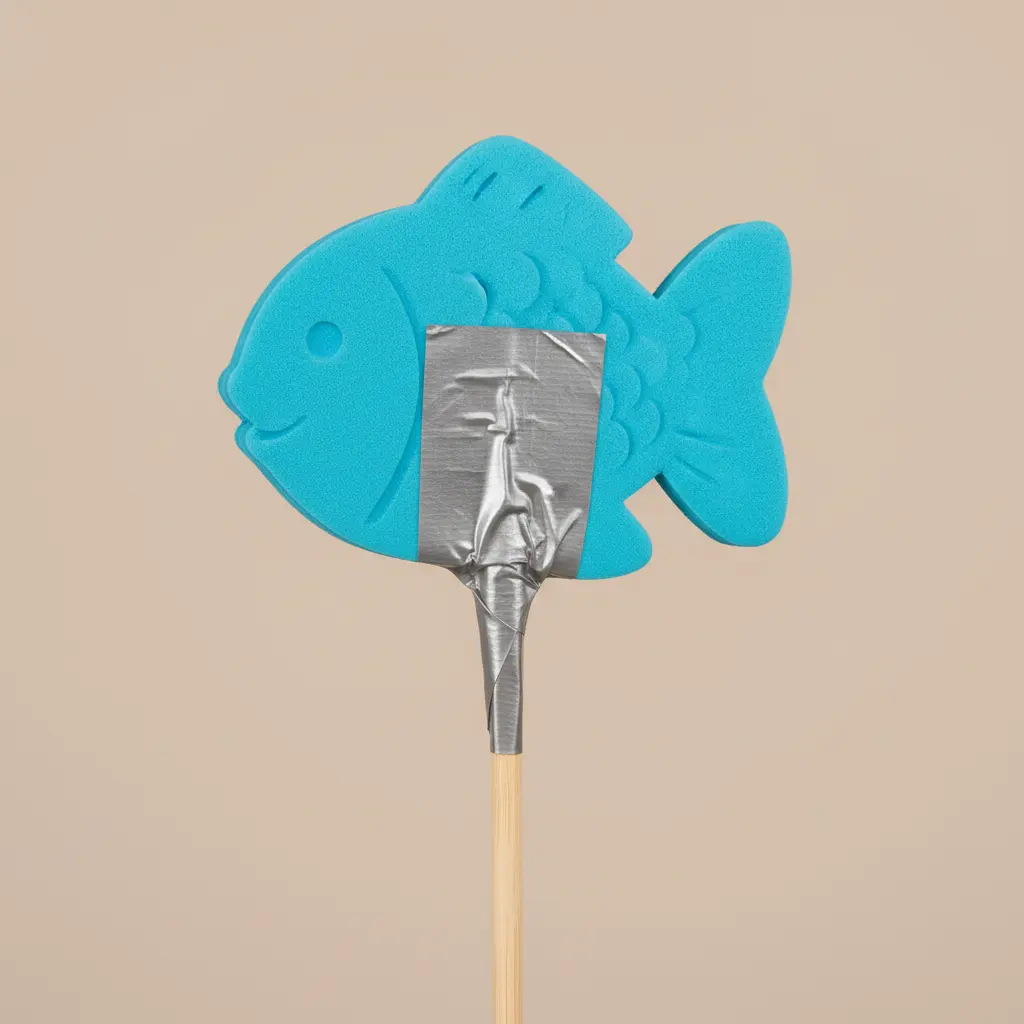
Ever wondered how to make a wand that looks like it came from a party store? This one is your answer. You simply cut two identical shapes from a craft foam sheet and sandwich your stick between them. I love this project because it gives you a clean, professional-looking silhouette on both sides. Your star or butterfly will look fantastic from every angle. It is incredibly simple and safe for kids to join in, especially if you use a low-temperature glue gun. You can match any theme just by picking your shape and color, then add glitter or ribbons for extra sparkle.
Mixing High Performance Homemade Bubble Solution Recipes
Your wand is only as good as the soap mixture you dip it into. The secret for giant, long-lasting bubbles is adding a polymer like plain white school glue or glycerin to standard dish soap and water. These ingredients strengthen the soap film, letting it stretch further without popping as it leaves your wand. A good starting point is one part dish soap to six parts water, and following reliable diy bubble wand ideas tells us to let the mixture rest thoroughly. You will notice the difference immediately in the density and flight of the bubbles you create after that essential sit time.
Conclusion
So, did you find a favorite wand to try first? Look at the creative potential you have right in your craft drawer or recycling bin. The real magic in these diy bubble wand ideas is not just the bubbles, but the time spent making something together. My best advice is to let the kids lead the design process, because the wands they help dream up will always be the most special. A sunny afternoon, a bowl of homemade bubble solution, and a wand you built together makes for a pretty perfect memory.
FAQs
Q: What is the best homemade bubble solution?
A: A simple mix of water, dish soap, and a little glycerin or corn syrup works great. Use about six parts water to one part soap, with a tablespoon of glycerin per cup for stronger bubbles.
Q: How do I make wire bubble wands safe for kids?
A: Always bend the cut ends of the wire back on themselves or cover them securely with tape. Check for any sharp points before letting children use the wand.
Q: Can I make a bubble wand without wire or pipe cleaners?
A: Absolutely. You can use straws, plastic cups with the bottoms cut out, or even bend a paperclip into a small loop. Look for any item you can form into a closed shape with a handle.
Q: Why do my homemade bubbles pop so quickly?
A: Bubbles pop fast in dry or windy conditions. Try adding glycerin to your solution to make the bubble film more flexible. Making bubbles on a humid day also helps them last longer.
Q: How can I store homemade bubble wands?
A: Let them dry completely after use to prevent rust on wire or mildew on wood. Store them in a box or hang them on a hook. Pipe cleaner wands may need to be reshaped before their next use.