
You know that feeling when you walk into a room and the lighting makes everything look right? That warm, inviting glow can be tricky to find in a store-bought fixture.
If you have been drawn to the rich, industrial look of copper but are not sure where to start, you are in the perfect spot for exploring DIY Copper Light Fixture Ideas. This material offers a stunning blend of warmth and modern edge that is surprisingly easy to work with.
I have gathered ten of my favorite projects, ranging from simple pendants you can make in an afternoon to more sculptural statement pieces. Each project highlights how copper pipes can create beautiful, functional light in your home.
Sourcing And Prep Of Copper Piping
Your project starts and ends with the quality of your Type M copper piping. This specific grade, often in 1/2-inch or 3/4-inch diameters, is the sweet spot for designing DIY Copper Light Fixture Ideas.
You will find it at any home improvement store. Trust me, the first thing you do after cutting each piece is to deburr the sharp edges with sandpaper.
This step is non-negotiable for both safety and a clean, professional fit that hides your wiring. A smooth interior bore makes threading lamp cord through tight elbows possible, so your final piece has those crisp, uninterrupted lines everyone loves.
Required Safety For Electrical Component Assembly
Always use a UL-listed lamp cord kit designed for DIY fixtures, as it includes pre-wired sockets and strain reliefs. These kits take the guesswork out of connections for most DIY Copper Light Fixture Ideas.
You want to avoid standard household wire, which is too thick and stiff to route neatly through your pipework. Secure every wire connection with wire nuts and wrap them in electrical tape for a double layer of safety.
Before you plug anything in, do a visual check to ensure no bare copper wire is exposed at the sockets. This diligence means your beautiful fixture is also a completely safe one.
1. Minimalist Single Edison Copper Pendant — A Clean First Project
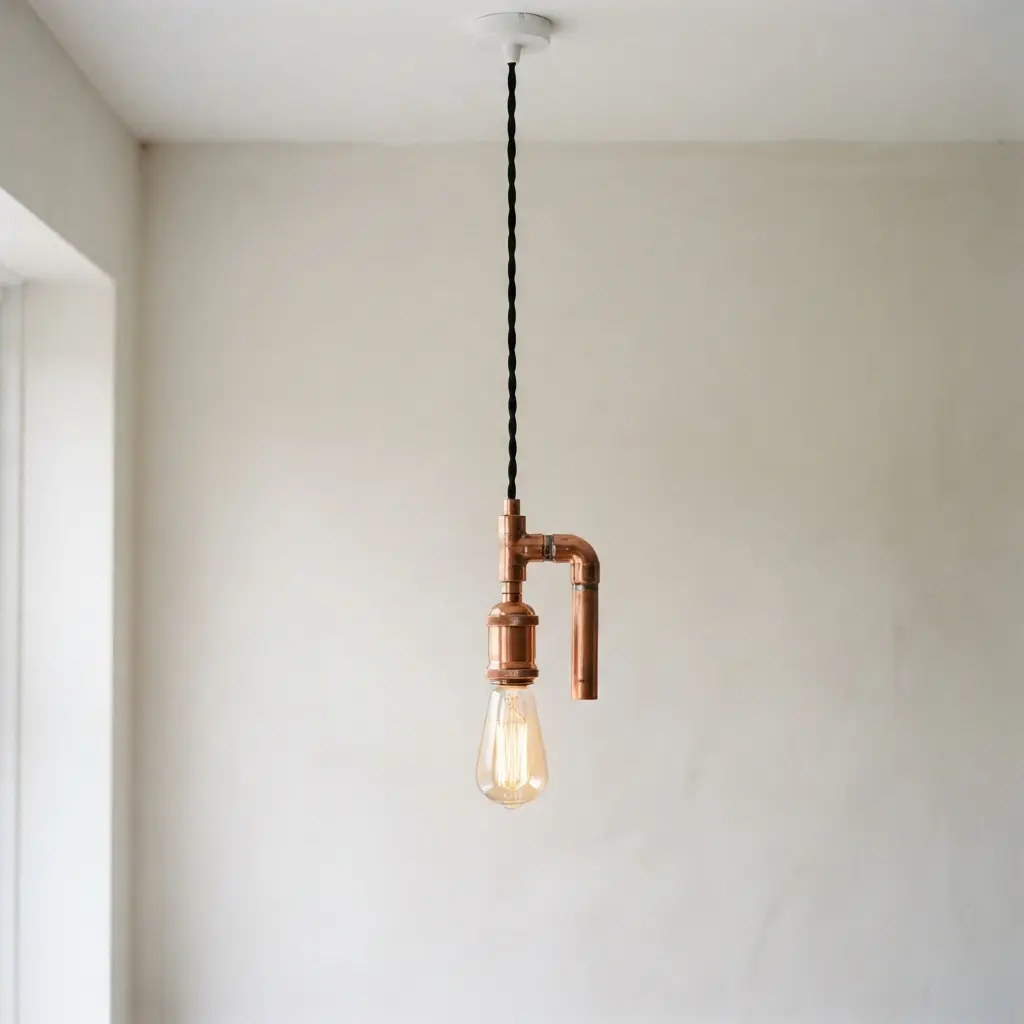
Ever wanted to make a light fixture but felt intimidated? This one is your perfect starting point for exploring DIY Copper Light Fixture Ideas. It is a copper lamp holder, a fabric cord, and a bulb.
You will connect the wires, secure the strain relief, and hang it up. I love how the warm copper finish makes the exposed filament of an Edison-style LED bulb glow so beautifully.
It is a fantastic way to get comfortable with basic wiring without any complex parts. The whole project feels incredibly rewarding when you flip the switch.
Pro tip: always use a three-conductor cord and connect the ground wire for safety. It is a habit that will serve you well on all your future projects. Trust me, you will be so proud of this clean, industrial look in your space.
2. Geometric Hanging Copper Pipe Chandelier
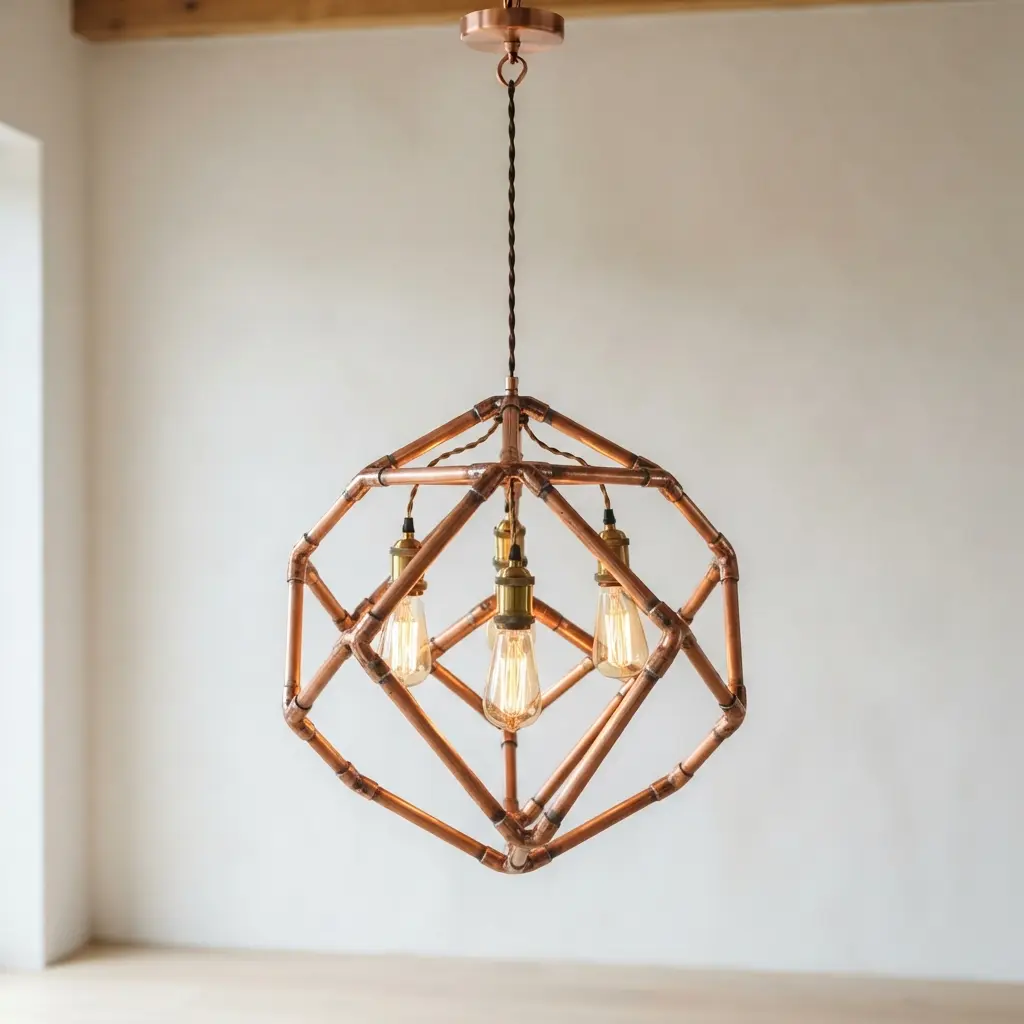
Ever wondered how those stunning industrial-looking fixtures in magazines get made? This one looks complex but is surprisingly approachable when tackling advanced DIY Copper Light Fixture Ideas.
You start by cutting copper pipes to precise lengths and connecting them with fittings to form a shape like a cube or pyramid. Then, you thread wires through the pipes to connect your Edison bulbs, creating a warm, sculptural glow.
What I love about this project is how the empty spaces in the DIY copper wine rack ideas part of the design. It feels like building a piece of modern art you can actually use.
The key to success is meticulous planning before you make a single cut. Trust me, a little extra time with your measuring tape saves frustration later. Your finished piece will be a total conversation starter, blending raw industrial charm with cozy, stylish light.
3. Industrial Copper Elbow Wall Sconce: Perfect for Tight Spaces
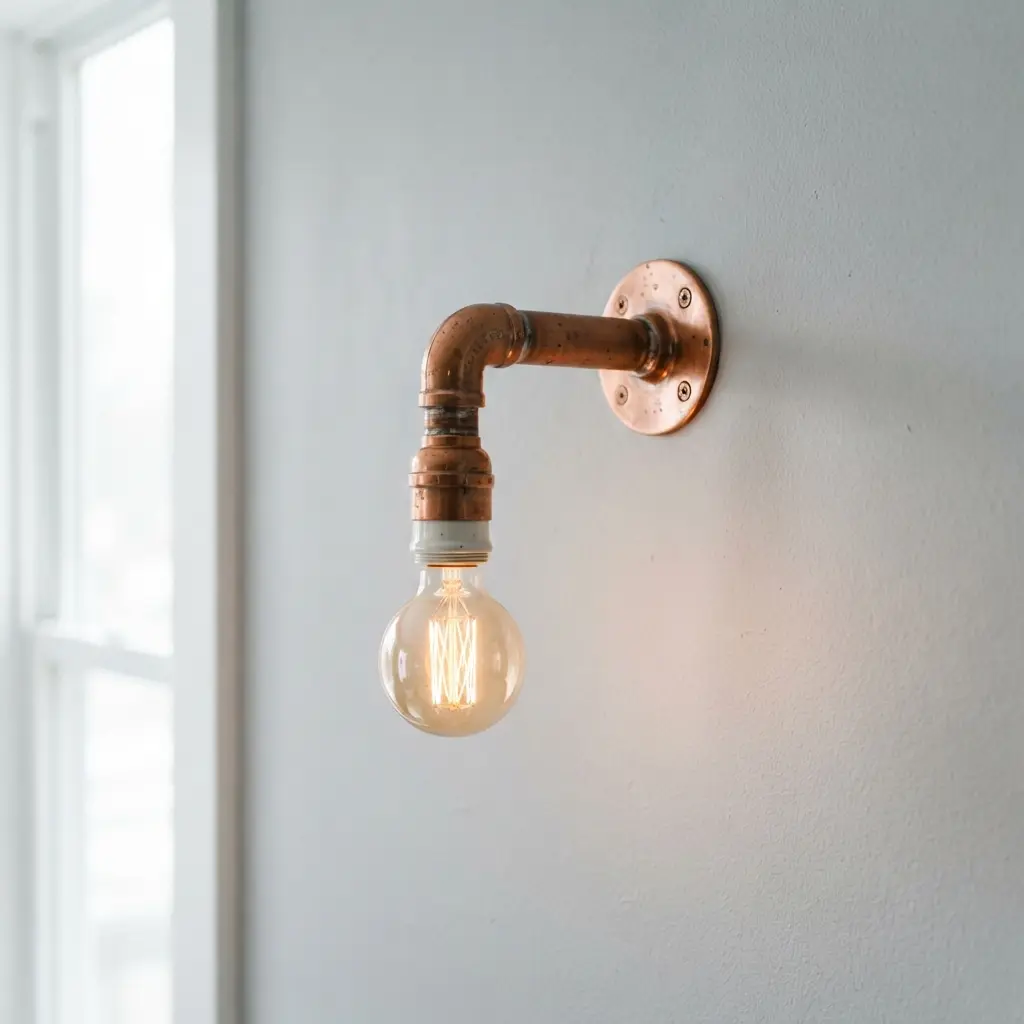
Ever wondered how a light fixture can feel both raw and elegant? This industrial copper elbow sconce ranks high among practical DIY Copper Light Fixture Ideas. It is built with a prominent copper plumbing elbow and exposed hardware, giving it that charmingly utilitarian look.
You mount it directly to the wall, so it uses zero floor space and gives you precise, directional light exactly where you need it. I love how the warm copper finish adds a touch of vintage character to any corner.
This design works so well in tight spaces because it uses vertical wall space so effectively. It keeps your surfaces clear and makes a small room feel more open. Just be sure to position it for the right task, whether that is reading light or ambient glow.
For a similar hands-on project that makes great use of wall space and raw materials, you need to see these DIY candle holder ideas. Feel the satisfaction of crafting a warm, industrial vibe yourself.
4. Abstract Multi-Arm Copper Floor Lamp
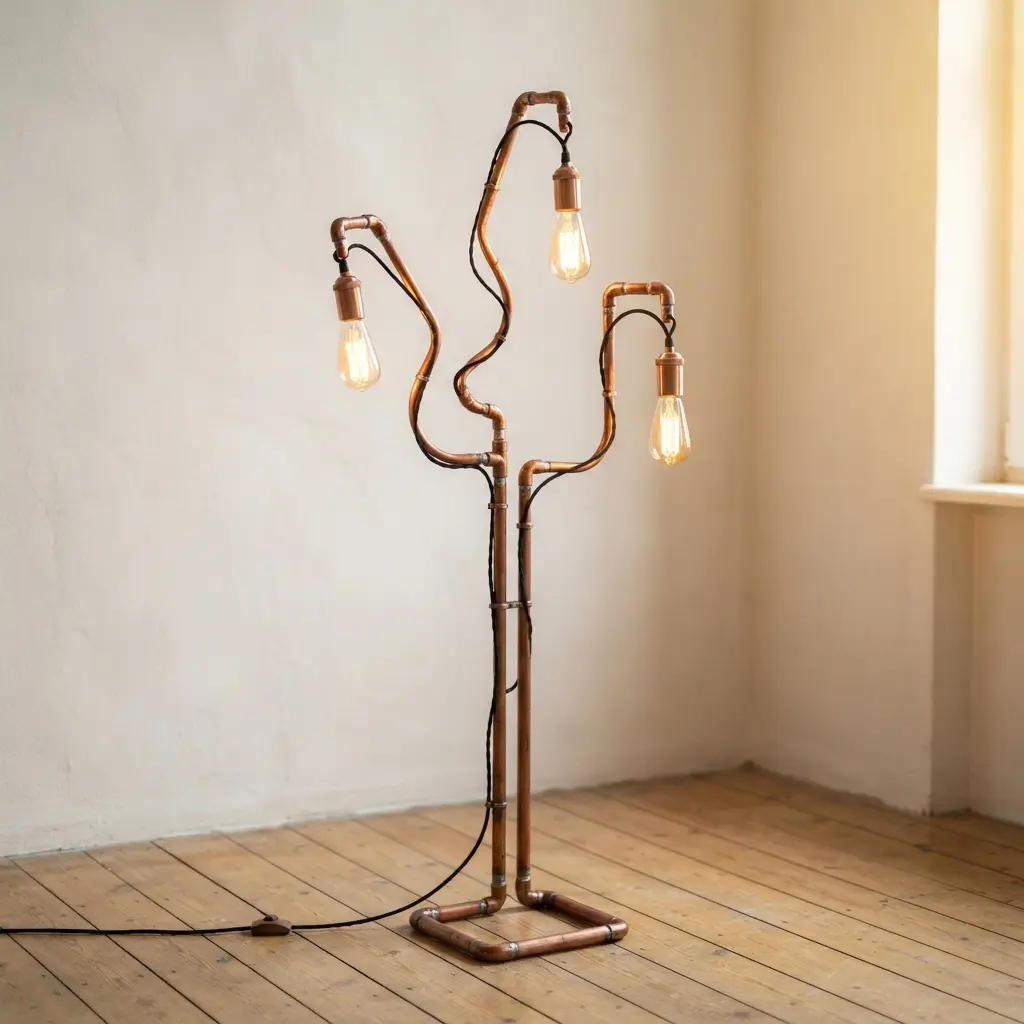
Ever wanted a floor lamp that looks more like a piece of modern art? This one lets you scale up your DIY Copper Light Fixture Ideas beyond basic hanging pendants. You will assemble multiple lengths of copper pipe using elbows and tees to create a dynamic, asymmetrical sculpture.
The arms extend from a central column, each ending in a light source, and the whole structure gets anchored to a heavy, stable base. It is a fantastic way to add a sculptural element and warm, ambient light to a room.
The key is to plan your arm arrangement on paper first for visual balance. I love how the copper’s natural warmth contrasts with the contemporary form. Trust me, using a weighted base is non-negotiable for safety with this tall, top-heavy design.
Feel that pride when you flip the switch and your custom sculpture lights up the corner.
5. Rustic Copper Pipe Desk Lamp
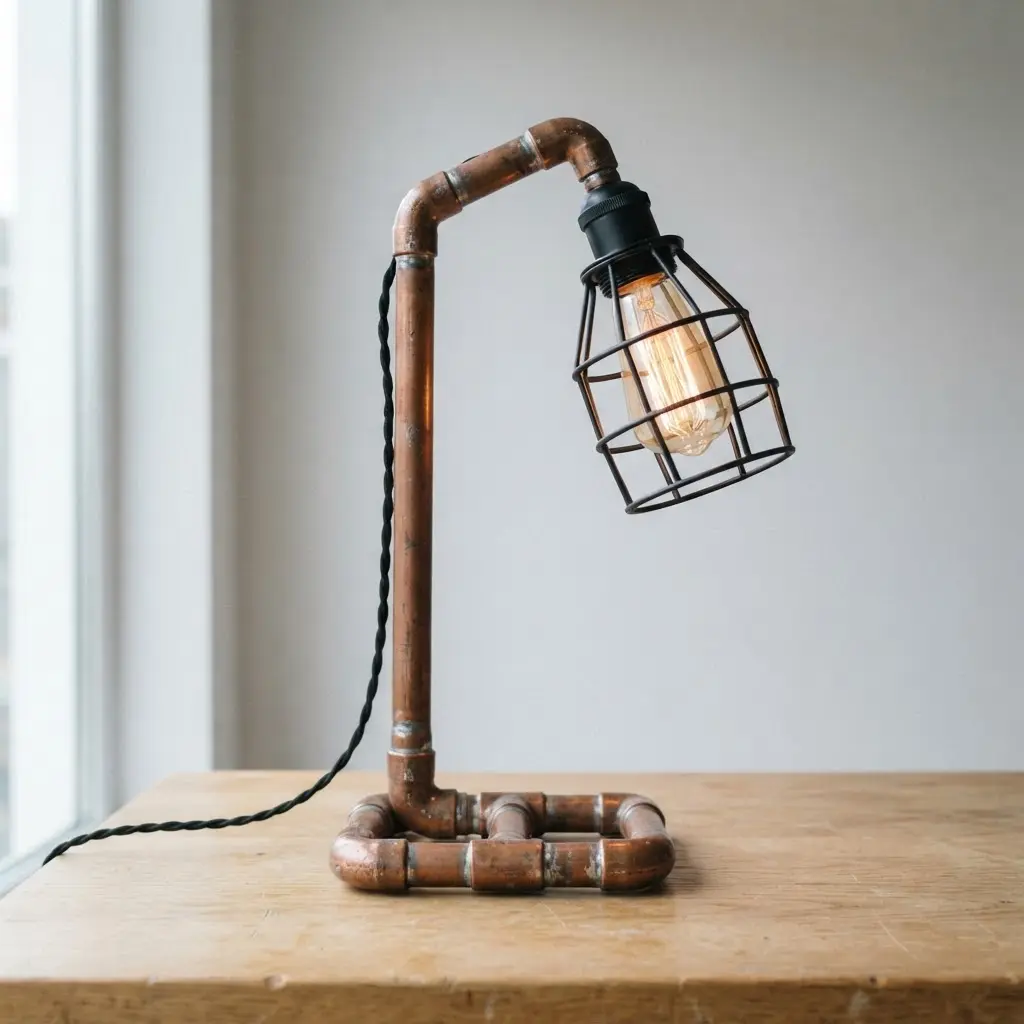
This one looks like it came straight from a chic industrial workshop, and it perfectly captures the rustic charm of classic DIY Copper Light Fixture Ideas. You start by cutting and dry-fitting lengths of copper pipe with simple elbow and tee fittings to form your chosen shape, then wire a socket and thread the cord through.
I love that the copper develops a unique patina over time, so your lamp literally grows more character the longer you own it. Why does this lamp work so well? It brings a warm, handcrafted energy to any desk that mass-produced lights simply can not match.
The design blends rugged, exposed pipes with the soft glow of an LED filament bulb, creating a perfect balance. For a cohesive look in your workspace, this lamp pairs wonderfully with other handmade DIY bedroom decor accents.
Isn’t that satisfying?
6. Vertical Tiered Copper Pipe Torchiere

Does a tall lamp feel intimidating? This one stands out as a vertical masterpiece among modern DIY Copper Light Fixture Ideas. You are basically building a sturdy, tiered sculpture with copper plumbing pipes and fittings, then threading the wire through it.
The light shines upward, creating a beautiful ambient glow that is perfect for cozy evenings. I love how the industrial look of the pipes contrasts with the soft light.
The key is planning your wire path before you permanently assemble anything. Drill those holes for the cord early, and always secure your structure to a heavy, stable base. This prevents tipping and makes the whole project feel professional.
When you flip the switch and see that warm light bounce off your ceiling, you will feel a real sense of accomplishment. It is a custom piece with major style payoff.
7. Copper Framed Box Lantern Light
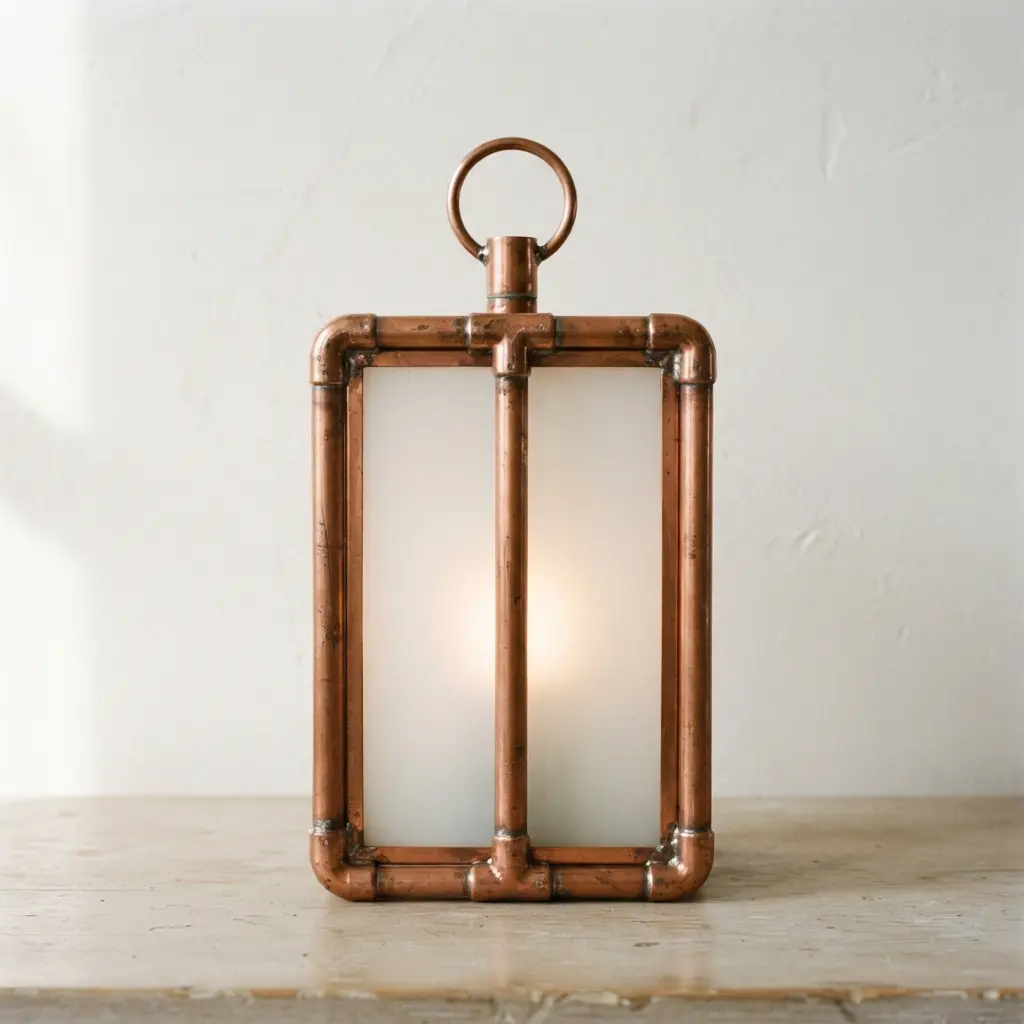
Who knew a simple rectangle could feel so grand? The magic here is in the frame. You build a sturdy box from copper pipes and fittings, soldering the joints for a clean, industrial look.
Then, you slide in panels of seeded or frosted glass to create that classic lantern glow. I love how this piece feels timeless. It works because copper’s warm hue makes any light feel inviting, and its natural patina adds character over the years.
For a truly unique look, browse some unique DIY lamp ideas to see how different enclosures can change the mood. This design ranks as a staple in traditional DIY Copper Light Fixture Ideas.
Trust me on this one. Wear gloves when handling the copper to avoid transferring oils, and take your time with the soldering for strong, even joints.
8. Exposed Copper Conduit Ceiling Mount
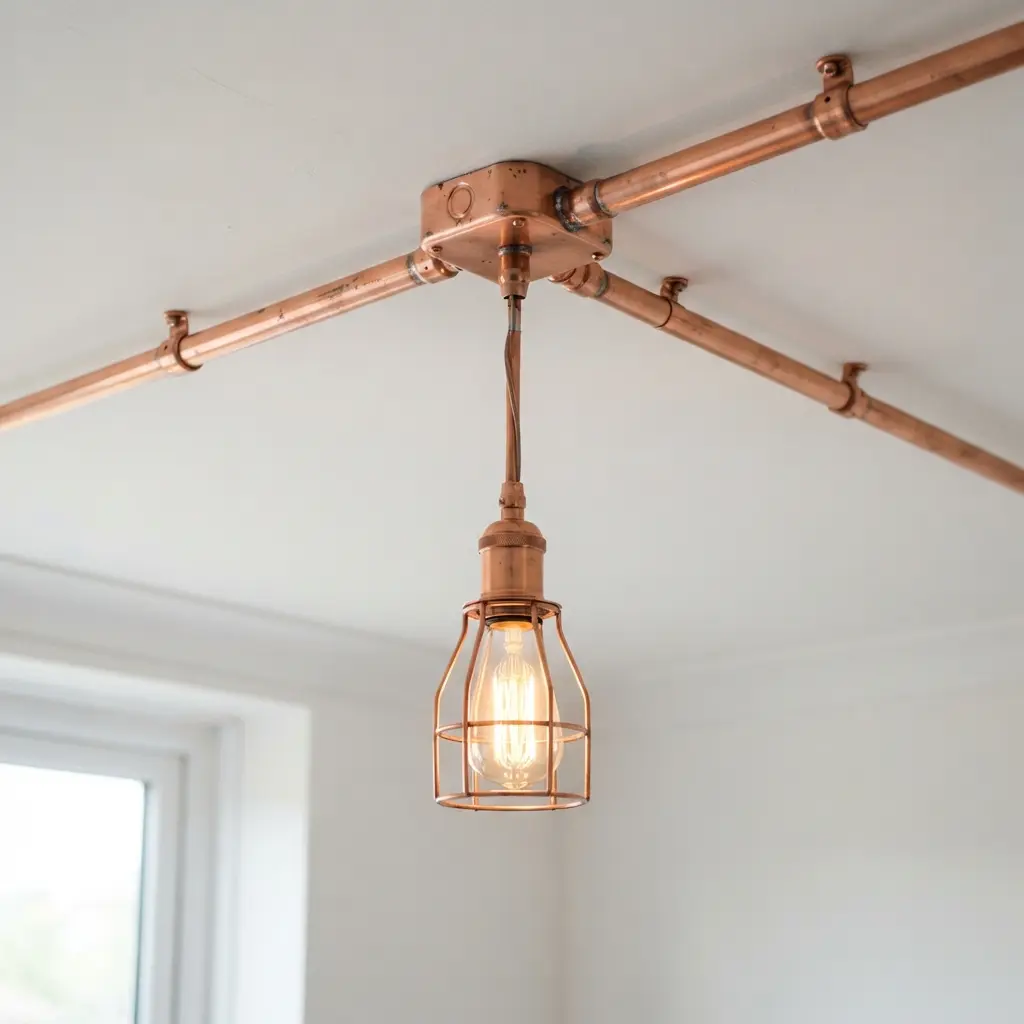
This one looks like it belongs in a loft or an old factory, doesn’t it? You are basically creating a visible, decorative path for your wiring right across the ceiling. The process involves planning your geometric route, then cutting and bending rigid copper conduit to fit it before securing everything with straps.
I love how this idea turns a purely functional electrical run into a striking design feature. It is perfect for adding a light where running wires inside the ceiling is not an option. That patina the copper develops over time gives it so much character.
Your best tip is to practice your bends on a spare piece first. Getting those angles crisp makes all the difference for a clean, professional look. You will feel proud of how this popular technique in industrial DIY Copper Light Fixture Ideas turns out.
9. Floating Copper Pipe Bedside Sconce
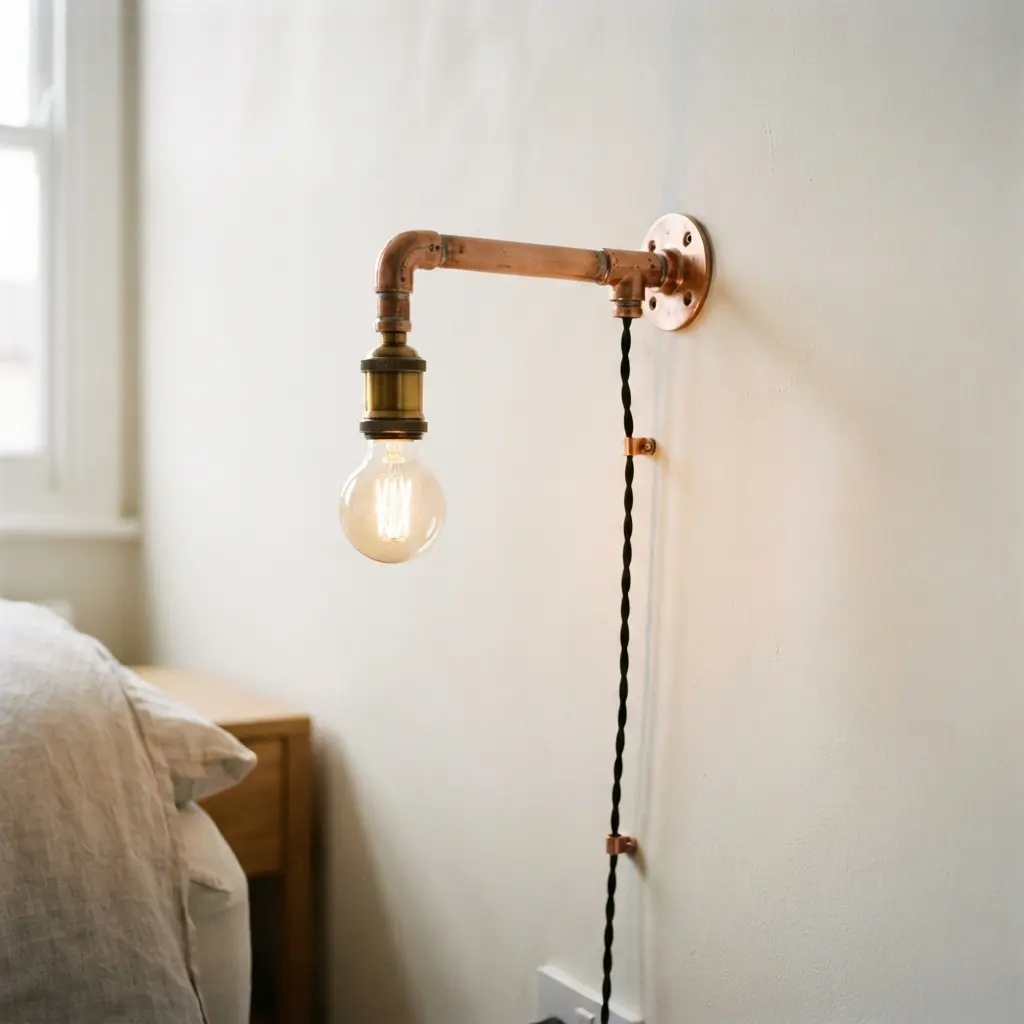
This one is a total space-saver with a huge style payoff. You assemble a simple frame from copper pipes and fittings, then run the cord through the pipes to a socket. That hidden wiring makes it look like it is magically floating on the wall.
I love how the warm glow from an Edison bulb bounces off the copper, creating the coziest reading light. It feels surprisingly sturdy once mounted, but always use the right drywall anchors for safety.
A pro tip? Test your wiring before you screw anything into the wall. That peace of mind is priceless, and it lets you focus on enjoying your new light. Compact designs often deliver the best results for DIY Copper Light Fixture Ideas.
For another way to create atmosphere, look into creative string lighting projects as a complementary idea.
10. Asymmetric Copper Branch Ceiling Light
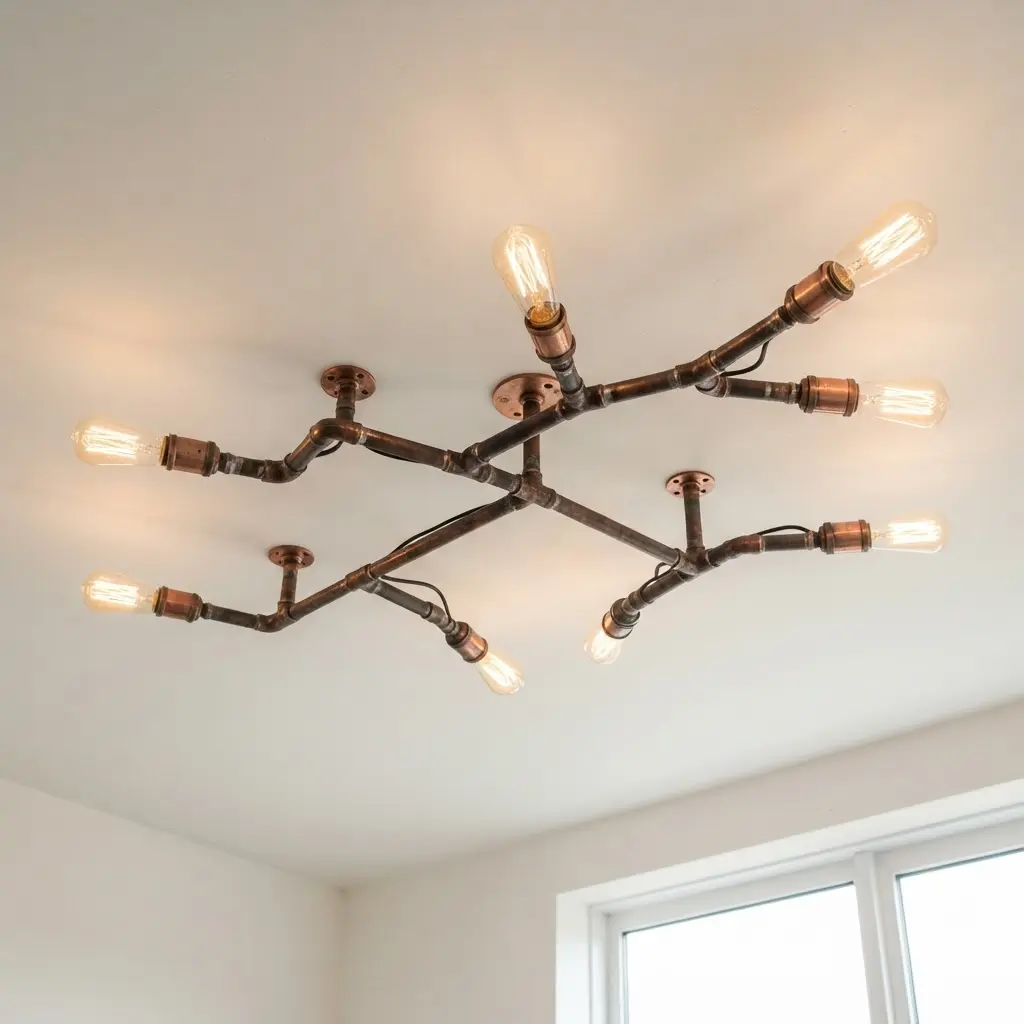
Ever wanted a light fixture that feels more like a piece of sculpture? This organic layout pushes your DIY Copper Light Fixture Ideas toward artistic expression. It involves shaping and joining copper branch segments into an organic, non-linear form that spreads across your ceiling.
The magic is in the deliberate asymmetry, which gives it a natural, flowing look. I love that you can choose your finish, from polished to a beautiful antiqued patina. Small lights are placed along the branches, creating a warm, dappled glow.
This works because it brings a touch of the outdoors inside, making your room feel both cozy and artistic. Plan your branch layout on paper first to get a feel for the balance.
Trust me, when you flip the switch and see that warm light dancing through the copper, you will feel so proud.
Methods For Maintaining Polished Copper Finishes
A protective clear lacquer spray is the only reliable way to keep that bright, shiny copper from developing a natural patina. You must apply it to perfectly clean, grease-free metal, so wipe every surface with vinegar or a dedicated metal cleaner first.
The trick is to use very light, even coats from a consistent distance to prevent drips or a cloudy finish. This step is essential when finishing DIY Copper Light Fixture Ideas for long-term use.
If you prefer the aged look, you can skip the sealant and let time do its work, but know that fingerprints and moisture will accelerate tarnishing. For a controlled antique finish, research chemical patina solutions you apply before the final clear coat locks it in.
Conclusion
Seeing your space transformed by light you made yourself is a special kind of satisfaction. These projects show how a few simple pipes and fittings can become something truly personal and stylish. The best part is you can start small with a single pendant and let your confidence grow from there.
Remember to choose bulbs that give off the warm glow you love, and always double-check your electrical connections for safety. Your home deserves that unique, handmade touch only you can give it. I hope this list sparks your next project and helps you prove that DIY Copper Light Fixture Ideas are worth every minute of effort.
FAQs
Q: Do I need to solder copper pipes for these lights?
A: Most of these projects are designed to use standard plumbing fittings that screw together tightly, so soldering is not required. This makes them much more accessible for beginners. Always use pipe thread tape for a secure, leak-proof connection.
Q: What kind of finish should I use on the copper?
A: It depends on the look you want. You can leave the copper bare for a bright, shiny finish that will naturally patina over time. For a more controlled look, use a clear lacquer spray to seal the shine. A brushed or darkened finish is also an option for a muted industrial feel.
Q: Are these fixtures safe to make as a beginner?
A: Yes, the structural pipe work is very beginner-friendly. The most critical part is the electrical wiring. If you are not comfortable wiring a light socket, purchase a pre-wired socket kit or consult a qualified electrician to help with that final step for complete safety.
Q: What type of bulb works best with copper lights?
A: Edison-style filament bulbs are a popular choice because their warm glow complements the copper beautifully and enhances the industrial aesthetic. Ensure the bulb’s wattage is appropriate for your fixture and that there is adequate space around the bulb for heat dissipation.
Q: Where can I find the copper pipes and fittings?
A: Most hardware stores and home improvement centers carry a wide selection of copper pipes, elbows, tees, and caps in various diameters. You can also find specialized fittings online. Measure your design carefully before you go shopping to ensure you get the right lengths and pieces.


