Leaf Preparation Methods For Durable Surfaces
The fastest way to warp a leaf is skipping the 72-hour pressing step in a heavy book. Trust me, we all think a few hours is enough, but you need that full three days for the leaf to be completely flat and bone-dry. This stable surface is the secret to preventing your acrylic paint from causing the veins to absorb moisture and curl, which remains crucial for successful color blocked leaf craft ideas. You want to start with sturdy leaves like oak or maple, as their thicker structures hold up better. The good news is this simple preparation creates a perfect, durable canvas for those sharp, clean edges your geometric design needs.
Optimal Color Palettes For Geometric Contrast
Your color-blocked leaf will pop with a high-contrast palette built on complementary pairs like orange and blue or purple and yellow. Here is the thing, the rigid, modern aesthetic of this style thrives on bold, simple choices rather than complex, muddy mixes. A monochromatic gradient, moving from a deep forest green to a pale mint, also creates stunning architectural focus. You will notice the sharp boundaries between your zones feel more intentional and graphic when you plan your color blocked leaf craft ideas with distinct and saturated hues. Stick to opaque acrylic paints or paint pens to guarantee that rich pigment adheres to the natural leaf texture without looking washed out.
1. Masking Tape Painted Maple Mural
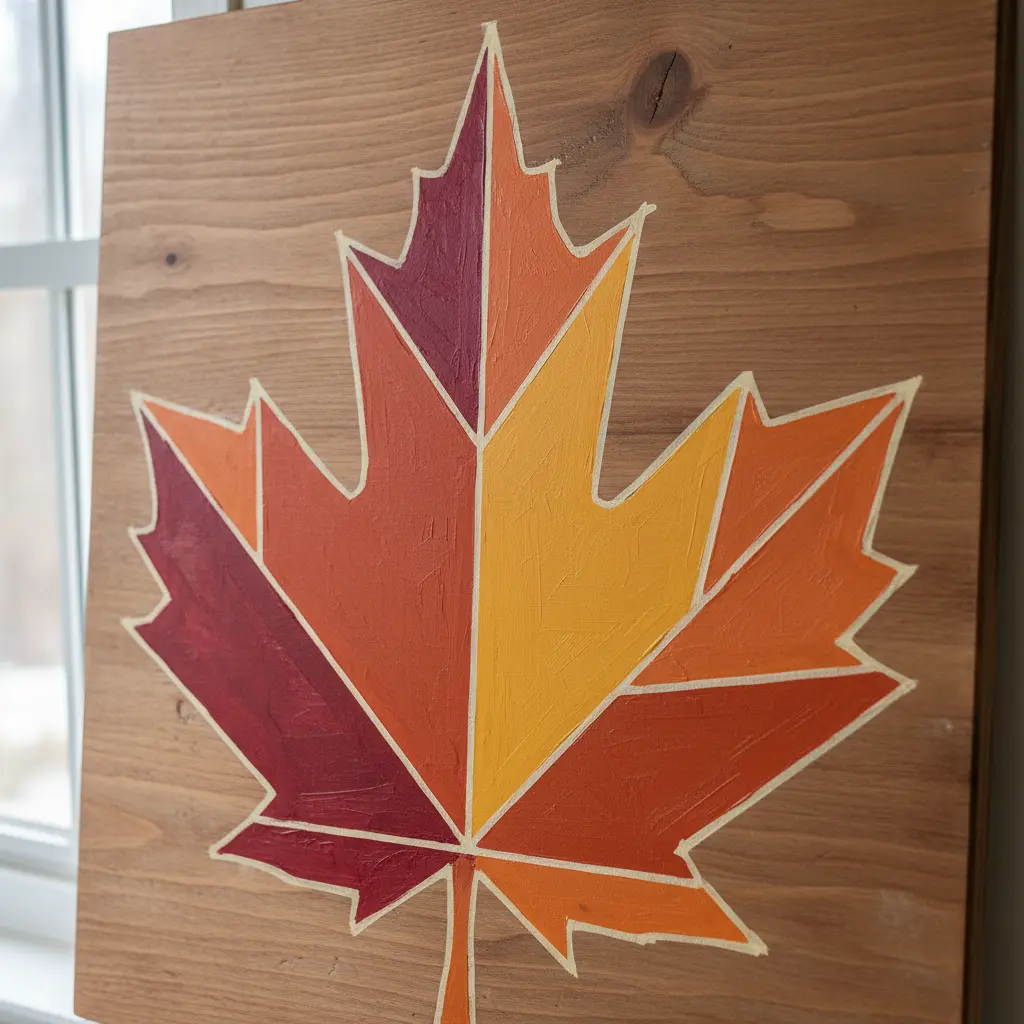
Who would have thought tape could make such crisp, graphic art? This technique uses masking tape as a stencil to create bold maple trees and leaves. You apply tape along your sketched outlines, press it down firmly, and paint your chosen autumn colors inside the shapes. Once you peel the tape away while the paint is still slightly wet, you get those perfect, sharp edges that look so professional. It is a wonderfully forgiving way to achieve a modern mural.
I love exploring color blocked leaf craft ideas because this technique lets you play with bold blocking. For a fun, related project that uses real leaves as a base, you can learn to create charming fox leaf art. That project shares a similar playful, nature-inspired spirit. Trust me, seeing those clean lines appear is incredibly satisfying.
2. Metallic Geometric Ginkgo Leaf Wall Art
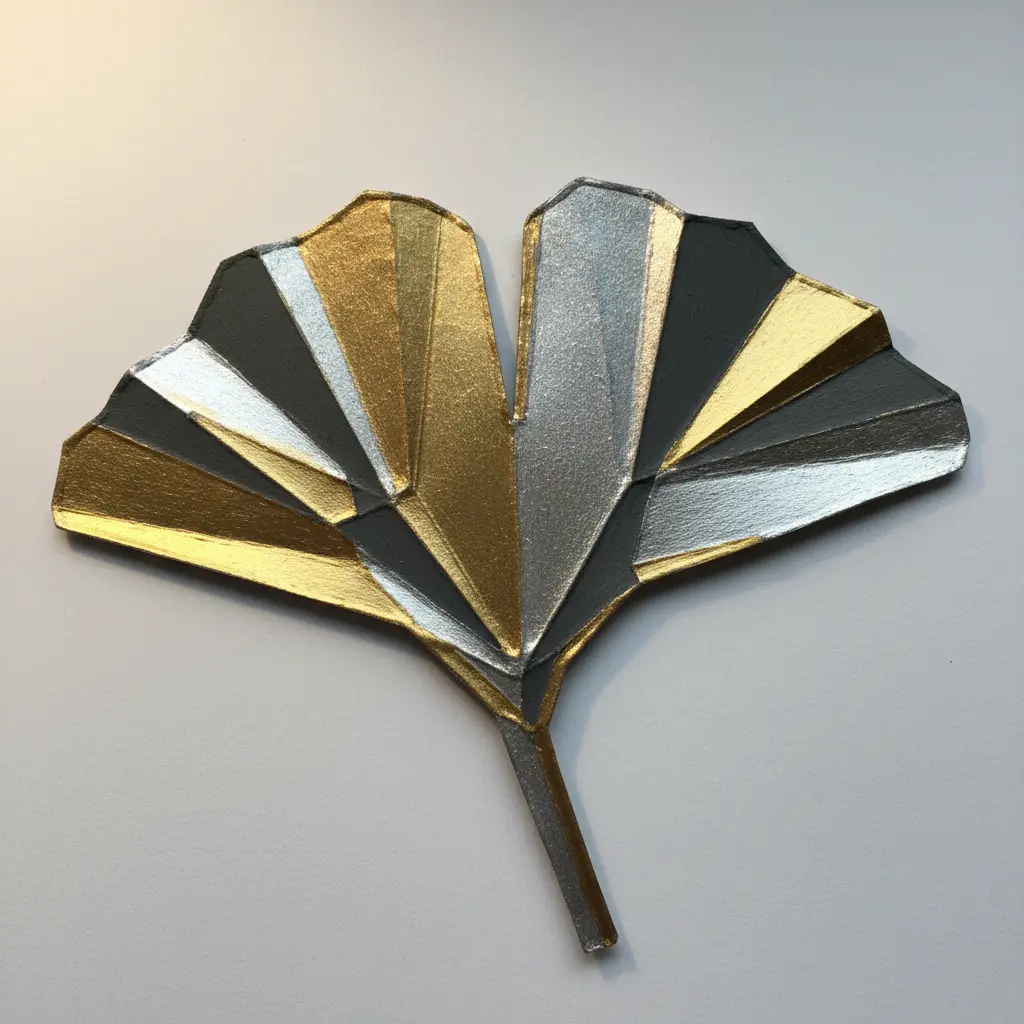
Who would have thought a simple leaf could look so modern and sleek? This design takes the classic ginkgo shape and breaks it down into sharp lines and bold angles, all finished with a gorgeous metallic shine. You will cut and shape pieces of sheet metal or aluminum, then assemble them into that iconic fan silhouette. The final touch is applying a rich gold, copper, or bronze finish that catches the light beautifully from every angle.
It works so well because it brings a touch of nature elegance into a contemporary space, making it a standout among color blocked leaf craft ideas. I love how the geometric lines play against the organic form, creating a piece that is both structured and graceful. For a cohesive seasonal look, you pair this with some DIY festive Thanksgiving leaf crafts using real foliage. Trust me, seeing that metallic glint on your wall is incredibly satisfying.
3. Tissue Paper Mosaic Oak Leaf Suncatcher
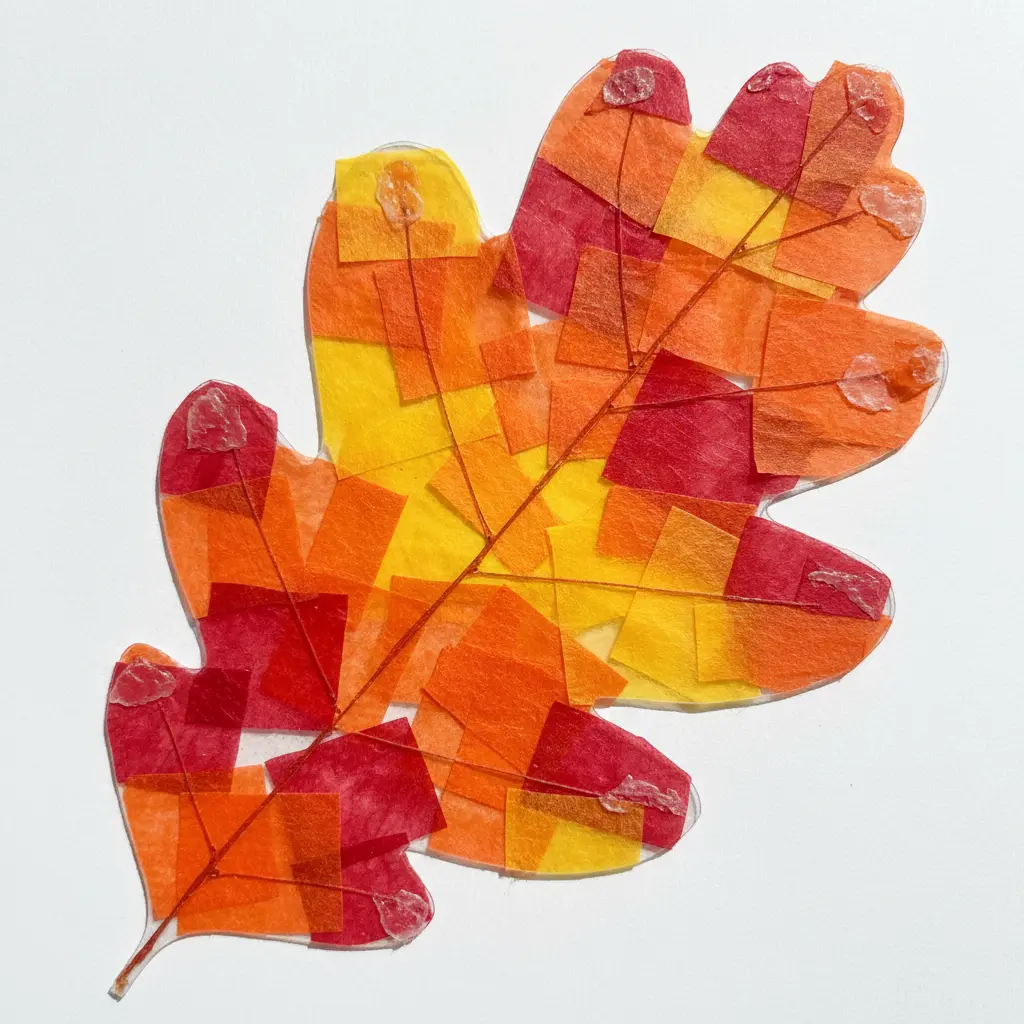
This one looks like a complex stained glass project, but it is incredibly simple and fast to put together. You will arrange small pieces of overlapping tissue paper in autumn colors onto a sheet of sticky clear contact paper, then seal it with a second sheet. When you cut out the oak leaf shape and hold it to the light, the overlapping paper creates a beautiful, multi-tonal mosaic effect.
I love how the light transforms it into a glowing, geometric piece of autumn. The secret to that vibrant, stained-glass look is making sure your tissue paper pieces overlap generously with no gaps, which perfectly aligns with popular color blocked leaf craft ideas. This is a fantastic project to do with kids, and the finished suncatcher makes a wonderful gift. For another project that captures the essence of the season, you could use similar techniques to craft spooky fall wreaths for your door. Trust me, the payoff is huge when you see those colorful patterns dancing on your wall. Does that not look stunning?
4. Neon Sgraffito Etched Birch Leaf Art
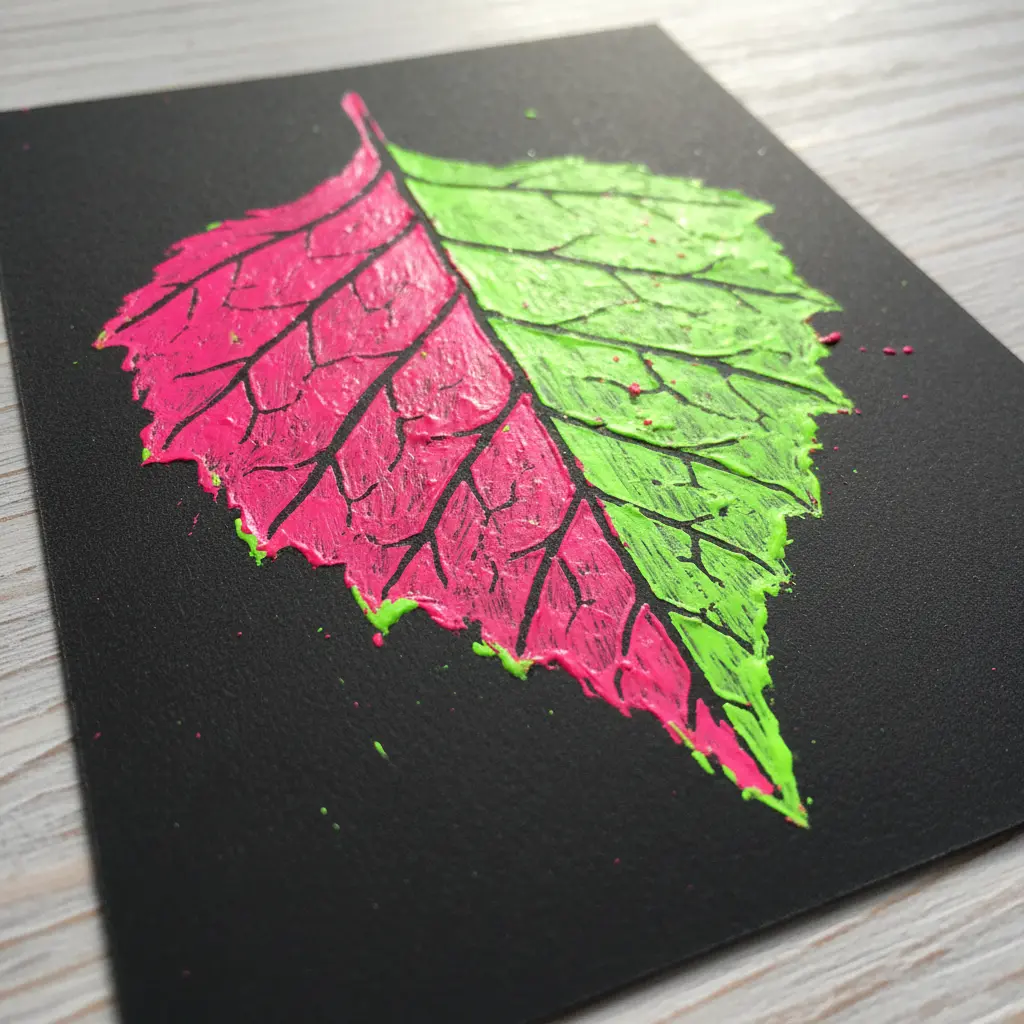
Ever wondered how to make a leaf look futuristic? This technique involves scratching a dark top layer to reveal bright neon colors underneath, creating the birch leaf’s shape and veins. The contrast is instant and electric. I love how the sgraffito etching adds real texture you can feel.
It works because the organic leaf form clashes beautifully with those artificial neon hues. The scratching process is super satisfying, which explains why this technique features heavily in creative color blocked leaf craft ideas. For a similar bold, modern look, you try geometric painting techniques to play with shapes and color blocking. My go-to tip is to practice your scratching pressure on a scrap piece first. Then feel the thrill when your glowing leaf finally appears!
5. Watercolor Gradient Fern Print Series
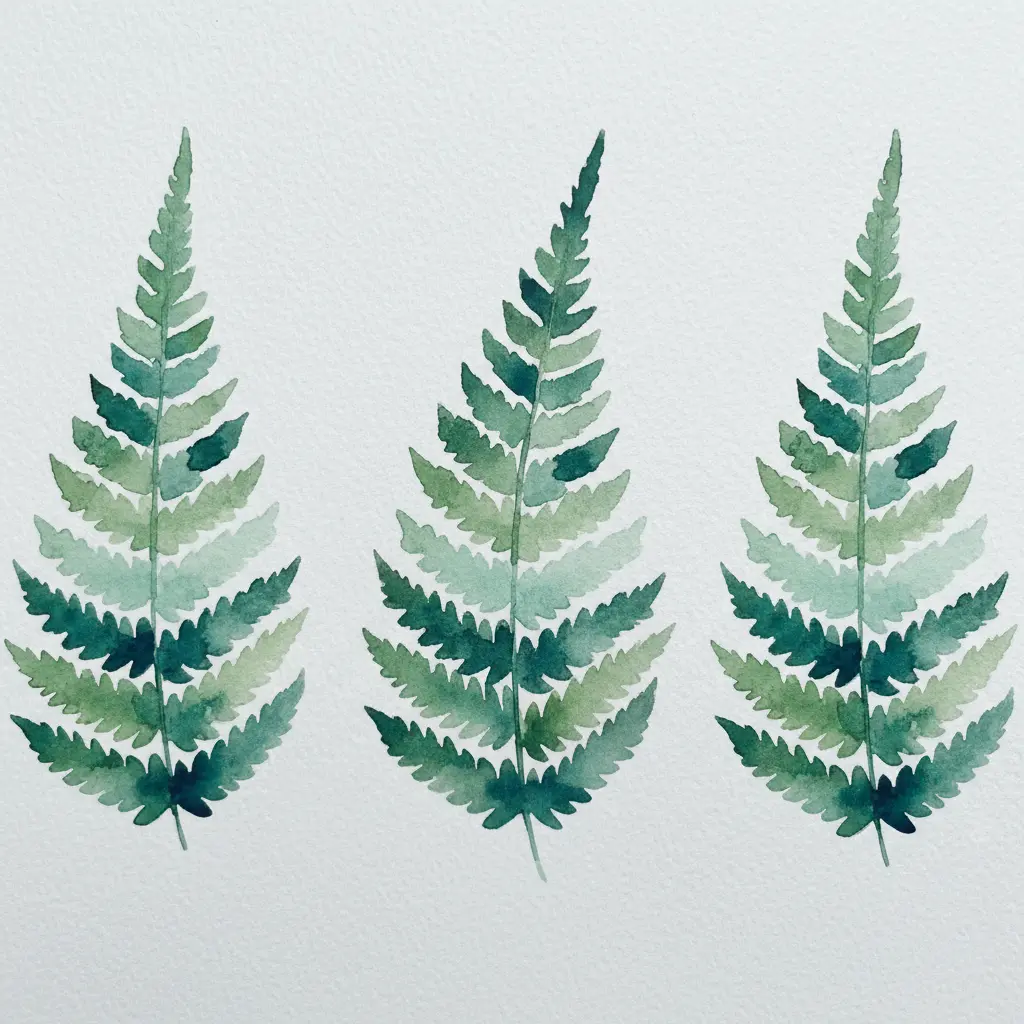
Ever tried making a series of prints that flow together like a quiet forest corner? This project looks like a pro gallery piece, but the core technique is surprisingly approachable. You will create a soft color transition, called a gradient, either within the fern shape itself or as its dreamy backdrop. I love how the wet-on-wet watercolor technique lets the colors bleed and blend on their own for those magical, seamless washes.
It works so well because the soft watercolor perfectly captures the delicate, feathery texture of fern fronds. The gradient adds a modern twist, making each print feel fresh and full of gentle movement. Your patience between layers is essential when planning your color blocked leaf craft ideas, so let each wash dry completely before adding another detail. Once you have your fern series complete, you might want to craft spring wreaths with liners to display them in a seasonal rotation. Does that not sound like a lovely way to keep your nature art in view all year long?
6. Cardstock Geometric Sycamore Leaf Garland
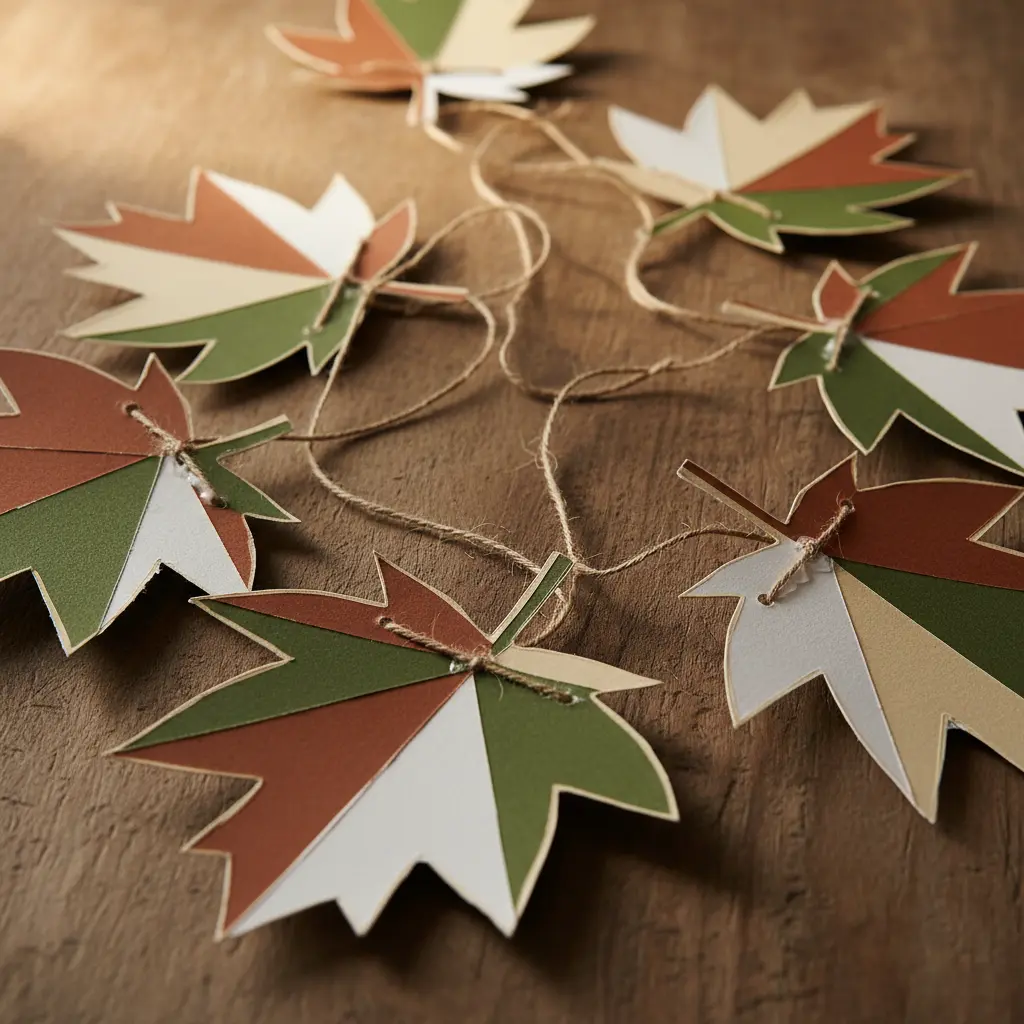
Who would have thought paper leaves could look so modern? This project proves why color blocked leaf craft ideas are perfect for adding a clean, graphic touch to any room. You start with a geometric leaf template and cut your shapes from sturdy cardstock. I love how a cutting machine makes this step so precise, but sharp scissors work fine too. Punch a hole at the top of each leaf, then thread them onto twine or fishing line, spacing them evenly.
It works because the distinct sycamore shape translates perfectly into those crisp angles. You get a garland that feels both natural and artistic. The best part is you swap cardstock colors for any season. Once you hang it up, you will feel so proud of your handiwork. It is a perfect indoor project for a rainy day, much like making creative pumpkin crafts for fall with the family.
7. Acrylic Color Blocked Magnolia Canvas
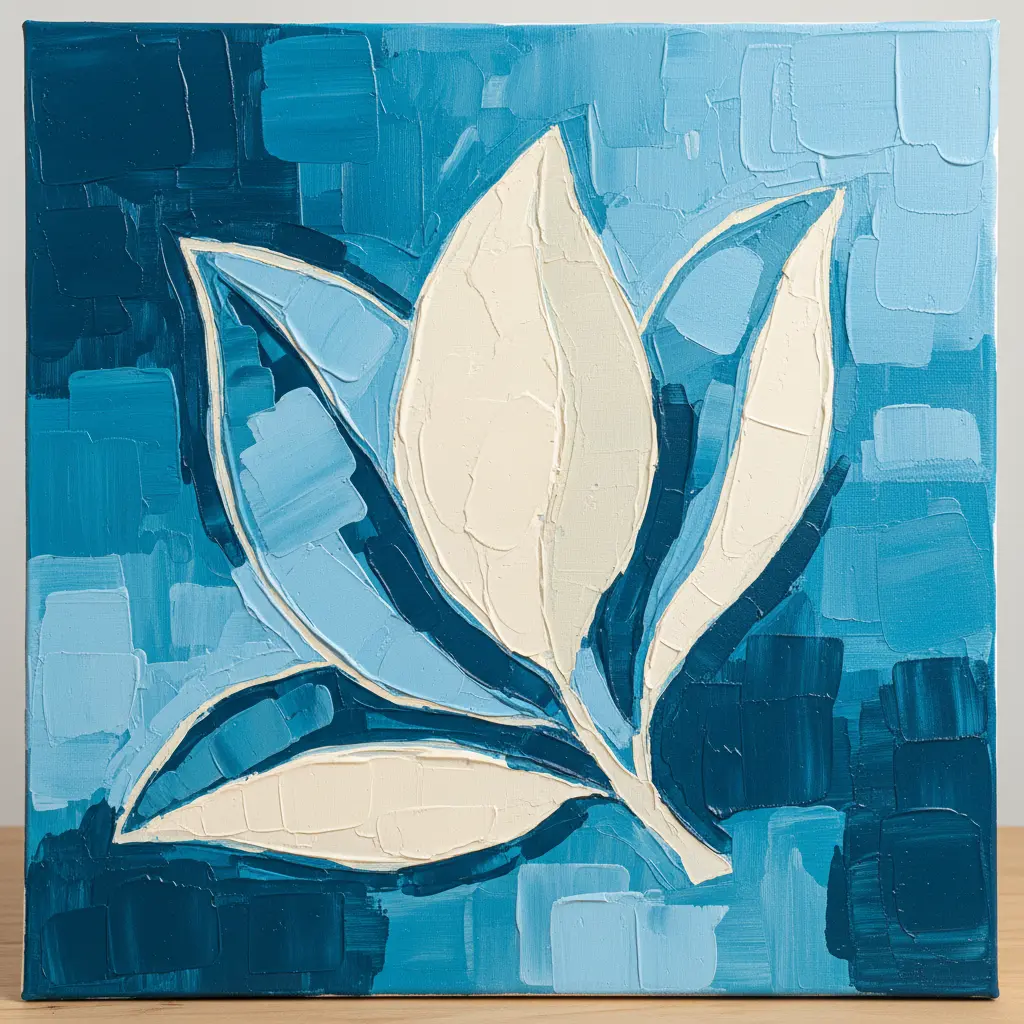
Ever wondered how to paint flowers in a fresh, modern way? This technique stands out among popular color blocked leaf craft ideas because it swaps soft blends for bold, graphic sections of color. You will sketch your magnolia, then fill each petal and leaf with distinct, flat areas of acrylic paint. The result looks almost like a stained-glass window, full of light and life.
I love how this style lets you play with shades. Use a flat brush to lay down a block of light pink right next to a darker one on the same petal. Do the same for leaves with different greens. Resist the urge to blend those edges. The sharp contrast is what gives your painting its striking, contemporary pop.
This is a fantastic project if you enjoy making cute owl themed crafts, as both styles celebrate bold shapes and a playful, graphic feel. Trust me, committing to those clean edges remains the secret behind successful projects, and you will feel so proud when your vibrant magnolia canvas comes together.
8. Paper Collage Abstract Leaf Silhouette Collage
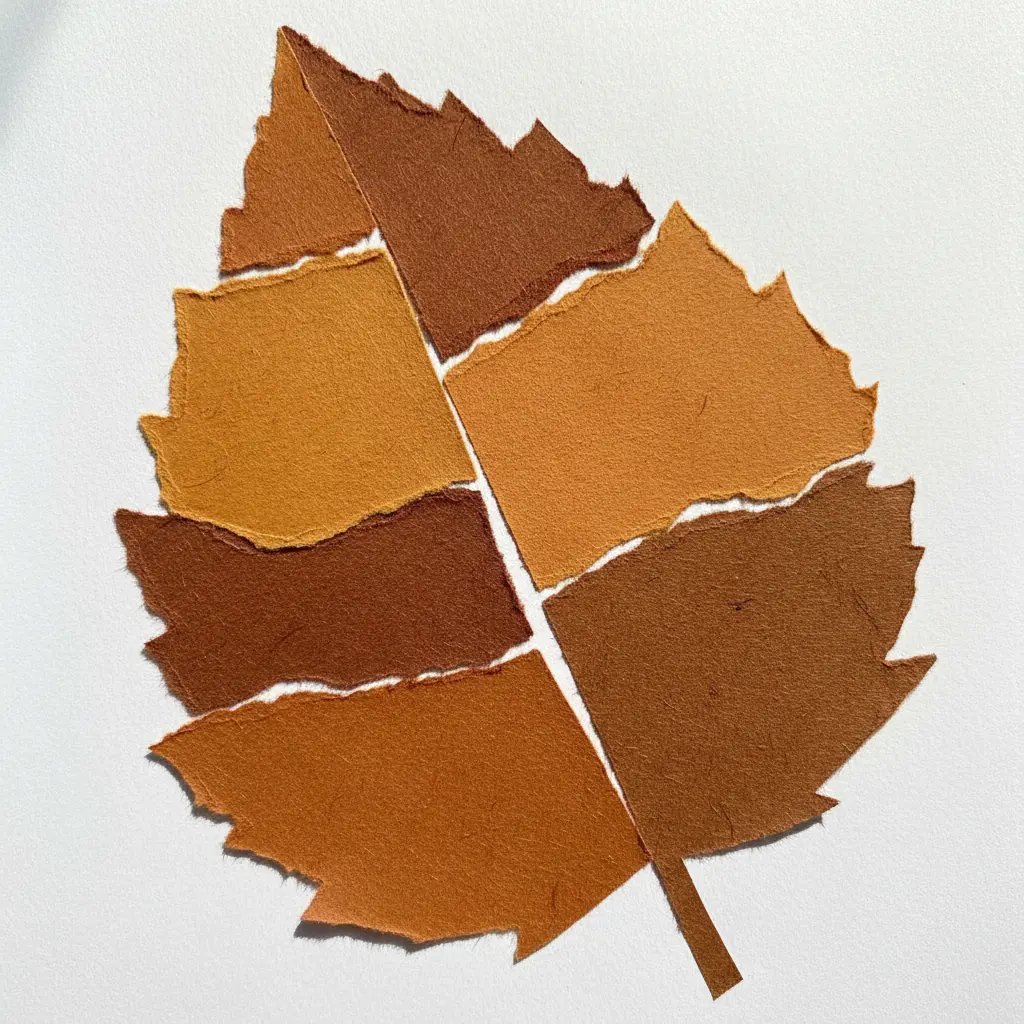
This one looks so intricate, but trust me, it is incredibly forgiving and fun. You start by sketching a simple leaf outline on your base, then fill it entirely with a mosaic of torn and cut paper scraps, a method that perfectly demonstrates why collectors love color blocked leaf craft ideas. I love using a wild mix of patterned scrapbook paper, magazine clippings, and even bits of old maps to create a vibrant, abstract interior.
The magic happens when you stop worrying about realism and focus solely on color and texture. Overlap your pieces and work in small sections to keep the glue manageable. This project works so well because the familiar leaf shape grounds the whole piece, while the crazy paper interior lets your creativity run free. Feel that rush of turning everyday scraps into a stunning piece of art.
9. Crayon Wax Resist Ivy Leaf Motif
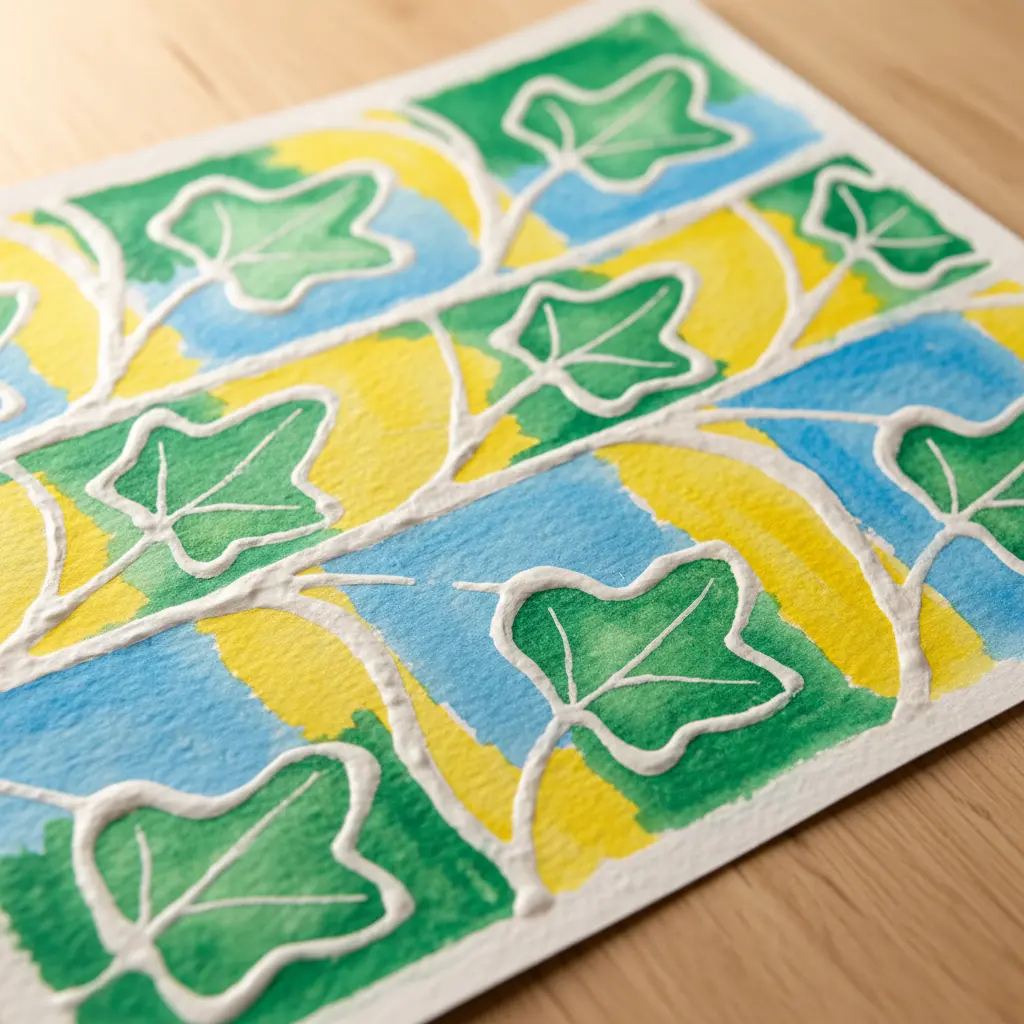
Ever wondered how to get those fine leaf veins to pop so clearly? This technique looks delicate, but it is wonderfully straightforward. You draw your ivy leaves and their veins firmly with a white crayon on watercolor paper, then wash over everything with green paint. The wax repels the watercolor, leaving your drawing crisp and white against the painted background.
I love how this method captures the organic, lobed shape of ivy so perfectly. It works because wax naturally resists water, creating that satisfying contrast for your color blocked leaf craft ideas. For the best result, press down hard with your crayon to deposit a solid wax barrier.
This project pairs beautifully with outdoor inspiration. If you are gathering natural materials, you construct fruit bird feeder ideas from your backyard finds. Feel the magic when your hidden drawing reveals itself under the brush.
10. Minimalist Black Outline Split Leaf Sketch
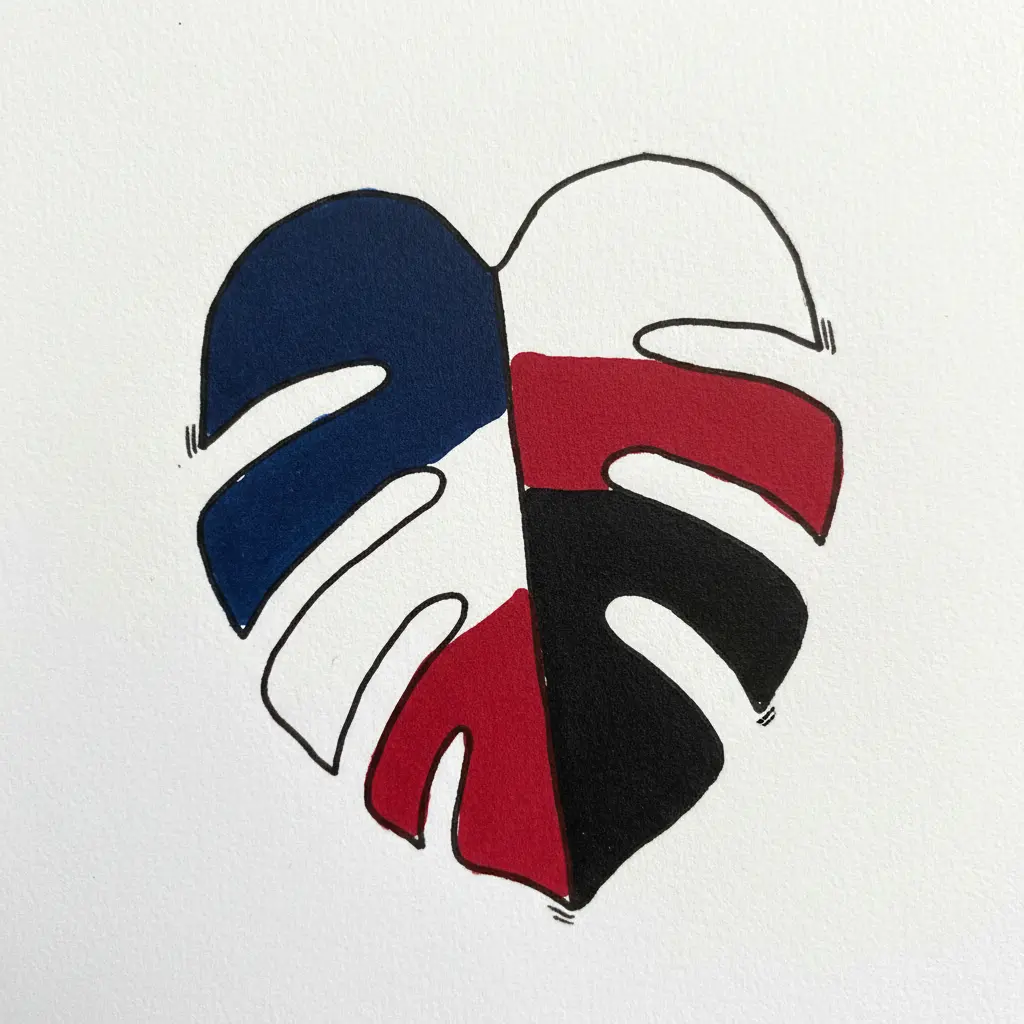
Who would have thought such a clean, modern look could be so beginner-friendly? You start by lightly sketching a simple leaf shape, like an oval or a heart. Then, with a confident hand, you draw a few crisp, straight black ink lines to create those distinctive splits. It shows exactly how accessible color blocked leaf craft ideas truly are when you focus on the silhouette.
I love this one because the magic is in what you leave out. The lack of detail makes the design feel elegant and intentional. Isn’t it satisfying when a few simple strokes create something so striking?
Once you have mastered this technique, you will find it applies to all sorts of projects. It pairs perfectly with other quick, graphic crafts like making fun DIY bubble wands for a playful afternoon.
Preservation Techniques For Decorative Display
Applying proper preservation techniques is crucial for protecting your finished color blocked leaf craft ideas, and one layer of a matte acrylic varnish takes two minutes to lock your work in place for years. This clear coat seals the paint and protects the delicate leaf from humidity and handling. Spray versions work best for an even, thin application that does not disturb your crisp lines or add unwanted gloss. Your finished piece becomes a permanent display item, ready to be framed behind glass or arranged in a shadow box. The final result bridges that beautiful gap between a fragile natural find and a lasting piece of contemporary graphic art.
Conclusion
What makes color blocked leaf craft ideas so satisfying is the way they turn a familiar natural shape into something that feels structured and contemporary. You start with the same leaf silhouette you have seen a hundred times, but the moment you draw a few deliberate lines through it and assign each segment a different color, the whole piece shifts. Suddenly it is not a craft project anymore. It is a design decision. If you are new to this style, give yourself permission to experiment with unlikely color pairings. A neon orange against a muted sage green feels far more striking than anything you might pick from a nature palette. Remember that the crispness of your edges matters more than perfect shading. A roll of good masking tape and a steady hand are your best tools. The projects here give you a starting point, but the real joy comes when you take the technique and apply it to your own favorite leaf shape, in colors that make you smile, for a space that feels entirely yours.
FAQs
Q: What paper should I use for color blocked leaf crafts?
A: Heavy cardstock or mixed media paper works best because it holds up to layers of paint and tape without buckling. Watercolor paper is a good choice for techniques that use wet washes. Avoid thin printer paper, which will warp and tear when you peel off masking tape.
Q: How do I get clean lines between color blocks?
A: Use low-tack artist masking tape designed for delicate surfaces and press the edges down firmly before painting. Remove the tape while the paint is still slightly damp to prevent peeling. For curved shapes, you cut the tape into thin strips and follow the contour of the leaf vein.
Q: Can I use real leaves instead of cut-out paper shapes?
A: Real leaves are too textured and fragile to hold crisp paint blocks, but you can trace around a real leaf onto cardstock to capture the shape. Press the leaf flat under a heavy book for a few days first to get a clean outline. The outline then becomes your template for the color blocked design.
Q: What type of paint gives the most solid color blocks?
A: Acrylic paint has high pigment density and dries opaque, which makes it ideal for bold flat areas. Craft acrylics work well on paper and canvas. For suncatcher projects, translucent glass paint or liquid watercolor on special film gives a luminous effect while still letting you separate colors.
Q: How can I display finished leaf art without damaging the piece?
A: Float frames let the artwork sit without a mat board covering the edges, which works well for pieces that have color all the way to the border. Adhesive putty is a renter-friendly option for lightweight paper crafts. For canvas pieces, a simple hanging wire on the back keeps the display clean and professional.