
Summer is the perfect time for getting creative and DIY projects are a great way to do just that. In this blog post, we’ll show you how to make your own mini summer notebooks! These cute little books are perfect for jotting down notes, making lists, or even as a travel journal. We’ll provide step-by-step instructions, including a list of the materials you’ll need and tips for customizing your notebook to suit your style. So grab some glue and let’s get crafting!

Summer is here! And with the sunshine come vacations, camping trips, weekend getaways, and other outdoor adventures. Any time I plan a trip, I always make sure to bring a little notebook with me to record all the special memories that happen along the way. This mini summer notebook is the perfect companion to any adventure, plus it uses recycled materials and is easy to make!
MINI SUMMER NOTEBOOK
Materials:
• Colored Card Stock or other pretty paper (for your notebook cover)
• Stamps and ink pad (to decorate your cover)
• Recycled papers (for your inside pages)
• Bakers twine (for the binding)
Tools:
• X-acto knife
• Ruler
• Cutting board
• Paper cutter (optional)
• Bookbinding Awl
• Bone Folder
• Bookbinding needle

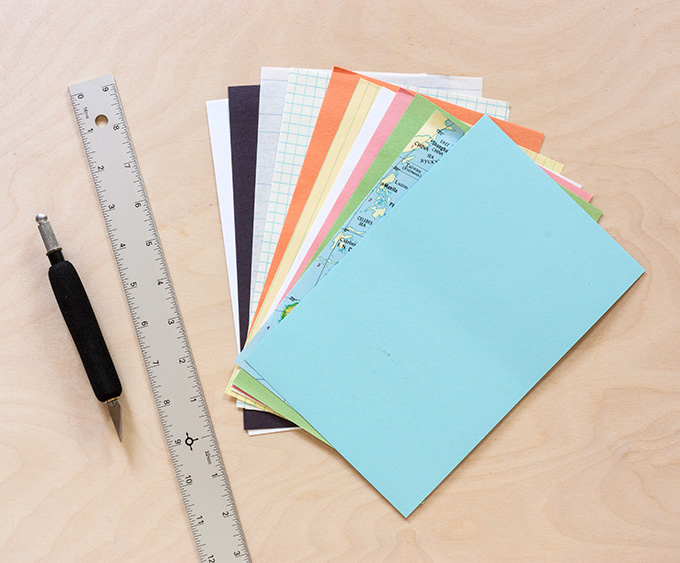
1. Cut your papers to size
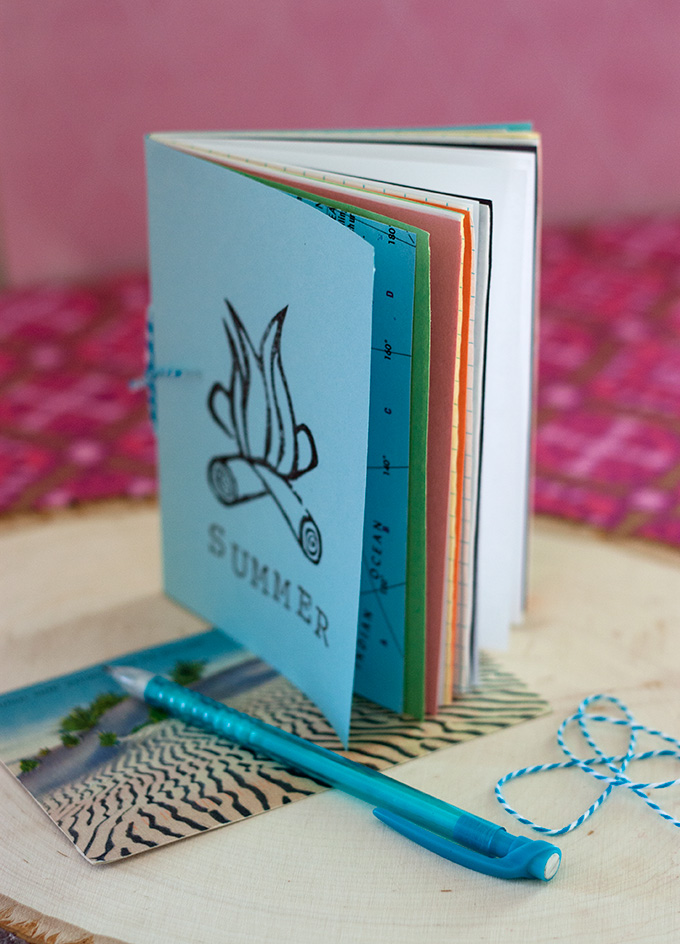
For the cover, I chose a thick colored cardstock. The thicker the notebook cover, the better. You can also try using handmade paper. For the inside pages, I used a variety of recycled papers I had on hand like lined notebook paper, copy paper, graph paper, construction paper and even some pages cut out of old books and magazines.
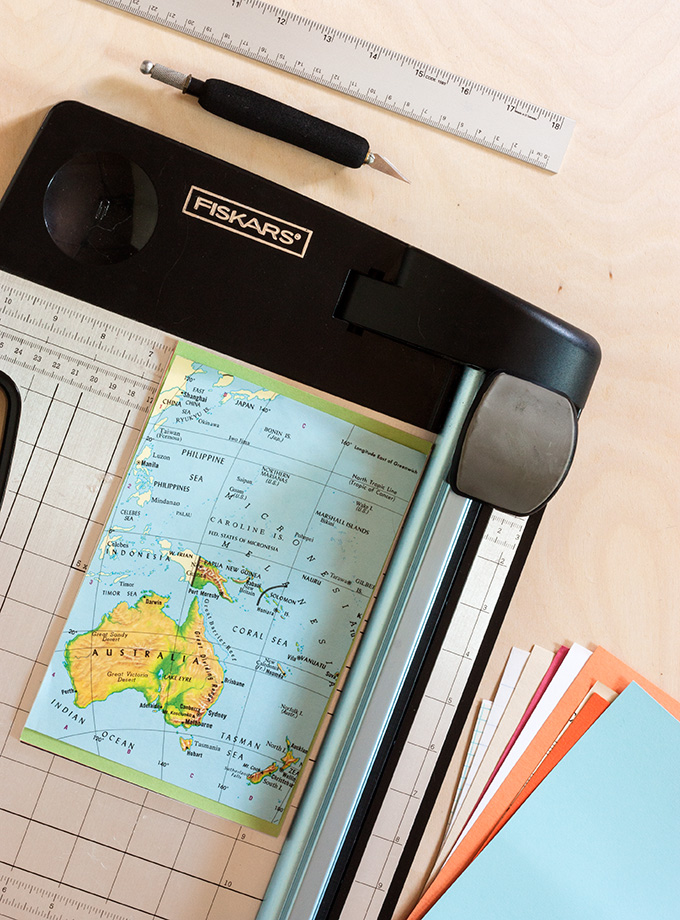
I wanted my notebook to fit easily into my backpack or purse so I chose to make the finished size 4.25”x5.5”. Using my paper cutter (or a ruler and x-acto knife works too), I cut all my papers (cover and inside pages) 8.5”x5.5” inches, which when folded in half, will become the finished size.
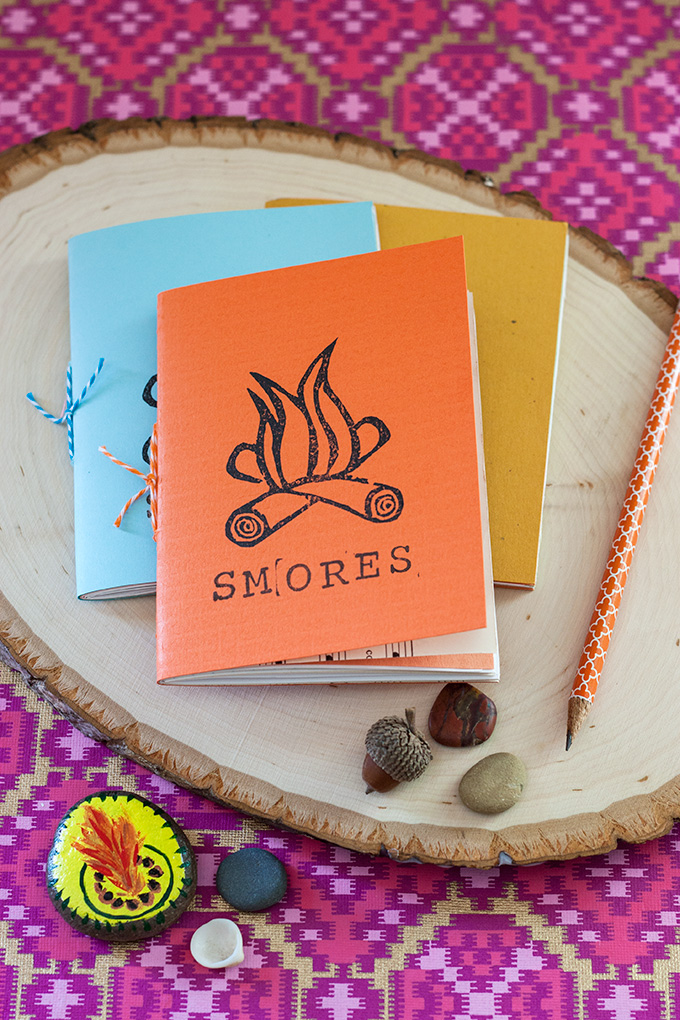
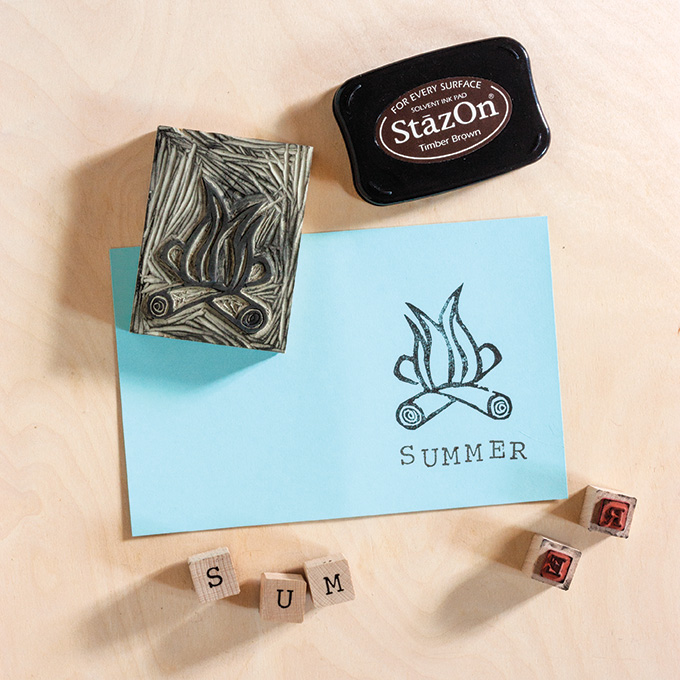
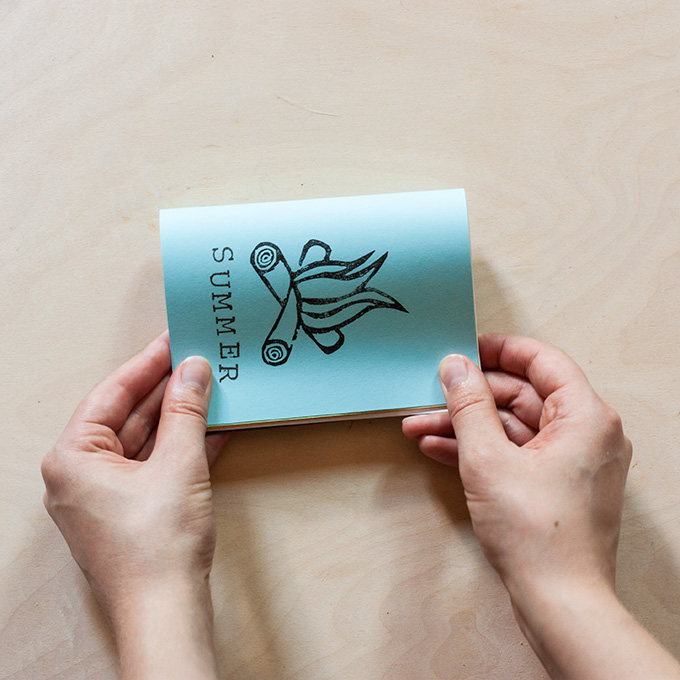
2. Decorate your cover
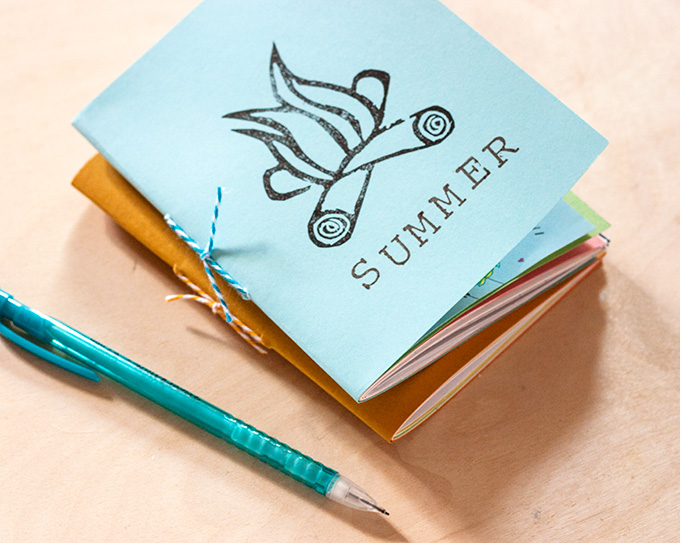
To decorate my cover, I decided to carve my own stamp. And since I plan to take this notebook with me on a camping trip, I chose to carve a campfire. I also stamped the word “summer” below using my set of alphabet stamps.
Feel free to decorate your cover however you want! You could also collage your cover, draw or paint something, or cover the entire thing in wash tape. It’s up to you!
3. Prep your inside pages
I chose 15 sheets of paper for the inside of my journal, which when folded in half will become 30 pages. This is the perfect amount for me to fill up while on vacation.
To prep the inside pages for binding, gather the cover and inside pages together (in the order that you want them to be) and fold the entire thing in half making a crease in all the pages. You can use the bone folder to get a nice clean fold/crease.
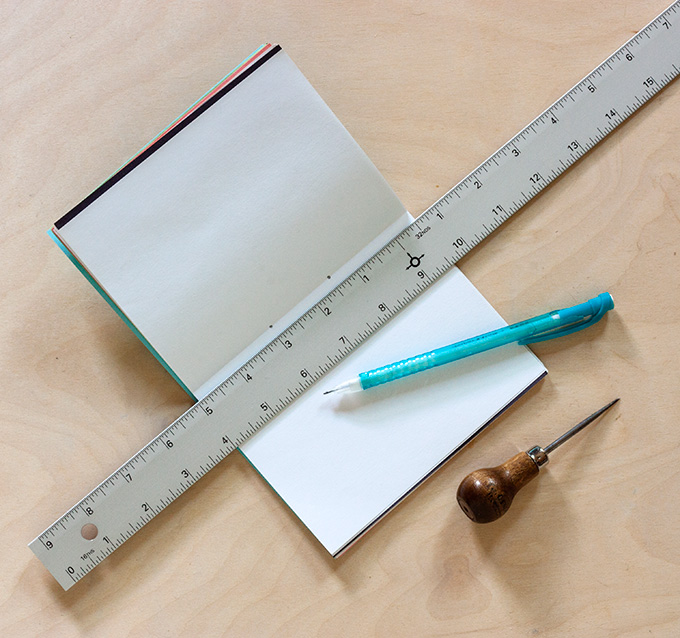
4. Bind Your Notebook
Starting at the middle of your book (cover page is on the bottom), take 5 pages from your stack. Using a ruler to measure, draw two dots 1 ½” apart at the center of the fold. Take the bookbinding awl and punch a hole through all 5 sheets where you marked with the pencil. Set aside. Repeat this process two more times, or until you have holes punched through all your pages.

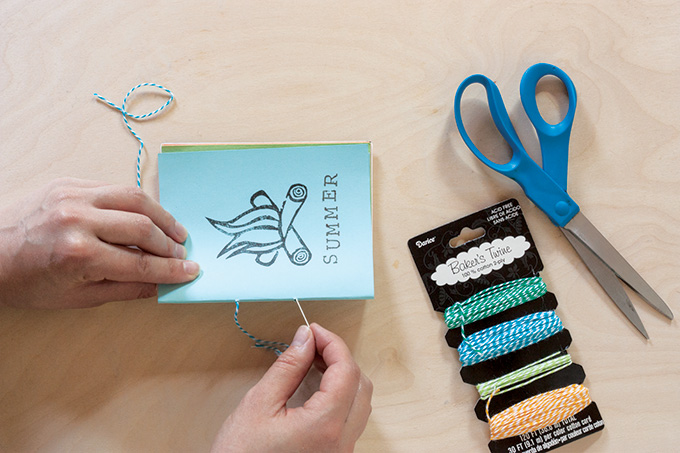
Reassemble your notebook back to its original order. Using a piece of baker’s twine and a bookbinding needle (or other needle with a large enough eye to thread the baker’s twine through), stitch the notebook together. Then tie a knot and trim.

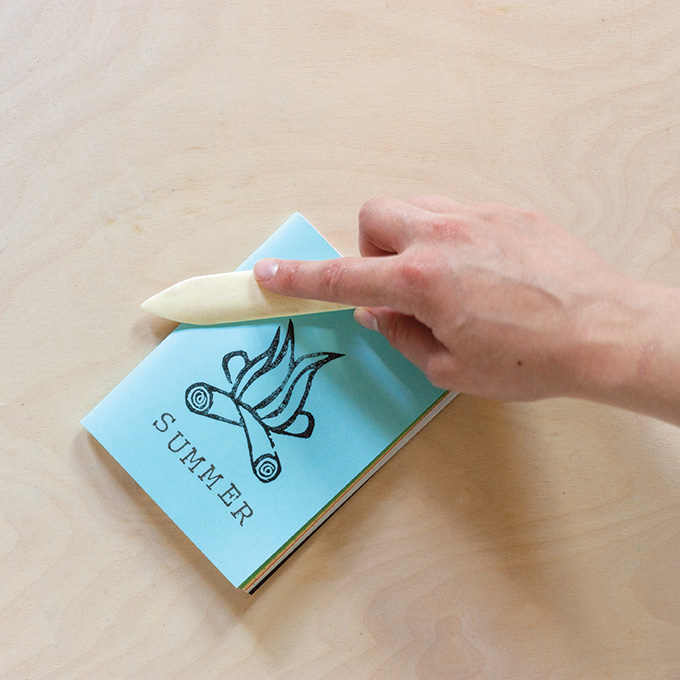
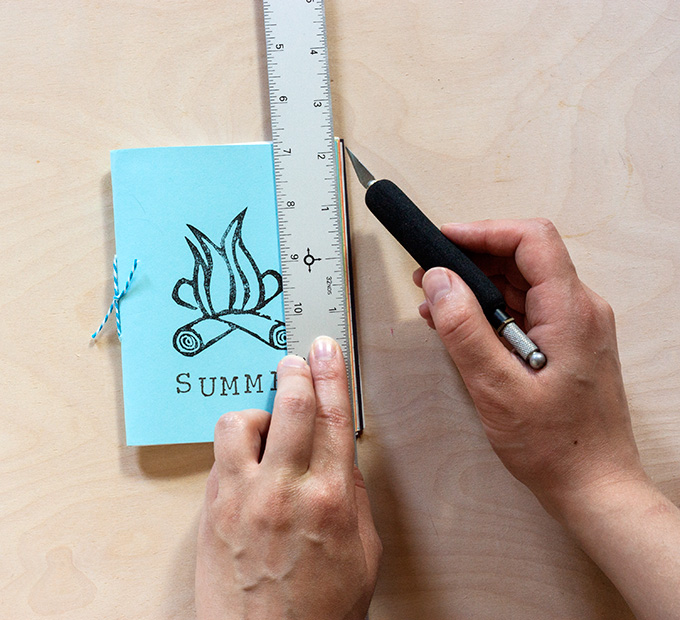
One final touch you can do (which is totally optional) is to trim your finished notebook. You’ll notice that with the pages folded in half, the inside papers peek out of the cover. You can use a ruler and x-acto knife to carefully trim the excess making for a clean, finished notebook.
That’s it! Now you have a fun mini summer notebook to take with you on all your summer adventures. Do you have any other summer travel traditions? Like making a photo album of your trip, collecting ticket stubs, or pressing leaves and flowers you collect along your way?
Creating your own mini summer notebooks is a fun and creative way to document your summer adventures. These DIY notebooks are perfect for capturing memories, jotting down ideas, or even just doodling on a lazy summer day. By following the simple steps outlined in this blog post, you can easily make your own customized mini summer notebooks that reflect your personal style and creativity. We hope you found this tutorial helpful and inspiring. If you decide to give it a try, let us know in the comments how your notebooks turned out!
FAQs
Q: What can you use mini notebooks for?
A: documenting routines or development, such as a diet journal or a log of workouts at the gym.
Keeping handy information, such as dates, measures, or directions, close to hand.
keeping track of a list of active pens that are inked or an ongoing swab book of inks.
Q: What are mini notebooks called?
A: A Pocket notebook, also referred to as an A6 notebook, is about half the size of an A5 and fits even more conveniently in your pocket or purse. It is true that keeping things tiny necessitates reducing the amount of page space, and the smaller pages make writing in a pocket notebook a little more challenging.
Q: What are the three types of notebooks?
A: Notebooks with a hard cover, a soft cover, or a flexible cover are the most common type of book.


