Surface Preparation and Paint Curing Requirements
The fastest way to ruin your project is using the wrong base surface, as glossy or untreated wood won’t hold paint correctly. You need a chalkboard paint or specialized vinyl designed for a true matte finish, which provides the authentic, high-contrast backdrop your vibrant stars need. Trust me on this, proper prep involves sanding your base smooth and applying multiple thin coats, letting each cure fully.
That curing time is not a suggestion, and studying proven star chalkboard wreath ideas confirms that rushing this step means your designs will smear right off during assembly. The good news is a properly prepped surface accepts crisp lines from white paint pens for those perfect geometric borders and star doodles.
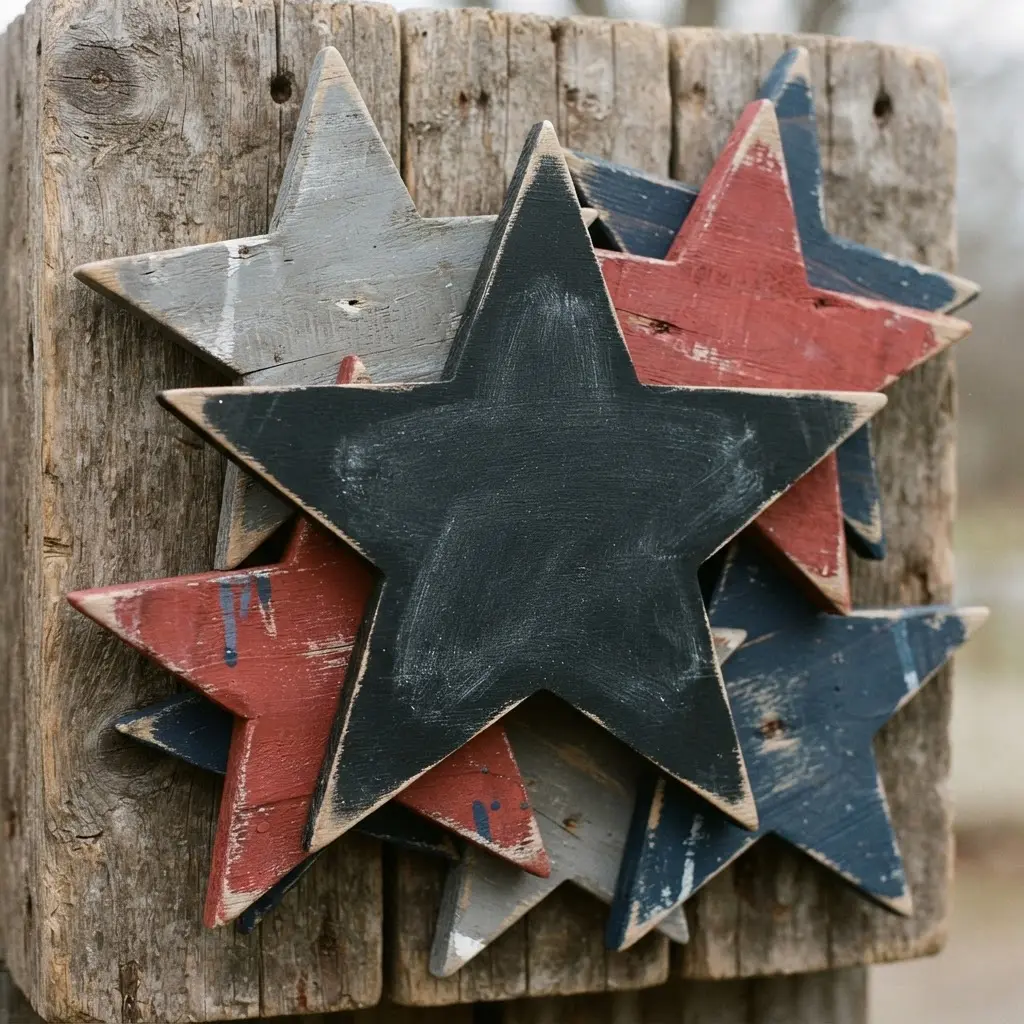
Selecting Durable Weatherproof Patriotic Accents
Your wreath will lose its charm fast if your red, white, and blue elements fade or warp after a single season outdoors. The trick is to choose materials with built-in durability, like metal star cutouts or sealed wooden shapes that resist moisture. We all know burlap and jute twine add that perfect rustic texture, but look for treated versions or plan to give them a light protective spray yourself.
For the star motifs, vary the materiality between, say, a galvanized metal centerpiece and smaller cardstock stars layered behind it to create visual depth. This mix prevents a flat, monotonous look while ensuring each component in your favorite star chalkboard wreath ideas can withstand being displayed on your front door.
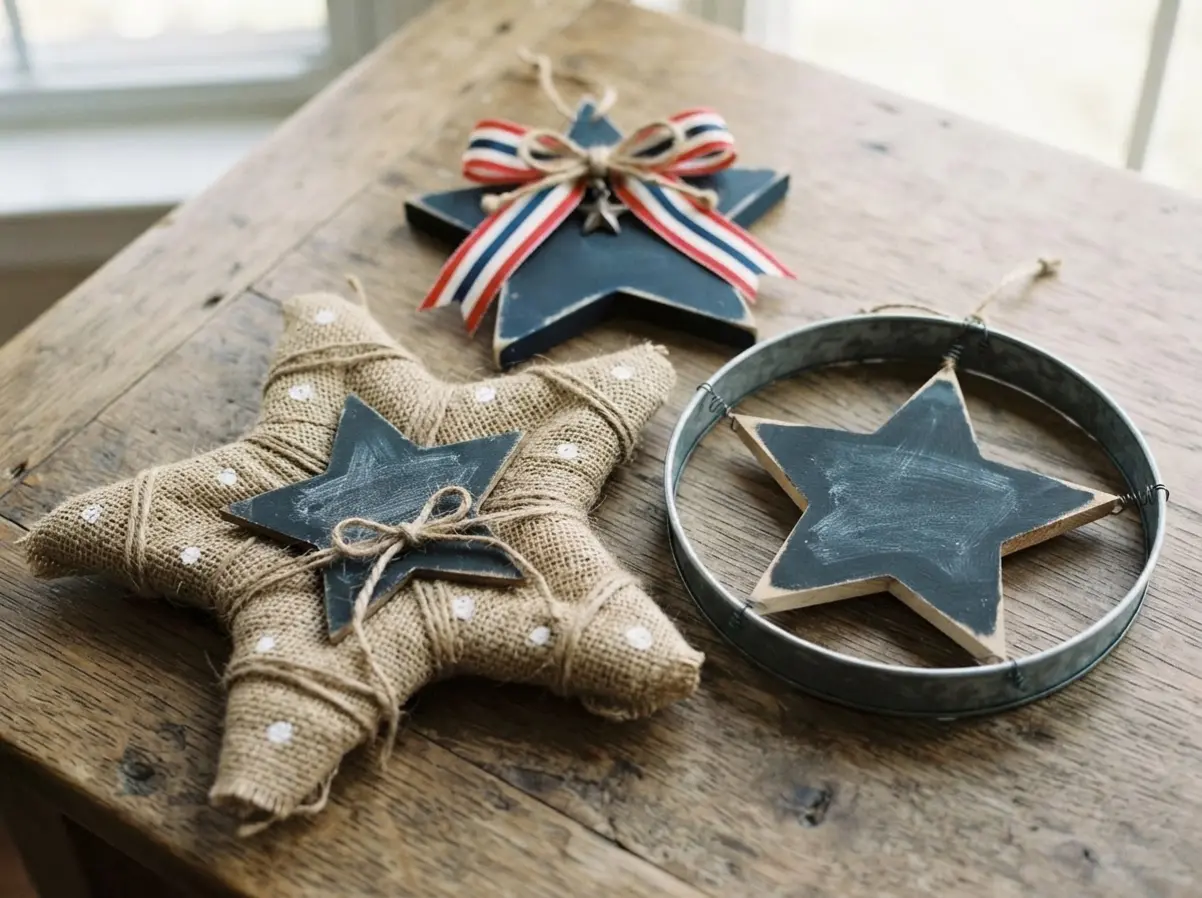
1. Rustic Burlap Star Chalkboard Wreath
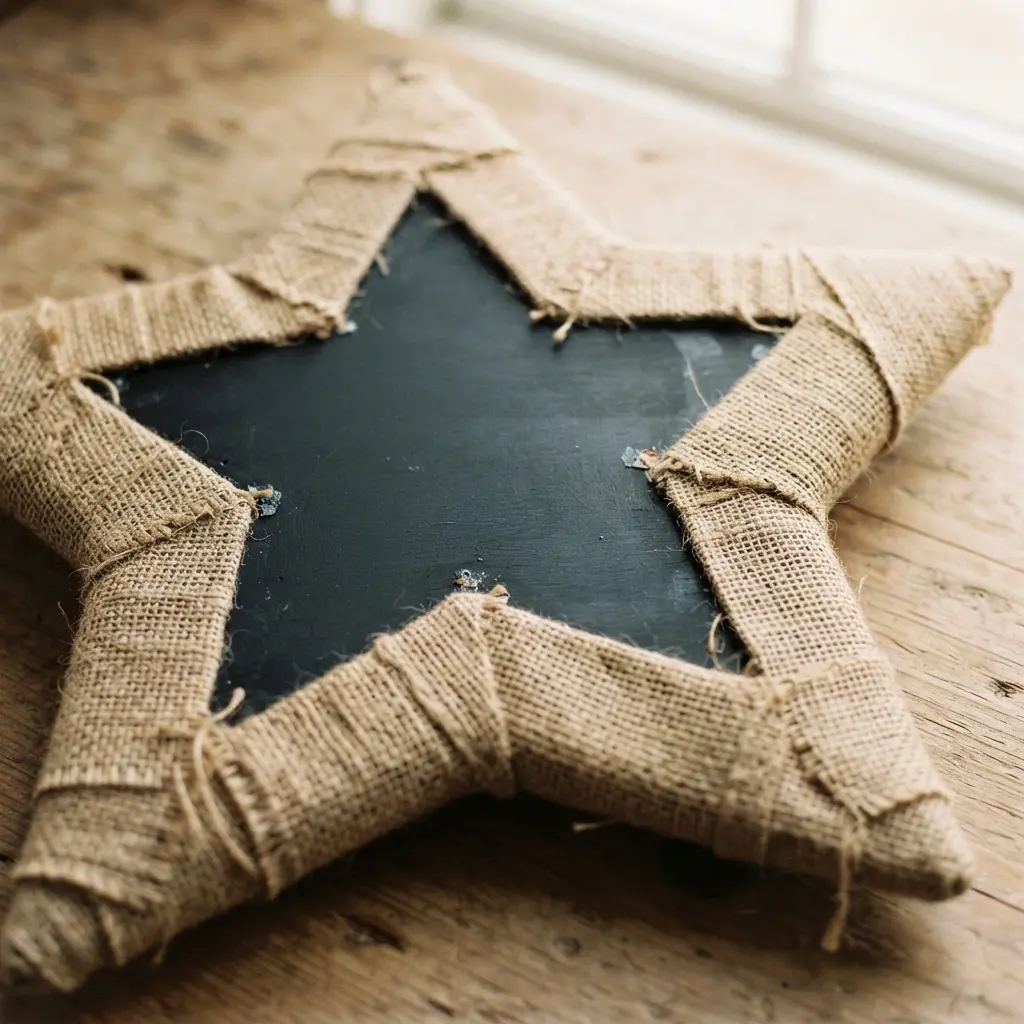
This one surprised me because it looks like a complex piece, but it truly comes together with a few simple materials. You start by wrapping or looping burlap ribbon around a wire frame to build that wonderfully textured base. Then, you hot glue a wooden star right in the center and attach a small chalkboard piece to it.
Why does it work so well? The burlap gives it that cozy, farmhouse warmth we all love, while the chalkboard lets you write a new message for any holiday or season. My best tip is to use plenty of hot glue to secure everything, just as many creators of star chalkboard wreath ideas recommend for long-lasting results.
2. Galvanized Metal Framed Chalkboard Star

This one brings a lovely rustic texture to your wall. You get a classic five-pointed star shape, but the frame is made from that sturdy, slightly mottled galvanized metal. It has that perfect farmhouse charm, and the dark chalkboard surface in the center is ready for your messages or drawings.
I love how functional it is because you can write a daily quote, a family message, or even use it as a menu board for a backyard barbecue. The industrial frame stays incredibly durable over time, helping your piece stand out among typical star chalkboard wreath ideas on the porch.
Remember to season your chalkboard first by rubbing chalk over the entire surface and wiping it clean. Doesn’t that mix of style and practicality feel exactly right for your entryway?
3. Patriotic Floral Boxwood Chalkboard Wreath
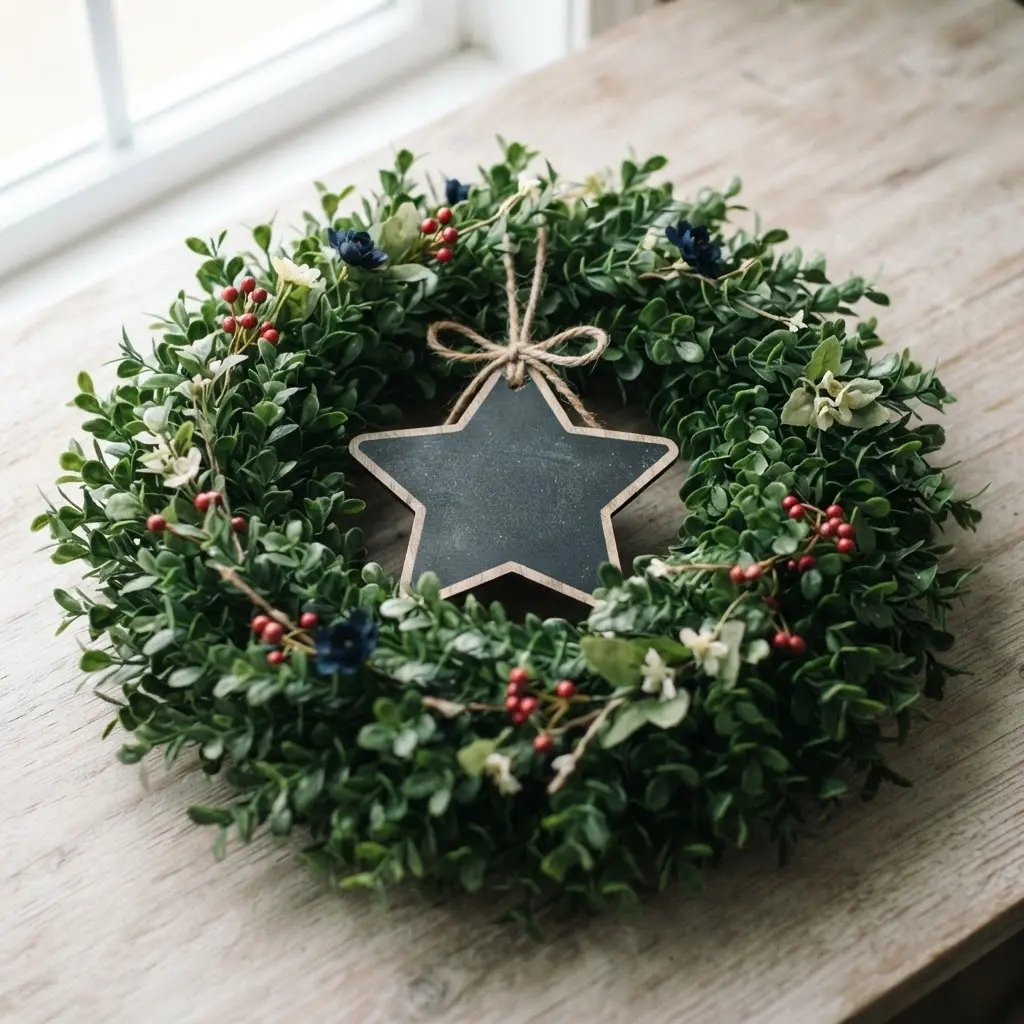
This design looks so fancy, but it is one of the friendliest wreaths to put together. You start with a lush base of artificial boxwood greenery on a simple wreath form, then tuck in your red, white, and blue flowers. The chalkboard centerpiece is where the personal magic happens.
I love how you can change the message for any holiday or just your family’s name. That custom touch makes it feel special every time you see it, which is why top star chalkboard wreath ideas always prioritize a clean, legible design on your chalkboard sign.
To make the display feel extra complete, consider crafting a decorative washi tape star to nestle alongside the flowers. It ties the whole patriotic theme together beautifully.
4. Red White Blue Ribbon Chalkboard Star
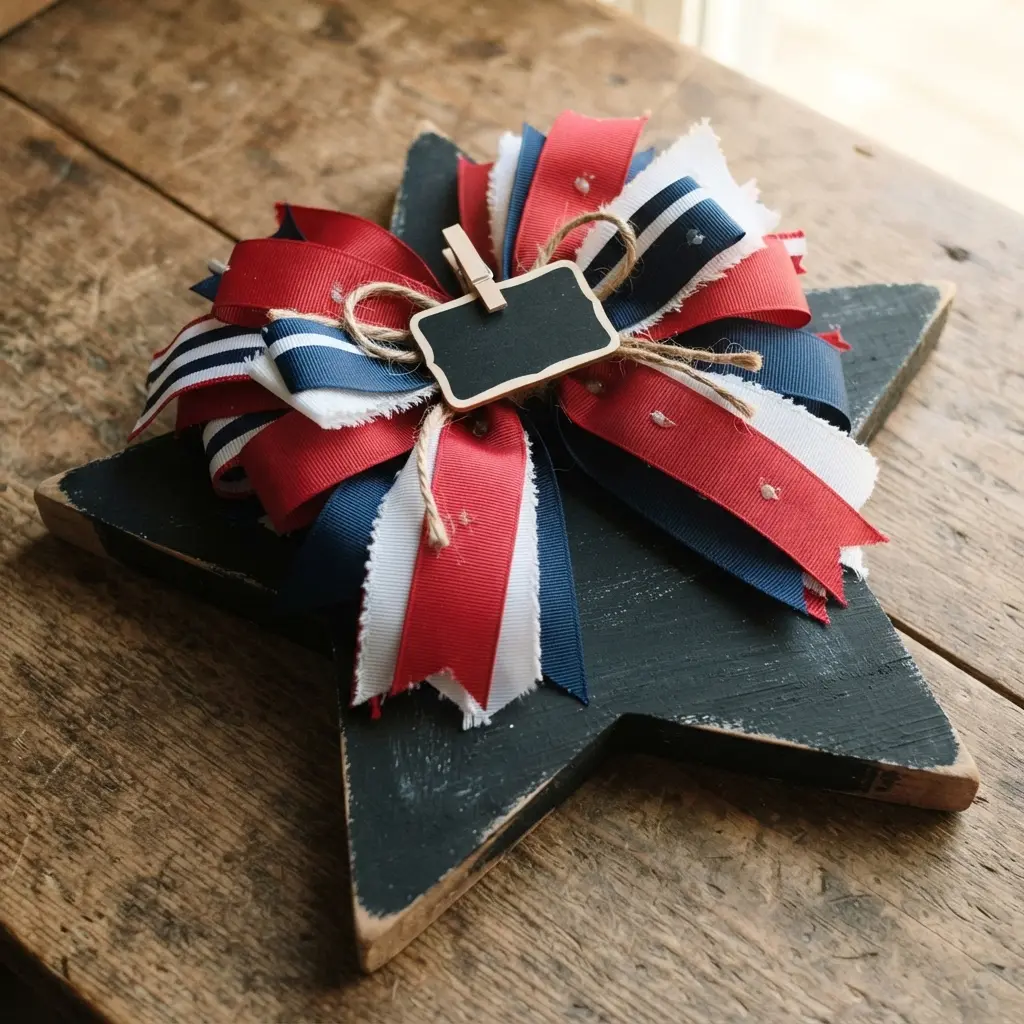
You know what makes this star so clever? It gives you a whole new way to personalize your patriotic decor. The process is simple but satisfying: you start with a plain wooden star, give it a few smooth coats of chalkboard paint, and let it dry completely.
Then, you get to play with your ribbons, tying bows or creating streamers in those classic red, white, and blue colors. I love how the rustic, handcrafted feel of the wood contrasts with the modern, customizable surface of popular star chalkboard wreath ideas. Isn’t it fun to think you can change the message for any occasion?
Just remember, a proper wait time between drying coats is the secret to a flawless writing surface that won’t ghost your first chalk drawing.
5. Layered Wooden Star Chalkboard Collage
This one surprised me because it looks complex but it really comes down to layering. You start with a few wooden stars in different sizes, then apply chalkboard paint to one or two of them. The trick is using small wooden blocks or cork pieces as spacers between the layers to create that lovely 3D effect before you glue everything together.
This collage works so well because it gives you a rustic focal point, much like the most successful star chalkboard wreath ideas do. Ever wondered how to keep your chalkboard messages looking fresh? You need to prime that painted surface first by rubbing chalk over it and then wiping it clean. Trust me, seeing your own seasonal message on those stars feels incredibly special.
6. Vintage Farmhouse Star Chalkboard Sign
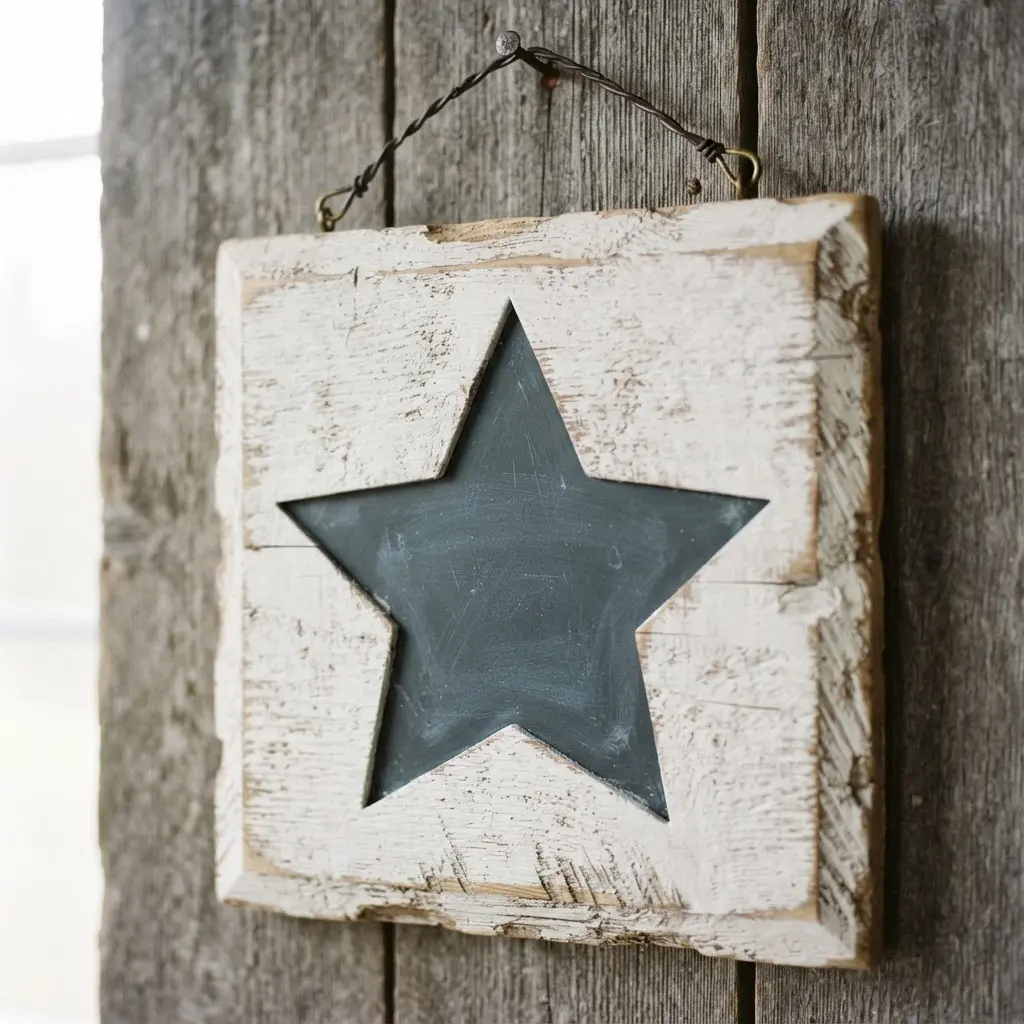
Doesn’t the thought of a rustic sign that changes with the seasons just feel perfect? This project starts with a piece of wood you can distress with sandpaper for that lovely aged look, then you’ll paint a section with proper writing paint. I love that you get a functional message board right in the center of a classic star shape.
The real trick is to season the board by rubbing chalk all over it and wiping it off before you write, which keeps your messages from ghosting later. Try it and feel the satisfaction of hanging your own personalized farmhouse decor, which remains one of the most satisfying star chalkboard wreath ideas to complete for your porch.
If you’re enjoying the rustic star theme, you can also create a rustic star ornament to coordinate with your chalkboard sign for a full holiday display.
7. Mini Star Chalkboard Cluster Wreath
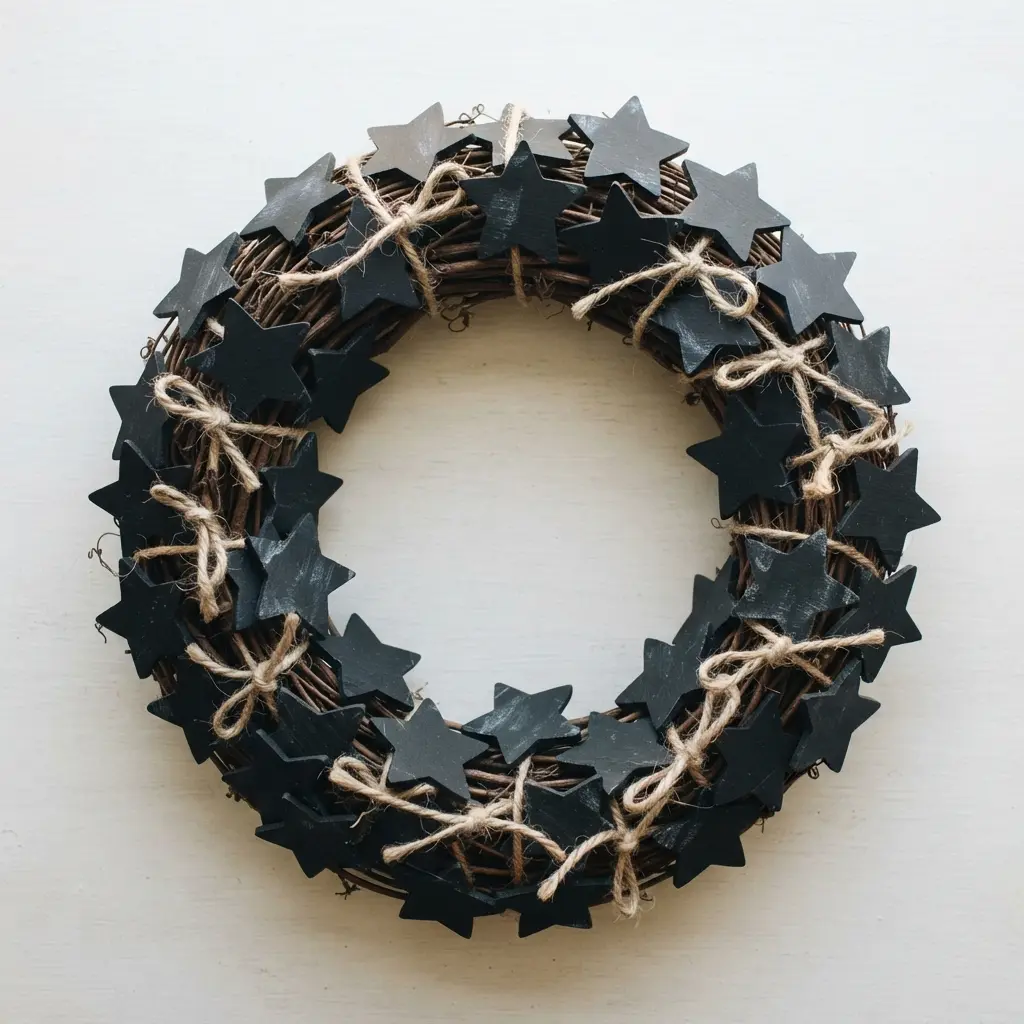
This one looks so intricate, but it is surprisingly simple to put together. You will start by preparing your little star chalkboards, making sure to cure and season them properly to avoid ghosting. Then, you just arrange them in a circular cluster on your chosen base and attach them securely with hot glue, overlapping for a full look.
I love this project because it adds a personal, interactive touch, a core principle behind all the best star chalkboard wreath ideas. You can write names, dates, or short messages and change them whenever you like. My go-to tip is to place your largest stars first, then fill in the gaps with the smaller ones to create dense, charming coverage.
Doesn’t a fun display like this keep your entryway feeling fresh for different holidays? You will feel so proud when you see that charming, rustic cluster hanging ready for guests.
8. Natural Twig Star Chalkboard Frame
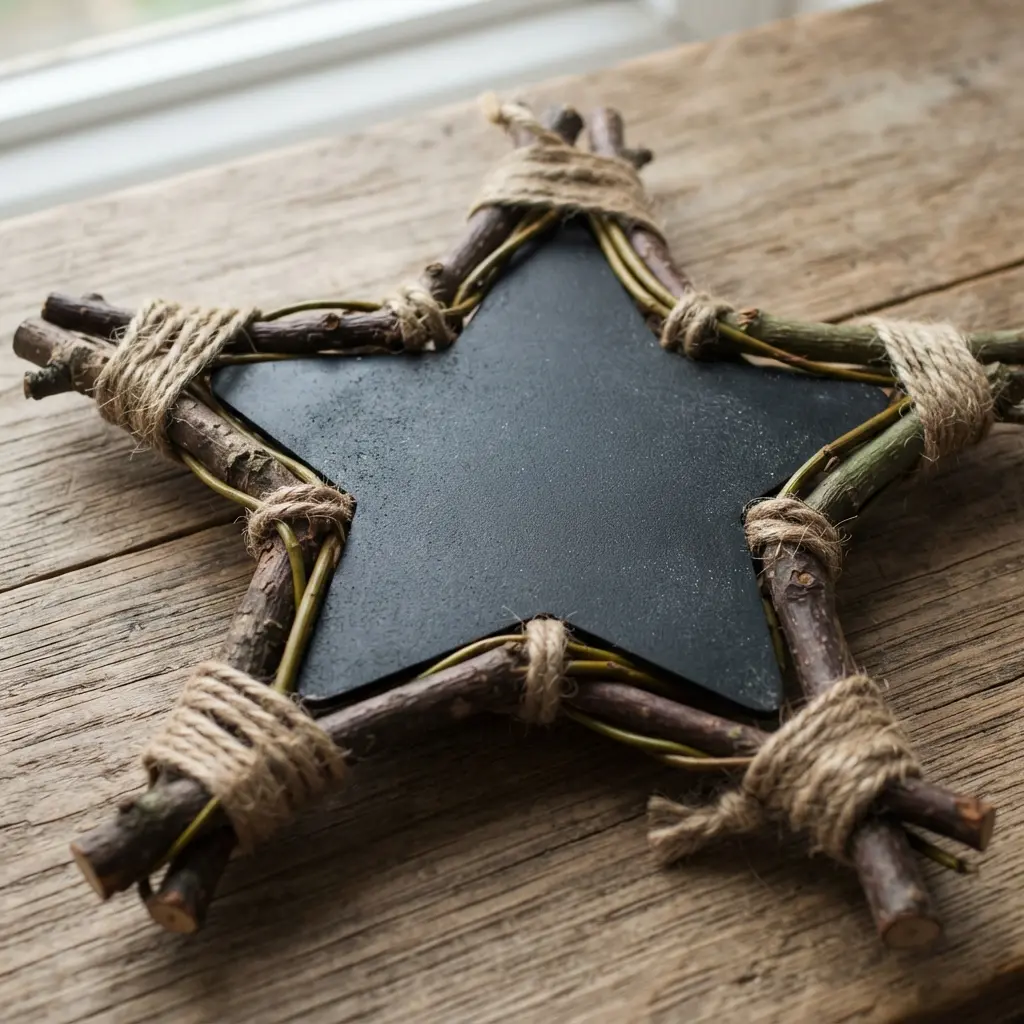
Ever wondered how to get that perfectly rustic, handpicked look? This design is all about letting the natural shape of your twigs guide the outer form. You’ll arrange them on a flat backing, securing the points with strong wood glue before fitting a panel in the center.
It works because the earthy texture of the branches makes a beautiful contrast with the smooth writing surface. For another project that uses natural materials, much like the best star chalkboard wreath ideas demonstrate, look at these simple spring wreath craft ideas. You can personalize it with seasonal messages or use it as a fun family board.
My top tip? Always use thoroughly dried twigs to prevent warping, a lesson every maker eventually learns. The final result feels wonderfully organic and full of character on any wall.
9. Patriotic Gingham Bow Chalkboard Star
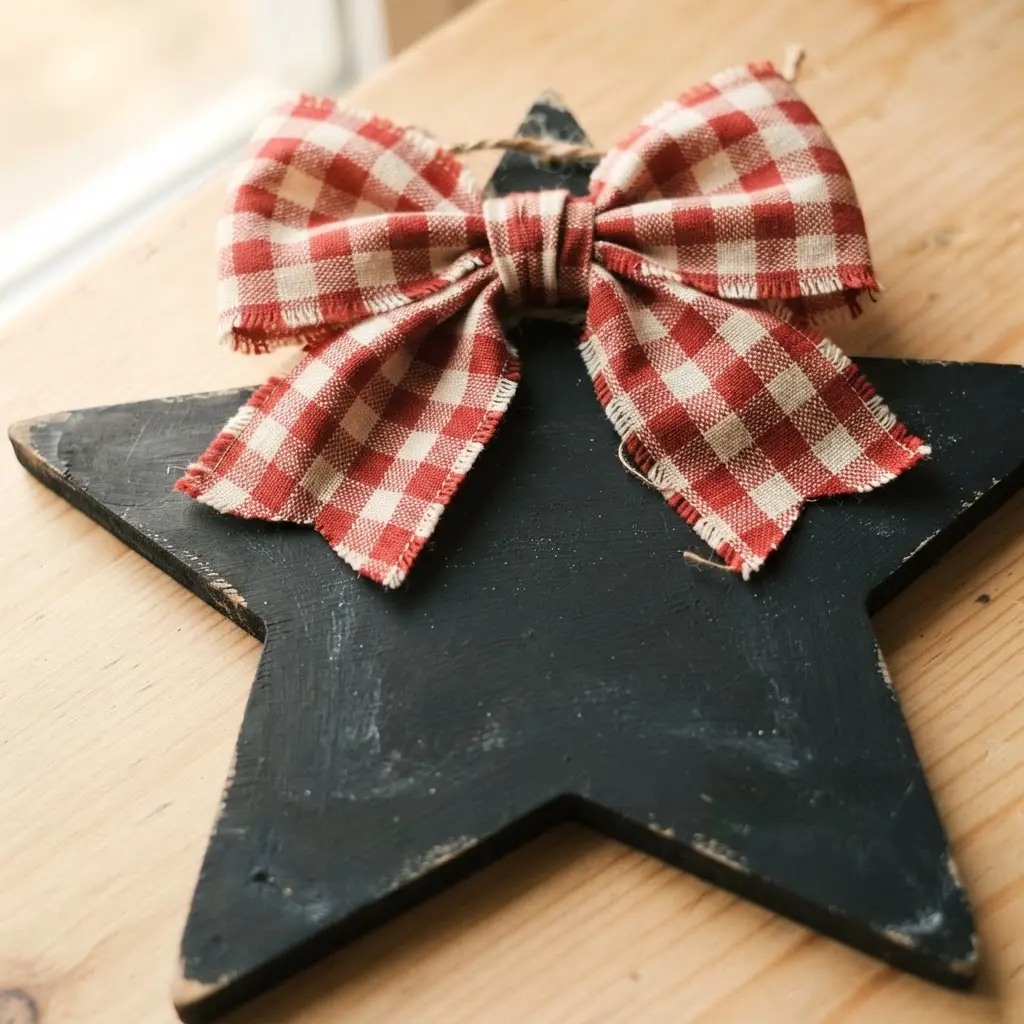
This one delivers a triple threat of charm, function, and patriotic spirit. You start with a simple wooden piece and coat it with chalkboard paint, letting each layer dry completely. The real personality comes from tying a crisp, red and white gingham bow and securing it right at the top point with a dab of hot glue.
Why does it work so well? It gives you a rustic, handmade centerpiece you can customize for any message with a bit of chalk. I love that it feels festive and personal all at once when you explore creative star chalkboard wreath ideas for your doorway. For a neat finishing touch, add a loop of twine on the back so it’s ready to hang as part of your personalized initial wreath ideas or on its own.
10. Fairy Light Accented Chalkboard Star
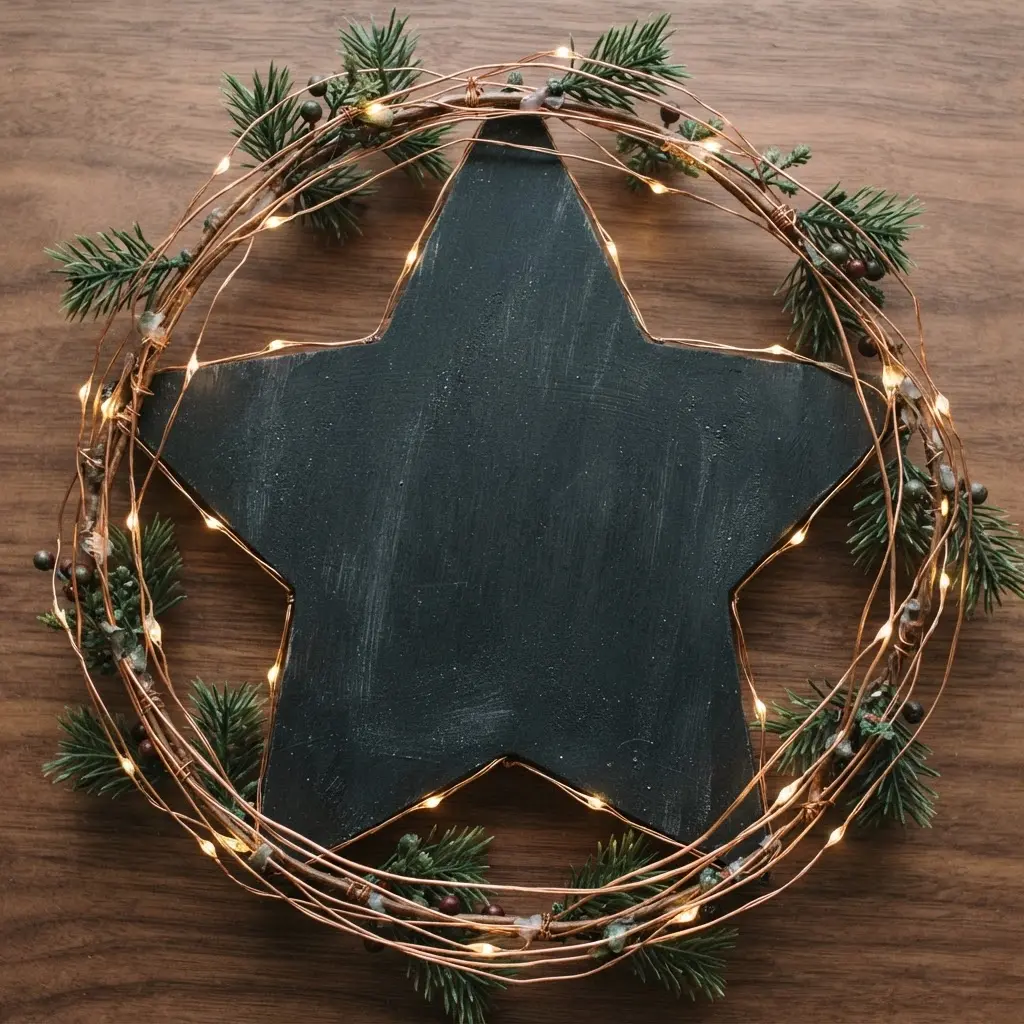
This is the project that makes everyone go ‘ooh’ when you turn off the main lights. It looks intricate, but you can absolutely build it with patience. You take a simple wooden shape, give it a coat of chalkboard paint, and then weave a string of warm white lights around its edges.
Trust me on this one, priming the surface with chalk first is a proven trick for star chalkboard wreath ideas to prevent ghosting of old designs. I love how the soft glow makes any written message feel magical. It works because you get a customizable sign and a cozy accent piece all in one setup.
Applying Matte Sealers for Chalk Detail Preservation
One light coat of a matte clear sealer is the difference between a project that lasts for years and one that smudges before you hang it. This final step locks in all your hard work, from the painted base to the intricate marker details and layered accents. You want a spray formula labeled as non-yellowing and matte to maintain that authentic aesthetic.
Apply it in a well-ventilated area with slow passes, just as professionals building star chalkboard wreath ideas recommend for lasting protection. Let this layer dry completely before you add any hanging hardware. This sealant shields your design from fingerprints, dust, and humidity, ensuring your patriotic statement stays crisp and clear through many celebrations.
Conclusion
The best part about creating this display is how it becomes a centerpiece for your own stories and celebrations. You get to choose the message, the textures, and the style that fits your home perfectly. Whether you lean towards the clean lines of galvanized metal or the softness of a floral frame, each project starts with that simple black surface waiting for your touch. My advice is to pick one idea that speaks to you, because gathering genuine star chalkboard wreath ideas matters more than following instructions perfectly. I hope one of these ten concepts sparks your next creative afternoon.
FAQs
Q: What is the best type of marker to use on a chalkboard wreath?
A: Use a liquid chalk marker designed for non-porous surfaces. These markers provide bold, opaque lines that dry quickly and wipe off cleanly with a damp cloth when you are ready for a new design.
Q: How do I keep a layered wreath from becoming too heavy?
A: Choose a lightweight base like a straw or foam form. Attach heavier elements, such as a wood or metal frame, directly to your door or wall first, then secure the lighter layer to that sturdy anchor point.
Q: Can I make a chalkboard wreath for other seasons?
A: The center panel is fully customizable. Swap colors for autumn hues, winter whites, or spring pastels, and change your lettering and accent materials to match any holiday.
Q: How do I get clean lettering on a small chalkboard star?
A: Practice your phrase on paper first. Use a pencil to lightly sketch guidelines, write with your chalk marker, and then gently erase the pencil marks once the ink is completely dry.
Q: What is a good way to add texture without adding bulk?
A: Incorporate flat elements like different ribbons, thin wood slices, or pressed dried leaves. You can also weave a small amount of faux greenery loosely around the base for visual interest.


