Sourcing Ethically Harvested And Cruelty Free Plumage
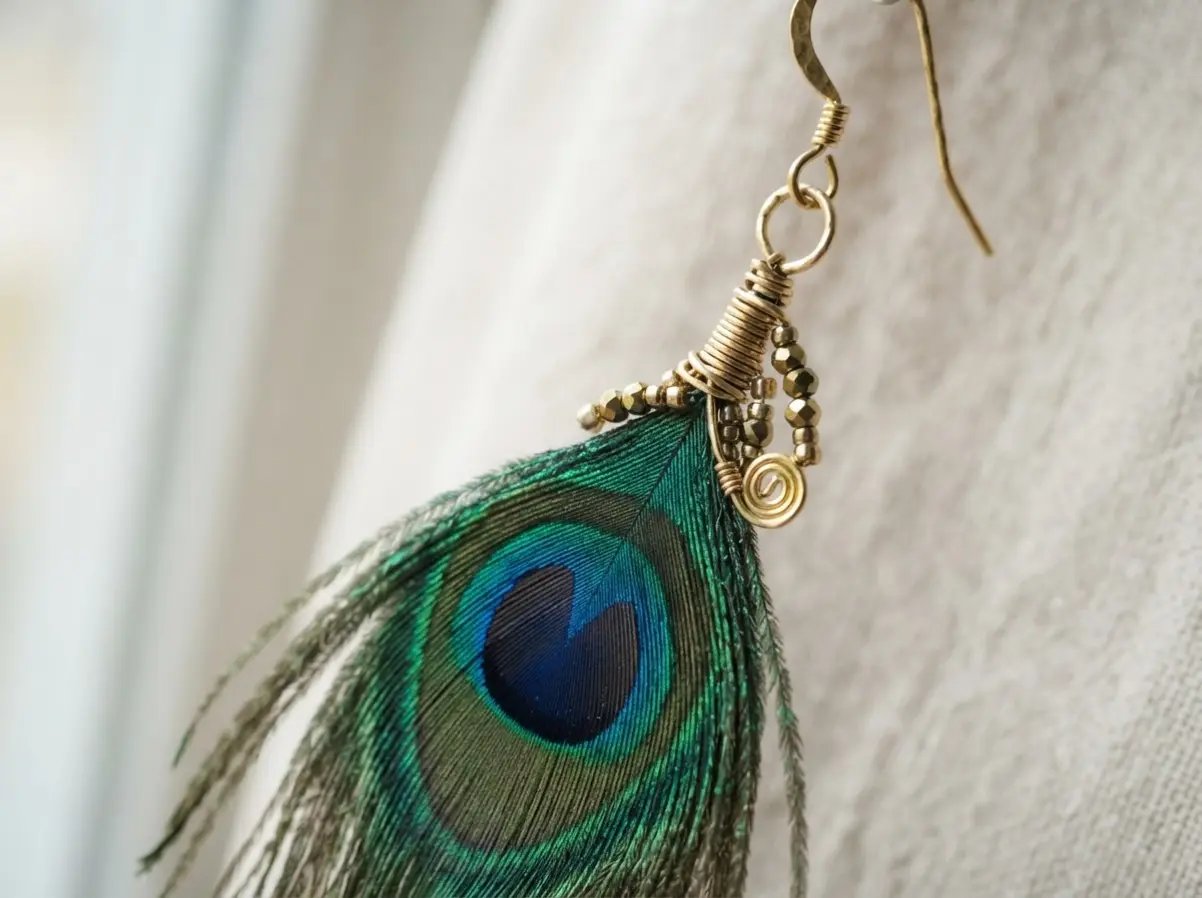
The best designs start with quality feathers like stiff pheasant hackle for structure or iridescent peacock for color, because they hold their shape perfectly for your DIY feather earrings. You want to find suppliers who clearly state their feathers are a byproduct of the food industry or gathered during natural molting seasons, never from live-plucked birds. Trust me on this, that extra bit of research ensures your beautiful accessories have a clean conscience from the very first step. I love using guinea fowl feathers for smaller, delicate pieces, as their fine spotting adds texture without overwhelming the design. Always check each feather for a clean, intact shaft, as a split quill ruins the stability of your entire piece.
Selecting Essential Metal Findings And Connecting Hardware
Your choice of jump ring gauge makes or breaks how your earrings hang, as a thick ostrich plume needs a sturdy 18-gauge ring while delicate guinea fowl calls for a fine 22-gauge. You will notice that using two pairs of pliers to twist these rings open and closed, instead of pulling them apart, keeps their true circular shape and prevents weak spots. The good news is that a simple feather cone is a handy fix for hiding a messy quill end and creating a clean, finished look where the metal meets the ear wire on your DIY feather earrings. For direct attachment, you must reinforce the quill first with a dot of strong glue or a tight wire wrap before piercing it for the ring. This attention to your metal findings guarantees your accessories have the integrity to match their bold style.
1. Bohemian Pheasant Feather Bead Accents
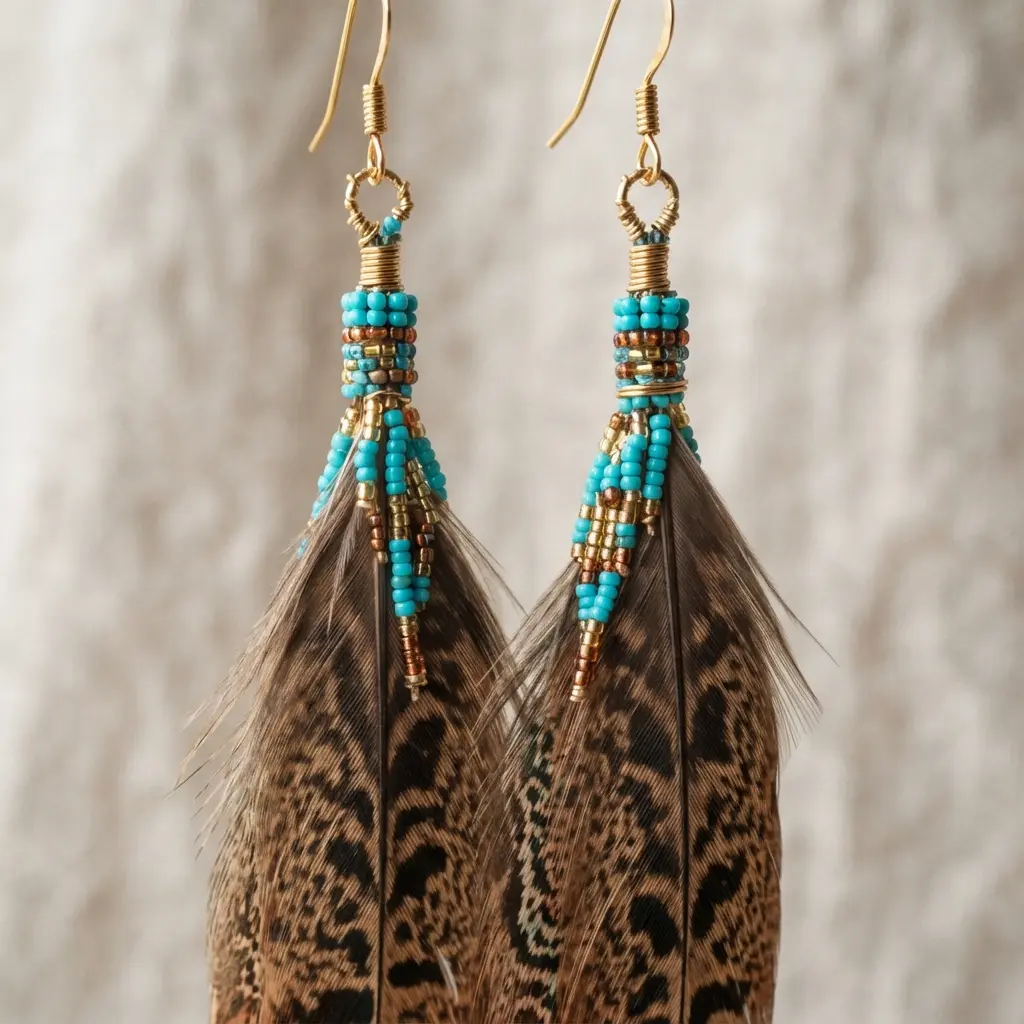
Who would have thought combining a feather and a bead could feel so elegantly bohemian? This one is my go-to for adding a natural touch to your favorite projects. You will secure the base of a beautiful pheasant feather to a bead using a simple wire wrap or a strong adhesive to build your DIY feather earrings. Then, you can add a decorative bead cap to hide the connection point and finish the look. I love how the feather’s iridescent colors play with the earthy tones of a wooden or stone bead.
It works because it is lightweight and moves with you, giving your piece a gentle, fluid energy. Each accent is distinct, so no two accessories will ever be exactly alike. For a different but equally beautiful nature-inspired project, you need a proper DIY Mexican bird earrings craft to expand your feather design skills. Trust me, once you start playing with these accents, you will be hooked on their effortless, free-spirited charm.
2. Neon Dyed Goose Biot Drops — A Pop of Modern Color
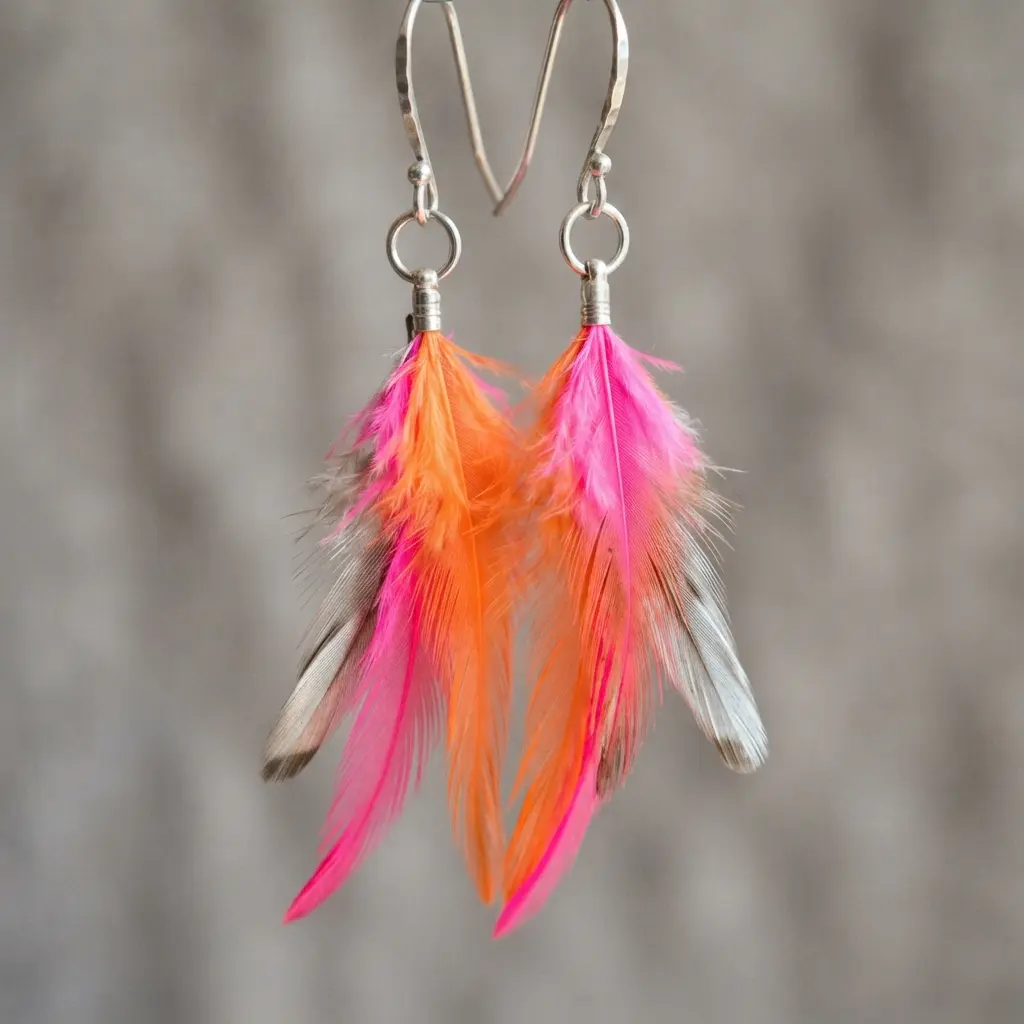
Who would have thought a single feather fiber could make such a bold statement? These neon-dyed biots are my secret weapon for adding an instant, vivid kick to a design like your DIY feather earrings. You take one of these thin, tapered goose feathers and secure its thick end to a headpin or eyepin with several tight wire wraps. Then you create a small loop at the top, connect it to an earring hook with a jump ring, and you are done. The magic is in how that segmented texture catches the light, creating a modern, minimalist look that is anything but quiet.
Trust me, getting the biot attached firmly is the only tricky part. Practice your wire wrapping on a spare piece first to build consistent tension. It is the same basic assembly you would use for any simple dangle, like in an easy turquoise drop earring tutorial, so once you master that step, the colorful possibilities are endless. Does that not look impressive?
3. Metallic Gold Quill Wrapped Accents
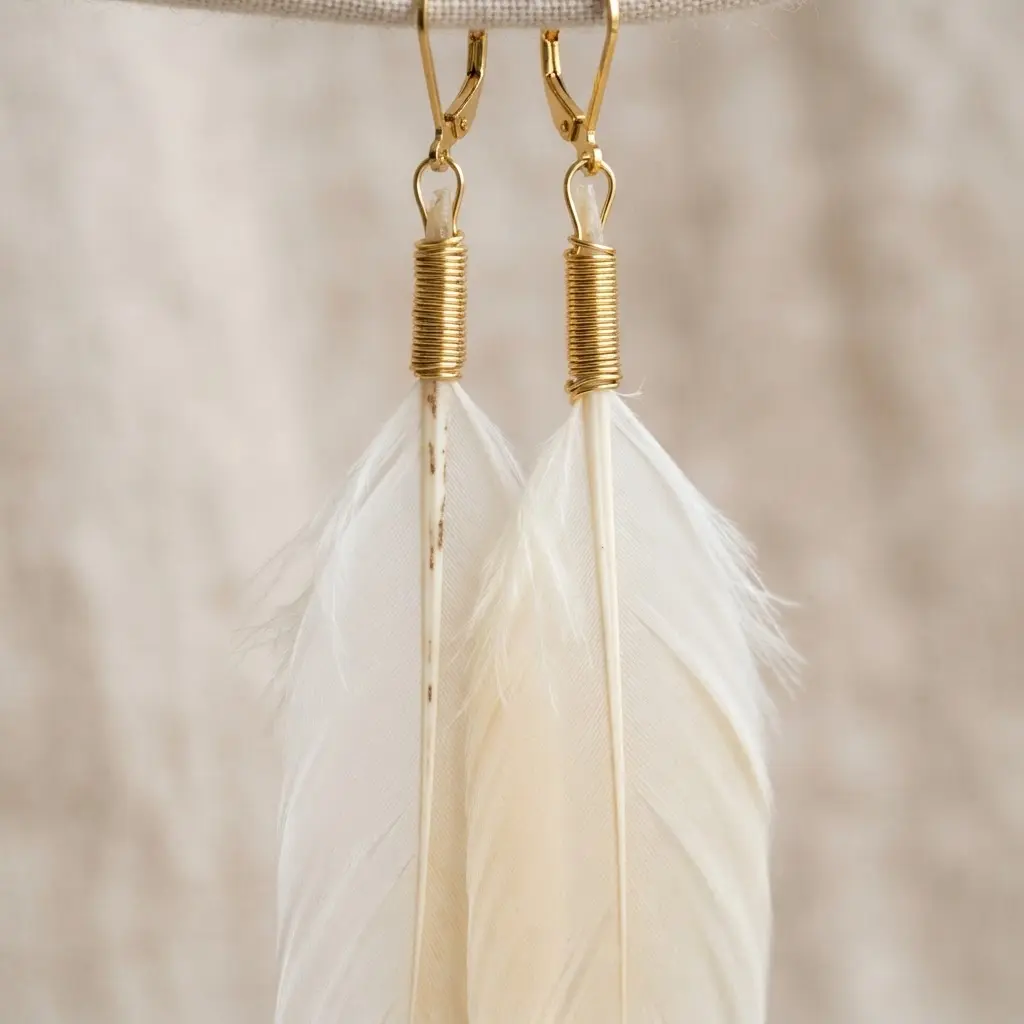
It looks like a tiny piece of luxury jewelry, right? These metallic gold strips create a striking visual when rolled into coils. You take a thin metallic gold quilling strip and roll it with a quilling tool, then gently shape it into a teardrop or a coil. A tiny drop of glue holds the end in place, which makes this technique perfect for DIY feather earrings.
The real magic happens when you arrange a few of these shapes together. I love how a simple cluster of these gold coils can upgrade a plain accessory. They add instant texture and sophistication, while the three-dimensional quality catches the light beautifully.
My top tip is to use an incredibly tiny amount of glue. Too much will soak the paper and dull that gorgeous shine. Keep your rolling pressure even and let the shapes relax naturally. When you glue your finished accents onto your design, you will feel so proud of that elegant, handmade touch.
4. Peacock Eye Statement Fringe Earrings
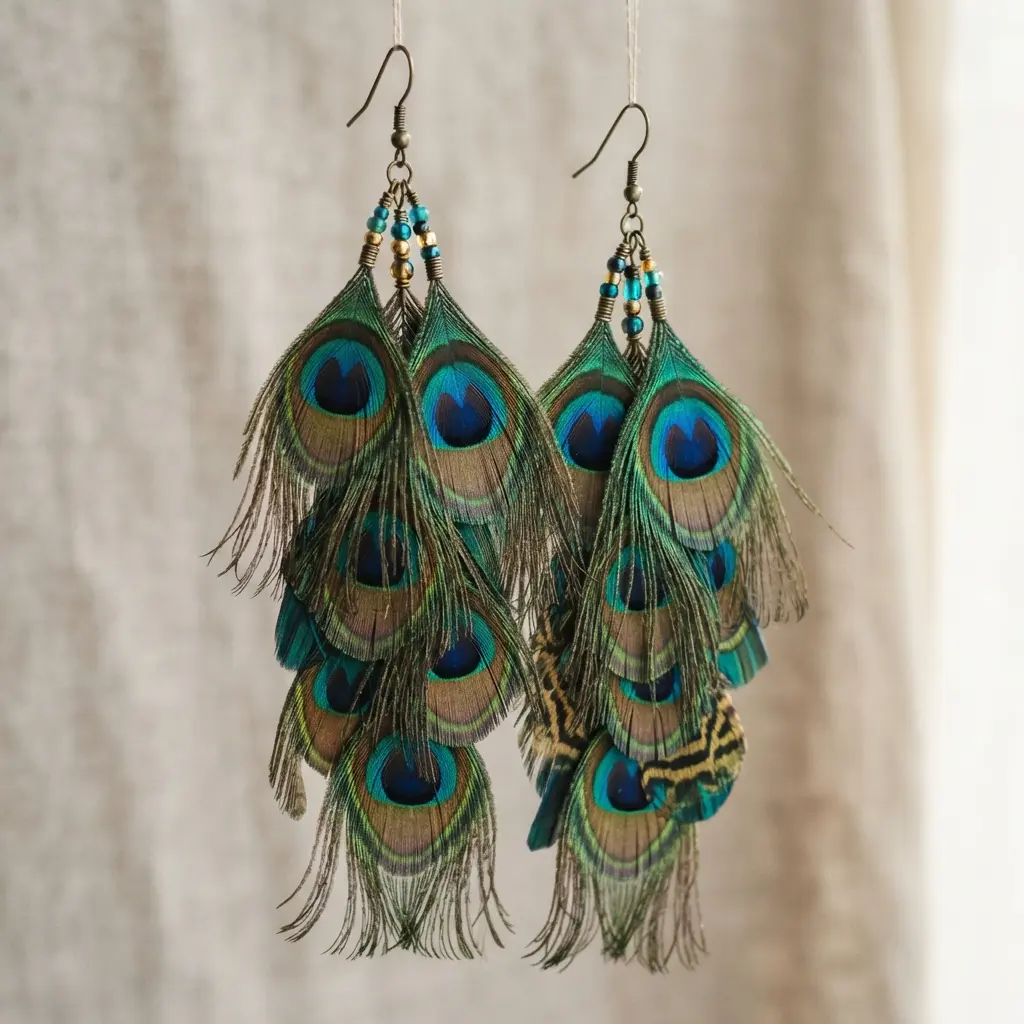
Doesn’t a peacock feather just scream glam? This project is all about capturing that wow factor. You start by creating the central peacock eye motif for your DIY feather earrings, often with a stunning cabochon stone or a cluster of colorful beads. Then, you attach individual strands of beads, chains, or tassels to form the flowing fringe below it. The combination of a bold centerpiece and fluid motion creates pure magic.
I love how these accessories enhance a simple outfit instantly. A practical tip for making your own spike accessories is to master secure connections, which is just as important here to keep all those beautiful fringe strands safely attached. Pay close attention to your fringe lengths for a polished look, and feel absolutely fabulous wearing your creation.
5. Minimalist Guinea Fowl Spotted Dangles
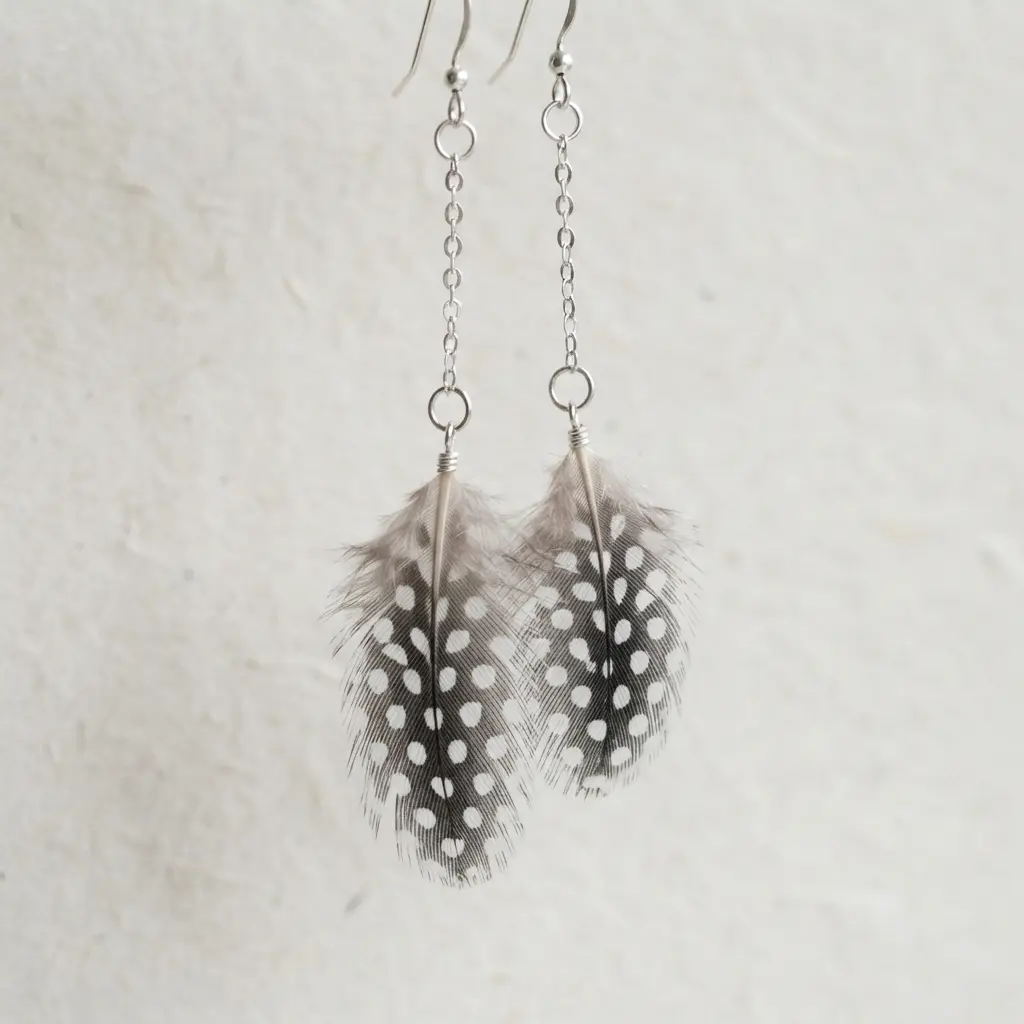
Ever wondered how to make a statement without any clutter when making DIY feather earrings? These dangles are your answer. You take a single, beautifully spotted guinea fowl feather and attach it to a simple sterling silver ear hook with a jump ring. I love that the feather’s natural white-on-dark pattern does all the work, creating a subtle, organic polka dot effect.
The design is so clean and intentional, keeping the focus entirely on the feather’s distinctive texture and shape. This makes your handmade accessories feel polished and versatile. Trust me on this one, keeping your supplies tidy helps you focus on the simple beauty of the materials, so be sure to organize your DIY jewelry creations as you go. Doesn’t that look effortlessly chic?
6. Rustic Leather Capped Feather Tassels
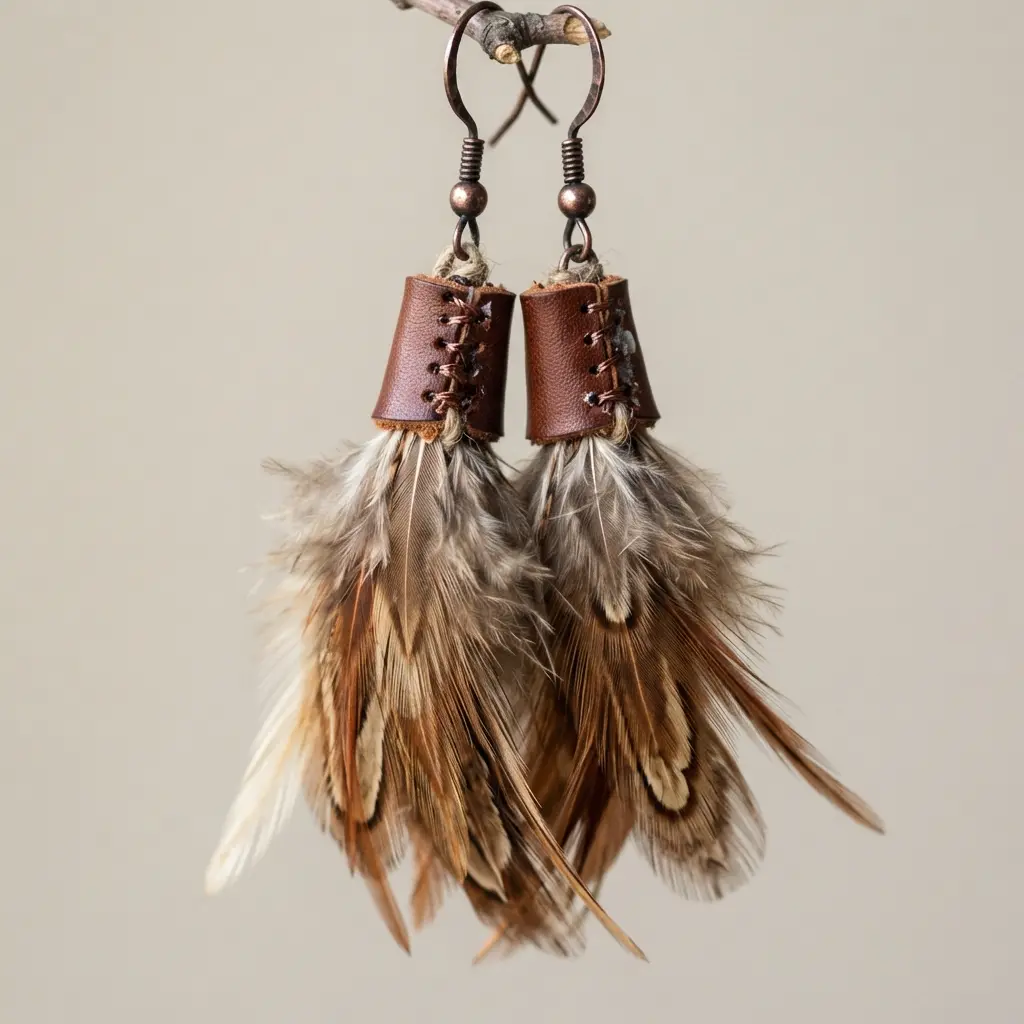
Have you ever wanted to add a bit of earthy, free-spirited movement to your accessories like these DIY feather earrings? This combination is a favorite for exactly that. You gather a small bundle of natural feathers, like soft rooster hackles or speckled guinea fowl plumes, and bind their ends with a tiny cap of soft suede or leather. A strong adhesive secures the whole thing, and a jump ring at the top makes it ready to dangle.
I love how the soft feathers play against the rugged leather texture. It creates a handcrafted, bohemian charm that feels distinct every time. For another project that mixes unexpected materials into a bold accessory, look at making a painted glass statement necklace craft.
Your key to success here is the glue bond. Make sure you use a flexible, strong craft glue and let it cure fully before handling. Feel that rustic satisfaction when your tassel swings perfectly.
7. Elegant Ostrich Plume Cluster Drops
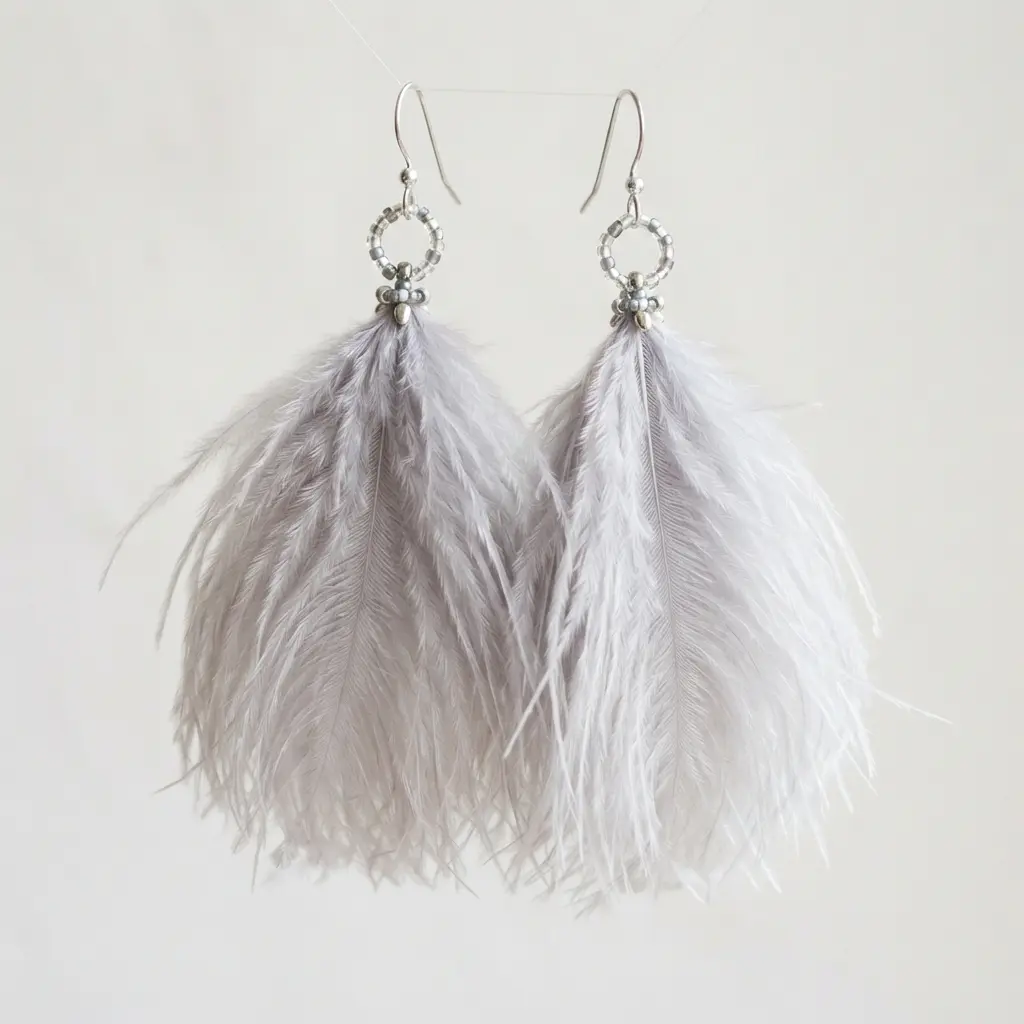
Ever wondered how to make DIY feather earrings that look so glamorous yet feel so light? The secret is using multiple ostrich feathers. You gather several plumes, trim their quills, and arrange them into a lush, full cluster inside a small metal cap. A strong jewelry adhesive holds everything in place before you attach it to your chosen earring hook. I love this one because the volume creates a real statement without any weight. The soft, airy texture looks incredibly refined.
For another project with a playful, voluminous feel, check out these creative ice cream cone necklaces. My go-to tip is to build your cluster around a few longer central feathers, then fill in with shorter ones around the edges. Does that not feel luxurious?
8. Turquoise Stone Feather Charm Earrings
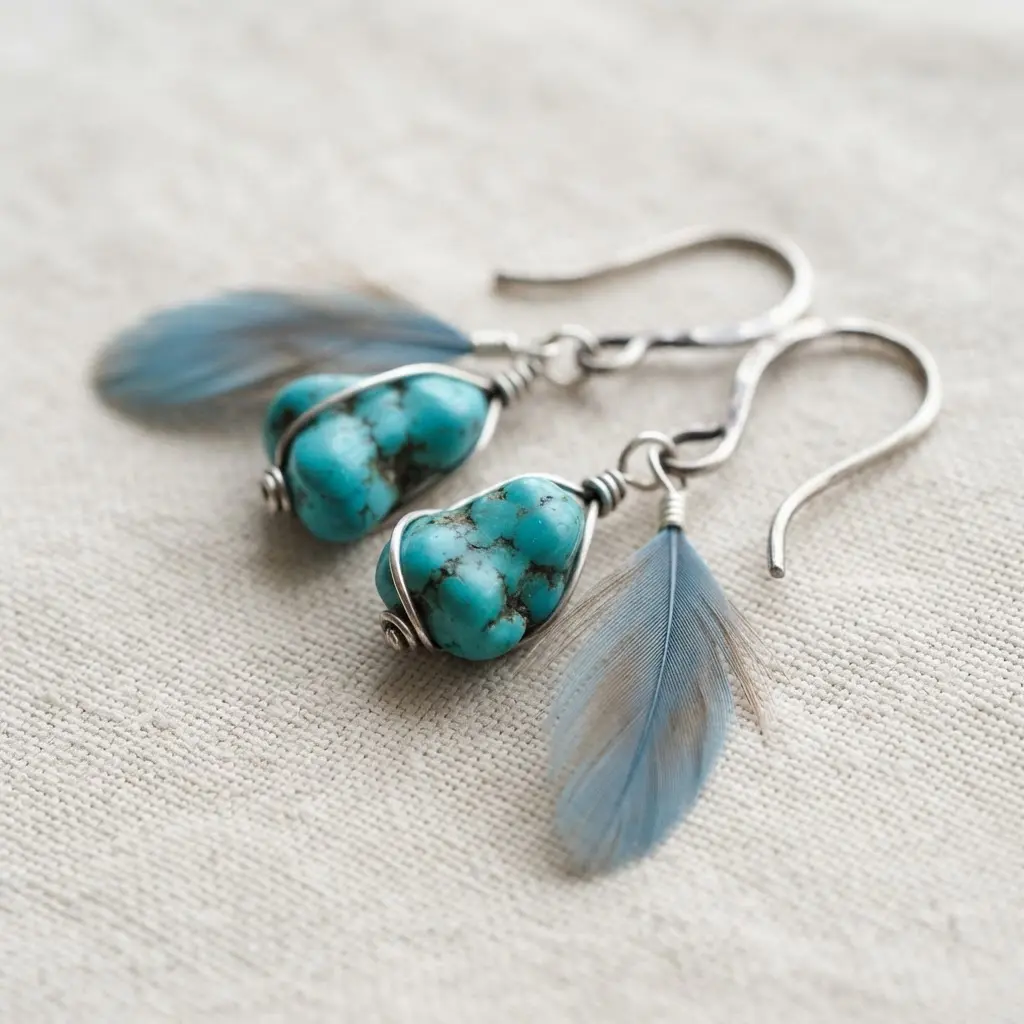
This combination looks so detailed, but you will be surprised how quickly it comes together. You connect a turquoise bead to a metal feather charm using a jump ring, then attach that to an earwire for your DIY feather earrings. I love how the earthy blue of the stone plays off the shiny, textured metal. It creates a nice bohemian look that feels special and handmade.
Using stabilized turquoise is my go-to tip here, as it is less likely to change color from skin oils. Your biggest job is making sure those jump rings are closed tight. Does that not sound like a satisfying project? You will end up with a pair of distinctive, eye-catching accessories.
9. Layered Rooster Coque Cascade Earrings
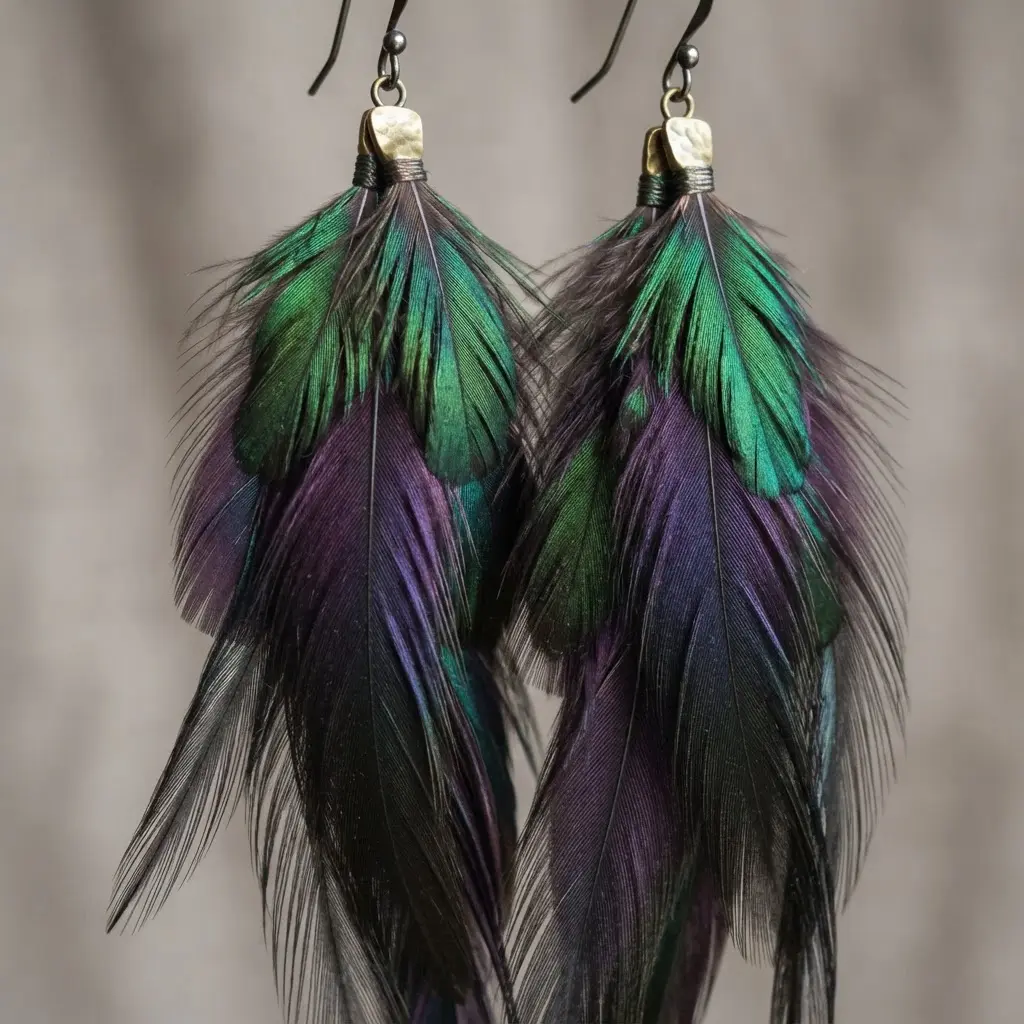
This one surprised me. It looks like a complex, couture piece, but the assembly is wonderfully straightforward. You will gather a bundle of rooster coque feathers for your DIY feather earrings, paying close attention to their natural curve and iridescent sheen. Arrange them in graduated lengths, with the shortest at the top and the longest at the bottom, and secure the bundle tightly inside a decorative metal cap.
Why does this work so well? The layered structure creates incredible depth and a dramatic, flowing silhouette that moves with every step. A common pitfall is not using enough feathers, which leaves the cascade looking sparse instead of luxuriously full.
For a fantastic textural contrast, pair these statement accessories with some simple tutorials for fabric bracelets to complete your bold, bohemian look. Trust me, you will love the eye-catching result.
10. Modern Geometric Wire Frame Feathers
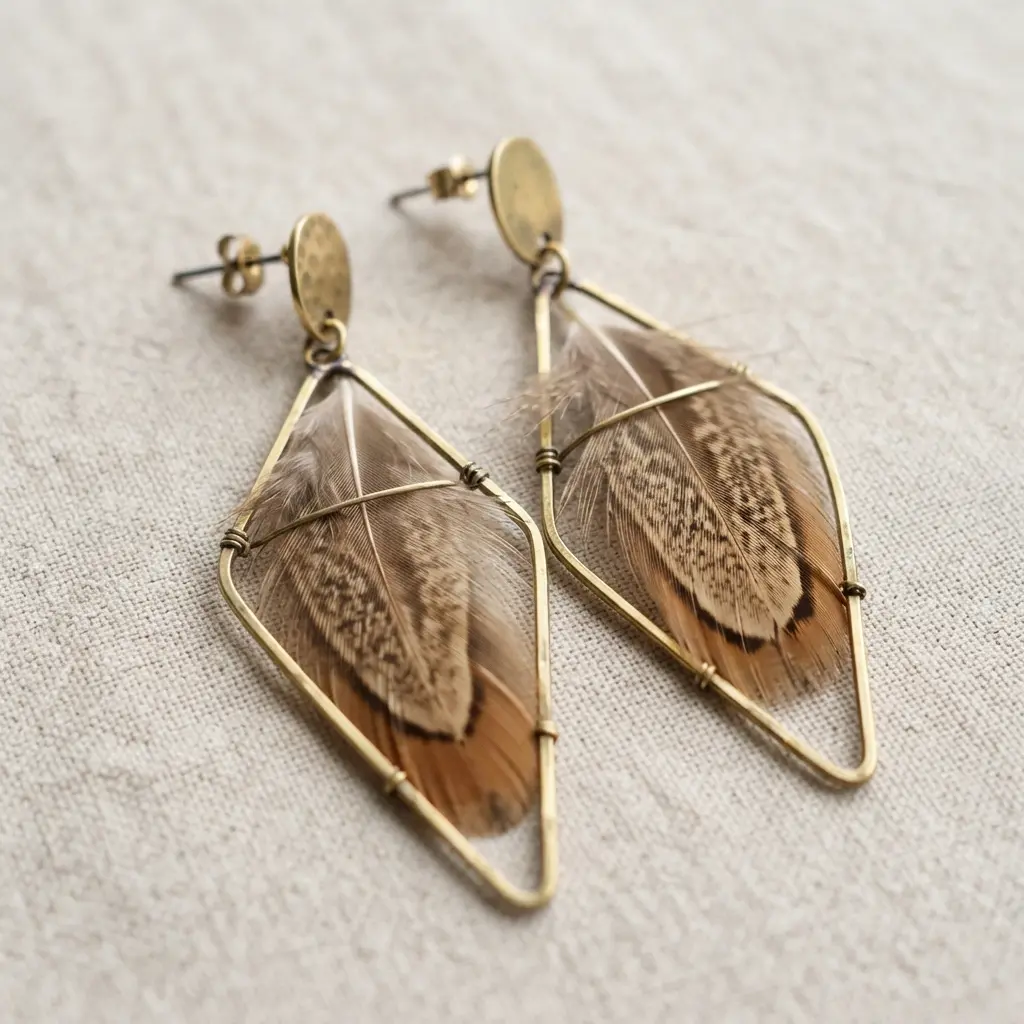
Who knew a feather could look so sleek and modern when sketching out DIY feather earrings? This style strips a feather down to its most basic shapes, like triangles and straight lines, to create a beautiful outline. You focus on the negative space and use sharp angles instead of soft curves. It feels more like architectural drafting than drawing, and I love the clean result.
Start with a strong central spine, then add geometric barbs as simple lines or triangles that intersect it. Stick to a monochromatic or metallic color palette to really sell that minimalist, wire-like look. Ever worried about making your design too busy? The trick is to remember that less is definitely more here, so the elegance comes from what you leave out.
It is a fantastic next step after you have mastered more organic feather shapes and want to try something with a contemporary edge. Once you are comfortable with this structured approach, you might find the same principles useful when you design a DIY felt tiara with clean, geometric cutouts. Does that not look striking?
Methods For Maintaining Shape And Preventing Damage
Store your finished DIY feather earrings flat in a dedicated box with tissue paper to support the plumes, never tossed in a jewelry bag where they can bend. If a feather gets squashed, you can often revive its barbs by holding it over a gentle stream of steam from a kettle, being careful not to wet the shaft.
Avoid any liquid cleaners or adhesives near the feather itself, as they strip natural oils and cause the vanes to become brittle and snap. A light mist of hairspray from a distance can help tame flyaway fibers and add a tiny bit of hold without making the piece stiff. This simple care routine protects all your detailed work and keeps those statement pieces looking fresh wear after wear.
Conclusion
So, which of these DIY feather earrings sparked that creative itch for you? The beauty of working with feathers is how each one is uniquely imperfect, which means your finished pair will be completely one-of-a-kind. My best piece of advice is to take your time when attaching findings—a strong bond with a quality adhesive and secure wire wrapping makes all the difference in how your accessories feel and last.
Remember, the goal is to create a piece that feels as good to wear as it was to make. I hope this gallery gives you the confidence to pick up some feathers, play with textures, and design a pair that feels authentically you. Now, grab your pliers and let your personal style take flight.
FAQs
Q: What is the best glue for attaching feathers to earring findings?
A: A strong, flexible adhesive like E6000 is ideal. It bonds well to both the rigid quill and metal findings, creating a durable connection that handles movement smoothly.
Q: How do I make sure my feather earrings are not too heavy?
A: Balance is key. Use lighter feathers or shorter lengths. Test the weight by holding the assembled piece before finalizing the attachment to the ear wire.
Q: Can I use feathers I find outside?
A: It is possible, but ensure they are clean and dry. Sanitize them gently. For a more consistent and vivid look, many makers prefer purchasing feathers from reputable suppliers.
Q: How do I hide the raw cut end of a feather quill?
A: Wrap it with wire, cap it with a metal bead cap, or use a small leather crimp. This gives a polished, professional finish and secures the feather firmly.
Q: What type of earring finding works best for statement feather earrings?
A: Leverback or French hook findings are excellent for heavier designs as they provide security. For lighter pieces, simple posts or lightweight hooks work well.