
Preparing Natural Fibers For Consistent Fabric Adhesion
The fastest way to ruin your bunny easter shirts is skipping the pre-wash, a step beginners often forget. That manufacturing sizing on new shirts repels paint and vinyl, causing your bunny design to crack or peel after the first wash. You want to wash the shirt in hot water with a tiny bit of mild detergent, then dry it without any fabric softener sheets.
This process strips away the factory chemicals and relaxes the fabric weave, giving your opaque fabric paints a perfect, grippy surface to bond with. Trust me, this ten-minute prep work makes all the difference for a shirt that survives dozens of Easter egg hunts looking fresh.
Selecting Complementary Easter Palette Color Schemes
High-contrast designs against pastel fabric bases are your best bet for creating standout bunny easter shirts. A crisp white or navy blue bunny silhouette on a soft pink or mint green shirt creates that instant, adorable recognition you are after.
The good news is you can achieve this with either a bold heat transfer vinyl or a few layers of thick fabric paint. Avoid muddy, low-contrast color pairs like pale yellow on cream or light grey on white, as they will blend together and lose the bunny shape. Your goal is a simple, clean graphic that stays visible even when the cotton stretches as your little one moves.
1. Simple Felt Applique Bunny Shirt
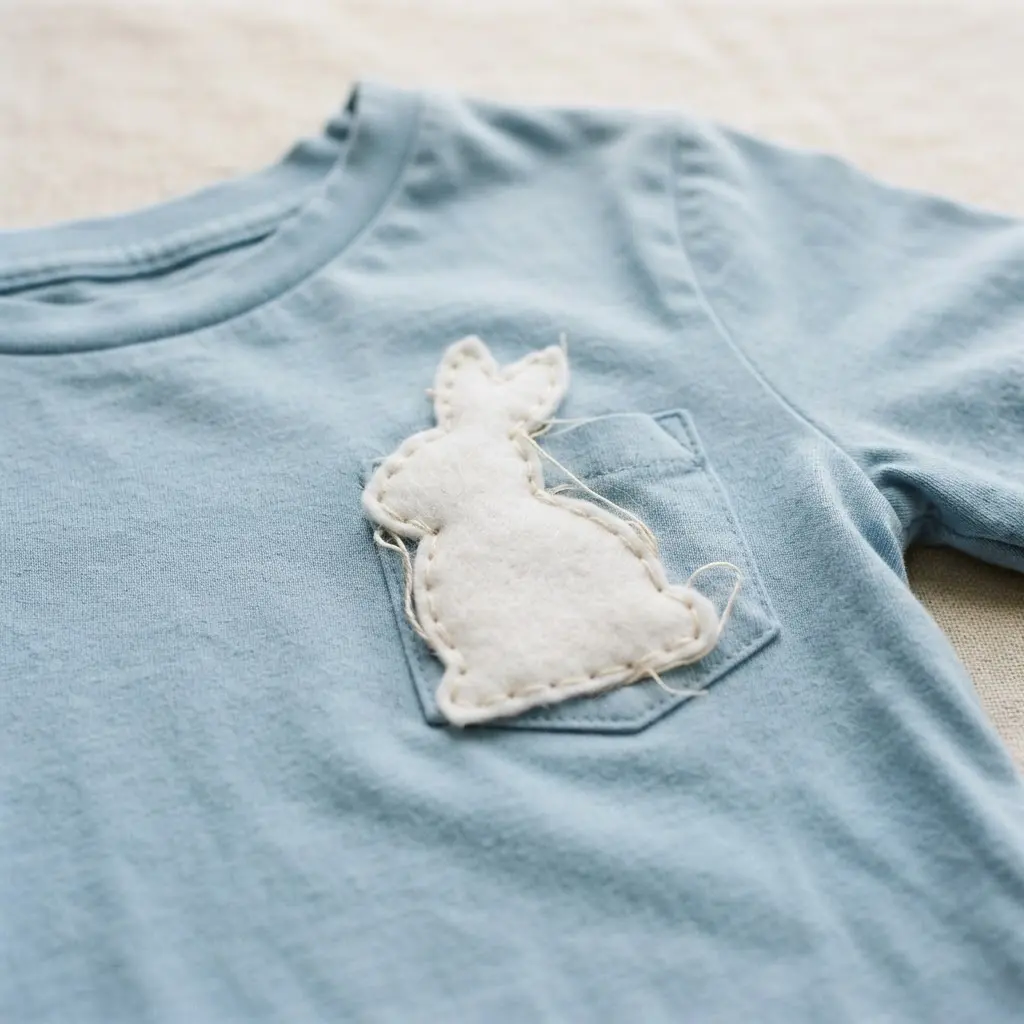
This one looks so detailed, but it is actually a perfect beginner project. You cut simple shapes from soft felt and adhere them to a shirt, creating a charming, dimensional bunny. I love using fusible web to hold everything in place before I even pick up a needle. It makes the whole process so much cleaner and easier.
That little bit of texture from the felt makes the design pop, especially on a solid-colored tee. For a truly personal touch, you could add some simple DIY bunny art projects to the background or even embroider some whiskers. Trust me, the result fits right into your lineup of handmade bunny easter shirts.
2. Hand Stitched Embroidery Bunny Outline
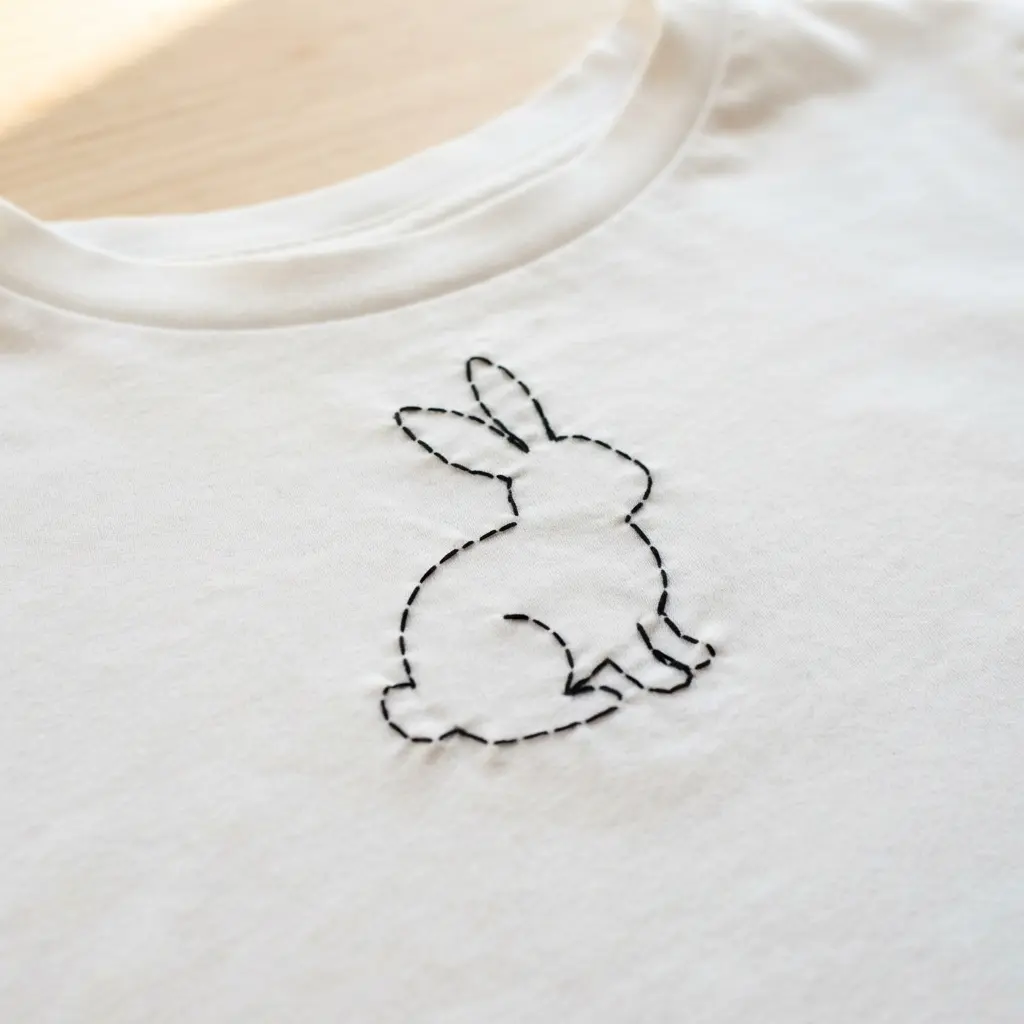
Who would have thought a simple line could be so charming? A hand-stitched bunny outline is defined by just one or two continuous stitches, creating a minimalist and elegant shape on one of your bunny easter shirts. You will trace a silhouette onto your fabric and then follow it with a backstitch or stem stitch using a few strands of embroidery floss.
It is a wonderfully quick and satisfying project, perfect for a first-time attempt. The clean, linear result looks fantastic and gives you that proud, handmade feeling.
3. Watercolor Effect Fabric Paint Bunny
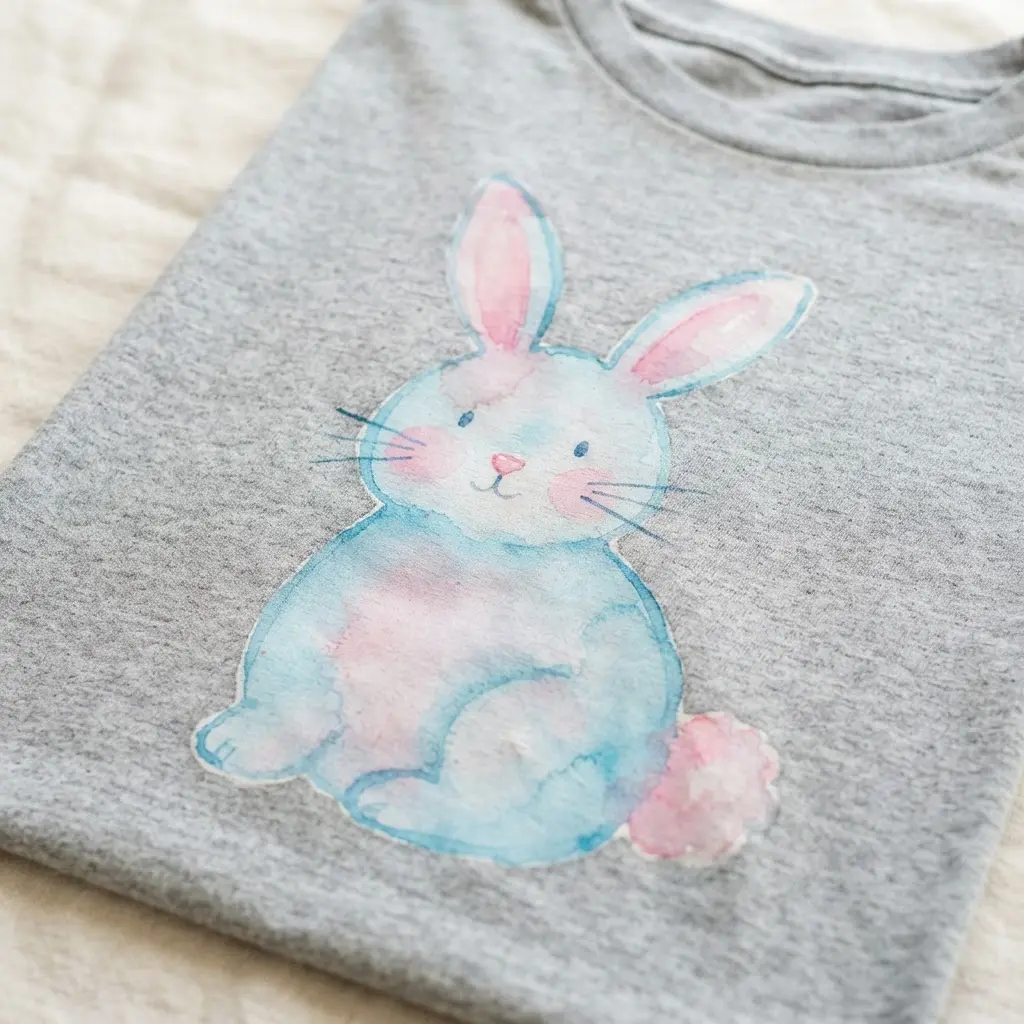
Ever wondered how to get that soft, painterly look on a shirt? This technique uses thinned fabric paints to create a gorgeous, blended watercolor effect on your favorite bunny easter shirts. You will dilute your fabric paint with a textile medium to achieve a translucent wash, then layer colors to build up a delicate bunny shape.
The gentle, diffused look perfectly matches a bunny sweet and soft character. I love starting with light washes and building up slowly. A key tip is to practice your paint consistency on a scrap of fabric first. For another fun and approachable bunny project, making cute popsicle stick bunny crafts is a fantastic way to get creative with kids.
4. Soft Yarn Pom Pom Tail Shirt
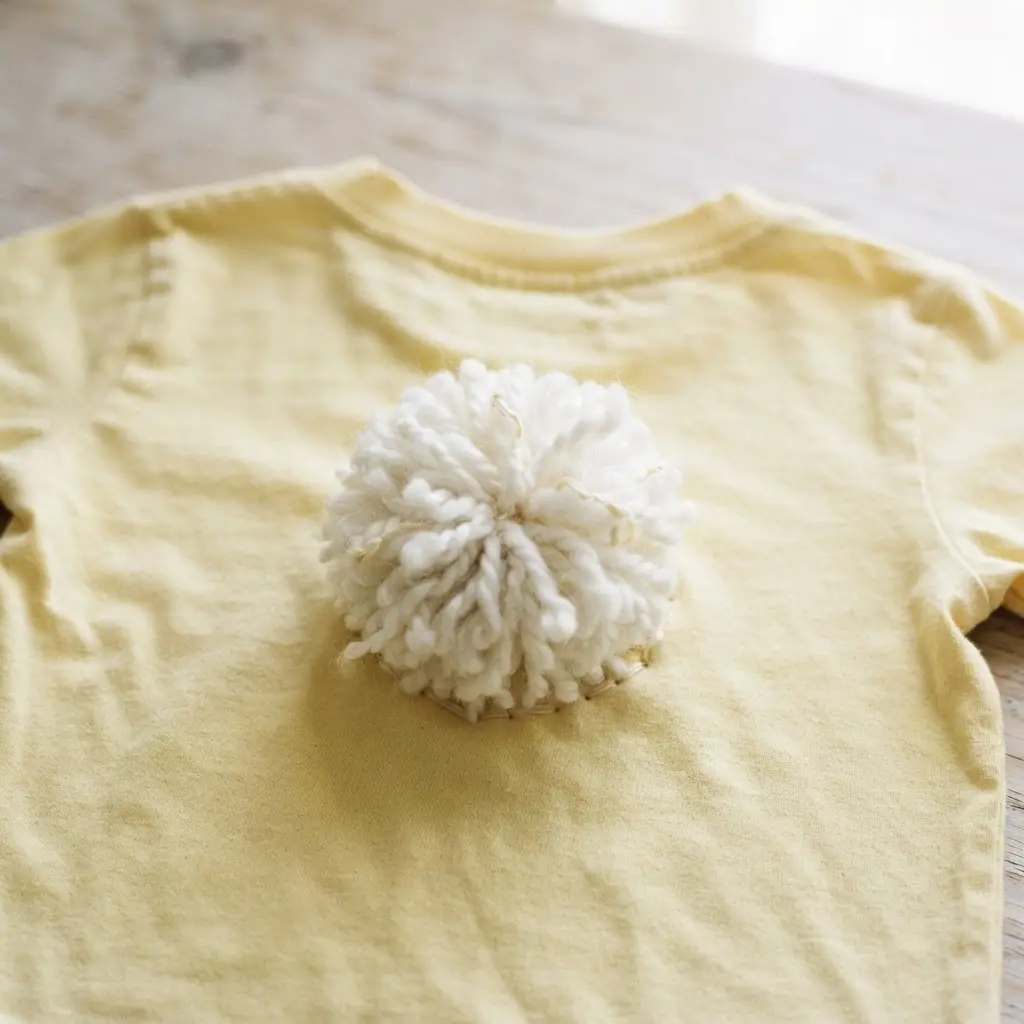
Ever wondered how those adorable bunny tails stay on shirts? Crafters love this playful approach when assembling whimsical bunny easter shirts. You start by making a dense, fluffy pom-pom using a pom-pom maker and soft white yarn. Then, you securely hand-sew it to the back of a comfy shirt, right near the hem.
I love this project because it adds a tactile, whimsical element to any outfit. That soft tail is irresistible to touch! The key is wrapping plenty of yarn for a full pom-pom and using strong thread to stitch it on really well. Trust me, a secure attachment means it will survive many Easter egg hunts and washes.
Does that sound like a fun way to personalize a simple top? You will adore the cheerful result.
5. Minimalist Heat Transfer Vinyl Bunny
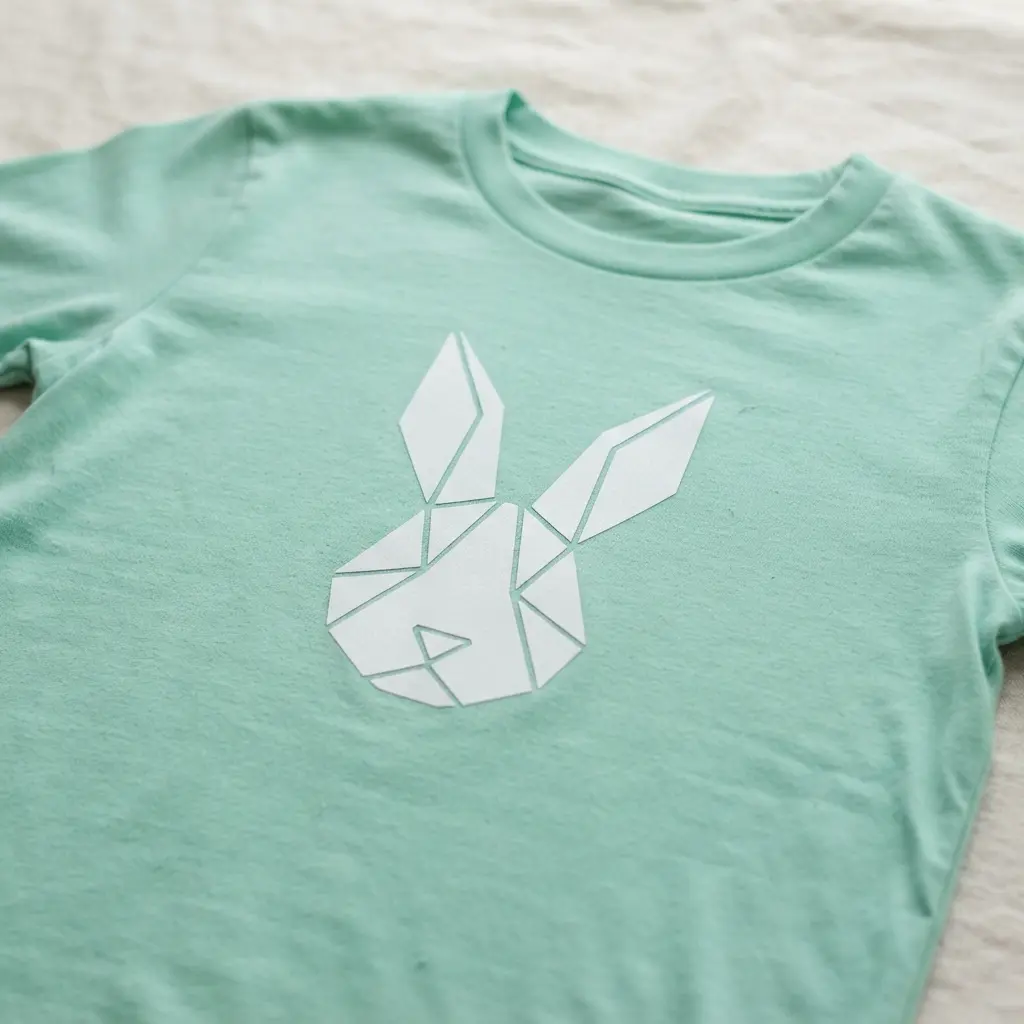
Ever feel like you want a bunny shirt that feels a bit more grown-up and modern? This style is your answer. A minimalist bunny design uses clean lines and simple shapes, like a basic head outline or a set of long ears. You cut this design from heat transfer vinyl using your digital cutter, weed it, and press it on.
The simplicity makes it incredibly versatile and easy to apply. I love that this look is quick to create. You can find free minimalist bunny designs online or sketch your own in your cutting software. The key is using a heat press for even pressure, which gives you a smooth, long-lasting transfer.
A household iron works, but it takes extra care to avoid those frustrating peel-up spots. These clean designs are perfect for making a matching batch of coordinated bunny easter shirts. You can easily coordinate them with some creative bunny mason jar crafts for a full, cohesive holiday look. Does that not sound like a fun and stylish project?
6. Rustic Burlap Patch Bunny Design
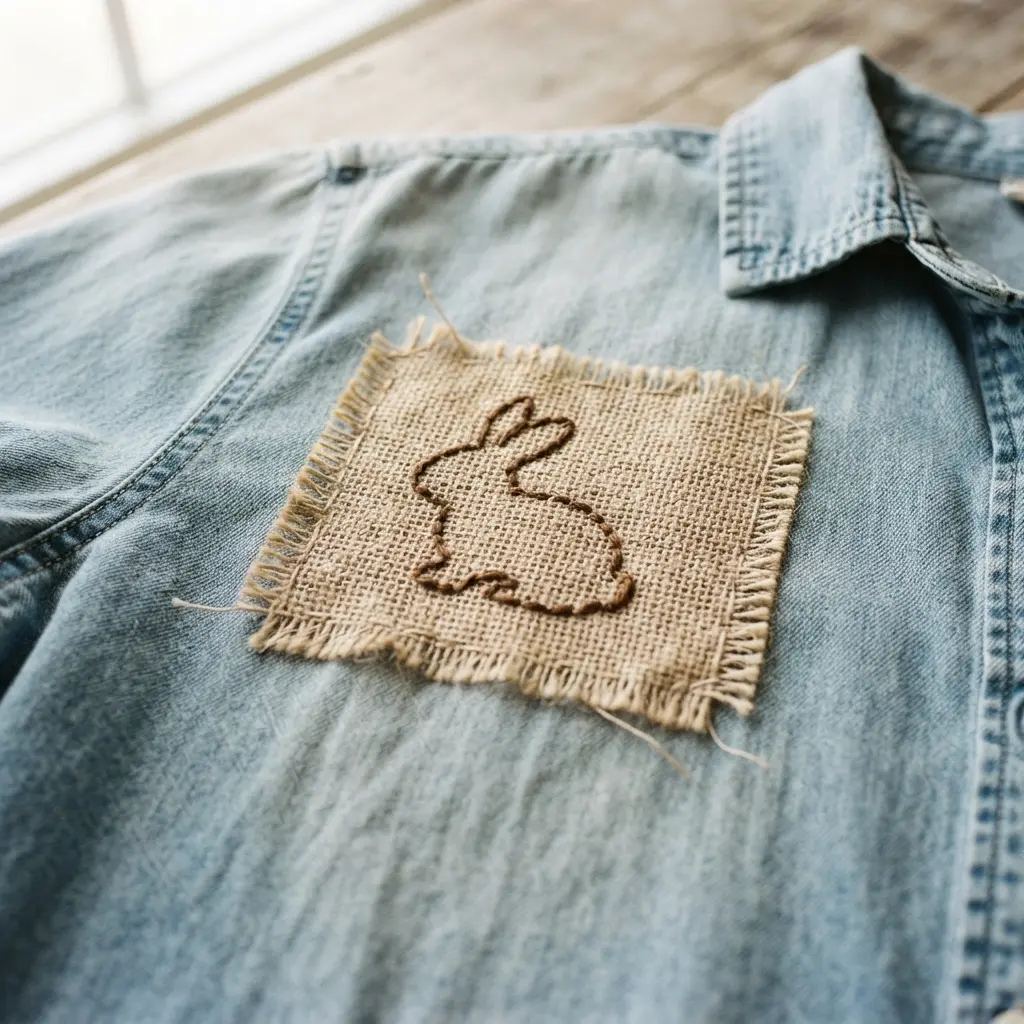
Who would have thought burlap could feel so cozy and sweet? I love this one for its homespun texture. You will create a simple bunny silhouette from natural burlap fabric and layer on small patches of gingham or floral cotton. The fun comes from adding those frayed edges and hand-stitched details with embroidery floss.
The layered, patched look is easy to achieve, giving you that rustic charm typical of handmade bunny easter shirts. You can even cut a shape from the bunny belly and back it with a different fabric for an inlay effect. This technique delivers a dimensional look without requiring a sewing machine.
The mix of rough burlap and soft prints feels nostalgic and handmade. Your finished piece carries a warm, farmhouse aesthetic everyone adores for spring. Trust me, applying a thin line of fabric glue to the cut edges first makes all the difference to control fraying. Feel that wonderful rustic charm when you are done.
7. Bright Tie Dye Bunny Silhouette
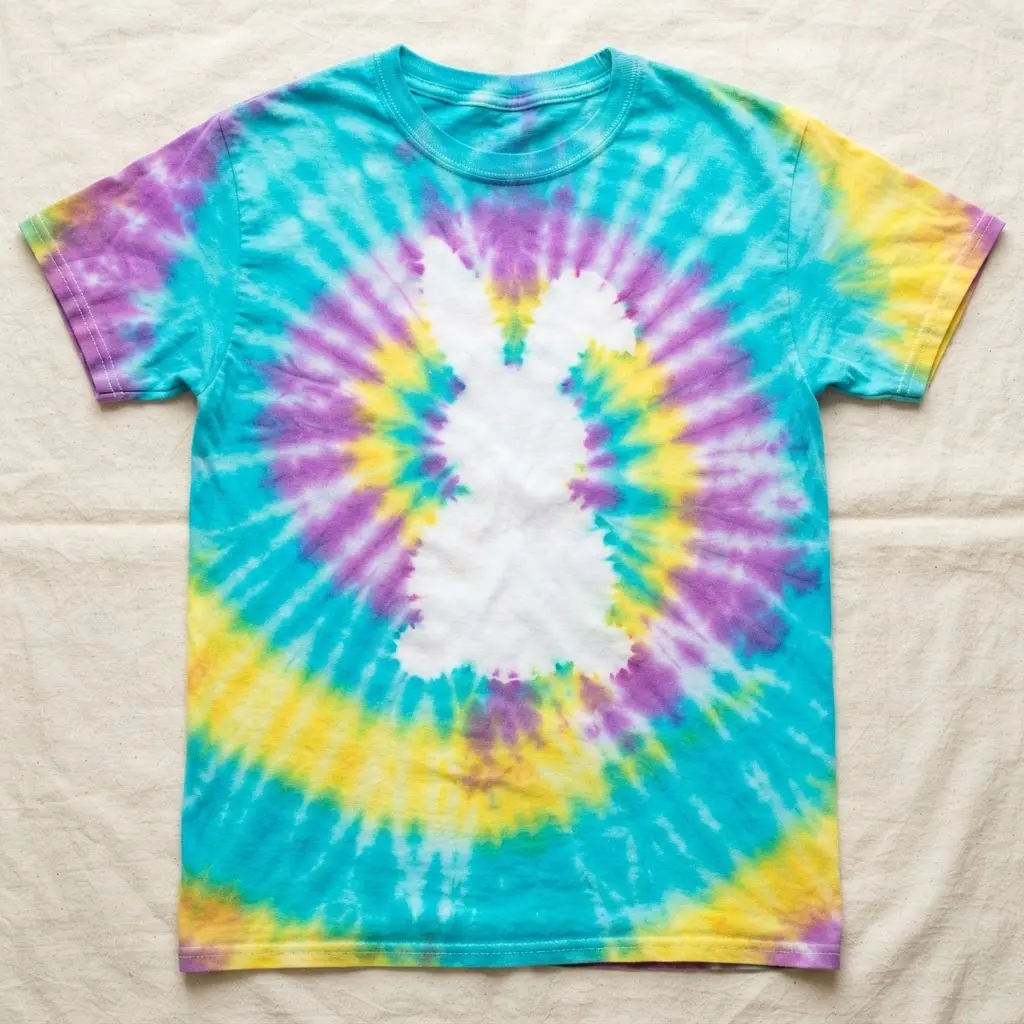
Ever wondered how to get that perfect, crisp bunny shape in the middle of a color explosion? You start by creating a solid freezer paper stencil of your bunny and ironing it right onto your pre-soaked shirt. This creates a resist, so when you twist the fabric around the bunny and apply your fiber reactive dyes, all that vibrant chaos swirls around a perfectly clean silhouette.
It remains a fantastic project for crafting vibrant bunny easter shirts that you will want to wear all season. I love how the contrast between the wild tie-dye and the simple shape stays joyful and spring-like. Trust me on this one, avoid oversaturating the fabric right at the stencil edge to prevent any bleed.
Get that right, and you will feel proud of your bright, custom creation. The final result brings together vibrant color and clean graphic lines.
8. Layered Fabric Scrap Bunny Collage
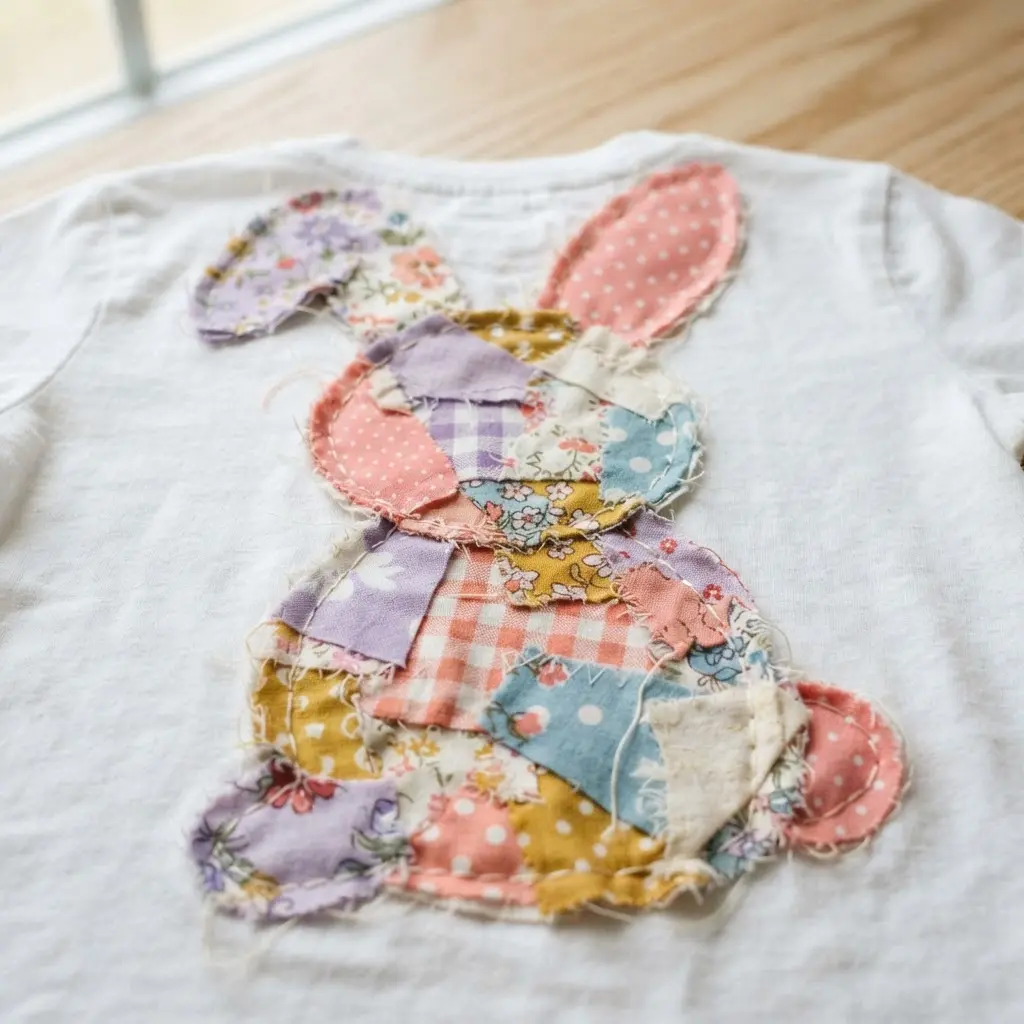
Who knew a pile of old fabric scraps could turn into something so charming? You build your bunny silhouette by layering different patterned pieces, starting with the largest scraps for the body and adding smaller ones for details like the ears. I love how this lets you play with contrasting textures and colors to create real depth.
Trust me on this one, dry-fitting ensures a seamless finish for any custom bunny easter shirts. Letting you tweak your arrangement until it looks exactly right gives a wonderful creative flow. Isn’t it satisfying to give those leftover fabric bits a beautiful new life?
9. Sparkly Glitter Fabric Paint Bunny
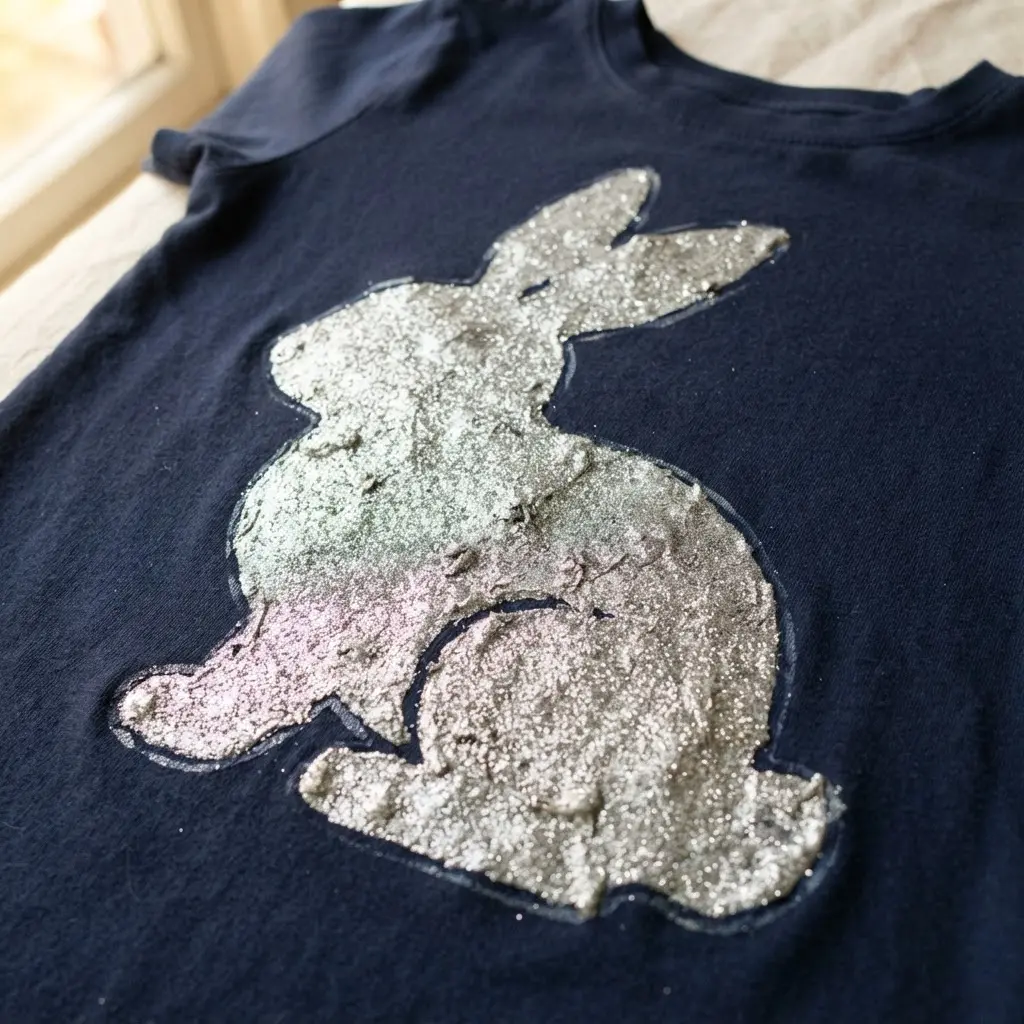
Who says glitter belongs to kids? This technique gives your fabric an instant party-ready look, making it ideal for festive bunny easter shirts. You trace a simple bunny outline onto your light-colored t-shirt, then fill it in with a thick, generous coat of glitter fabric paint.
I love watching it dry into a textured, sparkly surface that catches the light perfectly. Trust me, slipping a piece of cardboard inside the shirt before you start painting prevents messy bleed-through. Let your creation dry completely overnight for the best sparkle payoff.
This approach adds a personalized, festive touch to your wardrobe. It also opens up a whole world of ideas for painted clothing you can try next.
10. Button Nose Bunny Face Shirt
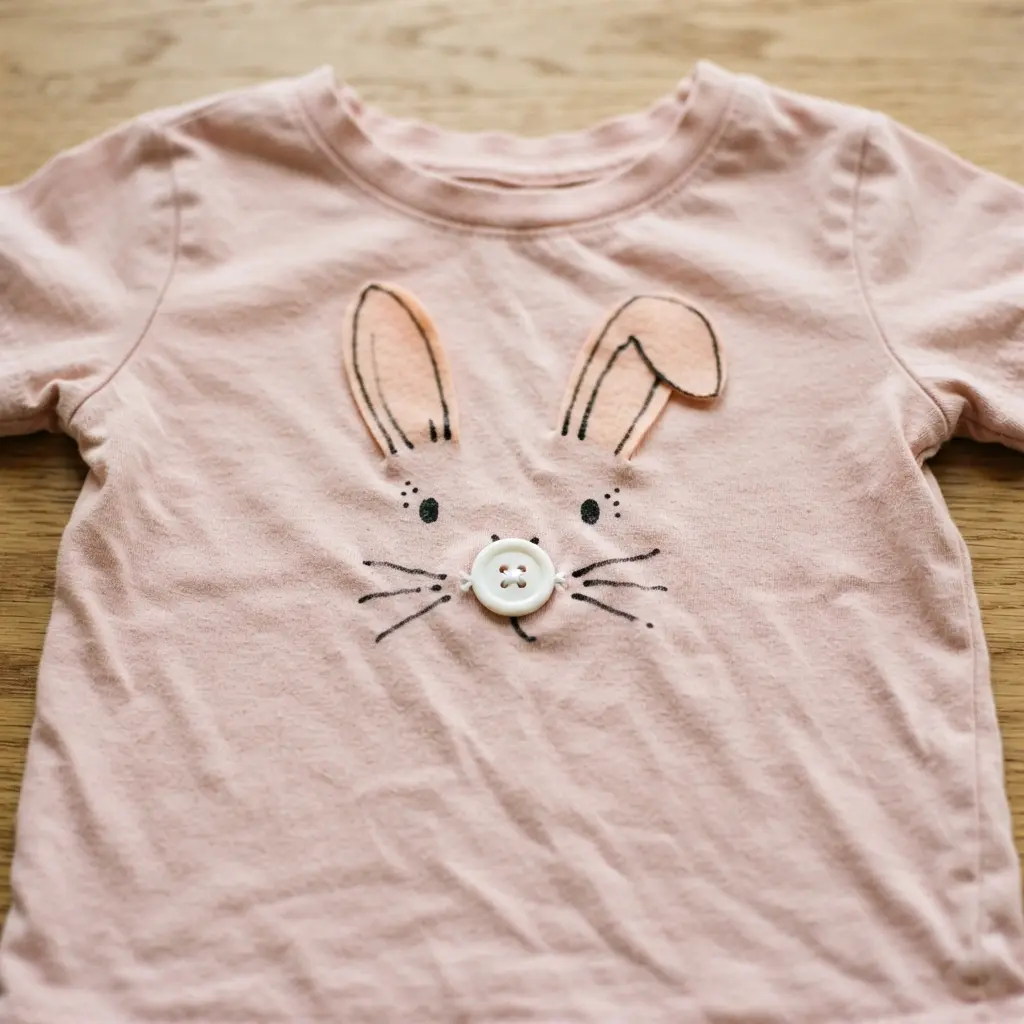
Who would have thought a little button nose could star in a whole shirt design? This classic look focuses on simple, sweet shapes. You start with a basic bunny face outline, then make that tiny round nose the main event. It can be a painted dot, a felt appliqué, or even a cute little embroidered knot.
I love how this charming approach adapts to nearly every custom design for bunny easter shirts. The trick is to keep features balanced and sized appropriately for your fabric. Use a paper stencil to get your placement just right before you commit with paint or vinyl. Feel the charm when you see that adorable face looking back at you.
Isn’t it satisfying when that one small detail makes the whole character come alive? You will adore wearing it.
Laundering Methods To Preserve Handcrafted Graphics
Turn the finished shirt inside out before you ever put it in the washing machine. This single habit protects your bunny design from friction against other clothes and the drum itself. That constant friction causes the main peeling and cracking issues over time. Wash it in cold water on a gentle cycle and skip the dryer altogether, opting to lay it flat or hang it to air dry instead.
The dryer heat can soften and weaken the bond of both vinyl and fabric paint. Following this washing routine preserves every delicate detail across your collection of bunny easter shirts. Keeping them looking fresh guarantees they stay part of your holiday rotation.
Conclusion
The best part of making these bunny easter shirts is seeing your child’s face light up when they put it on. It becomes more than just an outfit, turning into a little piece of your time and creativity they get to wear. My advice is to pick the project that makes you smile first, since that is usually the one you will enjoy making the most.
Whether you finish it in an afternoon or spread it out over a few cozy evenings, the result will be something uniquely yours. I hope one of these ideas sparks that happy feeling of getting ready for a spring celebration together.
FAQs
Q: What is the easiest bunny shirt for someone with no craft experience?
A: The simple felt applique or the button nose bunny face are great starting points. Both require minimal materials and straightforward steps you can complete in a short time.
Q: How do I make sure the design stays on the shirt after washing?
A: Always follow the instructions for your specific materials. For paints and glues, proper heat setting with an iron is often required. For sewn elements, use a tight, secure stitch.
Q: Can I make these shirts for an older child or adult?
A: Absolutely. Scale up the size of your bunny design to fit a larger shirt. The techniques work the same, so you can easily adapt any of these ideas.
Q: What type of shirt works best as a blank for these projects?
A: Look for high-quality cotton or cotton-blend shirts. They hold paint and glue well, are easy to sew through, and provide a smooth, stable surface for your design.
Q: How long do most of these projects take to complete?
A: Times vary. A heat transfer vinyl or fabric paint design might take under an hour. Hand-sewn or embroidered projects offer a more relaxing pace and can be done over a few sittings.


