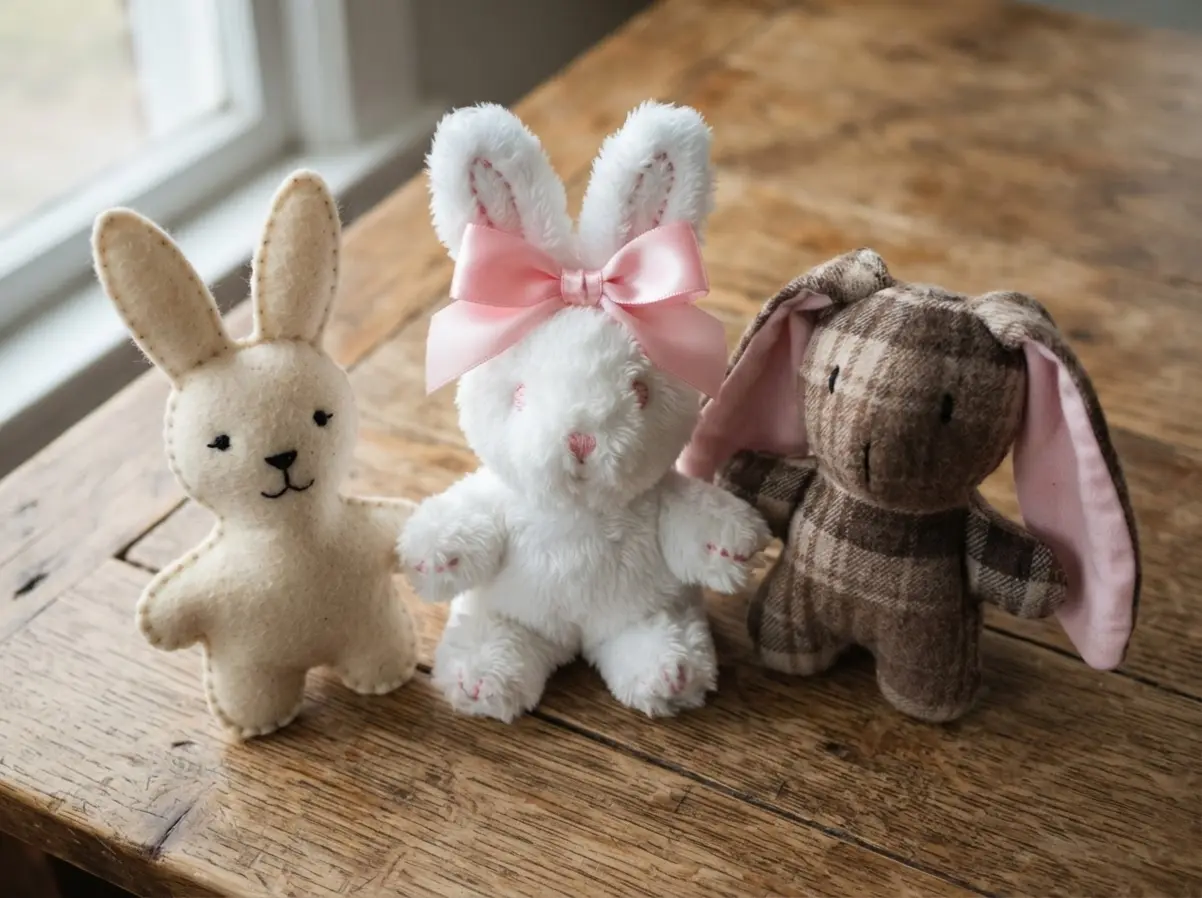
This gallery is packed with ten distinct visual concepts, each with its own character, from vintage felt to soft minky. Whether you are making a gift or adding to your own seasonal decor, you will find the spark you need to start stitching.
Mastering Precise Seam Allowance For Miniature Plush
The fastest way to get stiff, oversized limbs on your plush is using a standard quarter-inch seam allowance. This tiny margin is your secret weapon for crafting seamless DIY bitty bunnies with perfectly rounded curves instead of bulky, distorted corners. You want to cut your pieces with sharp scissors and mark your seam line with a heat-erasable pen before you ever touch the sewing machine.
We all know how tempting it is to use a wider allowance for safety, but that extra fabric gets trapped inside the seam and fights the stuffing. This precision prevents weak stress points at the intersections and gives you that professional, tightly turned finish.
Selecting Fabric Weights For Small Scale Toys
Your fabric choice directly decides how much internal structure your character will need. The good news is, a light to medium-weight quilting cotton is your most forgiving friend for a first attempt. If you fall in love with a plush minky while making DIY bitty bunnies, remember it has more stretch and requires a firmer, more generous polyester fiberfill to avoid a sad, saggy result.
Wool felt is a fantastic middle ground for detail work, like inner ears, because it needs no hemming and adds lovely texture. Just be sure you match the fabric weight to the scale of your pattern pieces to keep everything in proportion.
1. Vintage Felt Bunny with Embroidery Stitches
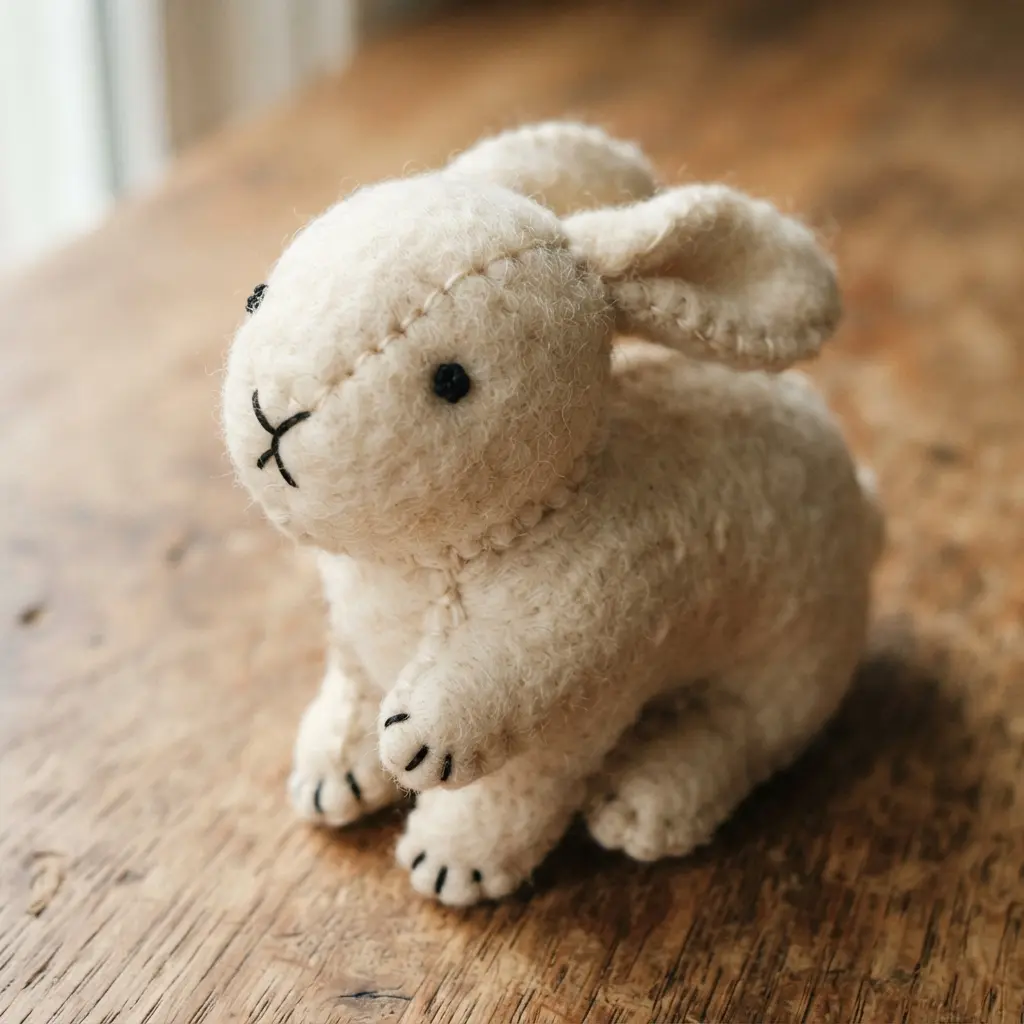
Ever wanted to make something that feels like a cherished heirloom? You will cut simple felt shapes and bring your DIY bitty bunnies to life with hand-stitched details like sweet eyes and tiny whiskers. I love doing the embroidery on the flat pieces before assembly because it guarantees much cleaner results.
Trust me, taking time to practice your blanket stitch on a scrap first makes all the difference for neat DIY bitty bunnies that hold up over time. Stuff it gently for a soft, huggable friend, not a firm pillow. Making one of these is such a satisfying way to create a unique, nostalgic treasure.
2. Floral Cotton Easter Bunny with a Ribbon Collar
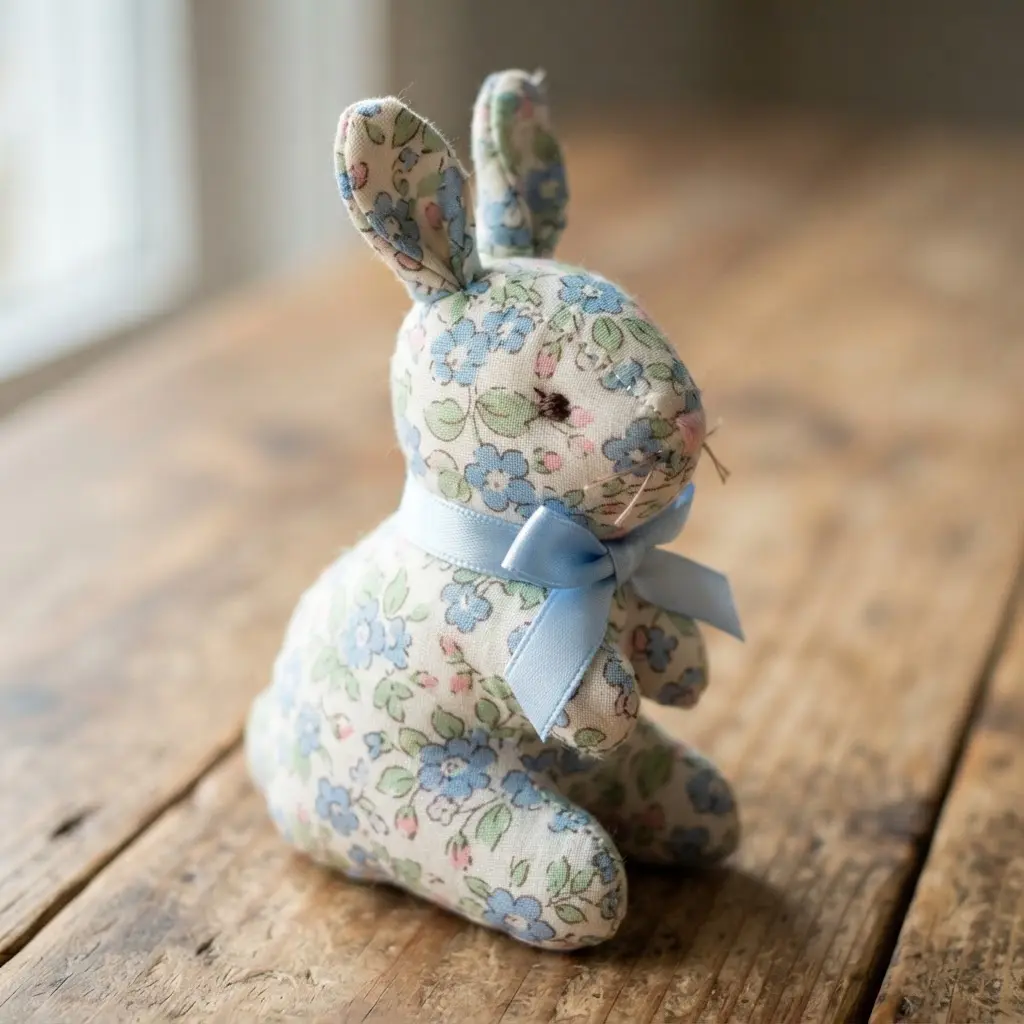
This little bunny always looks so sweet and finished, doesn’t it? The secret is that floral patterned cotton does most of the visual work for your DIY bitty bunnies from start to finish. You cut your bunny shape, sew the seams, and then add a ribbon collar to complete them before styling.
I love how this project works because it feels timeless. The fabric softness and the ribbon charm create a gentle, springlike friend. Your finished plush will have that handmade warmth you cannot buy.
My go-to tip is to use a smooth chopstick to push the stuffing into the ears and paws. This gets you a nice, firm shape that holds its form perfectly. Feel the satisfaction of giving your creation personality with that perfect little bow.
3. Soft Minky Plushie Bunny with a Satin Bow
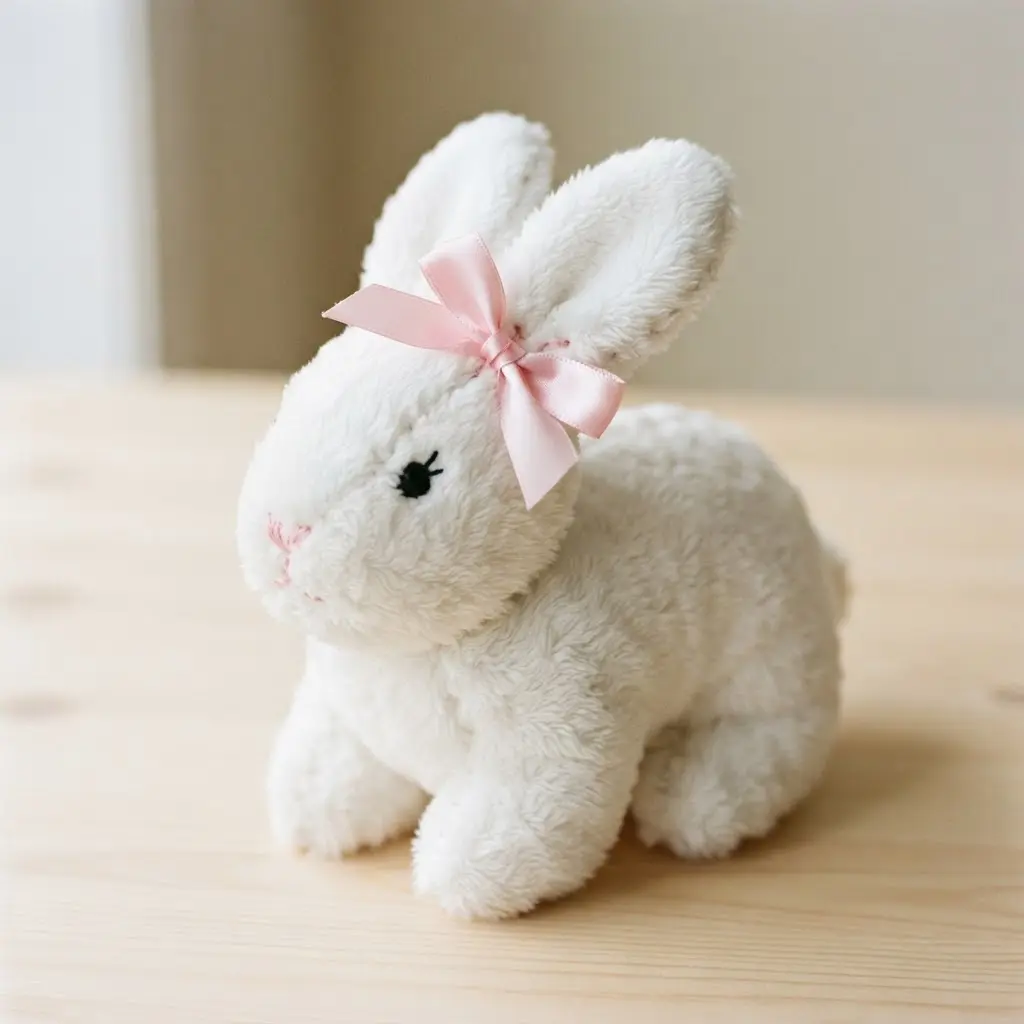
This bunny feels like a cloud you can hug. You cut the pieces from that irresistibly soft minky fabric, then embroider the sweet face while sewing your DIY bitty bunnies together.
You turn it right side out and stuff it until it is plush and squeezable. The final touch is that elegant satin bow tied around its neck. Sound tricky? It is not, as long as you use plenty of plastic fabric clips to keep the slippery minky in place while you stitch.
That combination of ultra-soft texture and a classic satin ribbon makes these DIY bitty bunnies feel truly special to hold. Try it and feel how rewarding it is to create something so comforting.
4. Patchwork Fabric Scraps Bunny Toy
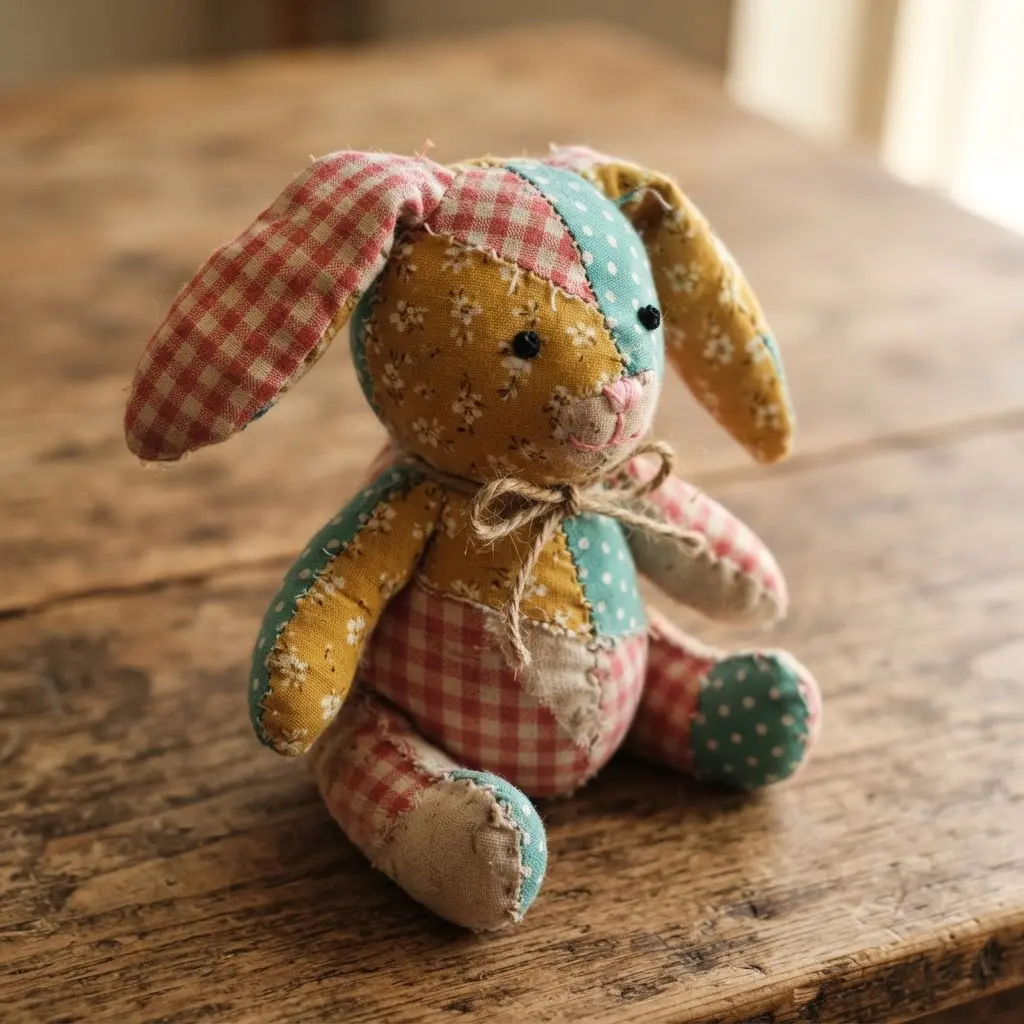
Who says leftover fabric belongs in the trash? This project turns those little scraps into a one-of-a-kind cuddly friend. You will sew your scraps together to create a vibrant panel, then cut the shape for your DIY bitty bunnies right from that textured fabric.
After sewing the body and stuffing it, you get to add personality with simple embroidery or felt details. The key to a neat finish is using a rotary cutter and mat for clean cuts on all those small pieces. Isn’t it wonderful to create something so unique from materials you already have?
5. Contrast Ear Liner Flannel Bunny Plush
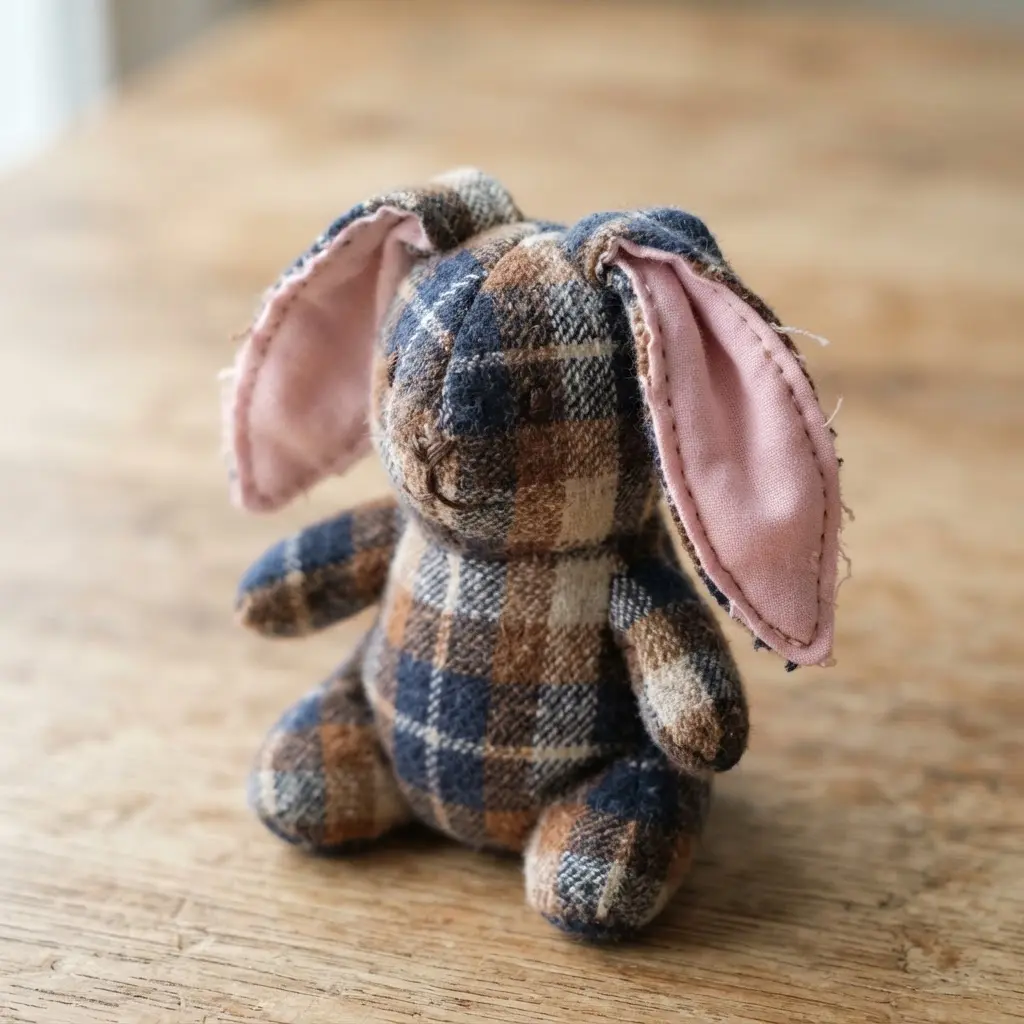
Doesn’t designing contrasting ear linings for your DIY bitty bunnies sound absolutely fancy? You will sew the main body from soft flannel, then line each ear with a contrasting fabric scrap before attaching them. The result is a plushie with wonderful visual depth and a subtle, fun texture difference.
I love how this one simple step elevates the whole look. It feels like a secret little detail that makes your creation feel extra special. Trust me, once you try it, you will want to line everything!
6. Miniature Sitting Bunny with a White Pom-pom Tail
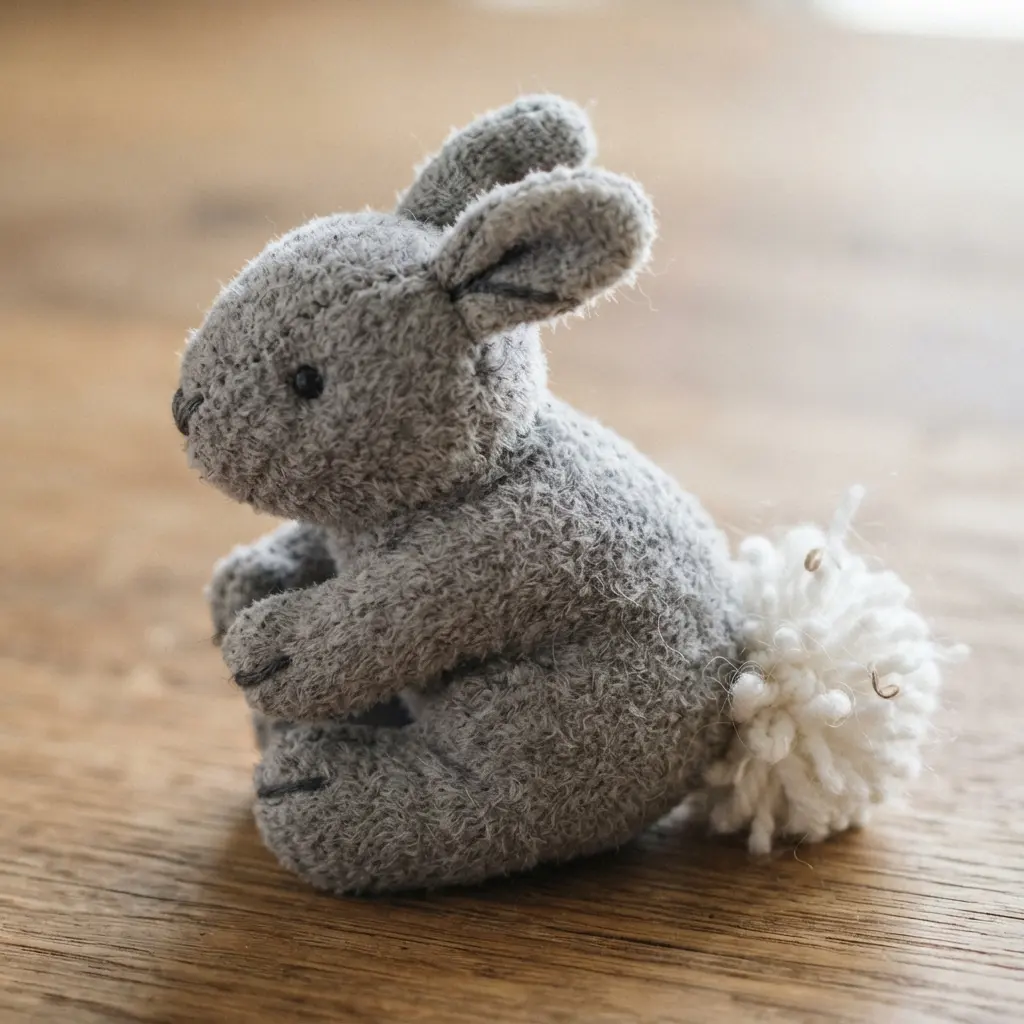
This little bunny is the definition of charming. You cut the simple rounded body form from felt or wool, then stuff it gently to give your DIY bitty bunnies a plump but stable sitting posture. The magic moment comes when you glue that fluffy white pom-pom right onto its backside.
Isn’t it satisfying how that one tiny detail makes it instantly recognizable? I love how this project is small enough to tuck into a fairy garden or use as a sweet springtime accent. It is a perfect companion for a seasonal shamrock wreath craft to decorate your door. Avoid overstuffing so your plush does not tip over, and use a dab of fabric glue to secure the tail.
7. Rustic Linen Bunny with Twine Detail
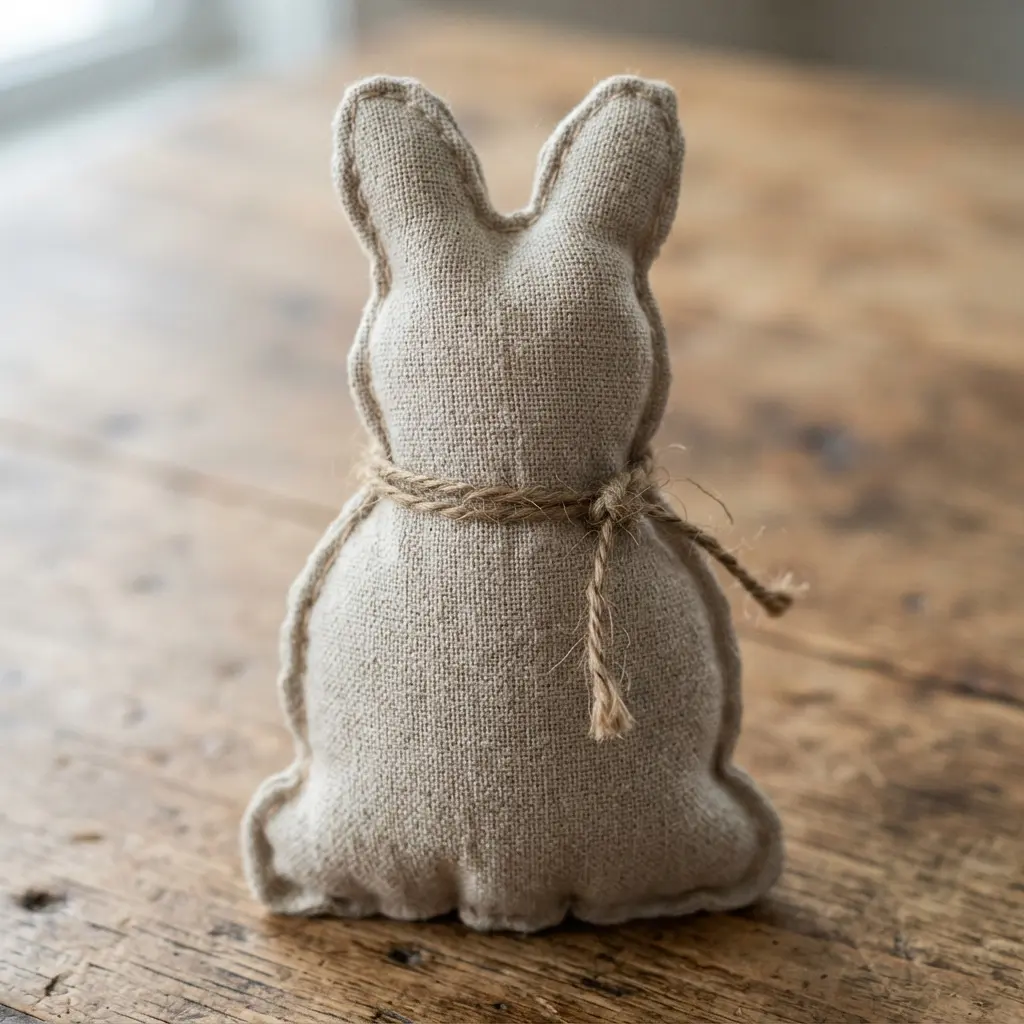
Does the idea of a simple fabric project with big farmhouse charm appeal to you? You start by sewing a basic shape from natural linen fabric, leaving a small opening. The combination of soft linen and rough twine creates a timeless look that makes rustic DIY bitty bunnies perfect for any farmhouse shelf.
I love how the visible fabric weave and hand-stitched seams add to that perfectly imperfect handmade feel. After you close it up, wrap some earthy jute twine around its neck or body. The combination creates a timeless look that works in any room. Your finished plush will have a gentle, whimsical presence you will adore.
8. Polka Dot Spring Bunny with a Checked Kerchief
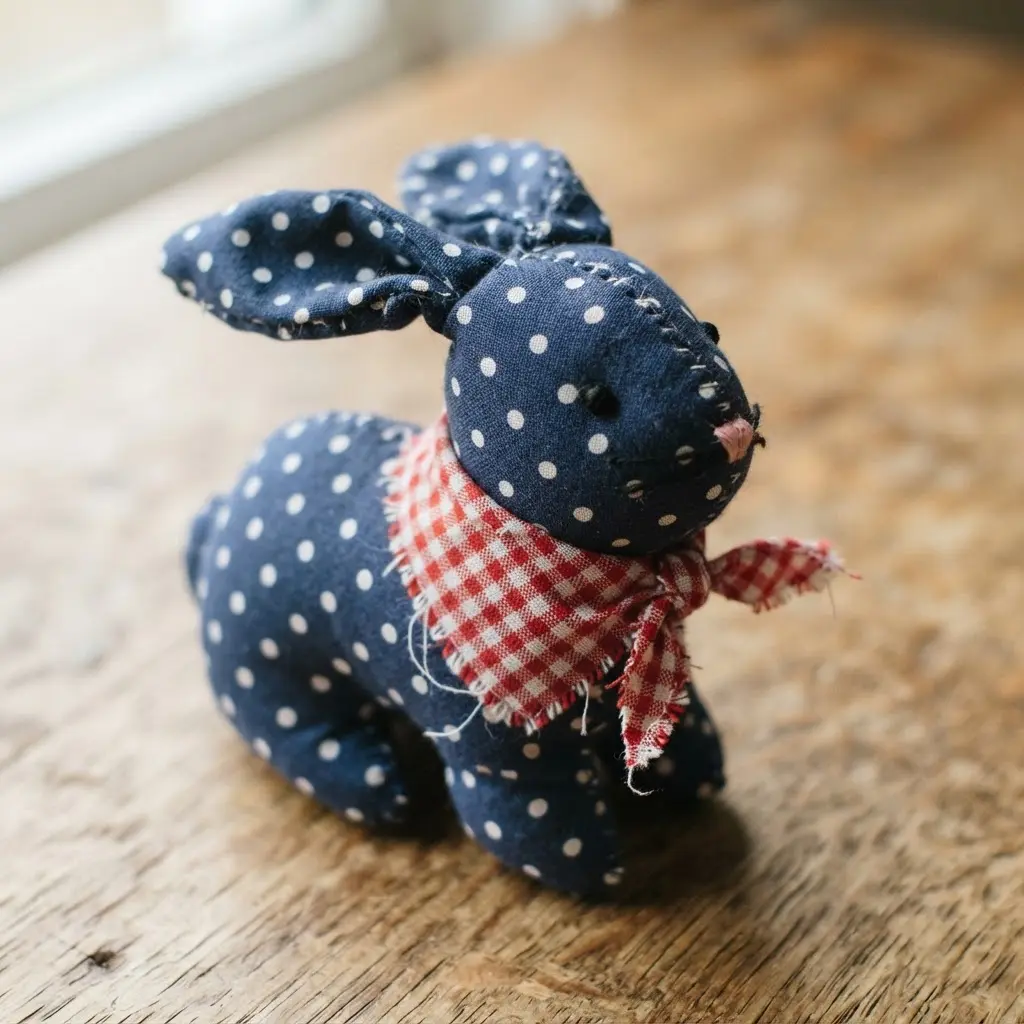
This one surprised me because the polka dots and gingham make it look like it came from a boutique. You start by cutting your bunny shape from polka dot fabric, then stitching the two pieces right sides together. Remember to leave a small opening along the seam for turning and stuffing later. Trust me on this one, pushing the stuffing into the ears with a chopstick makes all the difference for a plump, professional look.
After turning your DIY bitty bunnies right side out, you will stuff them firmly with polyester fiberfill for maximum durability. Then, just hand-stitch the opening closed and embroider on a sweet little face. The final, charming touch is tying a small square of checked fabric around its neck.
That rustic kerchief instantly gives your plush a cheerful, spring-ready personality. Feel how satisfying it is to create such a detailed-looking toy with such straightforward steps.
9. Wool Blend Pocket Sized Bunny Toy
Ever wanted a tiny, cuddly friend you can take anywhere? You will likely use a soft wool blend felt and hand-sew the simple shape, stuffing it firmly with fiberfill. The real charm comes from embroidering a sweet little face with floss, which makes it safe for kids too. Its small size makes it an instant comfort object, perfect for slipping into a pocket or a child’s hand.
The material feels so warm and natural, which I love. You will have a delightful finished toy in no time. These make wonderful gifts, so after you finish your plush, you might want to create a coordinating cute shamrock shirt designs for a complete handmade spring outfit.
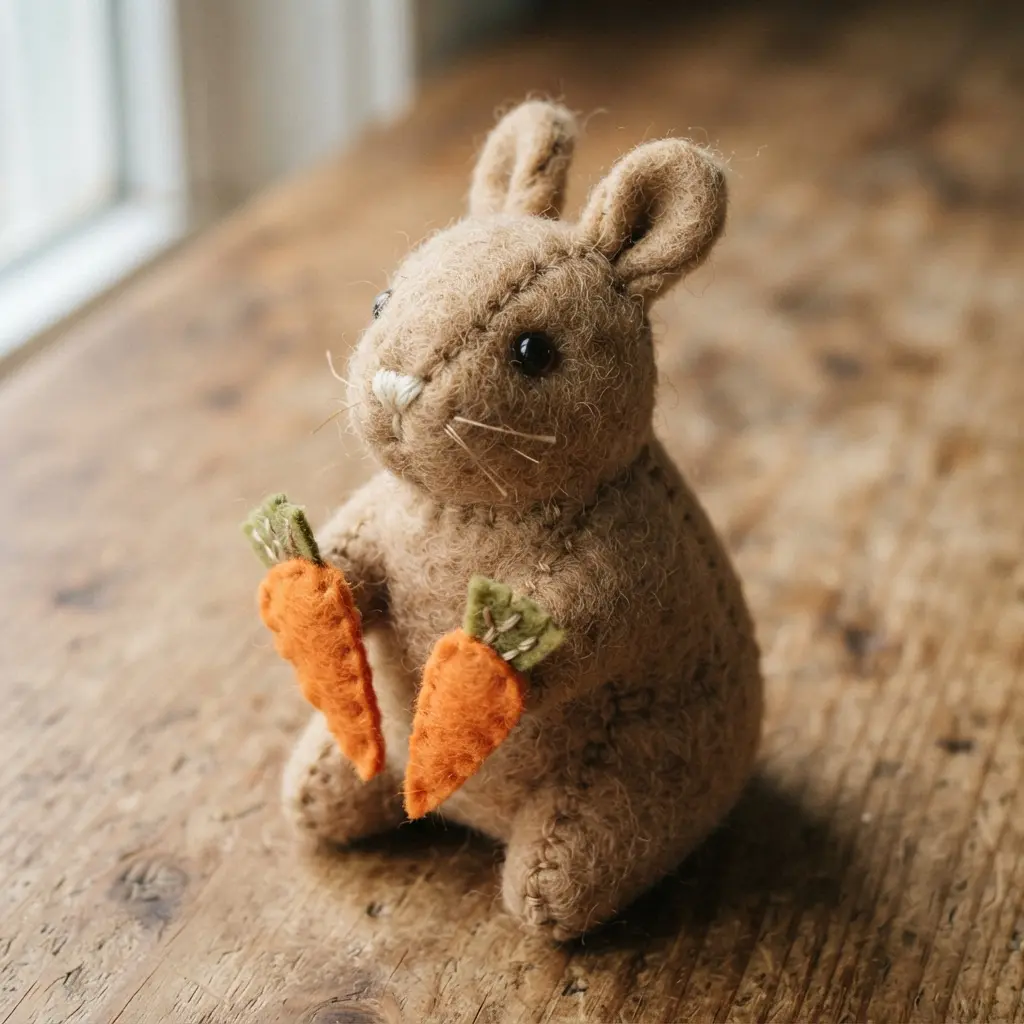
10. Detailed Expression Bunny with Felt Carrots
Who would have thought a bunny’s personality could be stitched right onto its face? You will cut and sew the soft plush fabric, but the real magic happens before you add filling.
I love taking the time to hand-embroider the facial expression first, giving your character a unique look that is happy, sleepy, or curious. You will also stitch on a tiny nose and mouth to complete the face. It works because you are not just making a toy, you are giving it a soul through those little stitches. Then you will stitch up a few simple felt carrots to tuck into its arms.
Try it and feel the joy of bringing a tiny, expressive character to life. You will notice an instant emotional connection when the face comes together.
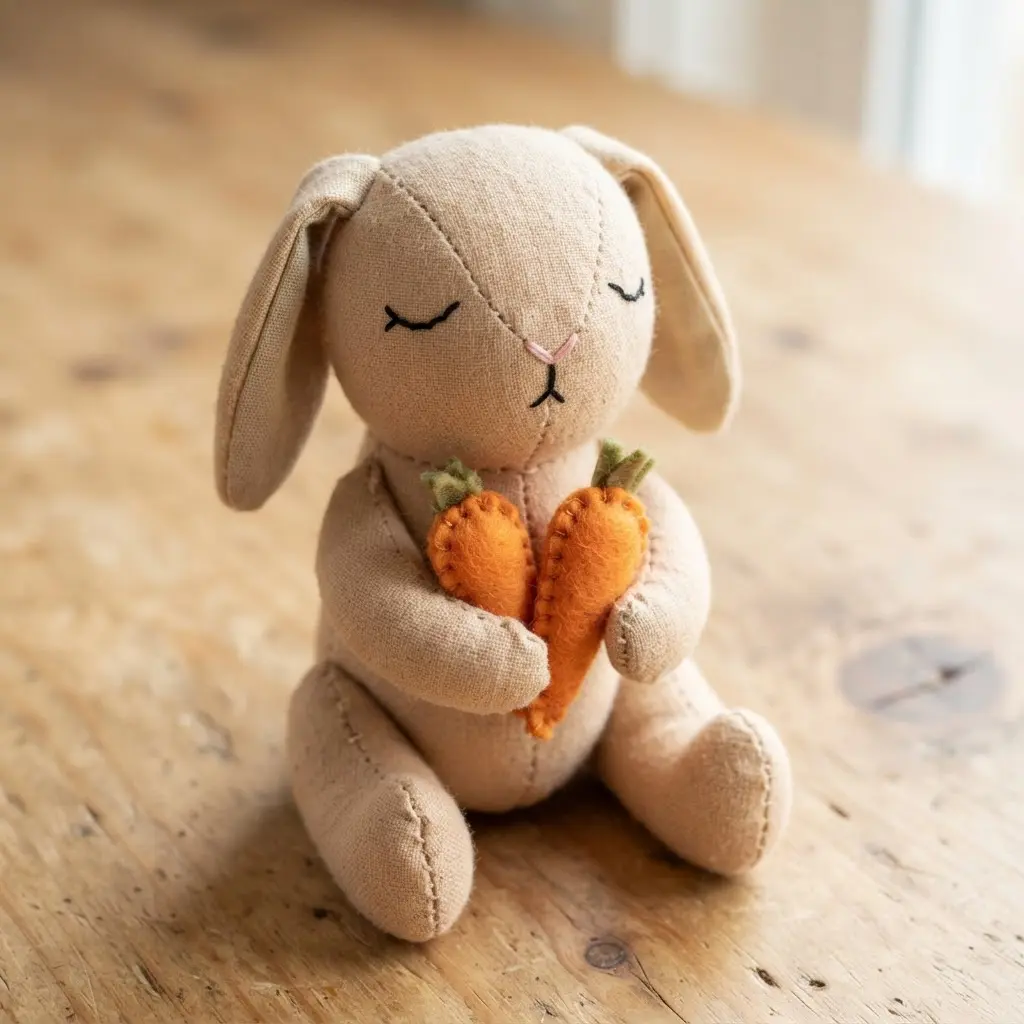
Adding Handstitched Facial Features And Whisker Details
A few strands of embroidery floss are the difference between a cute shape and a character with real personality. Here is the thing, you must embroider the face before you close the final seam. This gives you full access to the inside of the head for a stable surface to push your needle against.
Use a simple satin stitch for sleepy eyes or a tiny straight stitch for bright, alert ones. For whiskers, take a single strand of floss and pull it through the muzzle, leaving long tails. Knot each tail securely inside the head before you add the final stuffing. This handstitched detail, along with a tiny ribbon collar, elevates your simple project into a true keepsake.
Conclusion
The real joy of making these little friends comes from seeing your own fabric choices and stitches give each one a unique personality. That moment when you turn a plush right-side-out and its character suddenly appears is pure magic.
My best advice is to keep your embroidery floss and a good turning tool, like a chopstick, close by. However you choose to style your DIY bitty bunnies, whether perched on a mantel or tucked into a gift basket, they are a wonderful testament to the cozy, creative satisfaction of making something by hand. I hope this list has you looking at your fabric scraps with fresh, inspired eyes.
FAQs
Q: What is the best fabric for a beginner making a small bunny?
A: Lightweight cotton or quilting cotton is ideal. It is easy to cut, does not fray excessively, and turns smoothly for clean seams on a small scale.
Q: How do I get a cute face on such a tiny plushie?
A: Use a fine embroidery needle and two strands of floss. Mark the face placement with a water-soluble pen before you sew to ensure the expression looks balanced.
Q: My bunny seams look bulky when I turn it. What went wrong?
A: This often happens with fabric that is too thick or if your seam allowance is too wide. Use a smaller stitch length and trim the seams closely before turning.
Q: Can I make these without a sewing machine?
A: Absolutely. These projects are small enough to hand-sew comfortably. Use a simple running stitch or backstitch with strong thread for durable seams.
Q: Where can I find templates for these bunny shapes?
A: Many craft bloggers and independent pattern designers offer free or paid templates. Look for simple silhouette patterns labeled for small plush toys or ornaments.


