

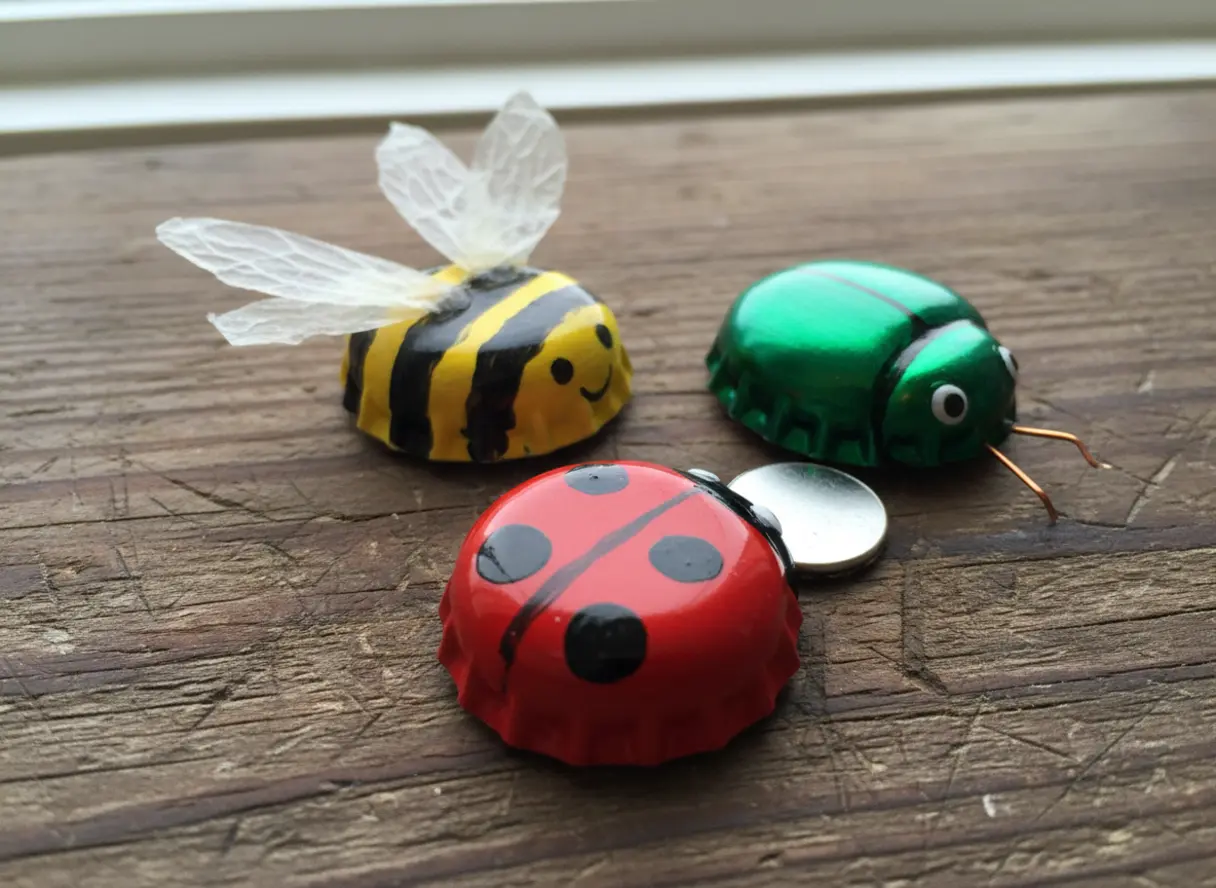
I love how these little circles of metal or plastic can become a whole garden of friendly insects with only a bit of paint and creativity. They’re wonderfully tactile for little hands and the results are instantly charming. This list is full of ideas that balance simple assembly with big personality, using supplies you likely already have at home.
Preparing Metal And Plastic Surfaces For Paint
That shiny finish on a soda bottle cap is a paint job waiting to peel right off. When making bottle cap bug crafts, you need a quick sanding with fine-grit paper to create a rough, toothy surface for acrylics to grip. Trust me on this, skipping the primer on metal caps guarantees your ladybug spots will flake away.
Use a white or gray gesso first, which gives you a perfect base for those bright, high-opacity colours. This step feels like a chore, but it makes the difference between a project that lasts and one that looks tired after a week. The good news is plastic caps often hold paint better, but a light scuff still helps. Your finished insect patterns need this solid foundation to look crisp.
Structural Adhesion Methods For Multi Piece Insects
Wobbly legs are the number one frustration with bottle cap bug crafts, and the fix is choosing the right glue. For stacked caps creating a segmented beetle body, you need a strong, fast-setting bond like a two-part epoxy. Hot glue is fantastic for attaching chenille stem legs because it cools quickly and holds the flexible material in place.
The trick is to use a generous dot and press the stem in while the adhesive is still molten. For a permanent metal-to-metal bond, like adding a smaller cap for a head, a drop of super glue gel gives you precision and strength. Let each joint set fully before moving to the next appendage, which prevents everything from shifting. This patience ensures your insect has a durable chassis that will survive enthusiastic display.
1. Polka Dot Red Ladybug Magnet
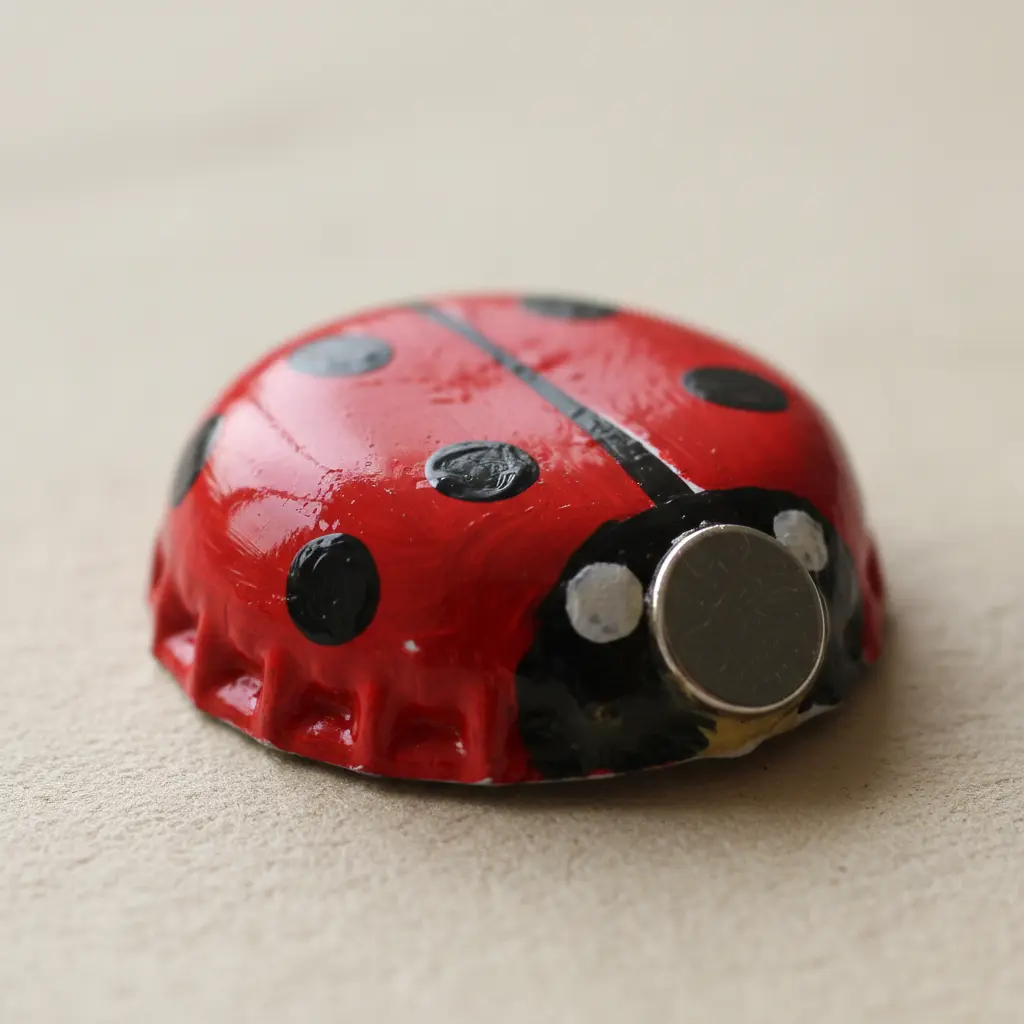
Who would have thought something so cheerful could start with a humble bottle cap for bottle cap bug crafts? This classic design works beautifully as a beginner project because the shape is so forgiving. You start by painting the whole cap a vibrant red, then add a black head at one end.
The fun part is dotting on those iconic spots with a small round brush. I love using a toothpick for the tiniest, most perfect dots. For a strong hold, use a dab of strong craft glue to attach a small magnet to the back. Your finished ladybug will brighten up any fridge or magnetic board.
2. Striped Yellow Bumblebee with Paper Wings
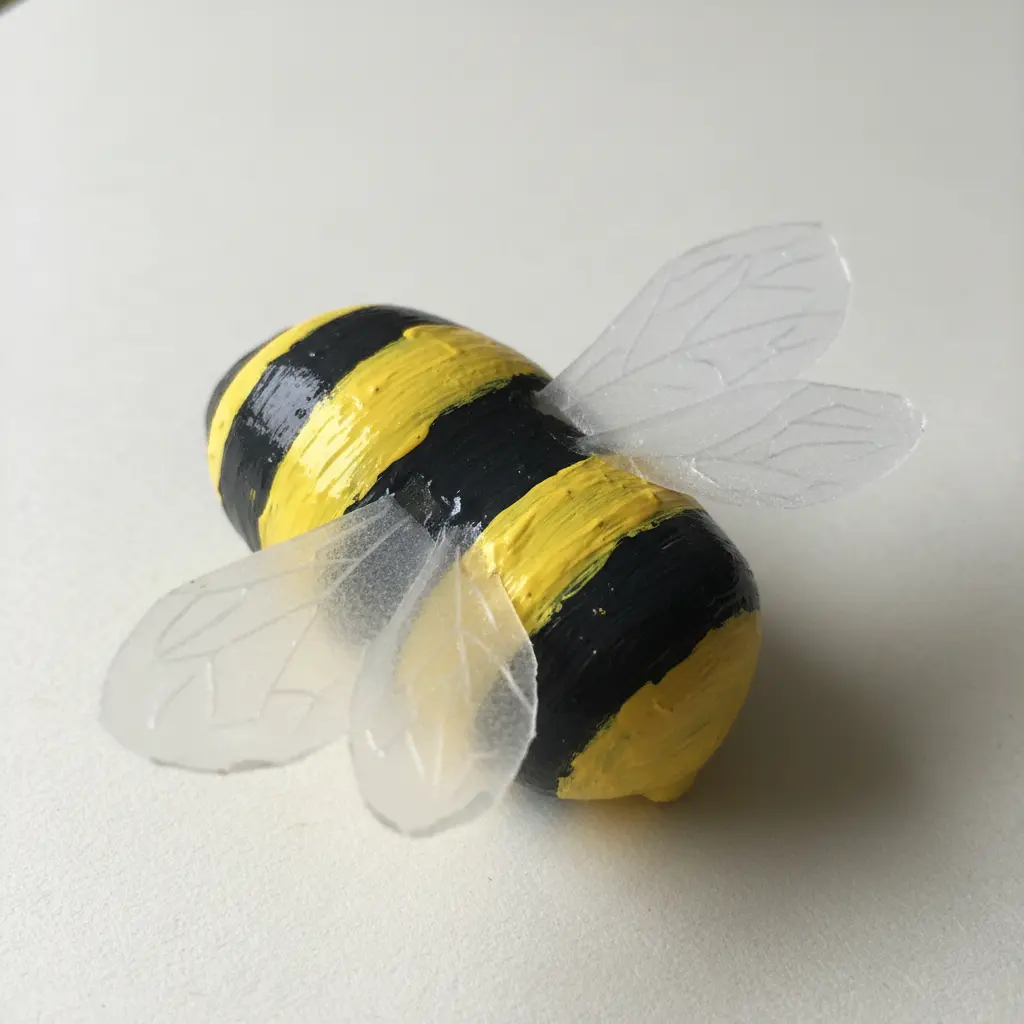
This one looks detailed but honestly, it moves quickly when assembling bottle cap bug crafts at home. You start with a simple, plump yellow body and add those classic black paper stripes for instant bumblebee charm. The real magic happens with the wings, cut from delicate tracing paper.
I love drawing tiny veins on them with a fine pen to mimic the real thing. The contrast between the fuzzy-looking body and those airy, translucent wings is delightful. It is a perfect project if you have leftover supplies from other upcycled builds. Your finished bee will have so much personality.
3. Metallic Green Iridescent Beetle Body
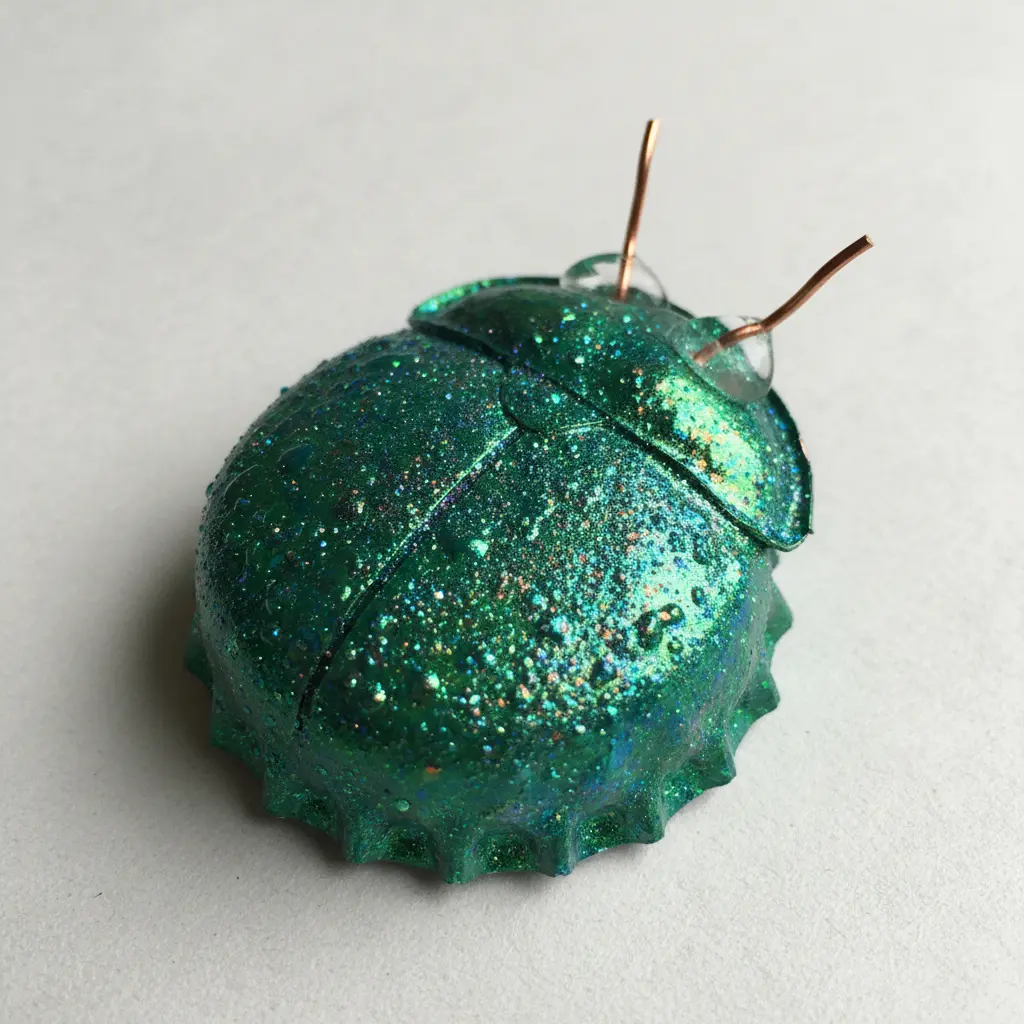
Ever wondered how real beetles get that magical, shifting green glow for bottle cap bug crafts? It is not paint, it is physics. Their shells have microscopic layers that bend and reflect light, a trick called structural color. For your craft, you can mimic this by layering different shades of green paint or using a special iridescent medium.
I love starting with a dark green base and dabbing a lighter, metallic green on top while the base is still a bit wet. This creates a blended, layered effect that catches the light from different angles. Isn’t that more entertaining than a flat color? Your finished beetle will have a stunning, jewel-like finish that feels alive.
4. Fuzzy Black Pipe Cleaner Spider
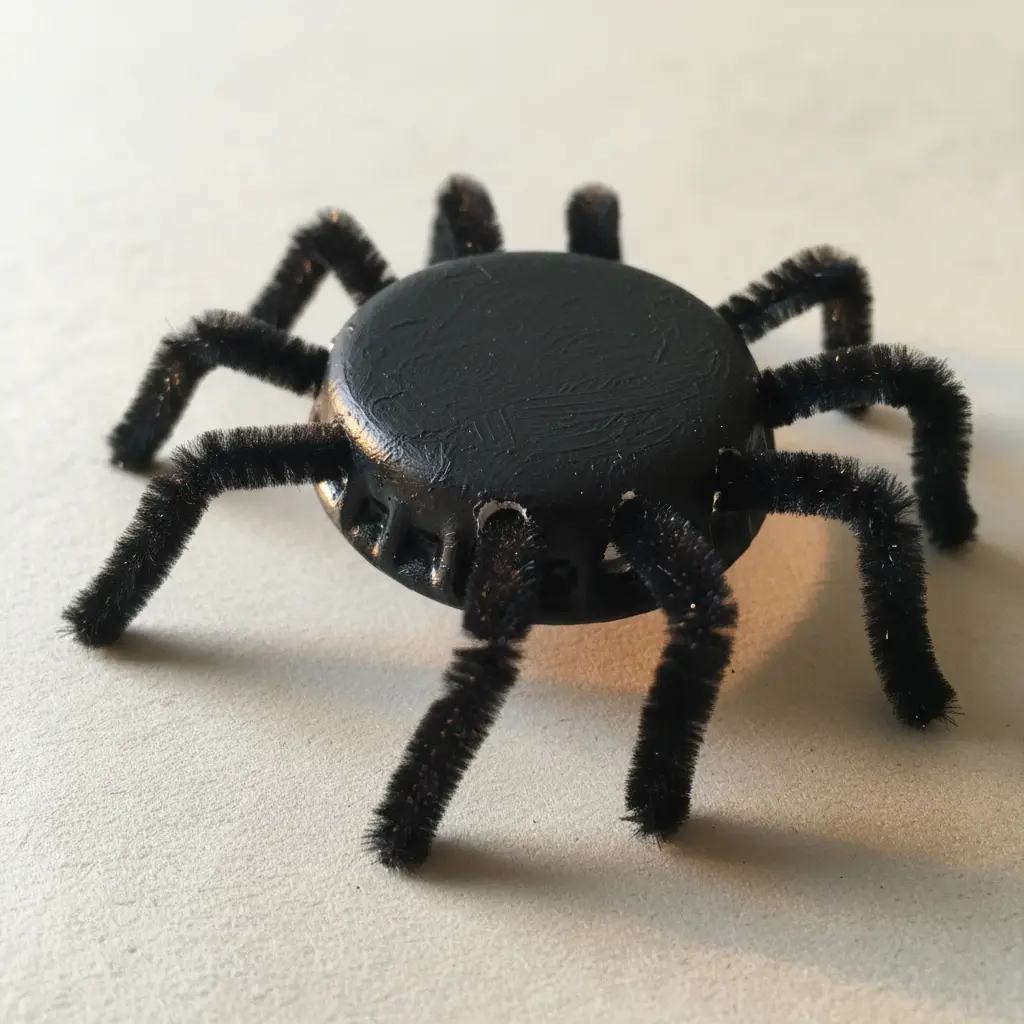
This one is a total crowd-pleaser among bottle cap bug crafts for good reason. It looks intricate but you can honestly make it in under ten minutes. The core is simply twisting a few black pipe cleaners together for the body and wrapping more around for the legs.
Bend each leg into a couple of little joints for that classic, creepy-crawly posture. I love finishing it off with a pair of googly eyes for instant personality. The fuzzy texture makes it feel friendly, which is perfect if you are building these with younger helpers. It works wonderfully as a standalone decoration or as part of a larger scene.
For a simpler, seasonal spin, these spiders pair perfectly with easy spring crafts for preschoolers like pipe cleaner flowers.
5. Painted Blue Butterfly with Felt Accents
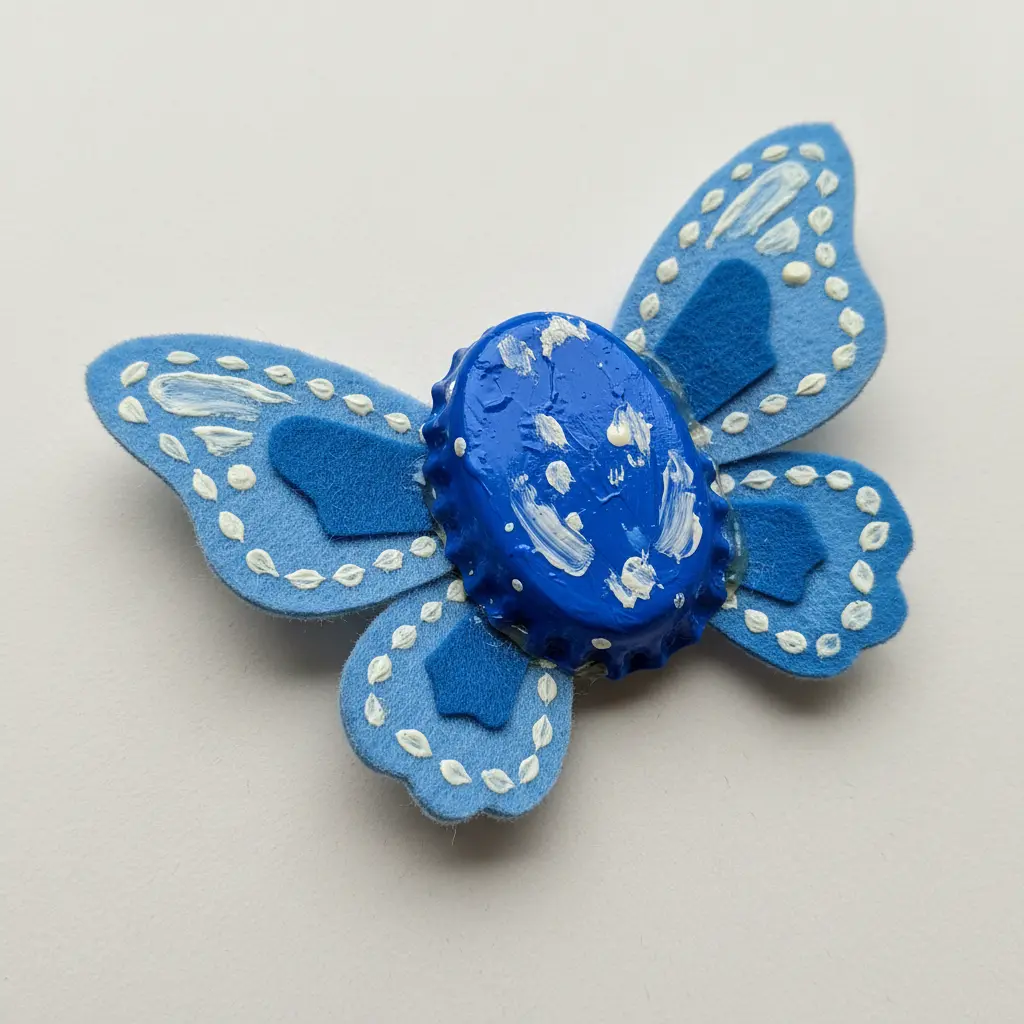
This creation is a real treat for your eyes and your fingers when planning bottle cap bug crafts. Who would have thought combining paint and felt could feel so wonderful? You paint the butterfly wings with various shades of blue acrylic, then add the body and accents with soft felt pieces.
I love the way the smooth, shiny paint contrasts with the fuzzy texture of the black felt body. It works because the mix of materials makes your creation feel more like a real object than a simple drawing. Let the painted wings dry completely before you glue anything on, or you will get unwanted smudges. Trust me, seeing your little blue butterfly come together with those felt details is incredibly satisfying.
This is a fantastic project to do with kids, as it pairs wonderfully with other fun duck tape crafts for kids for a full afternoon of creative play.
6. Multi-Segmented Orange Monarch Caterpillar
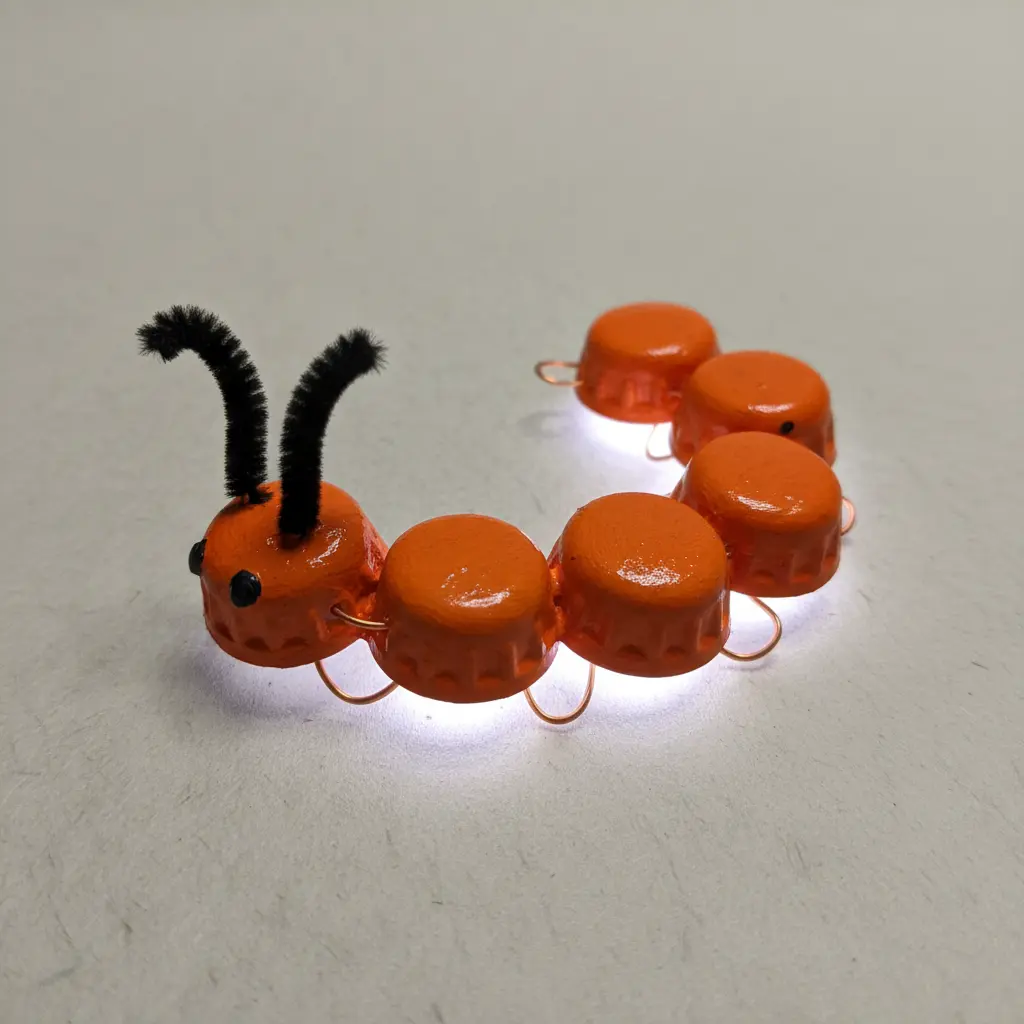
Ever think a caterpillar could be this cute inside a bottle cap bug crafts lineup? This one surprised me with how perfectly caps mimic those rounded, chunky body segments. You will line up your orange caps in a slightly overlapping row to form the main body, then glue them onto a sturdy popsicle stick base for extra stability.
I love how adding a smaller cap for the head and some simple pipe cleaner antennae brings it to life instantly. The magic here is in the material, since those round shapes are begging to become a segmented insect form. Trust me on this one, using a strong adhesive like E6000 craft glue is the key to keeping your caterpillar intact for play. Feel that creative pride when you see your upcycled creation crawling across the shelf.
7. White Spotted Mushroom Ant Decor
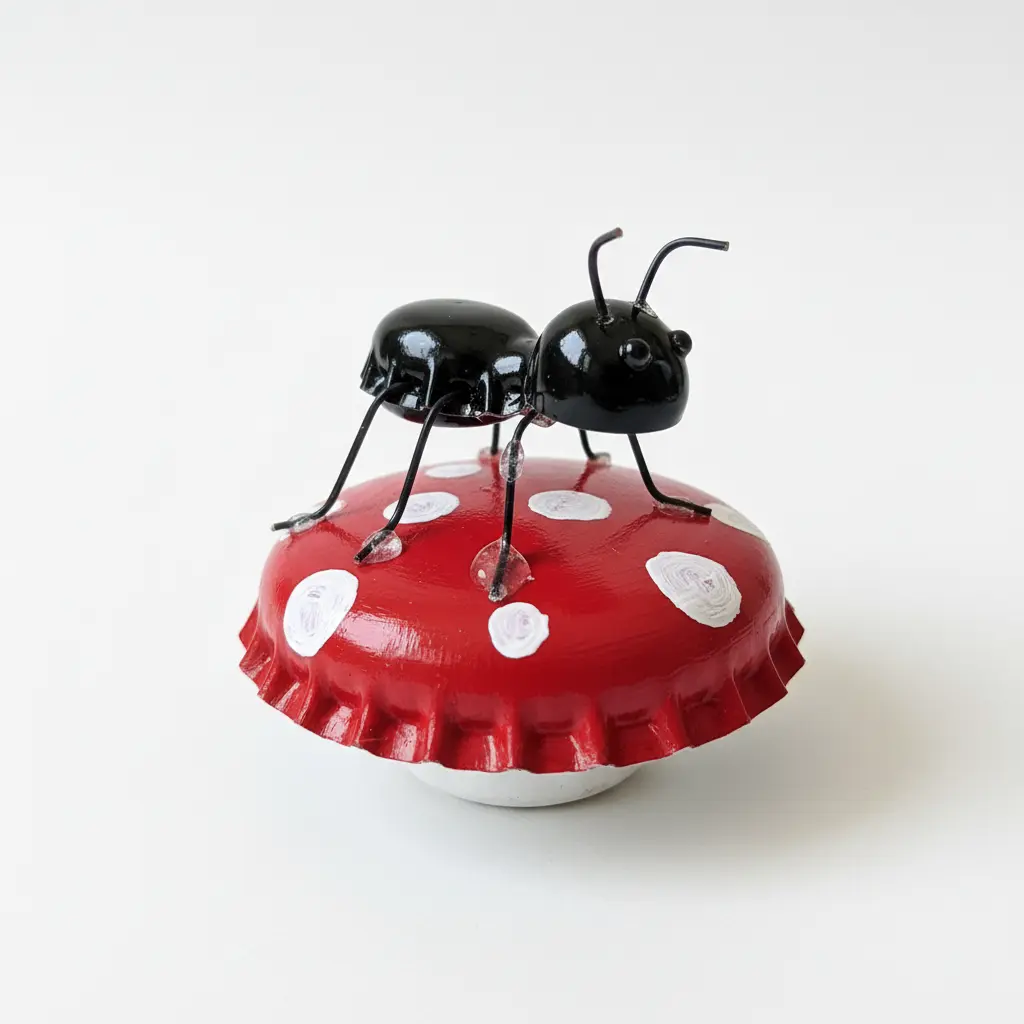
This little scene looks like it jumped right out of a storybook, doesn’t it? I love this project because bottle cap bug crafts can easily capture that nostalgic, whimsical vibe. To make your own, start by forming the mushroom cap and stem from recycled materials, like a painted plastic section. Next, you will add the iconic bright red paint and those perfect white spots to the cap.
Crafting the ants from small caps or beads gives them a fun, chunky look. Pose them climbing the stem or exploring the cap for a magical feel. The key is using a strong, weather-resistant adhesive to keep your little ant friends securely in place, especially if your decor will live outdoors. This makes it a durable piece of garden art.
For another project that builds a whole tiny world, you can get inspiration from creative undersea animal crafts. Seeing your finished mushroom and ant duo is genuinely satisfying.
8. Vibrant Purple Dragonfly with Translucent Wings
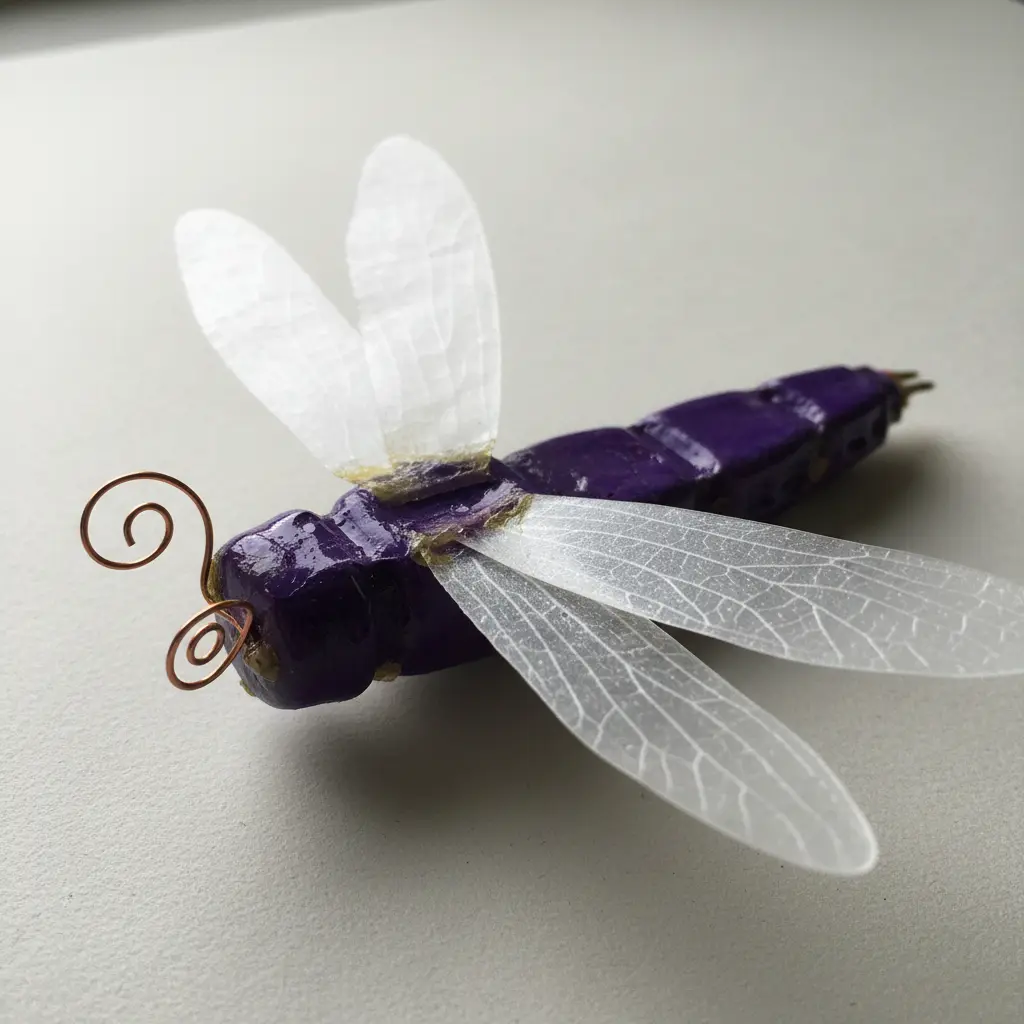
This design feels magical, doesn’t it, especially when adding delicate details to bottle cap bug crafts? You take simple caps and suddenly create something airy and light. The trick is to thread your purple bottle caps onto a sturdy wire to form the long, segmented body.
Then, cut four wing shapes from a clear plastic bottle or some cellophane. I love how the light catches them during display. Securely glue these wings right onto the middle section of the body, and your dragonfly gets its full personality. It is a fantastic project to do with kids, and it makes a wonderful handmade gift.
For another fun nature-themed project using everyday items, you could explore some cute owl craft ideas after finishing this one.
9. Glossy Black Cricket with Long Antennae
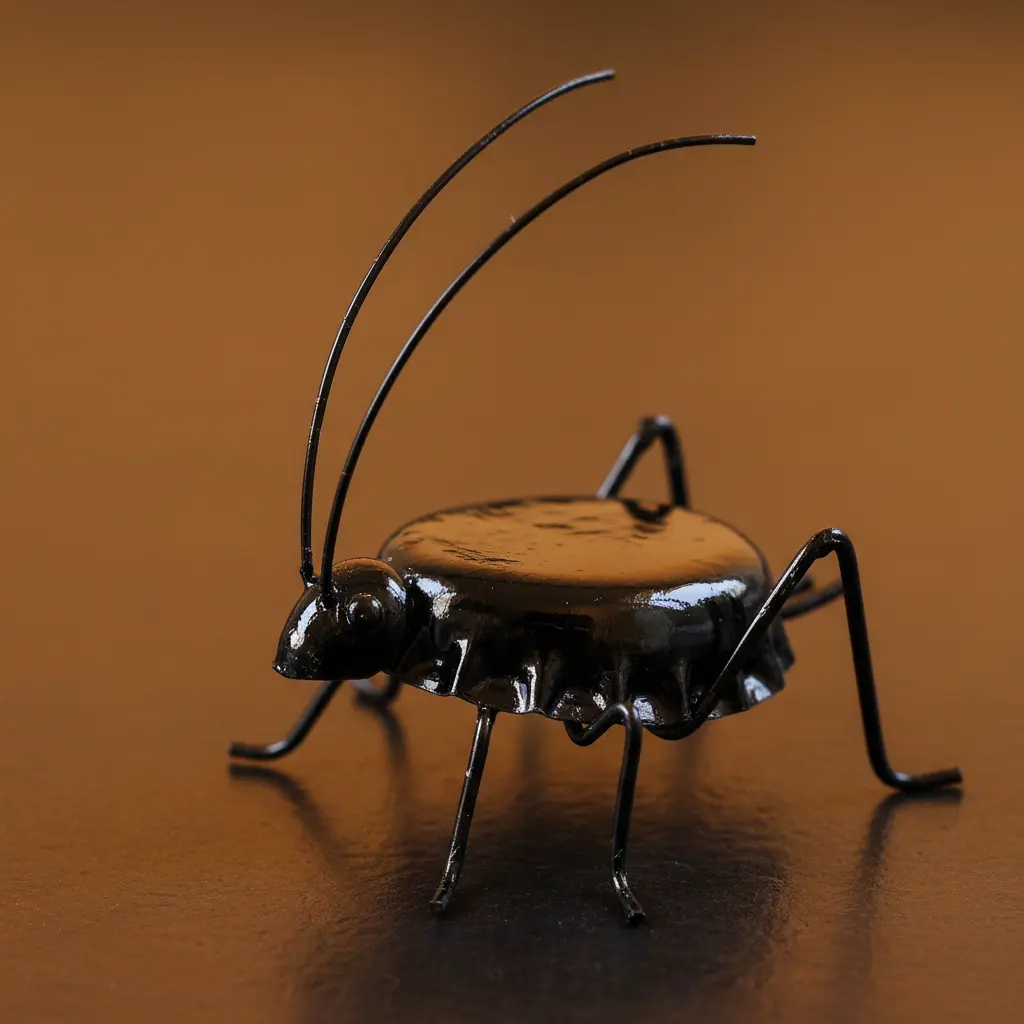
Ever wondered why crickets always seem to be listening in our backyard bottle cap bug crafts? That is all down to their incredible long, thread-like antennae. I love how these sensory tools are nearly twice the length of their body, helping them navigate in the dark. Their shiny black shell is not merely decorative, either.
What makes this bug so reliable at surviving? Those antennae are absolutely key. They detect food, sense danger, and help find a mate. Their signature chirp, created by rubbing their wings together, is a highly effective long-distance call. This combination of stealthy looks and sharp senses is a masterclass in natural adaptation.
Here is a quick tip to avoid confusion during identification. Always check the antennae length first. Crickets have super long ones, while grasshoppers sport short, stout feelers. Getting a positive ID on your garden visitor feels incredibly rewarding.
10. Simple Green Grasshopper on a Leaf Base
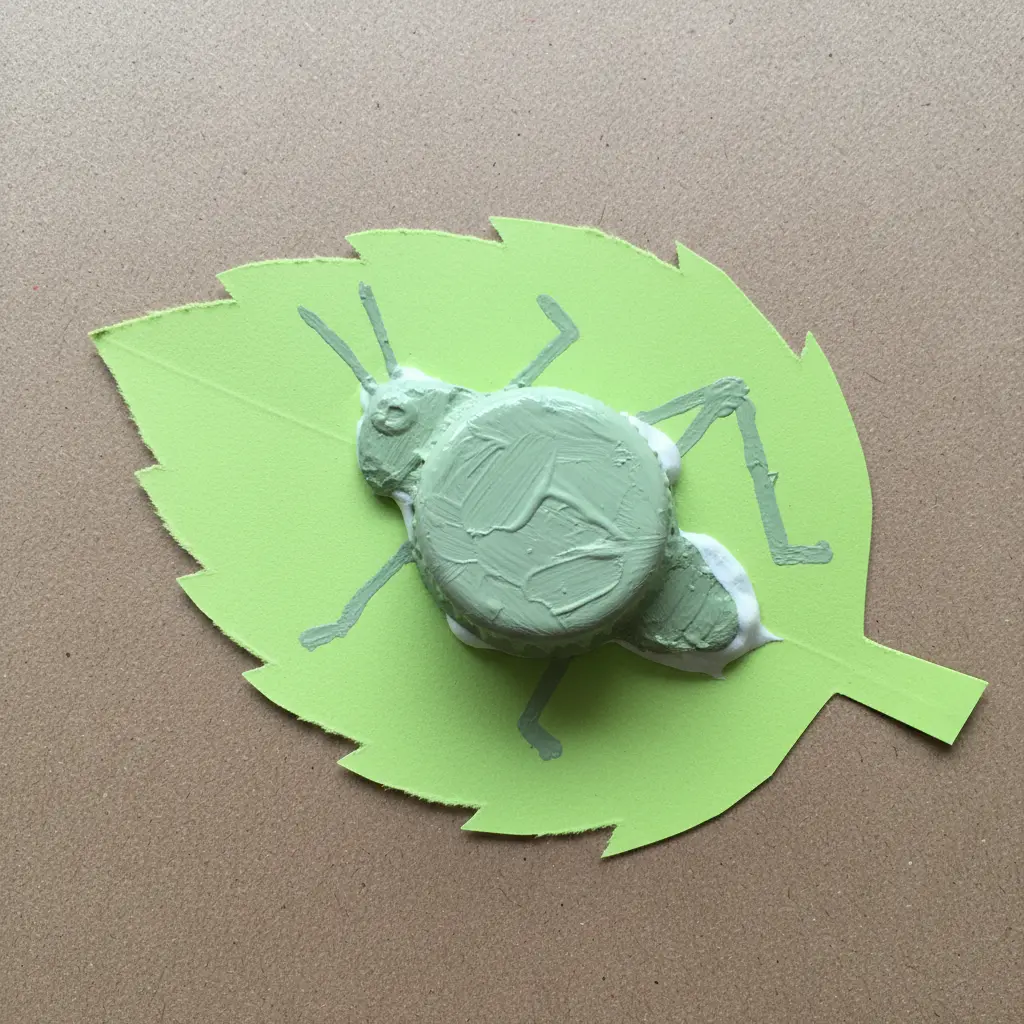
Who knew a few paper shapes could create such a charming creature for beginner bottle cap bug crafts? I love how this one comes together on a flat surface. You will cut an elongated oval body and a smaller round head from green paper, then attach six simple leg strips.
Glue your finished grasshopper onto a leaf-shaped base for an natural, grounded look. This project works so well because it is incredibly accessible to all skill levels. It is a fantastic way to practice basic cutting and gluing with recycled materials. Just let each piece dry before adding the next to keep everything neat and tidy.
Displaying Finished Insect Collections With Magnetic Backings
A self-adhesive magnetic strip turns your bottle cap beetle into a fridge friend in seconds when displaying bottle cap bug crafts. Peel the backing and press it firmly onto the back of your dry, finished insect. This method lets kids rearrange their entire collection on any steel surface, creating a buzzing diorama that changes daily. You can also glue small, strong neodymium magnets to the underside if you used stacked caps for a heavier piece. For a framed display, a thin sheet of steel inside a shadow box provides the perfect mounting surface. This approach gives your work a clean, gallery-like look while keeping the fun, interactive element.
Conclusion
The best part about gathering your finished bottle cap bug crafts is seeing how a simple upcycled piece can spark so much imagination. Your collection of colorful insects is more than craft time; it is a small reminder of the creative possibilities hiding in everyday objects. When you are ready for your next project, try mixing and matching elements from different designs, like a ladybug’s polka dots on a dragonfly’s wings. The most successful builds are the ones that make you and your little helper smile the widest.
FAQs
Q: What is the best glue for sticking things to metal bottle caps?
A: A strong, fast-drying option like a hot glue gun works perfectly. For a cleaner setup, choose a thick craft adhesive specifically formulated for metal and plastic surfaces.
Q: How do I prepare bottle caps for crafting?
A: Wash them thoroughly with warm soap and water to remove sticky residue. Let them dry completely on a towel before painting to ensure smooth adhesion.
Q: Are these crafts safe for young children?
A: With proper supervision, absolutely. Always select child-safe, non-toxic paints and glues. An adult should handle any hot glue applications or sharp tool steps.
Q: What can I use if I don’t have googly eyes?
A: Draw simple eyes with a permanent marker or paint white circles followed by smaller black pupils. Small paper cutouts also create an excellent homemade alternative.
Q: Can I use plastic bottle caps instead of metal ones?
A: Yes, plastic works perfectly and often requires less surface prep. They are lighter and easier for small hands to hold during painting or gluing sessions.








