

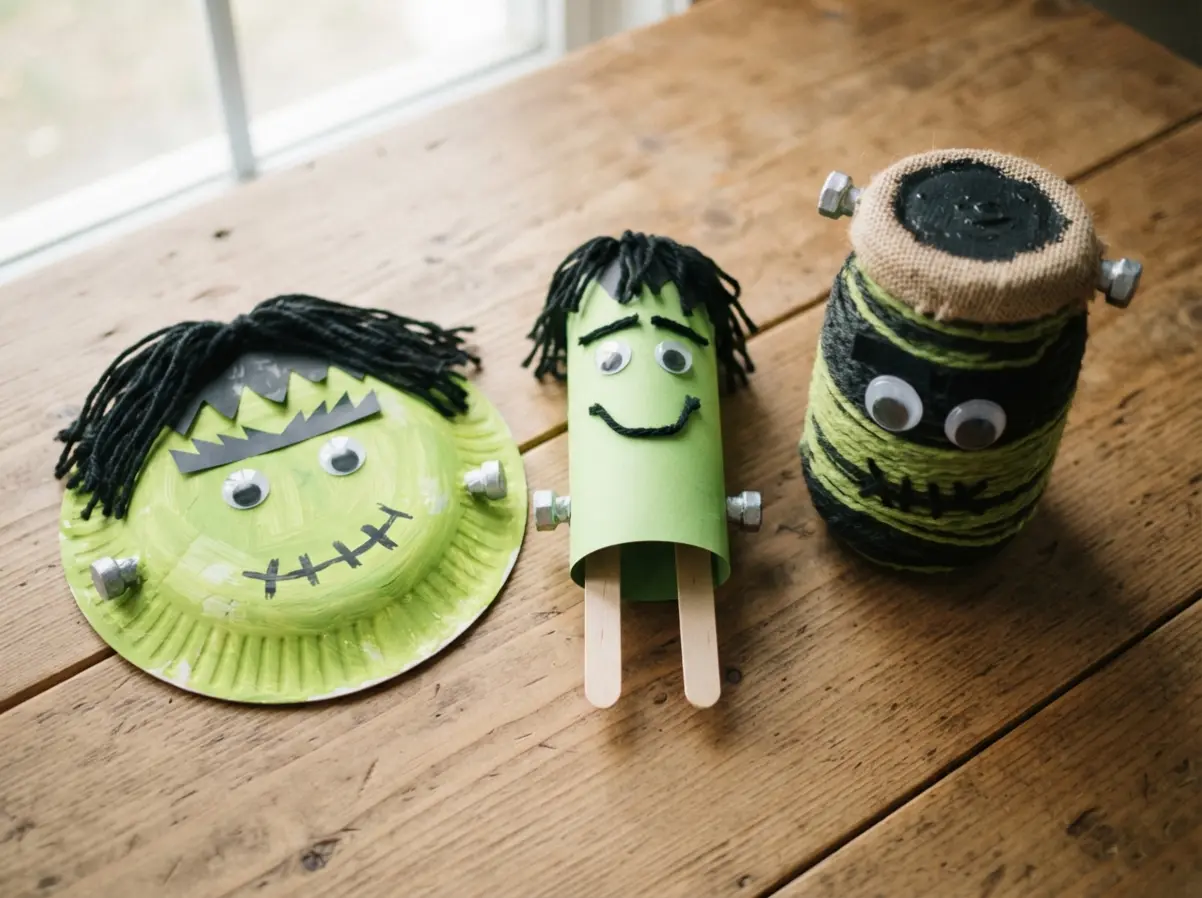
He is instantly recognizable with his bolts and stitches, making him the perfect character for creative projects that young makers can proudly show off. Let’s get those busy hands creating some monster magic.
Color Palette Selection for Monster Features
Your monster needs lime or forest green skin for that classic look, but trust me, the real magic happens with the black details. We all know those jagged hair pieces and stitches define the character, so use a stark, high-contrast black construction paper or paint. When exploring frankenstein craft ideas for kids, grab some silver or gray paper to make those metallic-colored bolts on the side your secret weapon for instant recognition.
A saturated primary color palette against these dark features makes the whole project pop, which works wonderfully for small hands learning color relationships. Focus on that expressive face and the iconic head shape first. This approach ensures every creation looks uniquely like the classic monster without needing precise anatomical details.
Essential Adhesive Choices for Recycled Materials
White school glue will peel right off a plastic milk jug, ruining a good monster head in minutes. When planning frankenstein craft ideas for kids, remember that you need a low-temperature hot glue gun for those non-porous surfaces like cleaned cartons or bottles, with an adult handling the application. For porous items like cardboard tubes or paper plates, a strong PVA glue works perfectly and dries clear.
I always keep durable tape on hand for quick assembly of larger pieces, as it holds firm while little artists adjust their work. The right adhesive choice prevents frustration and keeps those funny stitches and lopsided grins exactly where your child placed them. This one tip saves more projects than any other, letting the focus stay on creativity instead of repairs.
1. Paper Plate Painted Frankenstein Mask
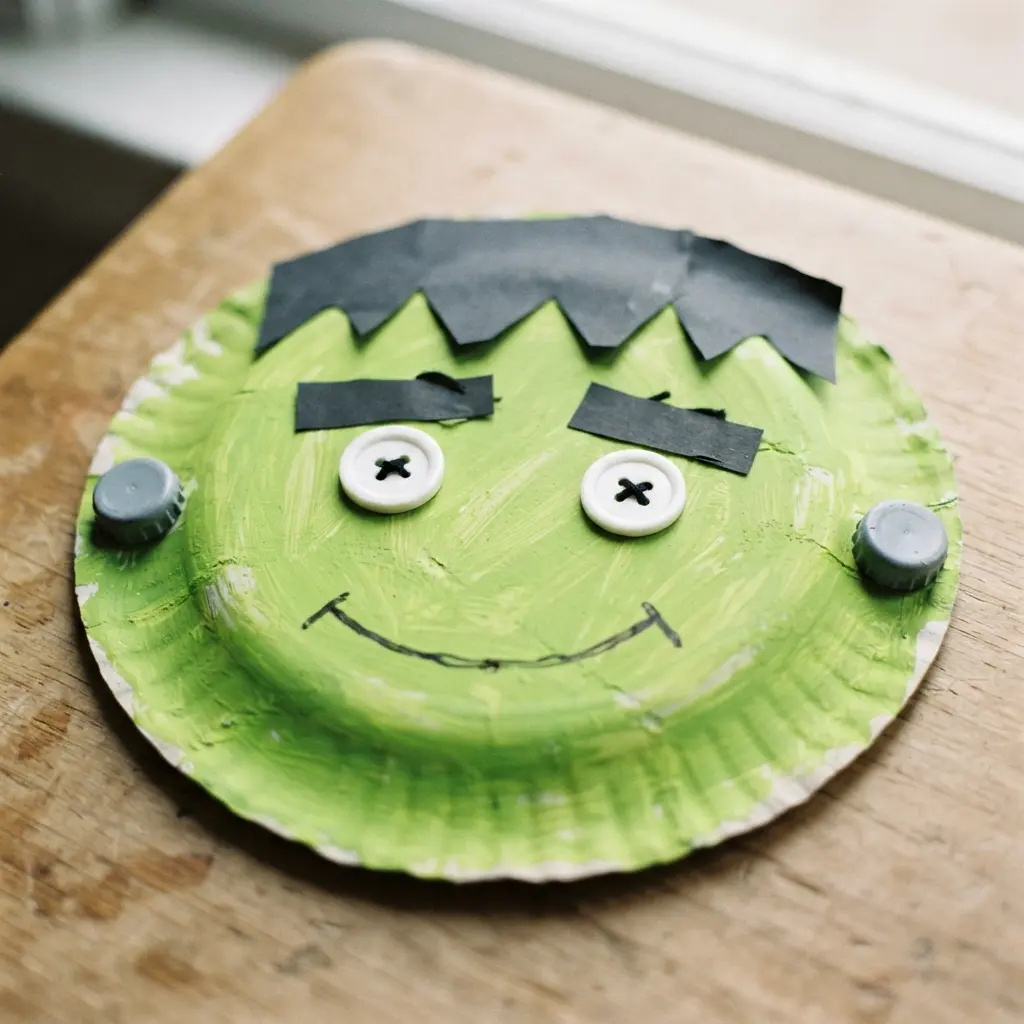
Ever wonder how to make a classic Halloween mask with stuff you already have? This project turns a simple paper plate into a fantastic monster face. You paint the whole thing green, then add those famous angry eyebrows and stitched-up mouth with black paint. It is a perfect first craft for little hands because the shape is so forgiving.
I love how letting them design the hair and scars sparks real creativity. When selecting materials for frankenstein craft ideas for kids, the secret to a clean look is letting that base coat dry completely before adding any details. Trust me, it makes all the difference. Once you have the features down, you can move on to other spooky DIY witch craft ideas to build a whole costume.
2. Toilet Paper Roll Monster Puppet
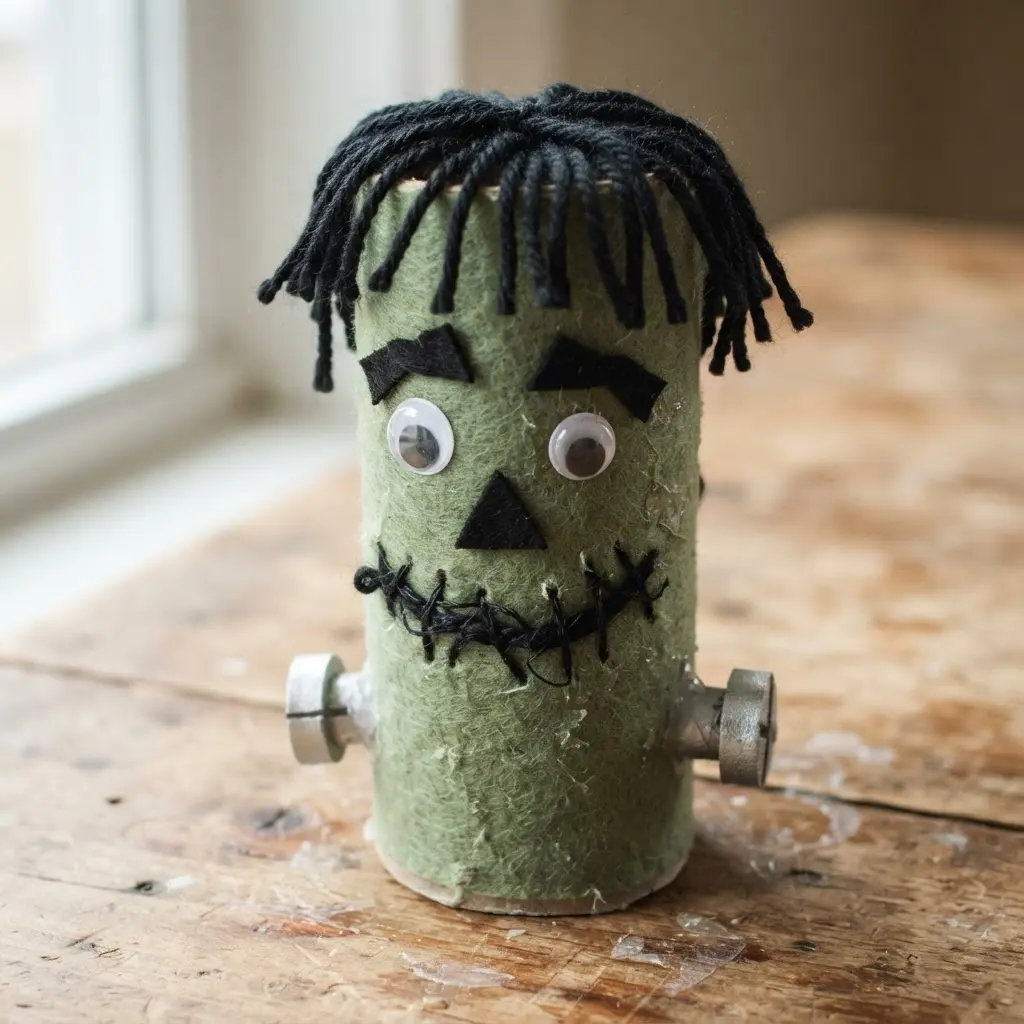
This is one of those projects where you look at the finished puppet and think, “I made that from what?” You will start by covering an empty roll with colorful construction paper using a glue stick for a clean, fast hold. Then, the real fun begins as you glue on googly eyes, cut out a funny mouth, and add wild yarn hair or pipe cleaner arms.
It works so well because it turns a simple household item into a toy that sparks hours of imaginative play. I love how each young maker’s monster becomes a unique character, and it is a perfect activity for building fine motor skills. If you want to explore more frankenstein craft ideas for kids that use upcycled materials, your kids might also enjoy creative seasonal projects for more fun.
3. Construction Paper Corner Frankenstein Bookmark
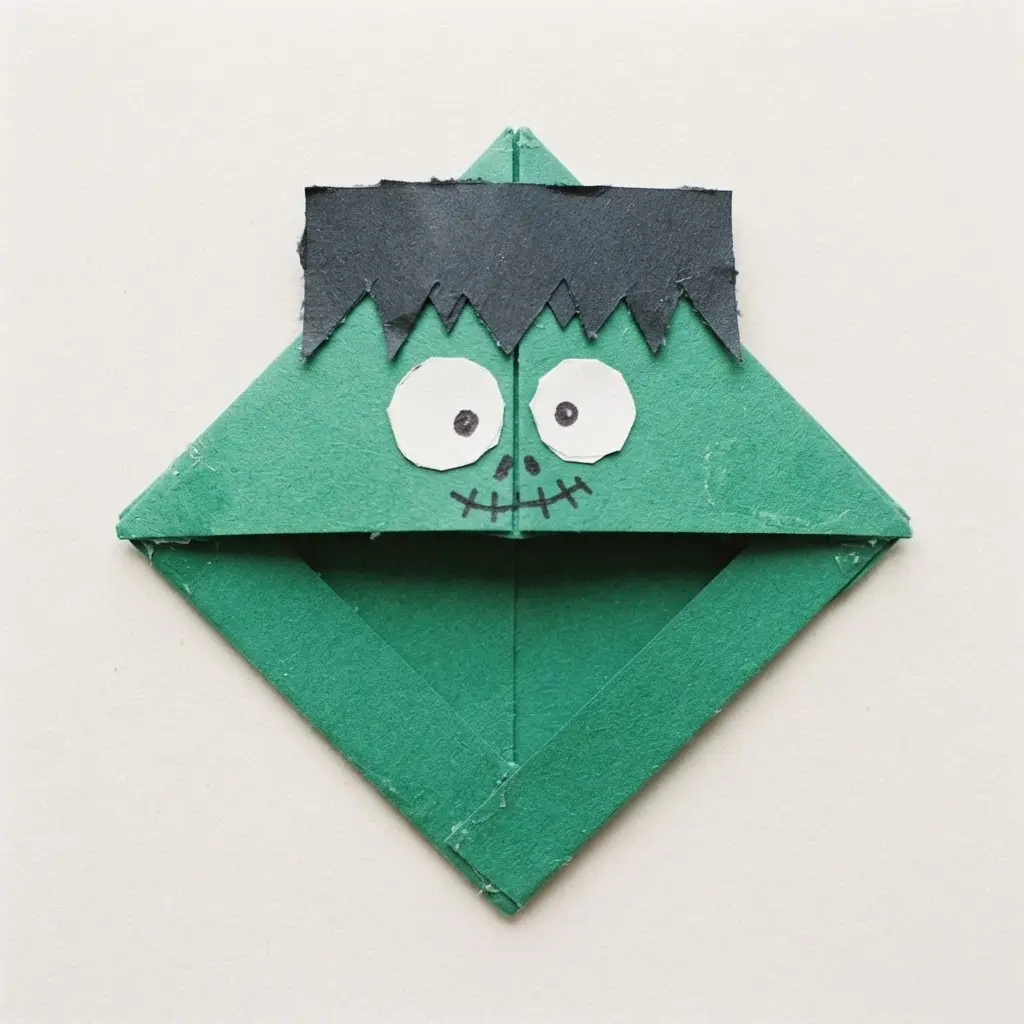
This one is a delightful surprise. It looks like a detailed character but the base is a simple folded paper pocket. You start with a green construction paper square and make a few clever folds to create the corner slot. Then you add the black hair, googly eyes, and those signature neck bolts.
What I love is how functional it becomes. When comparing frankenstein craft ideas for kids, you will quickly notice kids get so excited to use their own monster creation in their favorite books. For more inspiration on similar reading-friendly projects, you can browse other spooky Halloween bookmark crafts to build a whole collection.
My top tip is to crease every fold sharply. A firm crease makes the pocket snug and stable on your page. Try it and watch your little monster hold your place.
4. Green Handprint Frankenstein Art Print
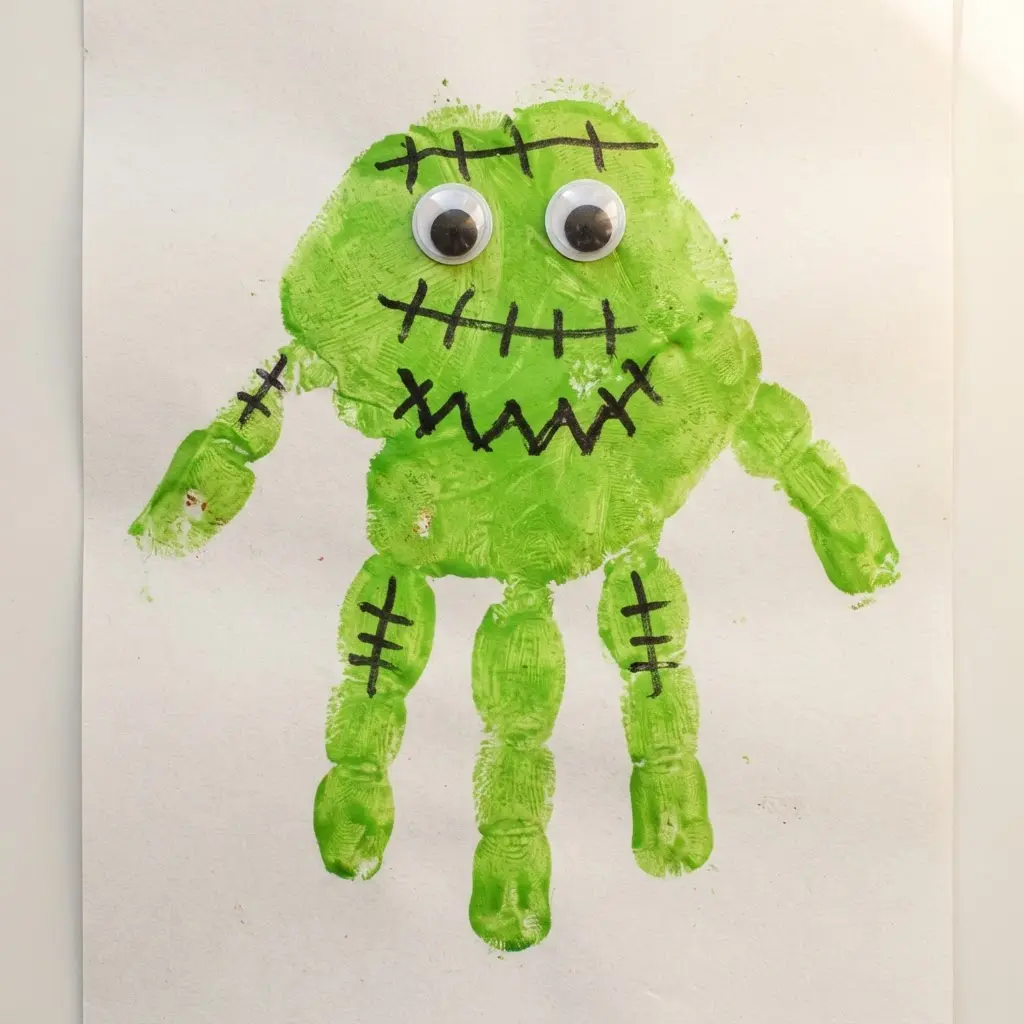
Who knew a handprint could turn into such a cute monster? When testing frankenstein craft ideas for kids, I love this one because it becomes a keepsake you will treasure for years. Paint your child’s palm and fingers with a generous coat of vibrant green tempera paint and press it onto white cardstock. Once it is fully dry, use black paint to add the spiky hair and a stitched smile.
The magic is in that personal touch. Your kid’s own hand becomes the monster’s head, making it a unique seasonal art print. It is a fantastic activity for little ones with some help. After you finish your creation, you might want some more spooky fun with creepy spider crafts for Halloween to decorate the whole house.
Trust me on this one: let the base layer dry completely before adding any details. You will get crisp, clean features that really pop. Does that not look adorable on your fridge?
5. Popsicle Stick Frankenstein Head Ornament
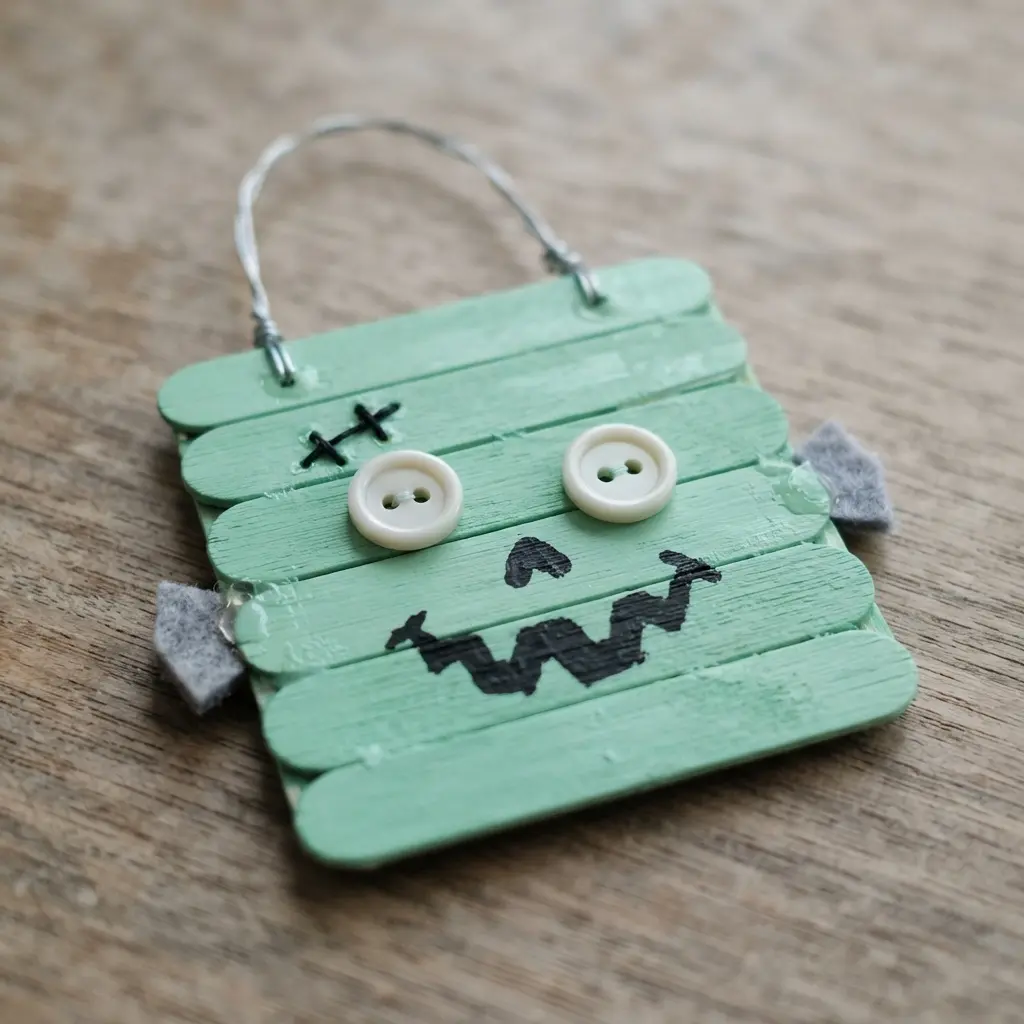
This little monster head is a total classic, and it always looks more complicated than it is. If you are listing frankenstein craft ideas for kids, note that you just glue a few sticks together, paint them green, and add those iconic features. I love that the popsicle stick base is so sturdy, letting young makers focus on the fun decorating part. Isn’t it satisfying to see that familiar character come together?
For the hair, cut a jagged shape from black paper and glue it on top. Then, paint or glue on the eyes and draw a stitched mouth. The final touch is adding those little black squares for the neck bolts. Let everything dry completely before you add a loop of twine to the back for hanging.
My go-to tip is to use a quick-drying glue when assembling the sticks, so your base is solid before you start painting. Your little crafter will feel so proud hanging their finished ornament up for the season.
6. Paper Bag Frankenstein Hand Puppet
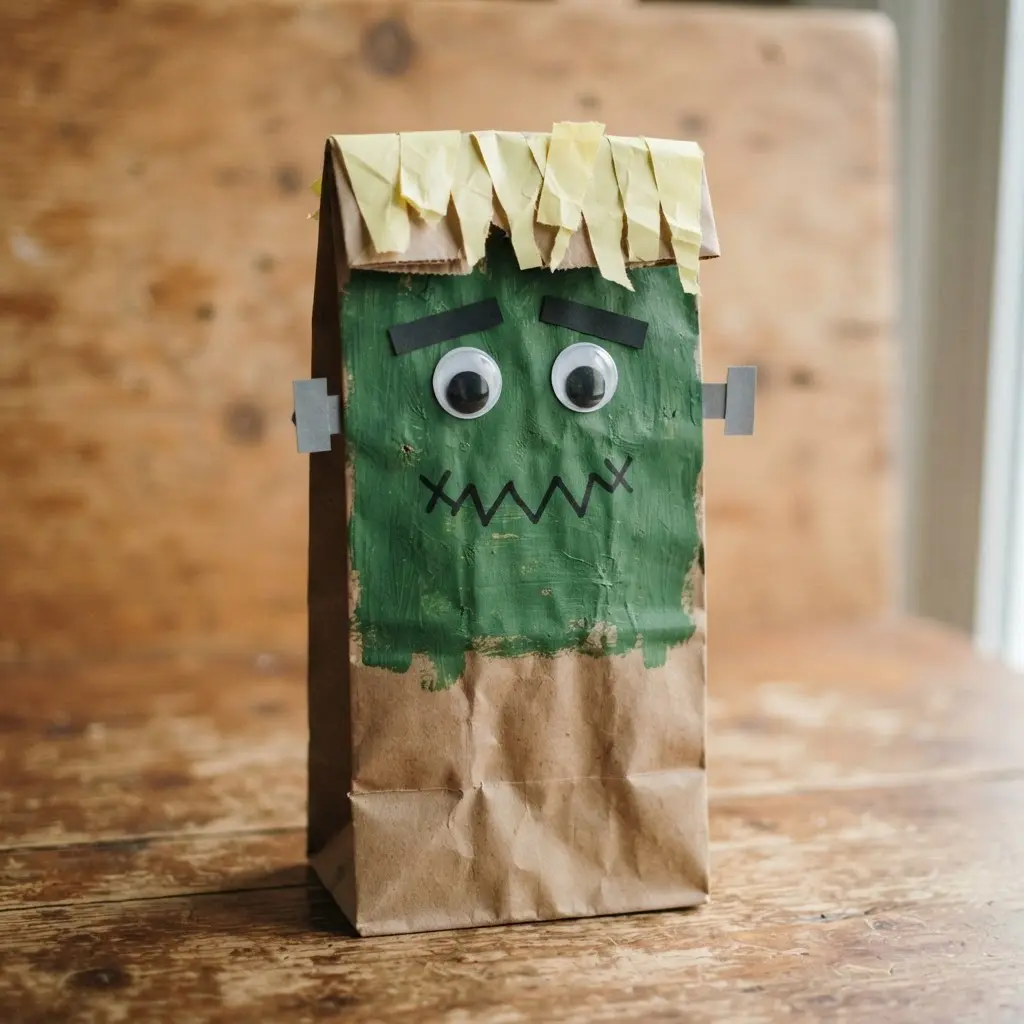
This one surprised me. When organizing frankenstein craft ideas for kids, you will see it looks like a detailed character, but the whole thing is built on a simple brown paper lunch bag. You start by covering the bag’s body and bottom flap with green paper for the head and chin. Then you add jagged black hair, big eyes, and those signature neck bolts.
The magic is in that bottom flap, which becomes a moving jaw. Isn’t that a fun, interactive touch for young makers? I love how this activity turns a classic spooky character into a friendly puppet perfect for storytelling. It makes a fantastic project for a chilly October afternoon, especially if you decorate with a fall wreath first to set the mood.
7. Yarn Wrapped Frankenstein Mason Jar
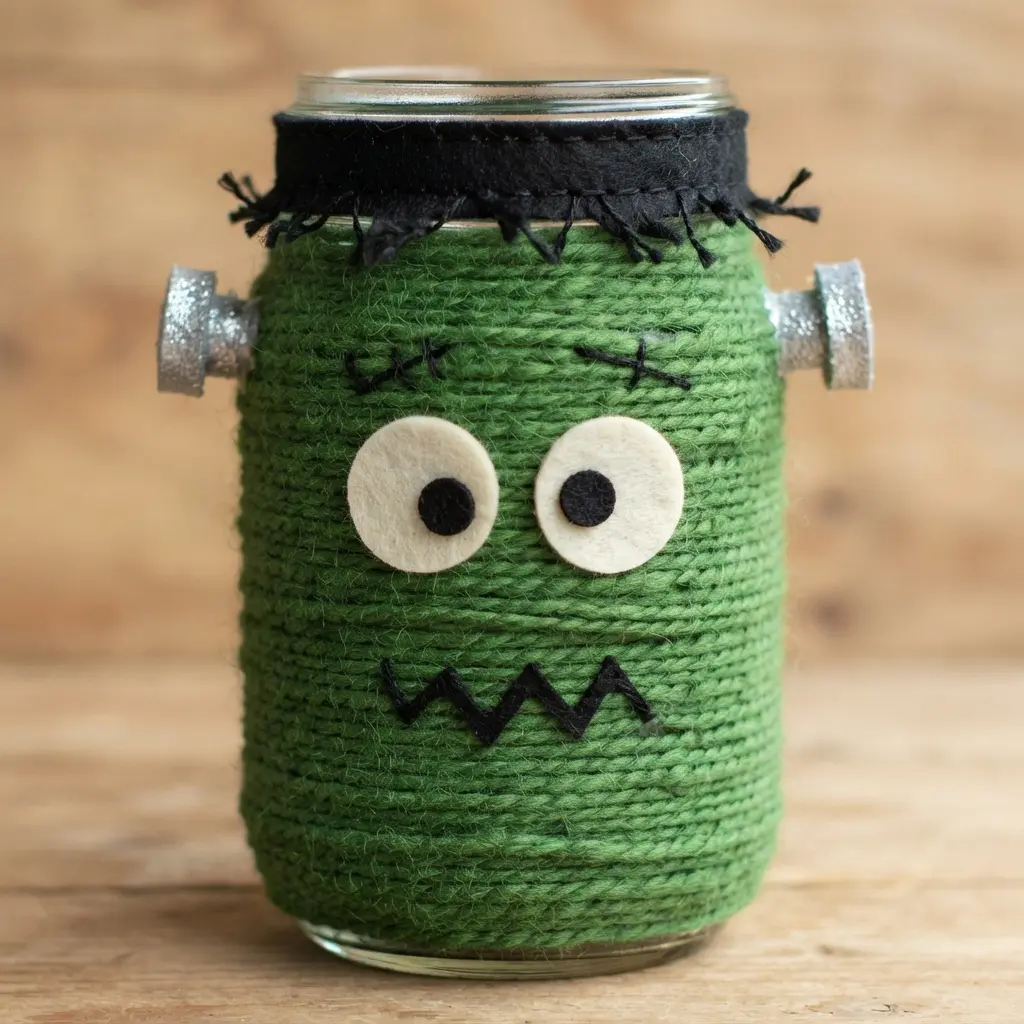
Who knew wrapping something in yarn could create such a fun character? This project is all about transforming a simple jar into a blocky monster head with some green worsted weight yarn and a bit of felt. When gathering supplies for frankenstein craft ideas for kids, wrap the yarn tightly up the jar, securing it with hot glue as you go, then add those iconic black felt eyes, mouth, and stitches.
It works so well because the yarn gives a wonderfully textured skin that looks great in any shade of green. My favorite part is making the hair with a fluffy black yarn for a silly, spooky finish. It is a perfect project for turning a treat jar into a seasonal decoration. After you have your monster jar, you might even create a fun Boo sign to complete your spooky setup.
Trust me, your family will love seeing their monster holding goodies.
8. Felt Frankenstein Coin Pouch Accessory
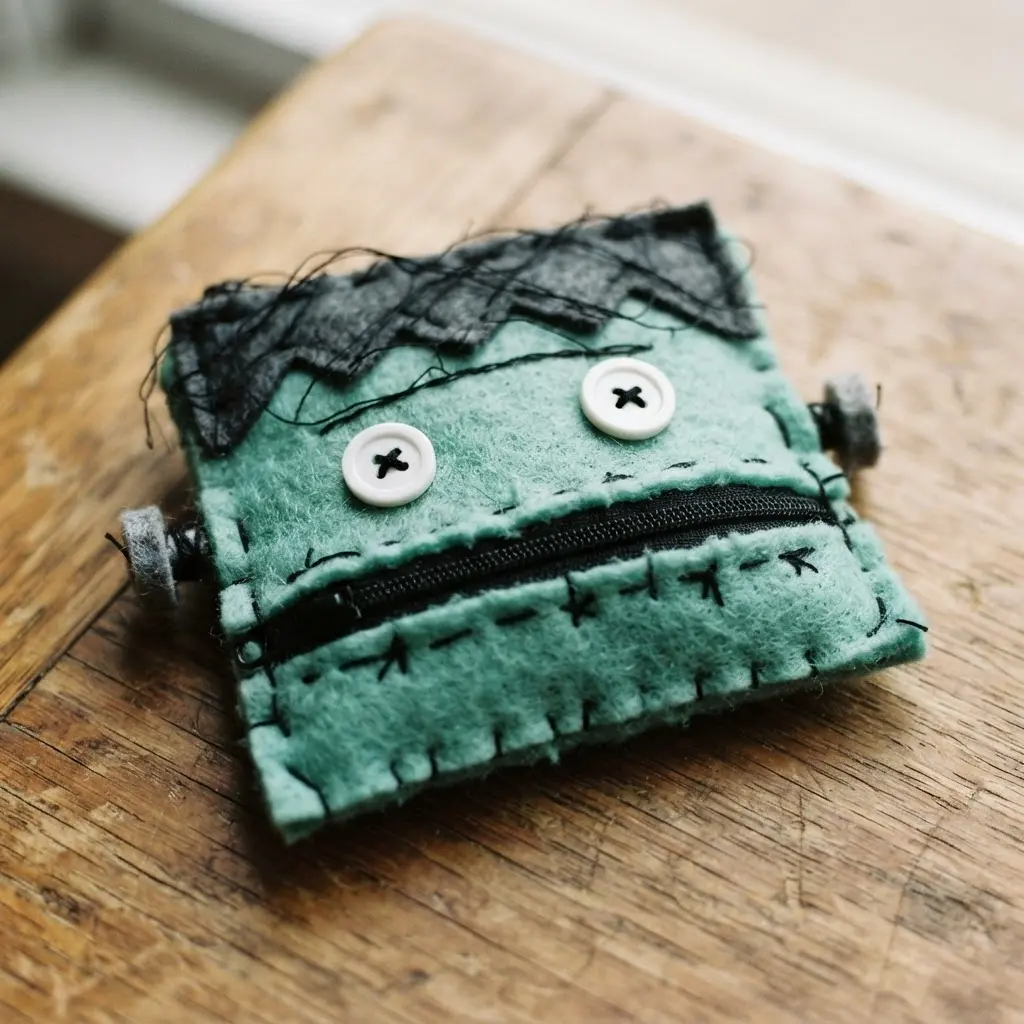
I love this one because it turns a basic pouch into an accessory your household will actually want to use. When reviewing frankenstein craft ideas for kids, note that you will cut two green felt body pieces and then build the iconic face with smaller black and white scraps. The secret to a crisp look is using a bit of fabric glue to hold those little felt eyes and bolts in place before you stitch them down.
Attaching the zipper between the two body pieces is the main construction step, and then you sew the edges together. It works so well because it is a soft, safe pouch that holds coins or earbuds with some autumn personality. This is a great first sewing attempt, and the skills you pick up here are perfect for trying new textile projects later on.
9. Edible Frankenstein Rice Krispie Treat
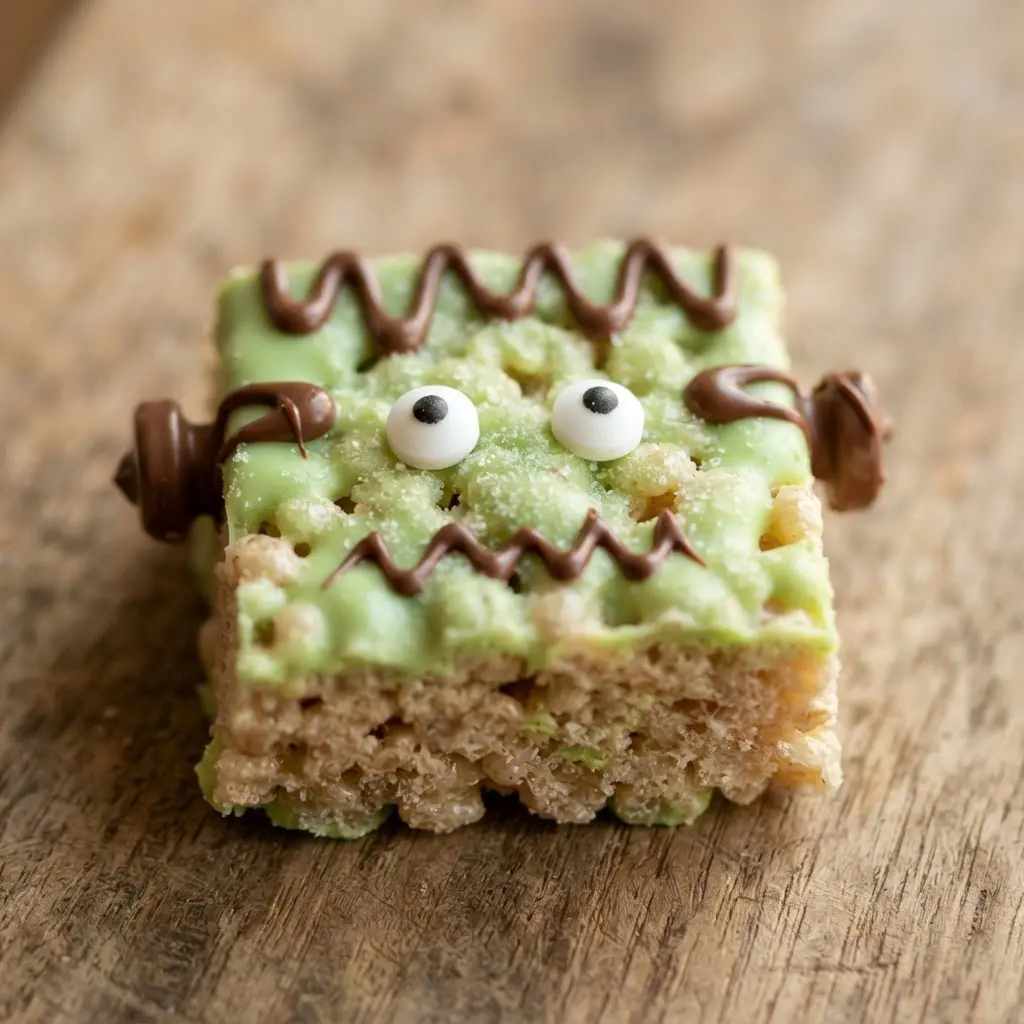
Ever wondered how to make a seasonal treat that is as fun to decorate as it is to eat? This project starts with the classic no-bake method, but you will stir in green gel food coloring to get that perfect shade. While preparing frankenstein craft ideas for kids, remember that once the mixture is pressed and cooled, the real fun begins with decorating each square into a little monster.
It works because young makers love the hands-on part of adding candy eyes and drawing the stitches. My favorite tip is to use a buttered spatula to press the mix into the pan gently. This keeps your edible treats delightfully chewy instead of rock hard.
10. Button Detailed Frankenstein Wall Hanging
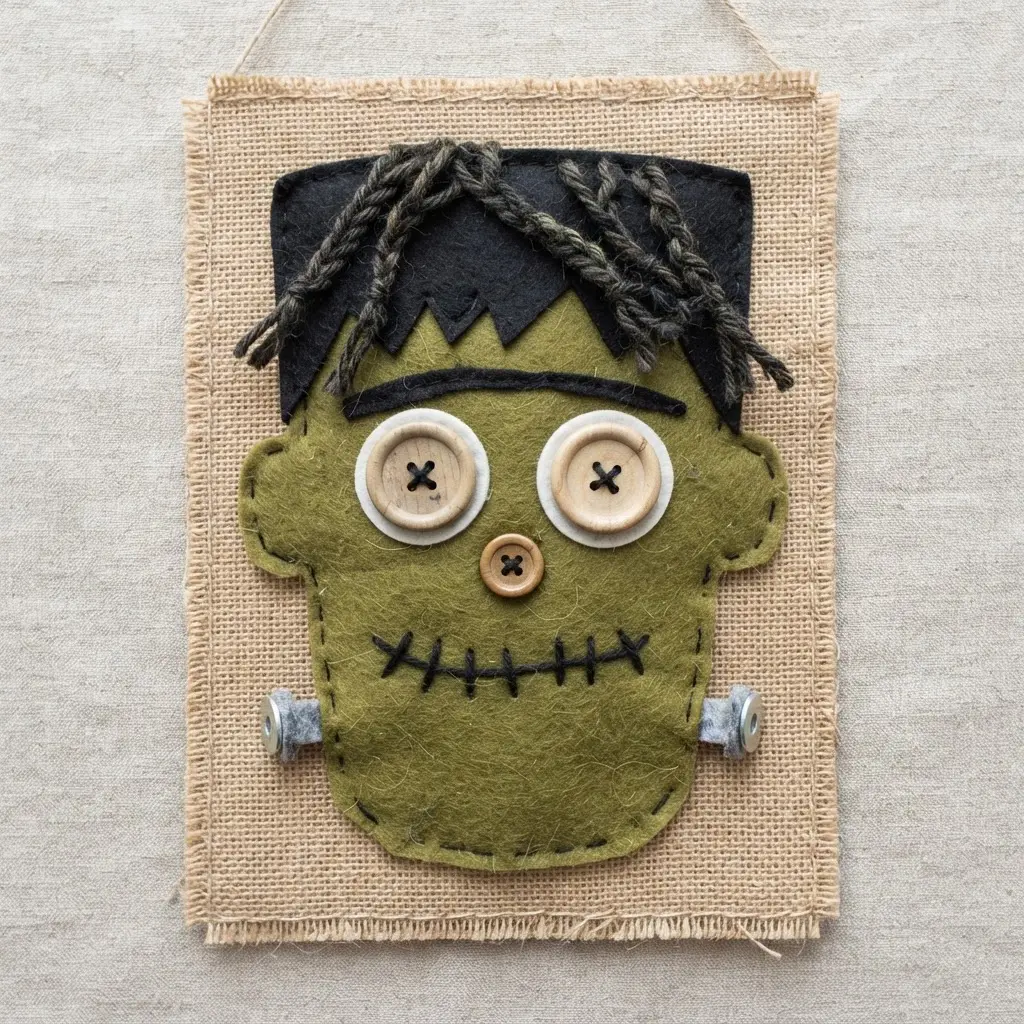
This one looks wonderfully complex, but it is actually a fantastic project for patient little hands. When ranking frankenstein craft ideas for kids, you should start by sketching the monster’s square head and features onto a piece of heavyweight felt or canvas. Then, the real fun begins as you sort through your button jar to find the perfect greens, blacks, and silvers to build his face, hair, and bolts.
I love watching the expression come to life as you place the eyes and mouth. The trick is to begin with the largest buttons for the main areas of his face, then fill in the gaps with smaller ones. Lining up tiny white buttons to create his signature stitches is my favorite part. It works so well because the mix of sizes and textures gives your monster a wonderfully bumpy, three-dimensional look that flat paint simply cannot match.
Once your adhesive is dry, you will have a unique, tactile decoration to hang up. For an extra layer of spooky fun, you could add a splattered paint background using some fun splatter painting techniques before you start gluing on the buttons.
Preservation Techniques for Seasonal Paper Crafts
When preserving frankenstein craft ideas for kids, a quick spray of matte acrylic sealant over the finished paint and paper layers locks everything in place for the whole season. This clear coat protects against little fingerprints and the occasional damp night, so the bright colors stay vibrant. You want to avoid glossy sprays for this project, as they make the paper look shiny and artificial, unlike a proper monster.
Apply the sealant in a well-ventilated area with adult supervision, holding the can about twelve inches away for an even mist. Let the piece dry completely flat so the varnish does not pool. This simple final step means your child’s green-faced friend can greet visitors year after year, becoming a beloved part of your seasonal decorations.
Conclusion
The best part about these projects is seeing that proud smile on a young face when they hold up their finished creation. It is not about making a simple decoration; it is about building confidence and sharing a fun memory together. My favorite piece of advice is to let them take the lead on the decorating, those wobbly stitches are what make their monster uniquely theirs. I hope this rounded-up list of frankenstein craft ideas for kids gives you a great starting point for an afternoon full of creativity and maybe a little seasonal mess.
FAQs
Q: What age group are these projects suitable for?
A: Most of these designs work best for elementary school-aged children, roughly five to ten years old. Younger participants will need supervision for cutting and gluing, while older makers can handle the assembly steps independently.
Q: What basic supplies should I have ready?
A: Keep green, black, and white cardstock, child-safe scissors, washable glue, and non-toxic paints on your table. Googly eyes, yarn skeins, and wooden craft sticks also provide plenty of creative options.
Q: How long does each activity typically take?
A: Each session fits comfortably into a single sitting, usually requiring between twenty and forty-five minutes. This pacing keeps the experience engaging without causing fatigue.
Q: Can these projects be completed using common household items?
A: Absolutely. The instructions emphasize everyday objects. Substitute cardboard scraps for specialty felt, permanent markers instead of paint, and repurpose glass containers or food packaging.
Q: Where should I display the finished artwork?
A: Arrange a mini gallery on your kitchen fridge or a hallway bulletin board. Puppets and hanging ornaments are perfect for interactive play, while bookmarks and wall hangings serve as practical room decorations.








