

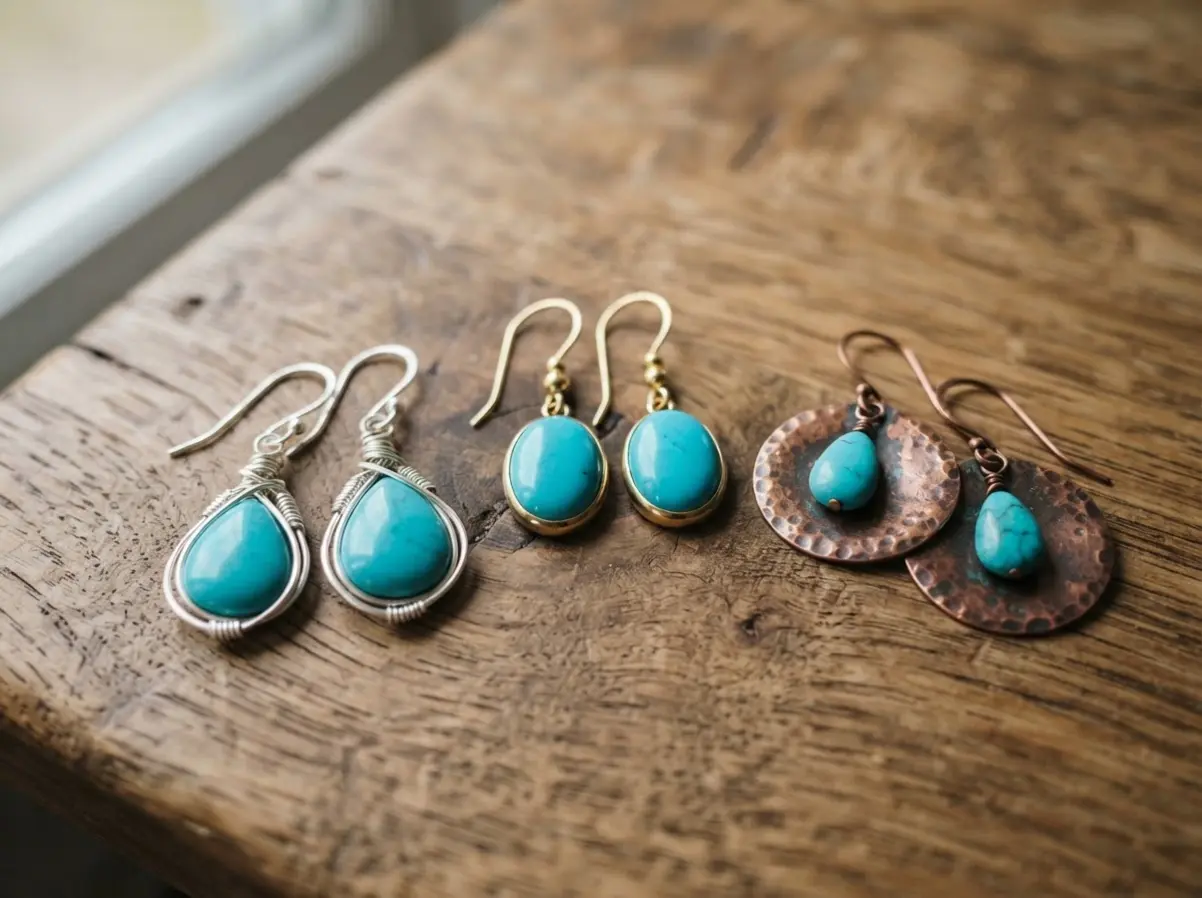
Selecting Metal Gauge for Secure Wire Loops
The fastest way to ruin a finished pair of earrings is using thin, soft wire that deforms when you close a loop. Trust me, beginners often make this mistake, and the earring findings just flop open after a few wears.
When crafting easy turquoise drop earrings, you want to look for 21-gauge sterling silver wire because it gives you the right balance of strength and flexibility for making your own headpins and secure wire-wrapped loops. Thinner gauges bend too easily, and thicker ones are a nightmare to work with using basic pliers. This specific gauge ensures your loops stay tight and your beautiful turquoise stones don’t go wandering off. It is the foundation of a professional finish that lasts.
Matching Stone Matrix Patterns for Twin Drops
Your pair of earrings will look mismatched and cheap if you ignore the natural matrix patterns in each turquoise bead. Here is the thing, turquoise is a natural stone, so no two pieces are identical.
The secret is to lay all your beads out on a neutral surface and look for pairs that share a similar color intensity and vein pattern. You might find one bead with a bold black web and another with a soft golden matrix, and they will never look like twins. This simple matching step takes two extra minutes, ensuring your easy turquoise drop earrings look intentionally designed rather than accidentally assembled. It is the professional touch we all want in homemade jewelry.
1. Single Smooth Teardrop Wire Wrap Earrings
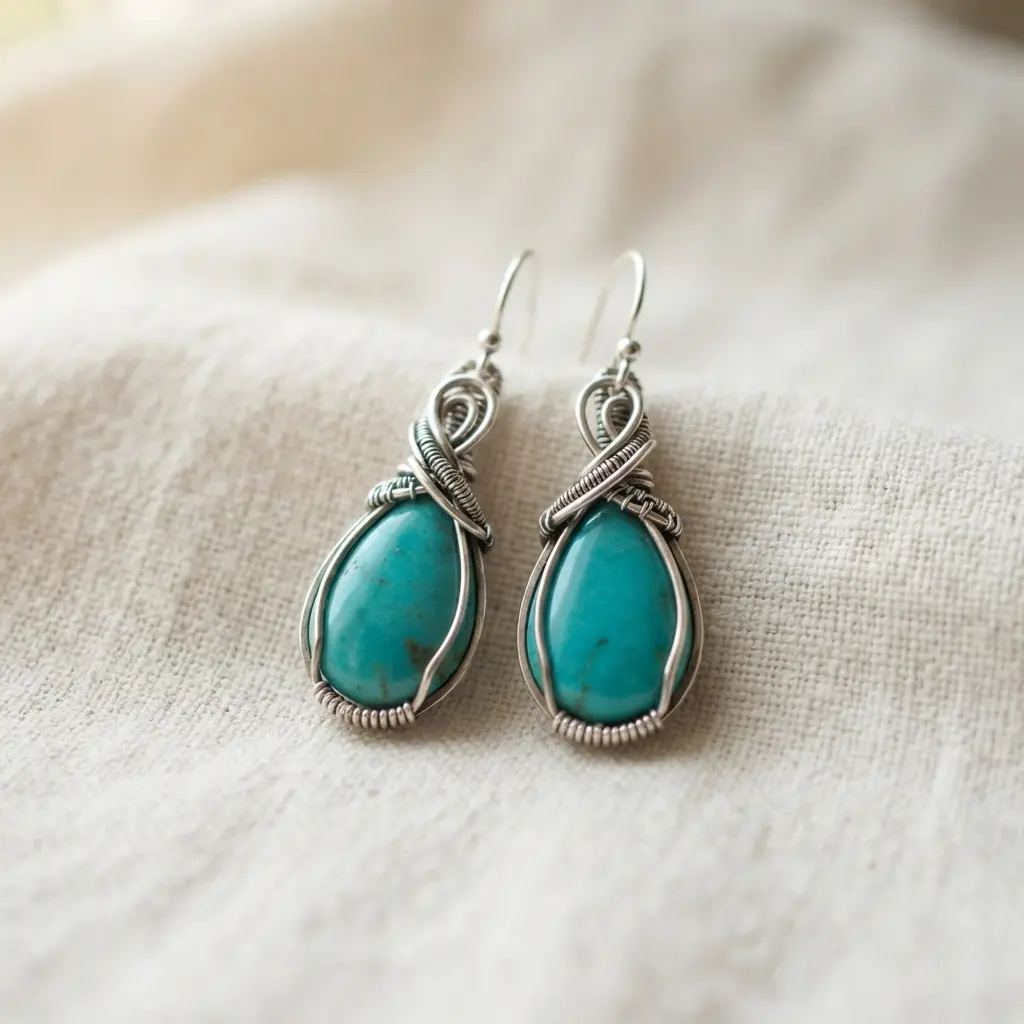
This design looks so polished, but honestly, it is one of the first projects I ever mastered. When planning your easy turquoise drop earrings, you simply form a small loop at one end of your 20 gauge wire, slide on your chosen teardrop bead, and create a neat bail above it.
Then, you wrap the wire tail smoothly around the wire stem. The trick is keeping consistent tension for a clean, secure look. Your final step is shaping the remaining wire into a comfortable ear wire.
I love how the simplicity lets the stone’s beauty shine. Trust me on this one, the result feels elegant and refined.
2. Raw Nugget Cluster Silver Dangle Earrings
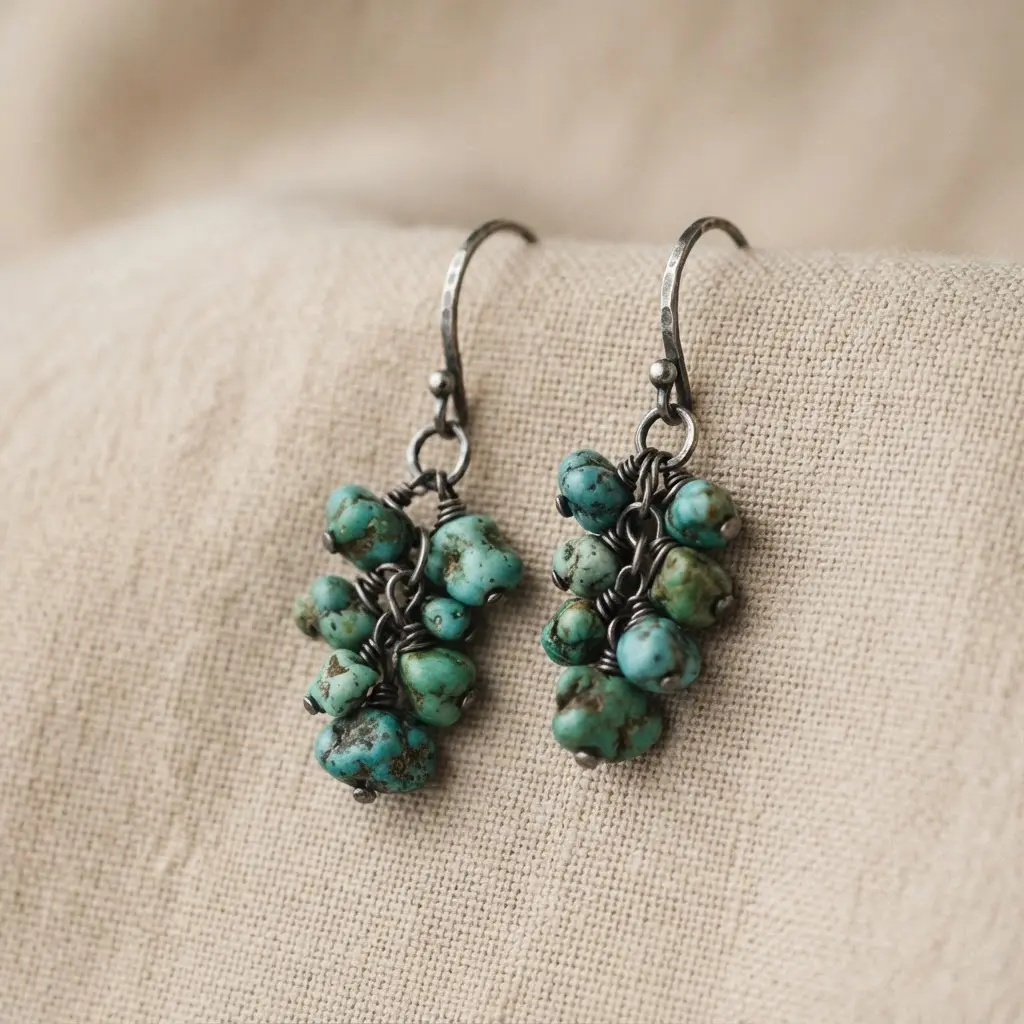
Ever feel like your jewelry should show off the earth’s raw beauty? This style does exactly that. You take small, unpolished pieces of turquoise and group them together in a loose, organic cluster.
When designing your easy turquoise drop earrings with a rustic flair, attaching these nuggets to sterling silver ear wires using simple jump rings keeps the focus on natural textures. The result looks like you plucked them straight from nature. I love how this design celebrates imperfection. Each nugget has a unique shape and texture, so no two pairs are ever identical.
It works because the contrast between rough stones and shiny silver creates a striking visual effect. Trust me, embracing the natural shapes ensures you create something truly special.
3. Minimalist Turquoise Bead Hoop Accent Earrings
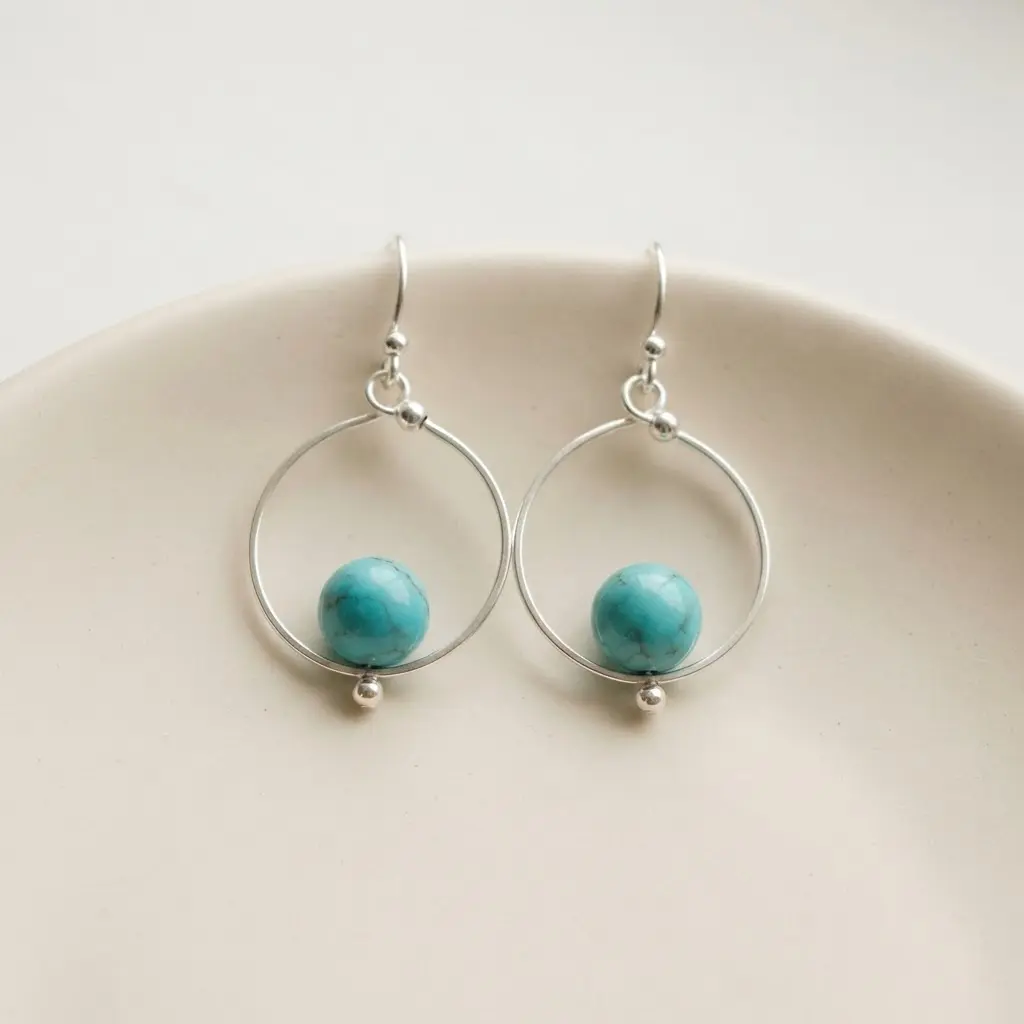
Who would have thought a single bead could make such a statement? This design is all about restraint. For beginners focusing on easy turquoise drop earrings, you start with a simple, thin sterling silver hoop and add just one beautiful turquoise bead, secured with a small jump ring.
The result is a clean, elegant earring where the stone provides a subtle pop of color without any clutter. I love how versatile these are. They work with everything from jeans to a little black dress because they remain so understated. The trick is choosing a high-quality bead, like stabilized natural turquoise, to ensure a polished appearance. Does it not feel effortlessly chic?
If you enjoy working with metal hoops, mastering a secure bold DIY spike earrings project builds the same foundational skills for opening and closing jump rings cleanly.
4. Polished Oval Turquoise Gold Drop Earrings
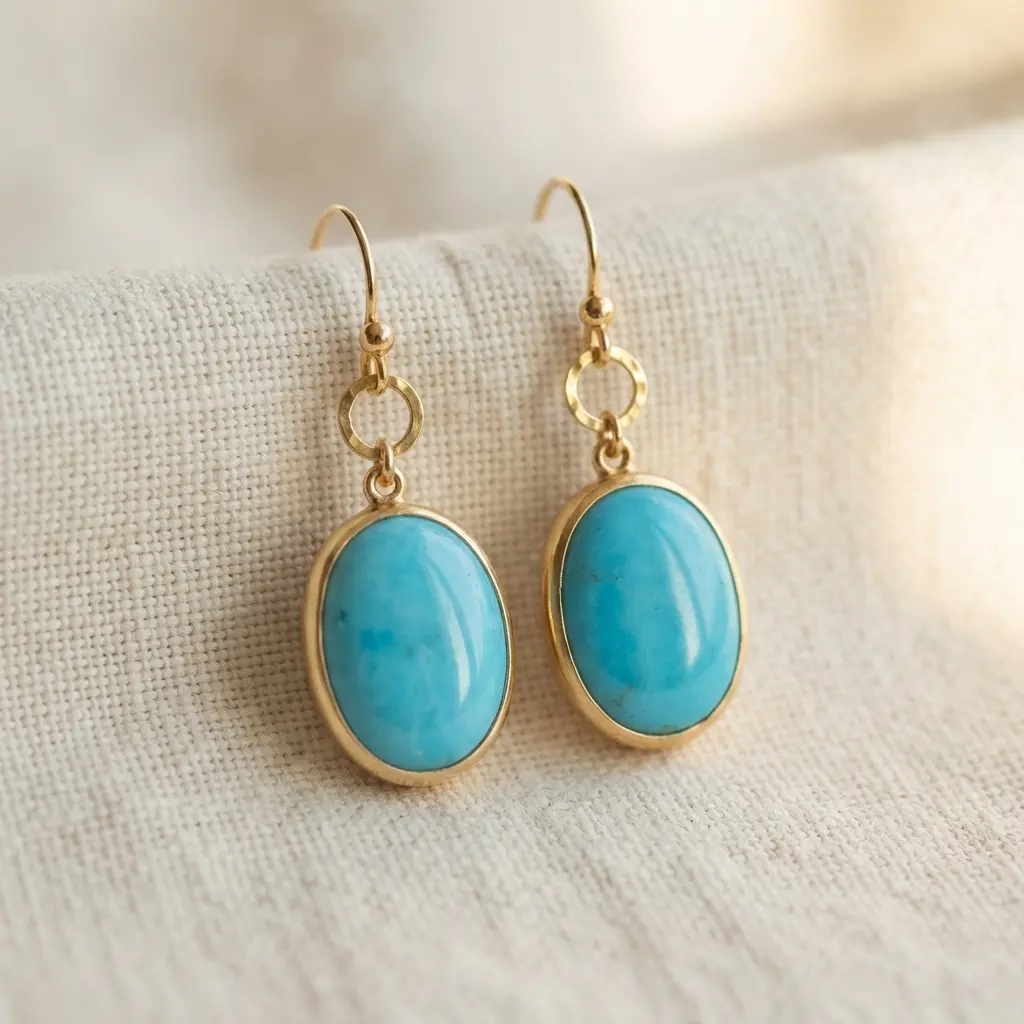
Ever wondered how a simple oval can feel so elegant? When crafting easy turquoise drop earrings with a classic vibe, the secret lies in the striking contrast between the cool, robin’s egg blue of the polished turquoise cabochon and the warm glow of gold.
You create a bezel setting to protect the stone, then attach it to a French hook or lever back for gentle movement. This combination works because it remains classic yet eye-catching. The dangle draws attention, and the vibrant blue against gold feels special. I love how versatile these are for dressing up casual outfits or adding a finishing touch to formal attire.
My go-to tip is to use a leather pad when setting the stone to avoid pressure marks. Trust me, careful handling makes all the difference. You will love how sophisticated the finished pair looks.
5. Tiered Chip Turquoise Sterling Fringe Earrings
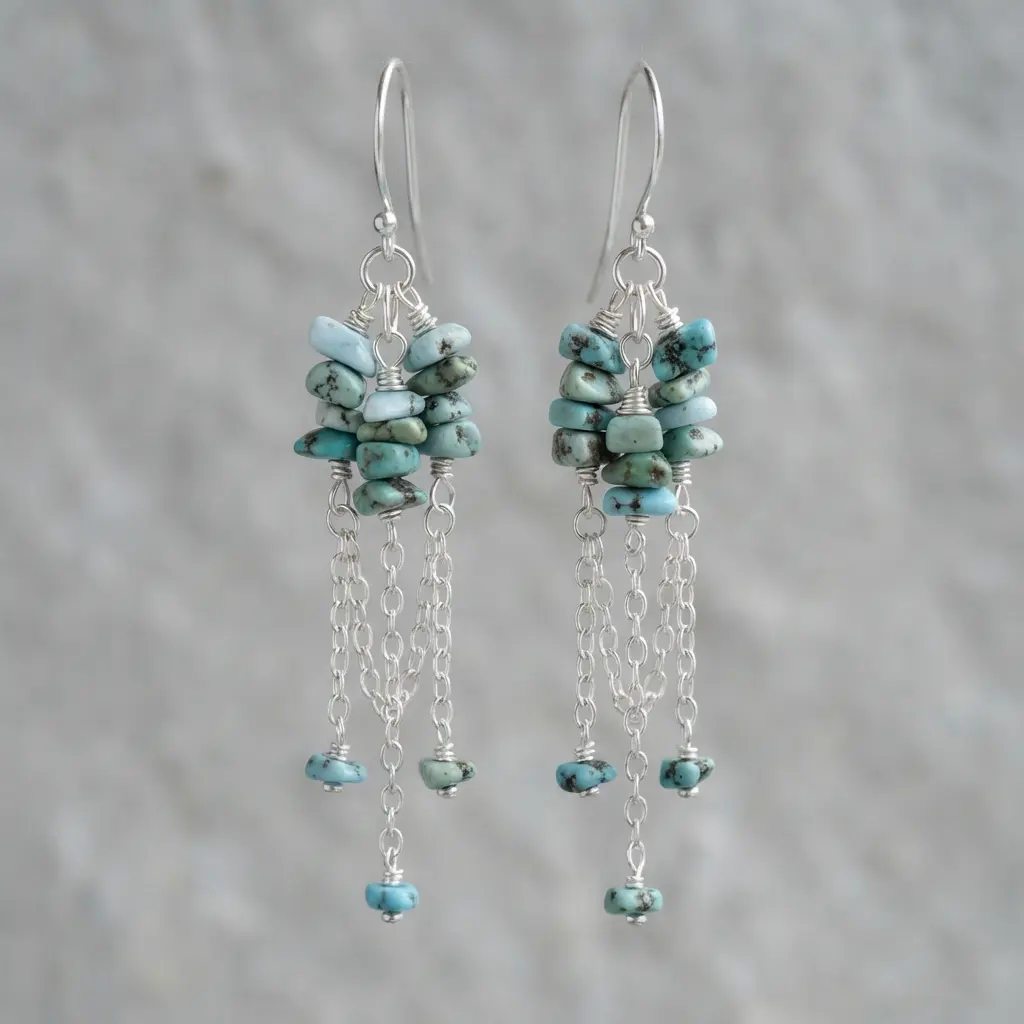
Does a design with multiple layers sound complicated? Trust me, this one is deceptively simple. You will create individual strands of chip turquoise on headpins, then link them together with sterling silver jump rings to form cascading tiers.
It works because the tiered structure creates depth without needing a single large, heavy stone. Building these easy turquoise drop earrings allows you to watch how natural variations and fringe movement complement each other beautifully. I love how sterling silver findings let the blue tones shine.
For a similar project with a different organic feel, apply these same tiered assembly skills while exploring crafting beautiful feather earrings. Your key tip is to close all those jump rings securely so your gorgeous fringe stays perfectly intact. Doesn’t the movement look stunning?
6. Duo Turquoise Round Bead Chain Earrings
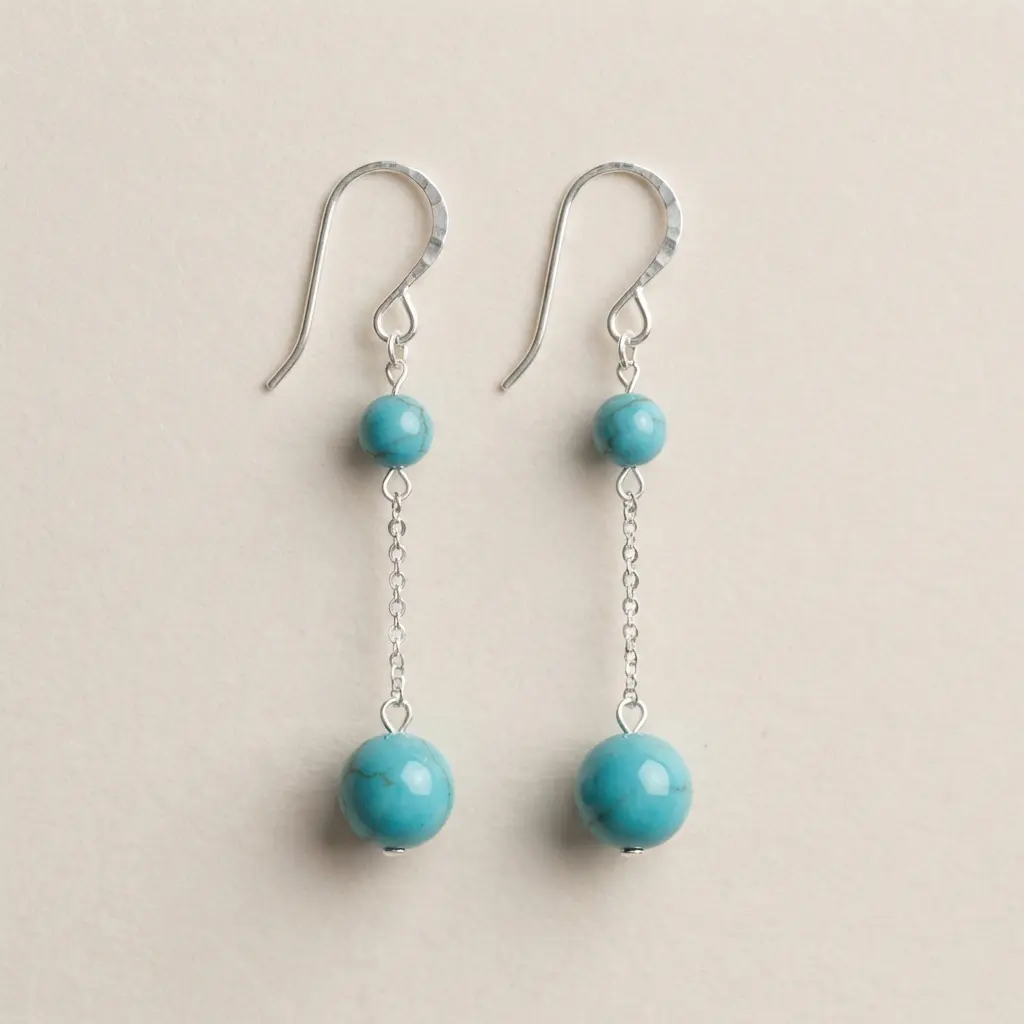
This one surprised me. It looks complex, but assembling these easy turquoise drop earrings will have you finished in under fifteen minutes. You start by threading your two main turquoise beads onto headpins.
Make a neat loop above each one, then connect them with a short length of delicate chain using jump rings. The magic lies in the placement. Space them apart on the chain so they can swing and catch the light independently. I love how the chain adds playful, bouncy movement that shows off the beautiful stone color.
It feels both elegant and a little bohemian, doesn’t it? Focus on making those loops tight and secure, and your earrings will turn out perfectly every time.
7. Western Style Copper Turquoise Teardrop Earrings
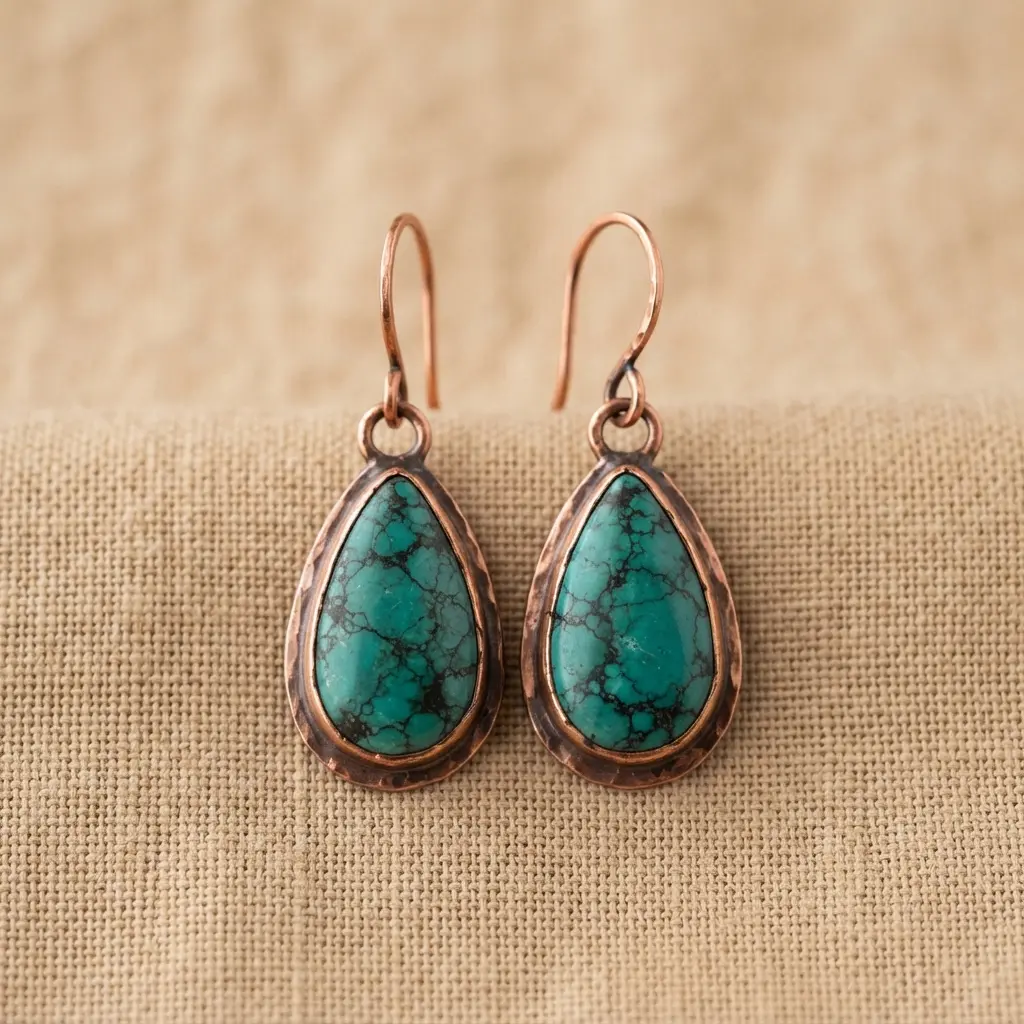
Who would have thought such a bold, rustic look could be so approachable? When shaping these easy turquoise drop earrings, you start by forming your copper sheet into a simple teardrop frame, often giving it hammered texture for that hand-forged feel.
Then, you nestle a beautiful turquoise cabochon inside. I love how the stone’s earthy matrix naturally complements the warm metal. It works because the teardrop shape remains universally flattering, and the whole piece feels connected to nature. Trust me: always apply a clear sealant to the back of your copper components to prevent skin discoloration.
8. Delicate Silver Bali Turquoise Pendant Earrings
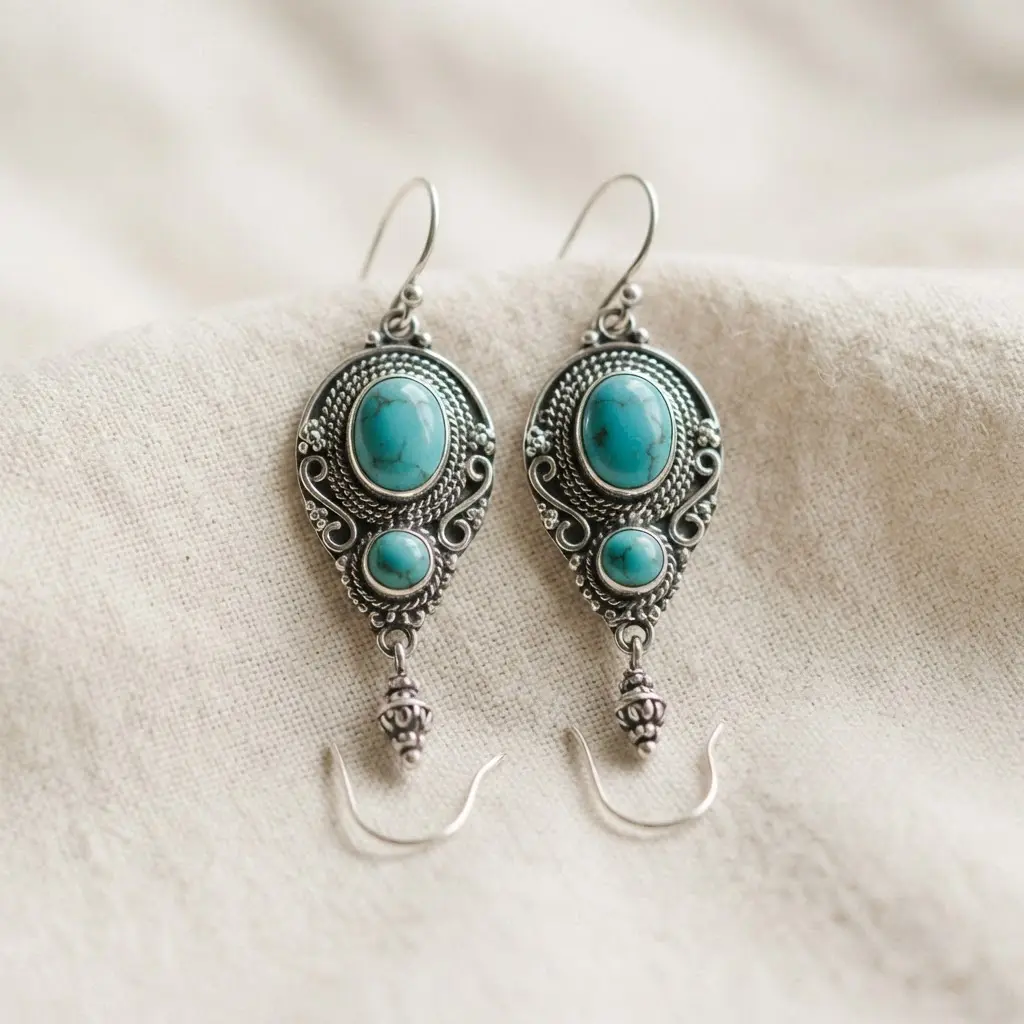
Don’t let the intricate look intimidate you. The charm of these earrings comes from traditional Balinese silverwork techniques like filigree and granulation. You will see tiny silver beads and coiled wires creating a lacy, antique-looking frame for the turquoise.
I love using a small, well-proportioned turquoise cabochon in a bezel setting when creating easy turquoise drop earrings with vintage details. It lets the stone’s natural color and matrix patterns shine without overwhelming the delicate silver design. That contrast between bright blue-green stone and dark, detailed silver makes these earrings so special.
Trust me, the result feels both elegantly handmade and surprisingly versatile. You will feel the satisfaction of creating something with rich artistic heritage.
9. Textured Coin Turquoise Stone Drop Earrings
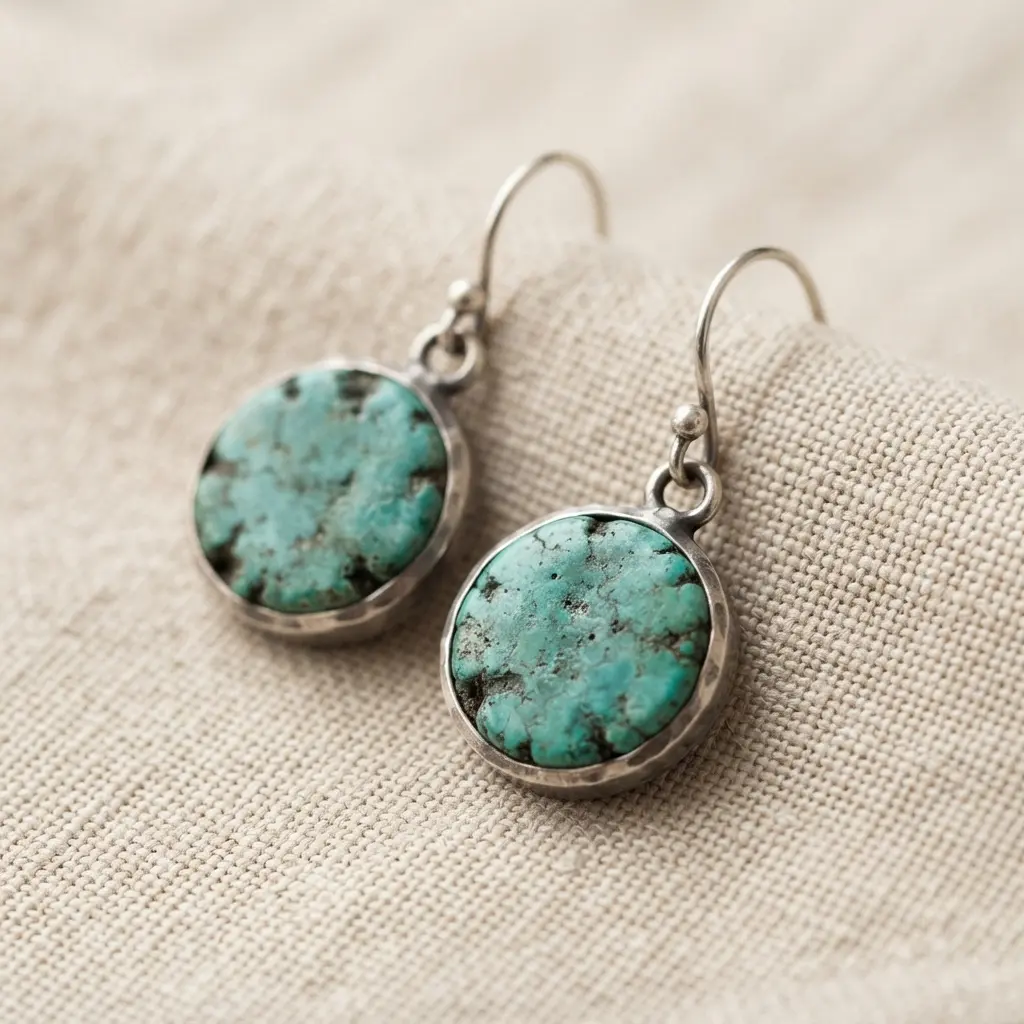
Ever wondered how to get that perfect artisanal look? The secret lives in the coin’s texture. When working on easy turquoise drop earrings, you start by cutting your metal blank and then using a planishing hammer or engraving tools to create a unique, handcrafted pattern.
Next, gently set your turquoise cabochon into a prepared bezel and solder it to the coin’s center. This protects the stone while allowing its beautiful color to pop against the textured metal. The combination feels both ancient and effortlessly modern.
Before you book a studio session for a piece like this, ask your artist about painted glass statement necklace projects to understand the patience required for detailed assembly work. Trust me, the final polish makes all the difference. The finished piece looks absolutely stunning.
10. Geometric Square Cut Turquoise Dangle Earrings
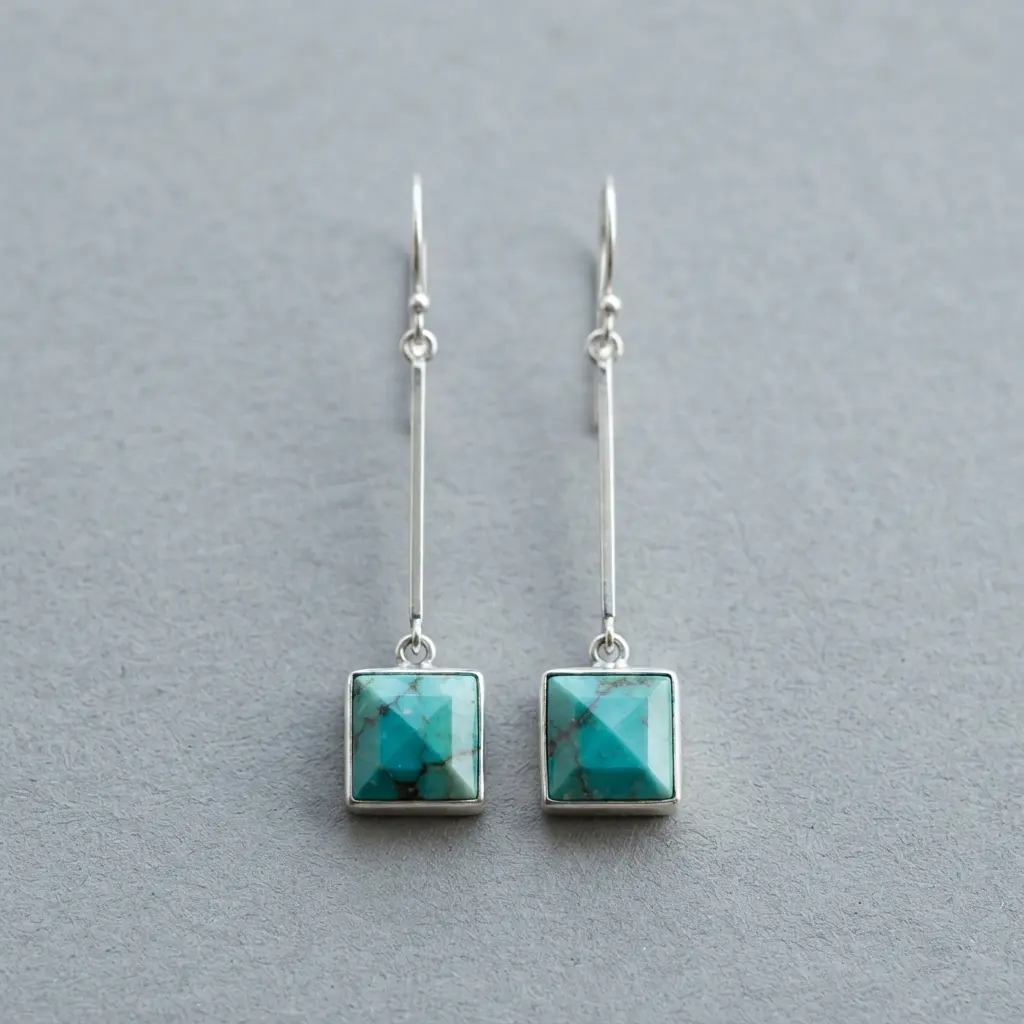
Ever wondered how to make a piece feel modern and timeless simultaneously? Achieving this look with easy turquoise drop earrings means embracing clean geometry. The structured lines of a square turquoise cabochon feel sleek against organic stone patterns.
You will attach it to a simple wire frame and connect it to a French hook for graceful movement. I love how the structured shape makes the stone color pop in a fresh way. The dangle design draws attention and feels incredible when worn. My go-to tip is practicing consistent wire loops on scrap metal first.
Ensuring your loops match guarantees the finished pair hangs straight and looks professionally finished. That small practice step saves plenty of frustration later.
Polishing Tips for Sterling Silver Findings
A quick polish with a soft jewelry cloth serves as the final step that makes your sterling silver components shine like boutique pieces. After all your careful assembly on easy turquoise drop earrings, those jump rings and ear wires can look slightly dull from handling tools and oils.
You don’t need harsh chemicals, only a gentle rub with a dedicated polishing cloth to remove oxidation and bring back a beautiful luster. This final touch ensures the metal complements the vibrant stones instead of competing with them. It also prevents skin irritation by smoothing microscopic rough spots left from tool marks. Your finished piece deserves this simple, satisfying shine.
Conclusion
So, how did your creative session turn out? I hope this gallery sparked ideas and showed you how achievable professional-looking jewelry can be. Look at the variety available to you, which represents genuine craftsmanship waiting to unfold.
The key to great easy turquoise drop earrings is balancing the stone’s natural beauty with a comfortable, lightweight design. My best piece of advice is starting with a project that uses findings you already handle confidently, like simple loops or jump rings. The confidence you build there will make every subsequent design feel even more rewarding. Pick your favorite from this list and begin crafting right away.
FAQs
Q: What are the essential tools I need to make these earrings?
A: You will need round-nose pliers for forming wire loops, chain-nose pliers for opening and closing jump rings, and flush cutters for trimming wire cleanly. These three tools handle most basic wireworking techniques.
Q: How do I choose good quality turquoise beads?
A: Look for beads with consistent color and a smooth, polished finish for an elegant look. For organic styles, raw nuggets with natural texture work well. Avoid beads with heavy white matrix or chalky surfaces, which often indicate lower density.
Q: My earrings feel heavy and pull on my ears. What did I do wrong?
A: This happens when the stone or design exceeds the support capacity of the ear wire. Choose lighter components and ensure your findings remain sturdy. Testing the weight in your hand before final assembly helps prevent ear fatigue.
Q: Can I use gold-filled wire instead of sterling silver?
A: Absolutely. Gold-filled or gold-plated findings work beautifully with turquoise. Verify your wire matches the recommended gauge, and handle tools carefully to maintain the surface plating.
Q: How do I make my wire wraps look neat and professional?
A: Maintain steady wire tension while wrapping, and place coils parallel and close together. Use the very tip of your round-nose pliers to initiate a tight starting loop. Practicing on inexpensive copper wire first builds muscle memory for perfect wraps.








