

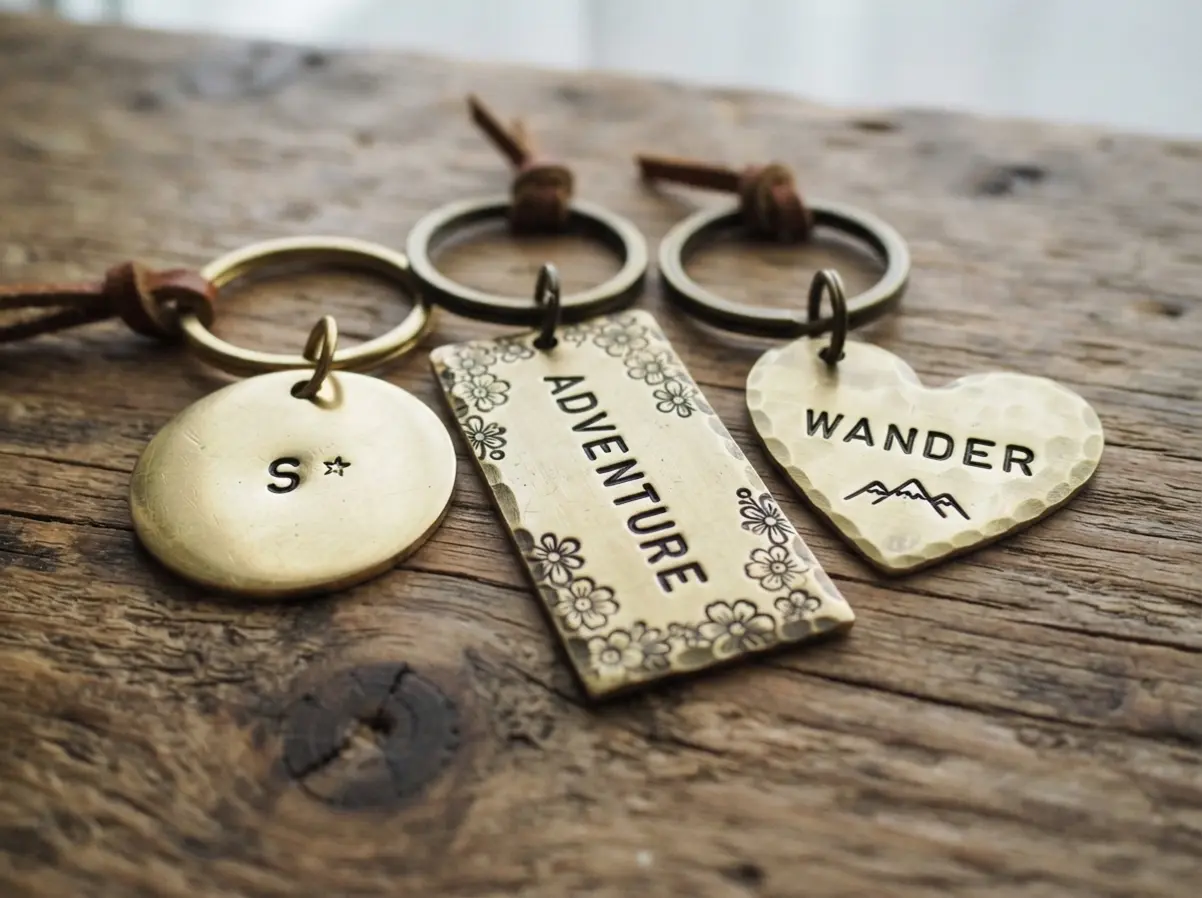
This collection is here to fuel your creativity with ten distinct designs, from minimalist initials to detailed nature scenes. Each one celebrates the unique texture and character you achieve with simple tools and a bit of practice. Let us look at some beautiful ways to make your mark.
Achieving Uniform Impression Depth on Brass Blanks
The fastest way to ruin a diy stamped brass keychain is using a lightweight craft hammer instead of a steel head mallet. You need that solid weight behind every strike to drive your stamp into the soft brass blank with consistent force. We tend to skip securing the blank, but trust me, a single strip of double-sided tape or a rubber stamping pad holds it flat against your bench block.
This prevents the metal from bouncing and causing those blurry, ghosted impressions you hate. Your finished piece will have crisp, professional-looking letters when each hit lands with the same authority. The good news is, once you feel that satisfying thud, you will know the depth is perfect every time.
Selecting Metal Stamp Sets for Precise Typography
Clean sans-serif fonts like Arial or Helvetica transfer onto small brass surfaces far better than ornate script styles. Those delicate serifs and thin connecting lines often fail to imprint, leaving you with broken, illegible letters. You want to look for a stamp set made from hardened steel, as this material holds its sharp edges through hundreds of uses without deforming.
The key is finding a font with enough surface area to make a crisp mark on each diy stamped brass keychain. For a polished result, consider using a stamping jig or even a simple piece of masking tape as a guide to keep your words perfectly level. This small step is the difference between a charming handmade look and a messy, amateurish one.
1. Minimalist Sans Serif Initial Disc
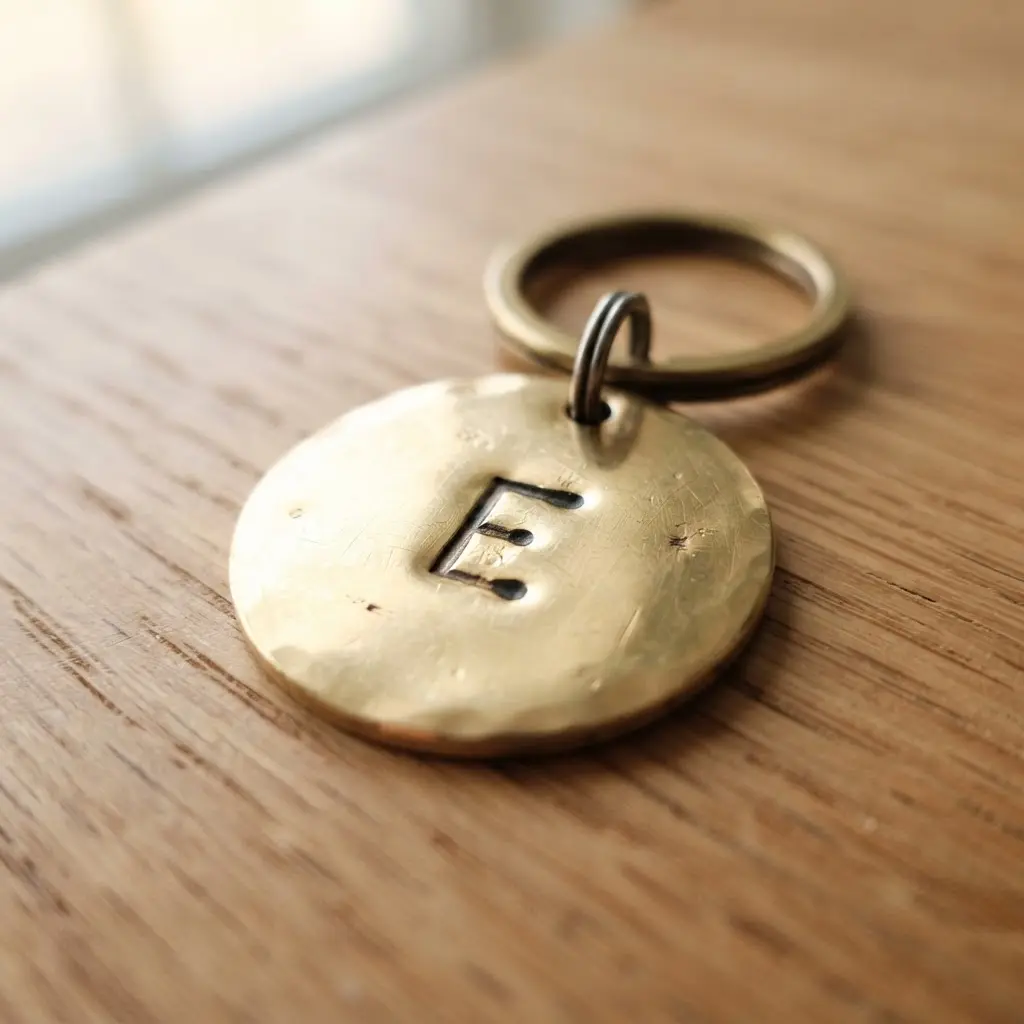
This project is perfect because finishing a diy stamped brass keychain only requires clean, simple lines. You will place a brass blank disc on a steel block and give a single, firm hit with your stamping hammer. The trick is holding that sans-serif letter stamp perfectly straight so your initial looks crisp and centered. Does that sound intimidating?
Trust me, it is not once you try it. I love how the darkening step makes the letter pop. You fill the impression with a marker and wipe the surface clean. The result is a modern, personal piece that feels professional.
It is a fantastic gift idea, especially if you pair it with other handmade items like DIY faux leather keychain ideas for a coordinated set. Feel how satisfying that clean, bold initial looks when you are done.
2. Whimsical Floral Border Rectangle Tag
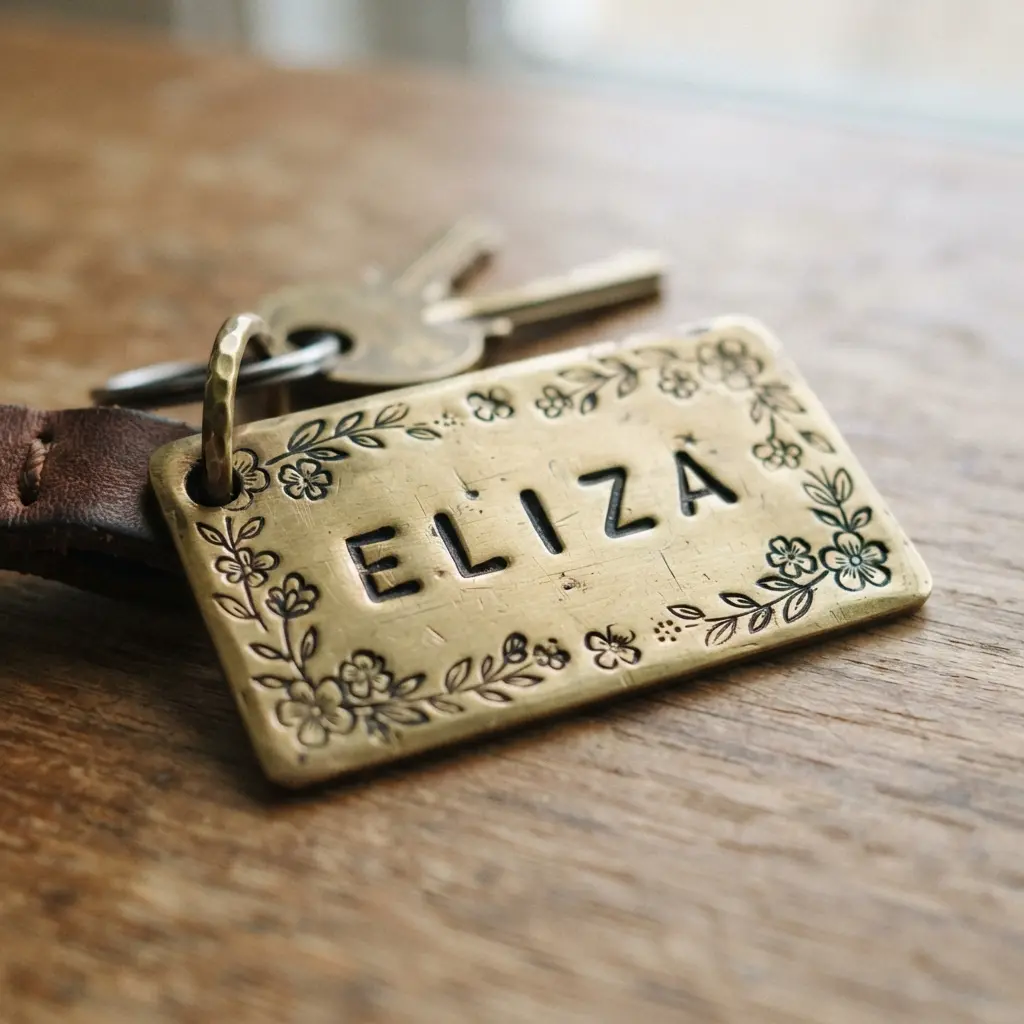
Ever think a floral border would be too tricky to stamp for a diy stamped brass keychain? I love this one because it is not. You start with a clean rectangular brass blank and plan your border. Use stamping tape to mark your edges, then pick your favorite small, playful floral stamps.
You will tap them one by one around the perimeter, leaving a nice open space in the middle. It works because the whimsical style feels light and personal, not rigid. Trust me, the result is a charming, handcrafted piece you will be proud to give or carry.
3. Hand Stamped Date Coordinate Bar
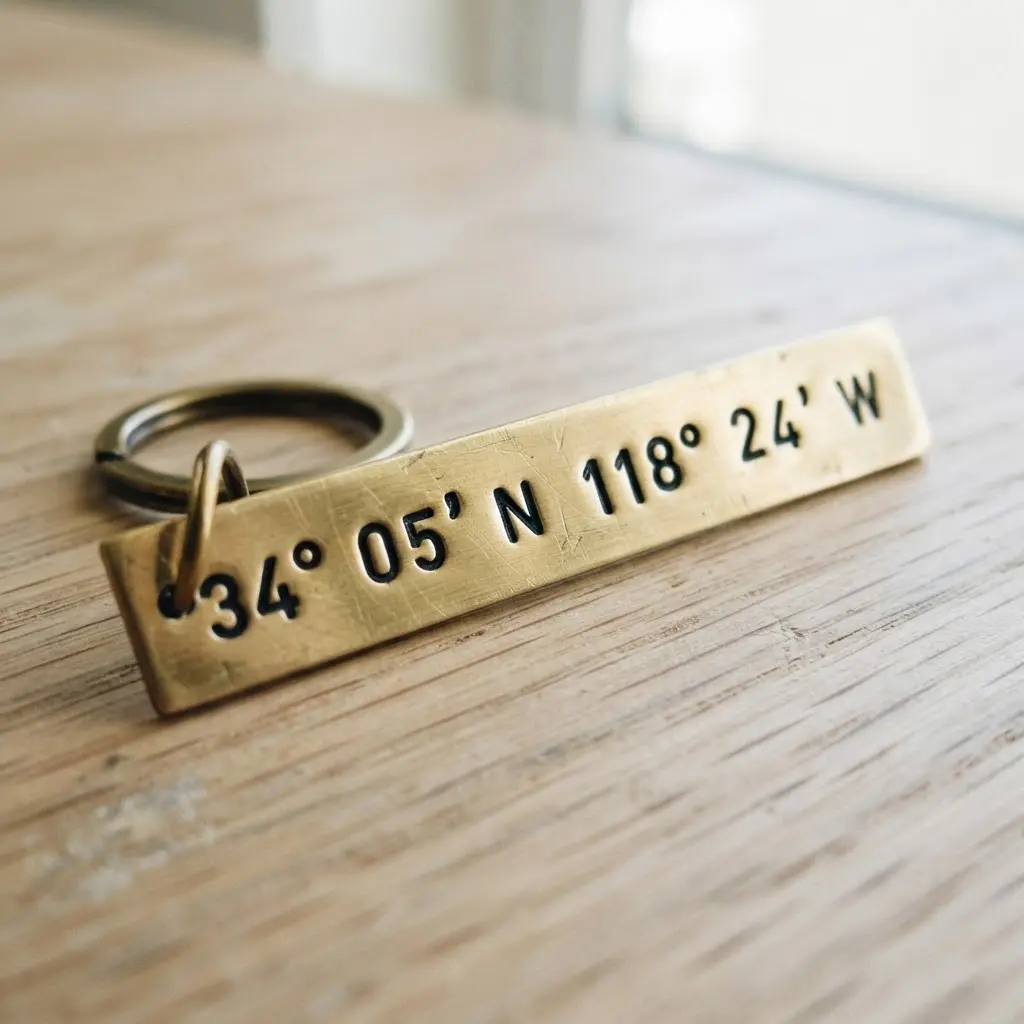
Ever wanted to carry a map coordinate and a special date right in your pocket? Planning a diy stamped brass keychain lets you do exactly that. First, you pick a meaningful spot and get its latitude and longitude. Then, you practice your stamping on some scrap brass before moving to your actual brass keychain blank.
The real magic happens when you carefully line up each steel stamp and give it one firm, confident strike with your hammer. I love how the slight imperfections from hand stamping make it feel truly personal. It works because you are physically hammering a memory into metal, creating a wearable story.
Once you finish stamping, you will want to look up creative ways to organize jewelry. Keep your growing collection of sentimental pieces safe and ready to gift.
4. Rustic Hammered Edge Brass Heart
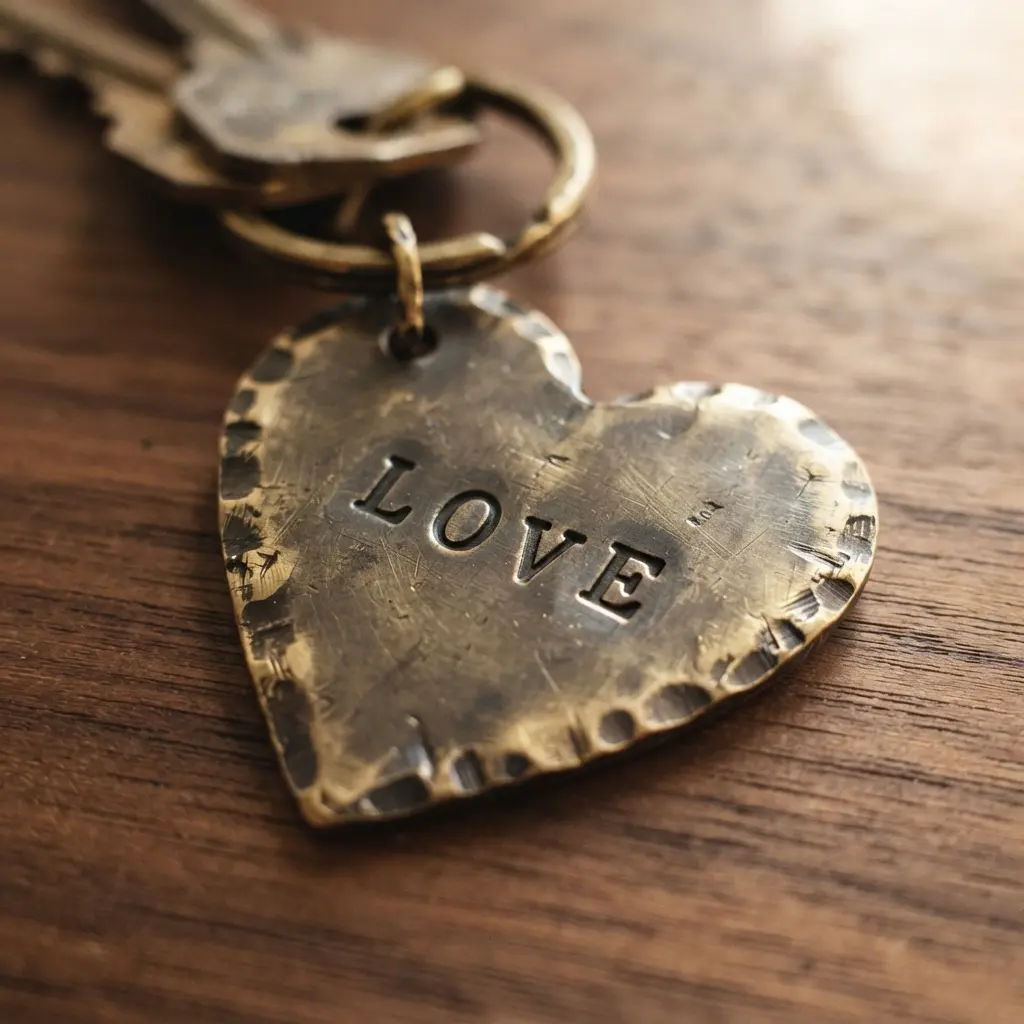
This is the technique that makes a diy stamped brass keychain feel like real metalworking. It looks complex but is incredibly straightforward once you start. You simply place your cut-out brass heart on a steel bench block and tap the edges with a ball-peen hammer. The key is using light, consistent taps to build up that beautiful, irregular texture without warping the shape.
I love how the hammering catches the light, giving the piece a handmade charm no machine replicates. The resulting hammered edge provides amazing tactile depth. It is a fantastic way to add a personal, artisanal feel to your project.
For a completely different but equally rewarding handcrafted feel, the skills you learn here translate beautifully to other materials, like the techniques shown in some great fabric bracelet and jewelry tutorials. Try this hammering method and feel the satisfaction of creating something uniquely yours.
5. Detailed Mountain Range Compass Disc
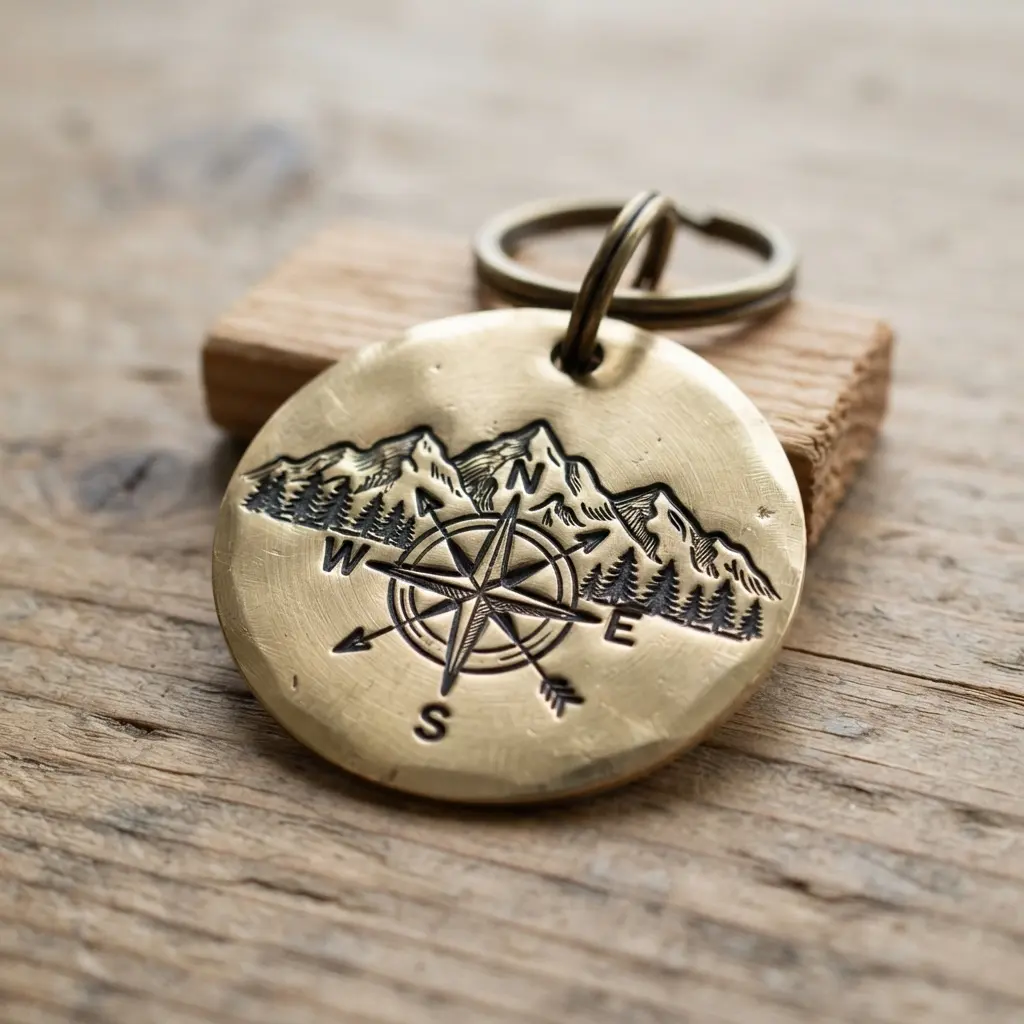
Ever wanted a diy stamped brass keychain that feels like a tiny piece of adventure? This one delivers. You will start by stamping or engraving a detailed mountain range onto a brass disc. Think of it as creating a miniature landscape with peaks and valleys.
Then, you integrate the practical part. You carefully add the compass degree markings and points around the disc edge. The trick is keeping the mountain art from blocking the view of the magnetic needle. Trust me, holding a finished piece gives you that ready for anything feeling.
6. Bold Serif Monogram Square Keychain
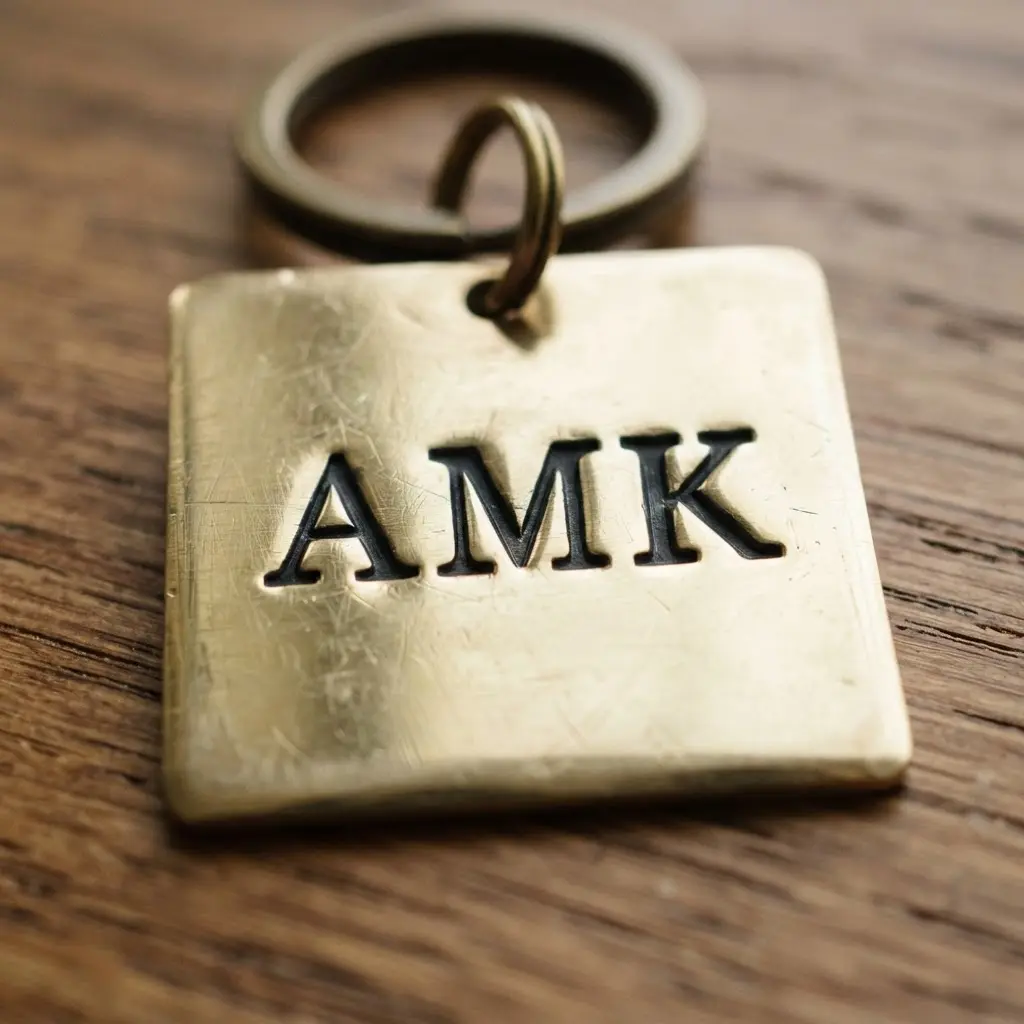
Who would have thought a diy stamped brass keychain with a square blank could feel so classic? This design is all about that timeless, sophisticated look. You will choose a bold slab serif font for your stamps, as the thick letters and sturdy feet hold up perfectly to hammering. I love how the clean square shape gives you a perfect, stable canvas for those deep, clear impressions.
The key is alignment. Use a strip of masking tape as a guide to keep your letters perfectly straight. Give each stamp one firm, confident hit with your hammer for an even impression across the whole monogram. After stamping, rub a bit of black enamel into the grooves to make your bold letters pop against the shiny metal.
This project turns a simple set of initials into a substantial, elegant keepsake. For another personalized accessory project, you can try crafting a painted statement necklace to match your new keychain style. Feel proud when you clip it to your keys.
7. Delicate Script Name Oval Tag
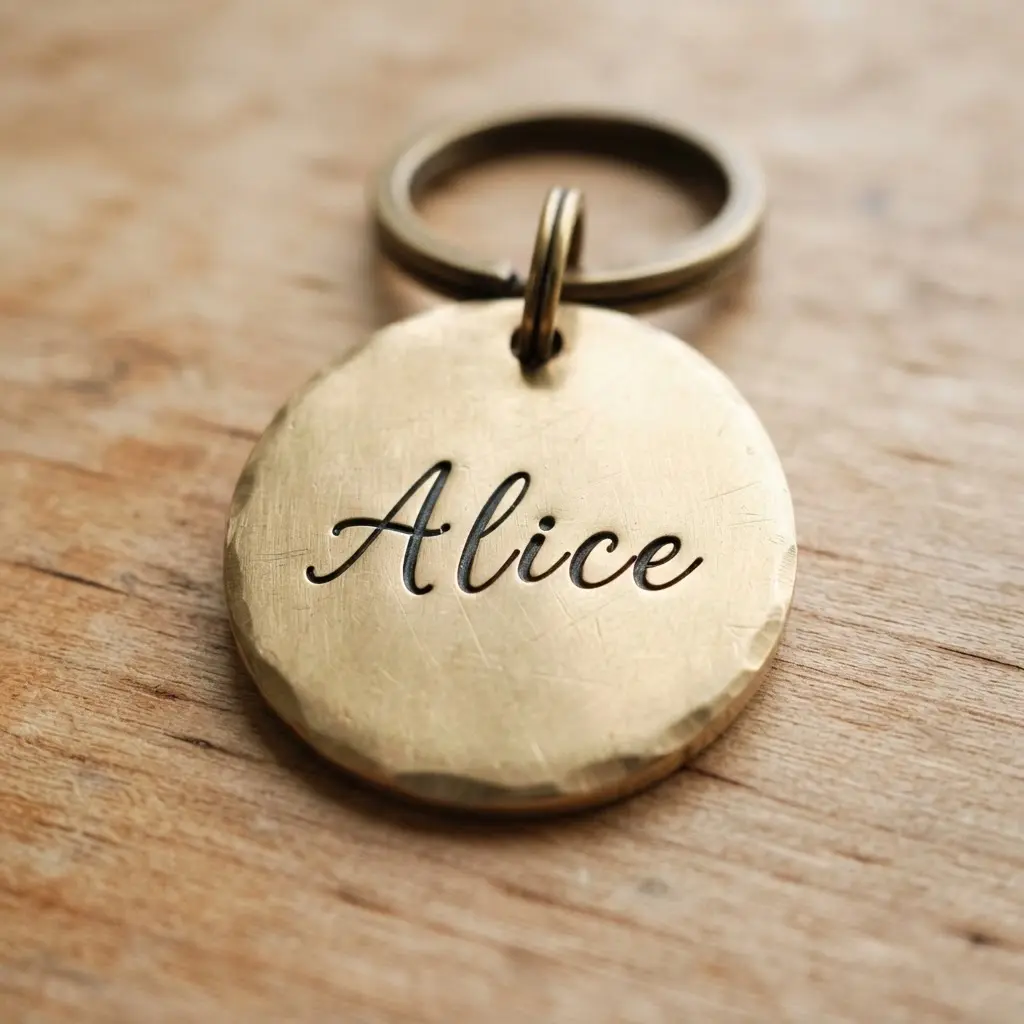
Ever wondered how to get that elegant, handwritten look on a diy stamped brass keychain? It relies on delicate curves and careful spacing. You will start with a clean oval brass blank and carefully arrange your letter stamps to spell out a name. I love using a piece of masking tape as a guide to keep everything perfectly straight and spaced.
Consistency matters here. You will strike each stamp with the same firm, controlled force from your hammer to get a uniform impression depth. Once the name is stamped, you will smooth the edges and give it a final polish. Trust me, the payoff is a timeless, sophisticated tag that feels incredibly personal.
8. Celestial Star Constellation Brass Hexagon
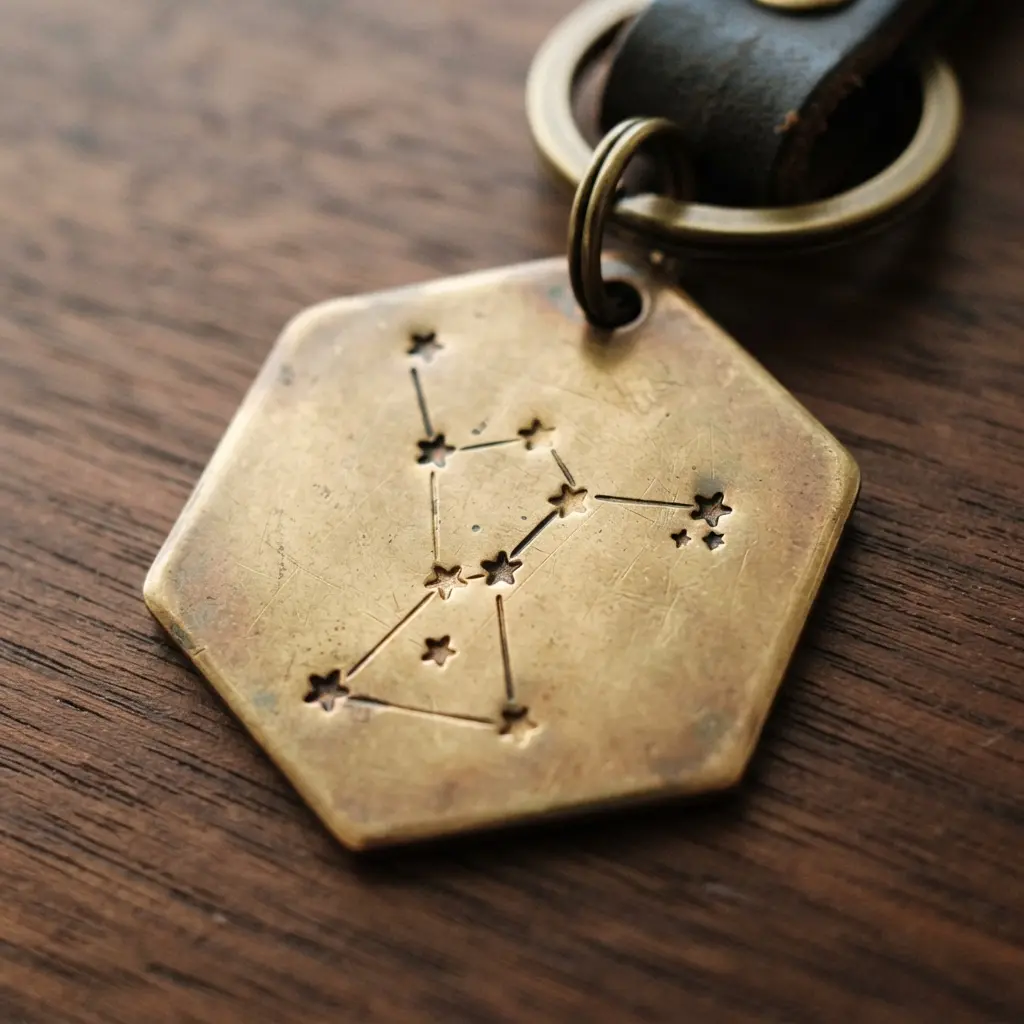
Ever wondered how those tiny stamped dots form a constellation on a diy stamped brass keychain? This one surprised me with its elegance, but the core technique is wonderfully straightforward. You start with your brass hexagon and carefully plan your star pattern. Using a metal stamp and hammer, you tap each star point onto the surface.
The real magic happens when you connect them with fine lines to match the constellation shape. For a truly stunning finish, I love using a patina solution to darken the brass and make those celestial details pop. It works because you are literally carving a piece of the night sky into a durable, personal token.
This is a fantastic project for anyone interested in metal stud embellishment art projects, as it builds similar precision skills with a completely different, celestial aesthetic.
9. Custom Pet Name Paw Motif
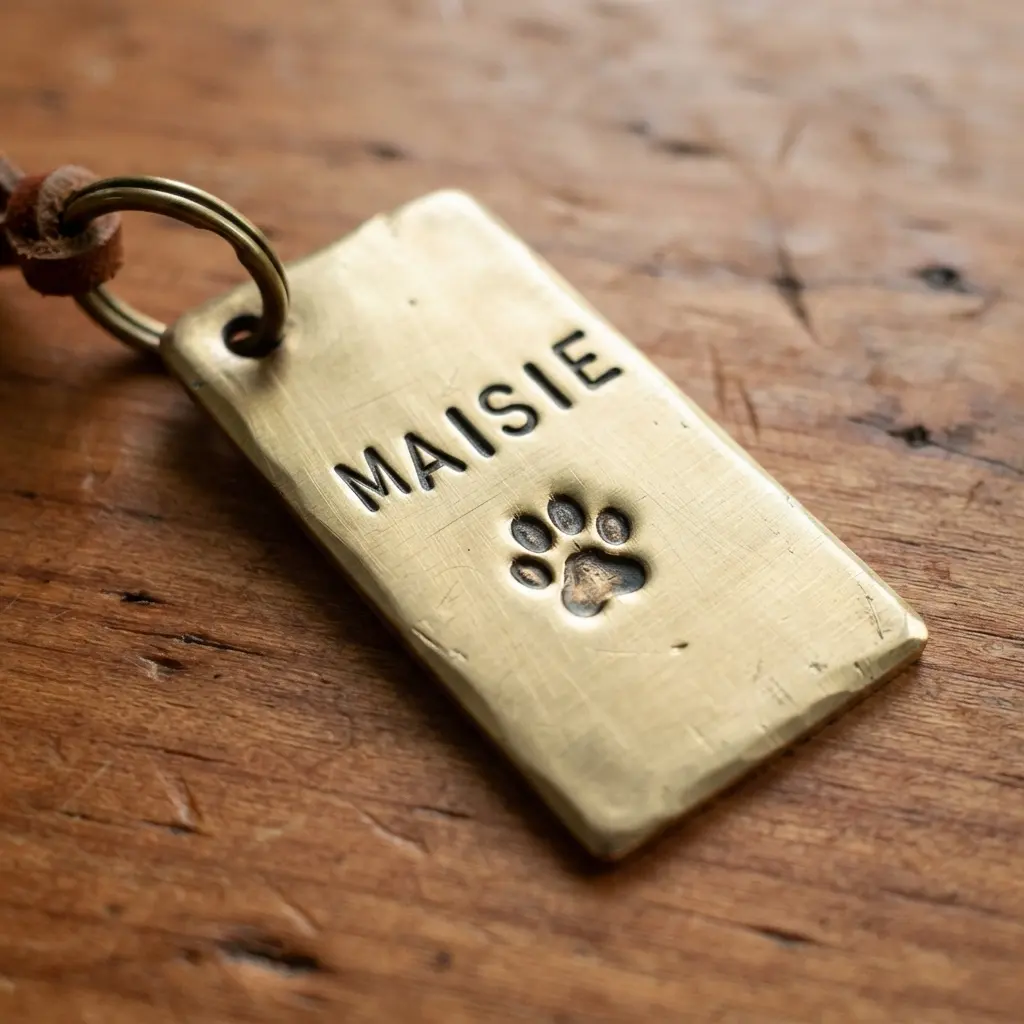
Who would not want a little piece of their furry friend on a diy stamped brass keychain with them all the time? This design mashes up your pet’s name and a classic paw print. You will stamp the name first, using a letter alignment guide to keep everything straight, then add the paw motif right beside or below it.
The trick is to plan your layout lightly on the brass blank before you start hammering. I love how the final piece feels both universal and completely unique. Trust me, getting a clean, deep impression on that first strike is incredibly satisfying.
If you want to add more color to your personalized metalwork, the skills you learn here translate perfectly to other decorative projects with Sharpie markers.
10. Vintage Typewriter Font Quote Rectangle
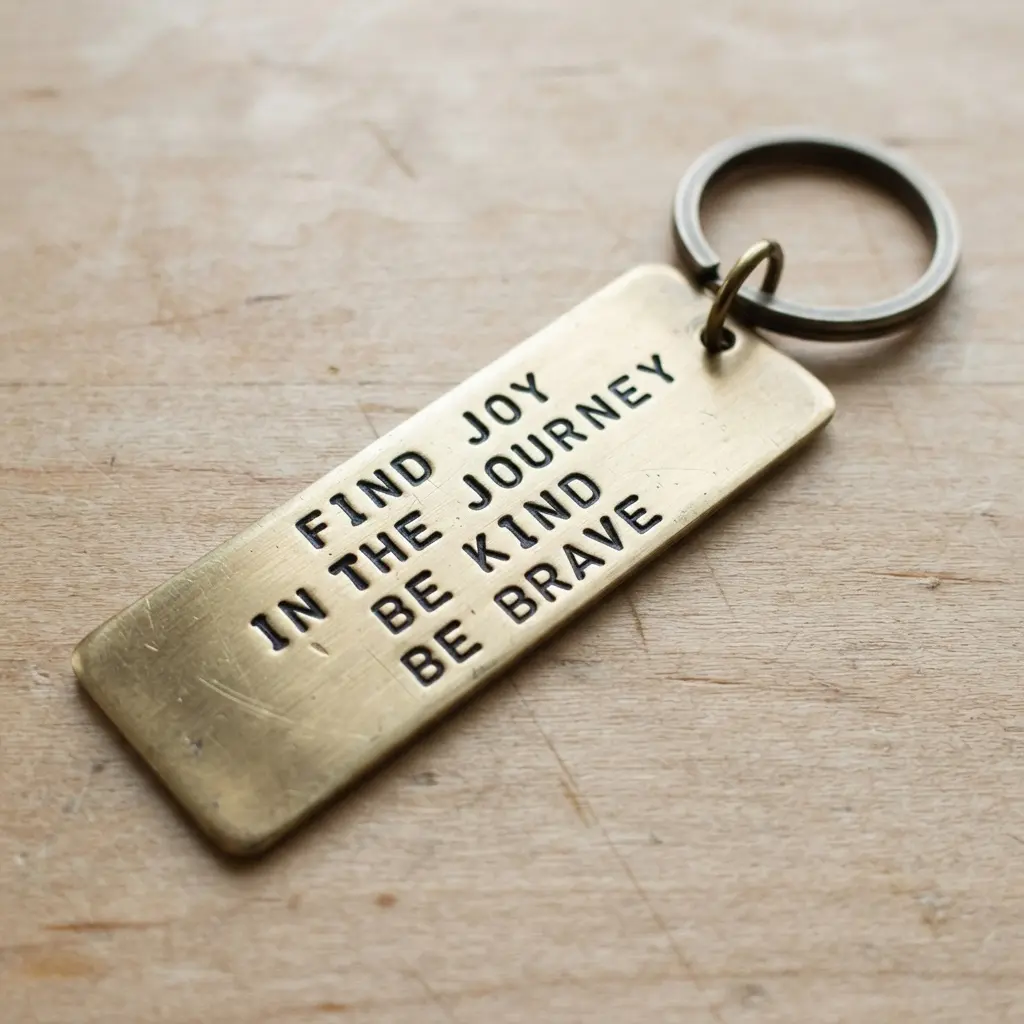
This design looks intricate, but it is one of the most rewarding to stamp. You start with a clean brass rectangle blank and a set of those charming, slightly imperfect typewriter font stamps. You will want to mark faint guide lines with a ruler before you start.
Then, it is all about consistent, firm taps with your stamping hammer for each letter. The key is to accept those tiny irregularities because they actually add to the vintage charm. That is what makes a long diy stamped brass keychain feel authentically handcrafted and personal.
My go-to tip is to use a stamping jig if you have one, or secure your blank with painter’s tape to keep it from sliding. It makes aligning your quote so much easier and gives you that straight, professional look you are after. Feel proud when you see your finished words in metal.
Oxidizing and Removing Excess Ink for Contrast
A permanent black ink pen makes the impressions on your diy stamped brass keychain pop brilliantly. Rub the ink directly over the entire surface, letting it flood every tiny crevice you stamped. The magic happens next, when you wipe the excess away with a firm paper towel and a bit of rubbing alcohol. This leaves the ink only in the recessed letters, creating that gorgeous, high-contrast look against the polished brass.
For an even deeper, antique effect, you use a chemical patina solution to darken the metal itself. Just remember to seal your work afterward with a clear acrylic spray sealant to lock in that beautiful finish and protect it from daily wear. Your finished accessory will look professionally made with this simple darkening technique.
Conclusion
The best part of finishing a diy stamped brass keychain is seeing your idea become a tangible, useful piece of art. It connects your creative energy to the simple, daily act of finding your keys. Whether you are making a gift for someone special or a new piece for your own collection, the process feels just as rewarding as the final result. My best advice is to start with a simple design you love and practice your stamping on a scrap piece of brass first.
That way, you get a feel for the pressure and alignment before you commit to your final blank. The warmth of the brass and the permanence of the stamp make each project feel like a small, significant achievement. I hope this gallery of ideas gives you the spark you need for your next creative session.
FAQs
Q: What is the best type of hammer for metal stamping?
A: Use a heavy hammer with a flat face, like a one-pound brass or steel mallet. The weight helps deliver a consistent, solid strike for a clean impression without requiring excessive force.
Q: How do I keep my letters straight when stamping?
A: Use a stamping guide or draw a light guideline with a permanent marker. Practice aligning each stamp by eye along this line before you strike. A jig or block holds your blank securely.
Q: Can I stamp on brass that already has a finish?
A: Yes, you stamp on finished brass without issues. Polished brass gives a bright, reflective look, while brushed or antiqued brass offers a rustic background for your stamped design.
Q: What should I do if my stamp impression is too light?
A: Ensure your brass blank rests on a hardened steel surface. Hold your stamp perfectly vertical and strike firmly once. Do not tap multiple times, as that causes double impressions.
Q: How do I darken the stamped letters to make them stand out?
A: Apply a darkening patina or black paint into the stamped grooves. Wipe the excess off the surface immediately, leaving pigment only in the recessed areas for a high-contrast look.








