

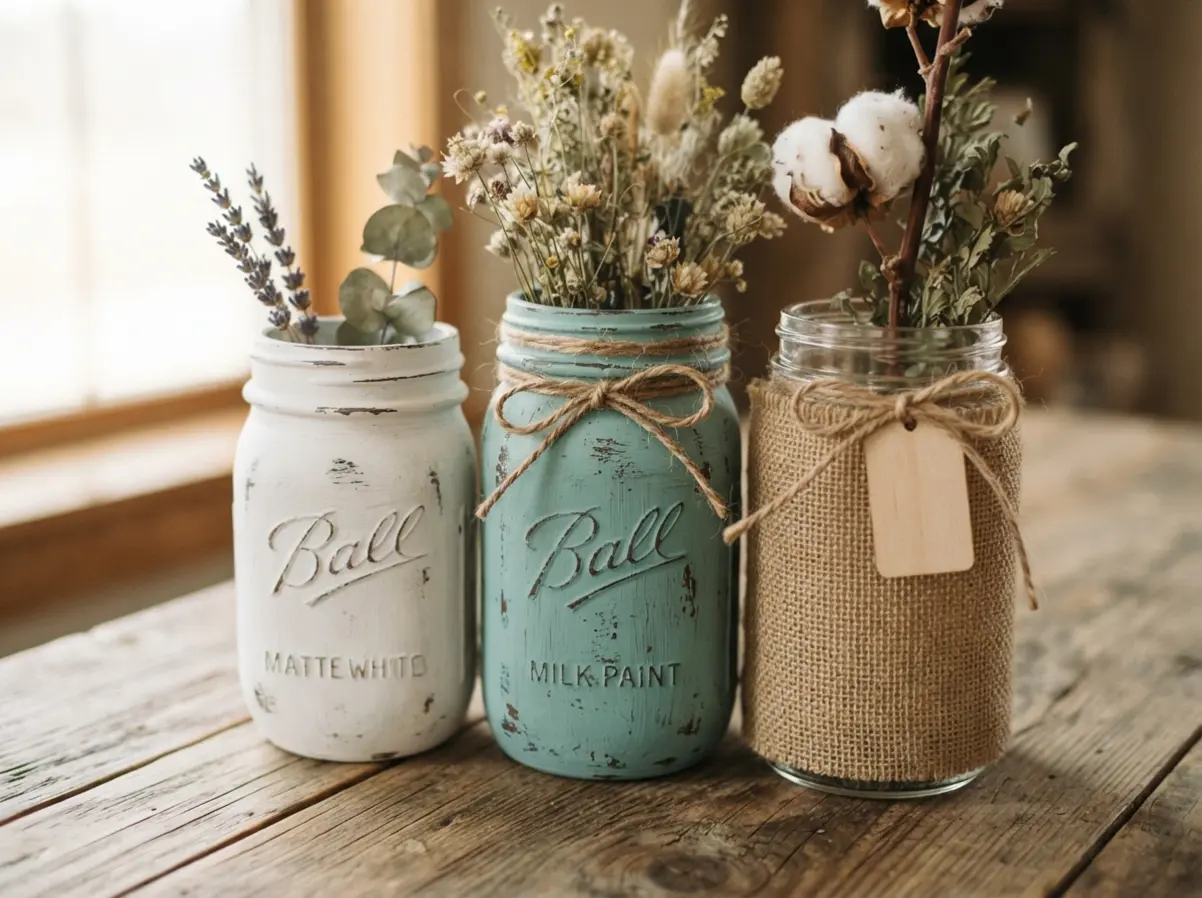
Glass Preparation for Optimal Paint Adhesion
Before starting any project for diy antique mason jars, scuff the entire jar with a fine steel wool pad to create a microscopic texture that helps paint cling securely. Turning that slick, non-porous surface into something rough gives your materials a proper grip. We all know the frustration when paint streaks and slides right off clean glass. After scuffing, wipe the jar down with a clean cloth dampened with mineral spirits to remove oily residue from your hands or the manufacturing line. This step is non-negotiable for reliable adhesion.
Trust me, skipping this prep causes finishes to peel later. A quick primer coat designed for slick surfaces adds another layer of insurance for your hard work. Proper preparation guarantees that your final piece holds its charm through seasons of display and handling.
Selecting Authentic Color Palettes for Aged Glass
The fastest way to make diy antique mason jars look modern instead of vintage is using a bright, saturated color straight from the can. You want to seek out dusty, muted tones that feel like they have lost their intensity over decades. Think of a faded denim blue, a chalky milk-paint white, or a rusty crimson that looks like old iron oxide. Mixing a dollop of a complementary color into your main paint instantly desaturates it. These chalky palettes form the foundation of the synthetic patina you are building. Look for paints labeled as matte, chalk, or mineral finish, since their flat texture reads as porous and old. A good rule is to choose two or three colors from the same muted family for your layering.
1. The Classic Matte White Chalk Painted Jar
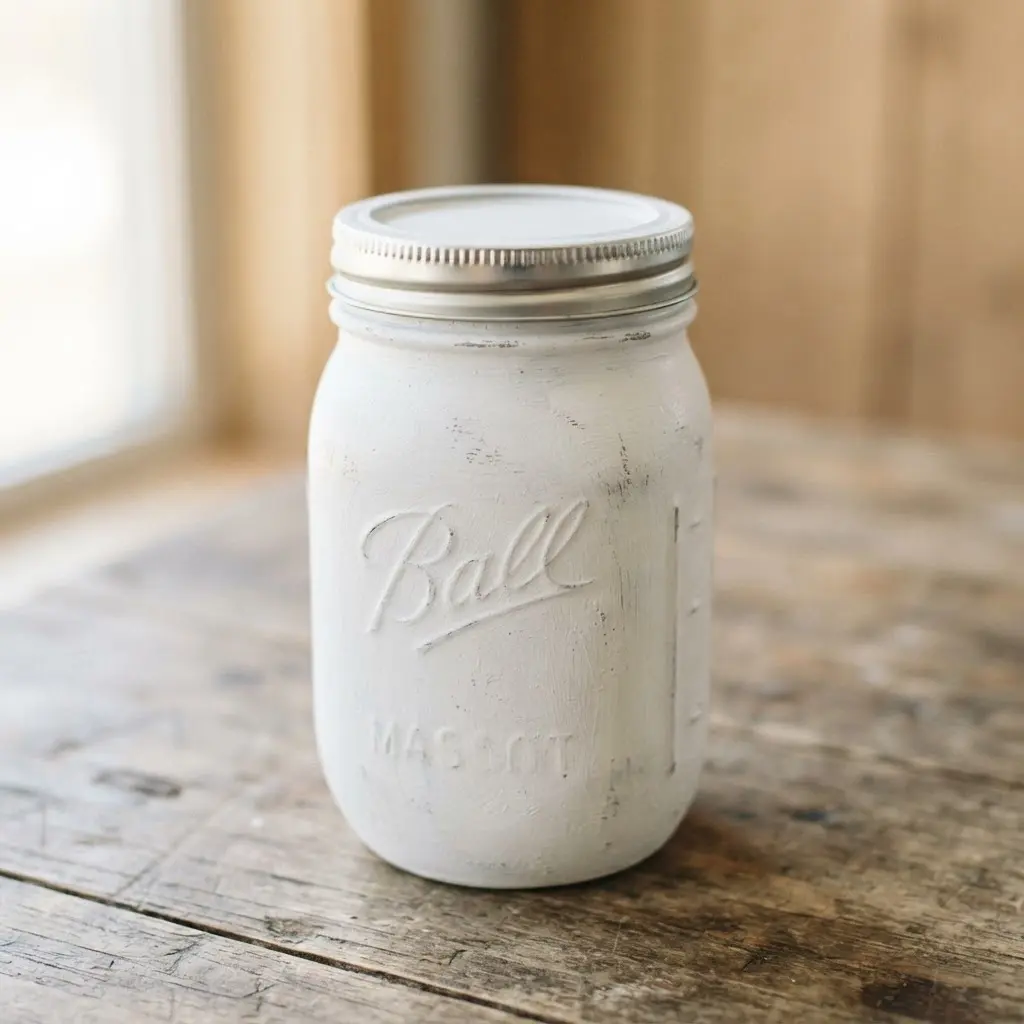
Ever wondered how a simple container looks so elegant on a shelf? This classic project transforms any clean glass piece into a soft, timeless display when you learn to craft diy antique mason jars perfectly. You simply apply a few thin coats of white chalk paint to the outside, letting each layer dry fully. The matte finish feels velvety and looks stunning across your decor.
It works because the neutral white fits everywhere, from a farmhouse kitchen to a minimalist bedroom. I love how it turns an old storage vessel into a chic vase or a lovely organizer. Trust me on this one: applying a clear sealer keeps your paint job lasting for years. Before you start painting, explore how to create rustic mason jar designs to expand your options. You will feel proud of your beautiful, upcycled creation.
2. Distressed Teal Milk Paint Jar with Visible Brushstrokes
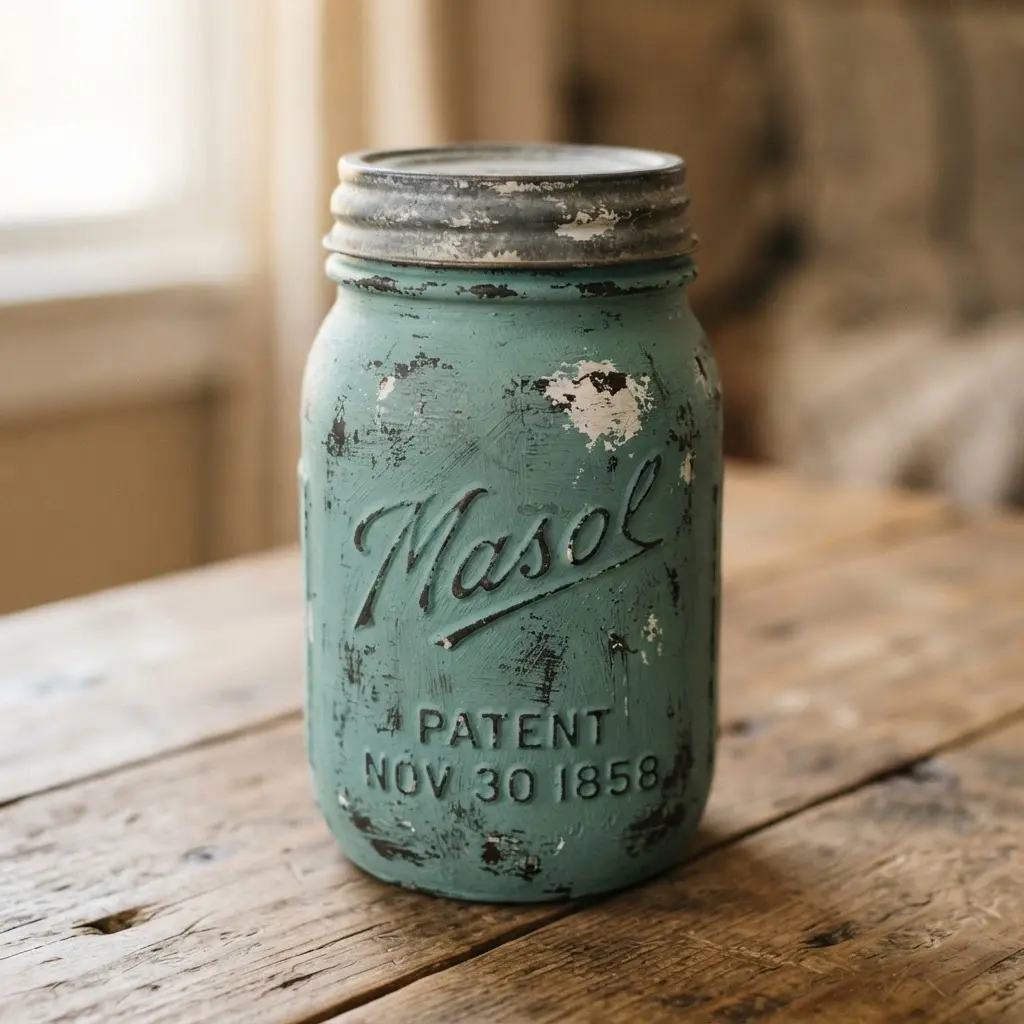
This one is a personal favorite because it looks like a cherished heirloom you found at a flea market, not something you made last weekend. You will apply teal milk paint in casual, overlapping strokes and let those marks stay visible for a wonderfully handcrafted feel. After the paint dries, use fine sandpaper to gently rub away color on the jar’s edges and raised details. This distressing creates a multi-tonal effect where the teal looks softly faded in spots, which highlights the vintage charm.
I love how this project builds a sense of history and warmth into a simple piece. If you are working on seasonal decor, the rustic vibe makes it a perfect companion for DIY fall acorn decorations. Does that not look stunning on a shelf? Crafting these diy antique mason jars takes only a few hours but yields decades of visual appeal. Keep your brushstrokes loose and let the paint crack naturally for authentic character.
3. Crackle Glaze Ivory Mason Jar — A Textured Finish
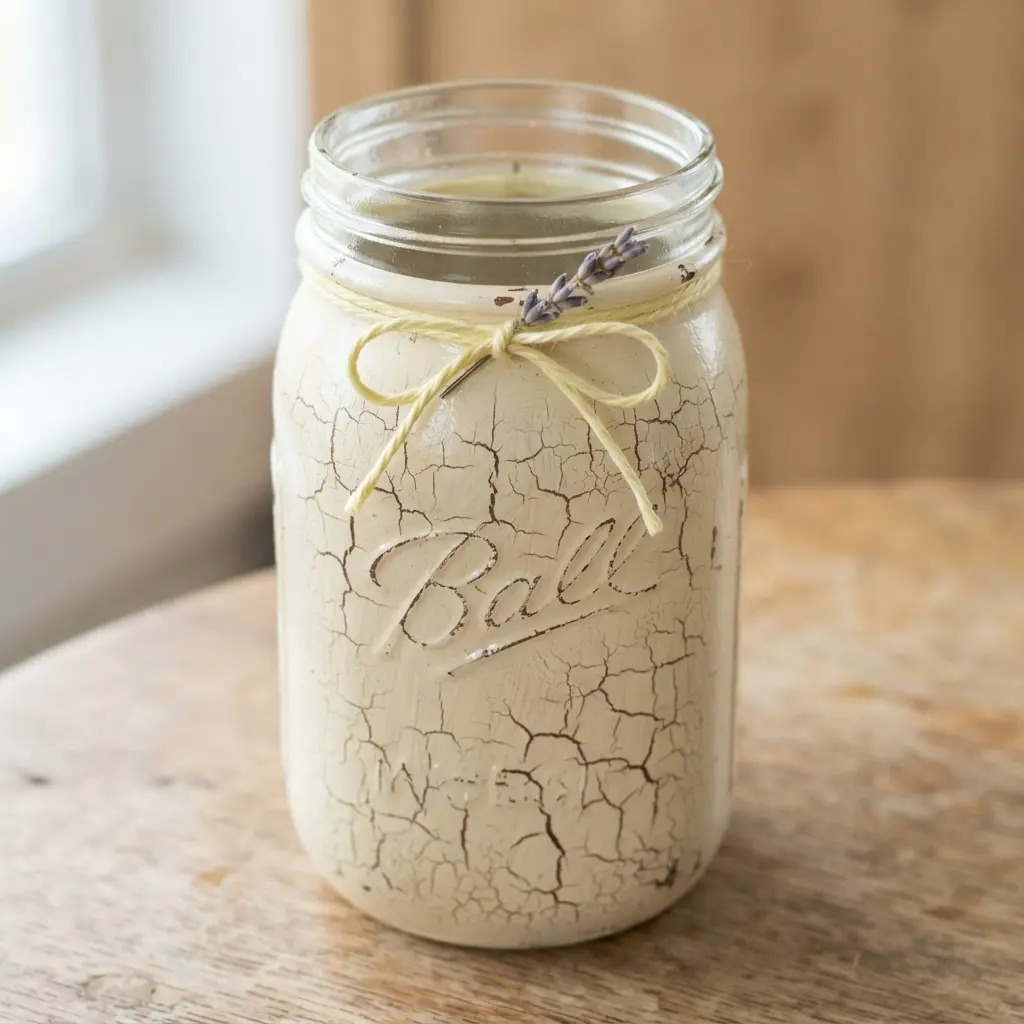
This finish looks incredibly complex, but applying crackle medium correctly makes crafting diy antique mason jars surprisingly straightforward. The trick is applying a base coat, then the crackle glaze, and finally a contrasting top coat. As the layers dry at different rates, that beautiful network of fine cracks appears. I love how the ivory color makes each tiny line stand out, giving you instant vintage texture.
That crackle pattern adds visual depth you cannot get from a flat paint. It feels old and treasured the moment it dries. For a consistent result, always follow the drying times on your product exactly. Rushing this step causes the most common mistakes. This jar makes a perfect vase or candle holder. If you are making a set for a seasonal display, planning fun craft ideas gives you a great color palette to match. Doesn’t that creamy, crackled finish look stunning on a shelf?
4. Sea Glass Frosted Blue Jar with a Soft Etched Look
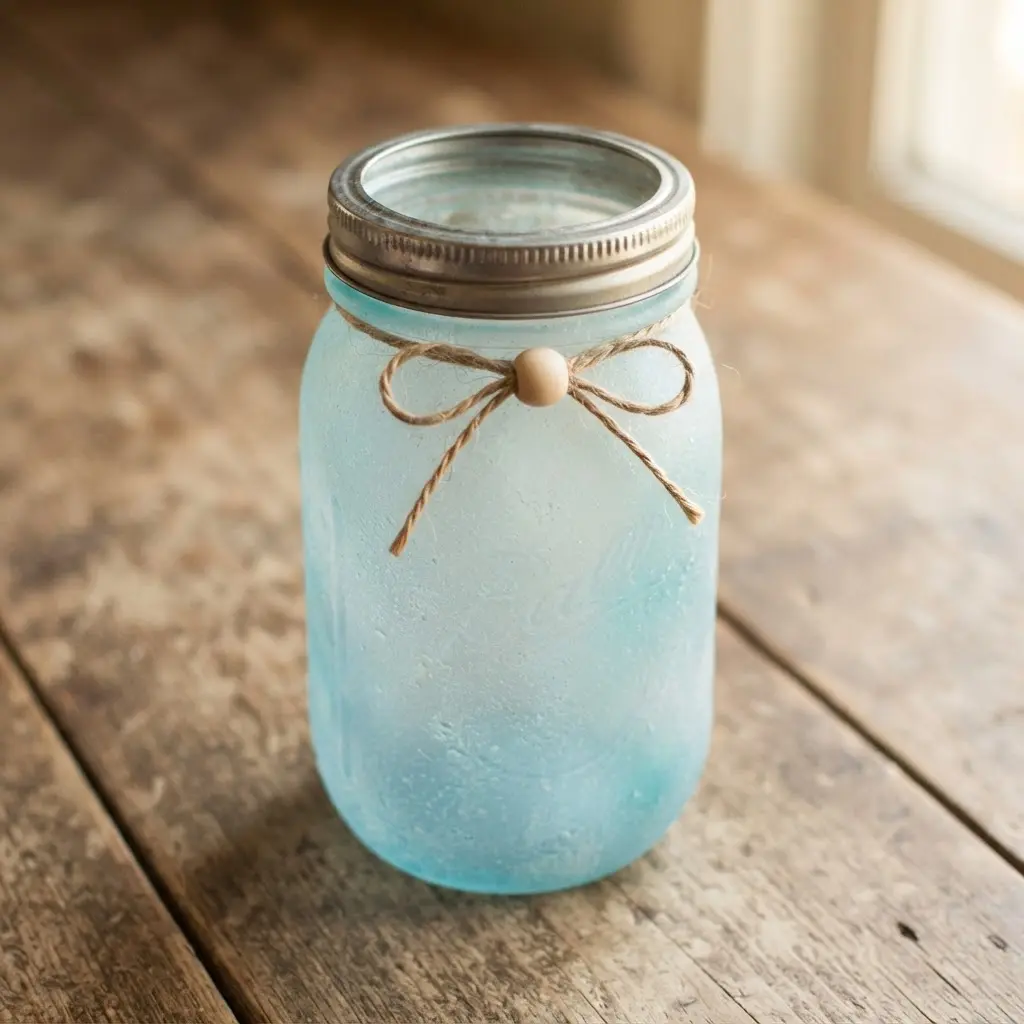
Ever wanted to capture the soft, weathered look of sea glass? To achieve that weathered aesthetic for your diy antique mason jars, apply a chosen stencil to a clean jar before building up light coats of frosted blue spray paint. Once it is dry, peel the stencil away to reveal the clear glass beneath, which creates that subtle, ghost-like design. The technique works beautifully without requiring advanced artistic training.
The soft etching adds a personal touch without being too fussy, and the frosted finish diffuses light beautifully. This project pairs wonderfully with kids, as the process stays straightforward and the results reward your patience. You can find inspiration for other simple projects in our guide to various spring crafts to keep the creative momentum going. Let each thin coat dry completely before adding the next to prevent drips and ensure that perfect, translucent effect.
5. Rust Patina Textured Mason Jar for Industrial Style
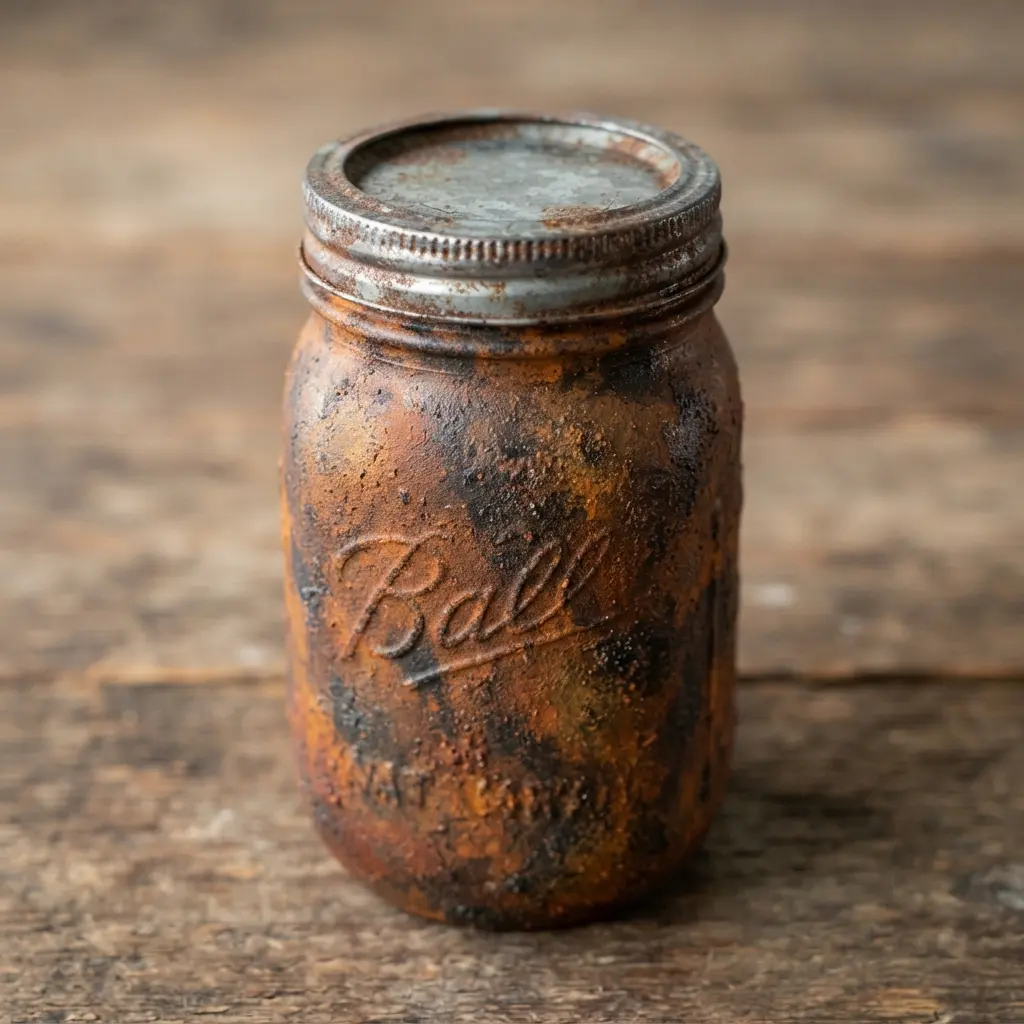
This one looks like a complex metalworking project, but you can create that gorgeous rusted texture with simple paint and a texturizing medium. Creating this industrial rust look remains one of the most rewarding ways to finish your diy antique mason jars. Start by priming your glass and applying a dark brown base coat. Then, mix your chosen rust-colored acrylics with baking soda or joint compound to build up that gritty, corroded feel.
Dab and stipple the layers with a sponge or stiff brush, letting each one dry before adding the next. It works because you mimic nature’s own process, creating incredible depth and a truly tactile surface. For a charming seasonal contrast, pair your rustic vessel with a piece of cute Easter bunny art. The finished piece feels wonderfully authentic on any desk or mantel.
6. Dry Brushed Antique Gray Jar with Subtle Highlights
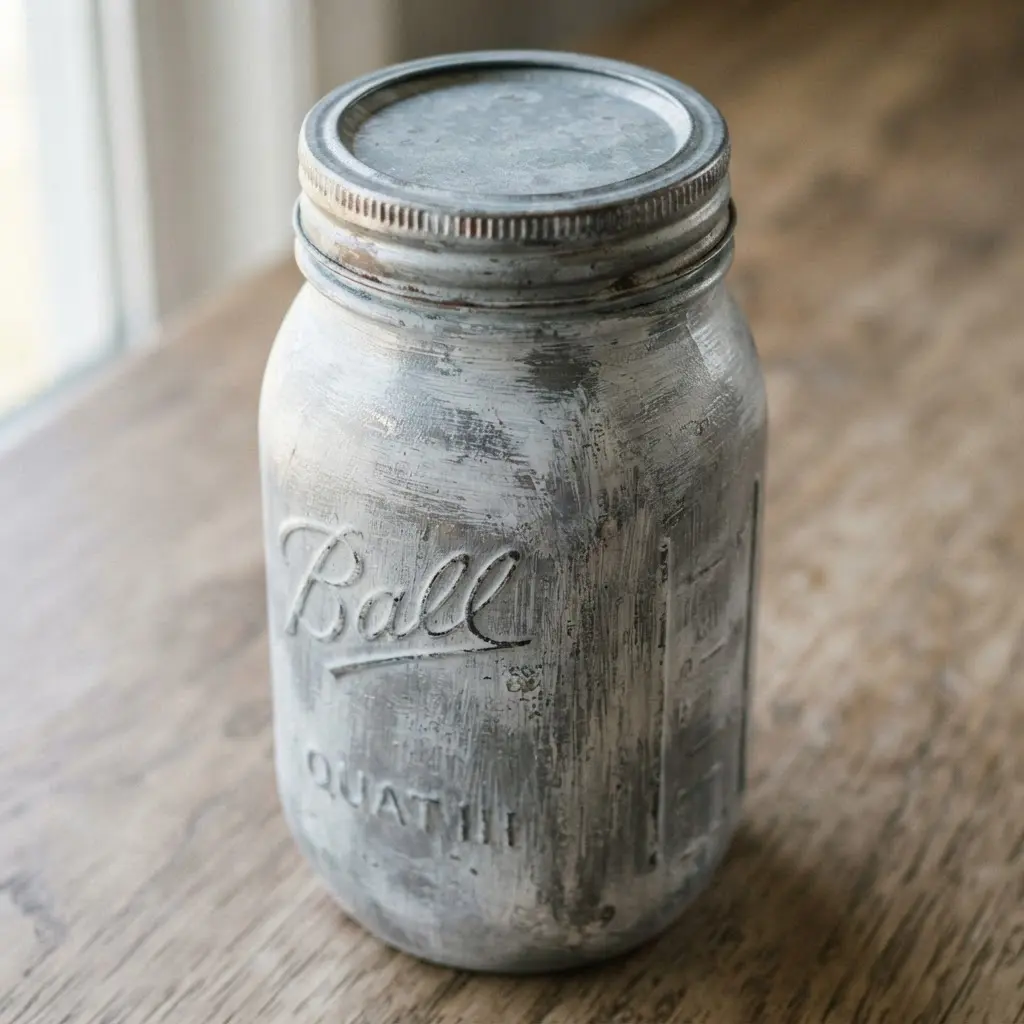
This finish looks professionally weathered, but the technique remains wonderfully forgiving. Mastering a gentle dry brush technique instantly elevates your diy antique mason jars without demanding advanced skills. You will use a stiff-bristled brush, dip it into your main gray paint, and then wipe off almost all the paint onto a paper towel before brushing it onto your jar. The magic happens when you repeat this with a very light cream or off-white, dabbing it on the edges and raised details.
I love how those subtle highlights instantly create depth and dimension. It makes the piece look like it has been catching the light on a farmhouse shelf for years, not minutes. My go-to tip involves offloading more paint than you think you need. Building up thin, textured layers guarantees that perfectly aged look.
7. Burlap Wrapped Weathered Glass Jar for Natural Texture
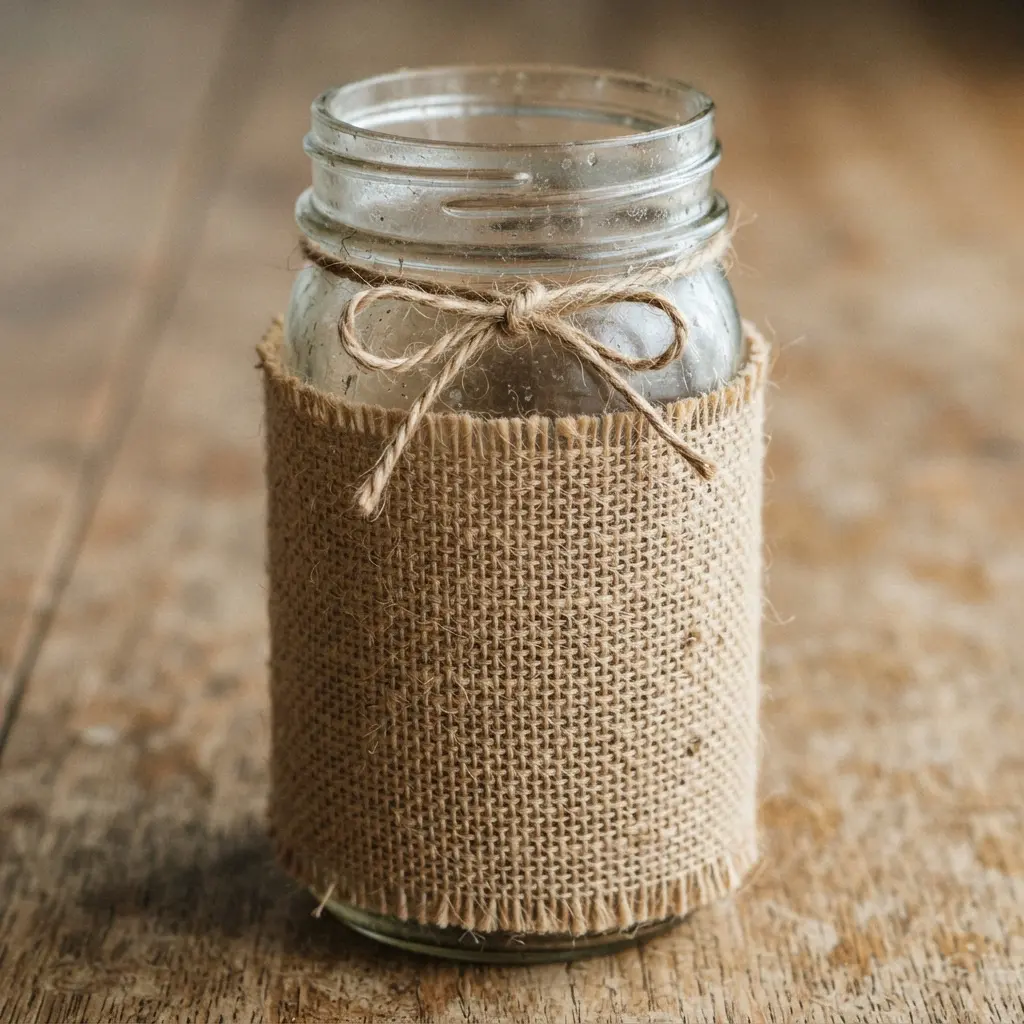
This project looks like a boutique market find, but you completed it in an afternoon. Wrapping coarse fabric around glass remains one of the quickest routes to beautiful diy antique mason jars for any cozy room. You take a simple jar and wrap it with rough, natural burlap fabric, securing it tightly with adhesive. For a weathered look, dab a thin, uneven coat of light gray acrylic paint with a sponge before wrapping.
Why does this work so well? It brings together two classic rustic elements in a way that feels both cozy and effortlessly stylish. A practical tip is to keep your adhesive lines thin and even to avoid glue seeping through the burlap weave. If you enjoy this earthy, handmade decor, you might find inspiration in a DIY toadstool mushroom craft for a complementary woodland touch. Feel how satisfying it is to create something warm and natural from simple supplies.
8. Vintage Amber Stained Mason Jar with Warm Tones
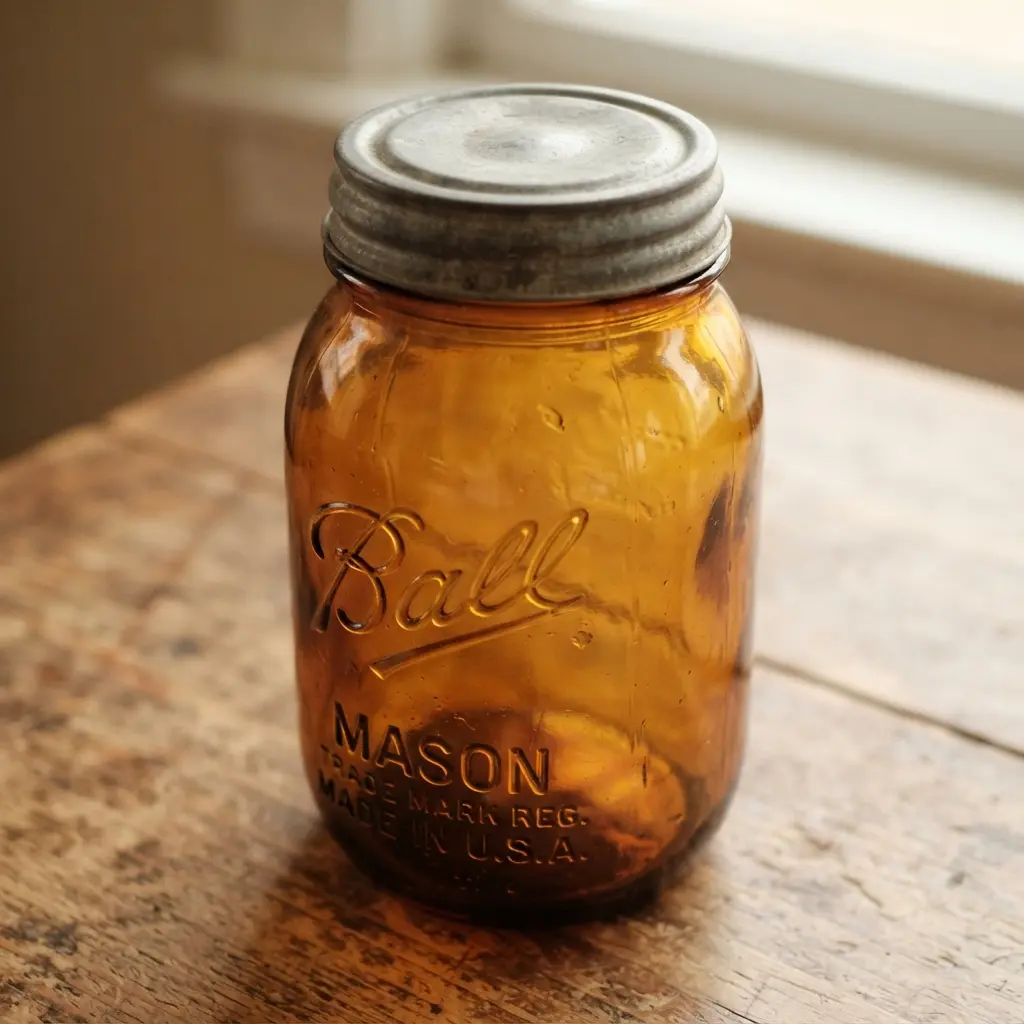
Ever wondered how to get that gorgeous, honey-colored glow in a jar? Capturing that warm amber glow inside your diy antique mason jars is simpler than it might first appear. The secret lies in using translucent amber glass paint or a mix of Mod Podge and food coloring. You apply it in thin layers to the inside of a clean jar, then bake it to cure the color.
This creates a soft, diffused light that is perfect for a cozy candle. The warm tone feels nostalgic and inviting, like a piece of history. I love how it instantly adds rustic charm to any shelf. Before you start, a good tip is to read up on how to make Easter egg bath bombs. The baking and curing process is similar, so you will feel confident handling the oven steps. Does that not sound satisfying?
9. Worn Sage Green Distressed Jar with Sanded Edges
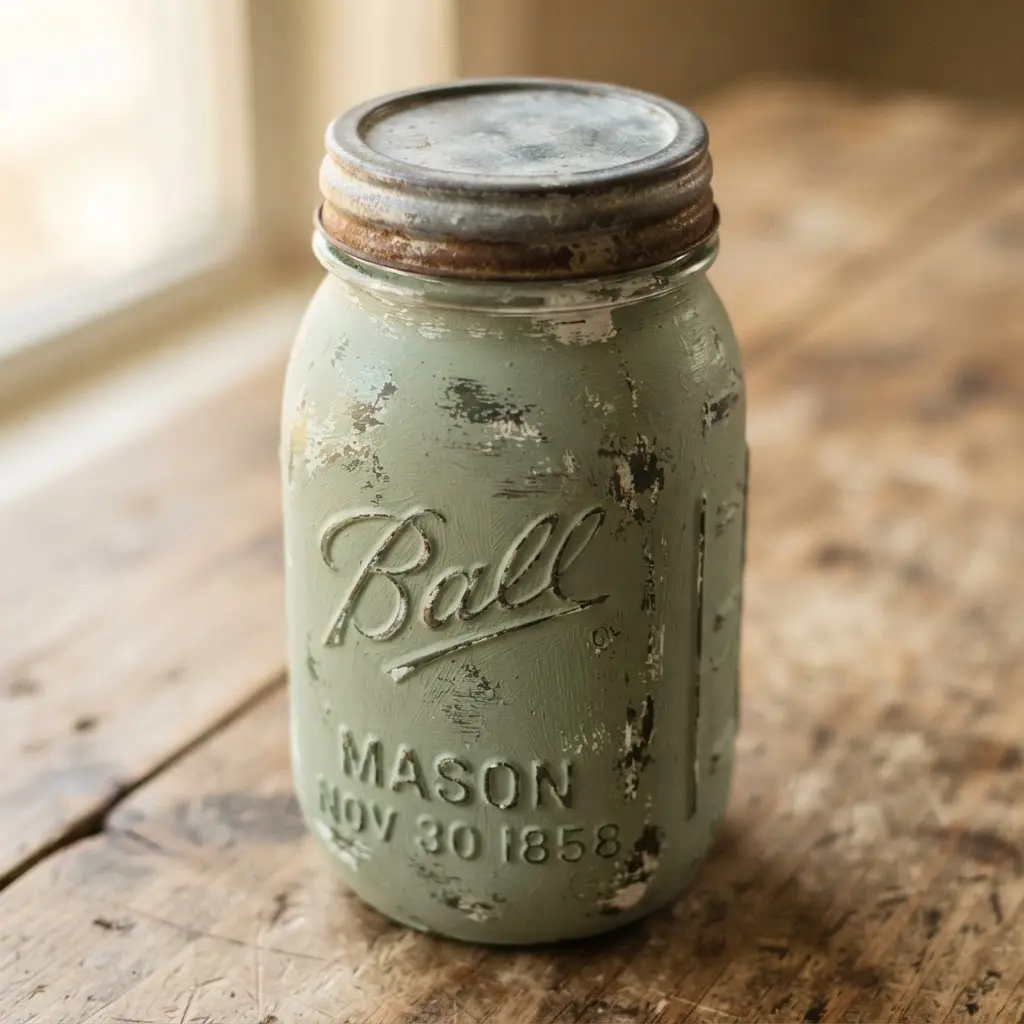
This one looks deceptively complex, but trust me, the process remains incredibly forgiving. Sanding down fresh paint reveals glass naturally and gives your diy antique mason jars a wonderfully worn appearance. You start by giving a clean jar a coat or two of sage green chalk paint, letting it dry completely between layers. Then, the real magic happens when you take fine-grit sandpaper to the edges, gently revealing the glass or base coat underneath.
Why does it work so well? The sanded edges instantly add a sense of history and character, making your vessel feel like a genuine found treasure. For an extra layer of depth, you can inspire with mixed media artwork by incorporating subtle crackle effects or tiny decals before sealing. A final coat of matte sealer locks in all that rustic charm, and you hold a piece that feels timeless and uniquely yours.
10. Metallic Bronze Faux Antique Jar with a Soft Sheen
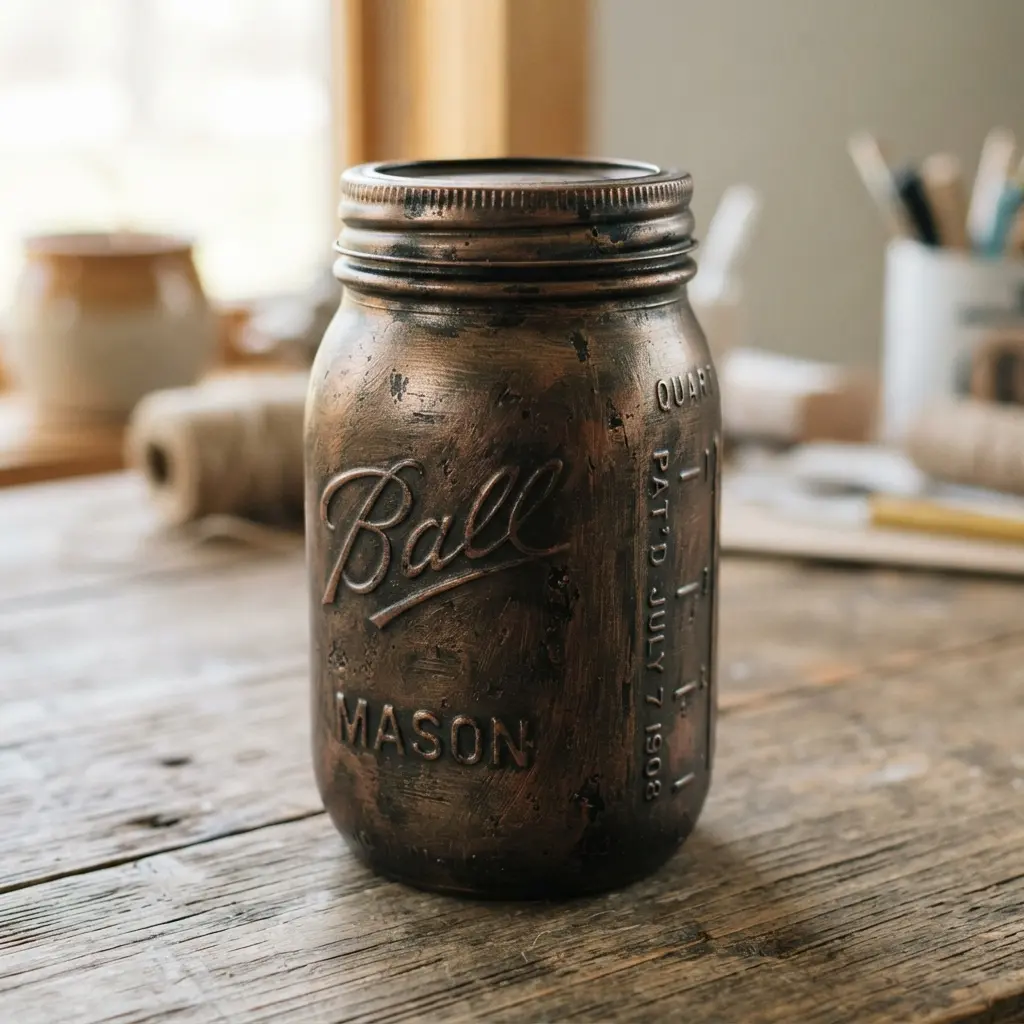
This one surprised me during my early experiments. Layering metallic paints and dark wax transforms ordinary glass into elegant diy antique mason jars with very little effort. Start with a clean jar and a coat of dark primer. Then, build up several thin layers of your metallic bronze paint, letting each dry completely. The magic happens when you wipe a dark glaze into the crevices and immediately buff it off. This creates that subtle, aged patina.
Trust me on this one: restraint with the antiquing medium matters greatly. Too much glaze and you lose the soft metallic glow. A light pass with fine sandpaper on the edges reveals hints of the dark base, mimicking natural wear. Finish it all with a satin topcoat to lock in that gentle sheen and protect your work. It feels so satisfying to hold a piece that looks like it carries a century of quiet history.
Once you master the technique, apply this rich, warm finish to all sorts of projects. It pairs perfectly with other upcycled items if you want to explore various mixed media paintings and create a cohesive vintage display.
Sealing Techniques for Long Term Distressed Preservation
Protecting every layer requires a reliable sealant, especially when sealing diy antique mason jars for long term display. A single coat of matte clear acrylic sealer applied with a soft brush locks in all your careful layers of paint and wax without changing the finish. The good news is this takes minutes and protects weeks of detailed work from chipping or wearing away. You want to avoid any gloss or semi-gloss sealants because they create a shiny, plastic-like film that ruins the chalky, porous antique aesthetic.
Apply the sealant in thin, even strokes, paying extra attention to the high-wear areas like the rim and threads where your patina concentrates. Let this cure fully for at least twenty-four hours before you handle the jar for display. This final step ensures your distressed finish stays exactly as you designed it for years.
Conclusion
Finding the right finish for your space connects directly with a texture or color that feels right to you, whether it decorates a kitchen shelf or serves as a special centerpiece. Mastering these simple steps guarantees that every diy antique mason jars project turns into a lasting keepsake. Pick one finish that speaks to you and start with a single jar to learn the technique. Your home will soon hold a little piece of handmade history that you crafted yourself.
FAQs
Q: What is the best type of paint to use for an antique look?
A: Chalk paint and milk paint are excellent choices because they dry to a flat, matte finish and distress easily. Acrylic craft paint mixed with a matte medium also works well for more control over the color.
Q: How do I get the paint to chip and distress realistically?
A: Apply a base coat of paint, let it dry completely, and then add a top coat in a contrasting color. Before the top coat is fully dry, use a damp cloth or sandpaper to gently rub areas where natural wear would occur, like edges and raised details.
Q: Can I use these techniques on jars with raised lettering?
A: Yes, jars with raised lettering are ideal for distressing. Lightly sand the lettering after painting to allow the glass or base coat to show through, which enhances the vintage character.
Q: How do I seal my finished antique mason jar?
A: Use a clear matte or satin varnish spray for durability if the jar will be handled. For a more authentic, waxed finish, apply a clear furniture wax or antique wax with a cloth and buff it gently.
Q: What is the easiest antique finish for a beginner to try?
A: A simple dry brush technique remains very forgiving. Dip your brush in paint, wipe most of it off on a paper towel, and then lightly brush over the jar. It builds color gradually and creates instant depth with minimal effort.








