Choosing Proportionate Beads for Character Features
Your snowman’s personality lives or dies by the scale of his face. When planning your DIY simple snowmen ideas, remember that beginners often use seed beads that are too large, which crowds the features and loses that classic silhouette. The good news is, a set of graduated white glass pearls gives you three perfect, proportional spheres in one purchase.
For the eyes and buttons, look for crisp, high-contrast black beads no wider than one-third of your smallest white bead’s diameter. This precise ratio keeps the design clean and readable. Trust me, a bright orange accent bead for the nose always reads as a carrot, even at a tiny size.
Consistent scale across all your pieces is what makes a collection look professional, not homemade. Taking the extra time to measure your findings pays off. You will notice the difference immediately when your pieces sit together on a display bust.
Selecting Metal Findings for Longterm Wearability
The fastest way to frustrate a crafter while following DIY simple snowmen ideas is a beautiful snowman charm that falls off its jump ring after one wear. You want findings that match the durability of your work. Sterling silver wire is my go-to for wire-wrapping because it is strong, tarnish-resistant, and hypoallergenic for most wearers.
For earrings, always choose surgical steel or titanium posts if you know the recipient has sensitive ears. Here is the thing: a flimsy base metal clasp will fail long before your polymer clay sculpture shows any wear. Invest in quality from the start.
Your finished piece deserves a secure setting that keeps it safe, so you avoid the heartbreak of a lost creation. A strong construction starts with the hardware you choose. Testing each connection before gifting ensures your work stays intact.
1. Polymer Clay Snowman Statement Earrings
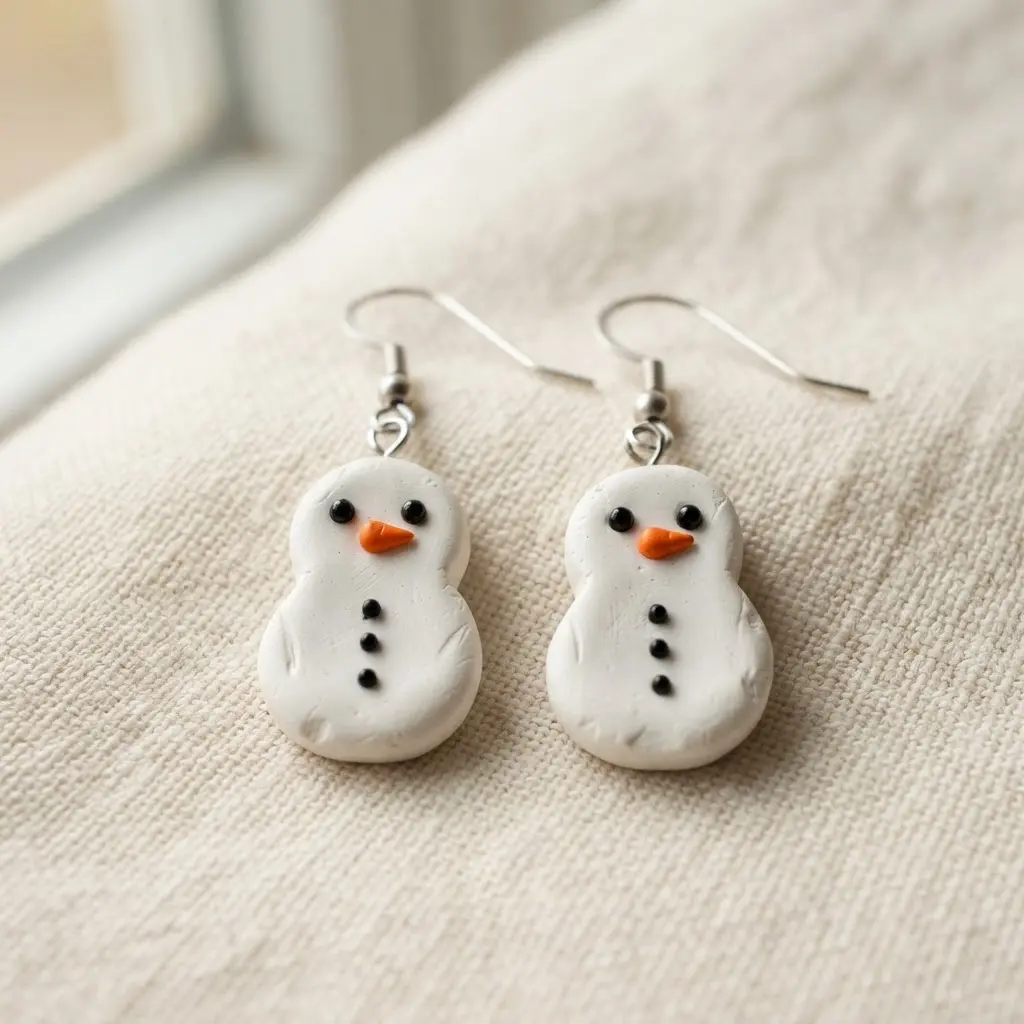
When trying out DIY simple snowmen ideas, you might wonder how such detailed earrings could be so beginner-friendly. You start by conditioning and rolling out your white polymer clay, then use round cutters for perfect snowman bodies. Sculpt tiny noses, eyes, and scarves from your scrap colors, and do not forget to insert an eye pin into the top before baking.
Trust me on this one: using an oven thermometer is the single biggest tip for success, as accurate temperature keeps your clay strong and prevents discoloration. After baking and cooling, you simply attach jump rings and ear wires with pliers. It is a fantastic project for making handmade holiday gifts.
You will love how lightweight and comfortable they feel to wear once the assembly is complete. Before you start sculpting, you need a solid foundation in DIY Christmas tree craft ideas to get comfortable with basic polymer clay techniques and holiday theming. Does that not look stunning when you are done?
2. Beaded Snowman Stackable Elastic Rings
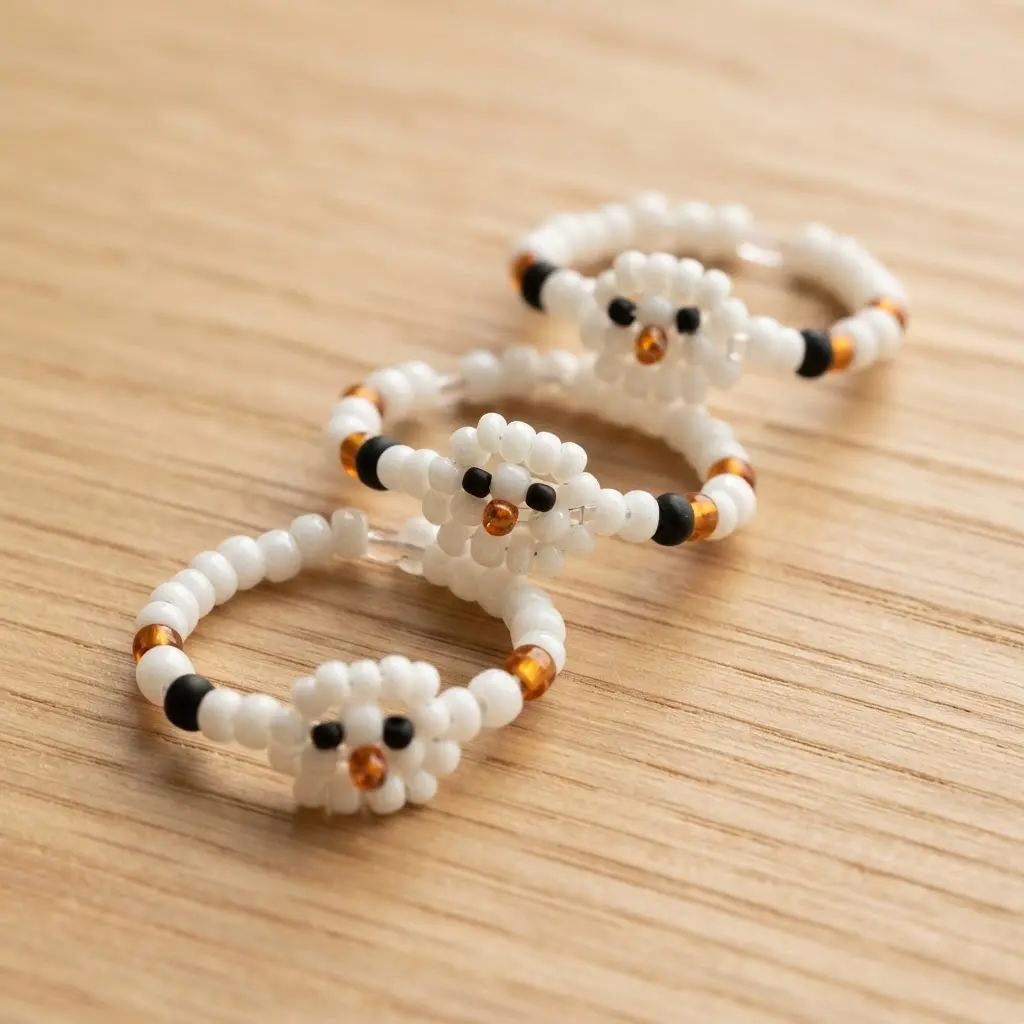
You might think jewelry is tricky, but exploring DIY simple snowmen ideas shows this ring stack project is wonderfully simple. You string a few white and off-white beads for the body and head, then add tiny black and orange seed beads for the face. The ring band itself is just a loop of smaller beads on a stretchy cord.
I love how you can customize each one with different bead colors or a little hat. The best part is the elastic cord, which lets you stack a few on one finger for a fun, festive look. It is so satisfying to see your miniature snowman come together in just a few minutes.
My go-to tip is to always secure your final knot with a tiny dab of clear glue. Trust me, this keeps your cheerful creation from coming undone while you wear it. Giving it a gentle tug after drying confirms your work will survive daily movement.
3. Resin Encapsulated Miniature Snowman Pendant
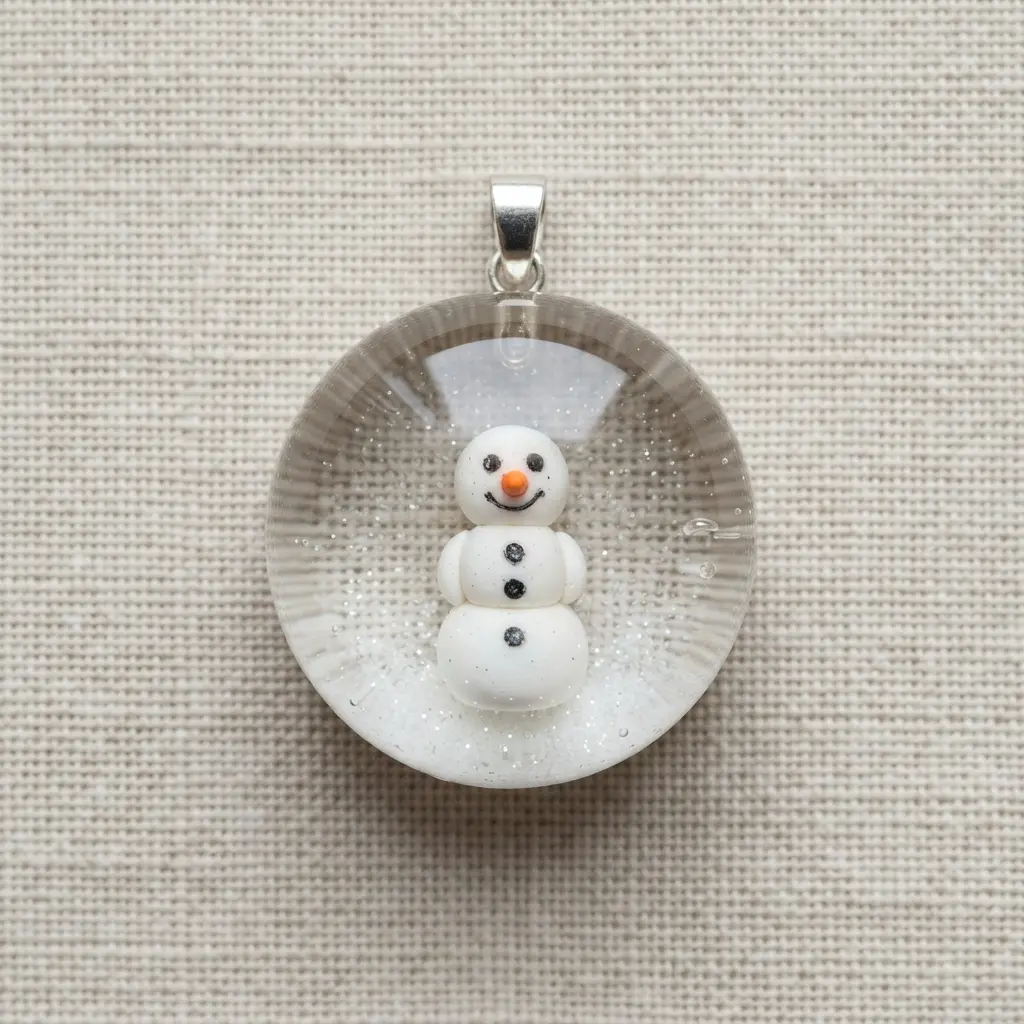
This pendant looks like it came from a professional jeweler, but trust me, following DIY simple snowmen ideas means you can make it at your kitchen table. It starts with sculpting a tiny snowman from polymer clay, adding those sweet little details with paint and fabric scraps. Once baked and sealed, you pour a clear base layer of resin into a silicone pendant mold.
Gently place your snowman inside, and fill it to the top. Watching it cure into a solid, glossy charm is pure magic. The resin acts like a snow globe, protecting your creation and giving it that beautiful, magnified look.
Sound tricky? The most important step is just following the resin mixing instructions exactly to avoid any sticky results. It makes a fantastic personalized gift, and you can pair it with other winter projects like making your own Christmas ornament coloring pages for a full festive crafting day.
4. Wire Wrapped Snowman Head Ring
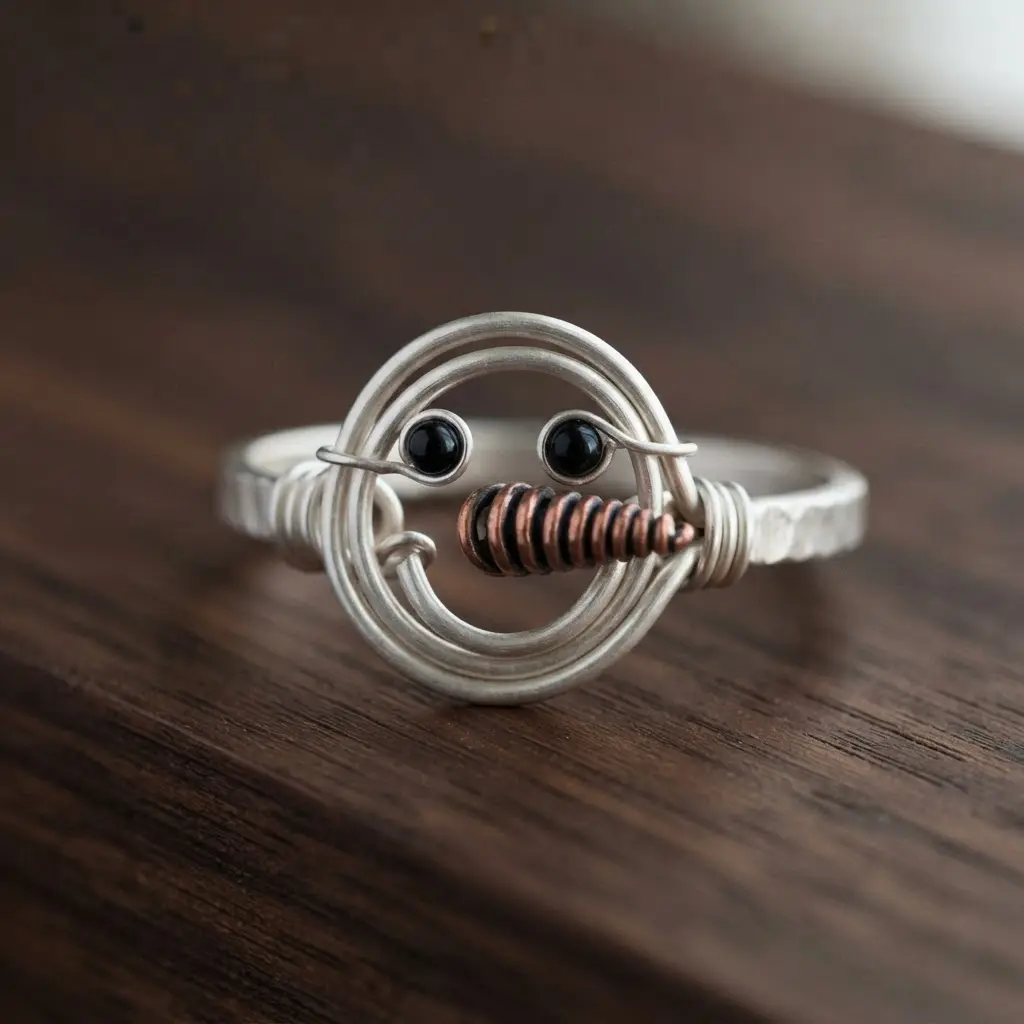
Ever wondered which of these DIY simple snowmen ideas lets you wear your favorite winter character right on your finger? You will start by shaping the main band using a piece of 18 or 20‑gauge artistic wire around a ring mandrel. Then, you slide your large white bead onto the wire tails and wrap them securely to form the snowman’s head right above the band.
Adding the face is where the charm really comes in. I love using a thinner gauge wire to carefully attach tiny black beads for eyes and a bright orange bead for the nose. That little carrot detail makes it instantly recognizable.
It works so well because it is a festive, personalized accessory you can make in one cozy sitting. Try it and feel that proud, handmade sparkle every time you wear it. Adjusting the tension of the wire wraps ensures a snug, comfortable fit for daily wear.
5. Glass Pearl Three Tier Snowman Brooch
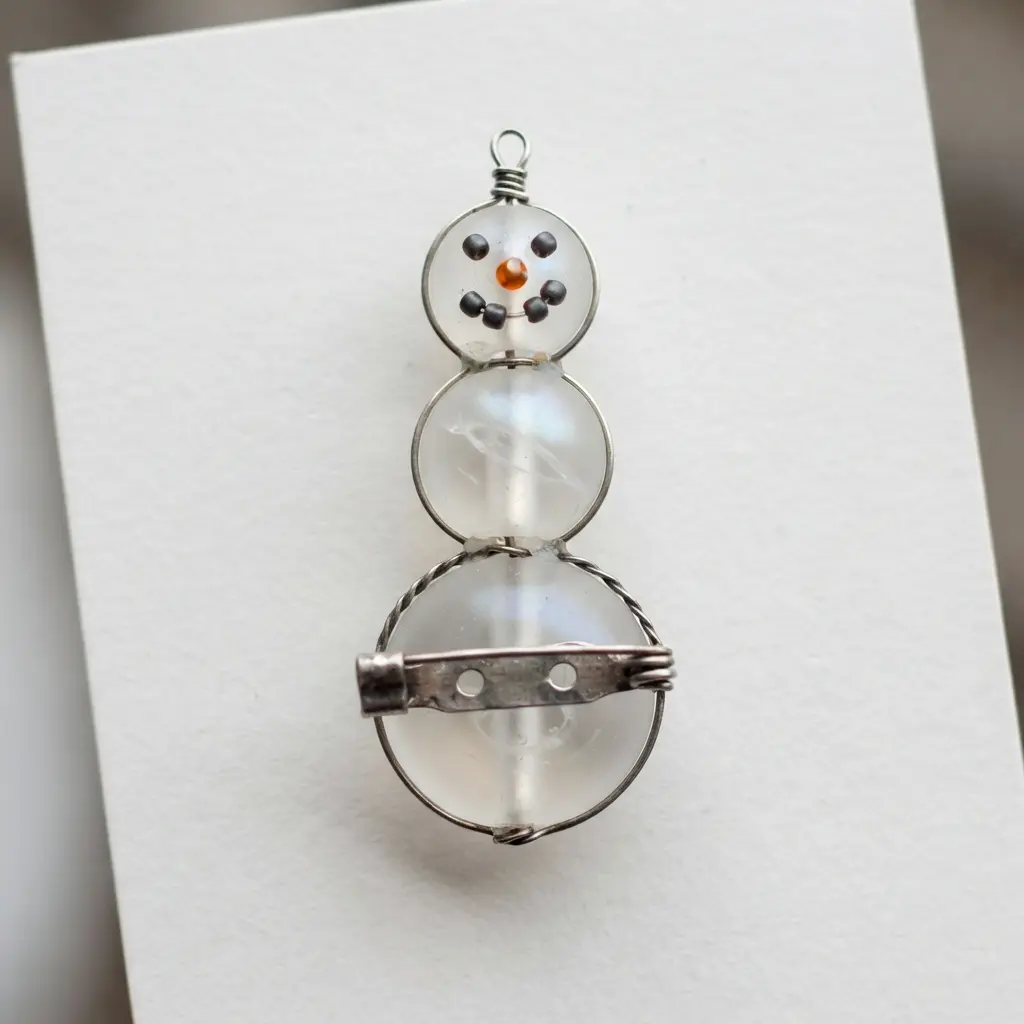
This brooch might look fancy, but it honestly stands out as one of the most straightforward DIY simple snowmen ideas to assemble. You are basically stacking three beautiful glass pearls with a little bit of glue and a few tiny details. I love how it turns a classic winter shape into something elegant you can wear.
Your main task is securing the graduated pearls with a strong jewelry adhesive. Use a toothpick to apply just a tiny dot so it does not seep out and dull the pearl’s shine. Then, carefully add the face with small black beads and an orange crystal nose.
It works because the lustrous pearls give that festive snowman feel with a touch of sophistication. A secure pin back is essential, so press it firmly onto the flat back and let it cure completely. The finished brooch is a perfect little accent for a winter coat or sweater.
It pairs wonderfully with other handmade winter accessories, like crafting paper mache Santas, for a complete homemade holiday look. Does that not feel wonderfully festive?
6. Felted Wool Mini Snowman Charm Bracelet
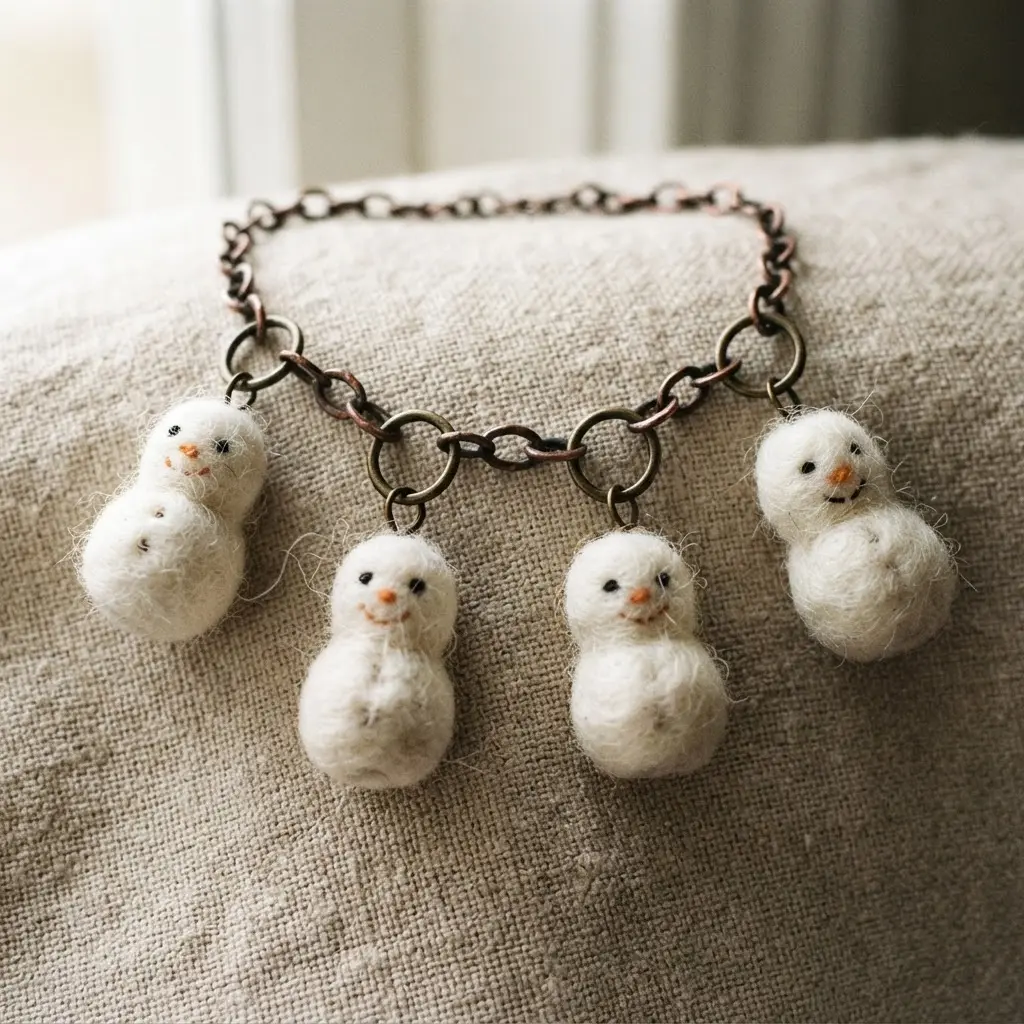
If you want to branch out from metal, this felted bracelet brings the soft texture of DIY simple snowmen ideas straight to your wrist. Who says holiday jewelry has to be all metal and sparkle? You will create tiny snowmen by repeatedly stabbing wool roving with a special needle until they are firm little balls.
Then, you can add sweet details like a stitched smile or a bead for an eye. The trick is embedding a small eye pin into the top of each one so you can hang it from a chain. It works so well because the soft felt feels cozy and handmade.
Perfect for adding a festive touch to a casual sweater. Trust me, finishing your first one is incredibly satisfying. The natural variation in the wool fibers gives each charm its own distinct character.
7. Seed Bead Stitched Snowman Cabochon Ring
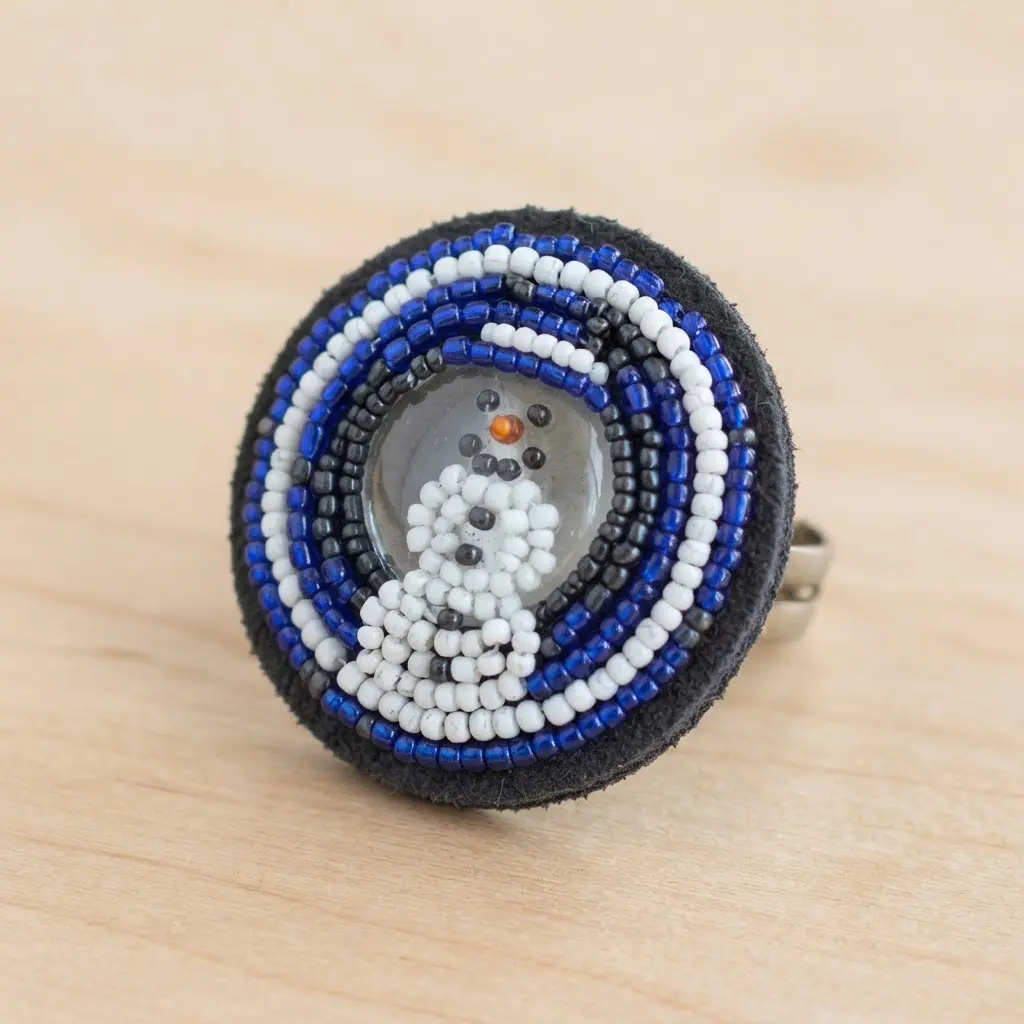
Even though beadwork looks complex, applying it to your DIY simple snowmen ideas is surprisingly approachable. This is a project that looks delicate and complex, but the core technique keeps things manageable. You use a simple peyote stitch to create a snug bezel of seed beads around your snowman cabochon.
Pull your thread taut with every stitch to lock that festive little face in place. The result is a charming piece of festive jewelry with so much handmade character. I love that the beading does all the decorative work, letting you play with color and texture.
For a cozy winter vibe, try pairing your snowman with a rustic flannel ornament craft for a matching handmade set. Isn’t it fun when your accessories tell a story? Keeping your tension even prevents the ring band from twisting on your finger.
8. Swarovski Crystal Snowman Drop Earrings
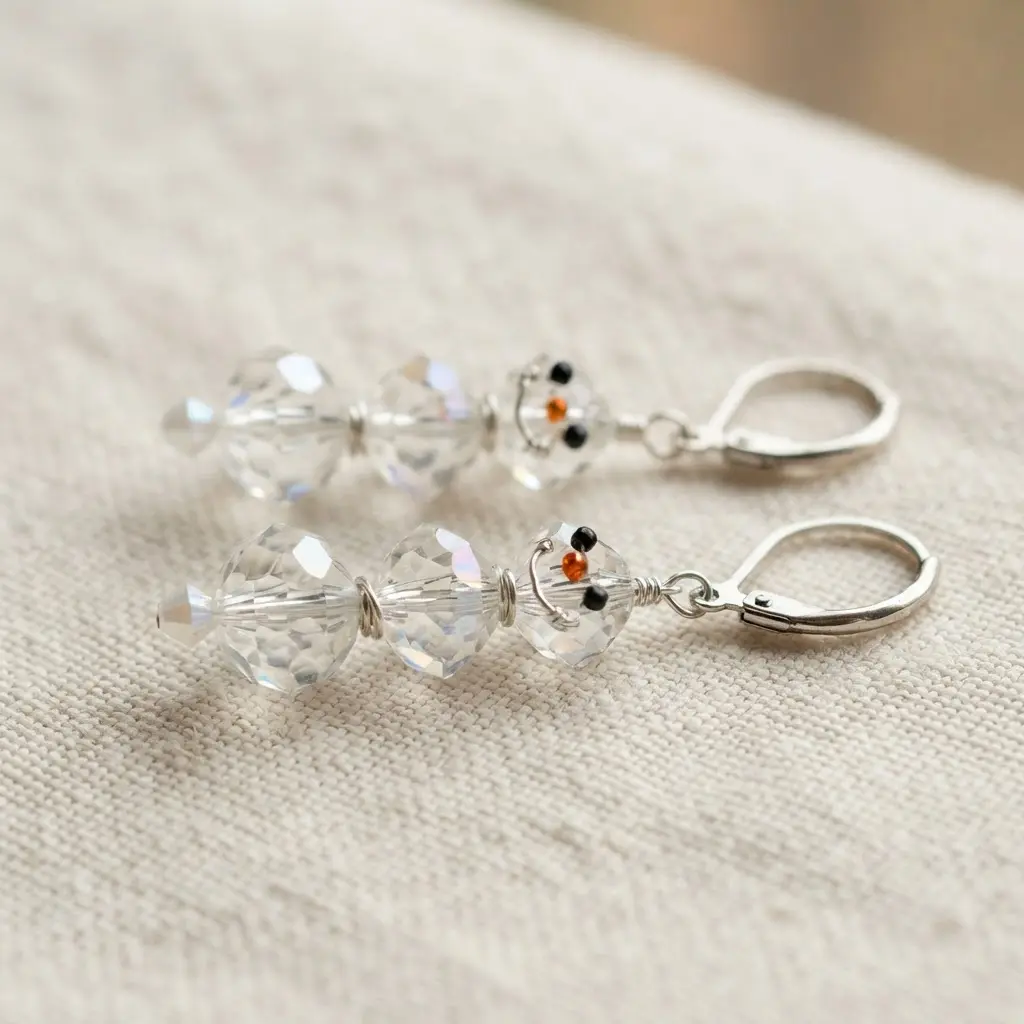
While building your DIY simple snowmen ideas, you will find these crystal drop earrings take just fifteen minutes to make. These earrings look like a fancy store purchase, but you can make them yourself in about fifteen minutes. You simply stack your Swarovski crystals on a headpin to form the snowman body, add tiny crystals for the face, and finish with a secure loop.
I love how the finished piece sparkles with every turn of your head. The key to keeping everything together is using sturdy jump rings and closing them completely with two pairs of pliers. This ensures your little snowman stays put on your ear.
You will adore wearing these elegant, festive accessories. They make a perfect handmade gift, and their comfortable drop style means you can enjoy them all season long. Cleaning the stones before assembly prevents any dull spots from showing.
9. Silver Stamped Snowman Silhouette Adjustable Ring
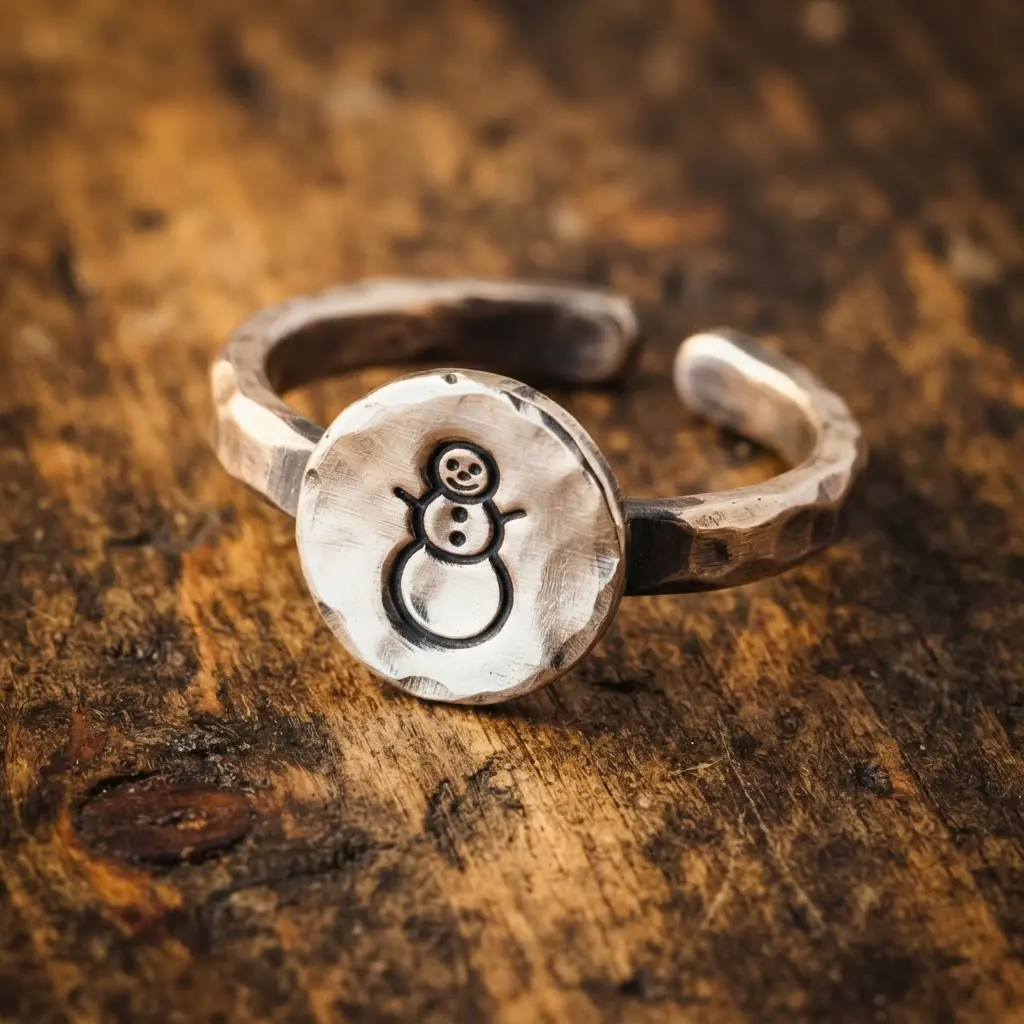
Ever noticed how many DIY simple snowmen ideas skip metalwork? This ring actually uses a metal stamping technique to press a snowman shape right into the silver. You start with a flat strip, stamp your design, then gently shape it into an adjustable band. The result is a subtle, elegant little snowman you can wear.
I love how this project captures a festive feeling in such a minimalist way. The adjustable fit makes it a no stress gift, since you do not need to know anyone’s exact ring size. Just be gentle when you bend it to fit your finger to keep the metal strong.
For a festive look that lasts, pair it with other handmade items like cross stitch Christmas decorations for a coordinated holiday style. A soft polishing cloth will keep your ring shining bright all season. Stamping on a hard, flat surface guarantees crisp, clean impressions.
10. Hand Painted Enamel Snowman Jewelry Set
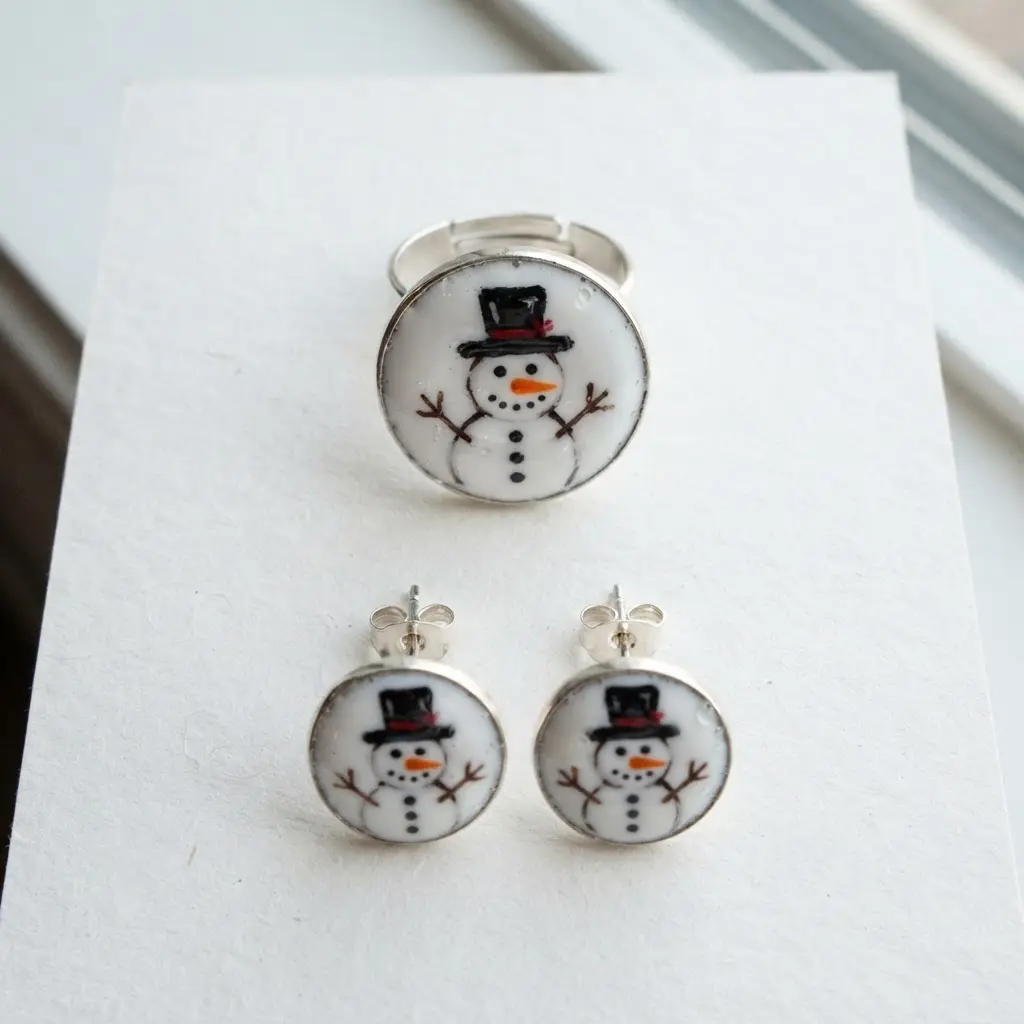
Among all the DIY simple snowmen ideas, a hand-painted jewelry set captures a snow day’s magic most perfectly. Who would have thought a set of jewelry could capture a snow day’s magic so perfectly? This one is a delight because it looks like a tiny, detailed painting you can wear.
The process starts with a sterling silver or pewter base, where the snowman’s outline is etched. Then, using the finest brushes, you hand-paint the liquid enamel into each little section, from the carrot nose to the colorful scarf. It is a surprisingly meditative activity.
You will love watching the cold enamel cure into a smooth, glossy surface that feels like glass. The hand-painted detail is what makes each snowman’s face unique and full of personality. Isn’t that a wonderful way to carry a bit of winter cheer with you all season long?
My best tip here is to work slowly and let each color dry completely before adding the next. This prevents any accidental smudging and keeps your lines crisp. Trust me, the payoff is a stunning, professional-looking piece of winter accessories that feels incredibly special to make or give.
Securing Wearable Pieces with Protective Varnish
One thin layer of matte UV resin domed over your piece seals every painted detail and provides a glass-like, wintery finish that lasts. Before you pack away your finished projects, sealing them is a crucial step for lasting DIY simple snowmen ideas. This step takes two minutes but protects weeks of delicate work from skin oils and minor scratches.
For polymer clay snowmen, a brush-on matte varnish is perfect, but for pieces with mixed materials like felt hats or tiny scarves, the resin encases everything in a solid, waterproof shield. You will notice the colors stay bright and the surface resists dust. Apply it in a clean, dust-free area and cure it fully according to the product instructions.
This final touch is what transforms your craft into a durable accessory ready for holiday festivities. Storing the finished pieces in a dry drawer prevents moisture from softening the adhesive over time. Your jewelry will thank you for that extra layer of protection.
Conclusion
There is something uniquely satisfying about wearing a piece you made, especially when it captures a bit of seasonal magic. These DIY simple snowmen ideas are meant to be a stepping stone for your own winter jewelry creations, so grab your supplies and start building. My best advice is to pick one project that speaks to you and gather your materials before you start. Seeing those little snowman faces come together on your workbench is one of the best parts of making winter jewelry. I hope this list gives you that spark of inspiration to create something you will love all season long.
FAQs
Q: What are the best materials for beginners making snowman jewelry?
A: Polymer clay and basic bead stringing supplies are excellent starting points. They are forgiving and do not require many specialized tools.
Q: How do I make sure the adhesive holds on small snowman parts?
A: Clean both surfaces with rubbing alcohol first. Use a strong, precise adhesive like a gel super glue or a two-part epoxy.
Q: Can I make these projects without a lot of expensive tools?
A: Absolutely. Many designs need only round-nose pliers, wire cutters, and a baking tray for clay.
Q: How do I create a snowman face that does not look messy?
A: Keep it minimal. Use a sharp tool or toothpick to place tiny dots for eyes and mouth.
Q: What is a good way to finish jewelry so it looks professional?
A: Focus on secure closures. Always close jump rings completely and ensure earring posts are tight.