Selecting Foundations for Optimal Shell Adhesion
The fastest way to ruin your wreath is choosing a base that cannot support the weight of your shells. We all know that gapy, unfinished look, and it happens when a flimsy form buckles under heavy whelks or large oysters. When exploring these diy seashell wreath ideas, a seamless finish requires you to use a flat-backed foam form.
This dense, rigid base provides a stable canvas for your arrangement and allows you to paint it a neutral sand or white color before you start gluing. Painting the foundation acts as a visual backup, hiding any tiny gaps between shells that might appear later. The flat back ensures your finished piece hangs flush against your door without wobbling.
Trust me, starting with this solid foundation makes the entire process smoother and your final design looks infinitely more professional.
Prepping Natural Finds for Longterm Indoor Display
Adhesive will never bond properly if you skip the essential step of cleaning every single shell. Salt residue and organic debris create a barrier between your glue and the shell surface, which is a recipe for pieces popping off later. You want to soak your finds in a bleach solution to sanitize them and remove any lingering sea life, then rinse them thoroughly.
The critical follow-up is letting each piece dry completely for at least 24 hours in a warm, dry area. While preparing your diy seashell wreath ideas, this process also gives you a chance to inspect each shell for cracks or weak points before you commit to placing it. Your wreath will stay intact for years, not just seasons, when you take this time upfront.
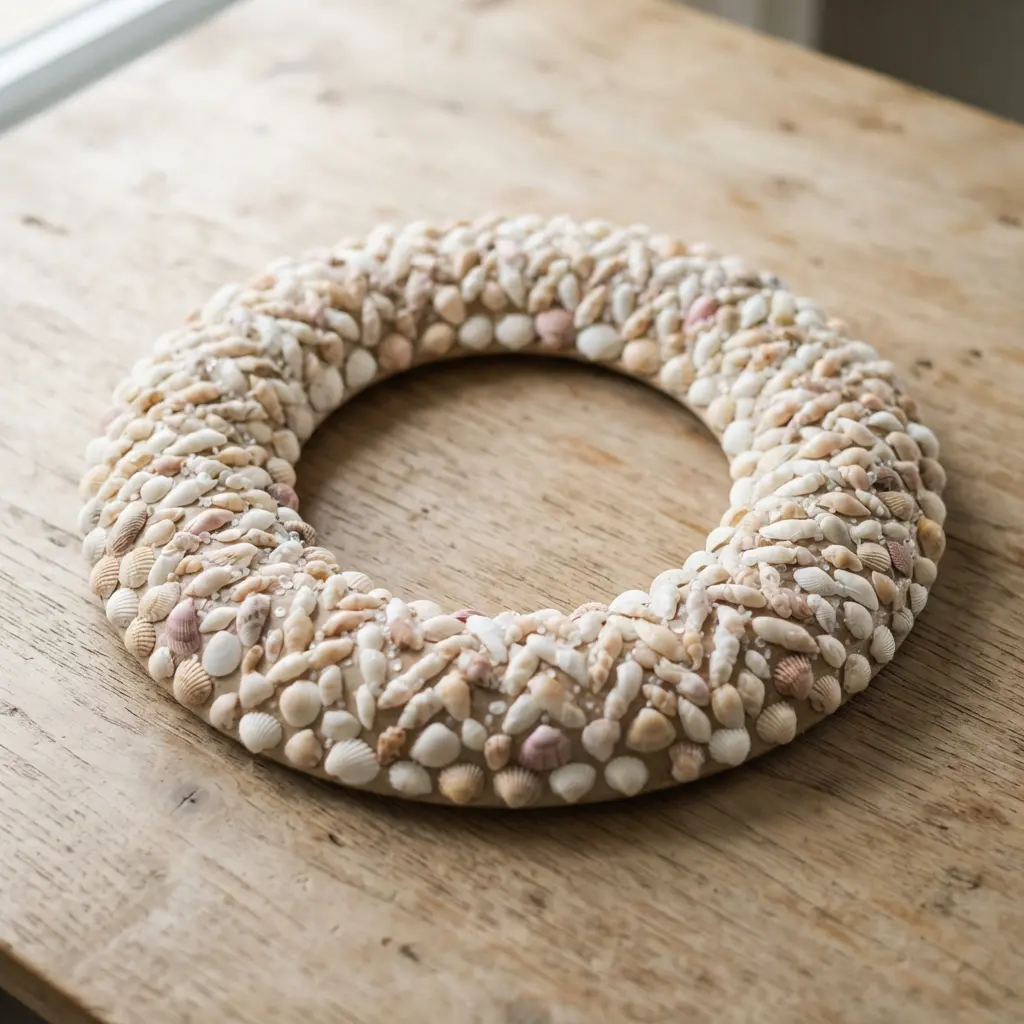
1. Natural Scallop Shell Spiral Wreath
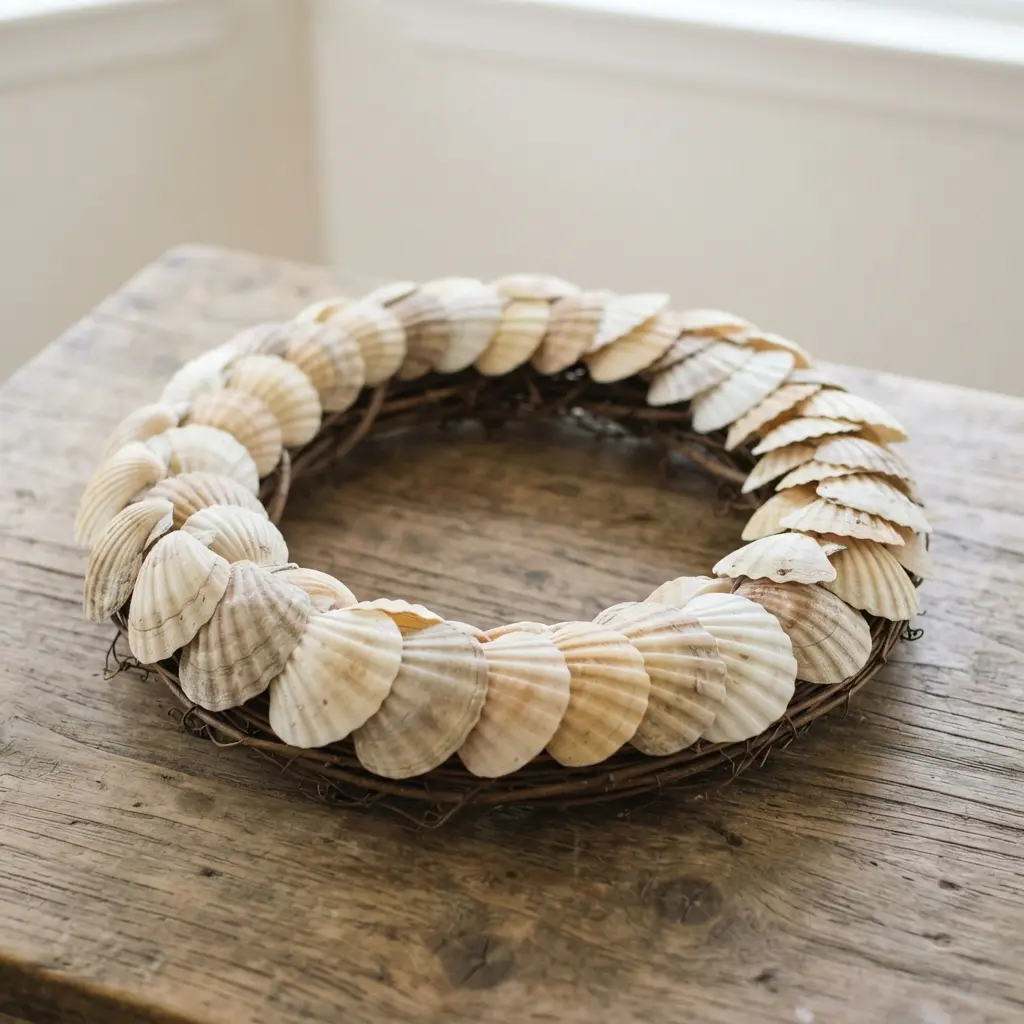
Ever wondered how to turn a bucket of shells into a stunning focal point? This wreath looks elegantly complex, but following top diy seashell wreath ideas means the process becomes wonderfully simple once you start. You layer and overlap your cleaned scallop shells in a continuous spiral around a sturdy grapevine or wire base.
The natural colors and textures create a beautiful, flowing pattern that feels like a piece of the ocean brought indoors. I love how this project uses repetition to build something truly special. It works because the spiral pattern adds a dynamic energy you just do not get from a random arrangement.
The key to success is sorting your shells by size before you begin. If you are new to working with natural materials, getting your foundation right is important. A good first step is to create a spring wreath to practice basic construction and gluing techniques on a simpler form.
Then, you will feel totally confident tackling this shell masterpiece. Does that not sound like a satisfying weekend project?
2. White Coral and Starfish Wreath — A Textured Focal Point
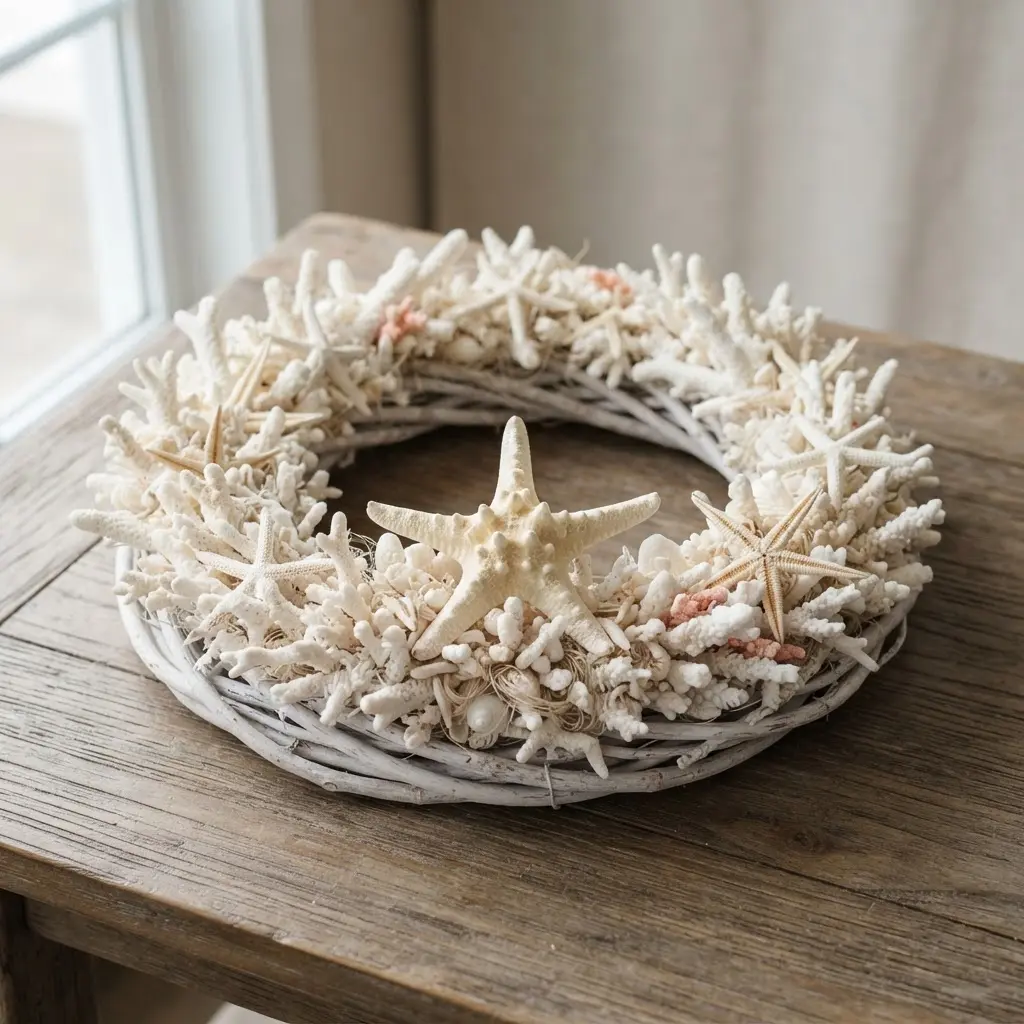
Ever wonder how to get that elegant, gallery-worthy coastal look without clutter? This monochromatic design stands out among popular diy seashell wreath ideas. I love how the all-white palette lets the natural textures of the branching coral and starfish truly shine. You arrange the larger pieces first, then fill gaps with tiny shells or sea glass for depth.
It works so well because the simple color scheme feels sophisticated and serene, just like the ocean floor. My go-to tip is to lay everything out without glue first to find the perfect balance. This creates a stunning focal point for your wall, and the best part is you can build it on a simple personalized initial wreath base for an extra touch of meaning.
3. Minimalist Driftwood and Seashell Wreath
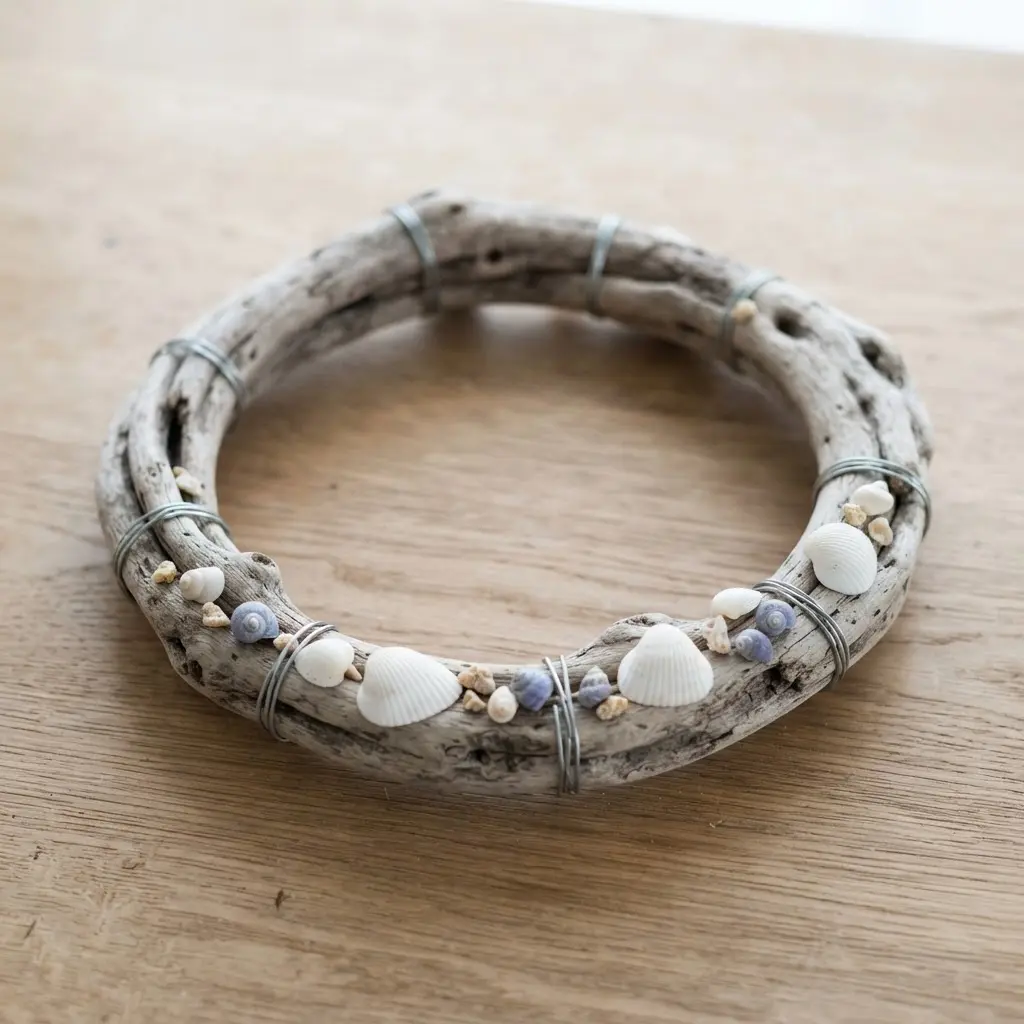
Ever feel like your coastal decor is getting a bit too busy? This design is my favorite way to bring back a sense of calm. You will strategically place a few beautiful driftwood pieces on a grapevine wreath base to create the main structure, then add just a handful of natural shells as quiet accents.
When browsing minimalist diy seashell wreath ideas, the magic lies in the negative space you leave between the elements. It works because it feels serene and timeless, not cluttered. My go-to tip is to pre-arrange everything and take a picture before you glue a single piece.
This approach is a wonderful project for beginners, just like making a simple cupcake liner wreath, because both focus on clean, uncomplicated design. Trust me, you will love the sophisticated look you create.
4. Glamorous Metallic Gilded Shell Wreath
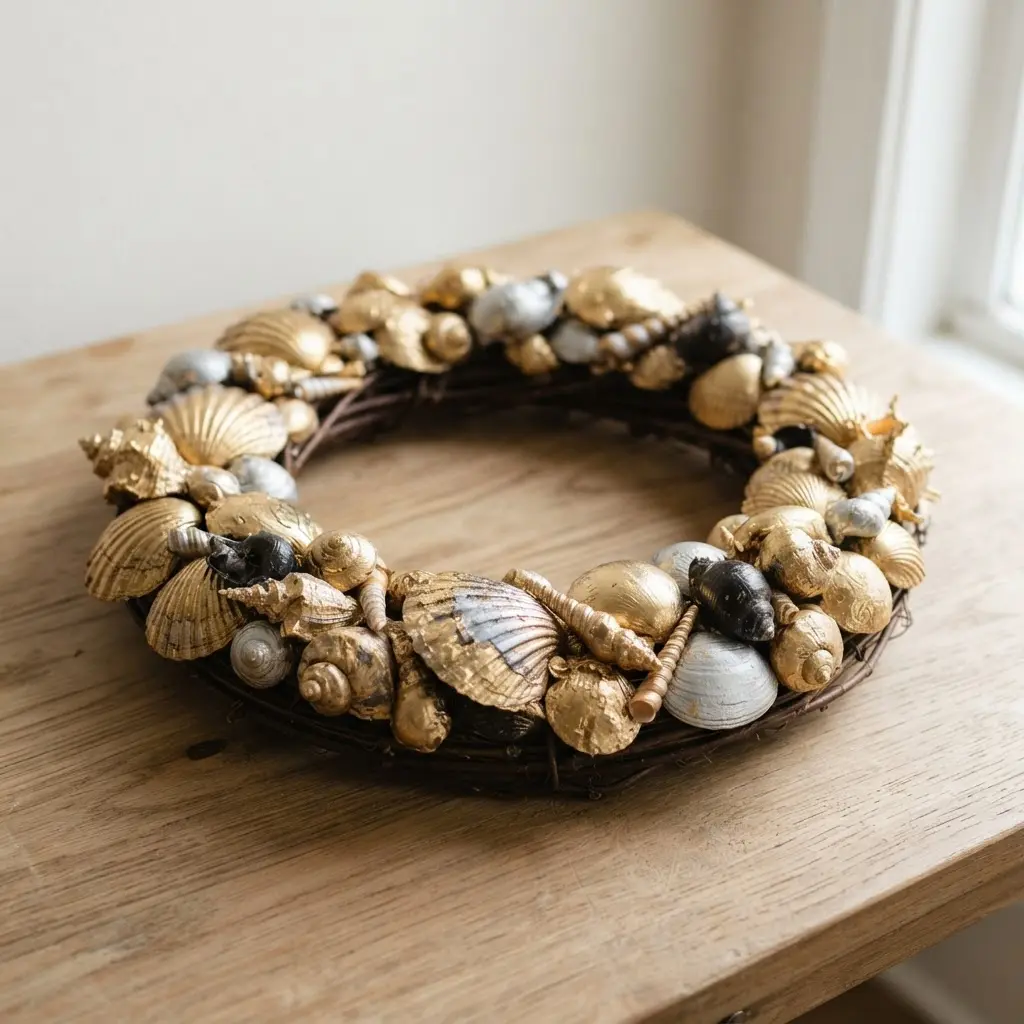
Who says seashells need to stay rustic? This glamorous wreath elevates common beach finds into pure opulence. The trick is in the gilding. You can use imitation gilding leaf or metallic spray paints to coat your shells, creating a shimmering, jewel-like finish. I love how the light catches on the textured surfaces.
Start by arranging your gilded shells on a grapevine wreath before you glue anything down. Mixing gold tones adds a rich, multi-dimensional look that shines across many diy seashell wreath ideas collections. Isn’t it amazing how a simple transformation creates such a sophisticated piece?
This wreath works because it brings a touch of unexpected luxury to your coastal decor. For a truly lush result, you could even incorporate some succulent wreath ideas into your design planning. Try this project and feel like you just crafted a treasure.
5. Rustic Jute Wrapped Shell Wreath
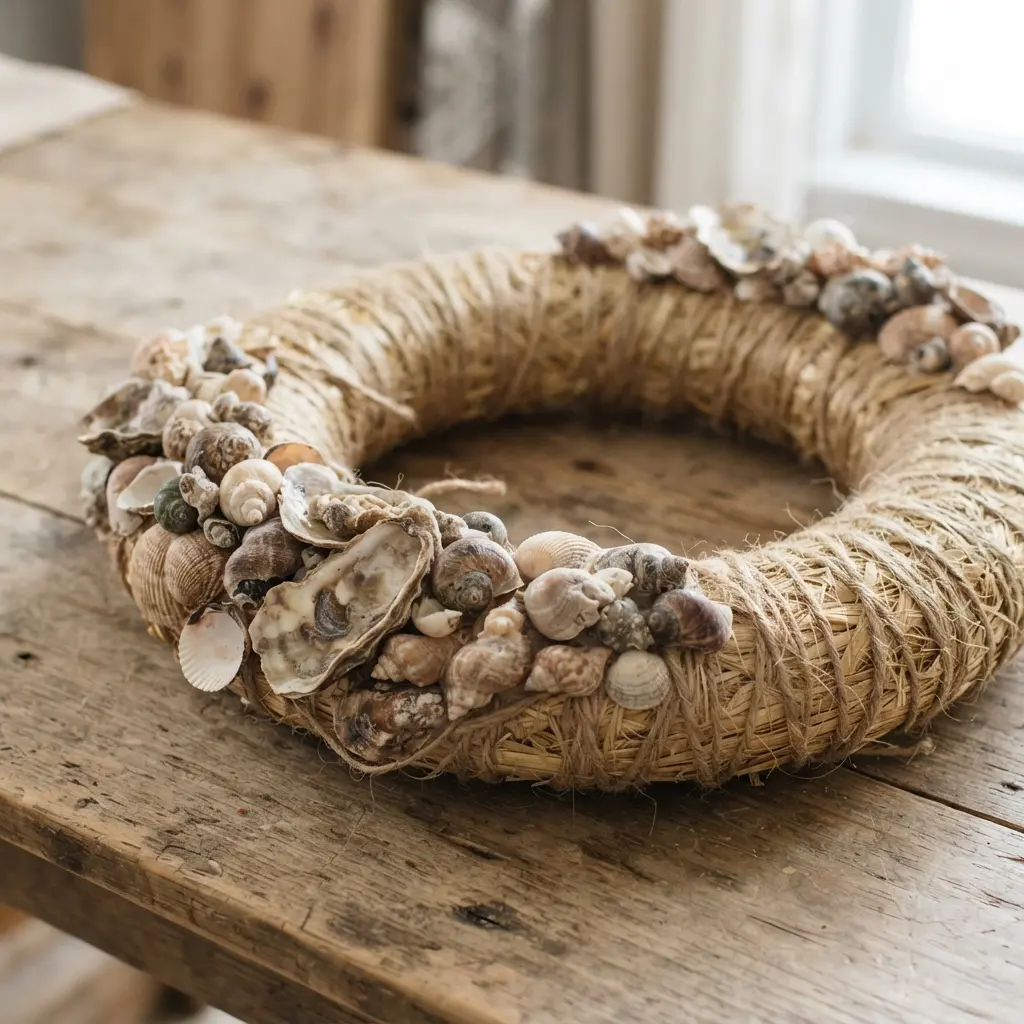
This project surprised me with how beautifully it blends coastal and farmhouse styles. You start by wrapping your wreath form tightly with natural jute twine, which creates a wonderful, textured base. Then, you get to arrange a mix of shells like scallops and cowries, securing them with a hot glue gun.
I love how the earthy jute makes the shells pop with a handcrafted feel. Dry-arranging your shells first is my go-to tip for a perfect layout. It feels so satisfying to hang up a piece that looks like you bought it from a boutique, and this step applies perfectly when testing various diy seashell wreath ideas.
If you enjoy this kind of textured, seasonal project, you might find an easy pumpkin yarn hoop wreath equally fun to make for autumn.
6. Coastal Blue Glass and Shell Wreath
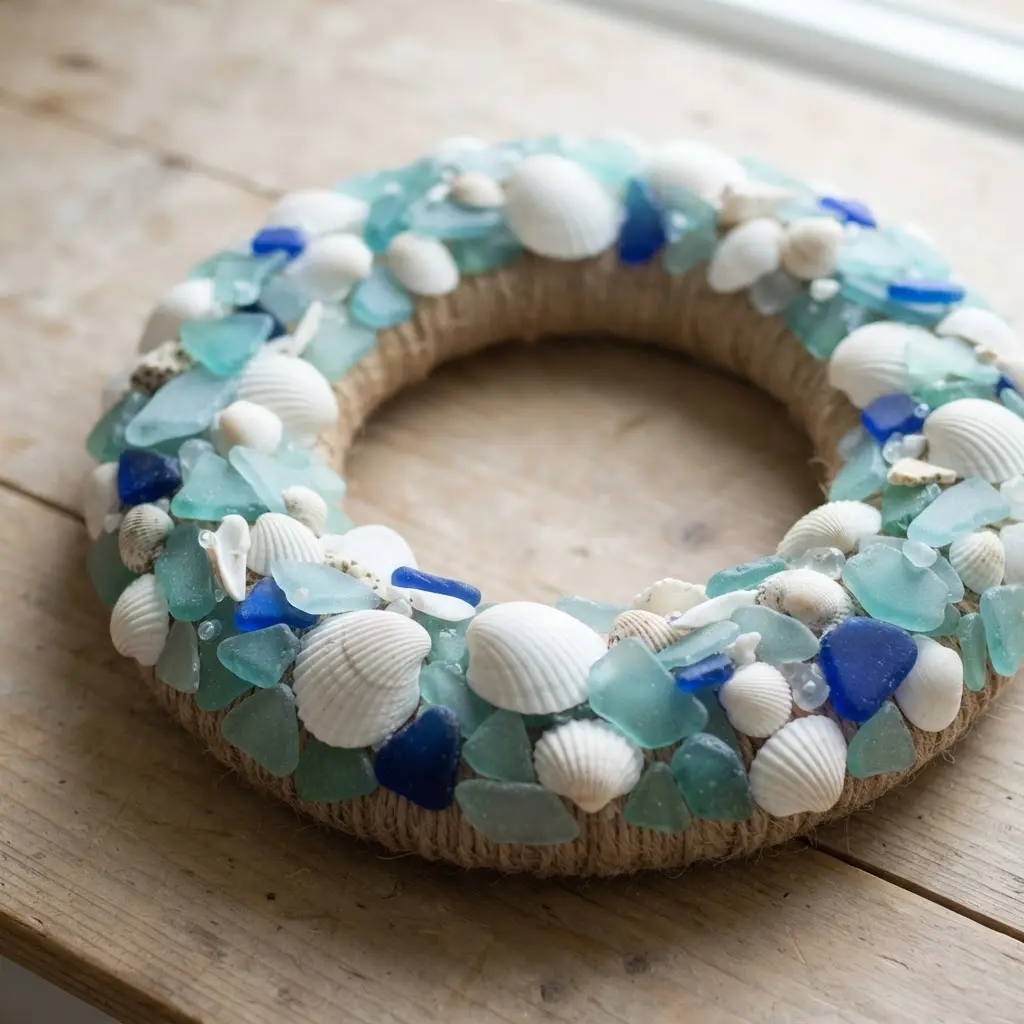
Ever wondered how to get that perfect, sparkling ocean look indoors? This wreath combines the natural texture of assorted seashells with the brilliant color of blue sea glass or beads. You will arrange them on a grapevine or fabric-wrapped base, using a strong adhesive like E6000 for a lasting hold.
The trick is to lay all your pieces out on the wreath first, without any glue, to find a balanced design you love. I love how the light catches the glass, creating little flashes of coastal color that feel so peaceful when you explore coastal diy seashell wreath ideas. This prevents overcrowding and lets each beautiful shell and piece of glass shine.
Once your layout is set, glue everything down securely. If you enjoy this process, you can use the same techniques to create your own fall wreath when the seasons change. Trust me, seeing your finished piece hanging up is incredibly satisfying.
7. Boho Raffia and Cowrie Shell Wreath
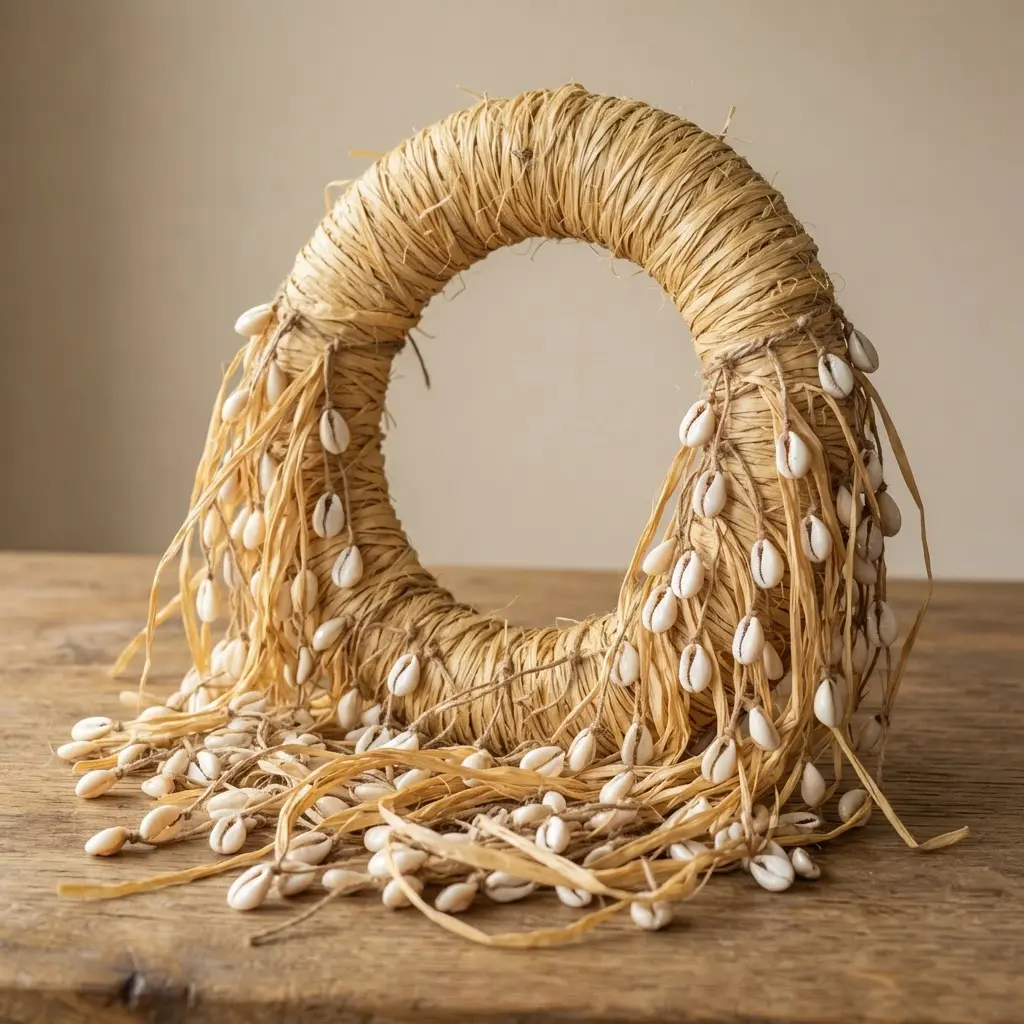
This one surprised me. It looks like it takes serious skill, but building the base is super straightforward. You start by wrapping or tying bundles of natural raffia fiber onto your wreath form to create a full, shaggy texture.
Then, you strategically glue on those beautiful, smooth cowrie shells. I love the contrast between the rustic raffia and the pearlescent shells. It works because it captures that free-spirited, organic vibe perfectly.
Pro tip? Do not skimp on the raffia. Building up lush layers is key, and using a strong adhesive like E6000 glue will keep your shells secure for years, which is a common theme in bohemian diy seashell wreath ideas. For another personal touch, you could add a monogrammed summer wreath to your collection. Try it and feel that instant hit of coastal tranquility.
8. Classic Monochrome Clam Shell Wreath
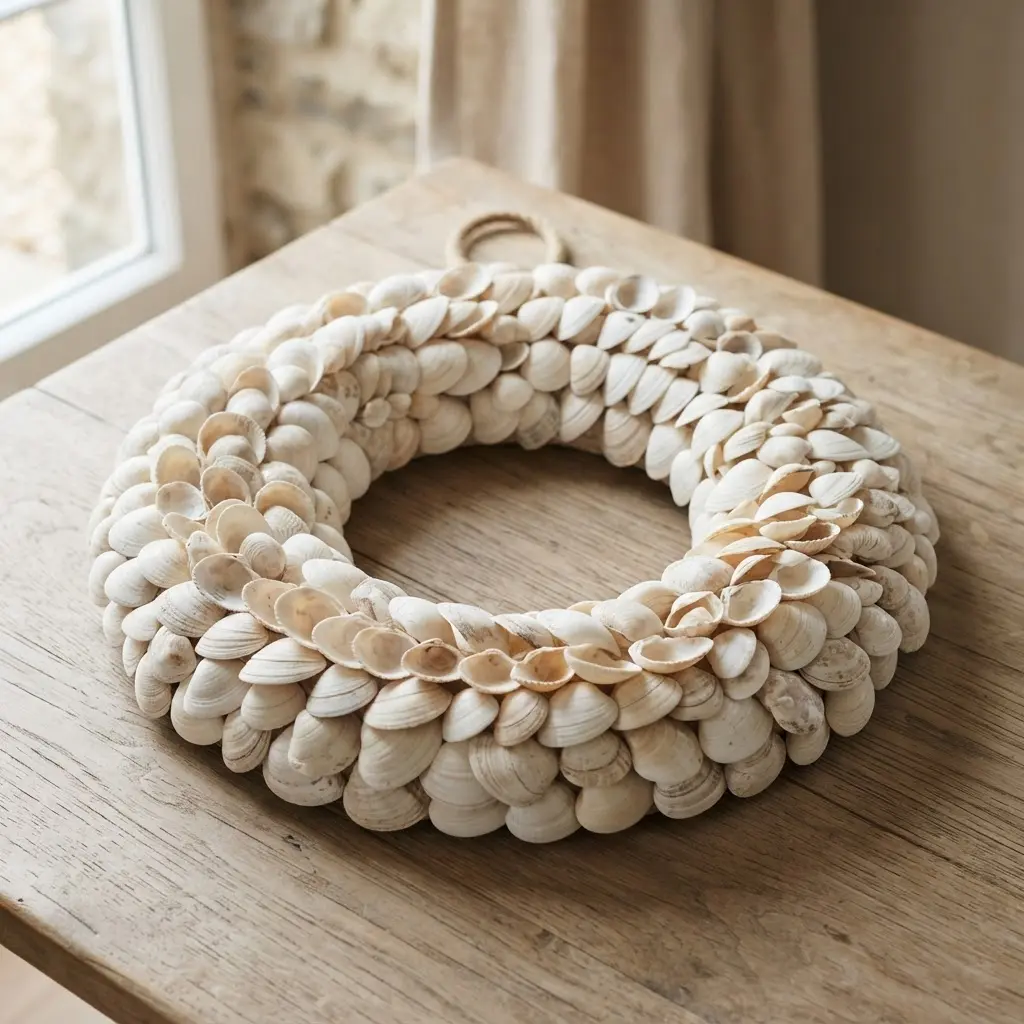
Ever wondered how to make a seashell wreath that feels instantly elegant? This design is all about restraint. You work exclusively with white and cream clam shells, letting their beautiful natural textures and subtle curves become the star. The result is a sophisticated, textural piece that fits right into coastal, farmhouse, or minimalist spaces.
I love this one because it forces you to appreciate the shells themselves. You will sort through piles, looking for those perfect ivory and bone-white shades. The trick is to start with your largest shells and layer the smaller ones over them to fill every gap.
Trust me, a dense, full wreath looks so much more polished, making it a top choice among classic diy seashell wreath ideas. It is a wonderfully calming project. You get into a rhythm of selecting and gluing, and the monochrome palette keeps everything feeling serene. For another coastal craft that uses found treasures, you could turn your leftover shells into a beautiful diy sea glass necklace. Does that not sound like a perfect afternoon?
9. Elegant Pearl Embellished Shell Wreath
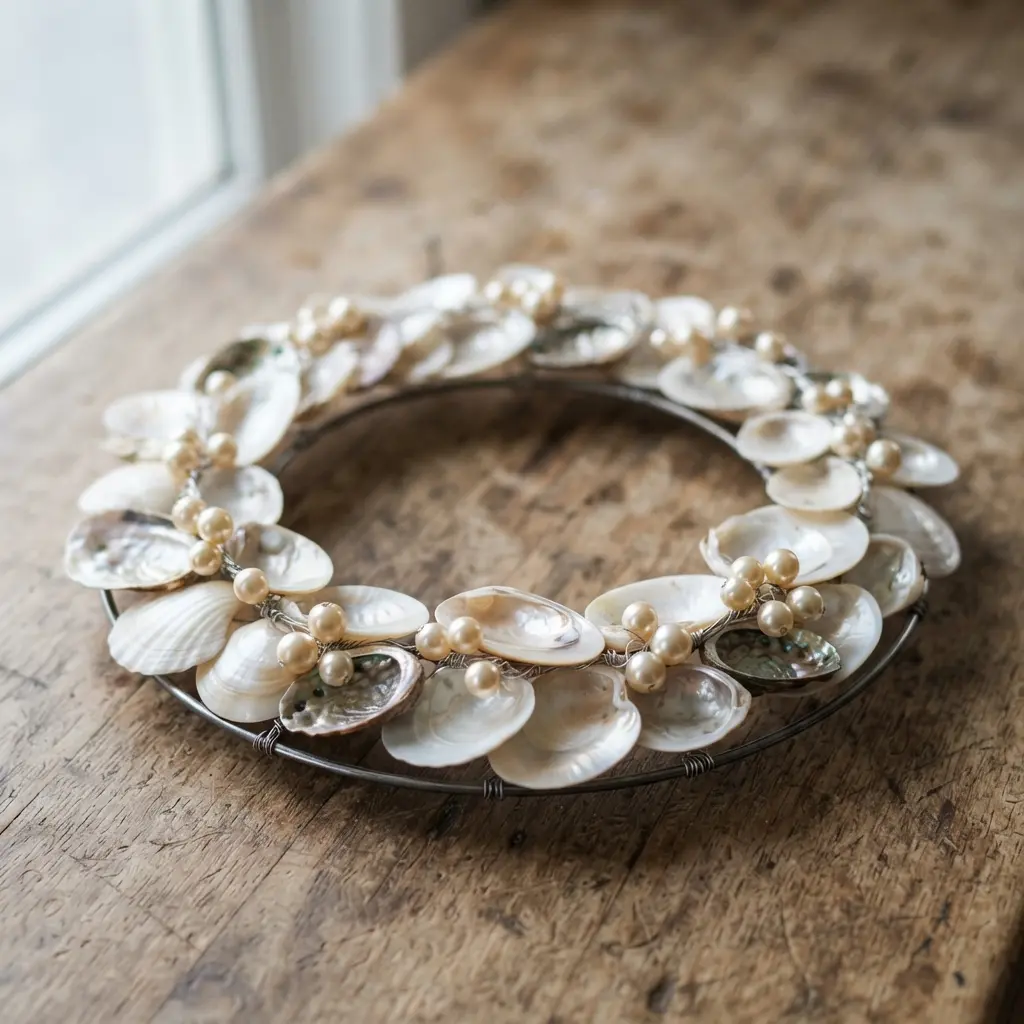
Who says seashells have to be rustic? This wreath proves coastal can be glamorous. Start by arranging your largest shells on a grapevine wreath base for a natural look, then layer in smaller ones to fill gaps. The magic happens when you add your pearls.
Glue them in clusters and as single accents, mixing sizes for that rich, elegant texture. I love this one because the pearls instantly elevate the whole piece from simple craft to sophisticated decor. It feels luxurious without being flashy.
Your finished wreath will have that perfect blend of organic and opulent. Trust me, seeing those pearls catch the light is so satisfying when you explore elegant diy seashell wreath ideas. Planning your layout before any glue touches the base is the key to a balanced design.
This careful approach ensures your wreath looks intentional, not cluttered. For another project with a distinct shape that makes a big statement, look into creating a star-shaped wreath craft. It uses similar assembly principles but results in a completely different silhouette.
10. Modern Geometric Patterned Shell Wreath
This one looks so elegant and complex, but the secret is a simple repeating pattern. You take uniform shells, like scallops or mussels, and arrange them in precise lines or concentric circles on your wreath form. I love how this turns the organic feel of the beach into something so structured and chic.
It works because the repetition creates a calm, modern rhythm that feels both artistic and orderly. Your key to success is a dry layout first. Arrange all your shells without glue to perfect the spacing and pattern. This prevents mistakes and saves you from a lopsided final look when testing modern diy seashell wreath ideas.
Once you are happy, use a strong adhesive to fix each piece in place. The result is a stunning, high-end decor piece with amazing texture. After you master this modern look, you might want to try a fun, seasonal twist with a spooky mummy wreath project for Halloween. Both projects use a similar method of wrapping and layering materials on a base.
Ensuring Secure Attachment and Protective Surface Coating
Industrial-strength hot glue is your best friend for securing the heaviest focal shells to your wreath base. You will notice a huge difference in holding power compared to standard craft glue, especially for those beautiful but weighty conch shells. For delicate accents like small sea glass pieces or bits of dried seaweed, a clear, flexible silicone-based adhesive works better as it won’t crack.
Once every piece is firmly set, the final step is applying a protective clear coat. A light spray of matte acrylic sealer over the entire surface locks your work in place and prevents any tiny fragments from loosening over time. Mastering these diy seashell wreath ideas means applying an invisible shield that protects the shells from indoor dust and humidity, preserving their natural beauty. Your finished wreath will have a cohesive, professional look and the durability to welcome guests for years.
Conclusion
So, did any of these seashell wreath concepts catch your eye? I find that the best part of a project like this is how it blends a bit of nature with your personal style, creating something that feels uniquely yours. We have covered many diy seashell wreath ideas, and my one piece of advice is to start with a sturdy base and take your time layering the shells; that patience makes all the difference in achieving a balanced, lasting piece. Whether you lean towards rustic charm or elegant simplicity, your finished wreath will be a lovely reminder of sunny days and salty air every time you walk through the door. Pick your favorite design and get started right away.
FAQs
Q: What is the best glue for making a seashell wreath?
A: A high-temperature hot glue gun provides the strongest hold for securing shells to a wreath base. It dries quickly and creates a durable bond that handles the weight of the shells.
Q: How do I clean seashells before using them in a wreath?
A: Soak shells in a solution of warm water and a bit of dish soap. Use an old toothbrush to scrub away debris. For a brighter finish, a short soak in diluted bleach helps, followed by a thorough rinse and complete drying.
Q: What type of wreath base works best for a heavy shell project?
A: A sturdy grapevine, straw, or heavy-duty foam wreath base is ideal. These materials provide a solid foundation and can support the weight of multiple layers of shells without losing shape.
Q: Can I use a clear sealant on my finished seashell wreath?
A: Yes, applying a clear acrylic spray sealant is a great idea. It protects the shells from moisture, enhances their natural luster, and helps prevent any colors from fading, especially if the wreath will be displayed outdoors.
Q: How do I start arranging shells on the wreath?
A: Begin by placing your largest or most unique shells as focal points. Then, fill in the spaces around them with medium and small shells, working in one direction to create a balanced, layered look. Dry fitting pieces before gluing helps.


