

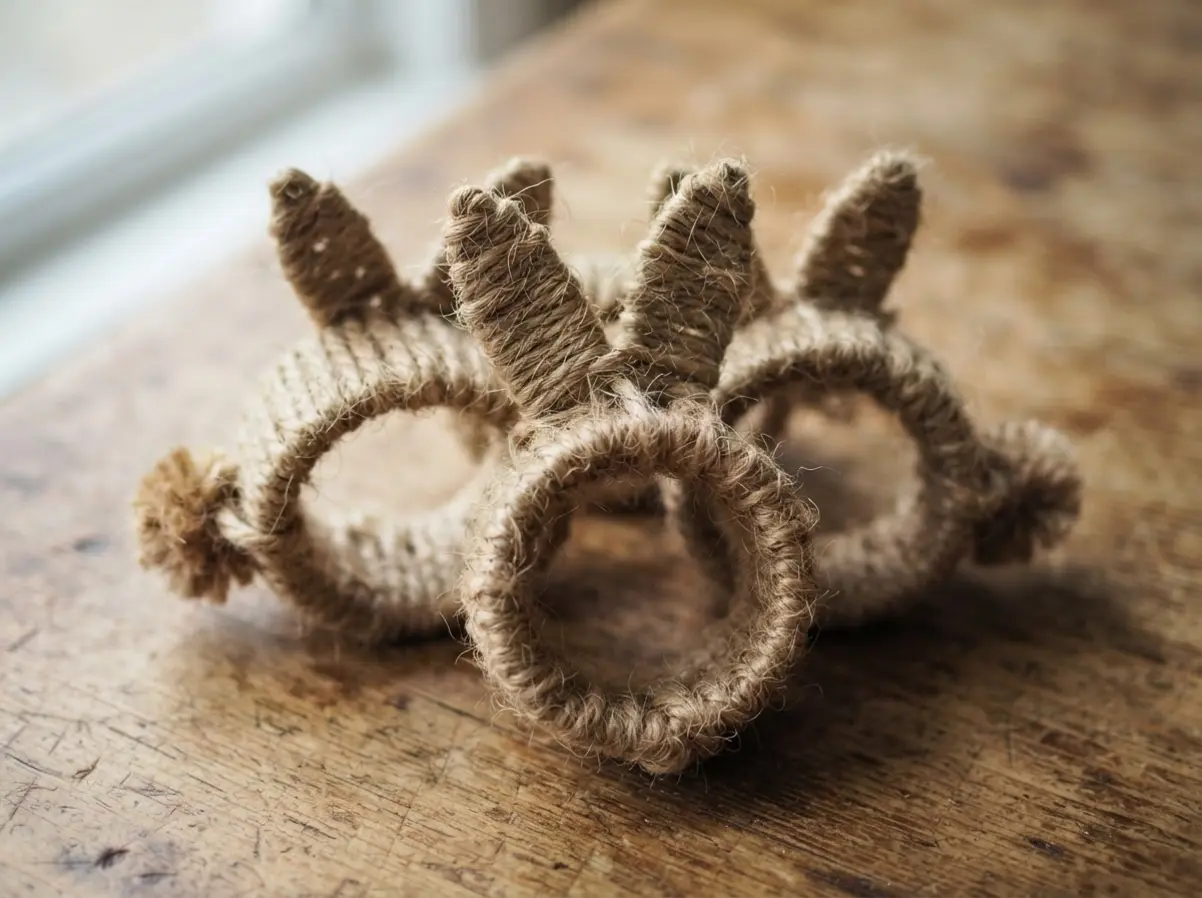
You want your table to feel warm, intentional, and a bit magical. That is where these little bunny napkin rings come in. They are the sweet, simple detail that ties your whole spring tablescape together. I have gathered ten distinct styles, from rustic to elegant, so you can find the perfect fit for your holiday brunch. Let us find your favorite.
Measuring Ideal Circumference for Balanced Table Linens
The fastest way to ruin a whole table setting is when your diy rabbit napkin rings pinch too tight or slip right off. You want your napkin to sit comfortably within its ring, not squeezed into a wrinkled lump or held so loosely it looks sloppy. A good rule of thumb is to add about an inch and a half to the napkin’s folded width for the perfect fit.
This little bit of breathing room means your guests can actually pull their napkins out without wrestling them, and everything stays neat all through dinner. I always test one finished ring on a folded napkin before making the whole set. Trust me on this, taking that extra minute to check the circumference prevents a lopsided, amateurish look on your Easter table.
Selecting Durable Materials for Repetitive Holiday Use
Thin paper or flimsy cardstock will collapse after one Easter meal, but a sturdy material like felt or polymer clay holds its shape for years. You want your diy rabbit napkin rings to feel substantial in the hand and survive being packed away and brought out each spring. Felt is a fantastic choice because it’s soft, cuts cleanly for those iconic bunny ear shapes, and comes in every pastel shade imaginable. For a more rustic look, natural jute or burlap adds wonderful texture and stands up to plenty of use.
The key is picking something with a bit of body that won’t bend out of shape when you slide a napkin in and out. Your future self will thank you for choosing a durable base when these same charming rings grace your table for many Easters to come.
1. Minimalist White Felt Rabbit Silhouette Ring
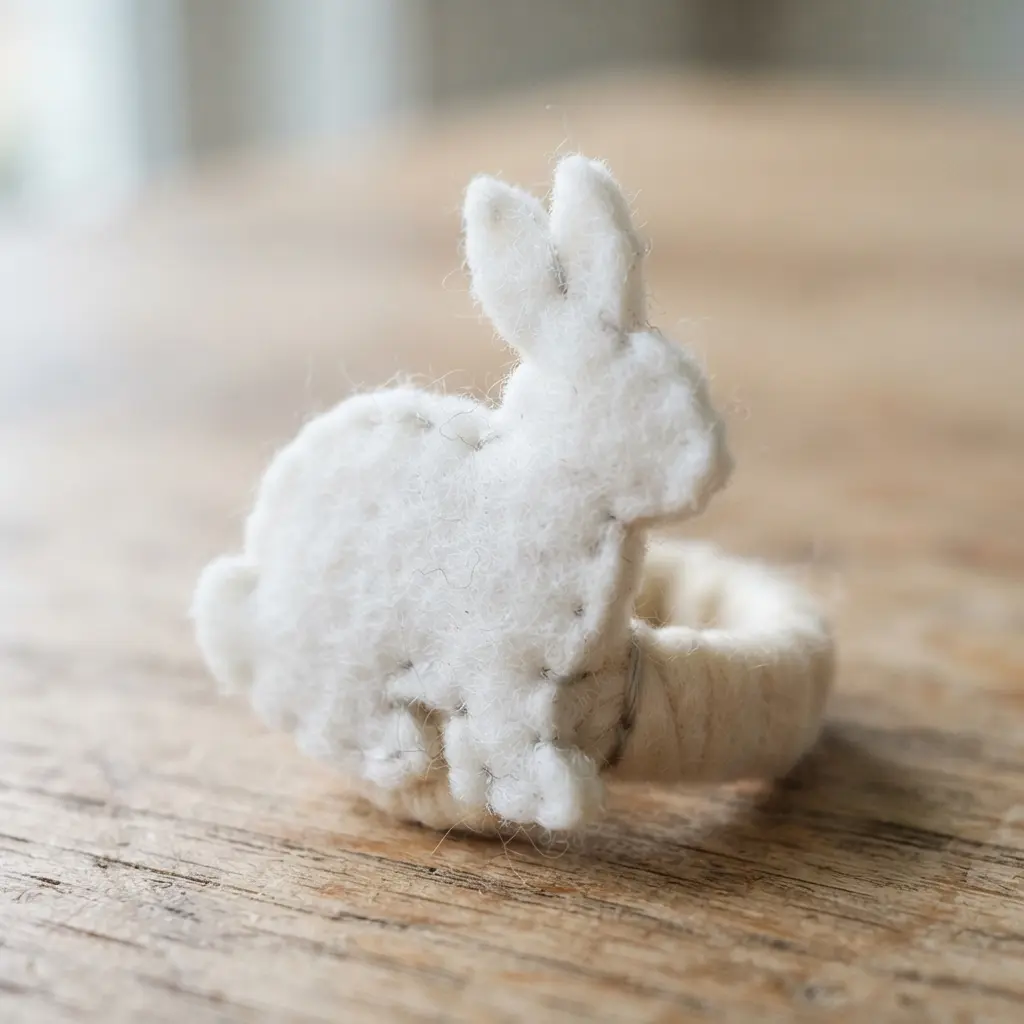
Who would have thought a piece of felt could feel so elegant? This approach to diy rabbit napkin rings is all about that clean, sharp silhouette. You start by cutting your white wool felt into a perfect, tiny rabbit shape using sharp scissors or a craft blade. Then, you simply bond that soft shape onto a simple metal band with a strong, clear adhesive made for fabric and metal.
It works because the contrast between the soft, matte felt and the shiny ring band is just so pleasing and unique. I love how it adds a whisper of springtime charm to your everyday look. For a super cohesive Easter table, you could pair this delicate ring with some adorable easter egg cup crafts as a sweet, thematic set.
2. Rustic Jute Twine Wrapped Rabbit Ring
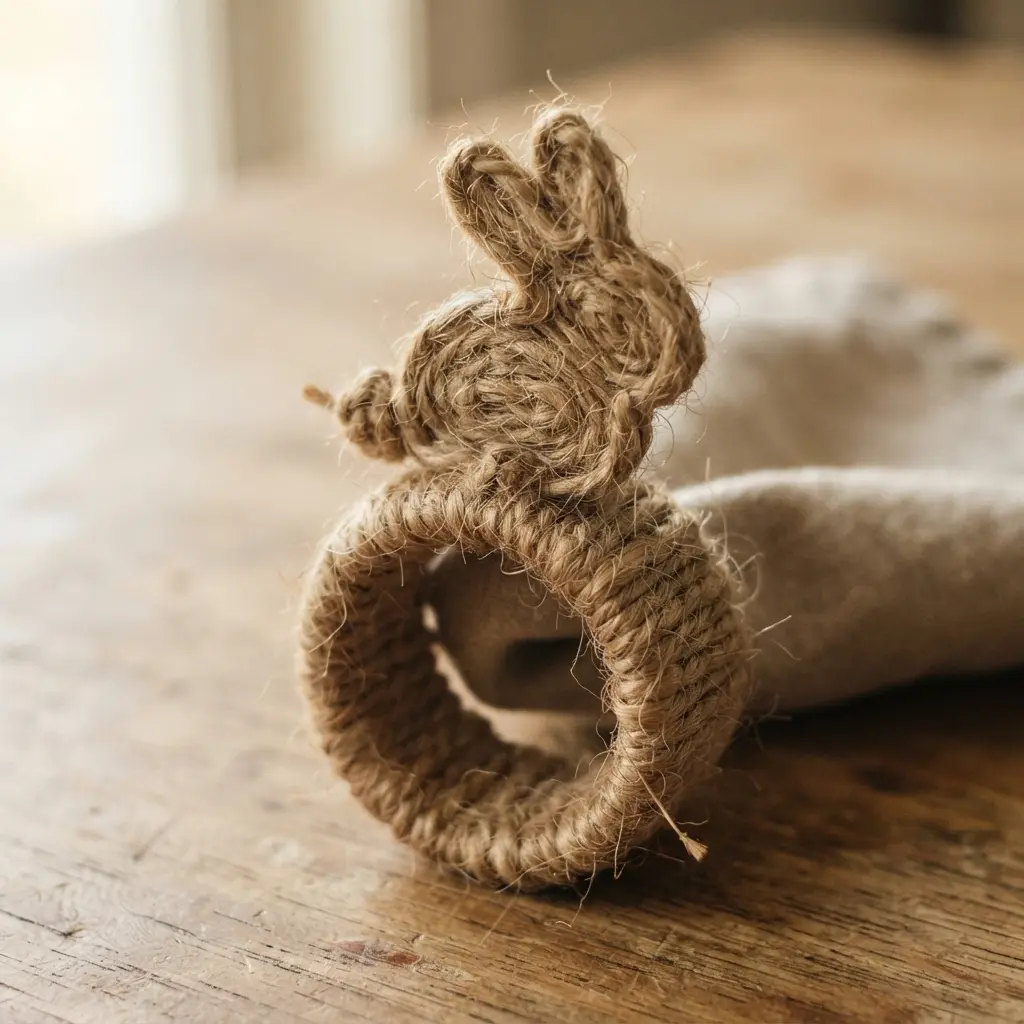
Creating diy rabbit napkin rings looks so intricate, but it is surprisingly simple once you get the hang of it. You start with a small rabbit silhouette, often made of cardboard or wood. The trick is to wrap it tightly with jute twine, securing it with dots of hot glue as you go to keep everything neat. Your finished rabbit will have a wonderful, earthy texture perfect for a farmhouse table.
Why does it work so well? The natural color and rough texture of the twine give it that handmade, rustic charm we all love for spring. I always find this project incredibly satisfying to finish. For more inspiration on simple projects, look at these easy bunny craft ideas before you start your next one.
My top tip for diy rabbit napkin rings is to work in small sections, applying glue as you wrap. This prevents gaps and keeps the twine perfectly snug against the form. Feel proud when you see that adorable, textured rabbit ready for your napkins.
3. Pastel Cardstock Layered Rabbit Ear Ring
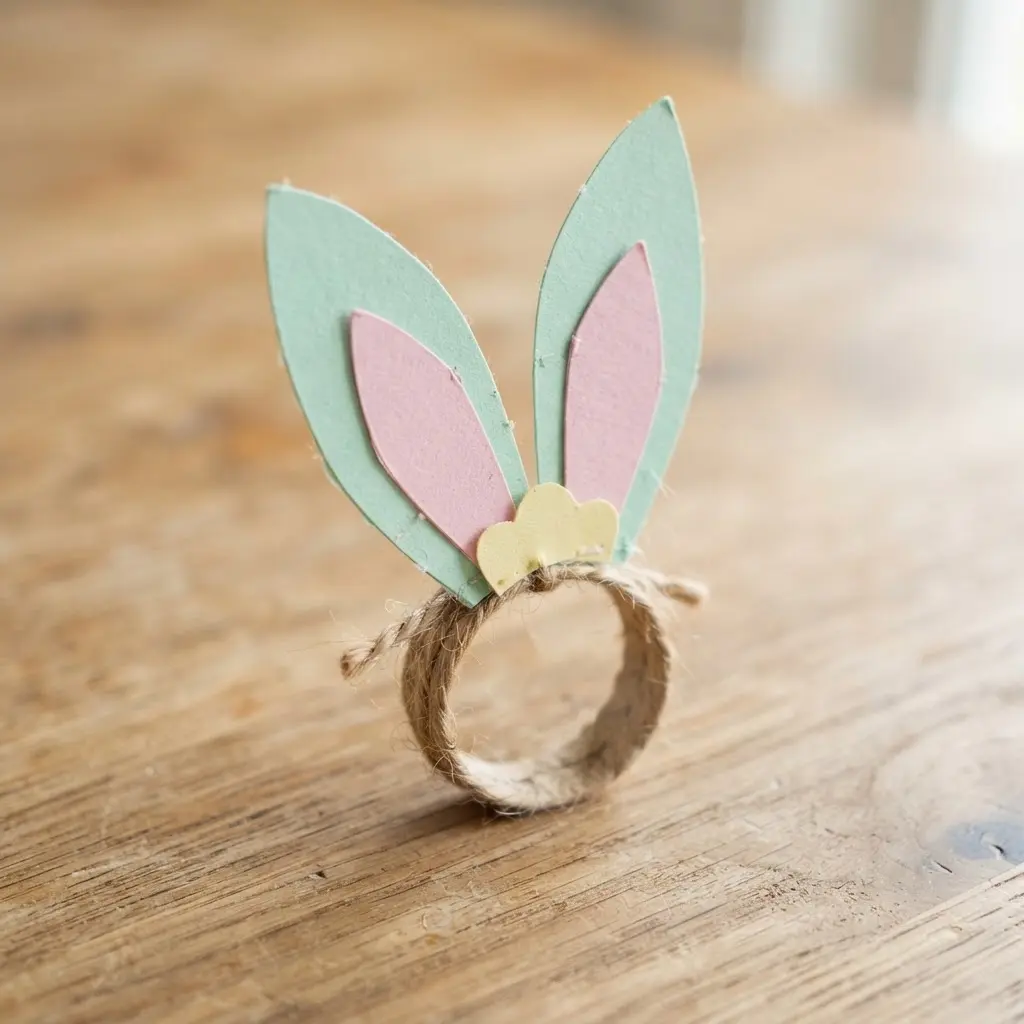
When crafting diy rabbit napkin rings, this one surprised me. It looks like a delicate, layered piece of jewelry, but it’s built with simple pastel cardstock. You trace and cut rabbit ear shapes in different sizes from a few complementary colors, then stack them with glue. The result is a charming, dimensional little ear that feels far more substantial than a single flat piece.
It works because the layering gives it a professional, playful depth. I love how it catches the light. For extra durability, seal your finished ears with a layer of Mod Podge before you attach them to the ring blank. This is a fantastic way to add a personalized touch to your Easter table, and it pairs wonderfully with other creative bunny mason jar ideas for a coordinated look.
4. Plush Faux Fur Bunny Tail Ring
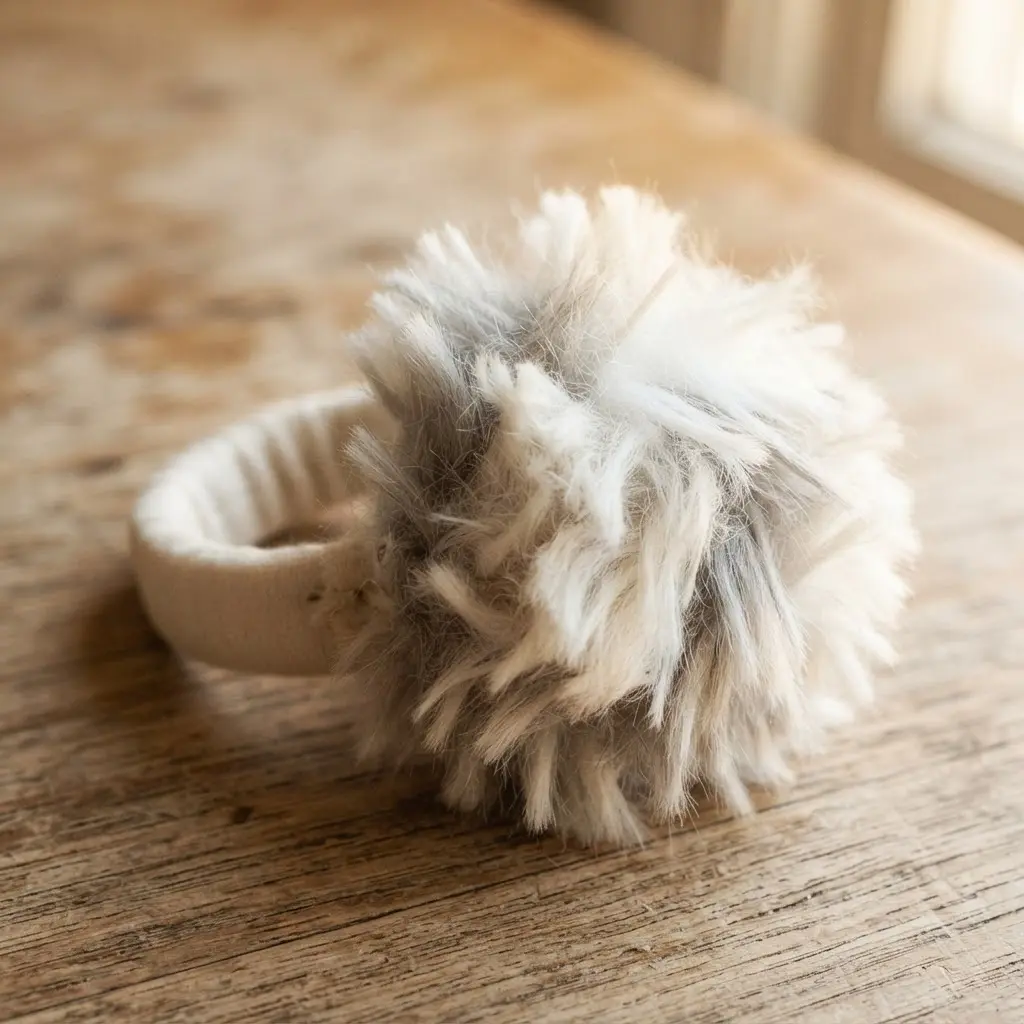
This one is all about that irresistible texture. You simply gather a piece of plush faux fur into a fluffy ball and glue it securely onto a ring base. The trick is to use a high-quality adhesive and let it cure fully, or your adorable tail might not stay put.
That soft, touchable puff makes your diy rabbit napkin rings instantly charming and adds a playful touch to any table setting. For extra durability, especially on fabric rings, I always add a few stitches after the glue dries. You can make a whole family of these in different colors, and they pair wonderfully with other cute pom-pom chick crafts for a full springtime tablescape.
5. Painted Wood Laser Cut Bunny Ring
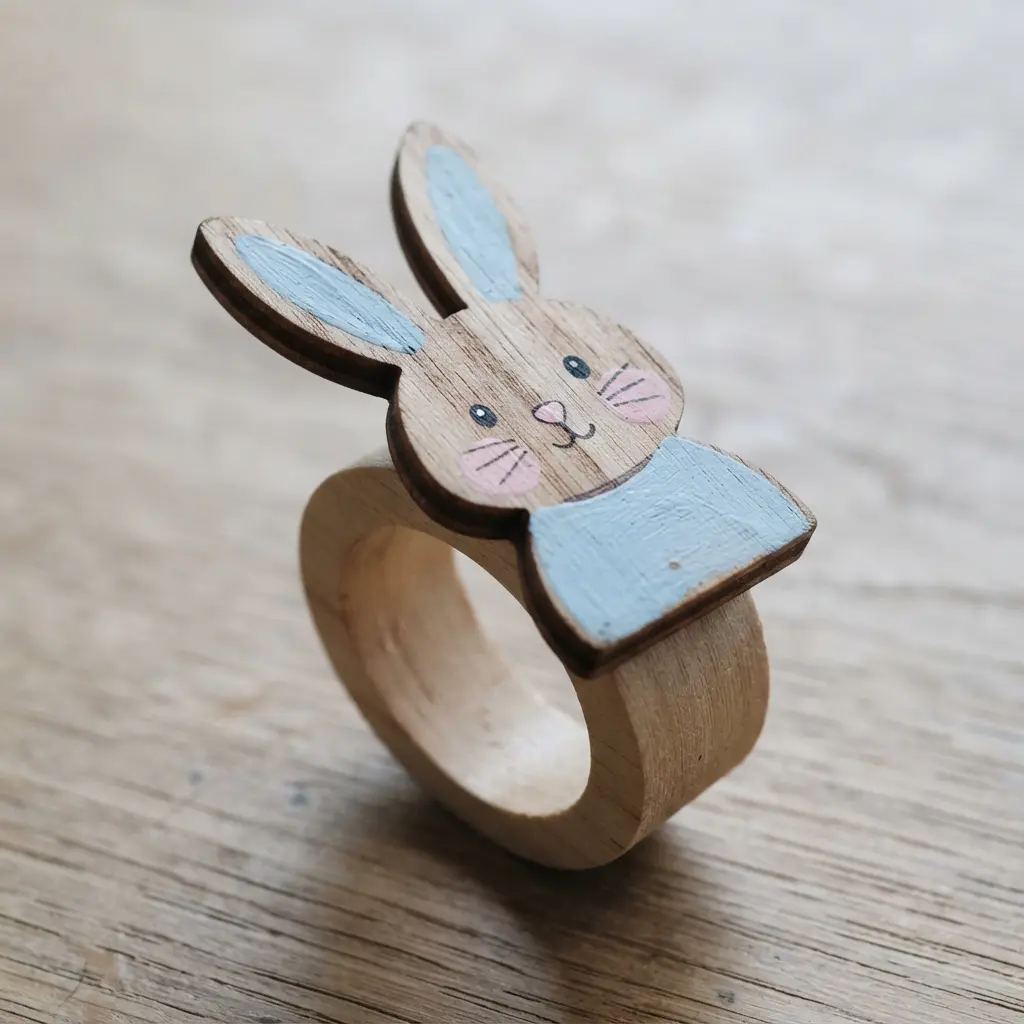
Each set of diy rabbit napkin rings looks intricate, but the laser cutter does the heavy lifting, giving you a perfect bunny silhouette every time. You start with a piece of birch plywood and your favorite acrylic paints. I love how the clean, etched details from the laser make painting the little face and ears so satisfying.
Why does it work so well for your holiday table? That handmade charm is undeniable. It is a quick project that adds a personal, thematic touch. For a cohesive tablescape, you could even match the paint colors to a festive easter banner hanging nearby. Trust me, a couple of thin coats of paint followed by a clear sealant will keep your bunny looking fresh all season.
6. Textured Burlap Fabric Rabbit Head Ring
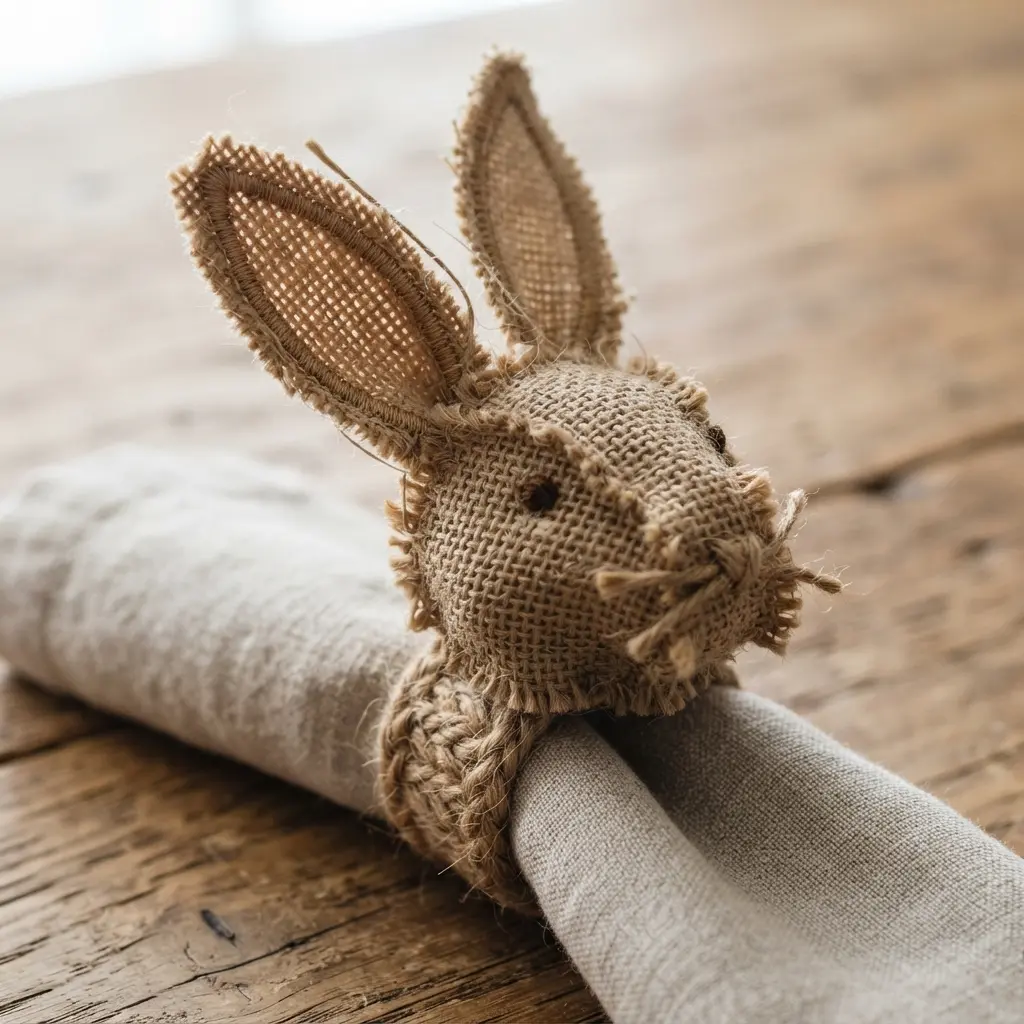
Ever wanted a ring that feels as handmade and charming as it looks? This textured burlap rabbit head ring nails that rustic, cottagecore vibe perfectly. You start by cutting your fine‑weave burlap into a head and ear shapes, then stitch or glue them together with a bit of stuffing inside for a cute, three‑dimensional shape. Add small beads for eyes and a little embroidered nose to bring your bunny to life.
I love how the natural roughness of the fabric gives it such a unique, earthy charm you just do not get with polished metals or smooth woods. The trick to keeping these diy rabbit napkin rings looking neat is applying a little fray‑check liquid to all the raw edges before you start assembling. Try it and feel the satisfaction of wearing a little piece of spring on your finger.
7. Glitter Embellished Pastel Paper Rabbit Ring
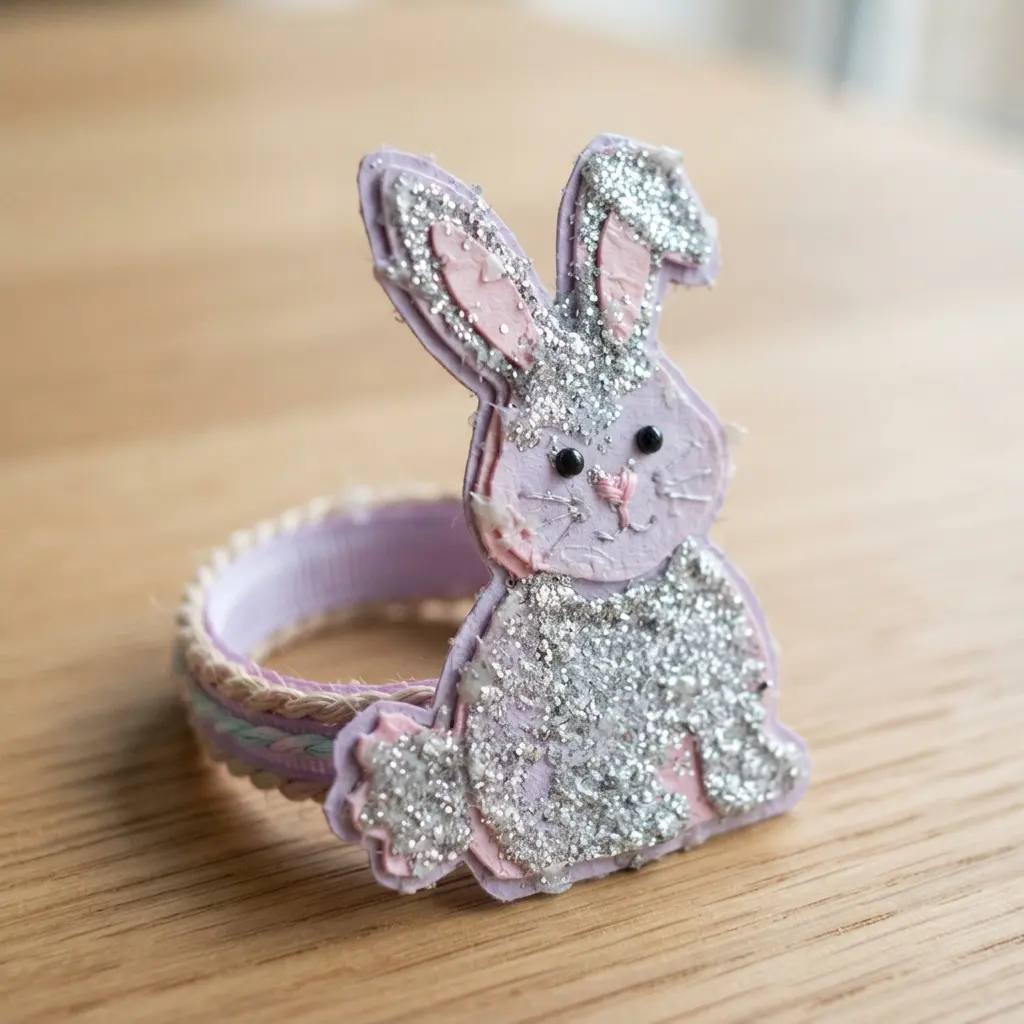
This one is pure magic for the table. You start with a simple rabbit silhouette cut from pastel cardstock. Then, the fun part. Apply a thin layer of craft glue to the ears or body and sprinkle on fine glitter. Tap off the excess and let it dry completely.
The key to a clean finish on diy rabbit napkin rings is sealing that glitter. I always use a coat of Mod Podge to lock in the sparkle and prevent any shedding. It gives the ring a smooth, professional look. Trust me, that extra step makes all the difference.
For a truly festive table, these rings pair wonderfully with decorative golden Easter eggs. The soft pastels and metallic gold create a stunning spring palette. Doesn’t that sound like a beautiful combination?
8. Floral Crown Decorated Rabbit Ear Ring
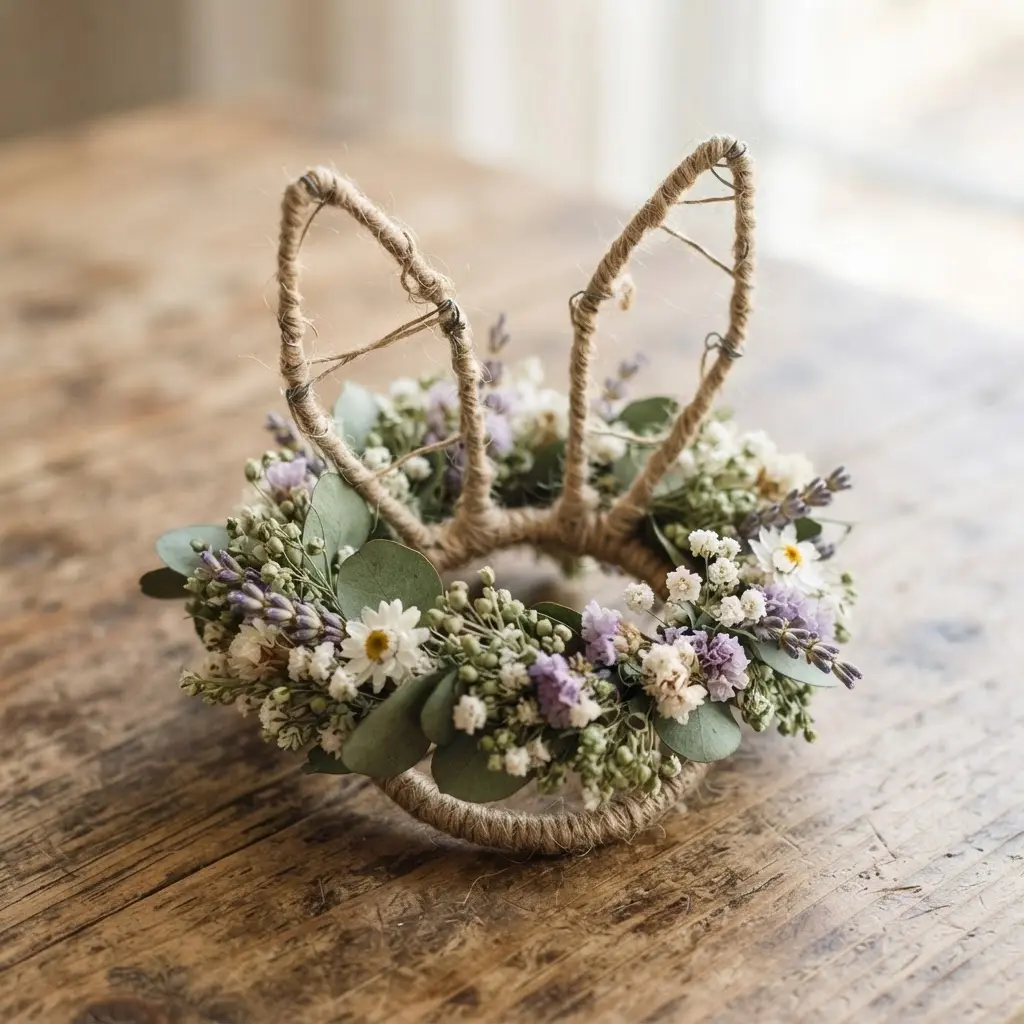
Who says napkin rings have to be simple? This design brings a touch of jewelry-level elegance to your table. You’ll sculpt your diy rabbit napkin rings with rabbit ears first, then create a tiny, colorful floral crown from resin, clay, or even tiny beads to wrap around the base. It looks intricate, but the payoff is a stunning, dainty centerpiece for each place setting.
The key is keeping everything miniature and balanced so the flowers do not overwhelm the bunny silhouette. I love how this one feels like a tiny, wearable garden. For a similarly festive and fragrant DIY project, you might enjoy making some homemade Easter egg bath bombs to pair with your spring table decor.
Doesn’t that sound like a lovely way to welcome spring guests?
9. Woven Pipe Cleaner Looped Bunny Ring
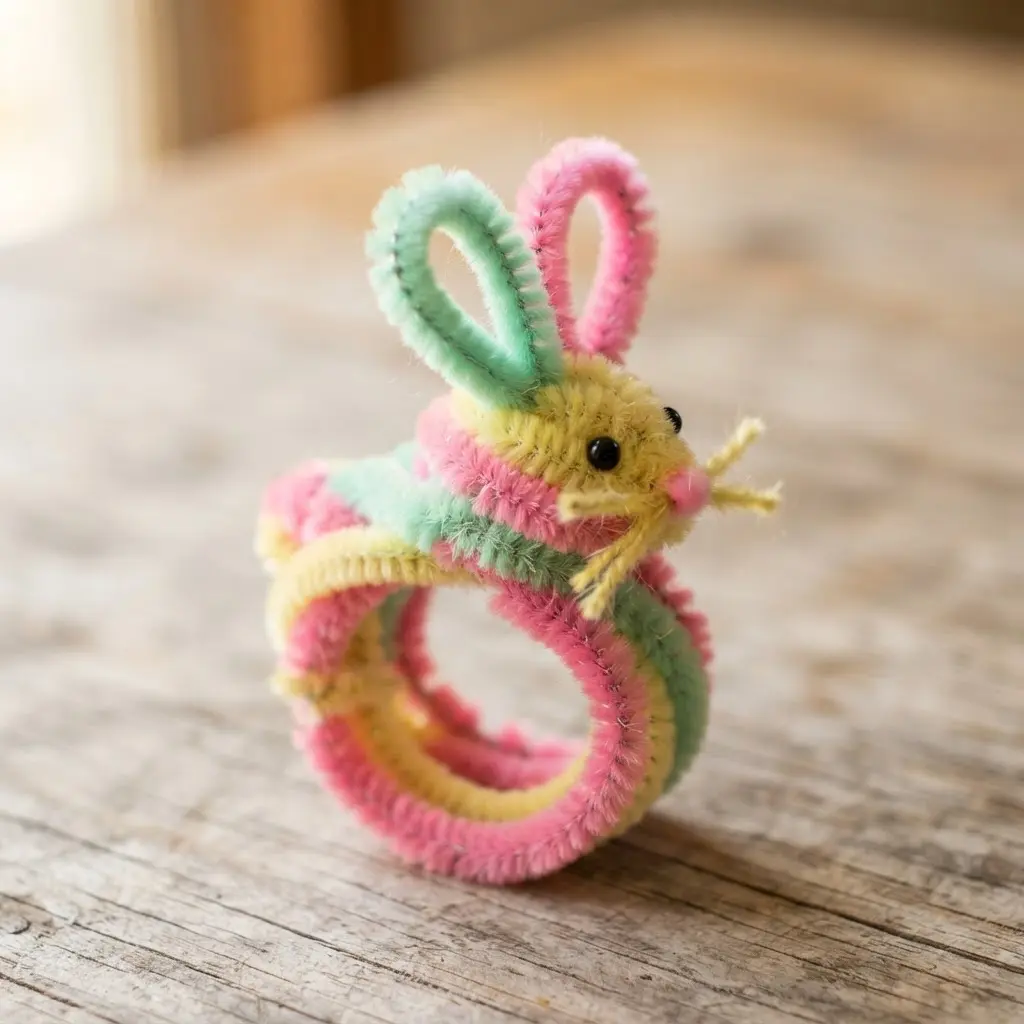
I love how this one looks intricate but is so simple to weave. You start by making a pipe cleaner ring base around a pencil for the perfect size, then build up a fuzzy bunny body by crossing and wrapping another chenille stem over it. The real charm comes from those playful, bouncy ears you form by looping a final pipe cleaner and attaching it securely to the woven head.
This technique for diy rabbit napkin rings works because the soft texture is instantly inviting and the process is wonderfully tactile. Your table setting will pop with personality, and these little rings make fantastic colorful tissue paper Easter eggs look even more festive when grouped together. Feel that handmade joy!
10. Macrame Knotted Rabbit Shape Napkin Ring
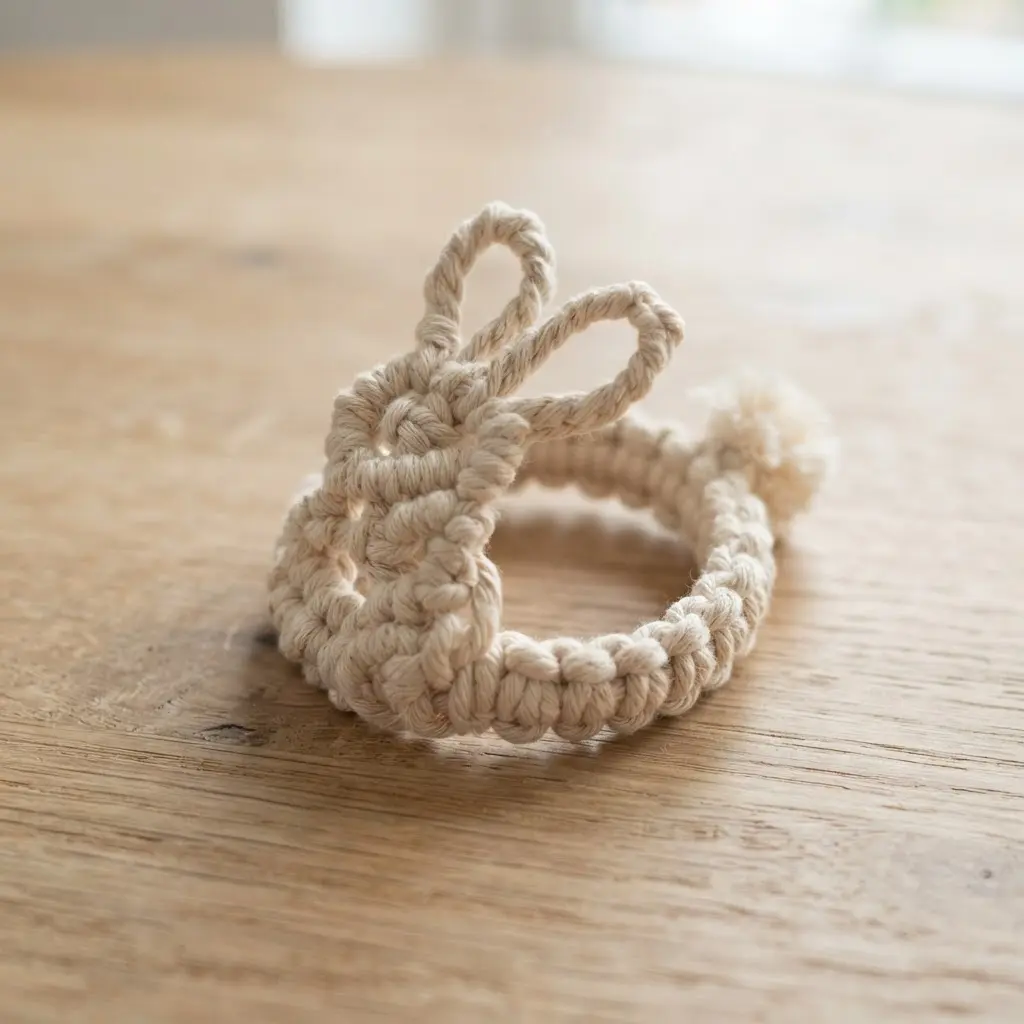
Who would have thought a few simple knots could create something so charming? You will start by attaching your cords to a wooden ring with a few Lark’s Head knots, then build the bunny’s head and ears using rows of square knots. When shaping diy rabbit napkin rings, the key is maintaining consistent tension as you shape the form, dropping strands carefully to round the head and point the ears. I love this project because the natural cord texture gives your table a cozy, handmade feel that store-bought decorations just cannot match.
Your finished napkin ring will be a delightful, rustic touch for any spring gathering. For a fun family activity, you can pair this project with some delightful spring crafts for kids to keep everyone in the creative spirit. Trust me, seeing your own knotted bunny on the table is incredibly satisfying.
Proper Storage Methods for Delicate Seasonal Tableware
Tossing your handmade napkin rings loose into a box guarantees crushed ears and tangled embellishments by next year. The safest way to store them is in a divided container, like an egg carton or a plastic bin with individual compartments. This keeps each ring from pressing against its neighbors and protects delicate details like glued-on beads or wire whiskers.
Wrapping each one in a bit of tissue paper first adds another gentle layer of protection against dust and scratches. Find a cool, dry spot for the container, away from direct sunlight which can fade your pretty pastel colors over time. A little care now means you can unpack a perfect, ready-to-use set every Easter without any last-minute repair panic.
Conclusion
The best part of displaying your diy rabbit napkin rings is the feeling they create on your holiday table. They are more than just holders; they are little expressions of the care you put into welcoming your guests. They spark conversation and make a meal feel like a celebration.
My advice is to pick one style that speaks to you and gather your materials. The process is often as enjoyable as the final result. Seeing those charming bunnies peeking out from your napkins on Easter morning is a simple joy that makes all the effort worthwhile. I hope this collection inspires your own beautiful table.
FAQs
Q: What is the easiest DIY rabbit napkin ring to make?
A: The minimalist felt silhouette is often the simplest. It requires only cutting a shape from felt and securing it. The plush faux fur tail ring is also very quick, involving just gluing a pom-pom to a basic ring.
Q: How do I make napkin rings that look polished, not childish?
A: Focus on quality materials and clean lines. Choose natural textures like felt, wood, or jute over bright construction paper. A minimalist silhouette or a single elegant material tends to look more sophisticated than a project with many clashing elements.
Q: Can I make these without a hot glue gun?
A: Yes. Many designs work well with craft glue, tacky glue, or even small stitches for fabric projects. For pipe cleaners or wire, you can simply twist the ends together securely.
Q: How far in advance can I make these napkin rings?
A: You can prepare them weeks ahead. Store them flat in a box or basket to prevent bending or crushing. Paper-based designs are best kept away from humidity to avoid warping.
Q: What if I am not good at drawing the rabbit shape?
A: Use a template. Search for a simple rabbit silhouette you like, print it, and cut it out to use as a stencil on your material. This ensures a clean, consistent shape every time.









