Whether you want to personalize a ceramic plate for a friend or add abstract patterns to old sneakers, each design is clearly explained so you pick the right ink type, surface, and sealant without guesswork. No special equipment is required beyond a basic marker pack and a few common household items. Grab your tools, pick the first project that catches your eye, and let the lines flow.
Surface Preparation Techniques for Permanent Ink Adhesion
The fastest way to ruin your design is marking over a greasy fingerprint on a ceramic mug. You need to wipe your target area with a cotton pad soaked in isopropyl alcohol before you even uncap your marker. This removes the oils from your skin that create a barrier the ink cannot stick to, a mistake beginners make all the time.
Trust me, this simple one-minute step makes the difference between a design that lasts and one that washes away after the first use. For the clearest results, you want to stick with smooth, non-porous materials like glass or glazed ceramic where the pigment bonds cleanly. The ink will not adhere properly to dusty, rough, or waxy surfaces, so give your piece a good visual inspection first.
Selecting Optimal Nibs for Detail and Coverage
When executing sharpie marker craft ideas, your finished piece looks amateur when outlines bleed into the fill-in areas because you used the wrong tip. You need an ultra-fine point for intricate line work and fine details, which gives you control for steady, measured strokes. Switch to a broad chisel-tip for filling larger sections, as its wider edge provides full, opaque saturation.
The good news is you can create depth by layering transparent colors, starting with your lightest shades first. You will notice that keeping strokes in one consistent direction prevents that streaky, uneven look we all want to avoid. Using the correct nib for each task gives your work those crisp borders and solid color blocks.
1. Heat-Set Illustrated Botanical T-Shirt Design
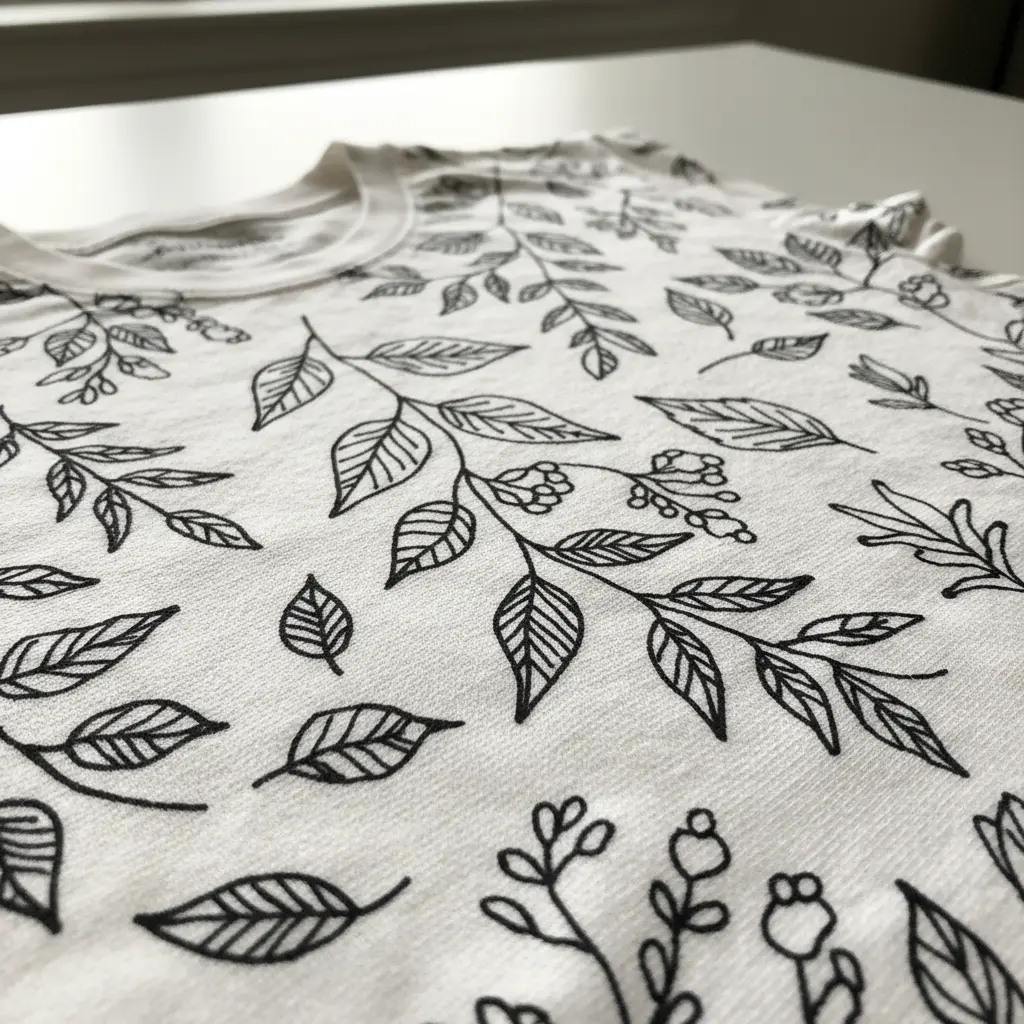
Exploring sharpie marker craft ideas led me to this project, which surprisingly looks like a professional print. You start by drawing a detailed botanical illustration on paper, then scan the artwork and print it onto heat transfer paper. Use a household iron or a heat press to permanently bond the design onto a cotton t-shirt.
I love this project because it turns art into a durable, wearable piece. The heat-setting process means your design survives the washing machine without fading or cracking. Trust me, the payoff is huge when you see your artwork come to life on fabric.
Getting the colors vibrant and the transfer smooth depends on using the right materials. If you are new to this, get comfortable with watercolor painting techniques for your original illustration. That foundational skill makes all the difference in your final t-shirt design.
2. Baked Oil-Based Ceramic Minimalist Mug
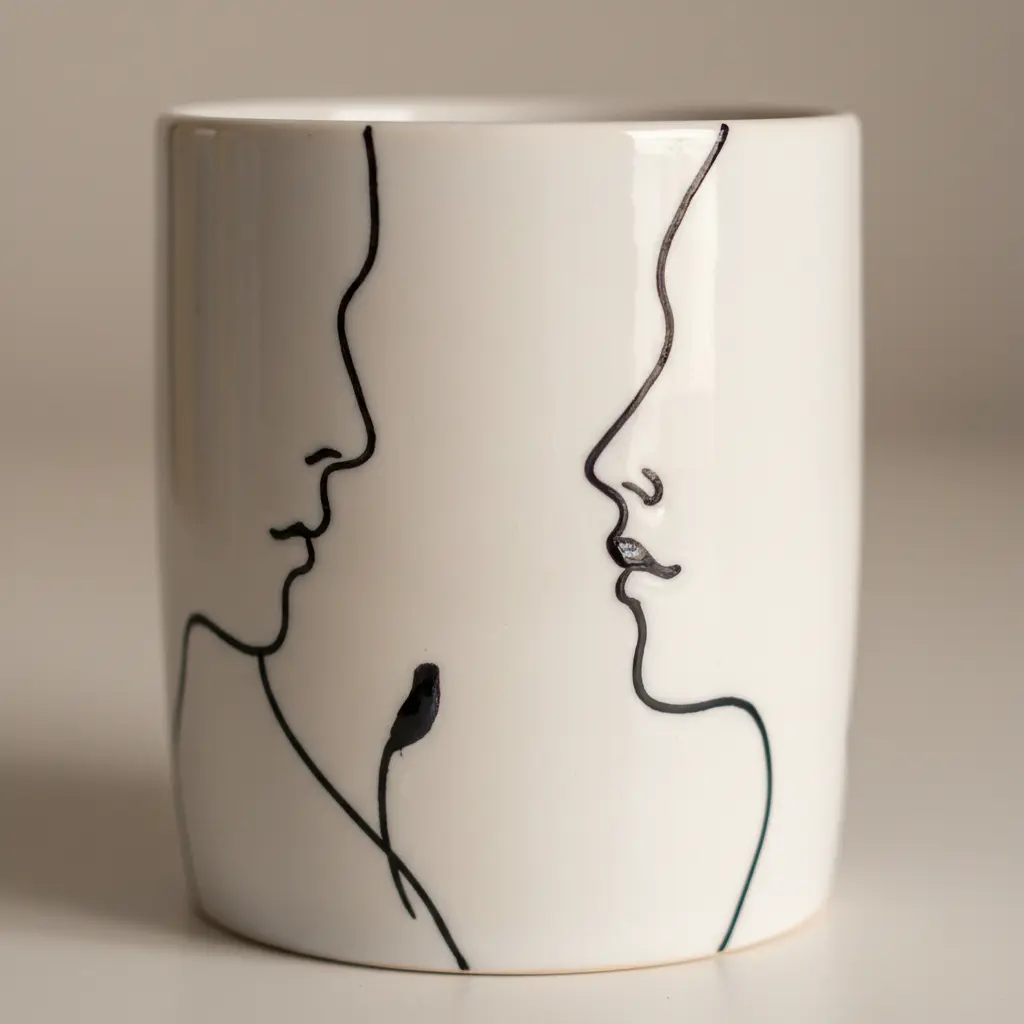
Among practical sharpie marker craft ideas, this mug looks professional but remains surprisingly simple to pull off yourself. The secret is using oil-based paint markers designed for ceramics, which give you crisp, opaque lines. Draw your clean, simple design on a plain mug, let it dry completely, and bake it in your kitchen oven.
I love how this process makes your design a permanent part of the mug, not just a decal sitting on top. The key step is letting the mug cool down slowly inside the turned-off oven after baking to prevent any cracks. For another way to add a textured, permanent design to your projects, check out these creative mixed media painting techniques.
3. Hand-Lettered Wood Slice Coaster Set
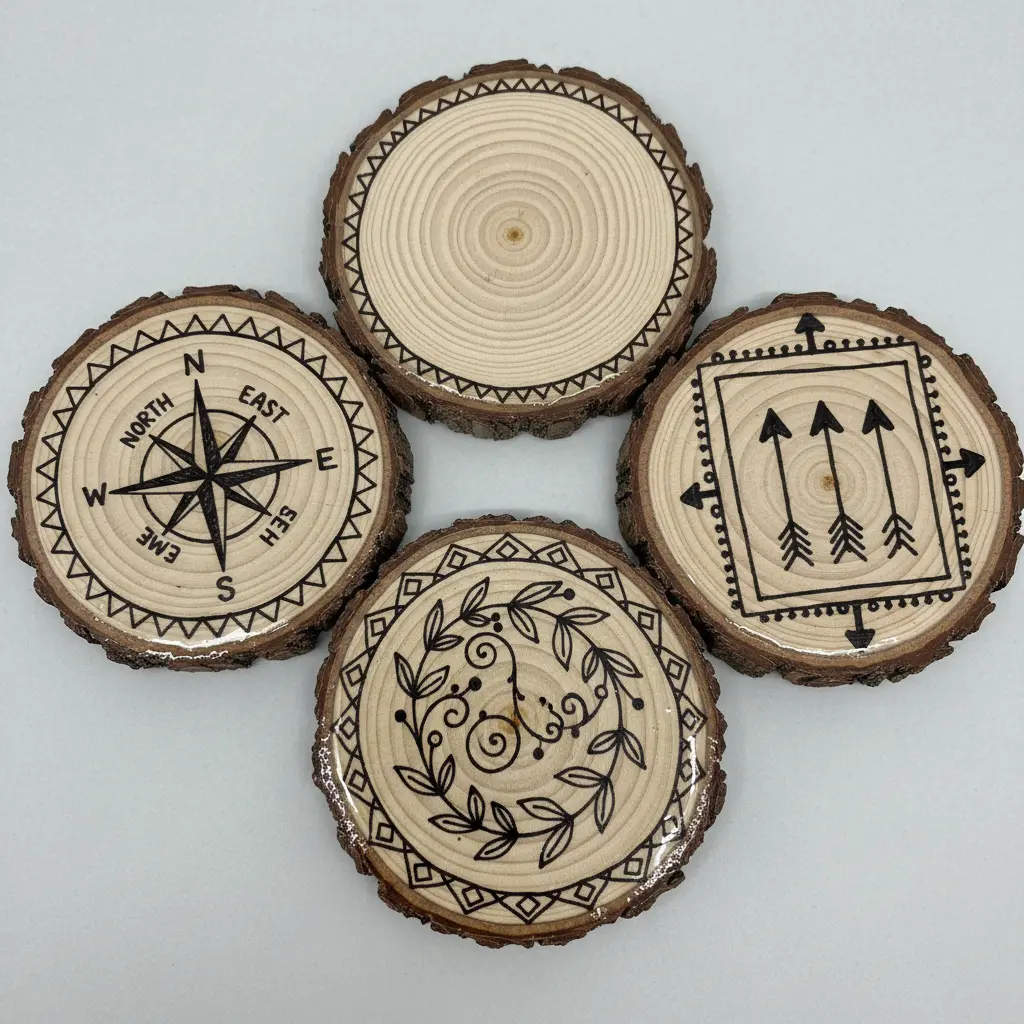
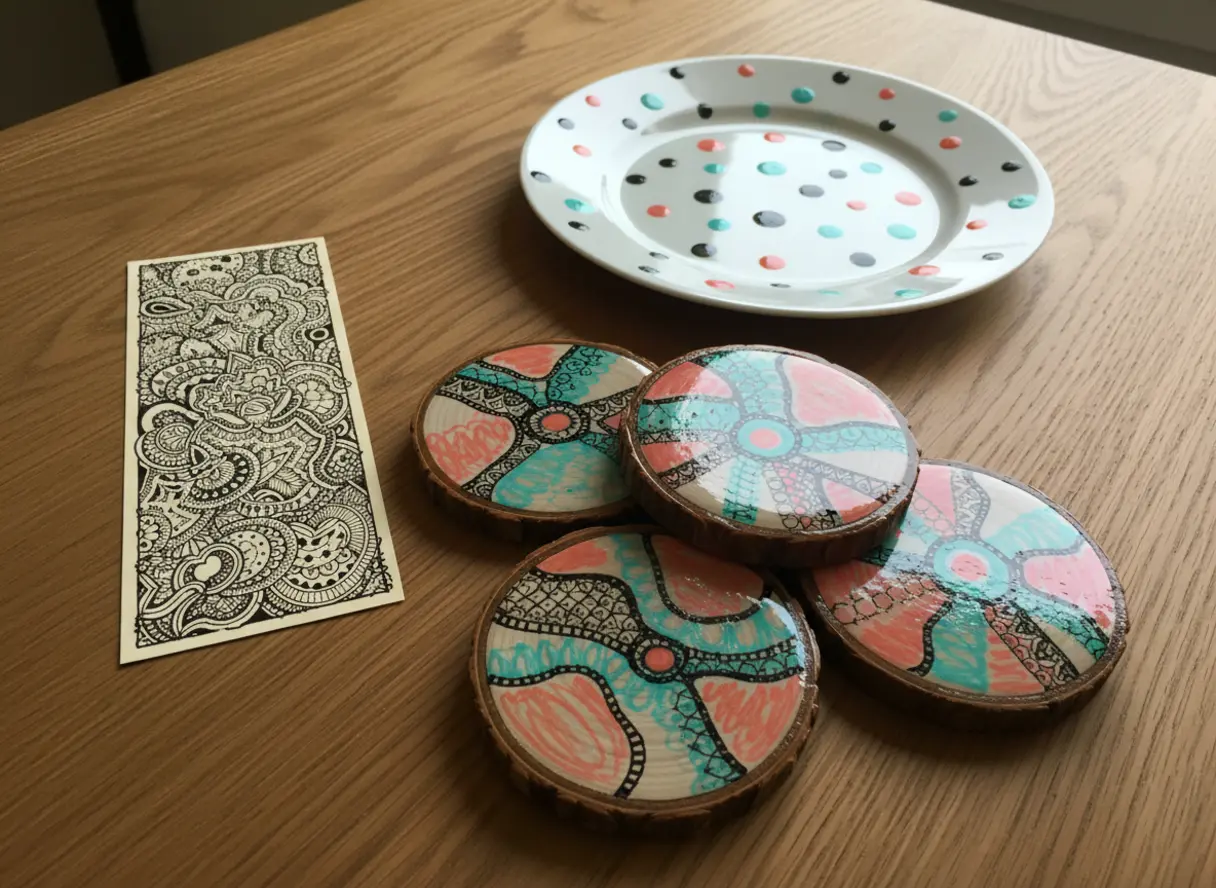
Creating rustic home decor remains one of the most popular sharpie marker craft ideas, and this project delivers exactly that. Start with simple, natural wood slices and transform them with your own lettering. I love how you can sketch a favorite word in pencil first, then go over it with a bold paint pen.
The key to making them last is that final protective sealant coat, which locks in your art against moisture and heat. Trust me, practicing your design on scrap paper first saves so much stress on the real wood. You get a set of unique pieces that feel incredibly satisfying to give or use yourself.
4. Dot-Art Mandala Garden Rock Decor
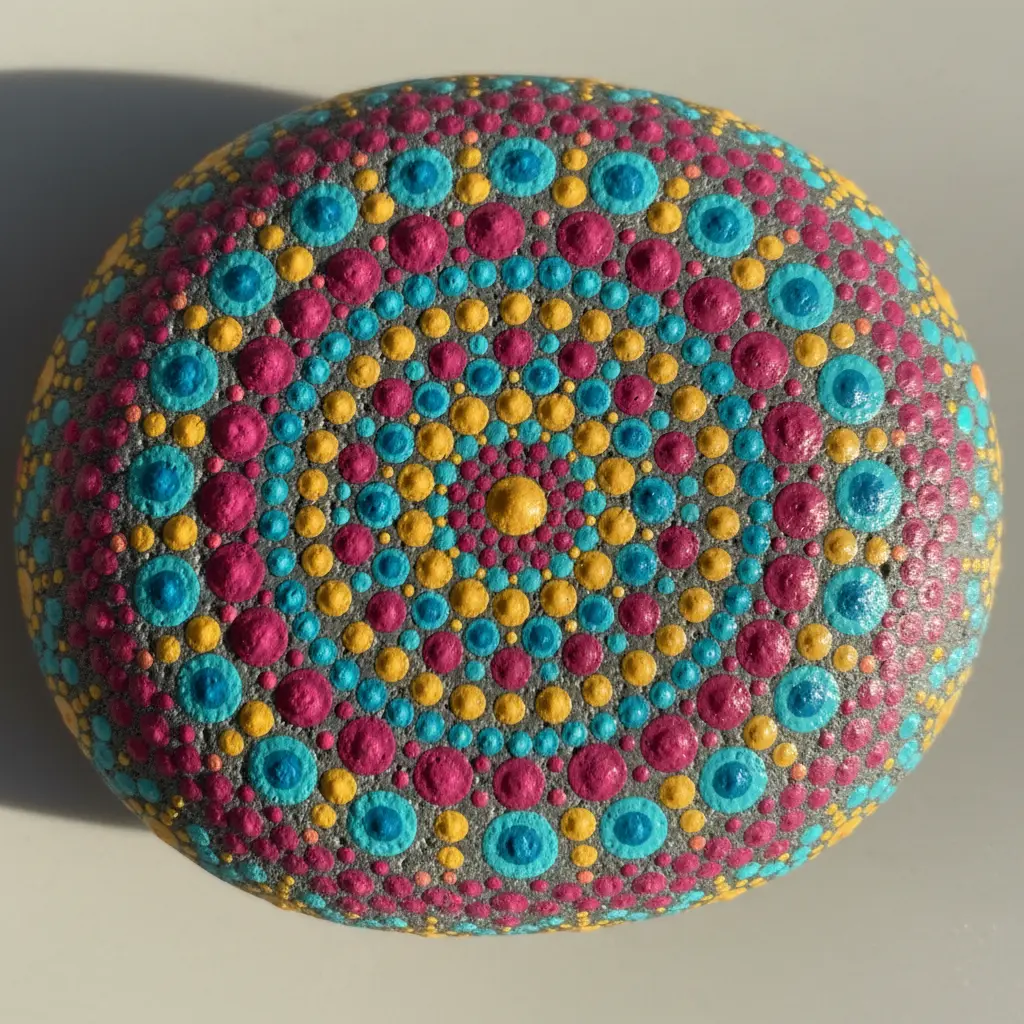
Transforming plain stones into art showcases how sharpie marker craft ideas bring vibrant texture to outdoor spaces. You start from the center with a specialized dotting tool or simple household alternative, building symmetrical rings of color outward. The process is wonderfully meditative, turning a simple rock into a personal garden treasure.
I love how the finished piece looks like a colorful mosaic. For a stunning visual effect, try placing your mandala rocks alongside other handmade garden accents. The rhythm of placing each dot is calming, and you will feel proud when your design is complete.
5. Abstract Geometric Patterned Canvas Sneakers
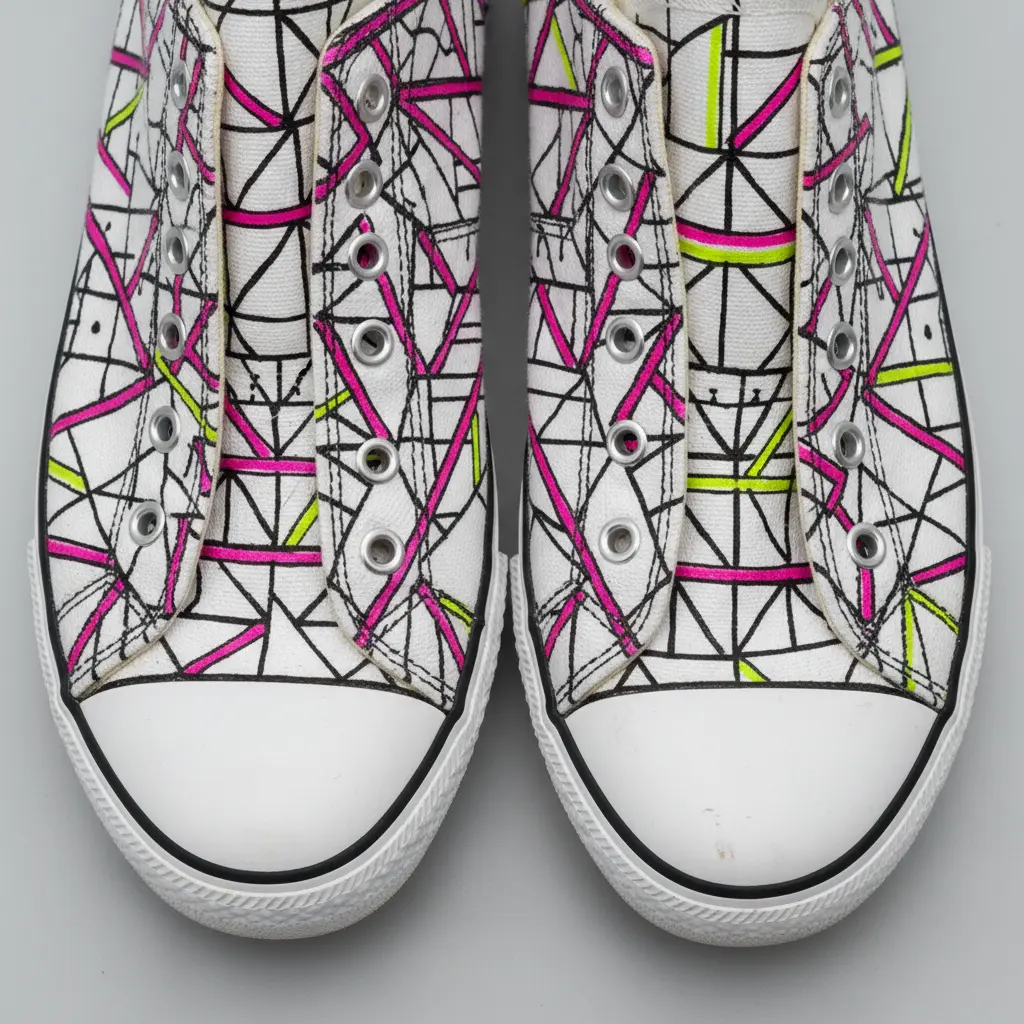
Customizing footwear sits comfortably among bold sharpie marker craft ideas, especially when you start with simple geometric shapes. Take your canvas sneakers, stuff them with cardboard or newspaper to keep the surface firm, and then start drawing. Use fine-tip markers for crisp outlines of your triangles and lines, then fill them in with bold colors.
It works because you are turning a basic shoe into a walking piece of modern art. Trust me, you will love the feeling of putting on a pair you designed yourself. Doesn’t that sound like a fun way to spend an afternoon?
6. Floral Bordered Personalized Glass Vase
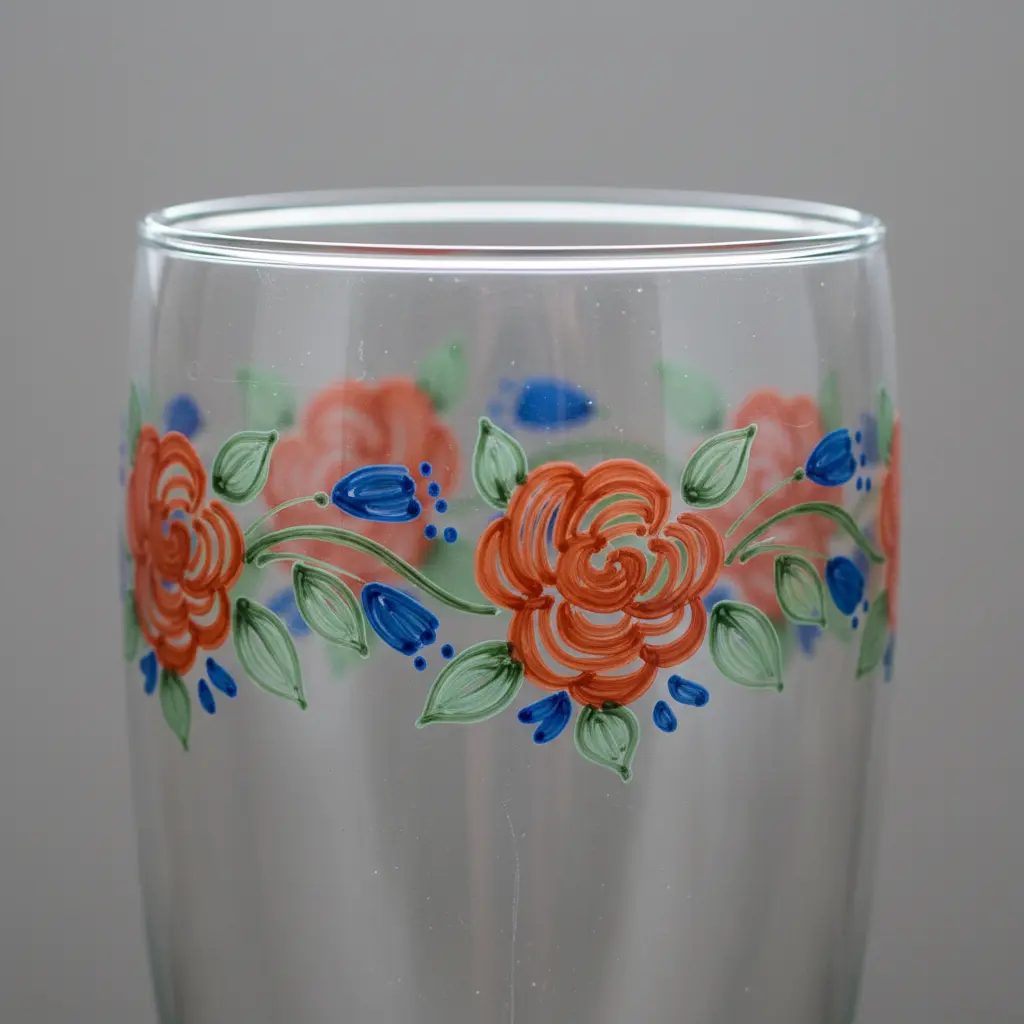
Personalizing glassware belongs to the quiet charm of sharpie marker craft ideas that double as heartfelt gifts. Draw a floral border design around the rim or base using your markers, then add a name or date in the center. The contrast between the permanent pattern and clear glass is stunning.
It works because you are merging beautiful art with personal meaning. The recipient gets a functional piece of decor that celebrates a memory every single day. For the best results, always use markers made for glass and follow the curing instructions to ensure your design lasts through many washes.
7. Intricate Zentangle Decorative Paper Bookmark
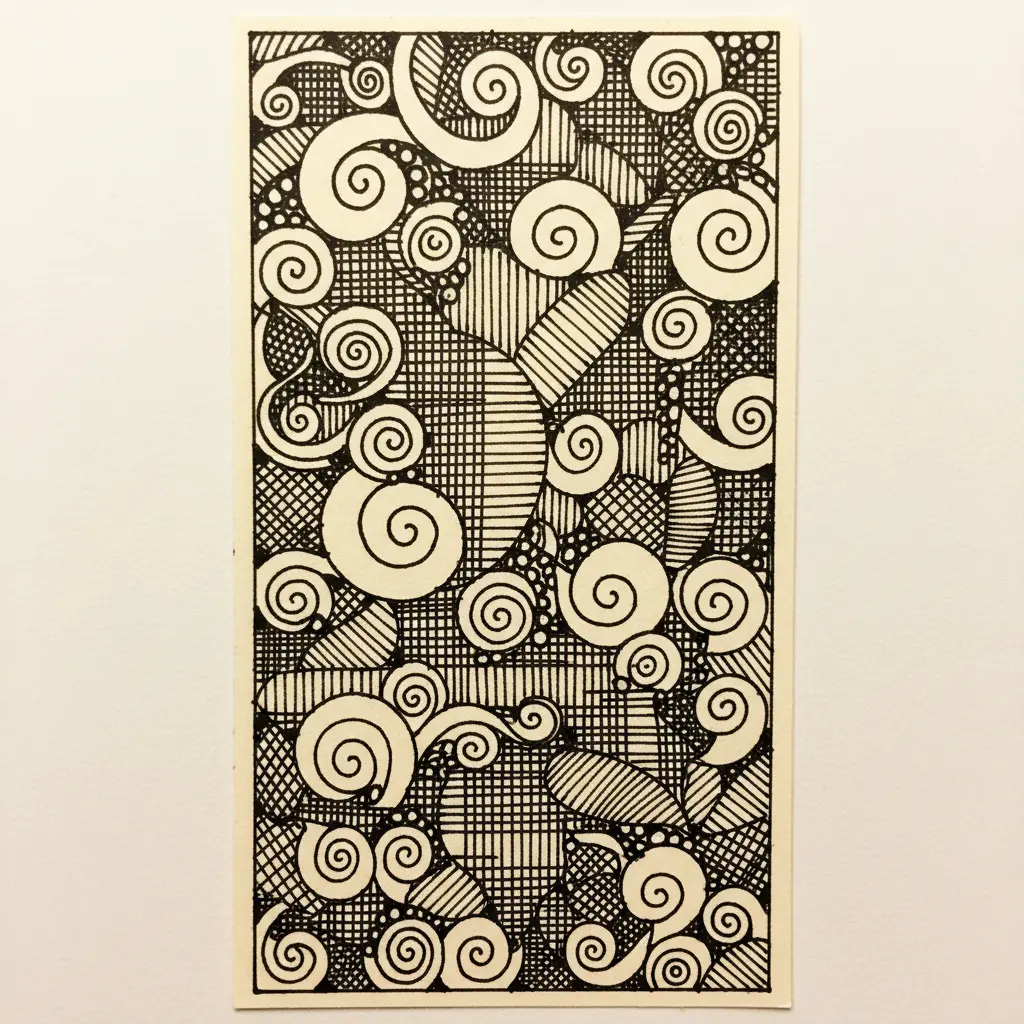
Designing paper accessories highlights one of my favorite sharpie marker craft ideas for quiet afternoons. Start by drawing a light pencil “string” on your cardstock to create sections, then fill each one with repetitive patterns using a fine-tip pen. I love how you can get lost in the flow of creating these detailed visuals.
It works because the structured patterns guide your hand, making complex designs feel achievable. A pro tip is to practice your favorite tangles on scrap paper first. This is also a fantastic project to pair with relaxing ornament coloring crafts for a creative afternoon.
8. Polka Dot Embellished Ceramic Plate Art
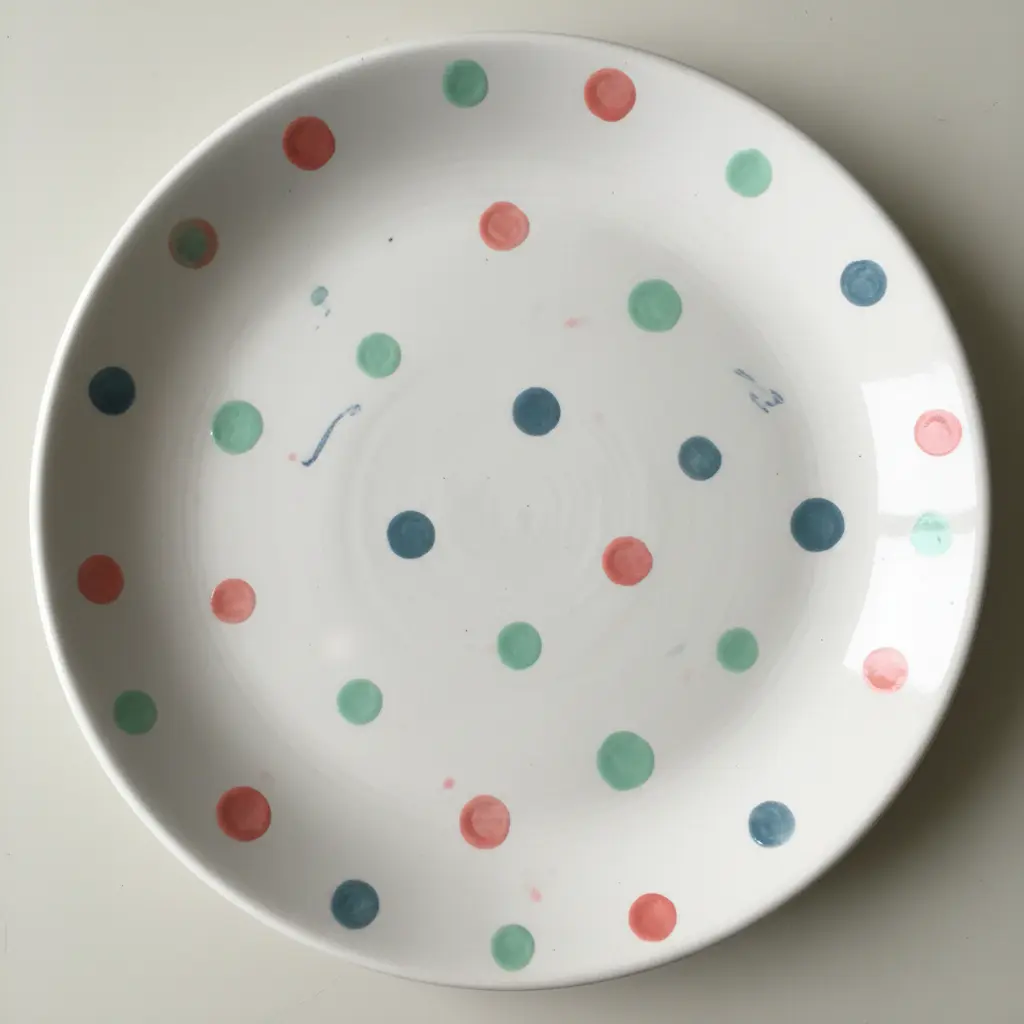
Decorating dishware ranks among the most accessible sharpie marker craft ideas for a lazy afternoon. This is one of my favorite ways to add a personal touch to my kitchen. Simply load a cotton swab or dotting tool with paint and press it onto a clean plate, reloading for every dot to keep the color consistent.
You can go for a neat, uniform pattern or scatter them playfully. The best part is how accessible this project feels to complete. It feels incredibly satisfying to see those perfect little circles come together.
9. Fine-Point Doodle Decorated Wooden Picture Frame
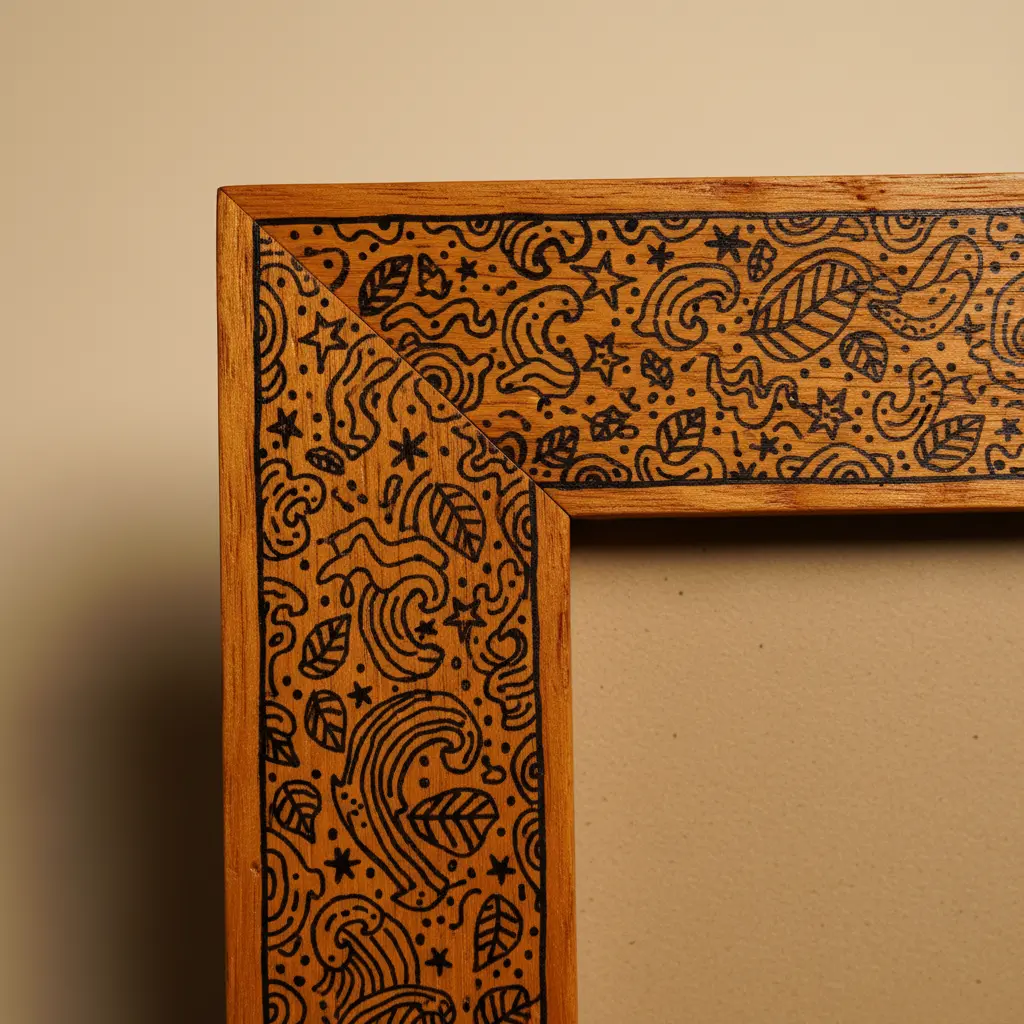
Customizing photo displays stands out as a wonderfully relaxing entry on any list of sharpie marker craft ideas. Start with a plain unfinished wooden frame, lightly sketch your design with a pencil, and trace over it with a fine-point permanent pen. The magic lies in those tiny lines coming together.
It works because you are turning a basic item into a personalized piece of art, perfect for photos or gifting. My go-to tip is to always do a quick test on a hidden spot of the wood with your chosen pen before committing. You can apply this detailed doodle technique to other small wooden objects for a coordinated set.
10. Calligraphy Embellished Fabric Tote Bag
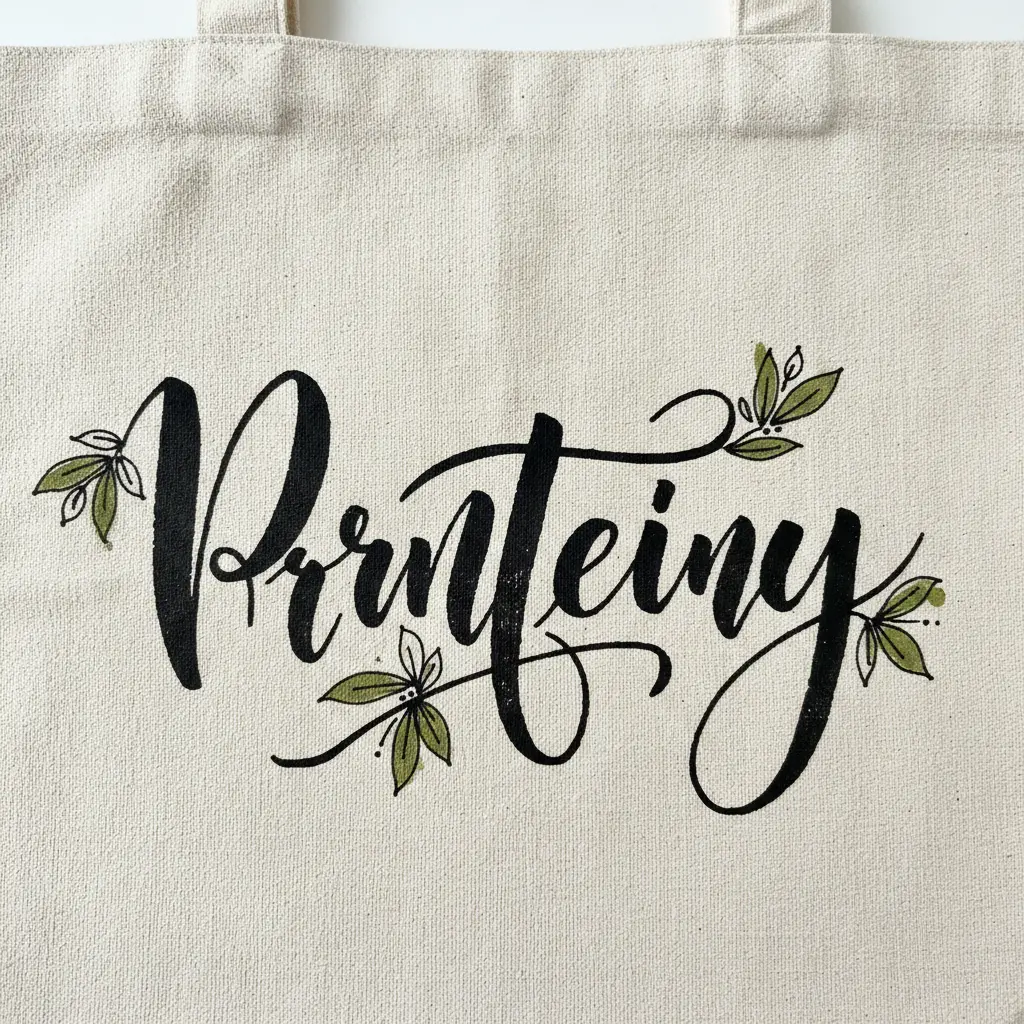
Personalizing everyday carry items represents practical sharpie marker craft ideas you will use daily. The trick is transferring your elegant script design cleanly onto the fabric before you start. You will need a plain canvas or linen tote bag, your favorite fabric paints, and a barrier to stop bleed-through.
For the calligraphy itself, use a brush-tip fabric marker for easy control or go the traditional route with a fine brush and paint. Isn’t it amazing how a single word in beautiful script can transform an entire bag? It works because it combines a useful item with your unique creative expression.
My go-to tip is to always wash and iron the bag first to prevent future shrinking. This project is a fantastic creative outlet, and you will love the elegant result. Feel proud when you carry that custom creation around town.
Heat Setting Methods for Long Term Preservation
Protecting your sharpie marker craft ideas from wear and tear means remembering the most important final step. You have to bake your piece in a standard kitchen oven to set the ink permanently into the surface. Place your decorated mug or plate into a cold oven, set the temperature to 350 degrees Fahrenheit, and let it bake for thirty minutes.
Let the item cool down completely inside the oven to prevent thermal shock, which causes cracks. This process bonds the pigment to the material, making it dishwasher-safe for daily use. For items that cannot be baked, like certain plastics, you must use a permanent adhesive sealant spray formulated for slick surfaces to lock in your work.
Conclusion
Sharpie art is about taking something ordinary and making it unmistakably yours. The mug you doodle while listening to music, the rock you dot with mandala patterns on a sunny afternoon—those are the things you reach for later and smile. If one of these sharpie marker craft ideas sparked a new vision, I hope you run with it immediately.
Start with the project that matches the surface you already have on hand, and test your markers on a scrap first. The oil-based versus water-based difference really matters, and a good sealant keeps your work looking fresh for years. You have the skills now, so go make something that feels like you.
FAQs
Q: Do Sharpie designs wash off fabric or mugs?
A: Regular Sharpie ink fades on fabric and non-porous surfaces without proper setting. For fabric, heat-set the design with an iron. For mugs, use oil-based Sharpie paint pens and bake the piece in a cool oven to set the ink permanently.
Q: Can I use regular Sharpies on glass or ceramic?
A: Regular water-based Sharpies do not bond well to glass or ceramic and wash off easily. Oil-based Sharpie paint pens are designed for non-porous surfaces and create a durable finish when baked. Always check your marker label before starting.
Q: How do I seal my Sharpie art so it lasts?
A: Use a clear acrylic sealant spray for porous items like wood and rocks. For fabric, heat-setting acts as the sealant. For baked oil-based projects on ceramic or glass, hand-washing is recommended. Apply sealant in light, even coats and let dry fully between layers.
Q: What surfaces work best for Sharpie crafts?
A: Porous surfaces like wood, paper, and fabric accept regular Sharpie ink well. Non-porous surfaces like glass, ceramic, and plastic require oil-based paint pens. Smooth, clean surfaces help the marker glide and produce crisp lines, so wipe down any item with rubbing alcohol first.
Q: How do I fix a mistake on a Sharpie craft project?
A: On non-porous surfaces, a cotton swab dipped in rubbing alcohol removes fresh Sharpie ink cleanly. On fabric or wood, a small amount of rubbing alcohol may lighten the mark, but incorporating the mistake into the design often works better. Always test in a hidden area first.