The ten ideas here turn foraged finds into autumn accents with a clear, curated aesthetic. They are arranged from quick projects to more detailed pieces, so you start wherever your inspiration hits. Grab your glue gun and bring a little woodland elegance home.
Sourcing Recycled Materials For Autumn Textures
The key to making realistic diy fall acorn decorations is pairing a smooth body with a rough cap, so start with a plastic milk jug lid for a sturdy, bulbous base. You need a material with enough structural integrity to hold a heavier, textured cap without drooping. For the cap itself, look for fibrous newsprint or the ridged surface of corrugated cardboard, which mimics the natural patterns found outdoors.
I always save my egg cartons for this purpose too, as the paper pulp gives a wonderfully organic feel. The good news is these materials are free, and their different weights create that perfect natural juxtaposition we love in autumn decor.
Selecting The Perfect Rustic Fall Color Palette
A glossy finish ruins your diy fall acorn decorations instantly, so you want to stick with matte paints. Look for a burnt orange with low saturation for the main body, then add depth with a wash of deep chocolate brown around the base. For the textured cap, mix a little black into a raw ochre to create a rich russet tone.
Trust me on this, a little goes a long way. Dry brushing these colors over your recycled materials will highlight their natural texture and give you that warm, woodland-inspired look. Your finished piece will feel authentically autumnal.
1. Metallic Gold Dipped Acorn Wreath — An Elegant Entryway Statement
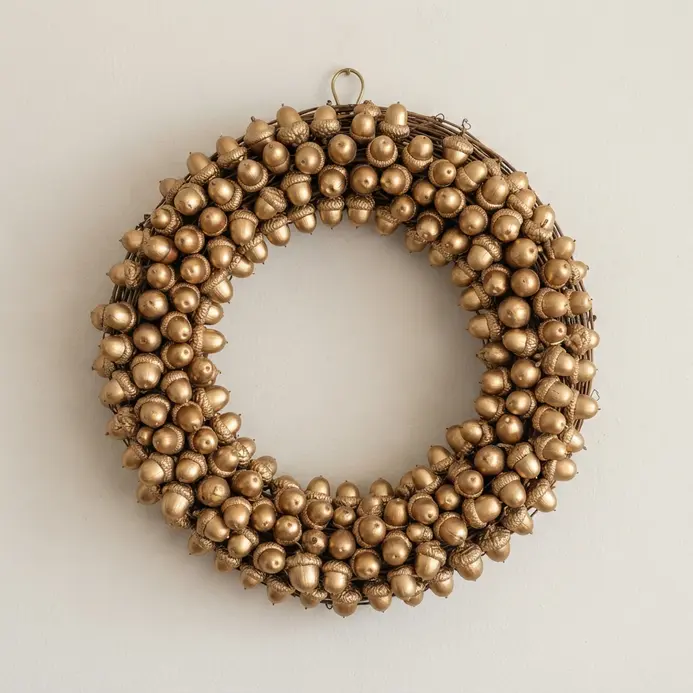
Who would have thought acorns could look this glamorous? This project transforms a simple natural find into a stunning piece of entryway decor. You will dip just the caps of your collected acorns in metallic gold paint, creating a beautiful contrast between the shimmering tops and the earthy brown nuts.
Trust me, the secret to a lush, full look is using a huge number of acorns. You will need to glue them tightly onto your wreath form, all facing the same direction. I love how this blend of organic texture and refined gold feels both cozy and elegant, making it a standout among diy fall acorn decorations.
Before you start gluing, it is smart to read a full guide on crafting a fall acorn wreath for essential tips on prepping your materials. This ensures your beautiful creation lasts for seasons to come.
2. Glittered Natural Acorn Candle Holder — Subtle Sparkle for Tabletops
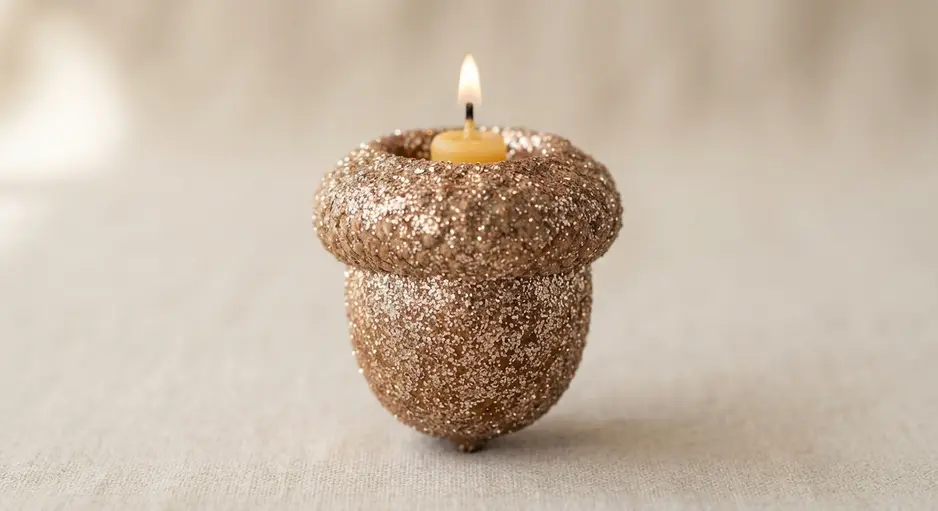
Isn’t it amazing how a little sparkle transforms something you find on a walk? You start with clean, dry acorns and apply a fine glitter to just the caps for your diy fall acorn decorations project. I love how the natural texture shows through the shimmer.
The trick is to use a light dusting so it looks like morning frost, not a disco ball. You then need to create a stable spot for a tea light, which often means securing the acorn to a small base. Trust me, this step is non-negotiable for safety.
It works because it captures that cozy, rustic feeling of fall but adds a bit of festive magic for your table. If you are gathering your own acorns, you might also make some unique fall acorns from easter eggs for a fun indoor option. Try it and feel the warmth it brings to your space.
3. Pastel Painted Acorn Table Centerpiece — A Soft Autumn Palette
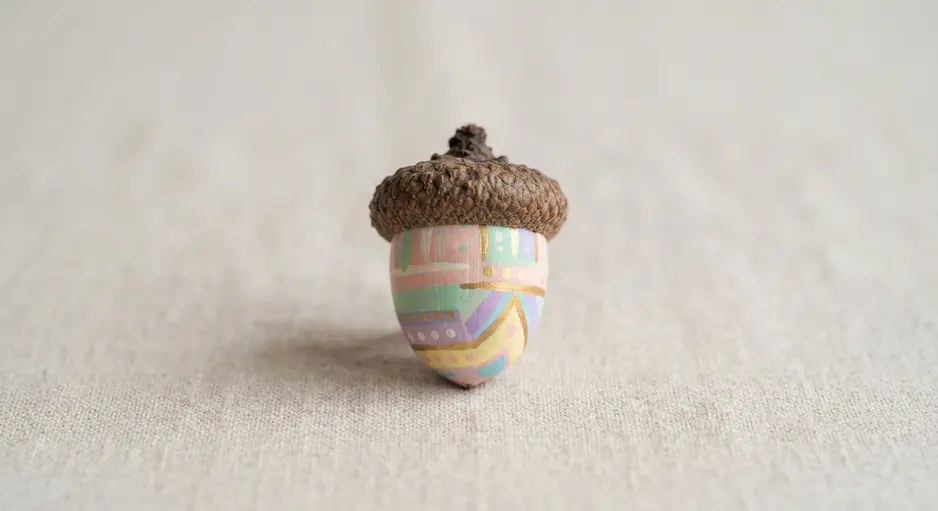
Who says autumn decor has to be all orange and brown? This centerpiece swaps the traditional palette for a dreamy, soft look that proves diy fall acorn decorations feel surprisingly elegant. You will paint the acorns in colors like pale blush or soft sage, letting the natural texture show through.
Your first step is to properly prepare your collected acorns by baking them to prevent any pests. For the cleanest paint job, gently pop the caps off before you start. Stick the acorns on toothpicks in a Styrofoam block to hold them while you paint and let them dry without smudges.
Once your pieces are sealed, arranging them is the fun part. Fill your chosen vessel with the painted acorns and add optional fillers like Spanish moss for texture. For another cozy autumn project, you can learn to make diy fall twine pumpkins to complement this serene look.
4. Rustic Twine Wrapped Acorn Garland — Simple Textural Charm
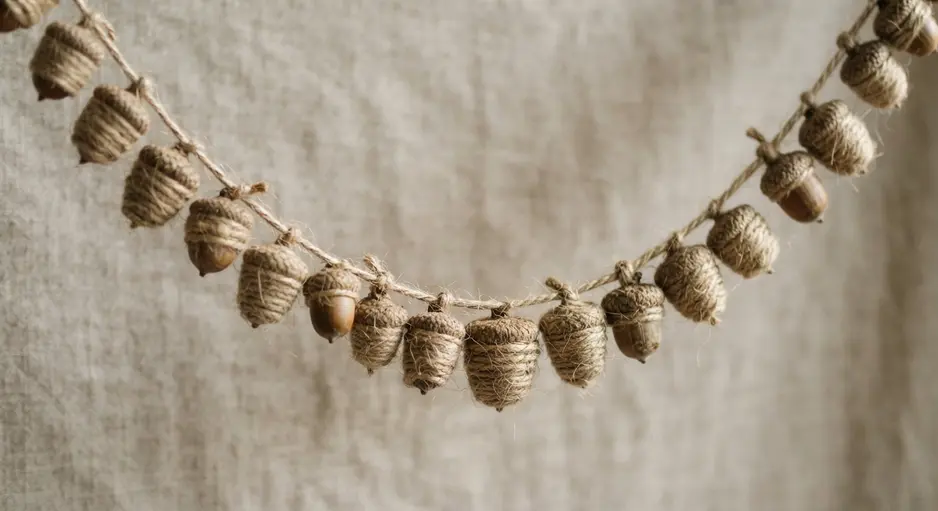
Who would have thought wrapping twine could add so much charm? This garland is a textural treat, with each piece secured tightly in jute twine to create a lovely ridged surface. You simply secure the end with a dab of glue, wrap up toward the cap, and glue each unit onto your main string.
Your biggest win here is the cozy, handmade vibe it creates instantly. It looks intricate, but the process is wonderfully simple and beginner-friendly. I love how most diy fall acorn decorations rely on such basic supplies to make something truly special for the season.
This project works beautifully to build out your mantel or doorway display. For a complete look, you can find instructions for a how to make a fall wreath to hang it alongside. Doesn’t that sound like a perfect afternoon?
5. Miniature Felted Woolen Acorn Ornaments — Cozy Handmade Touch
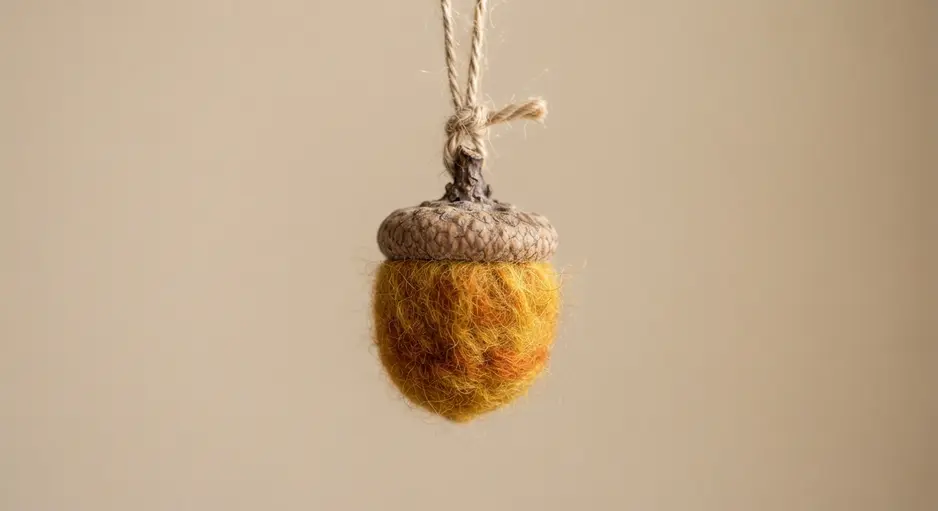
This one feels like a hug from autumn. You take a soft bit of wool roving and shape it with a felting needle into a tiny acorn body. Then you glue it into a real, dried acorn cap and add a loop for hanging.
Why does this wool project stand out among other diy fall acorn decorations? The soft fiber against the natural cap creates a perfect blend of handmade warmth and organic texture. It is a cozy, tactile decoration that feels deeply personal.
For a beautiful seasonal display, try pairing your finished ornaments with some decorating with thanksgiving leaves on your mantel or table. My top tip is to work slowly when needle felting to build a dense, sturdy shape. Trust me, the patience pays off when you see that perfect little acorn form.
6. Moss Adorned Acorn Napkin Rings — A Natural Tablescape Detail
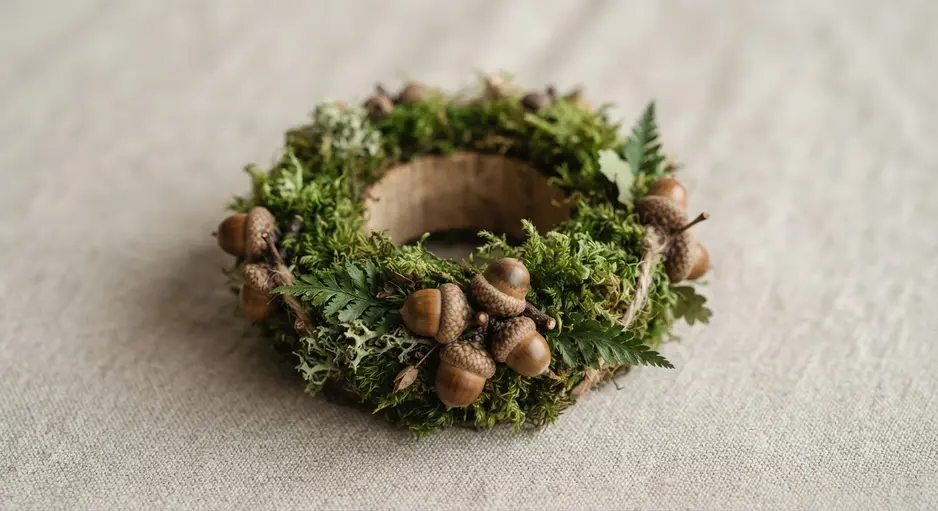
This project looks like something from a boutique catalog, but I promise it is wonderfully simple. You start by filling clean, dry acorn caps with clumps of preserved moss, creating a soft little dome. Then you just hot glue that natural ornament onto a plain napkin ring base.
The magic is in that perfect mix of textures, which explains why so many successful diy fall acorn decorations rely on contrasting elements. It feels so organic and earthy, instantly warming up your autumn table. Ever wanted a tablescape that looks collected instead of overly curated?
For a cohesive woodland theme, your finished napkin rings pair beautifully with other foraged elements like creating fox leaf art as a centerpiece. That combination builds a full, immersive natural vibe. Doesn’t that sound inviting?
7. Polished Wooden Bead Acorn Accents — Modern Organic Style
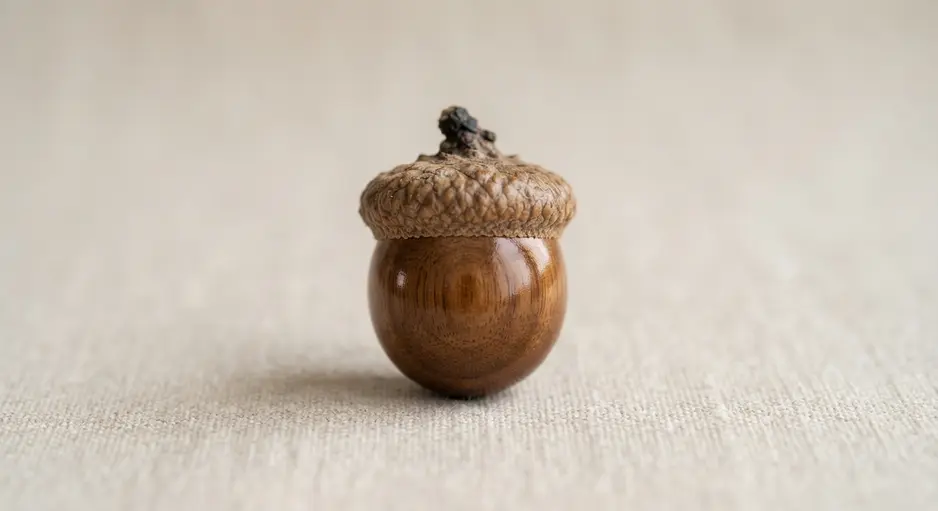
This project gives you that perfect mix of natural and sleek. You take a larger wooden bead for the body and a smaller, flatter one for the cap, then polish them to a smooth shine. I love using a hardwood like walnut for its rich grain.
Glue them together, and you have a minimalist accent that feels amazing in your hand. The polished wood elevates a simple shape into something sophisticated, proving the sheer versatility of diy fall acorn decorations. It brings warmth and a quiet, crafted feel to a space.
For a cozy companion project, try making a rustic flannel star ornament to add some soft, tactile contrast. Does that not look stunning?
8. Patterned Acrylic Painted Acorn Collection — Artistic and Playful
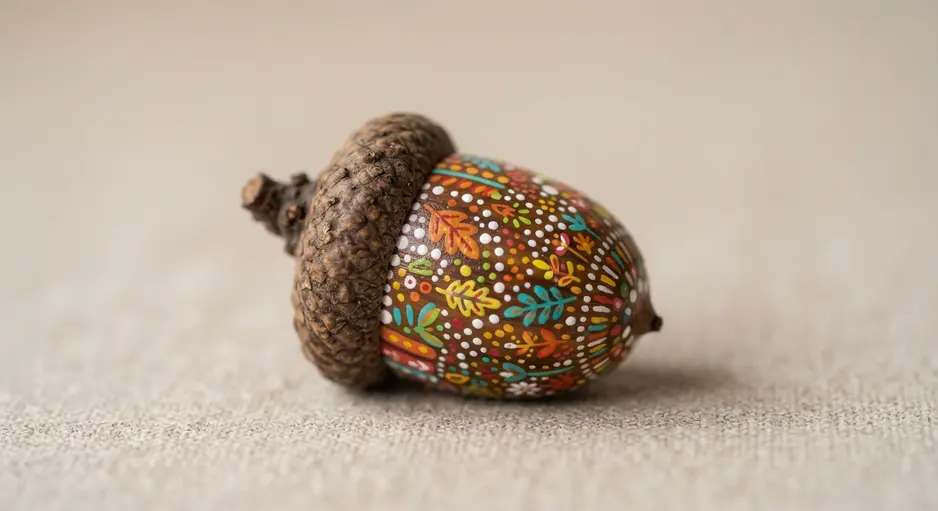
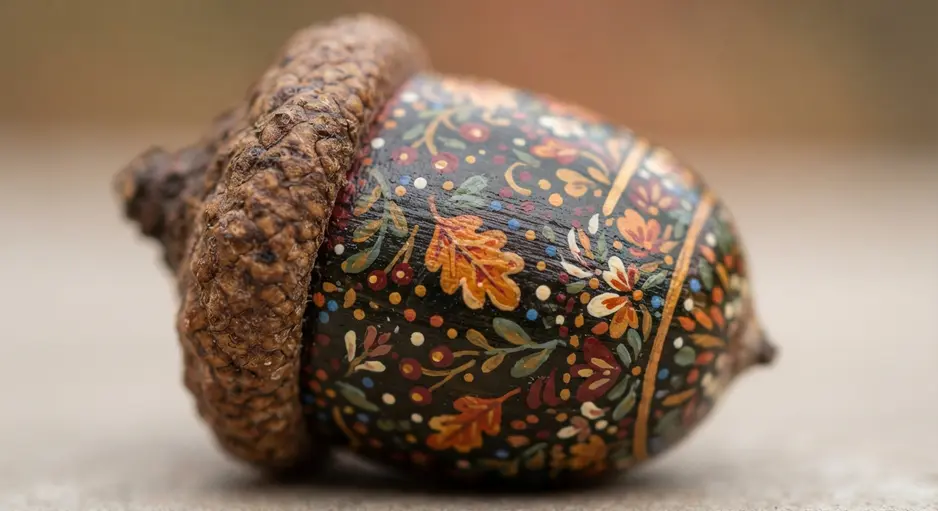
This is the project that proves careful painting transforms the most humble find into gallery-worthy diy fall acorn decorations. You start by giving your cleaned acorns a solid base coat of acrylic paint and letting it dry completely. Then, with your finest brush, you add playful patterns like polka dots, geometric lines, or tiny florals, working with one color at a time.
The magic here is in the contrast between the natural, earthy acorn shape and your bold, artistic designs. I love how each one becomes a unique, miniature sculpture you can scatter on a mantel or arrange in a bowl. Isn’t it amazing how much personality a few careful strokes add?
The final, crucial step is sealing your work with a clear, non-yellowing varnish to protect all that detail and make the colors pop. Reading a guide on making a log candle holder will give you great tips on cleaning and drying found wood items properly. Trust me, taking that extra prep time ensures your playful acorn art lasts for seasons to come.
9. Dried Floral Embellished Acorn Cluster — Romantic Autumn Bouquet
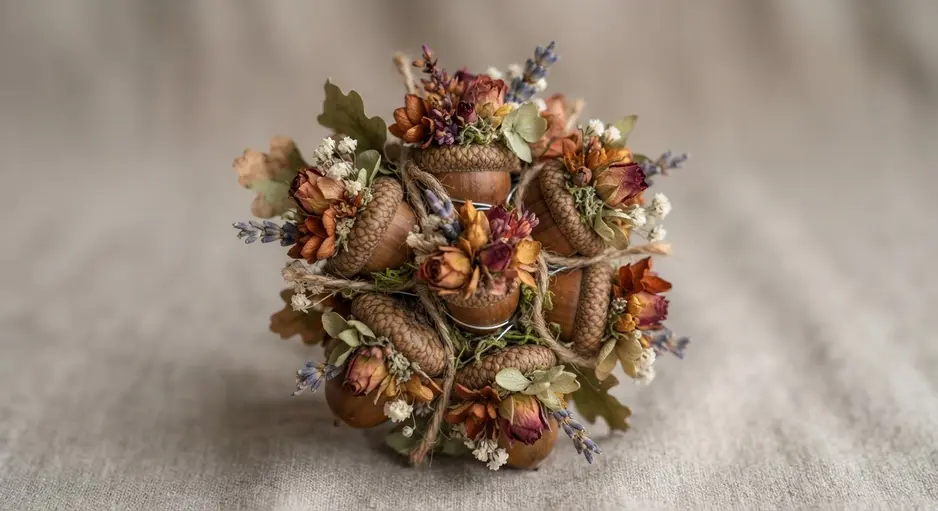
This is my favorite project for adding a touch of soft romance to autumn. You combine rustic nuts with delicate blooms, a proven formula for beautiful diy fall acorn decorations. Then you tuck in delicate dried flowers and foliage alongside the hardened shells.
I love using small dried roses and fluffy bunny tails among the nuts for that whimsical, gathered-from-the-woods feel. Your biggest tip is to use a low-temperature hot glue gun to protect those fragile blooms from heat damage. Add your textural bits like seed pods last, and step back often to avoid overstuffing.
The result is a stunning, long-lasting centerpiece that pairs beautifully with other seasonal decor, like a spooky halloween wreath on your front door. Does that not look enchanting?
10. Velvet Fabric Covered Acorn Set — Luxe Textural Contrast
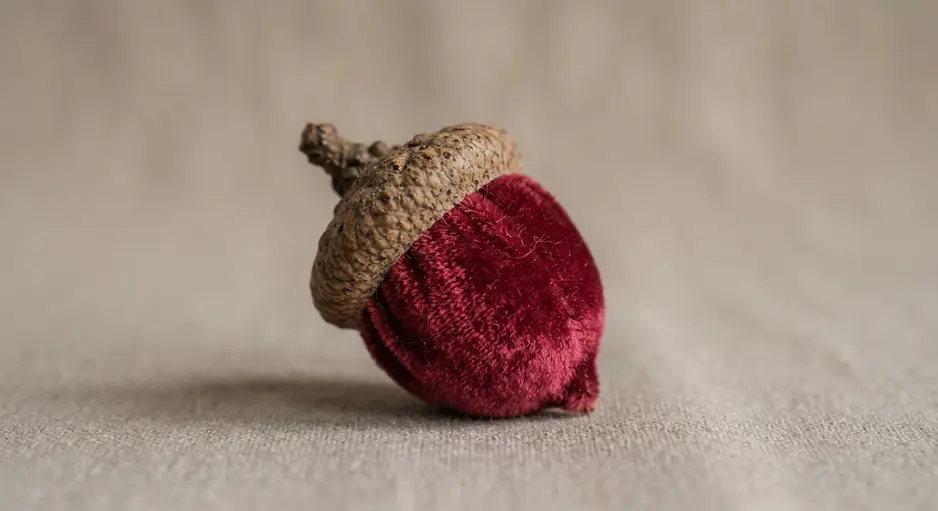
Who would have thought velvet could make diy fall acorn decorations feel so effortlessly elegant? This project creates a stunning contrast by pairing a real, rustic acorn cap with a body wrapped in plush velvet fabric. You cut a small piece of premium velvet and carefully stretch it around a base.
Secure it with a tiny bit of strong adhesive before attaching the cap to finish. It is that simple juxtaposition of natural and luxurious that makes these pieces feel so special. The key is using a minimal amount of glue to prevent any seeping and get that smooth, professional wrap.
I love how this set works for both autumn displays and year-round decor on a shelf. Once you have a set finished, they make wonderful handmade gifts. Does that not look stunning?
Protecting Finished Crafts With Matte Clear Sealants
One layer of a matte acrylic spray varnish takes two minutes and protects weeks of work from dust and handling. You must use a matte formula to lock in your carefully chosen rustic palette without adding synthetic shine. This final coat is essential for any serious diy fall acorn decorations.
The trick is to let all paints and glues dry completely first, then apply two light, even coats from about twelve inches away. This step ensures the adhesion between your lightweight paper pulp and heavier plastic base stays secure for seasons to come. Your pieces will keep their beautiful, desaturated finish and feel solid in your hands.
Conclusion
So, which of these projects called to your creative side? I find that the best part of working with natural materials is how they quietly connect us to the season. Your finished diy fall acorn decorations tell a little story that started with a simple walk outside. For your next step, remember that preserving your acorns is key for projects you want to enjoy year after year.
A quick bake in a low oven dries them out thoroughly and prevents any unwanted guests. With that simple tip, you are all set to make autumn treasures that feel both personal and polished. The beauty of these ideas is how they let the humble acorn shine in so many different ways.
FAQs
Q: How do I prepare acorns I find outside for crafting?
A: First, rinse them in cool water to remove dirt. Inspect each acorn for small holes, which indicate pests, and discard those. Then, spread them on a baking sheet and bake at 200 degrees Fahrenheit for about two hours. This kills any remaining insects and prevents mold.
Q: What is the best glue to use for attaching acorn caps?
A: A hot glue gun provides a strong, instant bond that holds the cap securely to the nut or to other materials. For a less visible bond on delicate work, a clear-drying craft glue works, but it requires a longer clamping or drying time.
Q: Will painted acorns last until next autumn?
A: Yes, if properly prepared. The baked, dried acorn provides a stable base. Acrylic paint seals the surface. Store finished decorations in a cool, dry place inside a sealed container to protect them from humidity and dust during the off-season.
Q: Can I use these acorn crafts outdoors?
A: Most are best for indoor use. Paint and glue are not fully weatherproof. For outdoor decor, consider using the acorns in their natural state within a protected area, like under a covered porch, or seal them thoroughly with a clear outdoor-rated sealant.
Q: My acorn caps keep falling off. What should I do?
A: This is common with fresh acorns as they dry and shrink. Always use acorns that have been baked and fully dried. If a cap is loose, add a small dab of hot glue inside it before pressing it firmly onto the nut. Let it cool completely before handling.