Sourcing Quality Rattail Cord and Fastener Supplies
Your frog closure will only look as good as the cord you start with, so trust me on this, genuine silk rattail cord is your non-negotiable foundation. This specific material has the perfect balance of flexibility for intricate knotting and a subtle sheen that catches the light beautifully, unlike stiffer synthetics. You want to avoid cords labeled for general crafts that are too thick and will make your geometric loops bulky and uneven. When reviewing DIY closure necklace ideas, always look for a diameter of 1mm or 2mm for a delicate, jewelry-appropriate scale. The good news is that a single spool in a rich color like burgundy or navy can yield multiple statement pieces, making it a fantastic investment for your studio. For the matching loop side, source the same cord to ensure perfect color and texture harmony, which is critical for executing any of these DIY closure necklace ideas with a balanced final look.
Achieving Proper Tension During Complex Knot Construction
The secret to a symmetrical pankou lies in maintaining absolutely consistent tension on every single loop as you tie it. Managing that steady pull across all your DIY closure necklace ideas prevents structural warping from day one. Beginners often make the mistake of pulling the cord tight only at the end, which distorts the entire plum blossom motif and leaves you with a lopsided knot. Instead, use your fingernail or a blunt tapestry needle to nudge each curve into place as you form it, checking the shape from all angles before moving on. Keep a small, clean weight like a charm or bead on the loose ends to prevent accidental unravelling while your hands are busy. You will notice that high-quality rayon or silk cord has just enough memory to hold a crisp shape without fighting you, which is why material choice directly impacts your tension control. Practice this mindful approach on a simple double-connection knot first to build the muscle memory your DIY closure necklace ideas require.
1. Silk Frog Button Bearded Choker – A Touch of Opulence
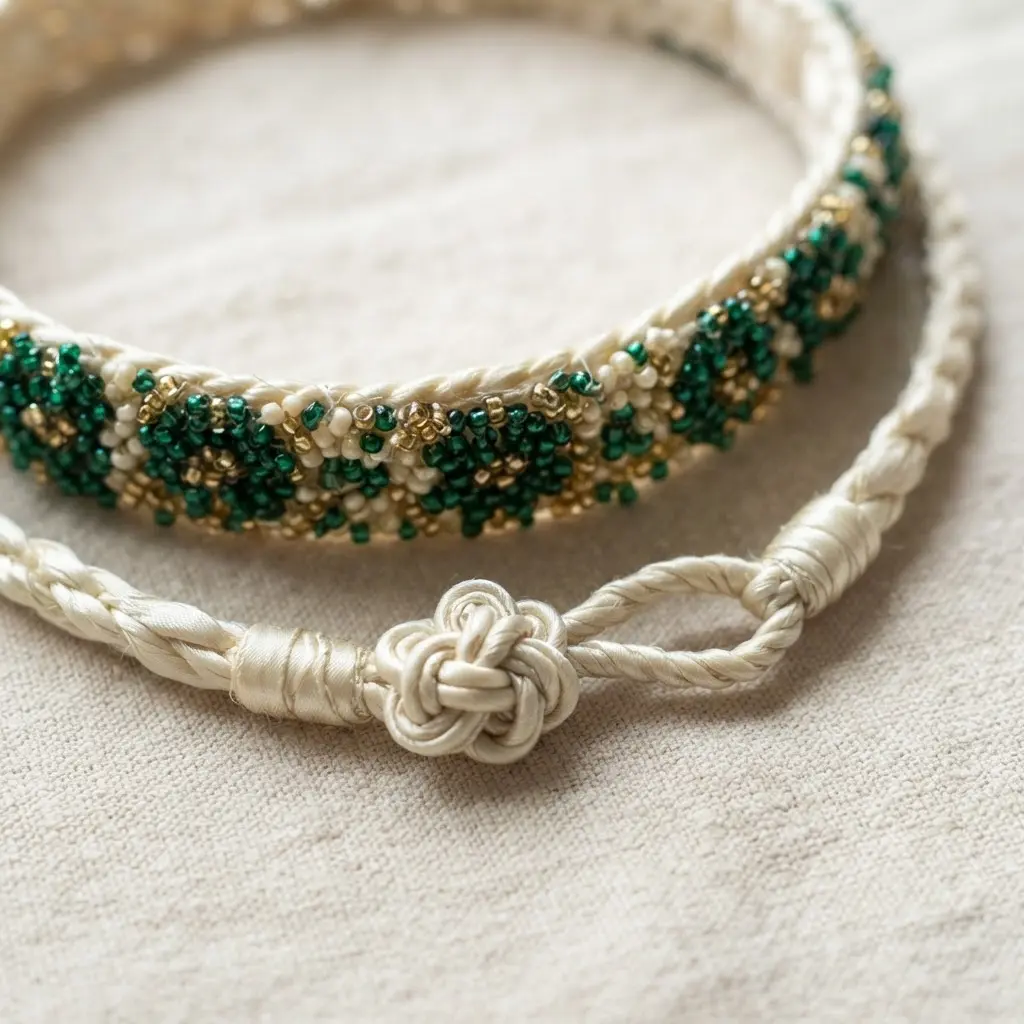
Ever wanted a necklace that feels more like a piece of art? This choker is it. The base is a silk ribbon that drapes beautifully, but the real star is the ornate frog button closure you tie or sew on. You then hand-sew or string your choice of beads, like pearls or crystals, directly onto the silk for that extra sparkle.
It works because the frog button is such a unique, functional focal point—it feels special, not just like another clasp. Many polished DIY closure necklace ideas rely on this exact balance of secure stitching and focal detail. Plan your bead placement carefully though, so it feels balanced and not cluttered. Trust me, the extra time securing every stitch is worth it when you see the final, opulent result.
2. Brocade Knot Toggle Ribbon Necklace – Textured Elegance
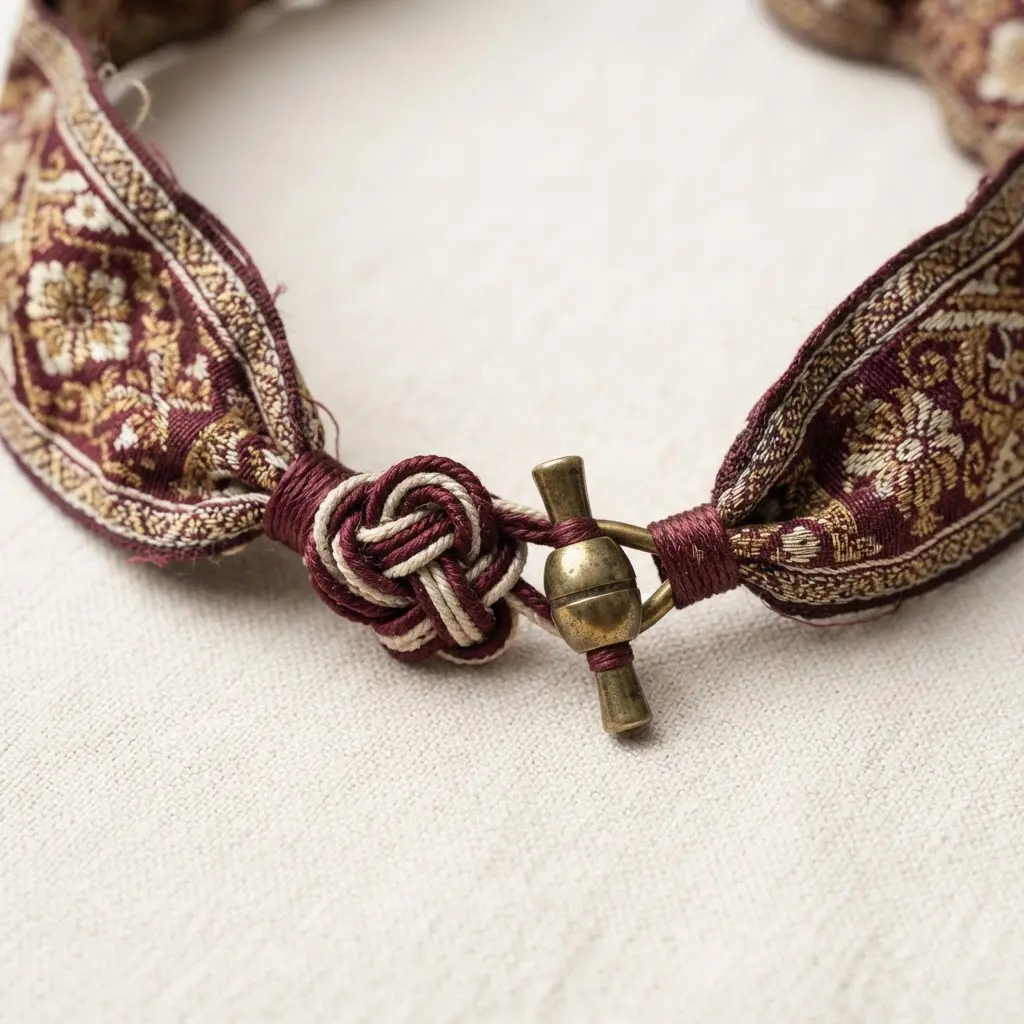
This one looks like a couture runway piece, but the secret is in the ribbon selection. You form the main knot first, creating those beautiful loops and folds, then secure it with a dab of strong adhesive. The final step is attaching the toggle clasp to each ribbon end, which becomes part of the design rather than hiding it.
I love how this style feels so luxurious to wear because of that rich texture. It works because the knot is a true focal point, adding handcrafted sophistication you just cannot buy. For a lovely coordinating look, you could pair this with beautiful rolled flower necklaces for a full, romantic set.
My go-to tip? Master your knot spacing, since it remains a core secret behind professional DIY closure necklace ideas. The satisfaction of tying that perfect brocade knot is absolutely worth it.
3. Metallic Thread Frog Closure Chandelier – Dripping with Detail
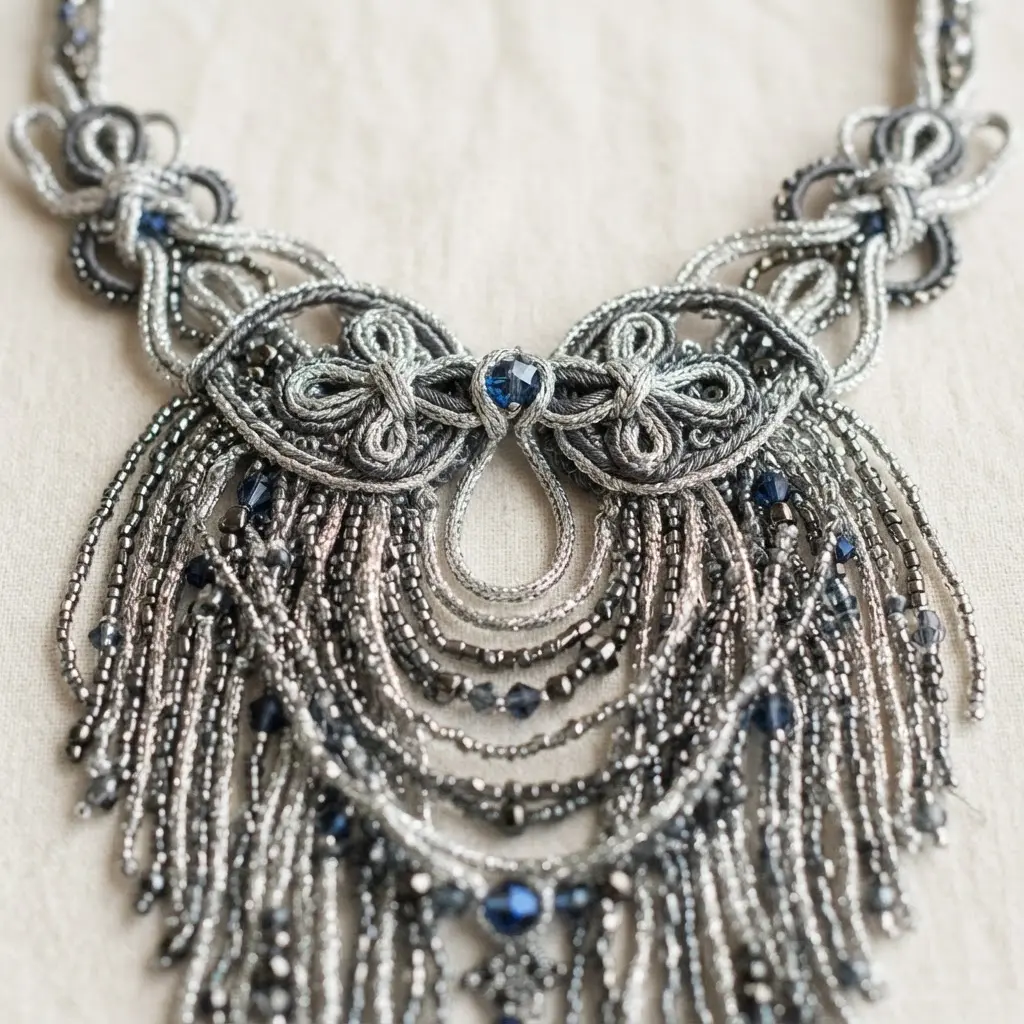
This chandelier looks like it would take forever, but the core technique is surprisingly straightforward once you break it down. You start by making oversized versions of a classic frog closure using braided metallic wire. Think of it as building giant, interwoven loops and knots that become the main decorative modules. Then, you weave tiny LED strips or fiber optic strands right into those metallic forms before linking all the modules together into a cascading or spherical shape.
It works because the light catches every twist and shimmer of the metal, creating this incredible, living sparkle. A key tip is to perfect your weaving tension on a small sample piece first, which is a staple technique for advanced DIY closure necklace ideas. For a similar level of intricate, handmade elegance, you might enjoy these anthropologie inspired necklace projects. The finishing payoff is absolutely stunning.
4. Velvet Cord Front Frog Necklace – Rich and Simple
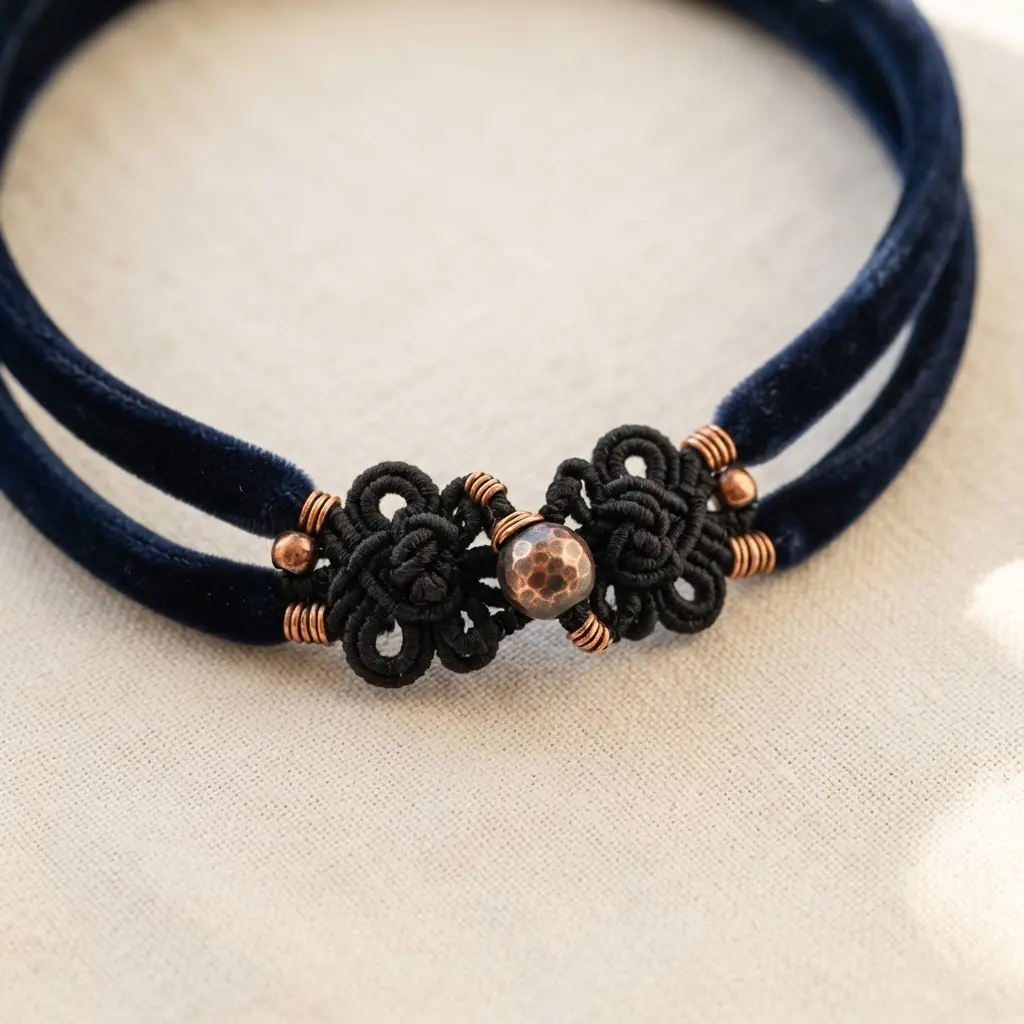
Ever wanted a piece that feels expensive but is surprisingly simple to make? This one is for you. The core is a velvet cord cut to your perfect length. You then attach a single, beautiful frog pendant right at the front center.
I love how the plush texture of the cord makes the metal or gemstone frog pop. It works because the design is uncluttered, letting that one meaningful symbol take center stage. Your finished necklace will have a quiet, luxurious feel.
Securing your edges properly is a hallmark of polished DIY closure necklace ideas that last for years. For a similar bold statement with a different edge, you could look into edgy spike necklace designs. Just be sure to use strong cord ends so your velvet doesn’t fray. Trust me, that secure finish makes all the difference.
5. Multi-Strand Pearl Frog Button Collar – Classic Fusion
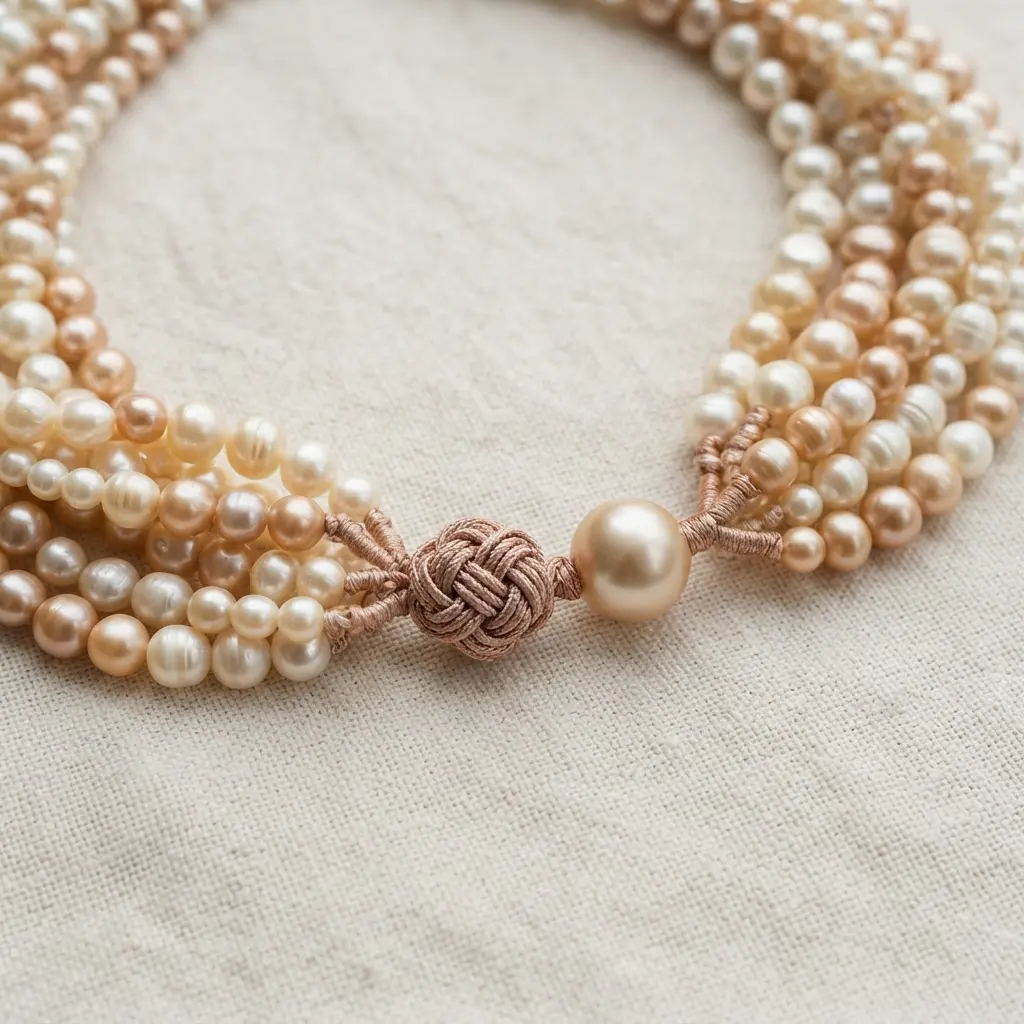
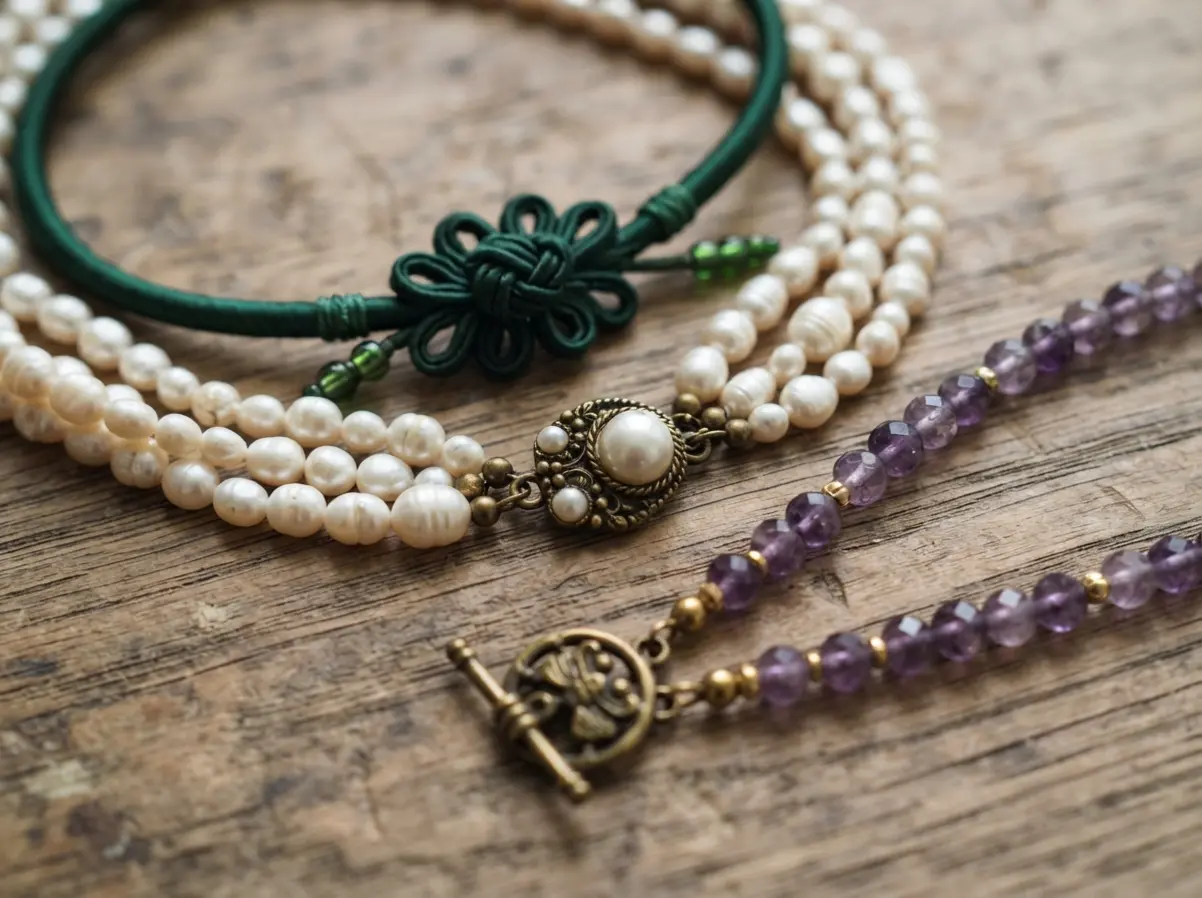
Ever wondered how to make a classic pearl necklace truly unique? This collar is your answer. It combines the timeless look of multiple pearl strands with the ornate charm of a frog button closure. You will string several graduated strands of lustrous pearls and attach each end to the decorative knot and loop of the button, creating that elegant drape.
The magic happens because it feels both incredibly refined and delightfully personal. Many elegant DIY closure necklace ideas follow this exact formula of classic beads and structural knots. I love that it is a statement piece without shouting. Your key to a perfect drape is checking the strand tension as you attach them. Get that right, and you have a stunning piece that looks far more complex than it is to make. For another project that blends classic charm with handmade detail, look at these charming heart necklace crafts.
Trust me, when you finish this and see it catch the light, you will feel so proud.
6. Satin Knot Statement Bib Necklace – Bold and Sculptural
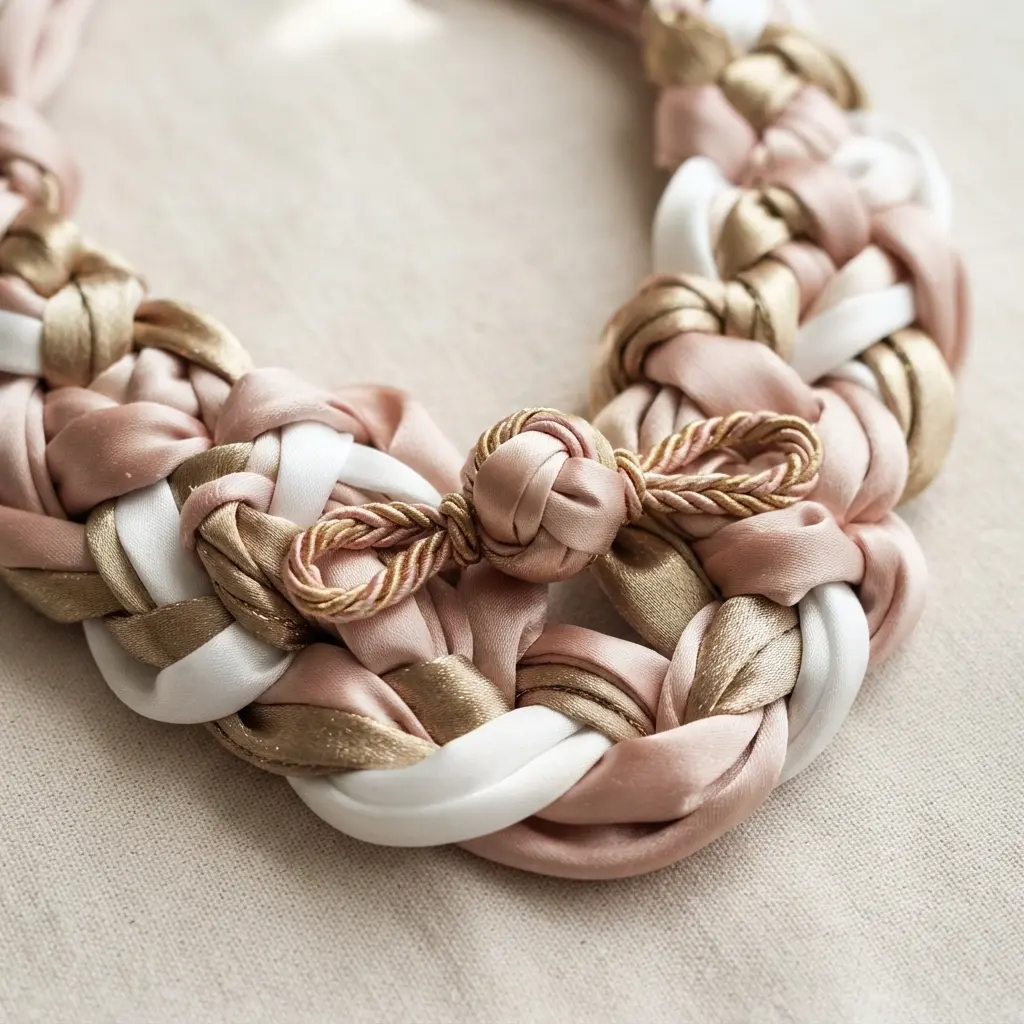
Who would have thought fabric could look so sculptural? This project is all about creating three-dimensional volume with satin knots arranged across your collarbone. You will carefully tie each knot to hold a firm, defined shape before sewing them onto a fabric or felt backing. It sounds complex, but the process is meditative and the result is a stunning piece of wearable art.
I love how the luxurious sheen of the satin catches the light, making the color pop. The key is planning your knot arrangement for a balanced look before you secure anything permanently. This necklace works because it offers a bold, artistic statement without any heavy gemstones, keeping it surprisingly comfortable.
For a fun and totally different fabric-based project, you can try making some fun popsicle stick necklaces with kids first to get comfortable working with unconventional materials. Trust me, taking your time with each knot is worth it. Careful assembly transforms basic fabric strips into standout DIY closure necklace ideas you will genuinely enjoy. Feel the satisfaction of creating a true conversation piece that is entirely your own.
7. Woven Leather Frog Closure Pendant – Textural Contrast

This one looks intricate, but trust me, the textural payoff is huge. Blending contrasting textures like this is a smart way to elevate standard DIY closure necklace ideas. You start by weaving strips of full-grain leather into a flat or curved pendant base, which gives you that wonderful, earthy texture. Then, you create the focal point by knotting thinner leather cords into a symmetrical frog closure and attaching it right to the woven center. The mix of the regular woven pattern with the dimensional, knotted closure is where the real magic happens.
I love this piece because it feels so satisfyingly handmade and interesting to touch. The contrast isn’t visual. Before you attach your bail, make sure you’ve practiced your knots on scrap leather for a clean finish. Your finished pendant will have this fantastic artisanal feel. For a fun, completely different textural direction, you could pair this earthy piece with some whimsical ice cream cone necklaces.
8. Cotton Cord Minimalist Frog Choker – Everyday Artisan
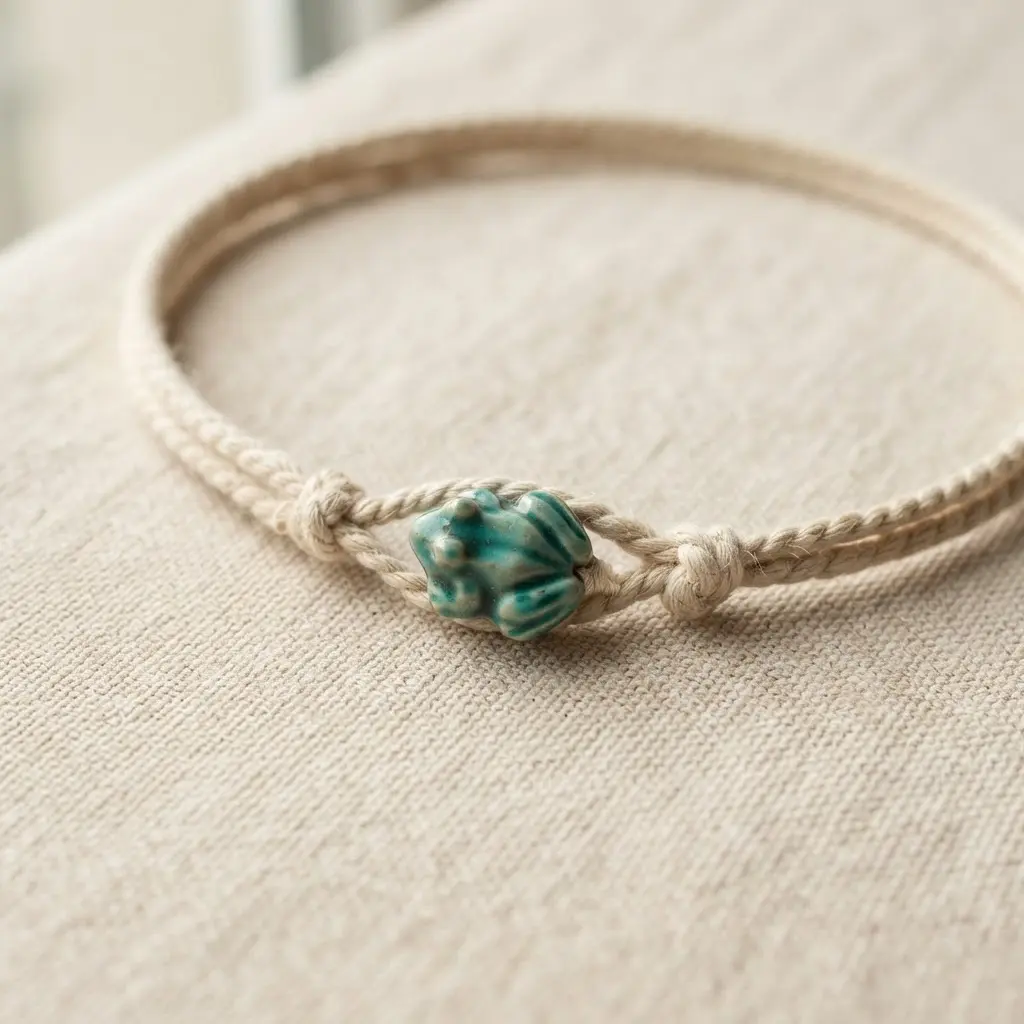
This one is my go-to for a personal touch that never feels loud. You start with a single strand of soft cotton cord, cut to a comfortable choker length. Slide on your small frog charm and finish each end with a simple lobster clasp for a secure, clean look.
It works because the cord is so agreeable for all-day wear, and the subtle charm adds just enough personality. Trust me, getting the length right is key. Finding the perfect fit is essential for comfortable DIY closure necklace ideas you will actually wear daily. Measure twice before you cut. You will love how this simple piece becomes a daily favorite.
9. Layered Chain Asian Knot Necklace – Modern Mix
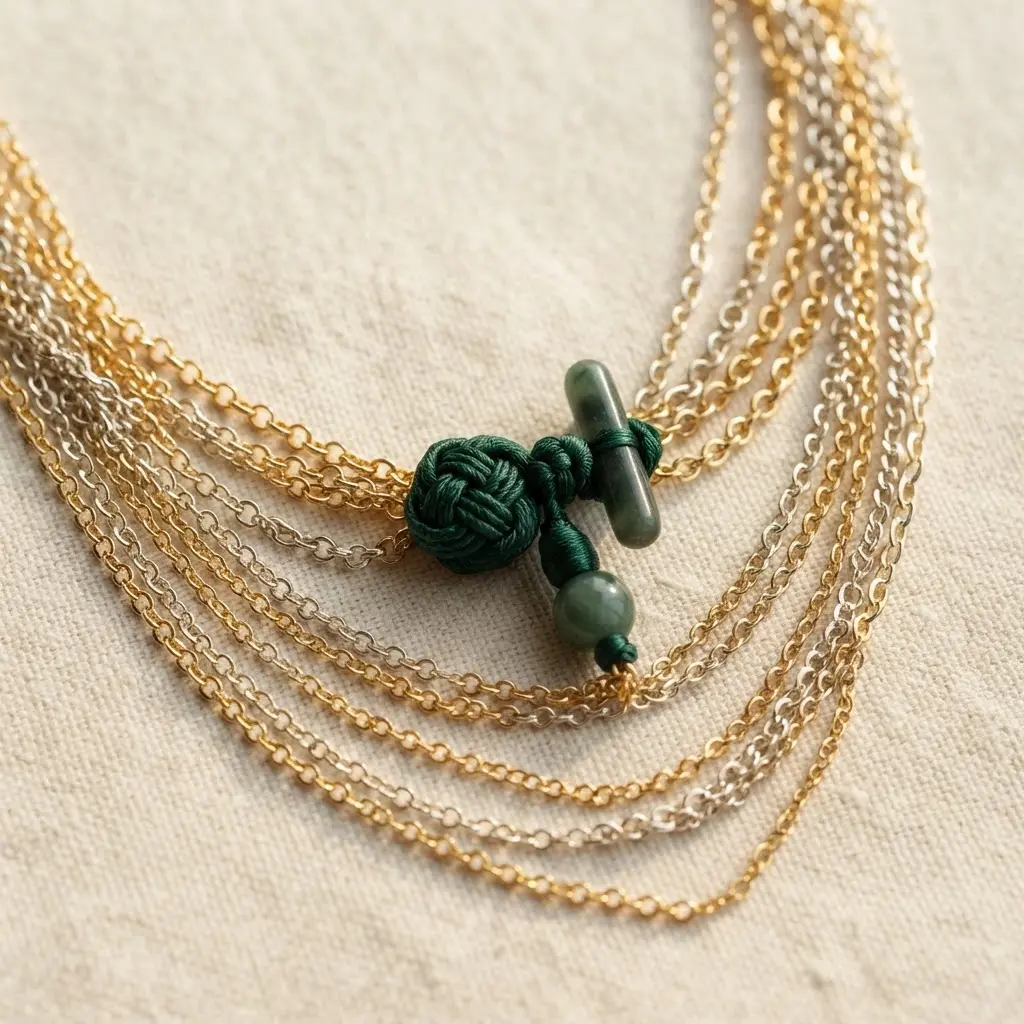
Ever wondered how to blend traditional symbols with a trendy layered look? Varying chain lengths is a reliable method for balancing intricate DIY closure necklace ideas. This necklace combines several different chain lengths and styles, with a metal Asian knot as the focal point. You will attach the chains to a single clasp for a unified piece, ensuring they hang nicely without tangling. The mix of textures and the modern take on a classic motif creates a piece that feels both timeless and fresh.
I love this one because it is so versatile. The key is to vary your chain lengths by at least two inches for a clean, layered effect. A lobster or toggle clasp works perfectly to secure all the strands at once. Try it and feel the satisfaction of wearing a unique, conversation-starting accessory you made yourself.
If you are drawn to playful and unique statement pieces, you might also enjoy the process of making a cute marshmallow peeps necklace for a fun seasonal twist.
10. Gemstone Beaded Frog Toggle Necklace – Colorful Focus
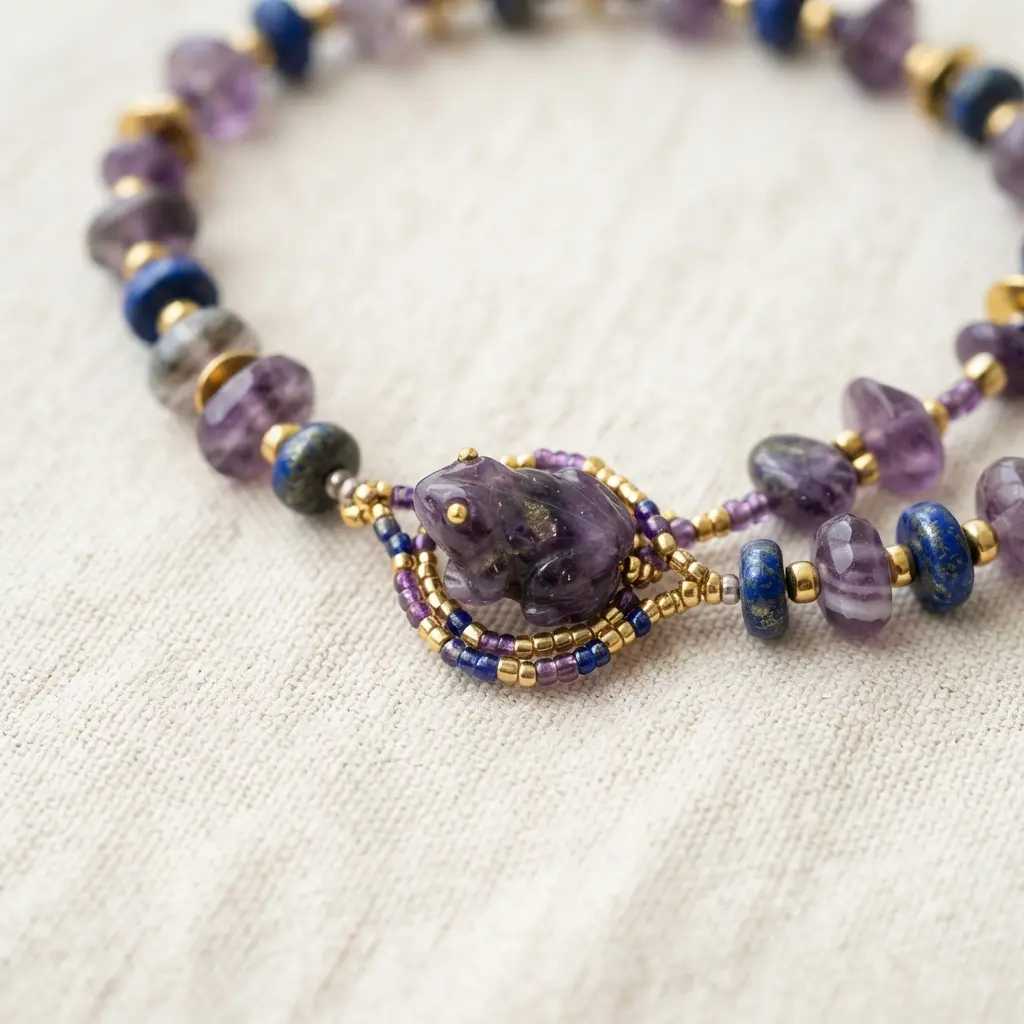
This one is pure fun. You get to play with a whole rainbow of gemstone beads like carnelian, peridot, and amethyst, arranging them in a way that makes your heart sing. Then, the star of the show is a little frog that serves as your clasp.
Why does it work so well? The vibrant stones feel earthy and joyful, while that playful frog toggle adds a unique, nature-loving touch you won’t find in store-bought pieces. It is a fantastic project if you have already made something like an adorable felt sparrow necklace and want to level up your beading skills with a more intricate closure. Mixing vibrant focal elements remains one of the most rewarding aspects of successful DIY closure necklace ideas. Trust me, the final click of that frog clasp is incredibly satisfying.
Stiffening Techniques for Finished Silk Cord Knots
A quick dip in diluted white craft glue is the professional trick to permanently set your hand-tied knot’s perfect shape. Mix one part glue with two parts water in a shallow dish, fully submerge your finished closure for a few seconds, then gently squeeze out the excess with your fingers. The key is to preserve all those delicate loops and not let them stick together, so you must carefully reshape the knot with a needle while it’s still damp. Lay it flat on wax paper to dry completely, which usually takes a few hours. This treatment gives the silk cord a slight, durable rigidity so it functions flawlessly as a fastener without ever drooping or losing its form. Your necklace will have that polished, intentional look where the closure truly acts as the focal point it was meant to be.
Conclusion
So, how did these ideas resonate with you? I hope this gallery sparked that wonderful feeling of possibility, where you can already picture the materials in your hands. Look at the potential you have to create something truly special—a piece that honors a beautiful tradition while expressing your own style. My best piece of advice is to choose one design that speaks to you most and gather your supplies. Start with a durable, high-contrast cord or thread to ensure your beautiful frog button closure stays secure and becomes a cherished part of your handmade collection. Finding your favorite among these DIY closure necklace ideas is just the first step. The journey from concept to finished piece you’ll adore is a creative path worth taking.
FAQs
Q: What is the best type of cord to use with a silk frog button?
A: For durability and a beautiful contrast, use a high-quality, smooth cord like silk rattail, satin, or velvet. These materials complement the button’s texture without causing excessive fraying. Avoid rough cords that might snag the delicate silk threads of the knot.
Q: How do I securely attach a frog button to a multi-strand necklace?
A: Create a solid anchor point by gathering all strands and binding them tightly with strong, reinforced thread before sewing on the button loop. You can also use a small metal end cap or a bead tip to neatly consolidate the ends, then attach the loop securely to that base.
Q: Can a frog button be used with a metal chain?
A: Yes, but choose a chain with smooth, oval links to prevent catching the silk. It works best when the frog button is used as a front-facing decorative element, with a simple jump ring or lobster clasp hidden at the back for the actual closure to reduce strain.
Q: Are these necklaces suitable for beginners?
A: Absolutely. Start with a single-strand design like the velvet cord or cotton cord choker. These projects focus on the beautiful closure without complex beadwork. The key is taking your time to sew the button loop on firmly and neatly.
Q: How do I prevent the frog button from twisting or lying flat?
A: Ensure the loop you create or attach is the correct size—snug but not tight. For a front-facing design, you can add a small stabilizer, like a flat bead or a second knot behind the button, to help it sit properly. Testing the drape with your materials first is always a good idea.