Foundational Typography Spacing and Letter Proportion
The fastest way to lose a child’s name in a busy project is to cram the letters too close together. You need generous spacing, called kerning, so each letterform has its own breathing room. When planning these name art projects for kids, young artists often draw the letters first and try to decorate the leftover space, which leads to a crowded mess. Instead, lightly sketch the entire name’s footprint as one large rectangle on your paper first. This visual boundary forces you to plan the composition and keep the name as the clear focal point.
Use simple, bold block letters for younger kids because they are easier to decorate and fill with collage materials. The good news is that this foundational step takes two minutes and prevents the most common beginner mistake of an unreadable final piece.
Selecting Durable Surfaces for Textural Artistry
Construction paper curls and buckles the moment you apply liquid glue, ruining any layered name art. You want a sturdy, rigid substrate that can handle wet adhesive, pressed beads, and multiple layers of paint. I always use poster board or medium-weight cardstock when setting up name art projects for kids because they lie flat and provide a solid foundation. Their smooth surface also takes pencil sketches for lettering beautifully and allows for crisp, clean cuts if you are making a silhouette name.
For a more tactile finish, consider mat board offcuts from a frame shop or even recycled cereal boxes covered with a fresh sheet of paper. These thicker materials give the finished piece a substantial, professional feel that holds up to enthusiastic handling in a classroom or on a bedroom wall.
1. Cardboard Name with Colorful Yarn Wrapping
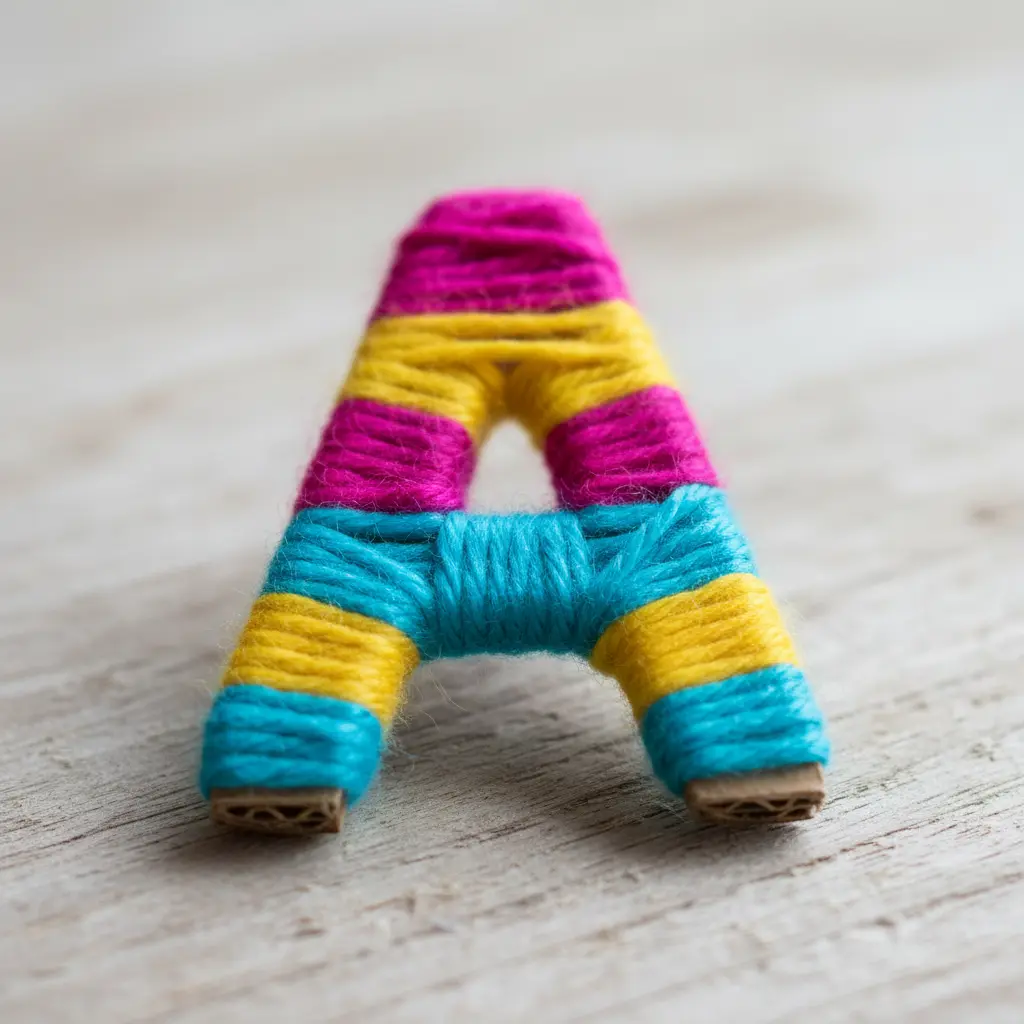
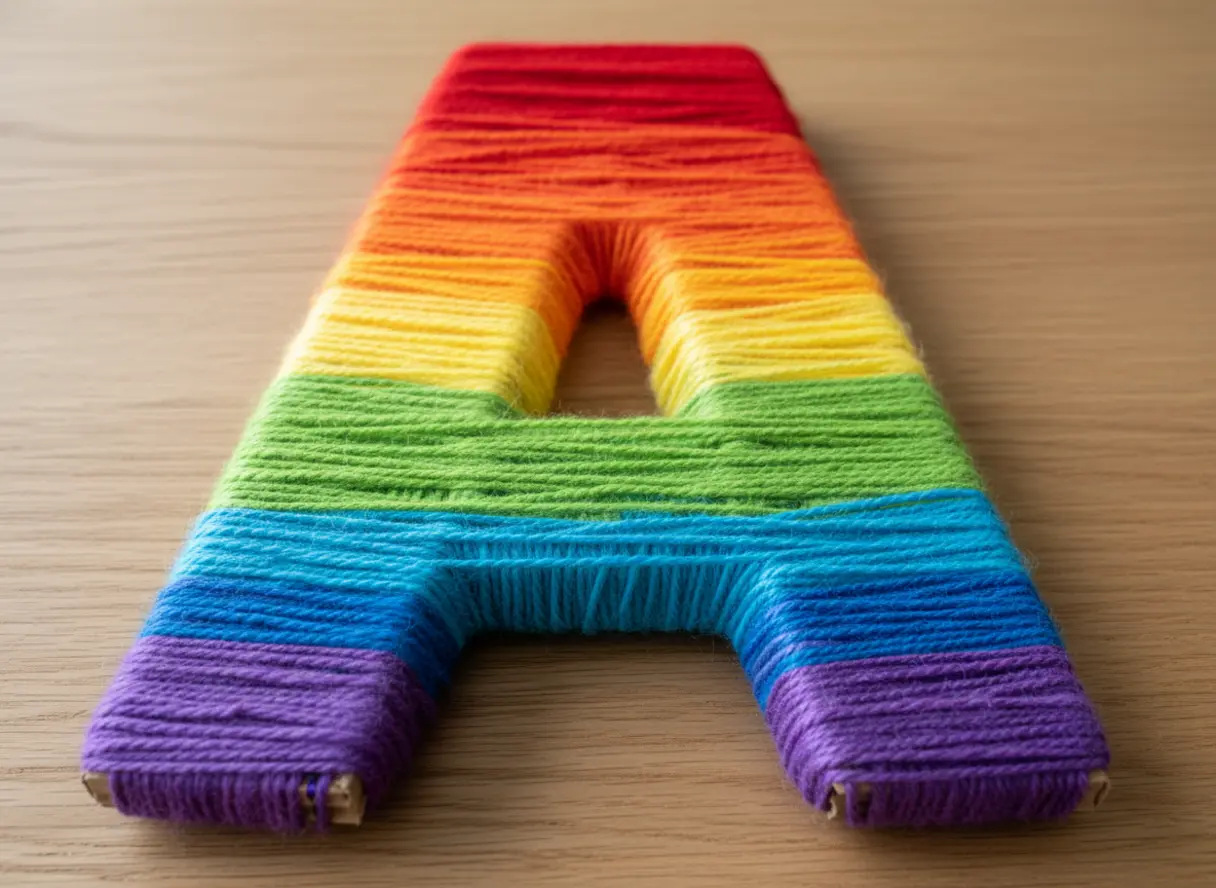
This looks so intricate, but trust me, it is a wonderfully simple and satisfying craft. You start by cutting thick block letters from sturdy corrugated cardboard. Then, you just wrap and wrap with your favorite yarn colors, securing the ends with hot glue on the back. I love how the texture builds up and the colors pop.
It works because the repetition is almost meditative, and you end up with a durable, personal piece of art. I find that name art projects for kids work best when you let the yarn build up naturally. A great first step is finding other creative craft ideas for kids to build their confidence with materials. You will feel so proud when you see that finished, vibrant name.
2. Finger Paint Rainbow Letter Study
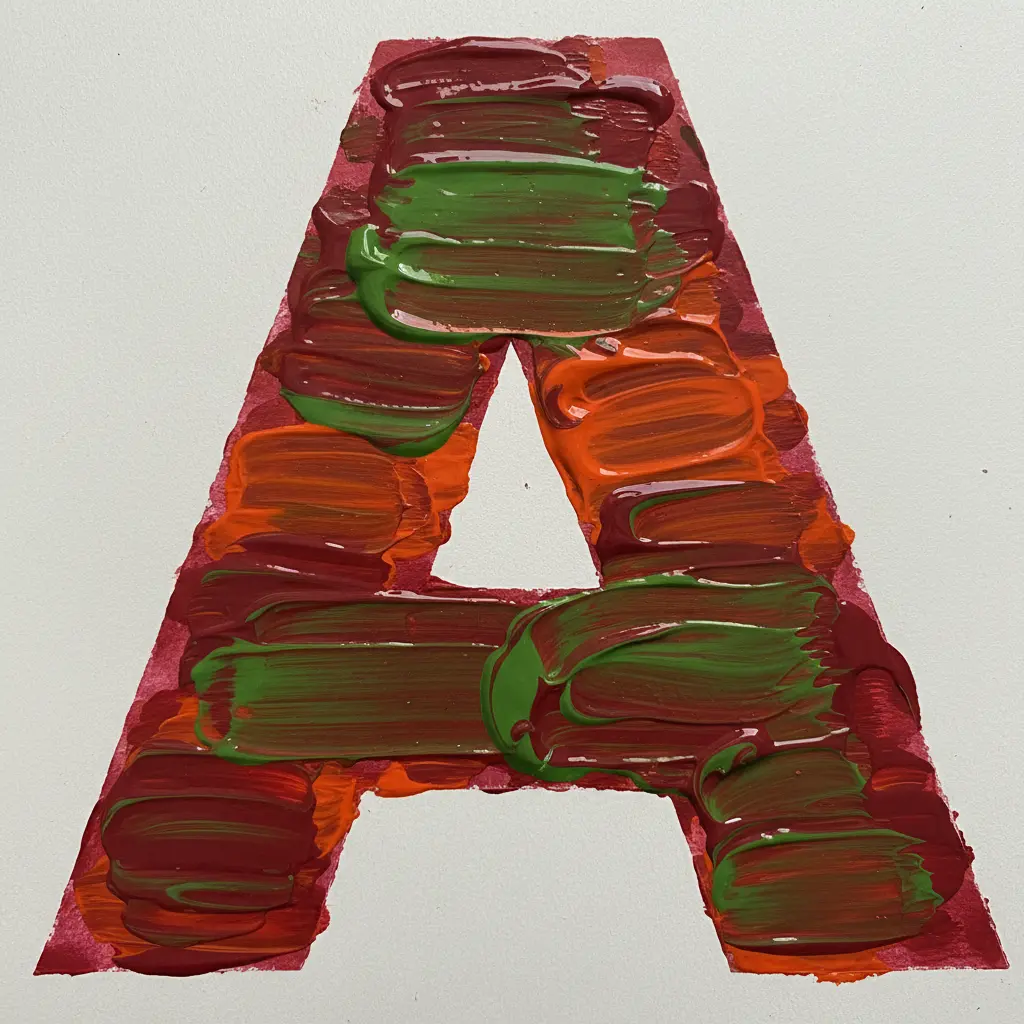
Does the thought of mixing paint and learning letters make you smile? This project is pure, messy joy. Setting up simple name art projects for kids creates an immediate sense of fun. Your child uses their fingers and a rainbow of washable finger paints to form big, bold letters. The result is a vibrant, tactile masterpiece that feels like play.
It works because the direct sensory input makes the shape of the letter stick in their memory. I love how personal each one turns out. A solid tip is to protect your space with a plastic tablecloth first so you can relax and enjoy the fun. This is a fantastic sensory activity to pair with other colorful art activities for kids. You will both feel so proud of the colorful alphabet you create.
3. Pressed Flower Name Collage Art with Collected Blooms
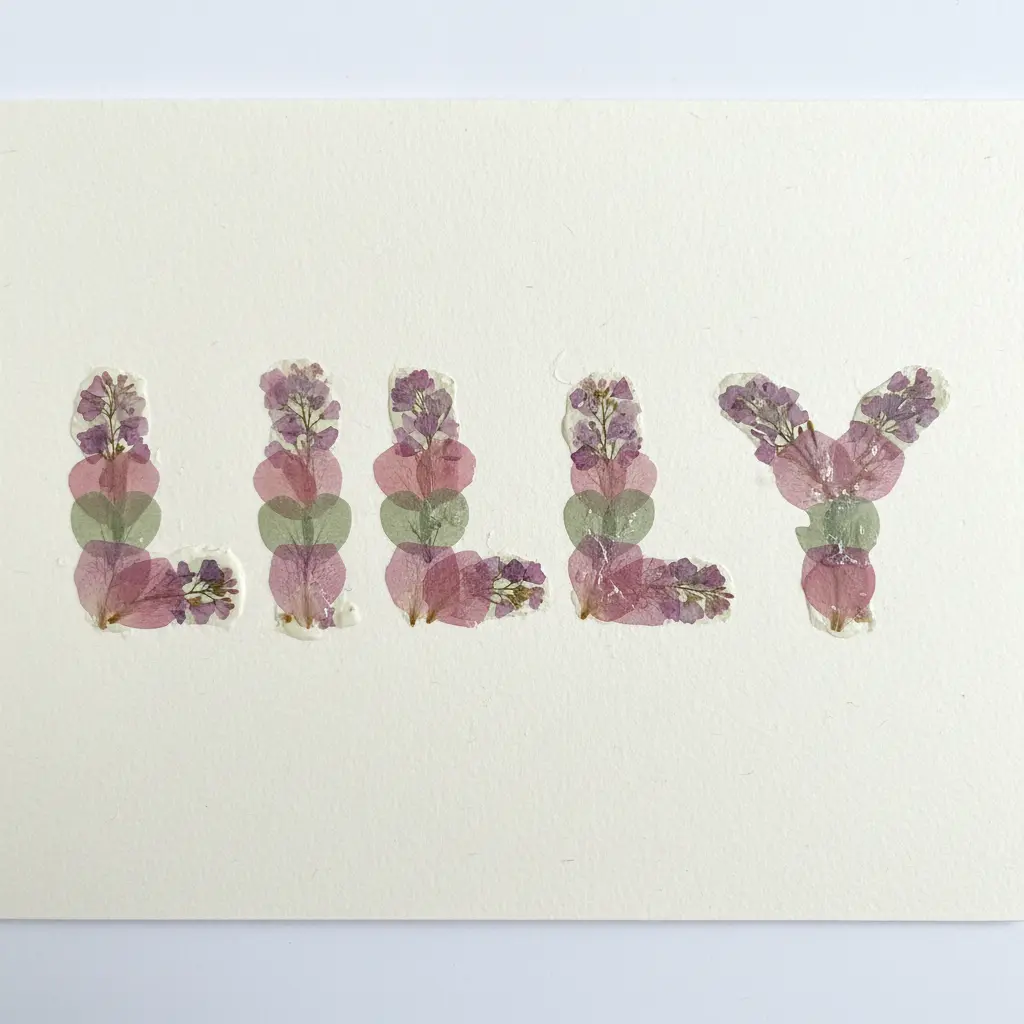
Ever wondered how to preserve a favorite flower from the garden or a special walk? This project turns those blooms into a beautiful, personalized keepsake. When you arrange pressed flowers and leaves for name art projects for kids, it feels like putting together a natural puzzle. I love how each letter gets its own unique texture and color from the real petals.
The result is a delicate collage that feels both artistic and deeply sentimental. Does that not sound like a perfect way to capture a memory? A quick tip from my own experience: always press more flowers than you think you will need. Some might not dry flat or could break during handling. Your final piece will look stunning, I promise.
4. Crayon Resist Watercolor Name Plate in Bold Hues
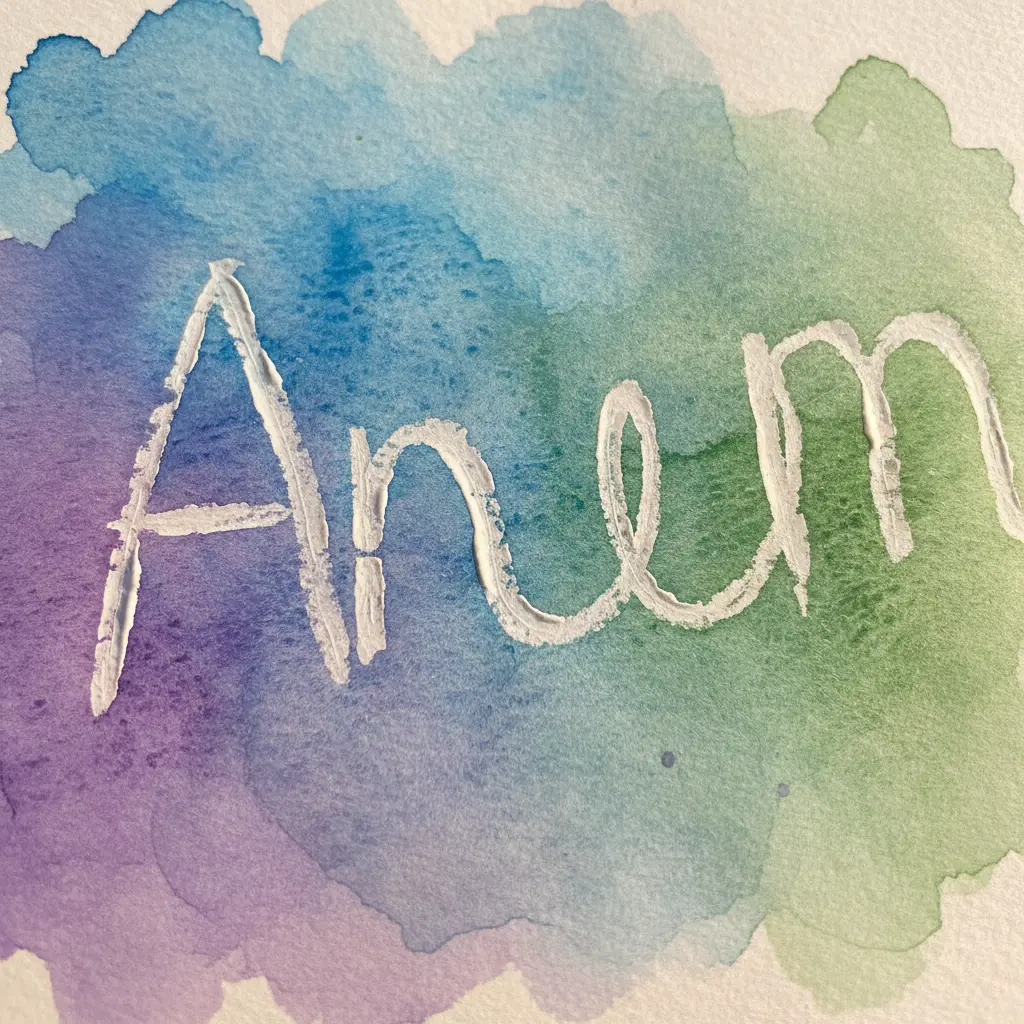
Ever tried a project that feels like a magic trick? This one does. You write a name firmly with a white crayon on thick paper, then wash bold watercolor hues right over it. The wax resists the paint, so your name pops out against a vibrant, flowing background.
I love how this combines a personal touch with such a satisfying reveal. The key to successful name art projects for kids is pressing down hard with your crayon to create a solid wax barrier. For another fun way to play with bold, expressive paint, you can learn some basic splatter painting techniques to add extra energy around the edges. It makes a stunning, personalized piece of art they will be so proud to display.
5. Puffy Paint Textured Initial Monogram Wall Art
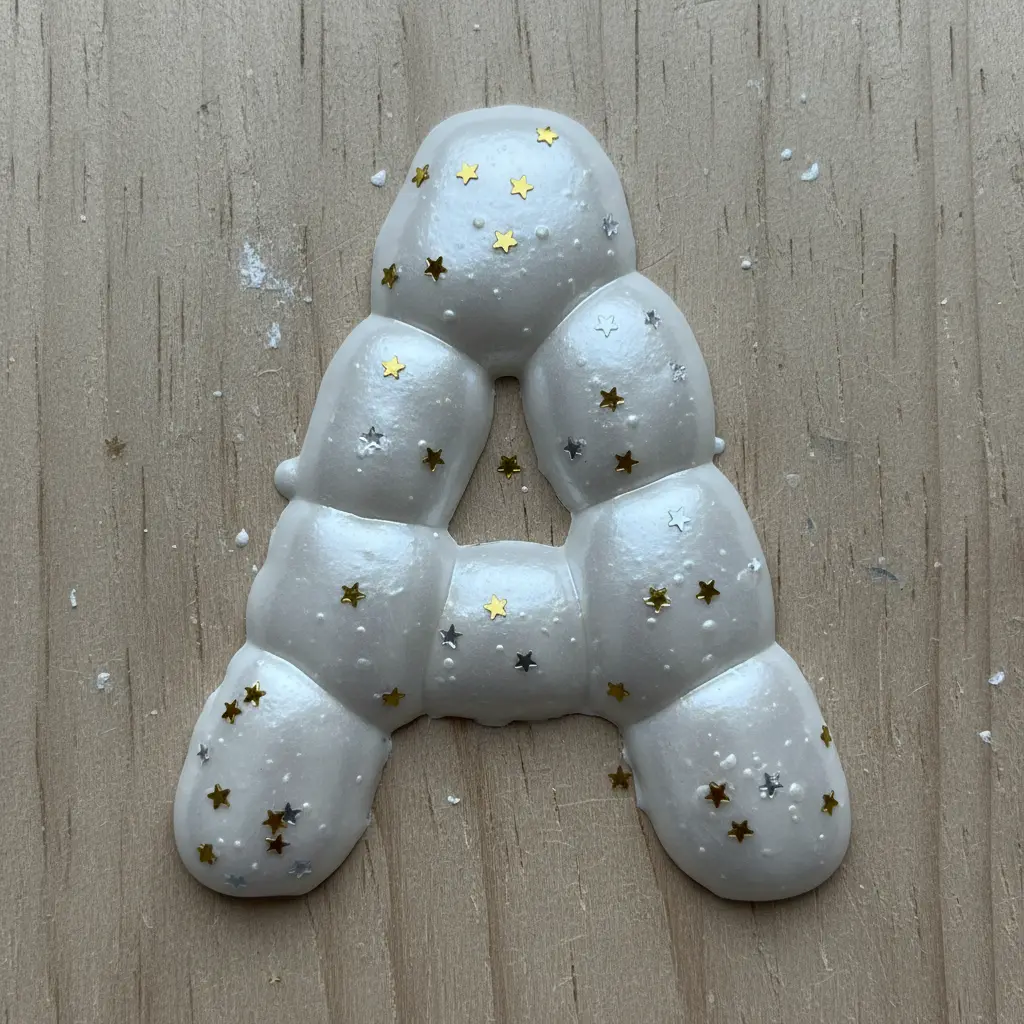
Doesn’t this sound like something only a pro could do? Trust me, it’s not. You start by painting a simple background on a stretched canvas and tracing an initial with a pencil. Then, the real fun begins—you squeeze the puffy paint right from the bottle onto your lines, watching it puff up into a cool, raised texture as it dries.
I love how name art projects for kids turn a basic letter into a piece of art you can actually feel. The tactile, three-dimensional result is so much more exciting than a flat drawing. It’s a fantastic way for kids to make a personalized gift or room decor they are genuinely proud of. For a fun twist, you can add some sparkle.
After applying the paint, immediately sprinkle on some loose glitter for extra shine before it sets. If your child loves other hands-on activities, they might enjoy trying some duck tape crafts for children on another creative day. Doesn’t that finished, touchable monogram look amazing?
6. Bubble Wrap Stamped Block Letters on Recycled Paper
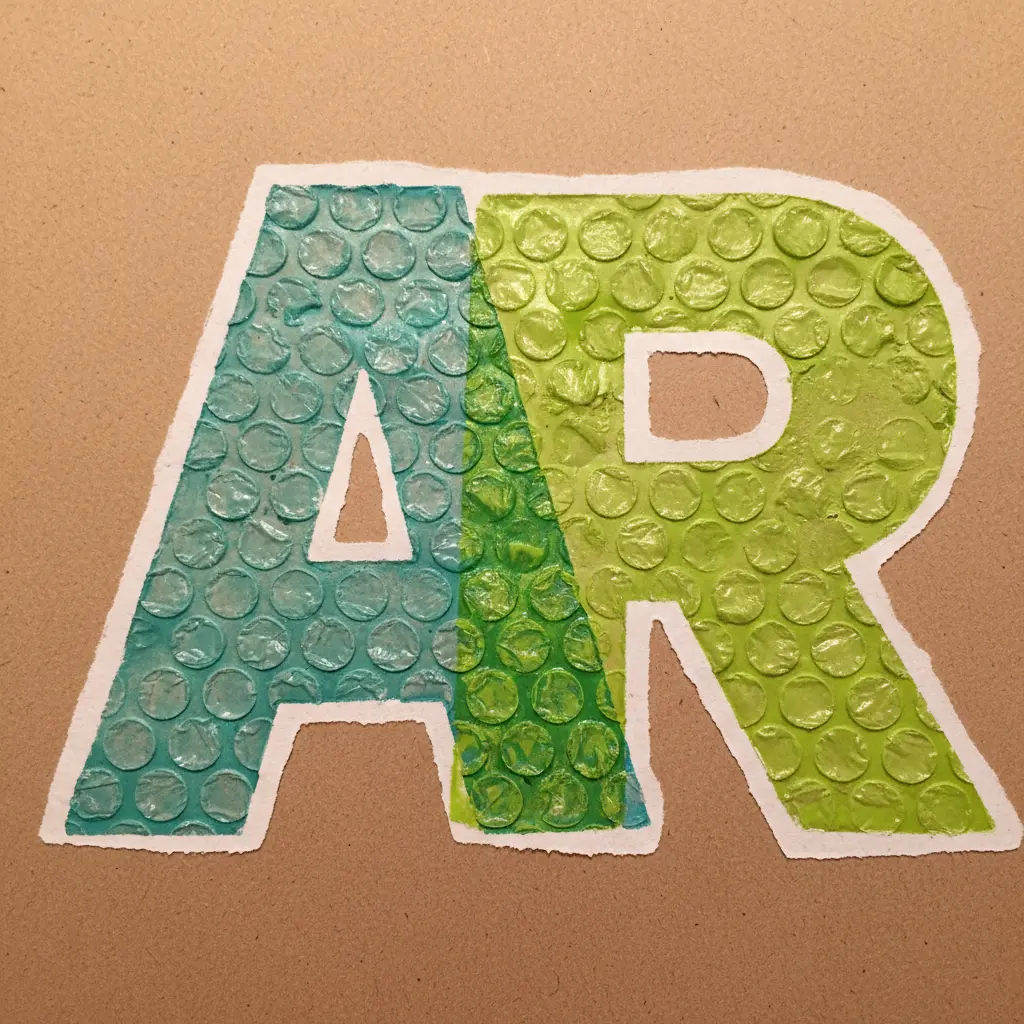
Who would have thought your recycling bin held a secret art supply? This project turns old cardboard and bubble wrap into textured, bubbly letters that look amazing. You lightly sketch your block letters onto the recycled paper, then use a foam brush to apply a thin layer of paint to your bubble wrap. Press it down inside the outlines and lift to reveal that cool, tactile pattern.
Combining upcycled materials with unique stamping textures is why name art projects for kids feel like such a fun discovery. My favorite part is how the varied tones of the recycled paper add character to each letter. A practical tip is to keep a stash of wet wipes handy for quick cleanups between color changes. When you are done, you will have a personalized piece of art that is full of personality and good for the planet too.
7. Salt Dough Sculpted Name Display with Painted Details
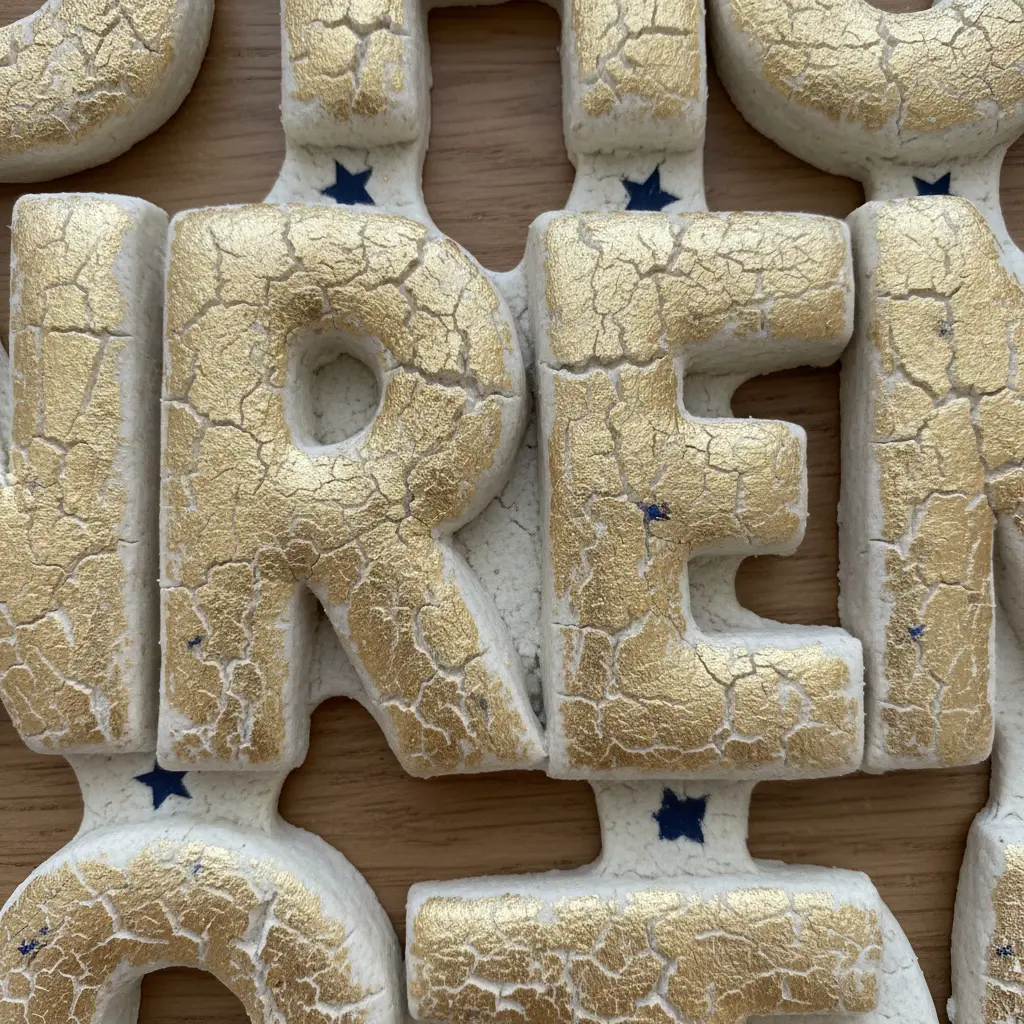
Ever think a name plaque could be this hands-on? This project turns basic kitchen ingredients into a personalized keepsake. You start by mixing flour and salt with water to make a pliable dough, then roll it out and cut or sculpt each letter. I love how tactile this part is for kids. After baking the letters until they are rock hard, you get to the best part: painting them with bright acrylic paints to add all the fun details.
The reason name art projects for kids work so well here is because the dough is a wonderfully forgiving base. The final piece feels substantial and custom-made, perfect for a bedroom door or a gift. My go-to tip? Make sure those letters are completely dry before you even think about splatter painting techniques, or they might crack later. Try it and feel proud of your homemade masterpiece!
8. Magazine Cutout Collage Name Banner Bunting Style
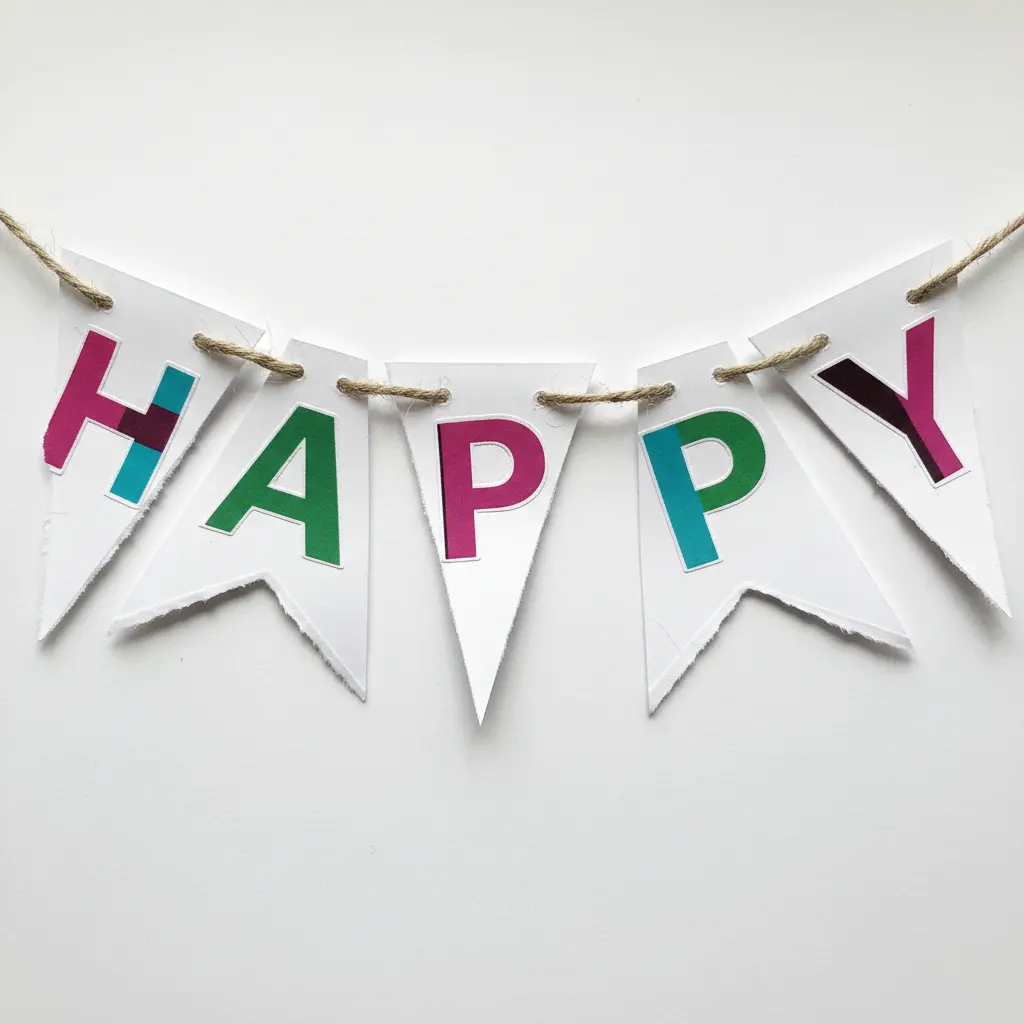
This one looks like a complex art project, but it is wonderfully simple and tactile. You cut out a collection of colorful images and text from old magazines and glue them onto separate cardstock flags, one for each letter of a name. Then you string the flags together to create a unique, personalized banner. I truly love how these name art projects for kids transform recycled paper into something so meaningful.
The trick is to use a craft knife for crisp, clean edges when you cut out your letters or trim the collage pieces. This keeps the letters readable and the whole banner looking polished. It is a fantastic way to explore color and composition without any drawing pressure. For a super vibrant background on your letters, you can borrow some marble painting techniques to create your own patterned paper first.
Just thread your finished flags onto a string and hang your one-of-a-kind creation. Does that not look stunning?
9. Sticker Mosaic Decorative Letter Art for Little Hands
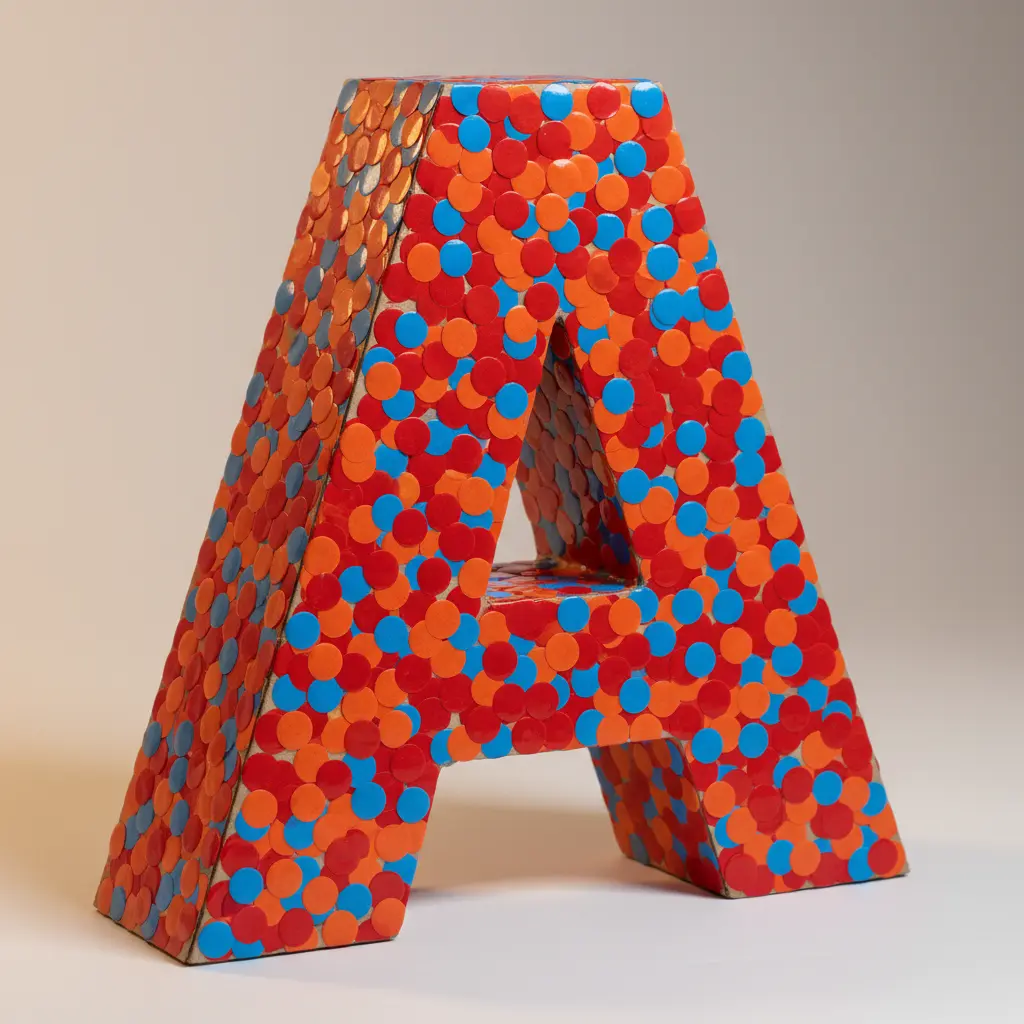
This project looks so intricate, but it is perfect for tiny fingers. You start by drawing a big, chunky letter on thick cardstock. Then, the fun part begins. Your child fills the entire shape with colorful stickers, creating a vibrant, textured mosaic of their initial or a letter they are learning.
I love how this builds letter recognition while strengthening those fine motor skills. Peeling and placing each sticker during name art projects for kids is a fantastic workout for little hands. It feels like a game, not work, and the result is a personalized piece of art they can be proud of. If you want to explore another low-mess, sensory-friendly art activity, the same fine motor practice is key for mastering salt painting techniques.
10. Button Embellished Cardstock Letter Motif Framed Display
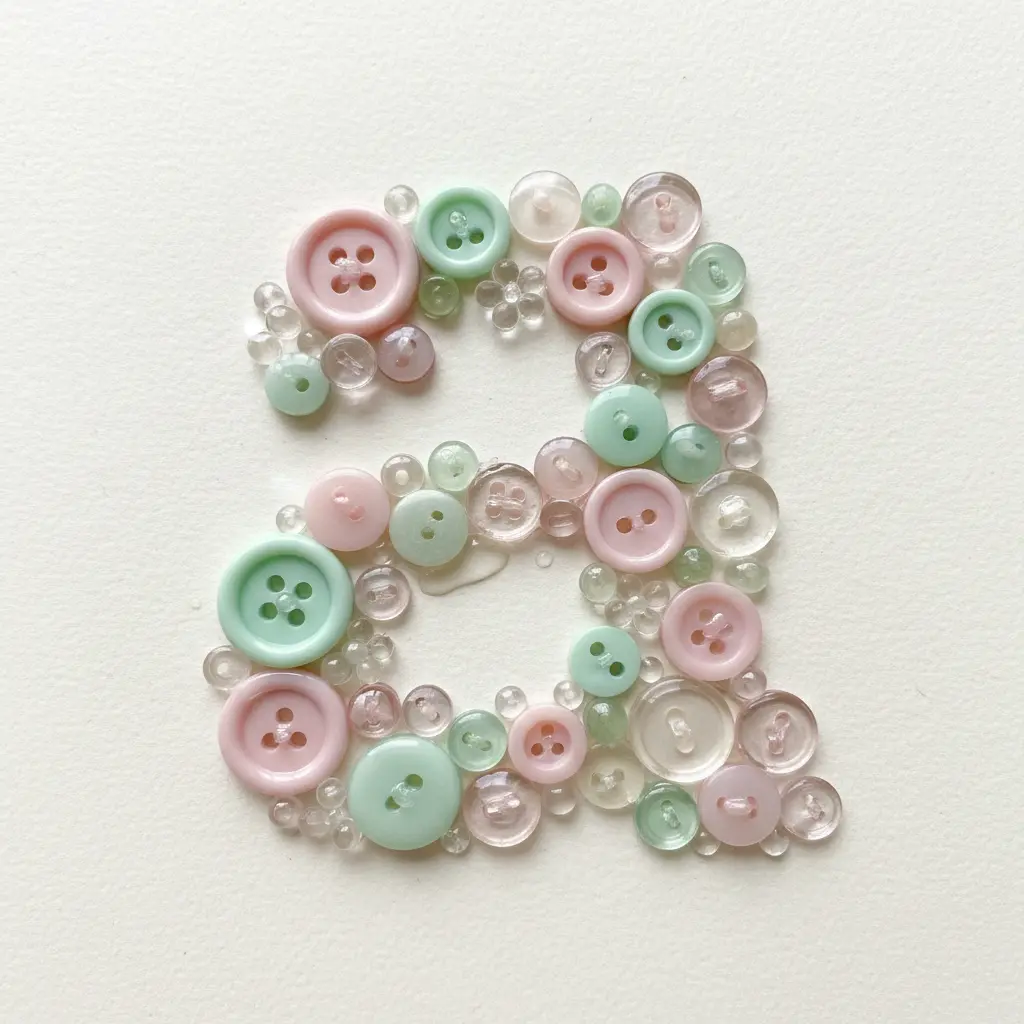
This project looks intricate, but its secret is a sturdy, blocky font. You cut your chosen initial from thick cardstock and cover every inch with a mosaic of buttons. I love how you can mix sizes and colors to fill all the gaps, creating this amazing, chunky texture. When gluing that button-covered letter for name art projects for kids, pop it right into a contrasting frame. The final piece has so much depth and personality, making it a perfect personalized gift. Doesn’t that sound like a fun way to use up a button stash?
11. Glitter Glue Outline Initial Sign with Sparkling Dimension
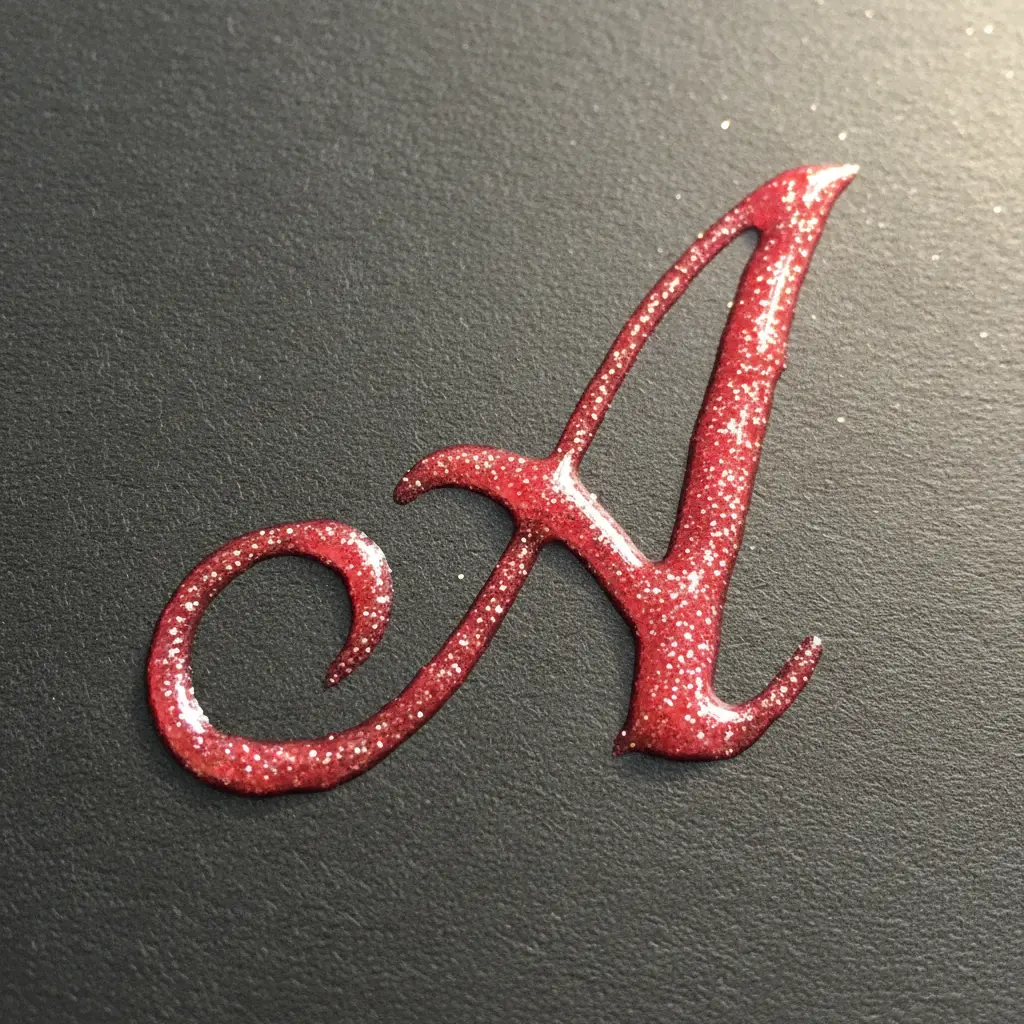
Ever wondered how to make a simple initial look like a dazzling keepsake? This project is all about creating a raised, sparkling border around a letter using glitter glue pens. You start by painting or covering your letter base, then carefully trace its outline with a steady stream of glitter glue. Let it dry overnight for a perfect, shiny ridge that catches the light.
I love how name art projects for kids can feel so special and personal. It is a fantastic way for a child to create a custom decoration for their room. Your sign will have a beautiful, three-dimensional quality that makes it stand out on any shelf. For a fantastic next step, try pairing your glittery initial with a creative felt banner projects to build a complete personalized display.
12. Natural Twig Construction Alphabetic Art from Backyard Finds
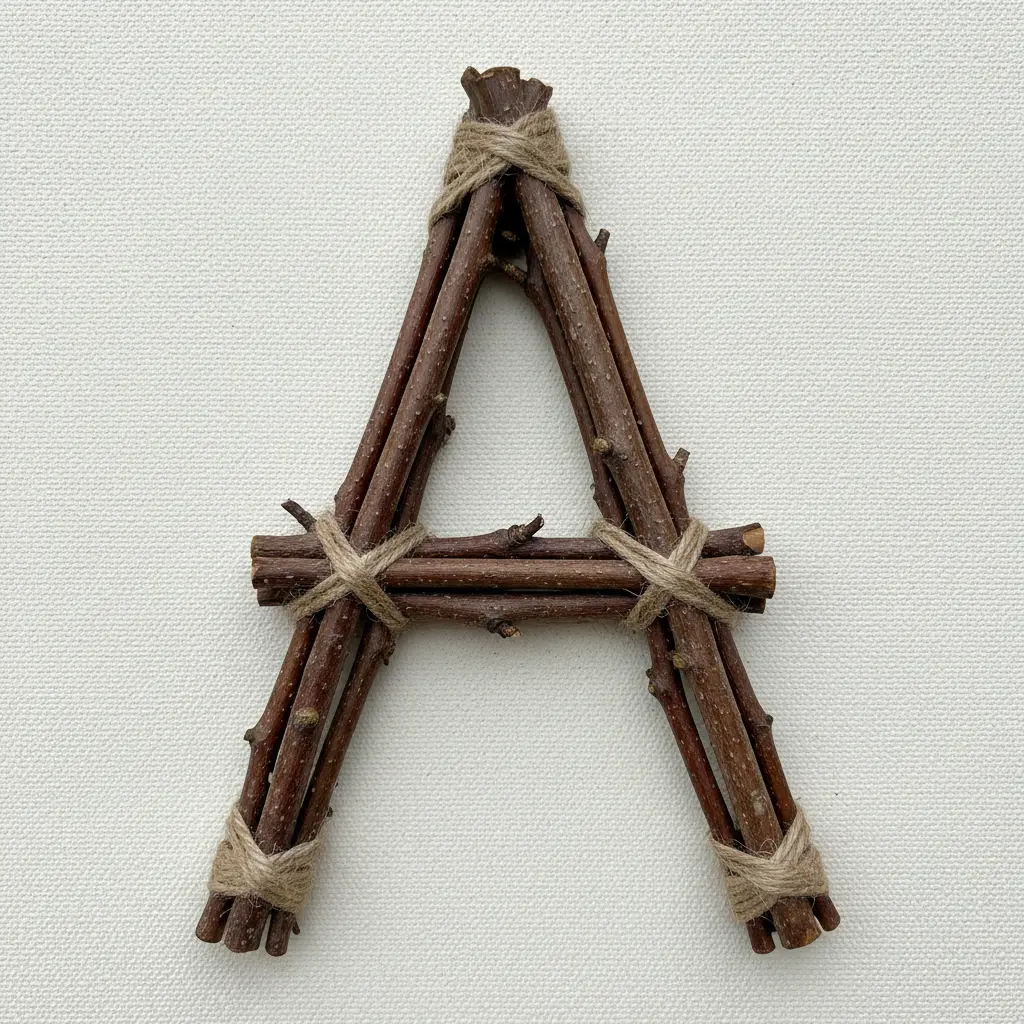
This one is a wonderful excuse to get outside and hunt for treasure. You are not just gathering twigs, you are curating the perfect pieces for your letter. I love the tactile challenge of fitting these irregular shapes together. Does that sound complicated? It is really not, once you start arranging them on your sturdy cardboard base.
Your main job is to find a variety of twigs, especially some with natural curves, to form the letter’s shape. A hot glue gun is your best friend for a strong, quick hold, but craft glue works fine if you have a little patience. The real magic is in the layering, adding smaller sticks, pebbles, or even moss to give your letter depth and personality.
This approach to name art projects for kids works so well because it turns a simple letter into a unique, three-dimensional sculpture with an earthy feel. It is a fantastic way to combine outdoor exploration with creative problem-solving. For another project that celebrates a child’s personal touch, look at this guide to colorful handprint art for more tactile fun.
13. Coffee Filter Tie Dye Letters: A Colorful Bleeding Technique
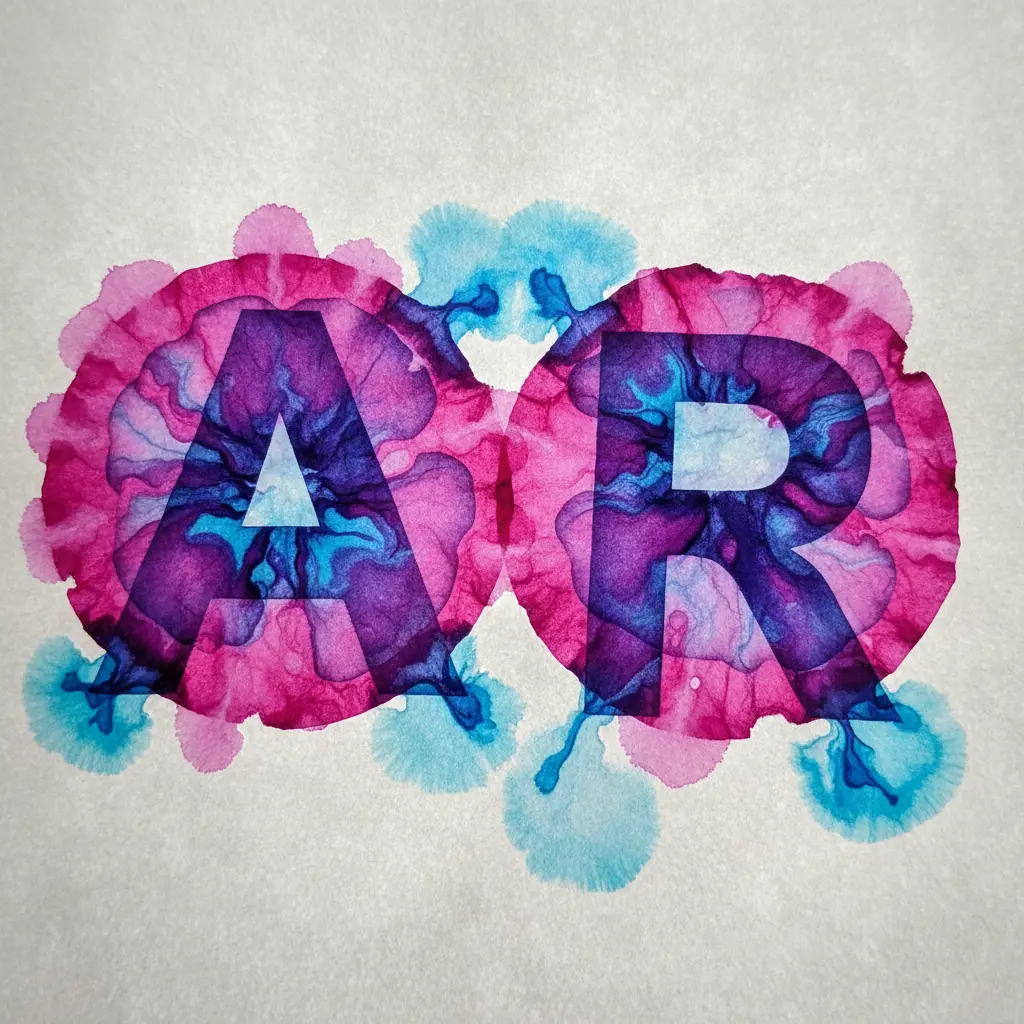
Who knew a simple coffee filter could transform into such a vibrant piece of art? You will draw designs with washable markers on the filter, then lightly mist it with water. The ink bleeds and blends into gorgeous, unpredictable tie-dye patterns that are perfect for cutting into letters. I love how the bleeding technique creates a soft, watercolor-like effect every single time.
Applying this method to name art projects for kids guarantees a vibrant, fluid result. It is a fantastic sensory experience for kids, watching the colors magically spread and merge. After your colorful filters dry completely, you can cut them into any letter shape you need. This project is a wonderful way to introduce color blending while creating something personalized. For another fun way to play with shapes and color, try exploring geometric painting as your next creative adventure.
14. Fabric Scrap Patchwork Monogram Sign on Sturdy Board
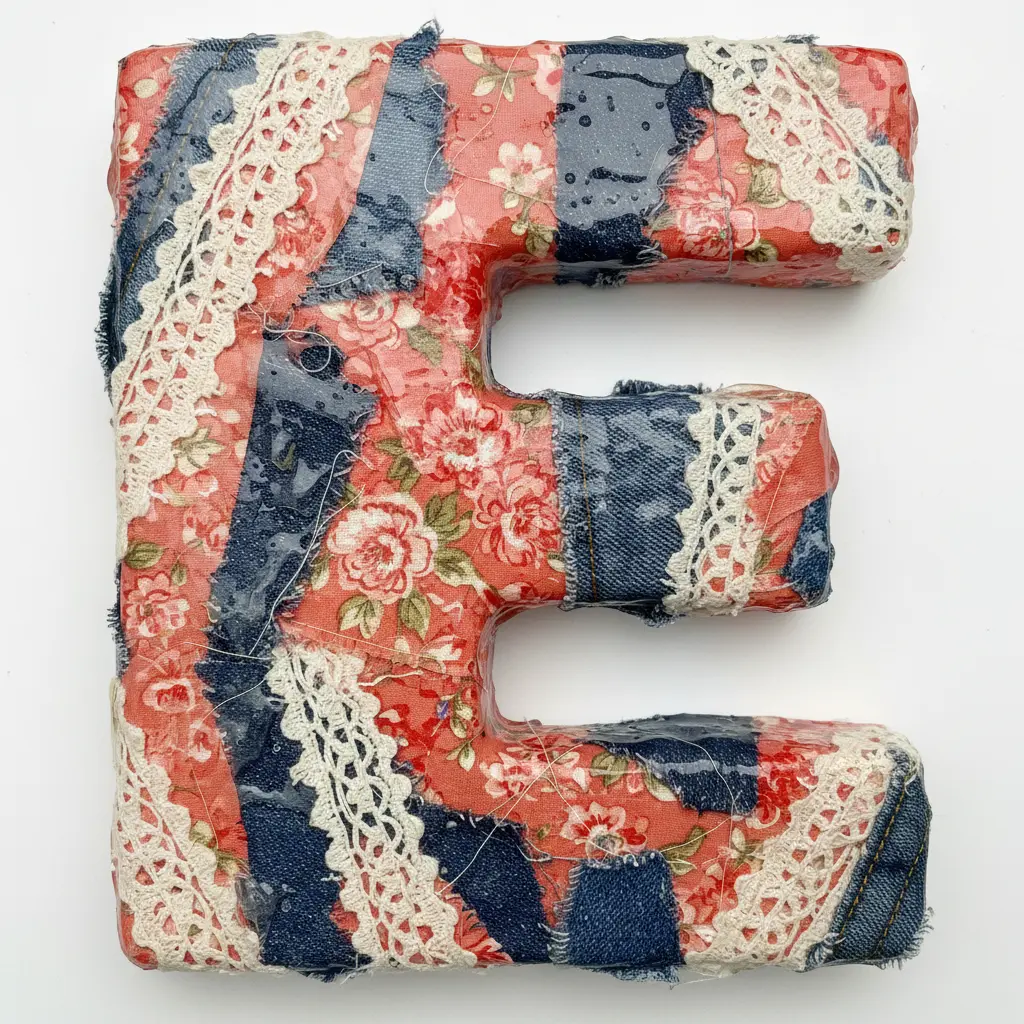
This project looks intricate, but the process is so satisfying and tactile. You start by pressing your fabric scraps flat with an iron and cutting them into random shapes. Then, you glue them piece by piece, overlapping slightly, to fill in a large block letter traced on your board. The real magic in these name art projects for kids happens in the patchwork design itself, creating a mosaic of color and texture that feels unique every single time.
I love how this turns old t-shirts or leftover fabric into something new and personal. Isn’t that a wonderful way to make a gift feel special? Pro tip: work in small sections and press each fabric piece firmly to avoid shifting. You will feel so proud when you step back and see your finished, one-of-a-kind sign.
15. Washi Tape Geometric Name Design with Crisp Lines
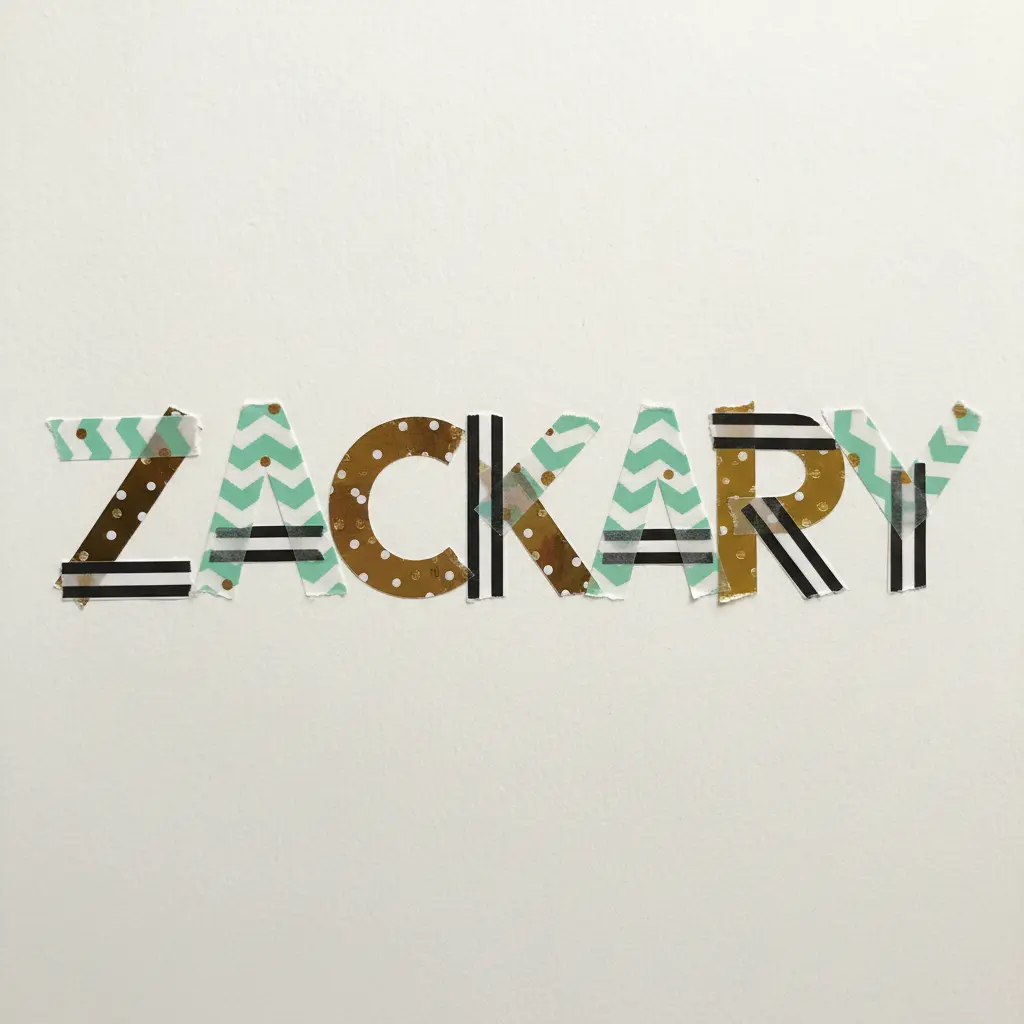
Ever wondered how to get those perfectly sharp lines? This project uses the magic of washi tape to build your name from simple, angular shapes. You will lightly sketch block letters, then cover each segment with tape, trimming the excess with a craft knife for that clean, modern look. I love how forgiving this is for a kids art project. The peel-and-stick nature lets you adjust as you go, and the crisp finish feels so professional. After finishing name art projects for kids, your final piece becomes a striking, personalized decoration.
Getting those perfect edges hinges on using a metal ruler and craft knife for every cut. Once you are done, you can explore other patterns like nature-inspired leaf art for a different organic feel.
Preservation Methods for Collaborative Classroom Art
A simple spray of matte acrylic sealer is the final, non-negotiable step for any mixed-media name project. This clear coat locks down loose glitter, seals vulnerable crayon wax, and protects marker work from smudging. It also gives the entire piece a uniform finish, whether the surface has slick painted letters or rough glued beans. Apply the spray in two light, sweeping coats about fifteen minutes apart in a well-ventilated area. For paper-based collages, you can use a brush-on decoupage medium like Mod Podge, which acts as both a glue and a topcoat. This preservation method is essential when displaying name art projects for kids that will be handled frequently, ensuring all that careful work lasts.
Conclusion
Watching your child turn a simple letter into a colorful piece of art is one of those quiet parenting wins that sticks with you. Every single one of these name art projects for kids gives them a chance to own their name in a completely new way, whether they end up hanging it on the bedroom wall or gifting it to a grandparent. My best advice is to not overthink it. Let the yarn get a little messy, mix the paint colors oddly, and let the glue dry with fingerprints in it. That is where the personality lives. When you step back, you will see that the finished piece is not just a craft; it is a snapshot of this exact age and stage. Next time you need a creative reset, pull out the washi tape or the scrap fabric bag and let their name lead the way.
FAQs
Q: What kind of glue works best for heavy materials like buttons and twigs?
A: A strong tacky glue or white school glue works well for most craft sessions. For heavier items like buttons and thick twigs, a hot glue gun with adult supervision gives the most secure hold. Test on scrap paper first to check that the glue does not soak through the cardstock.
Q: How do you make a neat bubble wrap stamp for letter art?
A: Wrap a small piece of bubble wrap around a flat block or a piece of cardboard, then secure it with tape on the back. Pour a thin layer of paint onto a plate and dab the bubble wrap stamp gently before stamping onto the paper. Rinse and dry the stamp between colors to keep the prints crisp.
Q: What is the easiest homemade salt dough recipe for sculpted names?
A: Mix two cups of flour, one cup of salt, and up to one cup of water until a smooth dough forms. Roll the dough into ropes and shape them into letters, then bake at 200°F for two to three hours until hard. Once cooled, kids can paint the letters with acrylic paint and seal with a clear varnish.
Q: How do you prevent coffee filter tie dye from bleeding too much?
A: Use washable markers to color the coffee filter first, then lightly mist it with water using a spray bottle. Too much water will make the colors bleed together and turn muddy, so a light mist gives controlled bleeding. Let the filter dry completely on a paper towel before gluing it onto cardstock.
Q: What age is appropriate for name art projects with small loose parts?
A: Craft sessions with small pieces like beads, buttons, or stickers are best for children ages four and older who no longer mouth objects. For toddlers, swap in larger yarn scraps, fabric pieces, or foam stickers that pose no choking risk. Always supervise closely and choose materials that match your child’s developmental stage.