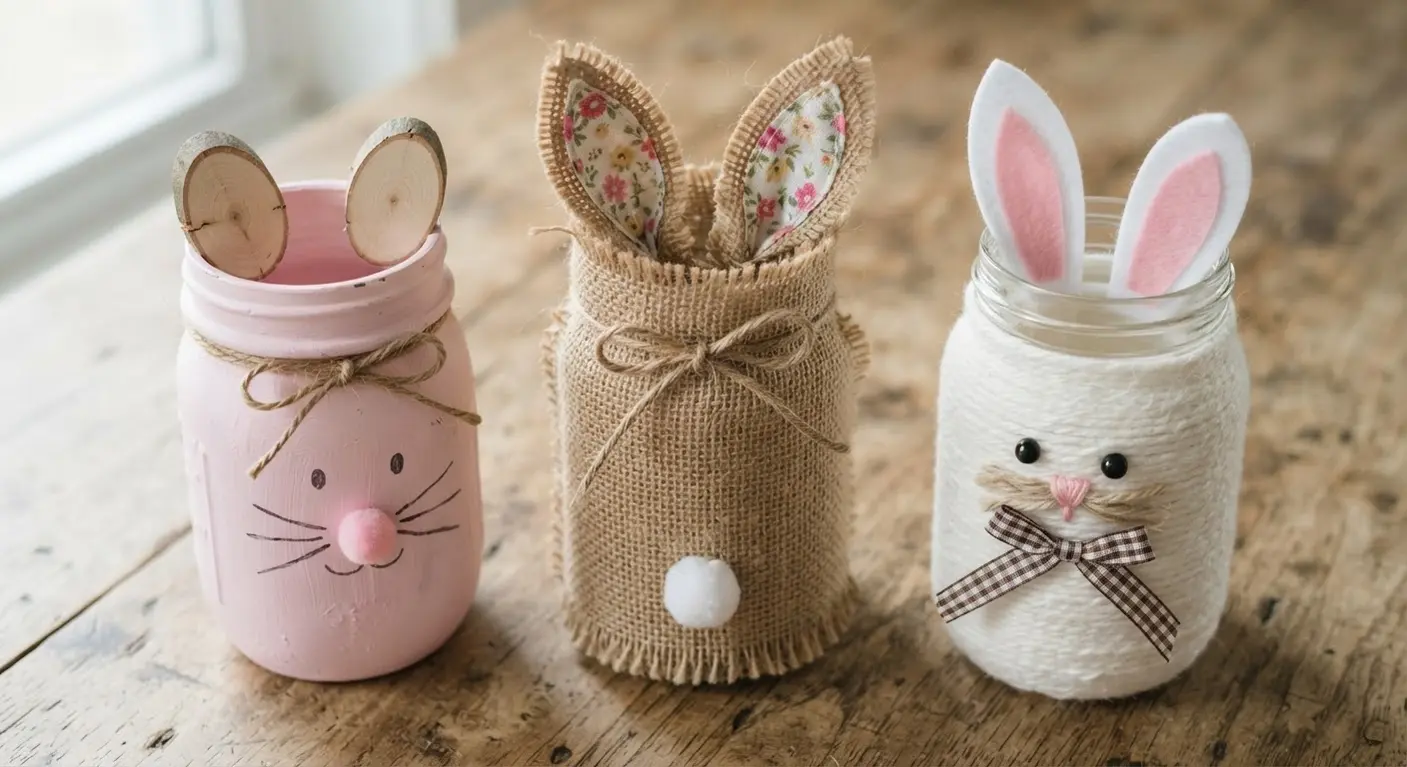
Whether you love painting, wrapping, or adding simple embellishments, there is a style here for you. I have gathered ten of my favorite approaches, from soft pastel paintings to cozy yarn wraps and minimalist decals. Each one is a delightful way to celebrate the season and make someone smile.
Preparing Glass Surfaces For Permanent Paint Adhesion
When exploring bunny mason jar ideas, the fastest way to ruin your project is painting a greasy jar. Wipe every surface with a cotton pad soaked in isopropyl alcohol. This one step removes invisible oils that cause paint to peel right off the glass.
Trust me, we all skip it and regret it later. Your paint needs a perfectly clean canvas to stick for good. After cleaning, let the jar dry completely before you touch it again.
Any moisture left behind will create a weak bond. This prep work takes two minutes but protects weeks of creative effort. You will notice the difference in how smoothly your first coat of paint applies and how firmly it holds.
Selecting Harmonious Pastel Color Palettes For Spring
Choosing paint for your bunny mason jar ideas requires matching the base to your final look, not just the color. A high-opacity chalk paint gives you that soft, matte finish perfect for a rustic bunny. For a more modern or shiny look, a glossy spray paint works better.
The good news is you can mix brands. Apply thin layers and let each one dry fully to prevent drips that ruin your smooth finish. Stick to two or three colors that sit next to each other on a color wheel, like soft pink, lavender, and mint.
This creates a cohesive spring theme that feels intentional. You avoid the jar looking chaotic or overwhelming with too many competing shades.
1. A Hand-Painted Pastel Bunny Mason Jar
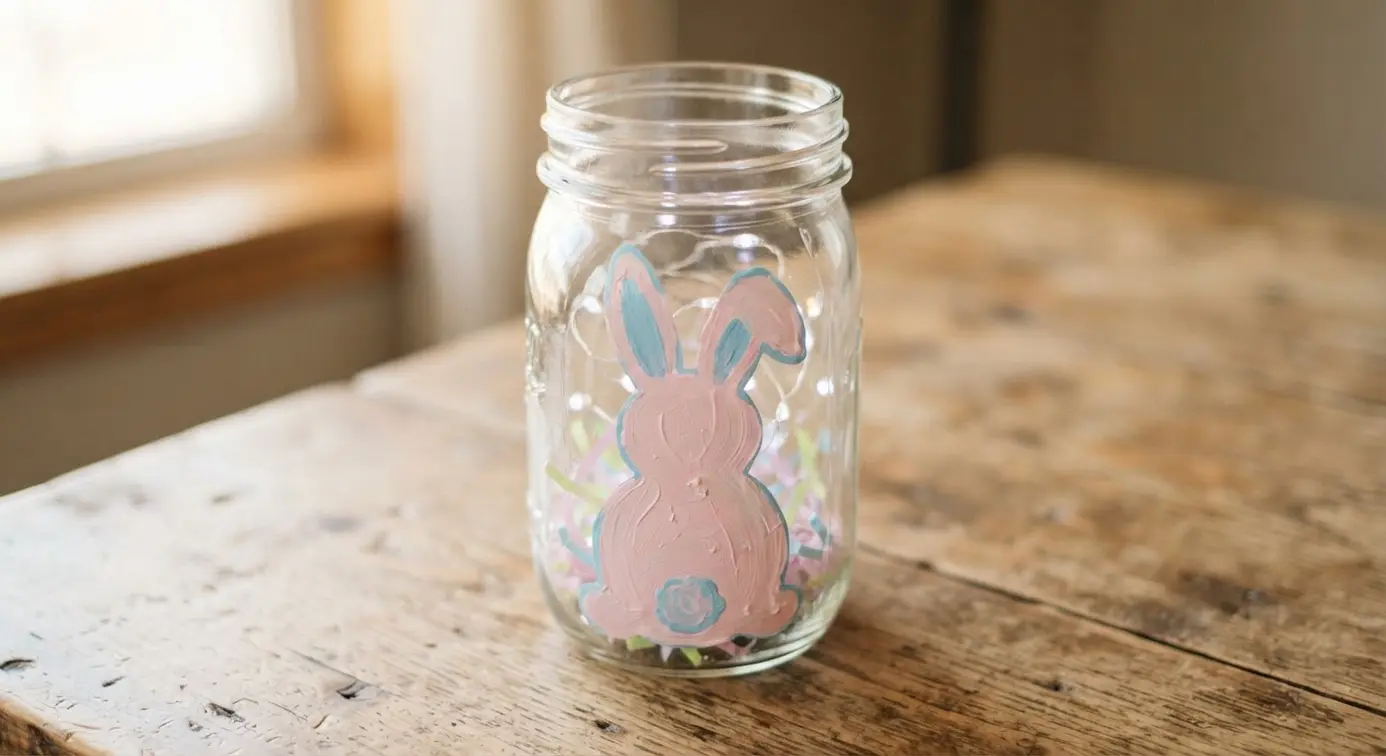
This approach ranks among the most beloved bunny mason jar ideas for beginners. You are turning an everyday object into a charming piece of spring decor with a few simple supplies. Start by giving your jar a good scrub with rubbing alcohol to remove any oils.
Once that is dry, you can sketch your bunny lightly with a pencil before painting its features with a small round brush. It works because those soft colors and a cute bunny instantly create a warm, festive feeling. A great first step for more rustic projects is gathering ideas for rustic mason jars to see different finishing styles.
Trust me, letting each coat dry fully is the secret to a smooth, professional look. You will love how it brightens up a shelf.
2. Frosted Glass Bunny Silhouette Container — An Elegant Look
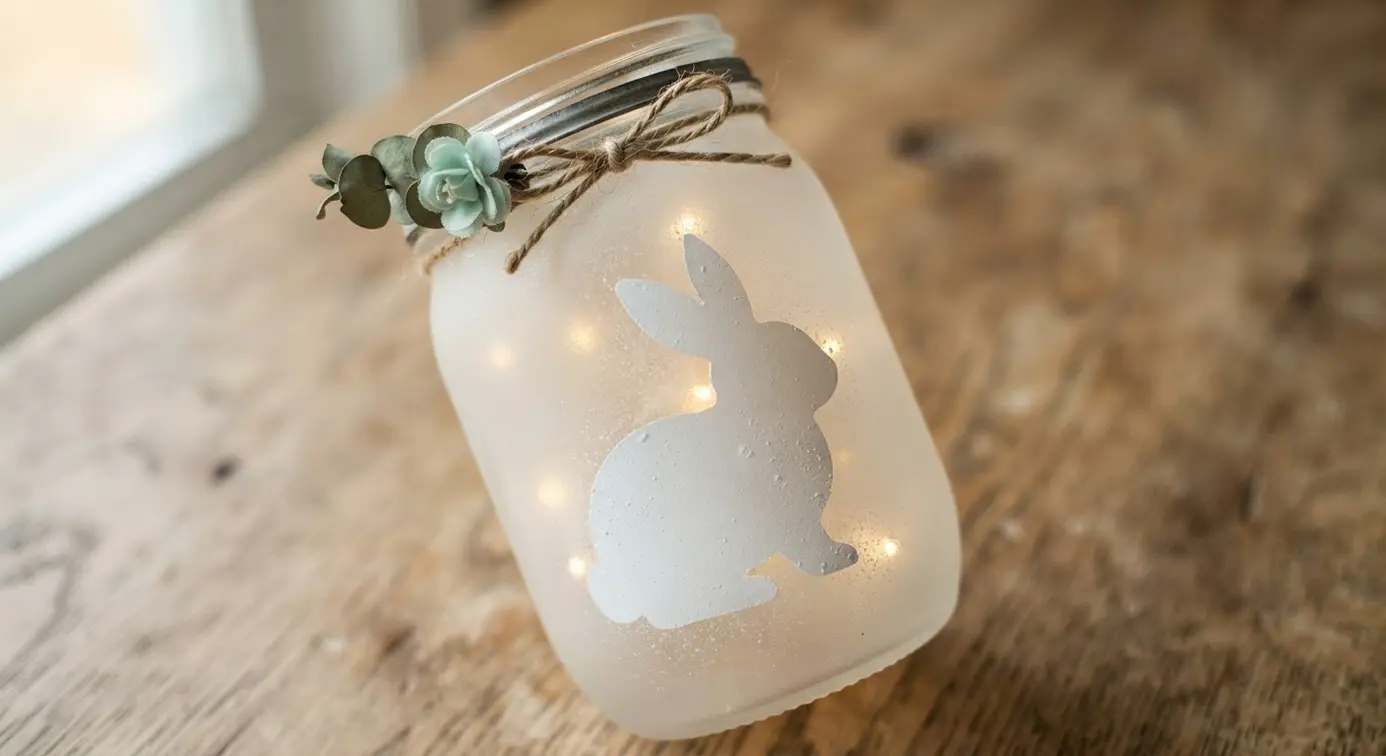
Many decorators favor this technique when building bunny mason jar ideas that need a soft, diffused glow. This elegant look starts with a bunny silhouette stencil applied to a clean glass container. I love using etching cream for a permanent frosted finish, but frosted glass spray paint works great too for a quicker project.
The key is applying the medium evenly over the stencil to create a crisp, minimalist bunny shape. Why does this work so well? The frosted glass diffuses light beautifully, giving your tabletop or windowsill a gentle, ethereal glow.
It feels sophisticated, not childish, making it a perfect spring accent. Before you start, make sure you have a solid grasp of ideas for rustic flannel star ornament techniques for working with stencils on curved surfaces. Trust me, that foundational skill prevents messy bleed under the edges.
Feel that quiet satisfaction when you peel off the stencil to reveal your perfect silhouette.
3. Rustic Burlap Wrap Bunny Jar
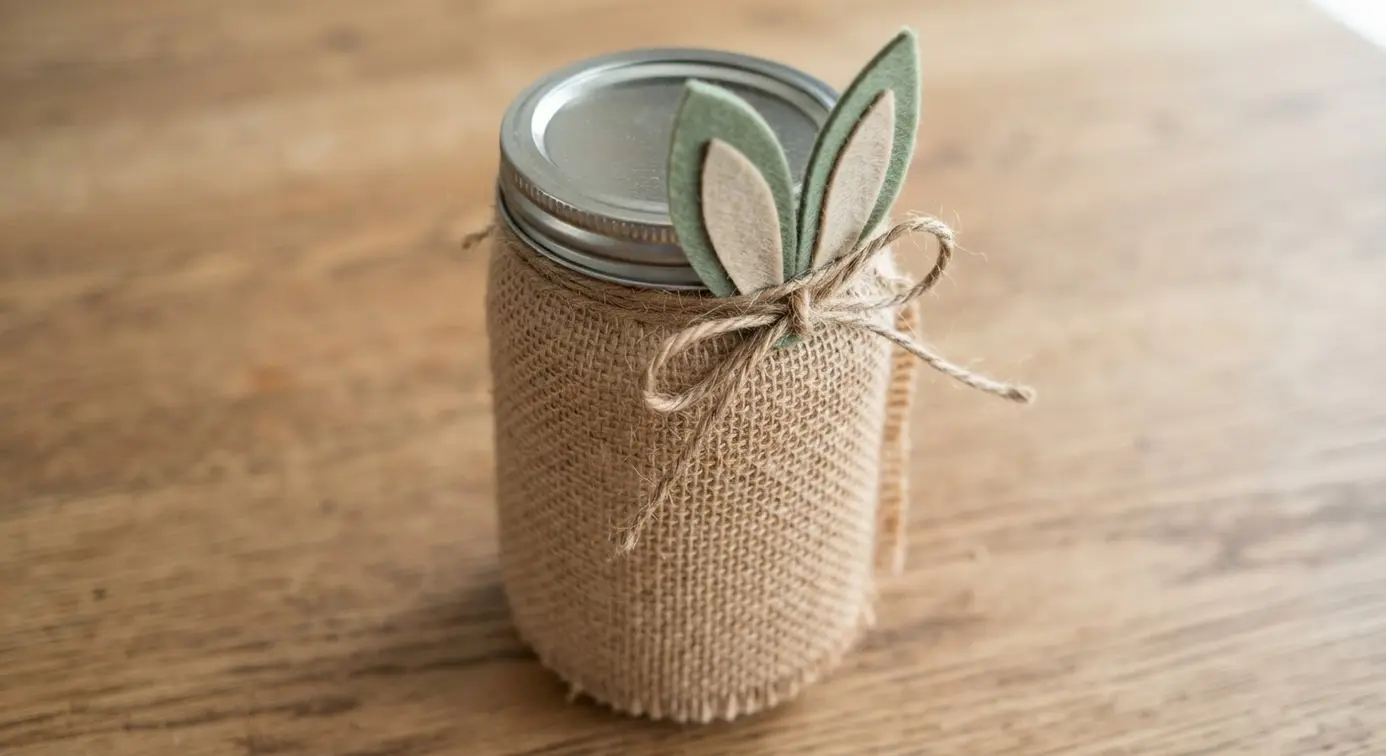
Exploring textured bunny mason jar ideas means wrapping a clean glass mason jar with a rectangle of natural burlap and securing it with fabric glue. Then, you cut out two floppy burlap ears and attach them to the top rim. This project looks like it came from a cozy farmhouse, but it is surprisingly simple to make.
Next, you add the personality. A fluffy white pom-pom becomes the tail, and you can draw a simple face or glue on little buttons for eyes. I love how the texture of the burlap gives it that perfect rustic charm.
Here is my go-to tip: if your burlap ears are a bit floppy, insert a piece of floral wire inside each one before gluing them on. This little trick helps them stand up nice and perky. Isn’t that a delightful way to welcome spring?
4. Cozy White Yarn Wrapped Bunny
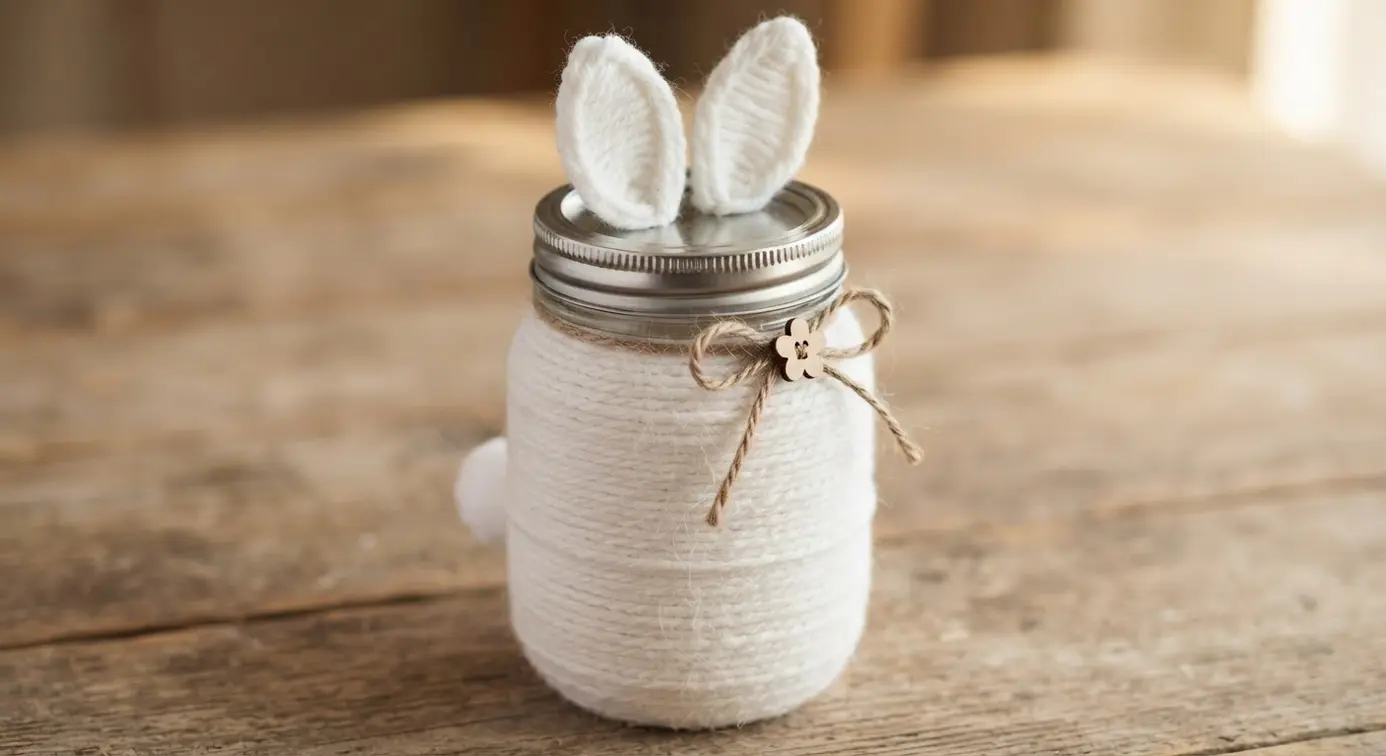
If you want to try wrapped bunny mason jar ideas, start by cutting a simple bunny shape from sturdy cardboard, then wrap it tightly with fluffy white yarn until the base is completely hidden. I love how the simple act of wrapping transforms a flat silhouette into a plush, textured decoration that practically begs to be touched. Does this sound satisfying to you?
The key is keeping your wraps close together and taut to avoid any gaps. Once your bunny is fully covered, you get to add personality with little details like a pom-pom tail or felt ears. It is a perfect project if you are also thinking about other handmade spring gifts, like a creative flower pot card for a gardener friend.
You will be amazed at how cozy and charming your finished bunny looks on a shelf or mantel.
5. Felt Ear and Whiskers Jar — Simple Character
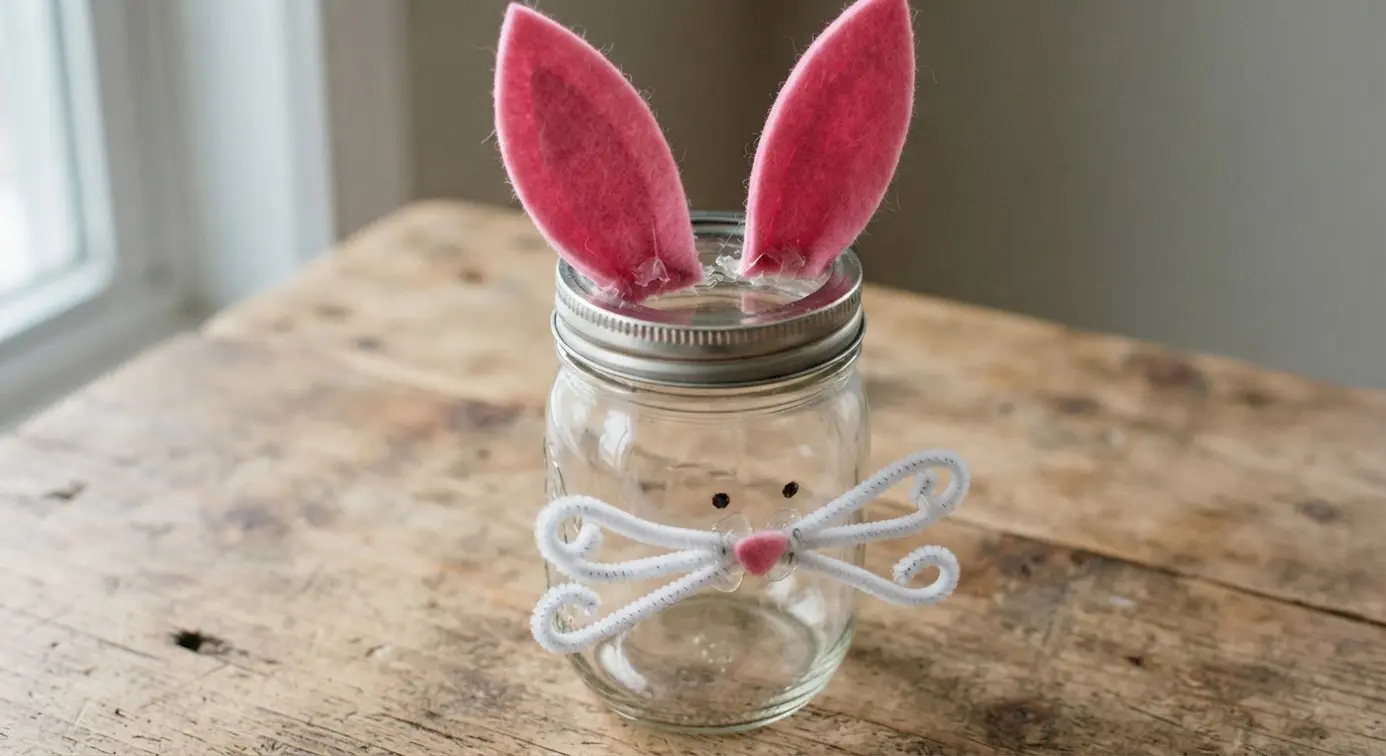
Adding character with felt pieces defines these bunny mason jar ideas. You are just adding simple felt shapes to turn a plain jar into a little personality. Clean your jar until it is completely dry, then cut two matching ear shapes and a few thin strips for felt whiskers.
Glue the ears to the top sides and arrange the whiskers on the front. I love using a contrasting color for the inner ear piece to make it pop. For a matching project, you could use the same felt colors to decorate bunny Easter shirts for a complete festive look.
Trust me, sketching your shapes on paper first saves felt and ensures perfect proportions. Seeing that simple face come together is pure joy.
6. Glitter Silhouette Glow Mason Jar
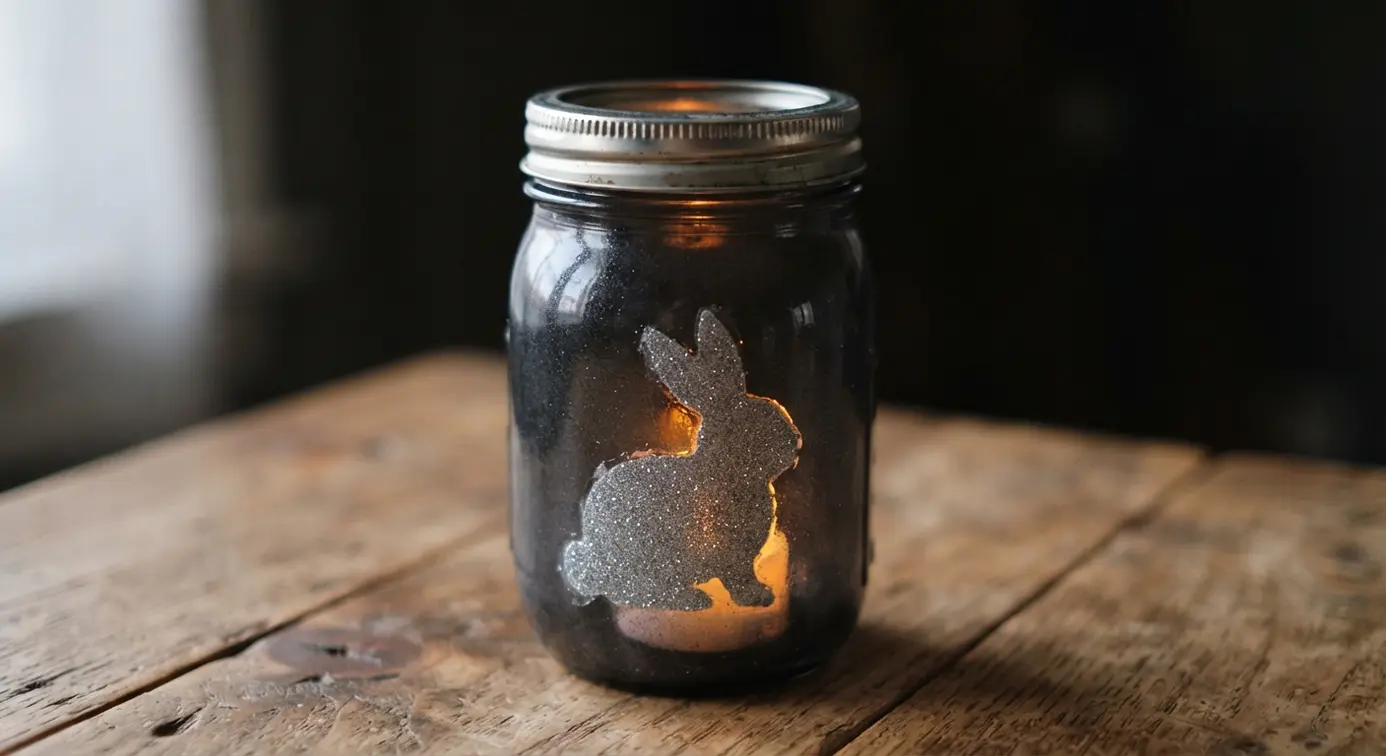
Creating glitter-focused bunny mason jar ideas begins by securing your chosen paper or vinyl shape onto the inside of a clean jar using Mod Podge. While the adhesive is still tacky, sprinkle on your glitter, tap off the excess, and let it dry completely. It is honestly one of the simplest ways to make a stunning piece of home decor.
The magic happens when you add the lights. Dropping in a set of battery-operated fairy lights instantly brings your glittery outline to life with a soft, cozy glow. It works so well because that combination of sparkle and light creates such a personalized, enchanting atmosphere.
I love how you can tailor this to any theme, and it makes a heartfelt gift anyone would adore. If you are looking for creative Easter bunny art projects to find the perfect shape, remember to use a fine glitter for the cleanest lines and seal it if you are worried about shedding. Turn off the main lights and enjoy your beautiful creation.
7. Sock Material Bunny Cover Mason Jar
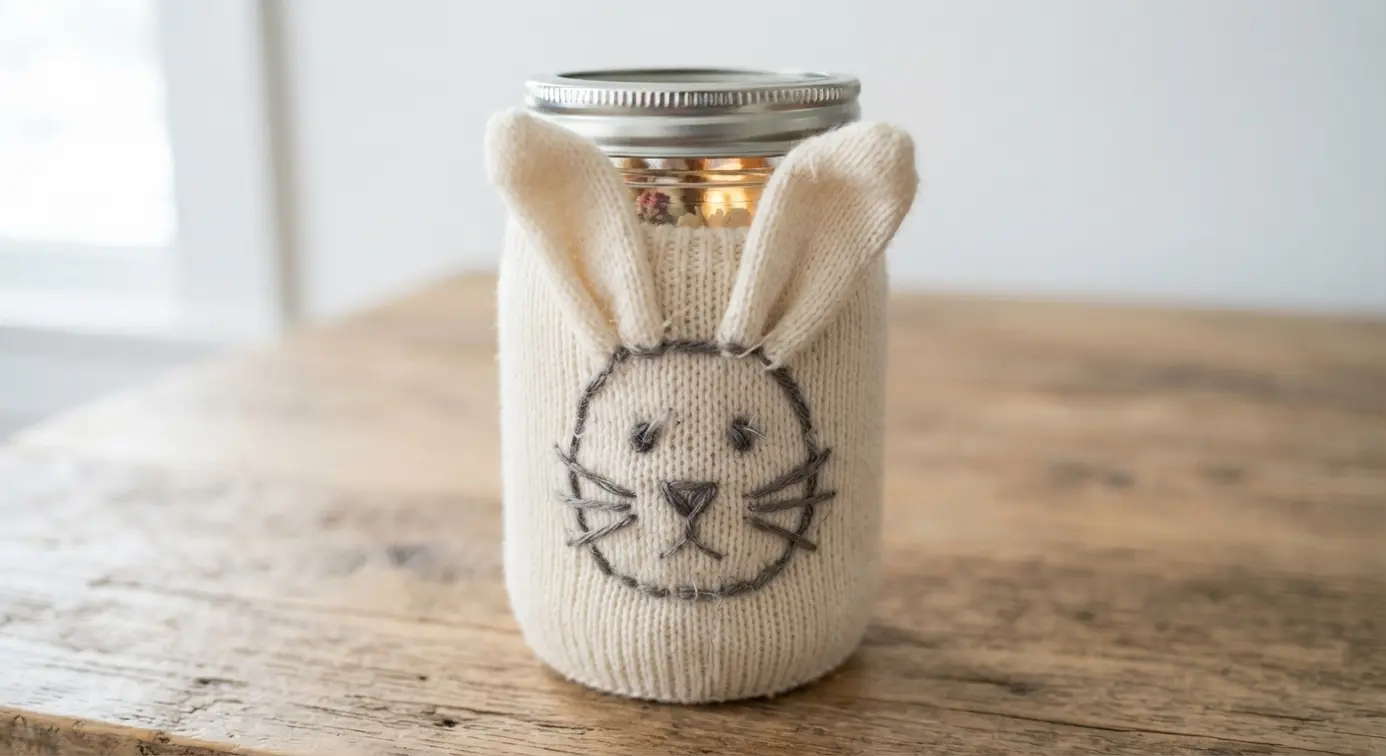
Searching for soft bunny mason jar ideas often leads to using old socks. You pull a clean sock over a jar, then stuff and tie the top to form the head. Adding ears and a face brings your bunny to life, making it look like a plush toy with a secret container inside.
It works because it turns two simple items into a charming gift holder. The soft texture makes it feel extra special. I love how this lets you personalize with any sock pattern you have on hand.
For a firmer shape, pack the head tightly with polyester fiberfill. After you finish, it pairs perfectly with other spring projects like easy popsicle stick bunny crafts for a full festive display. Feel the delight when you see your finished creation!
8. Minimalist Black Vinyl Decal Jar
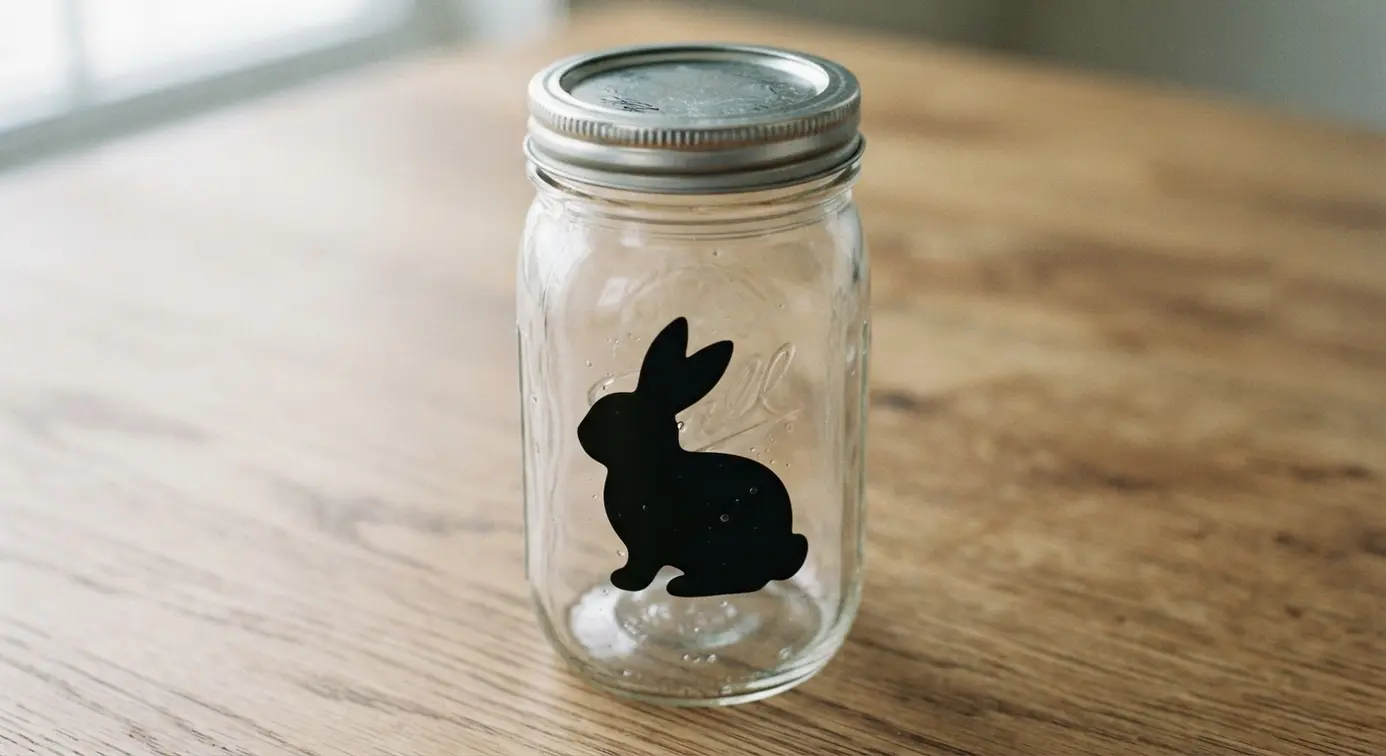
When exploring modern bunny mason jar ideas, this clean vinyl approach gives your pantry that magazine-worthy look. You start with a simple glass jar, then apply a black permanent vinyl decal with a word or icon. The process is straightforward and instantly organizes a space while looking modern.
You clean the jar surface well, then use a transfer tape to position your decal and smooth it on. It is all about that crisp, black-on-clear contrast. The result is a functional label that feels more like decor.
Make sure that jar is completely dry and free of any oils before you press the decal down. You will feel so satisfied seeing your shelves transform from cluttered to curated.
9. Floral Crown Bunny Mason Jar
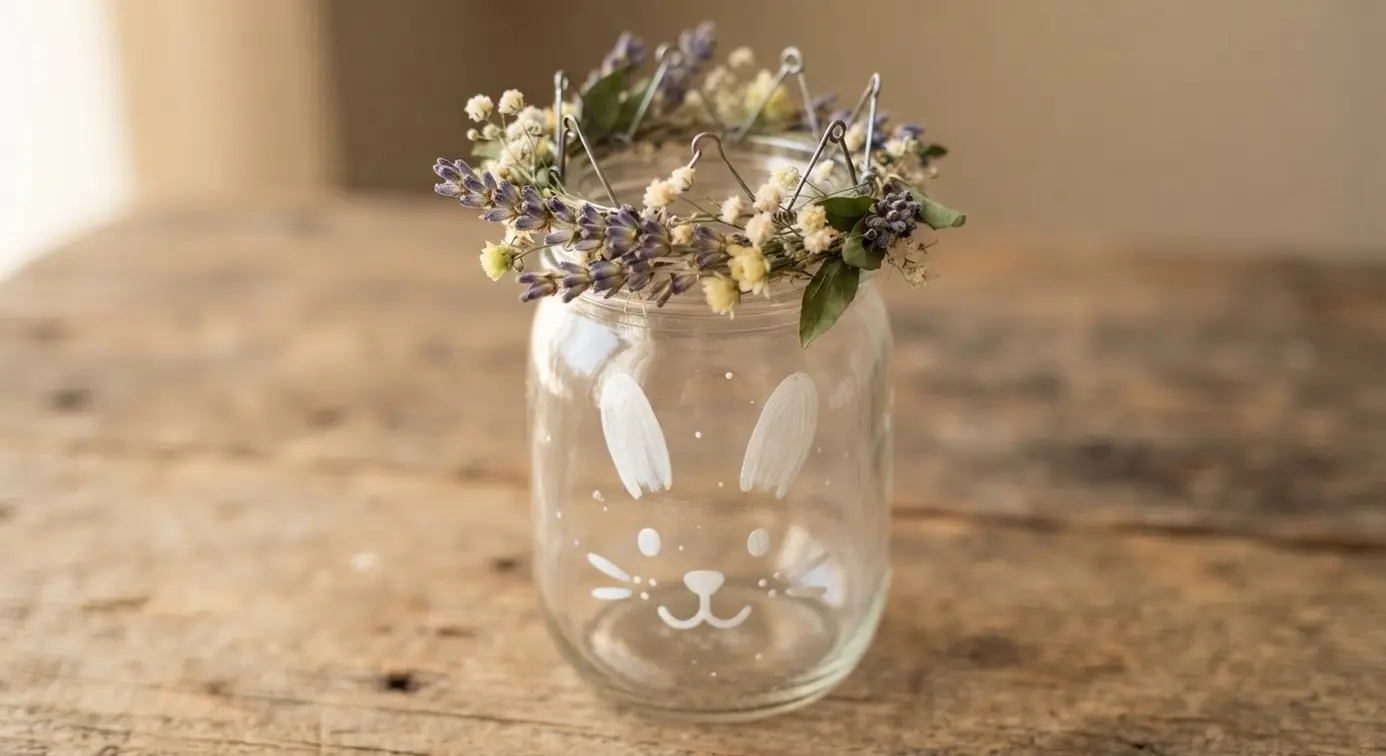
Among floral bunny mason jar ideas, this design looks like something from a fancy boutique, but you can make it in an afternoon. Start by painting your jar a soft white or pastel color. I love using chalk paint for this because it gives a nice matte finish that sticks to glass well.
While that dries, cut out bunny ears from white felt and add a smaller pink inner ear. Hot glue them to the jar near the rim. Now for the magic part: gather some small artificial flowers and a bit of greenery to make a tiny wreath.
Secure it all together with your hot glue gun and place it on top like a crown. These jars make perfect spring gifts. Fill one with treats and pair it with some creative Easter egg cup crafts for a delightful tablescape. You will feel so proud of your work.
10. Pom-pom Tail Bunny Gift Jar
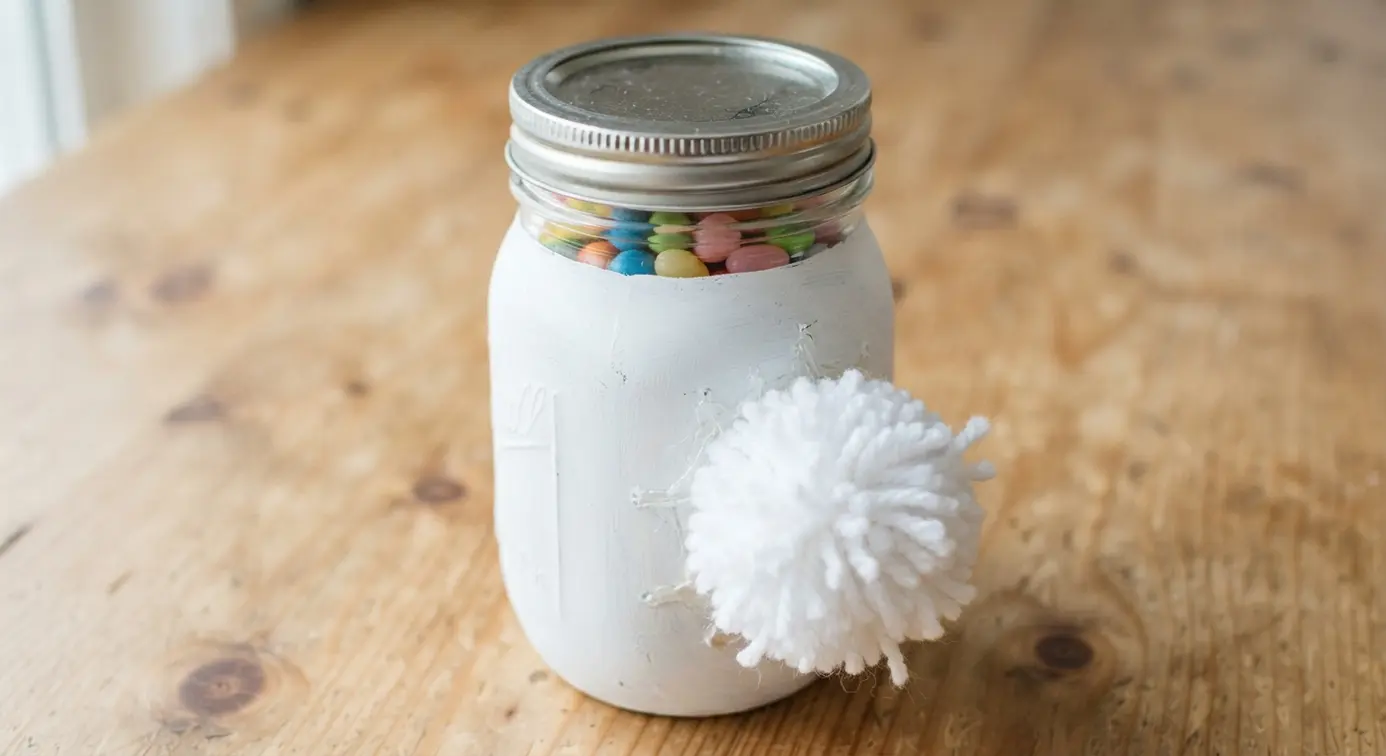
Crafters love pom-pom tail bunny mason jar ideas because they look intricate but remain wonderfully straightforward. You start with a clean, dry glass jar and add a bunny face right on the front. I love using a small pink pom-pom for the nose and drawing the whiskers with a permanent marker.
The real charm comes from attaching those floppy felt ears to the lid and a fluffy yarn tail to the back. The key is using a hot glue gun for a quick, strong hold on the glass. That pom-pom tail gives it such a playful, tactile feel your recipient will adore.
Once your adorable bunny jar is assembled, fill it with treats or small gifts. It is a perfect handmade container for Easter, but it is so cute you will want to make them all year. If feeling inspired to reuse jars in other creative ways, you could even create a jar aquarium lamp as your next fun upcycle project.
Applying Clear Protective Sealants For Project Longevity
Protecting your bunny mason jar ideas means applying a clear acrylic sealer over the dry design to lock everything in place. Brush on a product like Mod Podge for a durable, washable finish that handles gift-giving. Spray sealants are great for an even coat without brush strokes.
Apply two thin layers, letting the first dry completely, for the best protection. This final step is what turns a cute craft into a lasting decor piece. You protect all your hard work from peeling or scratching when someone handles the jar.
It is the difference between a project that lasts one season and one you can bring out year after year.
Conclusion
Making these bunny mason jar ideas is about sharing a bit of handmade joy. Each jar holds the potential to become a special gift or a cheerful piece of your own spring decor. The best part is that you do not need advanced skills, only a willingness to play with color and texture.
My advice is to pick the one that makes your heart happiest and start there. Gather your paints, yarn, or felt, and enjoy the process of bringing a little bunny to life. I hope these projects inspire you to create something you love. Your next bunny mason jar idea is waiting to become a reality.
FAQs
Q: What is the best paint to use on glass mason jars?
A: Acrylic craft paint works well, especially brands formulated for glass or multi-surface use. For better adhesion, clean the jar with rubbing alcohol first and consider using a sealant after the paint dries.
Q: How do I attach felt or fabric pieces securely to the jar?
A: A strong craft glue or a hot glue gun provides a good hold. Apply glue to the entire back of the fabric piece and press firmly onto the clean, dry glass. Let it dry completely before handling.
Q: Can I make these jars if I am a beginner at crafting?
A: Absolutely. Many of these designs require minimal materials and steps. Start with a project that uses simple adhesives or wrapping techniques to build your confidence.
Q: What can I put inside a finished bunny mason jar?
A: They make perfect gift containers. Fill them with Easter candy, cookie mixes, small toys, bath salts, or packets of garden seeds. You can also use them as charming vases or candle holders.
Q: How do I prevent painted designs from scratching off?
A: Let the paint cure fully for at least 24 hours. Then, apply a clear acrylic sealer spray or brush-on varnish designed for crafts. This adds a protective layer over your design.