

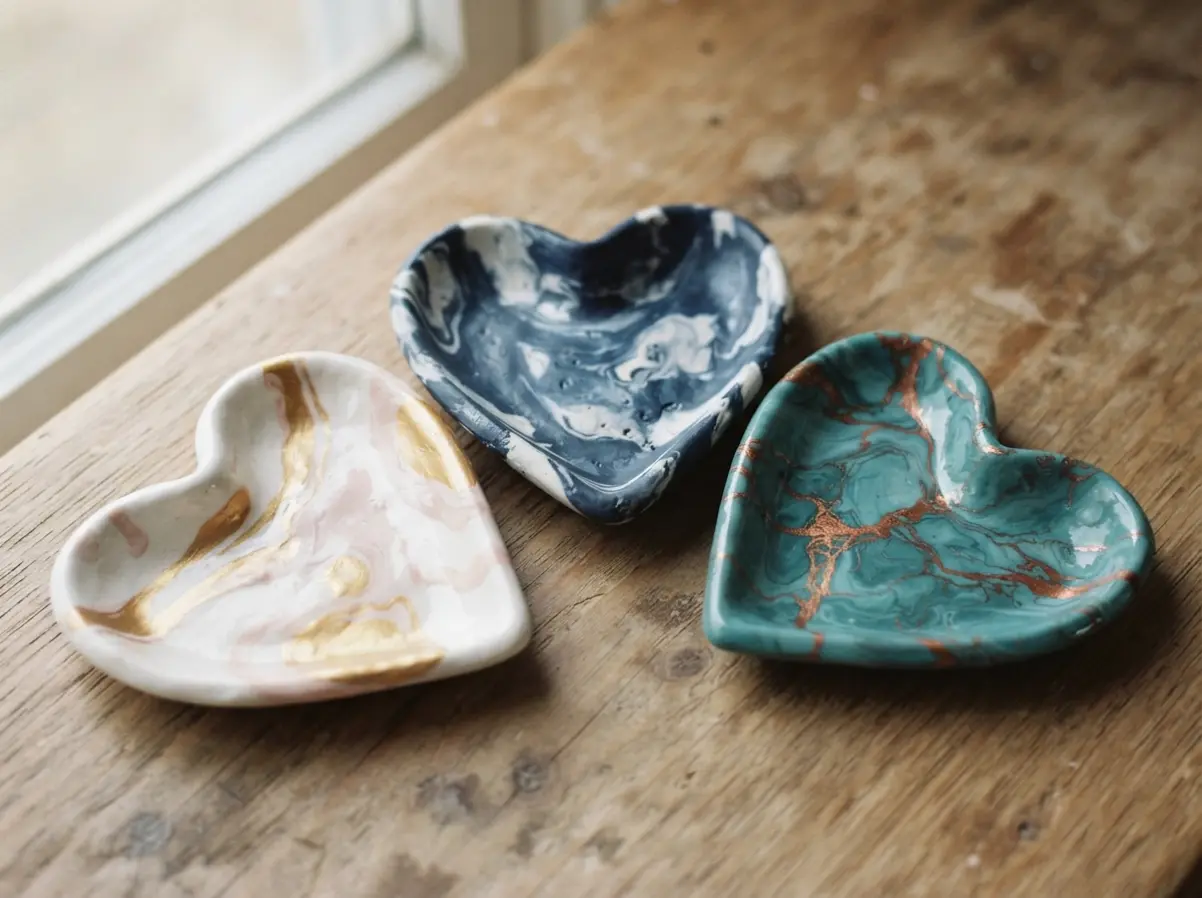
Achieving Consistent Marble Patterns With Polymer Clay
The fastest way to ruin a perfect swirl is over-conditioning your clay, which blends colors into a muddy grey instead of keeping those crisp, organic veins. When testing new heart ring dish ideas, you want to treat each color block like a separate ingredient, stacking them and gently rolling only until you see the first distinct ribbons appear. Trust me on this, using a non-stick silicone surface and a high-quality acrylic roller gives you the control to stop at exactly the right moment. That visual depth you love comes from a limited palette of two to four colors, and I always include a metallic like copper or gold to make the matte shades pop. The good news is, once you see those first beautiful swirls, you can stop and slice your clay without another roll.
Selecting The Ideal Clay For Durable Dish Structures
Your finished piece needs a clay that holds a sharp edge and bakes to a solid, durable finish, which is why I reach for a firm brand like Premo or Kato every single time. Softer clays are tempting for easy conditioning, but they often slump or warp in the oven, ruining your smooth heart shape. You will notice a firm polymer clay also maintains its thickness better under the roller, preventing those frustrating thin spots that bake unevenly. We all know a ring dish gets daily use, so choosing a clay known for its strength after curing is non-negotiable. As you develop heart ring dish ideas, remember that this foundation ensures your marbled art is built to last on a dresser for years.
1. White Pink Gold Marbled Heart Dish
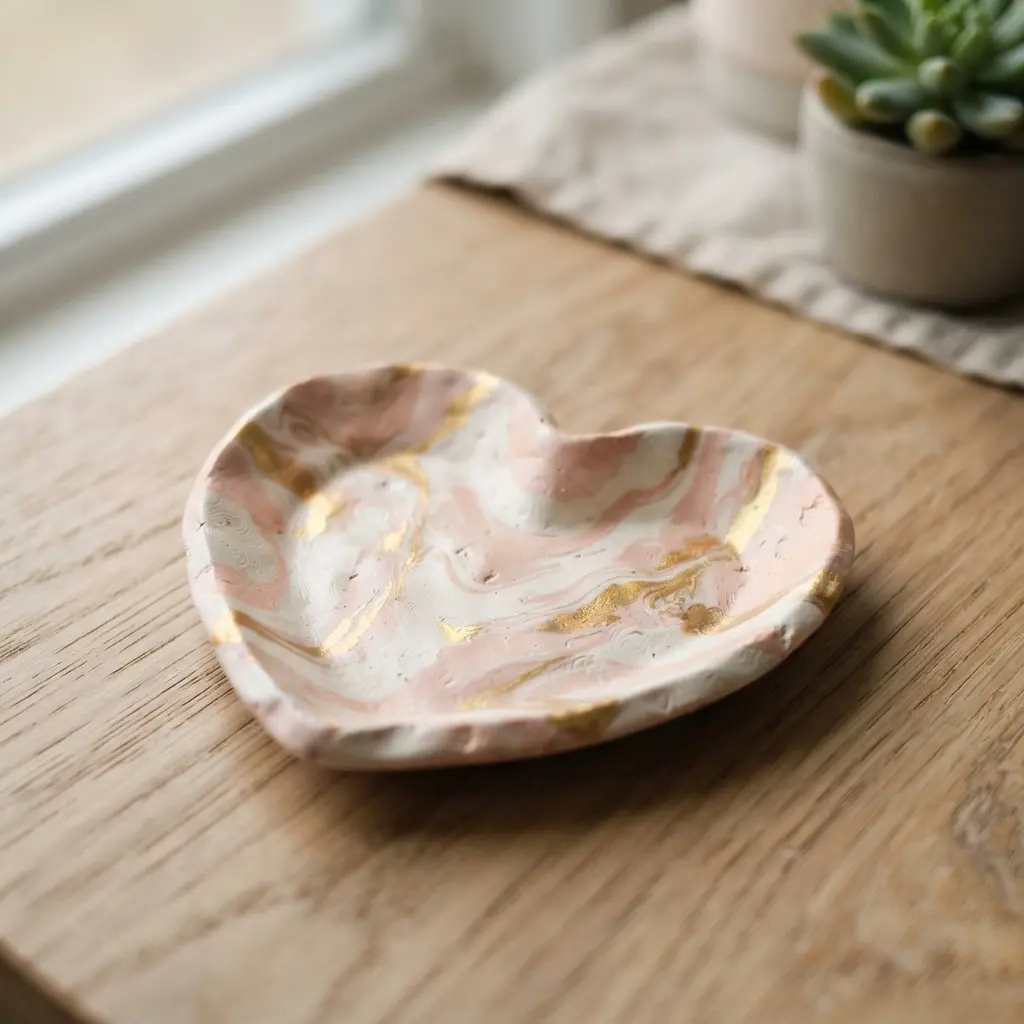
This one looks so elegant, but I promise it’s a wonderfully forgiving project to start with. The secret is in the gentle twist and fold of your clay colors. You take small pieces of white, pink, and gold polymer clay, twist them into a log, then fold and twist again. The trick is to stop before the colors fully blend, so those beautiful, organic veins of gold stay distinct.
Once you have your marbled sheet, cut out a heart shape and gently press it into a bowl to form the dish. Isn’t it satisfying to see that unique pattern emerge? When arranging heart ring dish ideas on your vanity, I love how the glossy finish makes the colors pop, turning a simple trinket dish into a little piece of art.
If you enjoy making heart-shaped gifts, you might want to see some DIY heart necklace projects for more wearable ideas. My top tip is to use an oven thermometer for perfect baking every time. Feel that pride when you pull your one-of-a-kind creation from the oven!
2. Duo Tone Grey White Swirled Heart Catchall
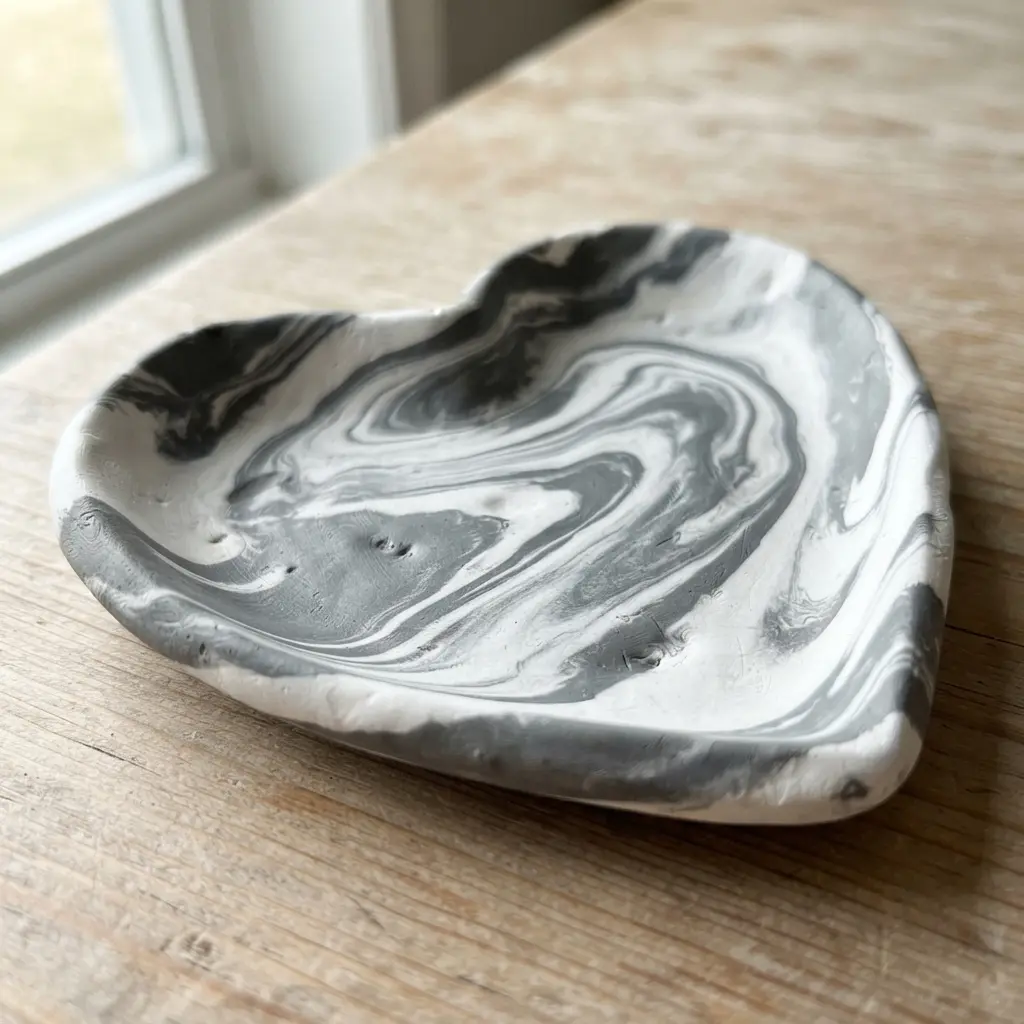
This piece stands out among heart ring dish ideas because the process is surprisingly straightforward. You simply pour your two shades of resin into a silicone heart mold and use a skewer or toothpick to create those lovely, organic swirls. The key is to swirl gently and stop before the colors fully blend, letting the resin do the rest of the work.
I love how this piece works because it’s a perfect marriage of form and function. The neutral color palette fits any room’s decor, while the heart shape adds a sweet, personal touch. Isn’t it satisfying to create something so pretty that also keeps your rings and keys organized?
If you are new to working with resin, getting your easy heart bracelet crafts right first is a fantastic way to practice the basic mixing and pouring techniques you will need here.
3. Terracotta Cream Earth Tone Marbled Heart Tray
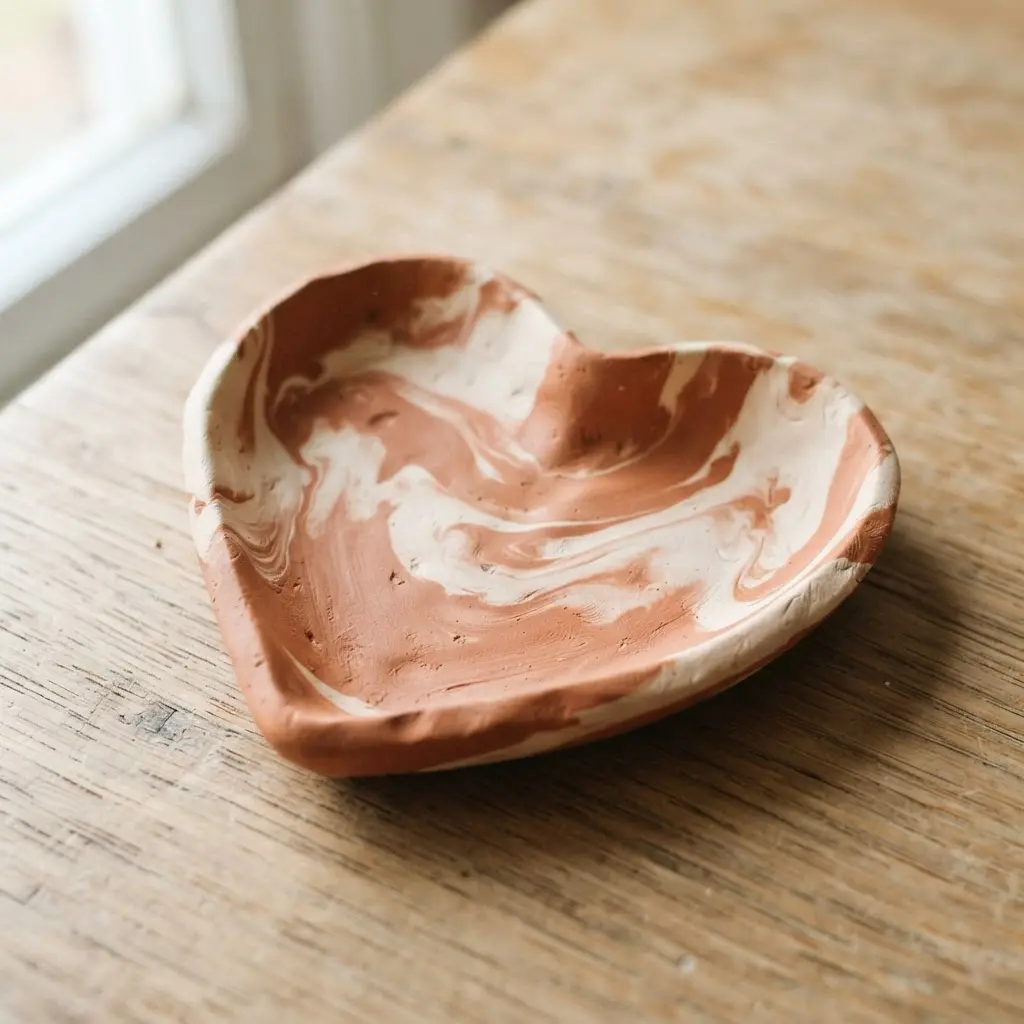
This one feels so elegant but the marbling technique is surprisingly simple. You start by mixing your base material into separate terracotta and cream colors, then gently fold them together. The key is to not mix them into a single color. You want those distinct, organic swirls. Press or pour that marbled blend into your heart-shaped mold and let it cure completely.
I love the unique, artisanal look you get from this process. Many heart ring dish ideas share this calm, beautiful vibe for any room. It makes a perfect little catch-all for keys or jewelry. Getting a clean finish is easy if you remember to properly prepare your mold before you start.
This project shares that same handmade, heartfelt quality as creating a studded heart canvas art piece. Both are wonderful ways to add a personal touch to your decor.
4. Pastel Lavender Mint Speckled Clay Dish
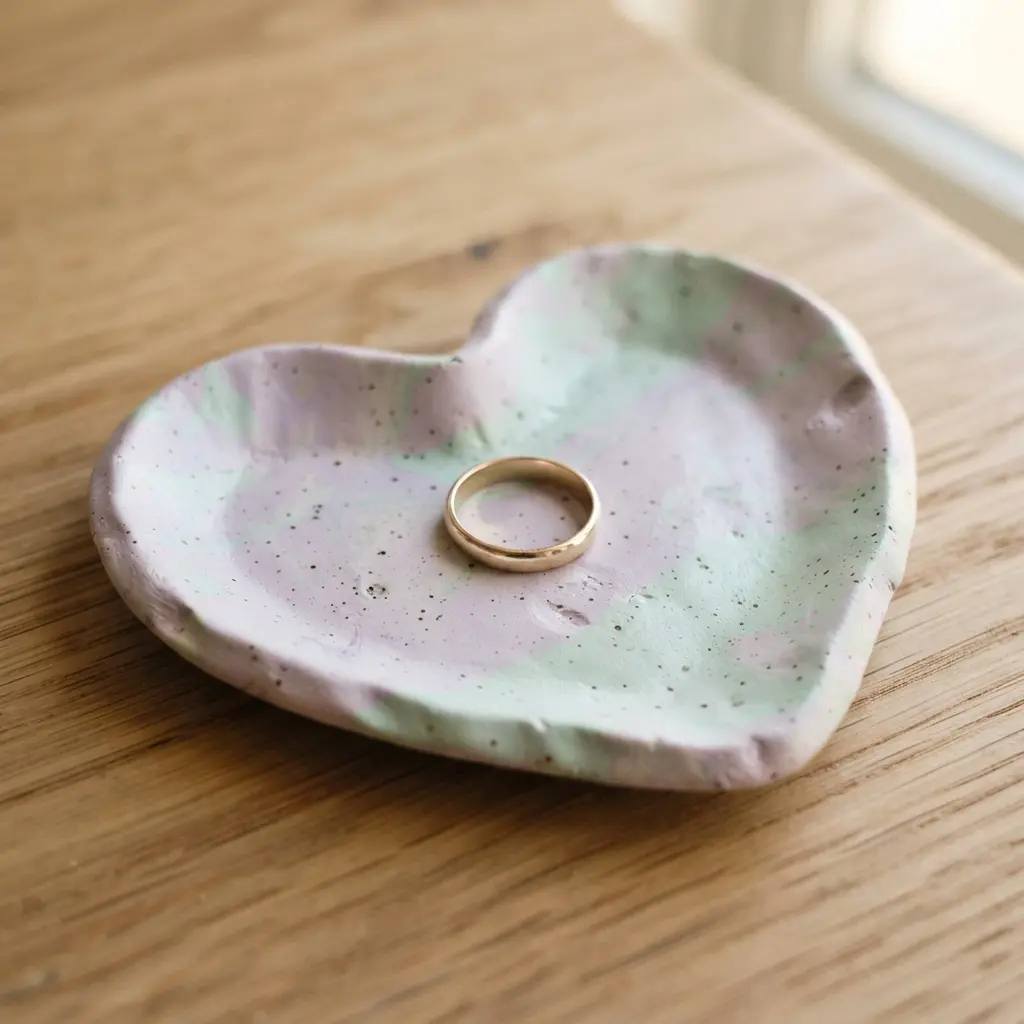
Doesn’t this color combo just feel like a spring morning? The soft lavender and mint create such a gentle look, and those tiny flecks add a wonderful handmade texture. I love how it feels both dreamy and earthy at the same time.
Start by conditioning your polymer clay in those two pastel shades. To get the speckles just right, mix in tiny pinches of a darker clay or some mica powder until the distribution looks even. Roll it out and shape it into a shallow dish, using your fingers to gently curl the edges.
These heart ring dish ideas work because the subtle colors and speckles hide minor imperfections, making it super forgiving for beginners. Your finished piece will look gorgeous holding jewelry on a dresser, and it makes a thoughtful handmade gift. For another project that brings a cozy, handmade feel to your decor, look at making a cornucopia heart wreath.
5. Navy Blue White Marbled Heart Trinket Bowl
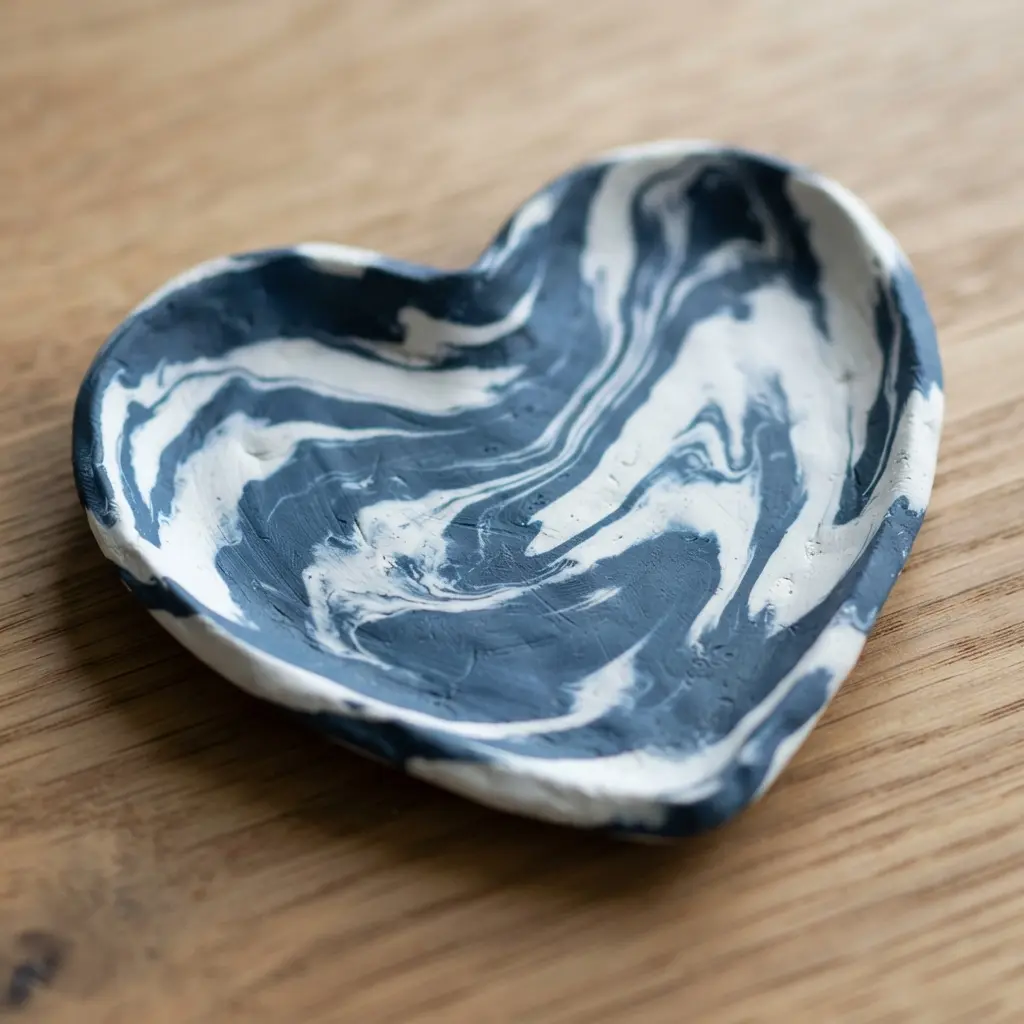
Among popular heart ring dish ideas, this look surprises people with its high-end boutique feel. It’s surprisingly simple to create that elegant marbled effect yourself. The secret is in how you combine your navy blue and white polymer clay or resin pigments. You gently twist and fold the colors together, stopping well before they fully blend. This keeps those beautiful, distinct swirls from turning muddy. I love how each piece turns out completely unique, just like a little work of art.
Once you have your marbled slab, you shape it into a heart using a heart-shaped cutter or mold. After it’s cured or baked, you have a stunning, functional piece. The sophisticated color combo works with so many decor styles, while the shape adds a sweet, personal touch. It’s perfect for holding rings by your bedside or organizing tiny treasures on a vanity. For another sweet project with a similar sentimental vibe, try making candy hearts out of clay.
Your biggest challenge will be resisting the urge to over-mix, which is why many successful heart ring dish ideas rely on restraint. Trust me on this, less is definitely more here. Aim for just a few folds and twists for that perfect, organic look. Feel proud when you pull your one-of-a-kind creation from the oven.
6. Gold Leaf Edged White Marbled Heart Plate
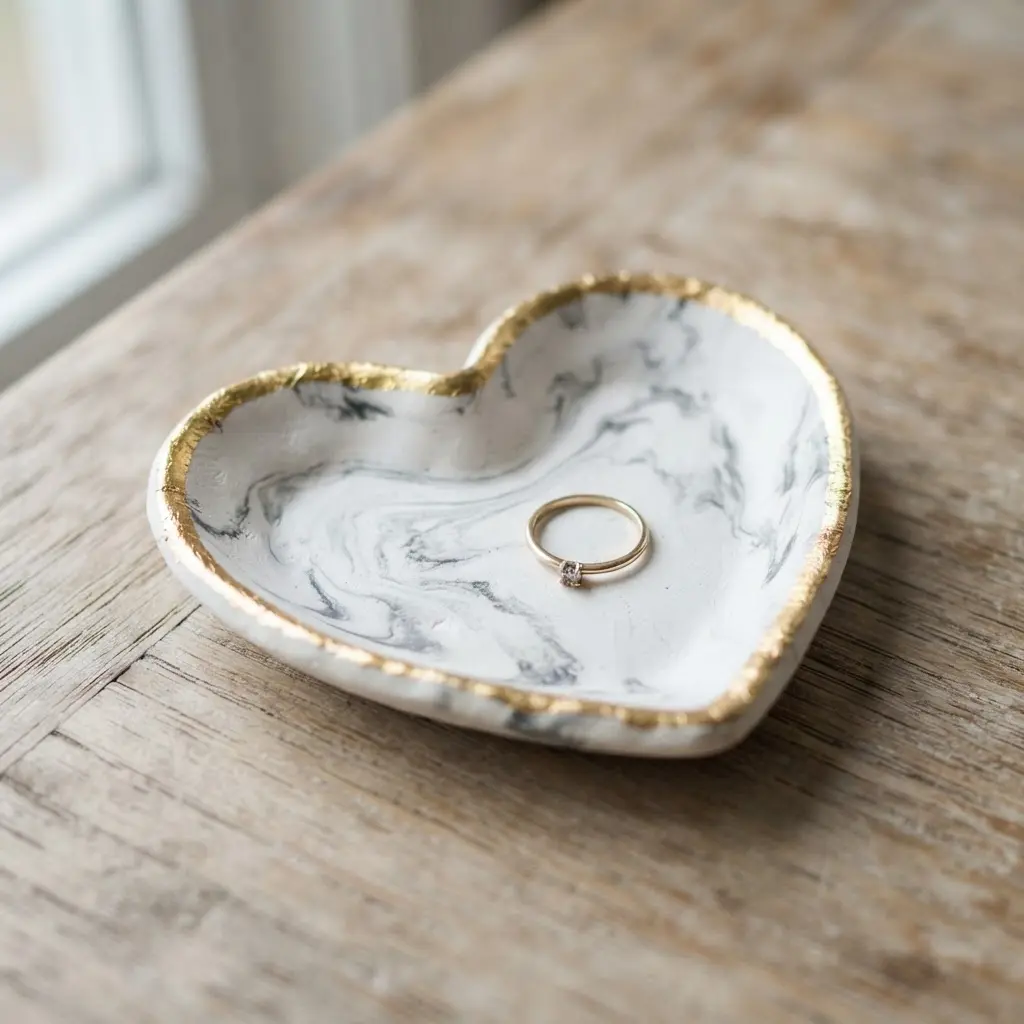
This design looks like it belongs in a high-end boutique, but you can absolutely make it yourself. The magic is in the marbling technique, where you swirl grey into white clay to create those beautiful, unique patterns. After firing, you carefully apply a special adhesive and then the delicate gold leaf sheets to the rim.
I love how the gold edge catches the light and elevates the whole piece. The metallic rim elevates the piece, proving that heart ring dish ideas can easily balance soft romance with crisp luxury. Doesn’t that combination look stunning?
Trust me on this one, always handwash your finished plate to protect that gorgeous gold leaf edge. Keep it dry when storing it away from humidity, and your tray will stay pristine.
7. Black White Modern Monochrome Marbled Heart Dish
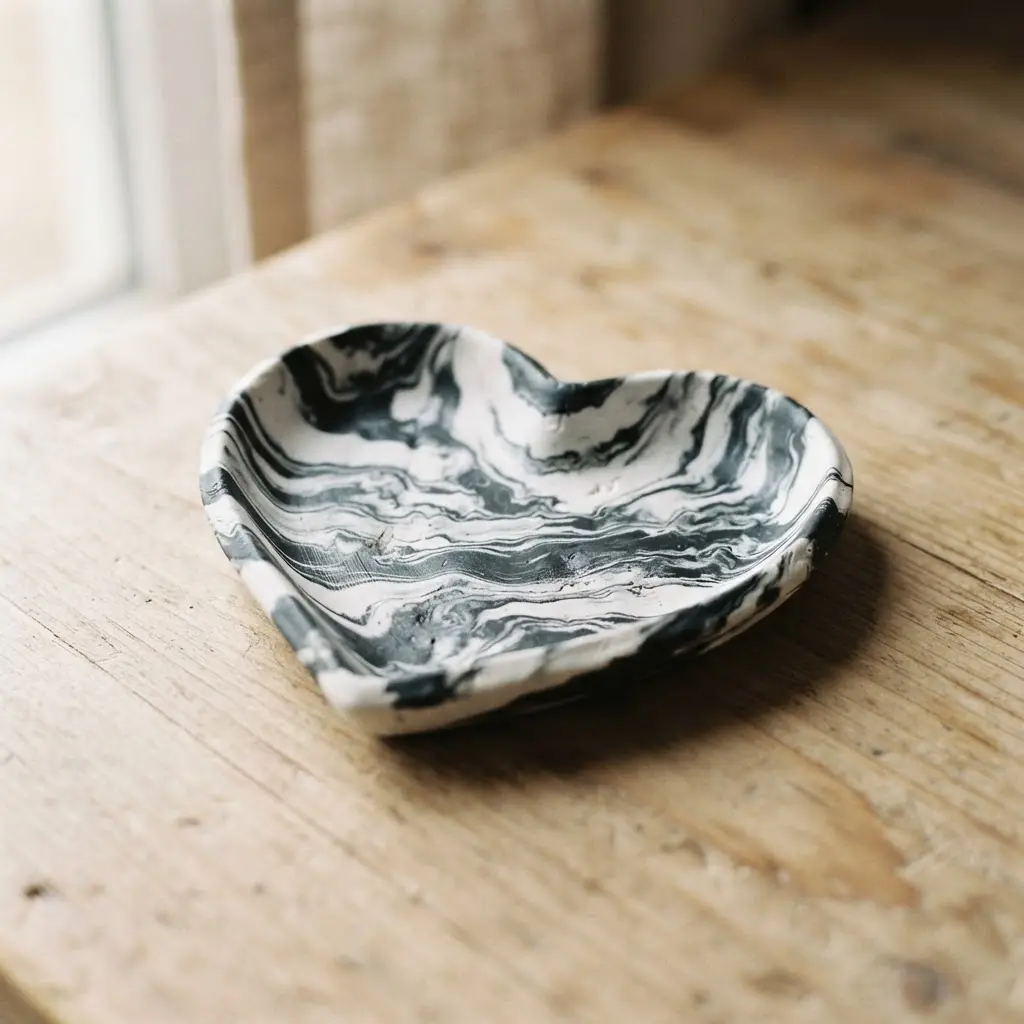
Ever wondered how to get that high-contrast marble effect without it turning into a muddy mess? The trick is in the gentle kneading technique. You only want to twist your black and white clay together a few times to create those gorgeous, swirling patterns before rolling it out and cutting your heart shape. I love how this creates a completely unique piece every single time.
The reason this design works so well is its elegant simplicity, which sets it apart from typical heart ring dish ideas. That bold monochrome palette makes it a timeless decorative accent that fits right into any modern space. It is perfect for holding your favorite ring or a few small trinkets. Try it and feel the satisfaction of creating something so chic and personal.
8. Sunset Ombre Pink Orange Clay Heart Holder
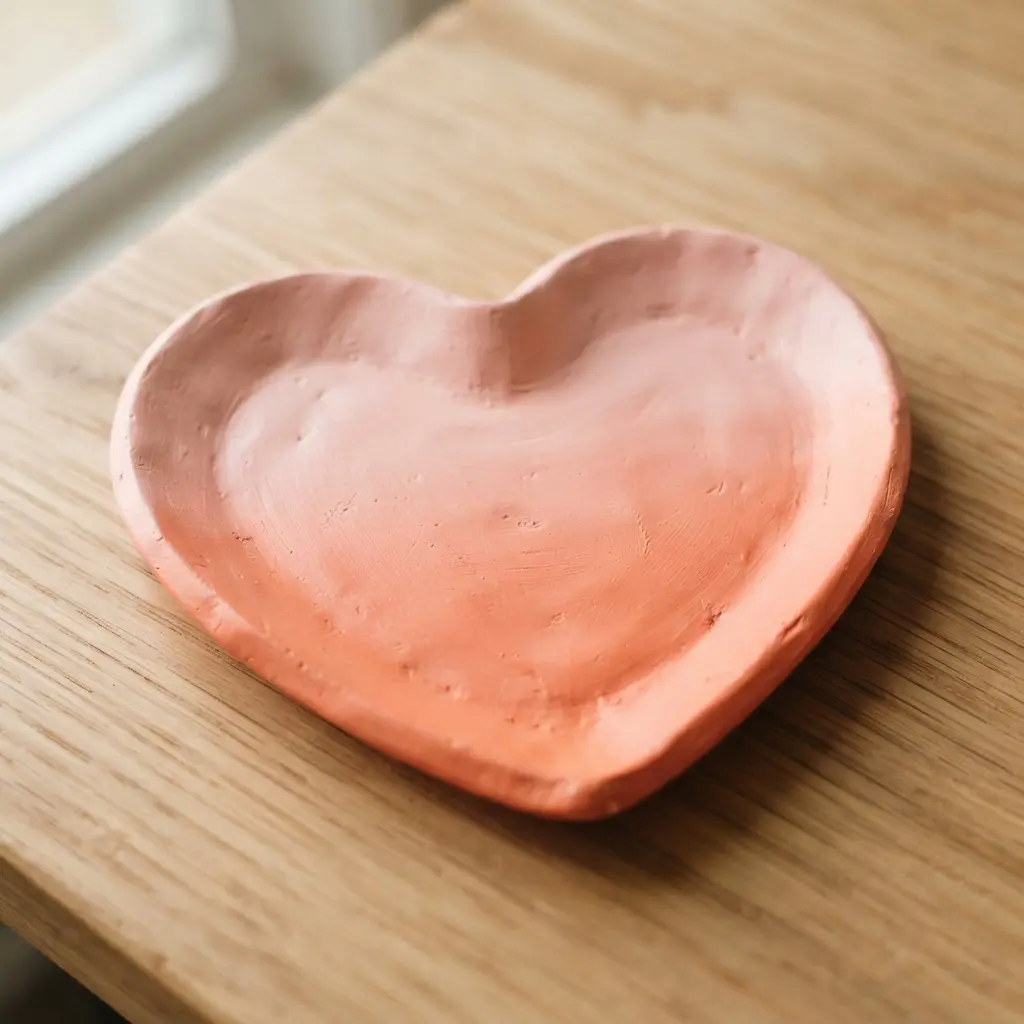
Who says a sunset has to stay in the sky? This piece brings those warm, glowing colors right to your dresser. You start by blending separate blocks of pink and orange polymer clay on your acrylic roller until you get that perfect, seamless gradient. Roll it out, cut your heart shape, and gently press the center to form a little bowl.
Once baked and cooled, you have a stunning, functional trinket tray. The ombre effect looks complex, but it’s really just about patient, gradual blending. I find that exploring fresh heart ring dish ideas turns a simple ring dish into a miniature work of art. For an extra-cozy vibe, try pairing it with some handmade heart-shaped vanilla candles on your nightstand.
9. Teal Copper Metallic Veined Heart Trinket Tray
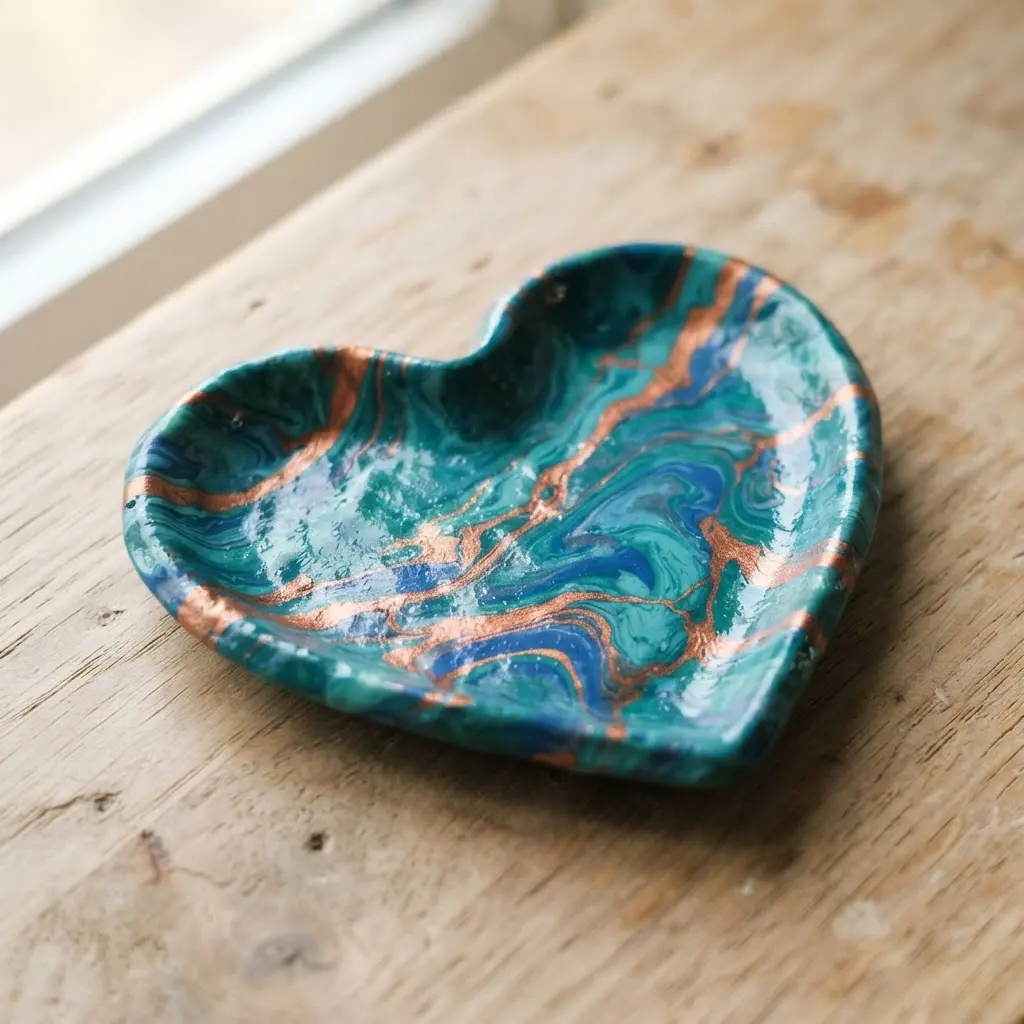
Starting your collection of heart ring dish ideas here means you will love how the copper powder adds shimmer. This one surprised me – it looks like expensive artisan pottery but it starts with simple polymer clay. The magic is in how you create those gorgeous metallic veins. After conditioning your teal polymer clay, you sprinkle on copper powder and then gently fold and twist it, aiming for thin, flowing streaks instead of a uniform blend.
Once you cut out the heart shape and curve up the edges, you bake it. That final step of applying a clear polymer clay glaze is what makes the teal pop and the copper shimmer. It works because that organic, veined pattern is impossible to replicate exactly, so every single tray you make is a one-of-a-kind piece of art. I love how it turns a basic trinket dish into a stunning decor item that holds your rings and keys with serious style.
If you enjoy making wearable clay art, the same careful attention to color and finish applies when you craft rolled flower necklace designs. Trust me, mastering this veining technique gives you a fantastic skill for all sorts of projects.
10. Matte Sand Neutral Marbled Clay Heart Vessel
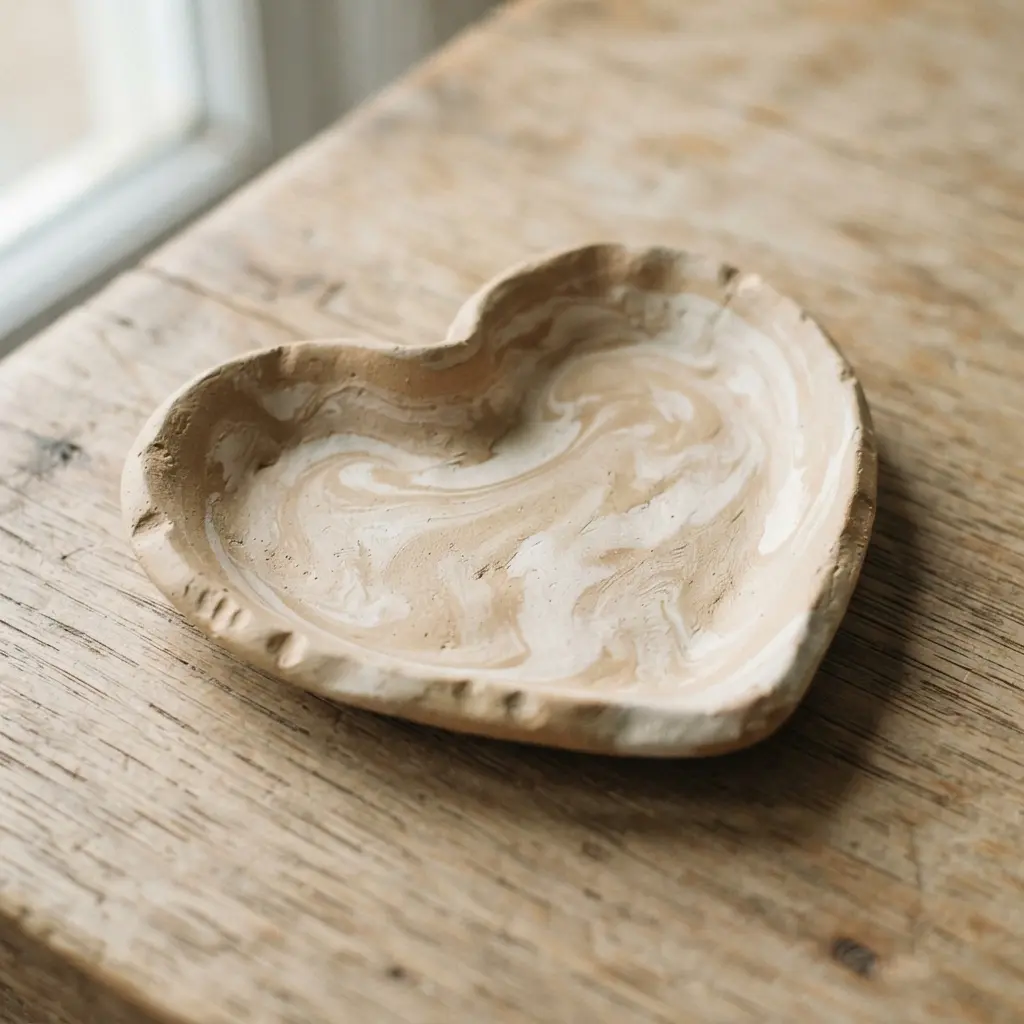
This one always feels so peaceful to make. You start by layering two or three shades of your neutral clay, then gently twist and fold them just a few times. Roll it out and cut your heart shape, forming it into a simple dish. The magic is in not over-mixing; you want those soft, natural veins to show through.
The matte finish and warm sand color make it feel organic, proving that heart ring dish ideas can be wonderfully understated. It is the perfect subtle touch for a shelf or a heartfelt handmade gift. I love how each one turns out completely unique.
Once your piece is fired, it makes a lovely home for trinkets. For a different take on heart-shaped art, some great watercolor heart painting inspiration uses similar soft, blended colors in a whole new way.
Applying Protective Finishes To Finished Clay Creations
Skipping the sealant is the one mistake I see beginners make that instantly downgrades a professional-looking piece. A single layer of high-gloss water-based varnish takes minutes to apply and locks in your colors while adding a gorgeous, glass-like shine that resists fingerprints. If you prefer a matte look, the same type of varnish comes in a flat finish and protects just as well. After baking and letting your dish cool completely, use a soft brush to apply an even coat, making sure to get into the curved edges. This final step is what makes your marbled heart feel like a finished product, ready to hold your favorite rings without a worry.
Conclusion
Finding the right heart ring dish ideas is about more than just a place to put your rings. It is about creating a small moment of beauty in your daily routine, a piece that feels truly yours. My best advice is to pick the color combination that makes you happiest and remember to keep the clay well-conditioned and avoid over-blending to keep those gorgeous patterns distinct. However you choose to make yours, I hope these projects spark that wonderful feeling of starting a new creation, one tiny, beautiful heart at a time.
FAQs
Q: What type of clay works best for marbled ring dishes?
A: A high-quality air-dry clay is ideal. It holds sharp edges well, sands smoothly, and takes a sealant evenly for a durable, professional finish.
Q: How do I prevent the colors from blending into mud?
A: Condition your clay thoroughly but handle it minimally when layering colors. Twist and fold just enough to create veins, and stop before the colors fully combine.
Q: Do I need to seal a clay ring dish?
A: Yes, applying a clear sealant is essential. It protects the surface from dust and moisture, adds a beautiful luster, and makes the dish easy to wipe clean.
Q: How can I keep the dish’s shallow shape while it dries?
A: Form the dish inside a small bowl or vessel that supports the curved shape. This prevents the edges from curling up as the clay contracts during drying.
Q: Can I add details like gold leaf after the clay dries?
A: Absolutely. Apply gold leaf or metallic paint to fully dried and sanded pieces. Use a strong craft adhesive for leaf and a thin brush for precise painted details.









