


Selecting Durable Adhesives For Seasonal Decorations
When preparing DIY spider crafts for halloween, the fastest way to watch your spider’s legs fall off mid-party is using a standard glue stick on heavy pipe cleaners or an egg carton body. Trust me on this, you want a premium tacky glue or a low-temperature hot glue gun for those crucial limb-to-body connections. These thicker formulas create a flexible bond that handles the wiggling and inevitable bumps that happen with excited little helpers.
A weak adhesive means you are fixing droopy legs instead of enjoying your creepy creation. For lighter materials like yarn or paper, a strong white glue works perfectly. The good news is a single bottle of the right stuff lasts through multiple projects, saving you time and frustration.
Establishing A Cohesive Halloween Color Palette
Your black spider will pop against a wall when you pair it with a neon green or bright orange web made from yarn or string. Here is the thing, that classic Halloween look comes from high-contrast combinations, not simply using every spooky color you own. Stick to two or three main colors like black, that electric green, and maybe an iridescent purple for pom-pom accents to keep your display feeling intentional.
We tend to grab all the glitter at once, but a limited palette lets each piece shine. Mixing in some glow-in-the-dark paint on the eyes or body adds a fantastic surprise element when the lights go down. This focused approach makes your collection look like a planned exhibit, proving that DIY spider crafts for halloween deserve thoughtful color planning rather than a random craft supply explosion.
1. Black Pom Pom Pipe Cleaner Spider
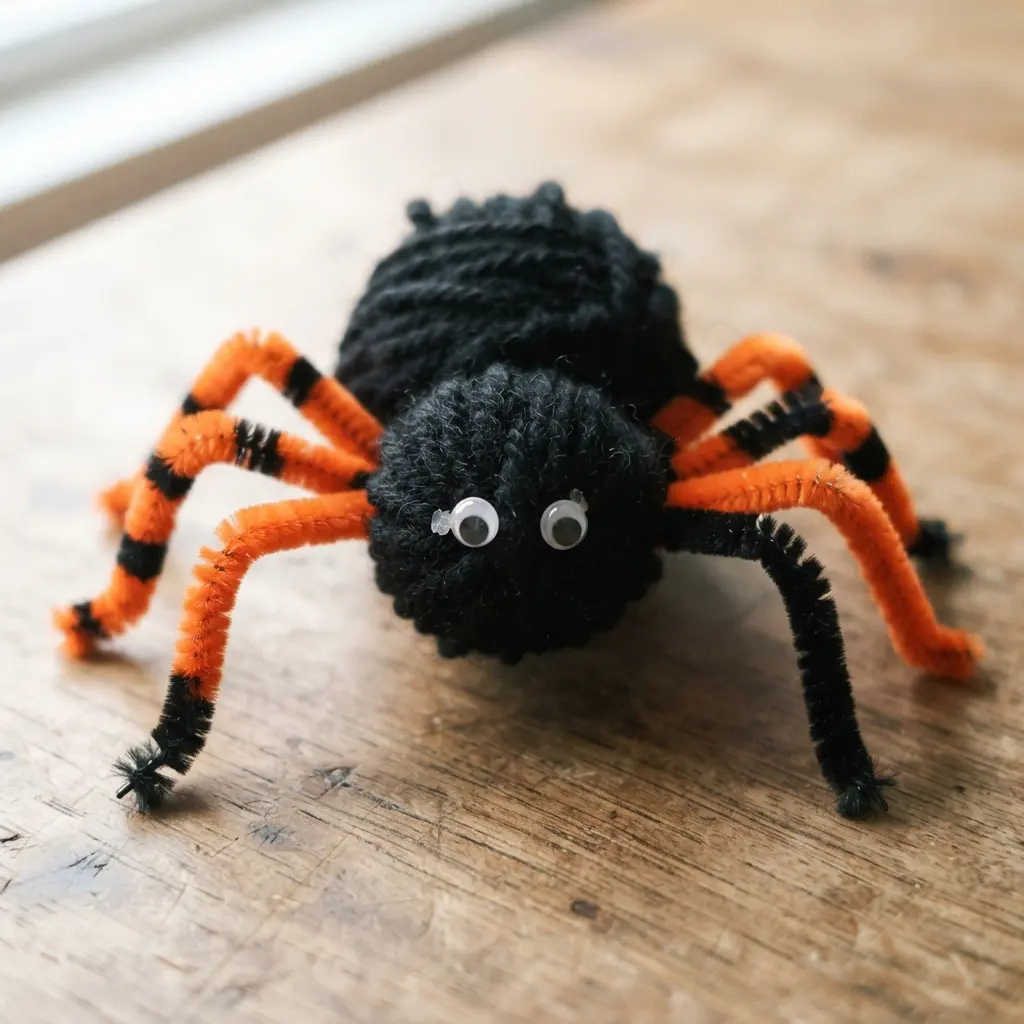
This one surprised me. It looks so detailed, but honestly, it takes under 10 minutes to assemble. You start by threading folded black pipe cleaners through a big fuzzy pom-pom to create eight legs, then bend each one into spooky little knees and feet.
The best part is how customizable it is. You can glue on two big googly eyes for a cute look or add a bunch of tiny ones for something creepier. I love how the bendable legs let you pose it anywhere, from a windowsill to a party table. It is a fantastic, simple project that feels wonderfully tactile.
For sturdier results with DIY spider crafts for halloween, especially if kids will be playing with it, a dab of craft glue where the legs meet the body makes all the difference. Once you get the hang of it, you will want to make a whole cluster. They are perfect for your Halloween decorations, and you will easily fill your season with fun activities.
2. Paper Plate Large Googly Eye Spider
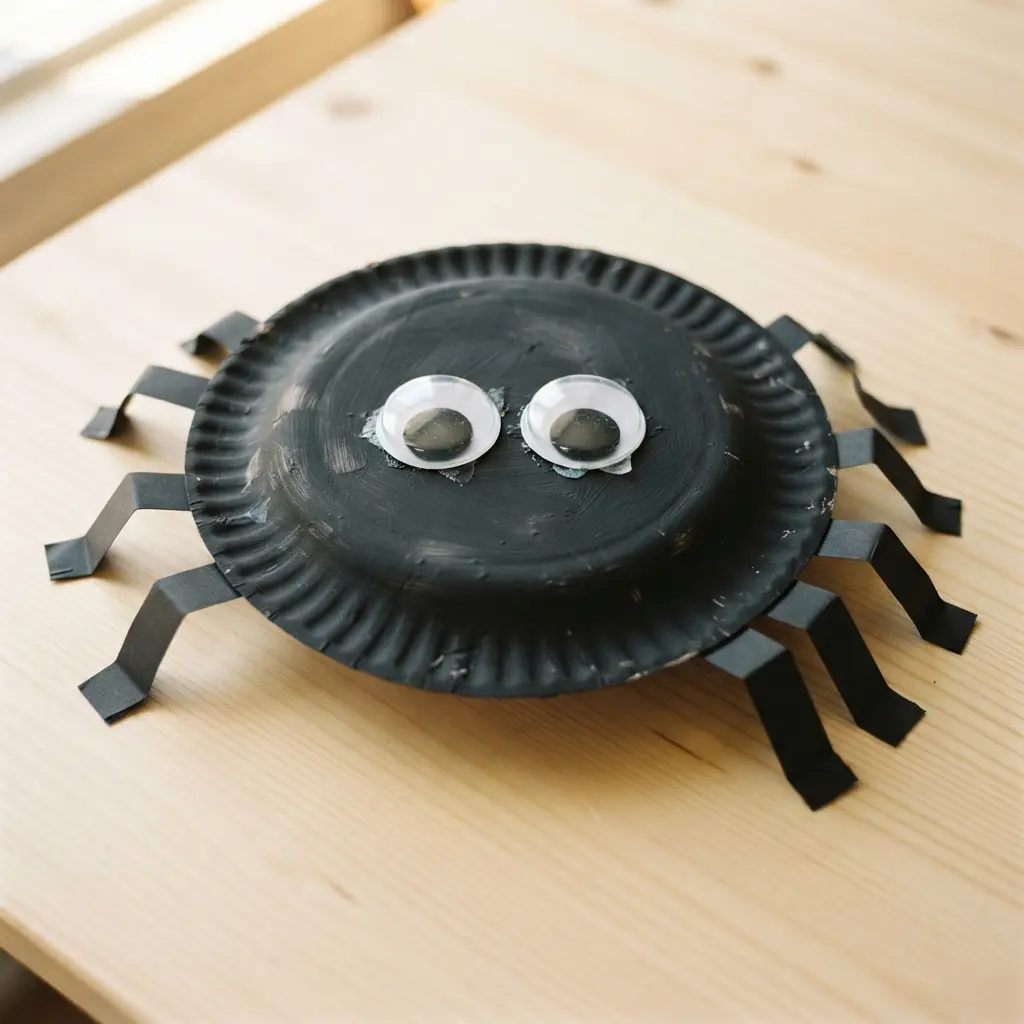
Who would have thought a simple paper plate would become such a delightfully spooky arachnid? You start by painting the plate black and letting it dry completely. Then, cut eight strips of black cardstock and fold them into zig-zag legs before gluing them underneath.
The magic happens when you add a whole bunch of googly eyes. Trust me, using a variety of sizes, with several big ones right on top, gives it that perfect playful yet creepy look. The generous use of eyes makes DIY spider crafts for halloween a huge hit with children.
It is a fantastic, low-mess activity that results in a decoration everyone loves. You will happily place your finished spider near some spooky Halloween bookmark crafts to create a whole creepy corner in your crafting space.
3. Recycled Toilet Paper Roll Spider Decor

Who would have thought a humble toilet paper roll transform into such a fun decoration? You start by giving the roll a couple of coats of black paint and letting it dry completely. Then, you thread black pipe cleaners through small holes to create eight wiggly legs and finish with a pair of googly eyes. I love how this project turns trash into a spooky treasure so quickly.
It works since the basic shape is already perfect for a spider’s body, saving you a ton of time. This is my go-to tip: make sure the paint is fully dry before adding the legs to avoid smudges. You can even add a string loop to hang your creepy creation near your seasonal wreath for a full porch display. This recycled approach proves that DIY spider crafts for halloween turn everyday items quickly.
4. Black Construction Paper Handprint Spider Art
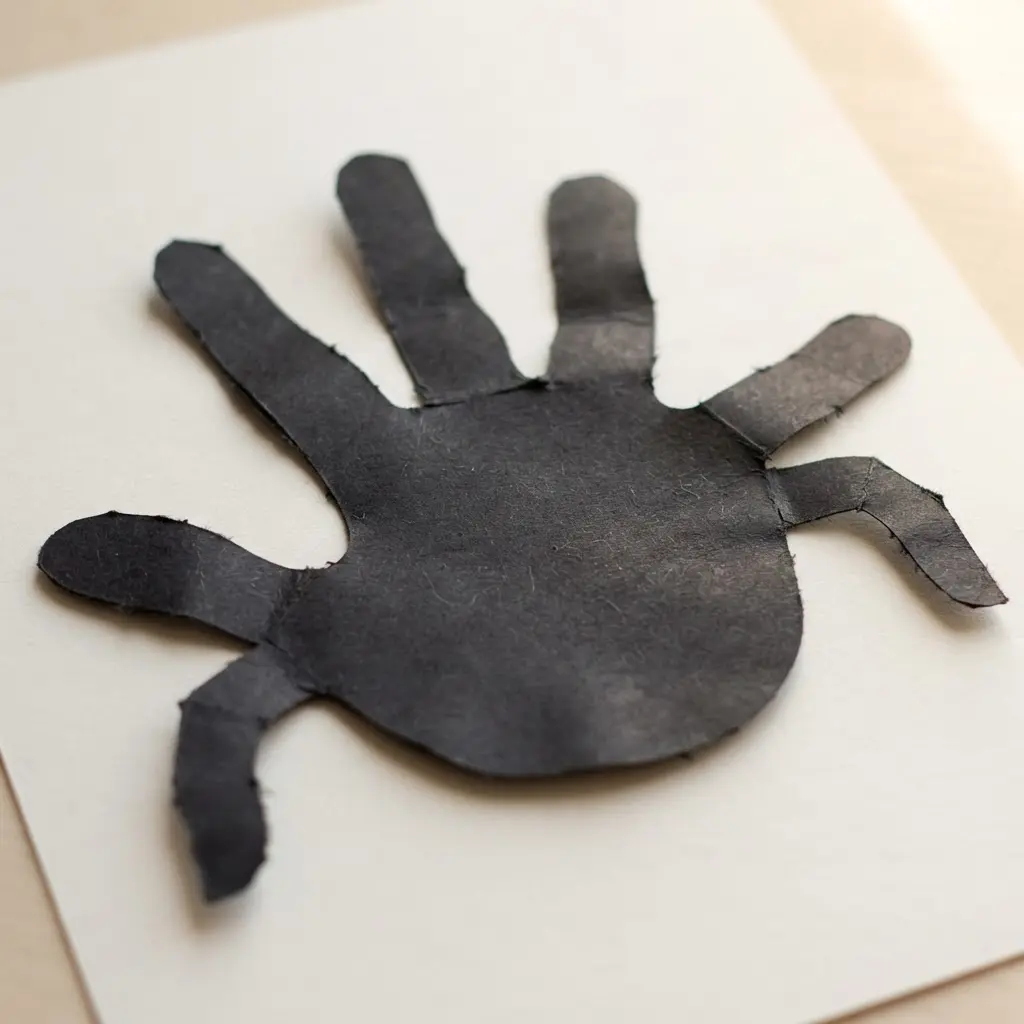
Have you ever wanted a Halloween project that doubles as a sweet keepsake while making DIY spider crafts for halloween? This one fits perfectly. You trace your child’s hand onto black construction paper, cut it out twice, and attach the palms to a simple oval body. Those splayed fingers become eight wonderfully spooky legs.
It works beautifully since it is incredibly simple for little hands to help with, and the contrast of the black on a bright background stays striking. Add some googly eyes for personality and you have a charming decoration. Feel proud of your creepy creation, and maybe pair it with some DIY Halloween gift tags for a complete handmade holiday touch.
5. Glossy Black Yarn Wrapped Styrofoam Spider

Ever wondered how to make DIY spider crafts for halloween look truly spooky, and simply cute instead? The secret lies in that glossy black yarn. It catches the light like a real spider’s body, giving it a sleek and menacing quality you will love.
You start by gluing two Styrofoam balls together for the head and abdomen. Then, you only wrap and wrap that shiny yarn tightly around the whole body, securing it with hot glue so no white peeks through. The final touch is adding eight black pipe cleaner legs and bending them into creepy, jointed poses.
This project stays so effective since the three-dimensional form and posable legs make it feel alive. It is a fantastic piece to hang up, and if you are working with younger helpers, you will find plenty of other creative pumpkin ideas for kids to keep the holiday fun going. Trust me, the glossy finish makes all the difference.
6. Felt Fabric Stuffed Spider Plushie Toy

Who says spiders have to be frightening when you explore creative DIY spider crafts for halloween? This felt plushie stands as the perfect huggable take on a seasonal classic. You will cut out two body shapes and eight leg strips, then sew them together, leaving a small opening for the polyester fiberfill stuffing. It is a tactile, satisfying process. I love how the felt doesn’t fray, making it a forgiving project for all skill levels.
Once you have your basic spider shape, the real fun begins with the face. Play with different eye placements using felt circles or safety eyes to create a friendly or spooky personality. This activity works since it transforms a traditional spooky symbol into a soft, personalized toy you will want to keep out all year. Get the stuffing right and you will feel a real sense of accomplishment holding your new eight-legged friend.
7. Pipe Cleaner Feathered Metallic Spider Ornament

Who says arachnids can’t look elegant? This little ornament proves they shine, mixing a bit of sparkle with soft texture for a chic seasonal look. You start by coiling a couple of chunky metallic pipe cleaners into a solid body.
Then, you cover it completely by gluing on small, soft craft feathers, overlapping them for a fluffy finish. The eight legs get folded and bent for a realistic jointed look before you tuck them right into the body under the feathers. It works beautifully since the feathers add a unique, ethereal texture you don’t get with other simple materials.
Trust me, adding those tiny metallic bead eyes is the final touch that makes it pop. For a magical holiday display, pair this feathered spider with some cute witch crafts and ideas on your mantle or tucked inside a wreath. Mixing sparkle with soft materials shows how elegant DIY spider crafts for halloween become when finished with care.
8. White Paper Doily Spider Web Craft
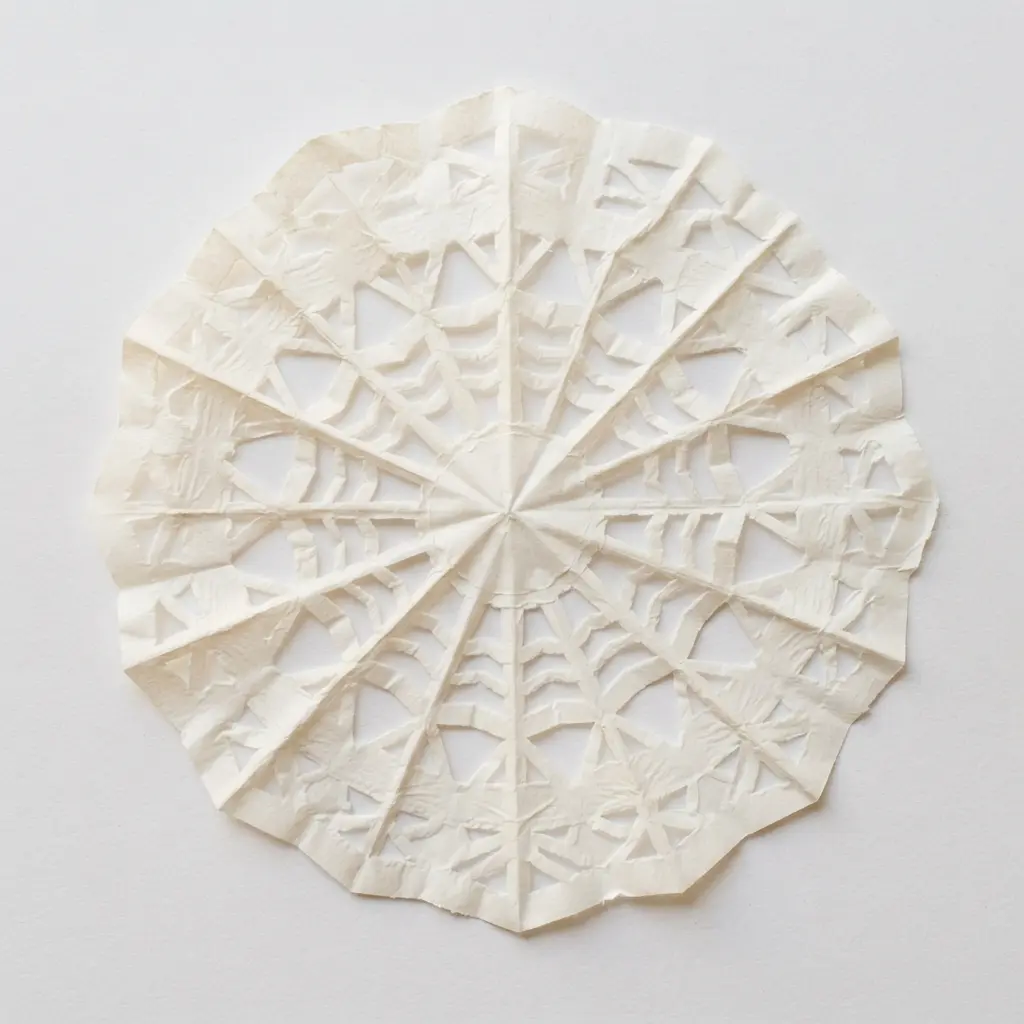
This one surprised me. It looks detailed, but you assemble a delicate web in minutes. The secret relies on using a paper doily as your perfect base. You simply cut small slits from the edges toward the center or fold it and snip tiny shapes, then unfold to reveal a lacy web. I love adding a tiny plastic spider or a touch of silver glitter for extra sparkle.
Why does this activity work so well? The doily’s natural patterns already mimic a web structure, providing a perfect starting point for DIY spider crafts for halloween. It is an easy, inexpensive way to get a spooky, custom look. Your finished web feels delightfully creepy and is perfect for hanging in a window.
My go-to tip is to leave a solid center when cutting. This keeps your web from falling apart. If you are working with kids, these webs pair wonderfully with some fun coloring sheets for a full afternoon of creative play.
9. Painted Rock Spider Desk Paperweight Project

Who says a paperweight has to be boring? This painted activity stays a favorite since DIY spider crafts for halloween turn free natural objects into useful desk companions. You find a smooth, palm-sized stone with a flat bottom for stability, then give it a couple of thin coats of black or dark gray paint for the body. After that dries, add personality with painted eyes or googly eyes for a playful touch.
It shines since you upcycle a free item into something useful and personal. That satisfying transformation stands as the whole point. For a polished look that protects your work, I always finish with a clear acrylic sealer. It makes the colors pop and keeps your creation looking great year after year.
You easily match its vibe to your other decor, like pairing it with some spooky Halloween eyeball rings for a coordinated theme. Doesn’t that sound like a fun way to add a little personality to your workspace?
10. Black Crepe Paper Fringe Spider Banner

This one looks like a professional party decoration, proving that DIY spider crafts for halloween take little time to assemble. You will be cutting strips into black crepe paper streamers to create that tattered, spooky fringe, leaving a solid top edge to hang it from. I love how the texture adds movement and a real cobweb feel.
Always be sure to use a ruler and pencil to mark your cuts first for even fringe. It works beautifully since the lightweight paper drapes nicely anywhere, from a mantel to a doorway. After you hang your banner, you will use the same supplies to make Halloween treat boxes for a fully coordinated setup.
Strategic Placement For Indoor Holiday Displays
You need to plan the hanging loop or knot into your spider web’s frame while you build it, instead of treating it as a last-minute afterthought. A loop of string tied securely between two sturdy sticks or a cardboard ring gives you a solid anchor point. This prevents the whole web from sagging or collapsing when you hang it, which we all know ruins the festive mood. Planning the hanging loop into your spider frame early keeps DIY spider crafts for halloween secure for indoor displays and maximizes their visual impact.
For freestanding arachnids, consider their balance. A wider leg stance or a slightly weighted body, like a pebble tucked inside before sealing, keeps them upright on a mantel or shelf. Think about traffic flow. Place your masterpiece high enough to avoid accidental swipes but low enough for kids to admire those glorious googly eyes. The right spot protects your work and amplifies the seasonal fun for everyone in the room.
Conclusion
The best part of these DIY spider crafts for halloween is seeing how each one takes on its own personality. A slight tilt of the eyes or the curl of a leg makes an arachnid look silly, spooky, or surprisingly elegant. It is a wonderful reminder that making things together focuses on the experience as much as the finished decoration.
My advice is to lay out all the materials and let everyone choose their favorite project to start with, since there is no wrong way to do it. I hope your home fills with a whole family of handmade spiders, each one a little keepsake of a creative afternoon spent together.
FAQs
Q: What are the easiest materials for young kids to use?
A: Paper plates, construction paper, and large pom poms provide excellent starting points. They remain easy to hold, cut, and glue. Pipe cleaners also work wonderfully for small hands since they bend easily and hold their shape without frustration.
Q: How do I make spider legs stay on securely?
A: For wire stems, poke small holes and feed the ends through, then twist them inside the body. For paper legs on a flat plate, create small slits and slide the pieces in, securing them with a strong dot of glue on the backside.
Q: Can I create these projects without using glossy plastic eyes?
A: You certainly can. Cut circles from white cardstock, paint small dots, or attach tiny buttons instead. Let kids draw their own facial expressions with markers to achieve a uniquely personal look.
Q: Are these activities suitable for a classroom or large group setting?
A: Yes, nearly all require inexpensive, bulk-friendly supplies like paper plates, cardboard tubes, and colored paper. Preparing pre-cut shapes ahead of time helps larger groups move through the projects smoothly and stays organized.
Q: How should I display these finished creations around my home?
A: Hang them from ceilings using clear fishing line, tape them safely to window panes, or arrange them carefully on shelves and mantels. A simple web framework made from string creates a perfect backdrop for displaying your entire handmade collection.









