

Color Palette Selection for Realistic Baked Textures
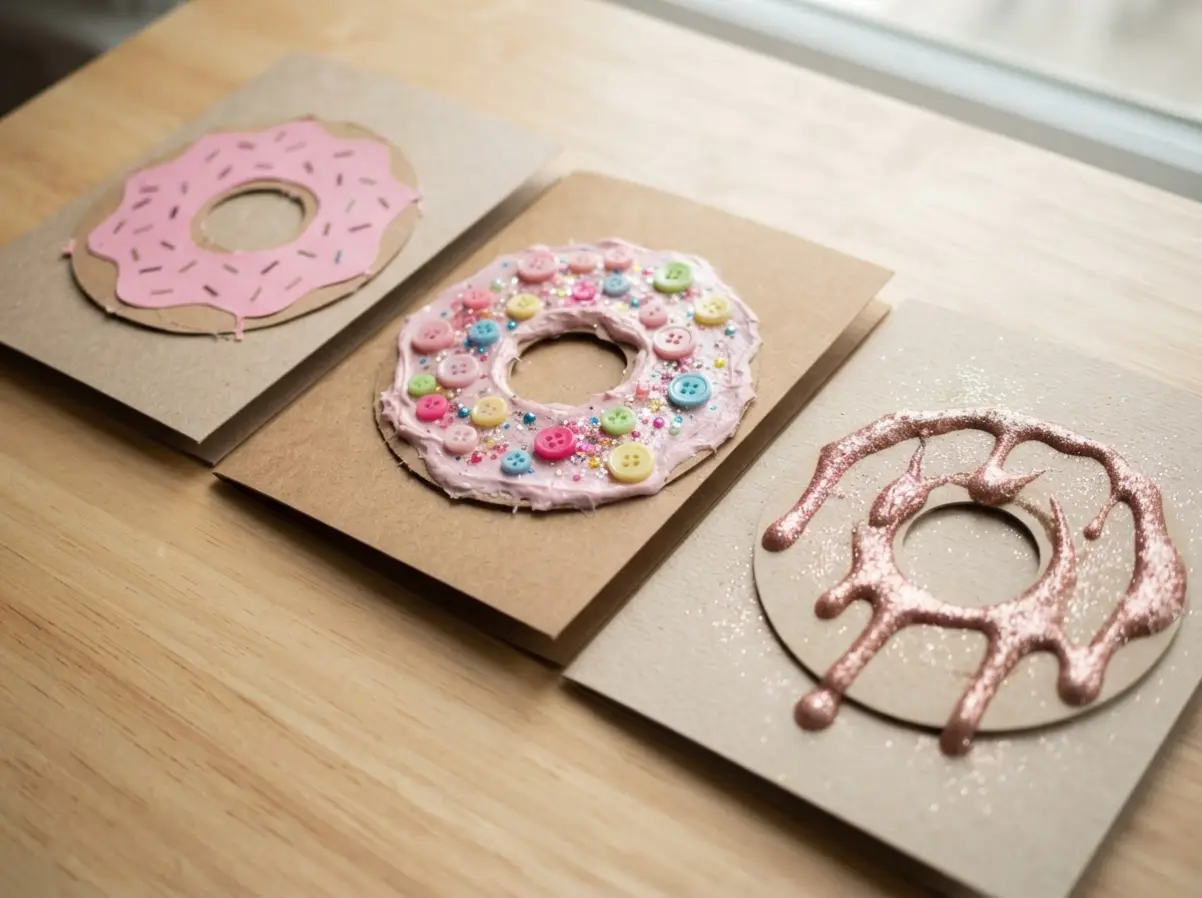
The fastest way to make your doughnut look real is picking a dough base color that is a few shades darker than your cardstock. We all know that real baked dough has a soft, golden brown warmth, not a flat beige. You can mix a little orange or red into a light brown paint to get that perfect, appetizing tone. The best approach for crafting successful Easy doughnut card ideas involves going for high-contrast icing colors like a bright pink or a deep chocolate brown against that base.
The good news is that puffy paint in these shades gives you that perfect, tactile glaze effect that feels like real frosting. This textural contrast is the secret to a card that looks good enough to eat. Trust me on this choice, and your finished project will instantly stand out.
Cutting Circular Bases without Professional Templates
A simple drinking glass or a roll of masking tape makes the perfect template for cutting your doughnut circles. Trace the larger circle for the outer edge of your card’s focal point, then find a smaller lid, like from a glue stick, to trace the inner hole. The trick is to cut the big circle first from your sturdy brown construction paper, which acts as your cardstock base. Then, you carefully cut out the smaller center circle freehand, which is easier than you think.
This method gives you clean, consistent shapes every time without any special tools. Mastering these shapes guarantees consistent results for all your Easy doughnut card ideas without professional equipment. You will notice your doughnut design looks more professional and less wobbly right away. Grab a ruler and steady your hands for the next step.
1. Layered Construction Paper Doughnut Card
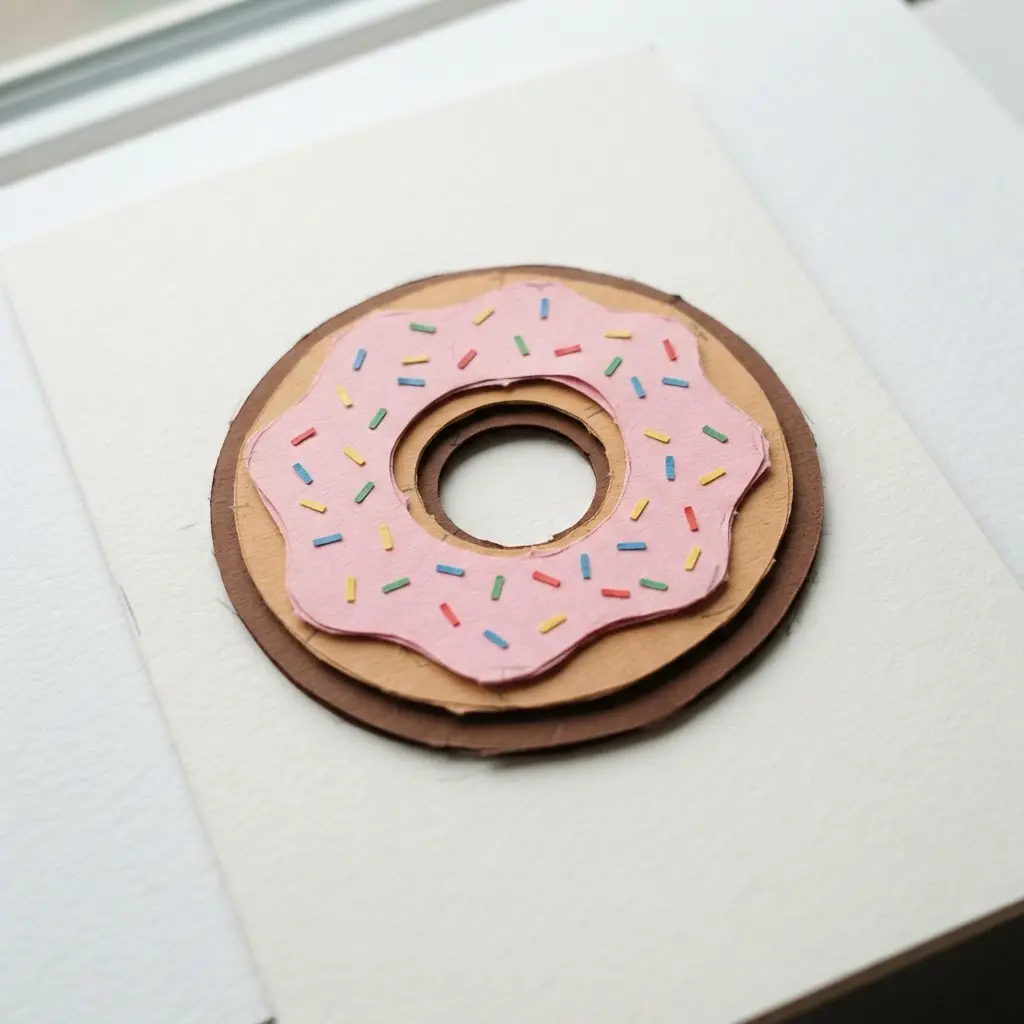
Ever feel like a card needs a little more personality? This layered approach brings a fresh twist to your Easy doughnut card ideas through a simple trick. You trace a simple circle for the base and cut a wavy, drippy shape from a second color for the icing.
Glue the icing on top of the doughnut body, and you have instant dimension. The layering technique makes it feel playful and tactile, not flat. Pick any icing color and cut tiny paper sprinkles from your scrap bin.
It is a fantastic way to use up leftover paper bits. The best part is how quickly it comes together. You will have a sweet, 3D card ready in no time.
2. Fingerprint Sprinkle Texture Doughnut Card
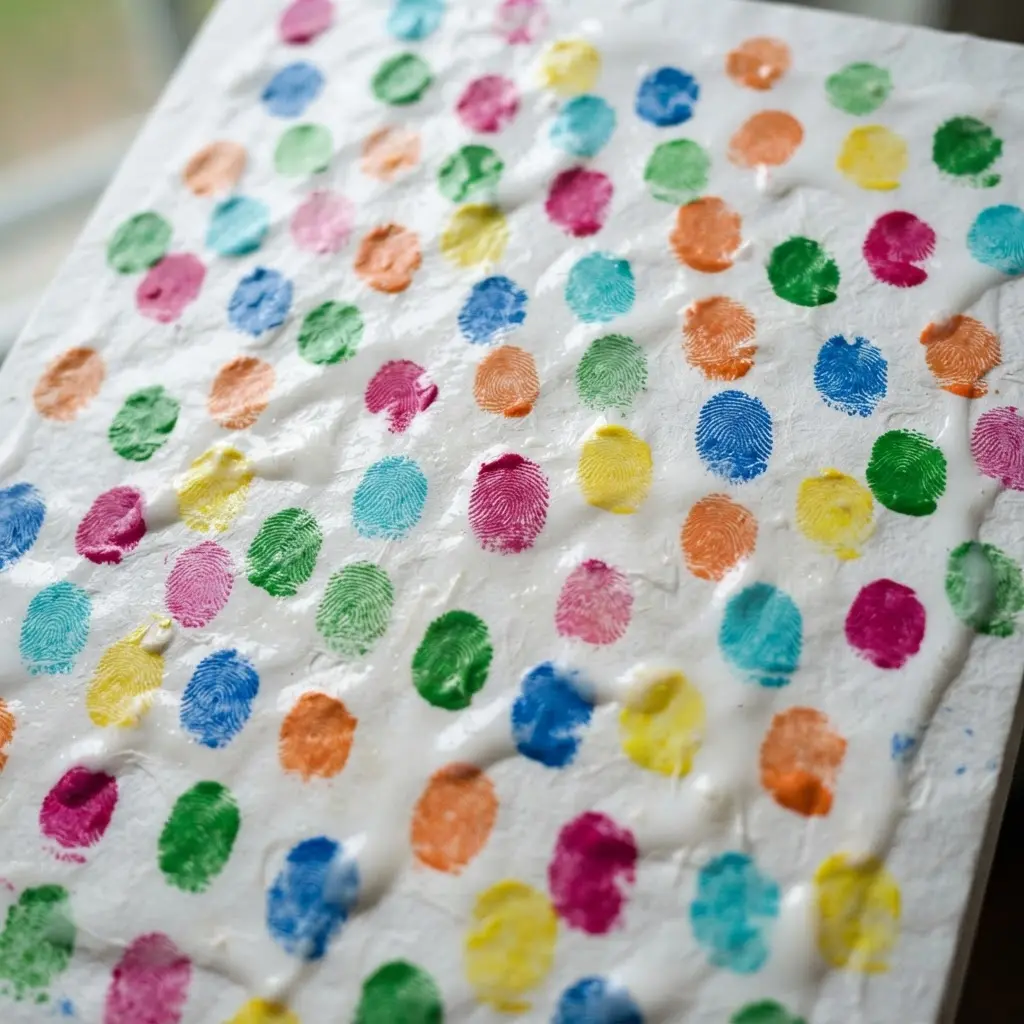
This idea looks like a professional bakery item, but it is simple and feels like magic. You create the doughnut base from cardstock, then press your inked finger onto it to build up a textured, slightly raised surface.
Adding this tactile step elevates every single one of your Easy doughnut card ideas with a handmade feel. The real fun starts when you add the jimmie sprinkles with a dot of glue, creating a fantastic tactile surprise. What makes it so effective is the combination of a simple fingerprint with a real, tiny object.
It is a perfect project if you are looking for easy handmade gift ideas that feel special. Just remember to let the ink dry before adding glue to keep your sprinkles from sliding. You will be amazed at how adorable and professional your card looks. Keep your workspace clean while the paint dries.
3. Button Embellishment Glazed Doughnut Card
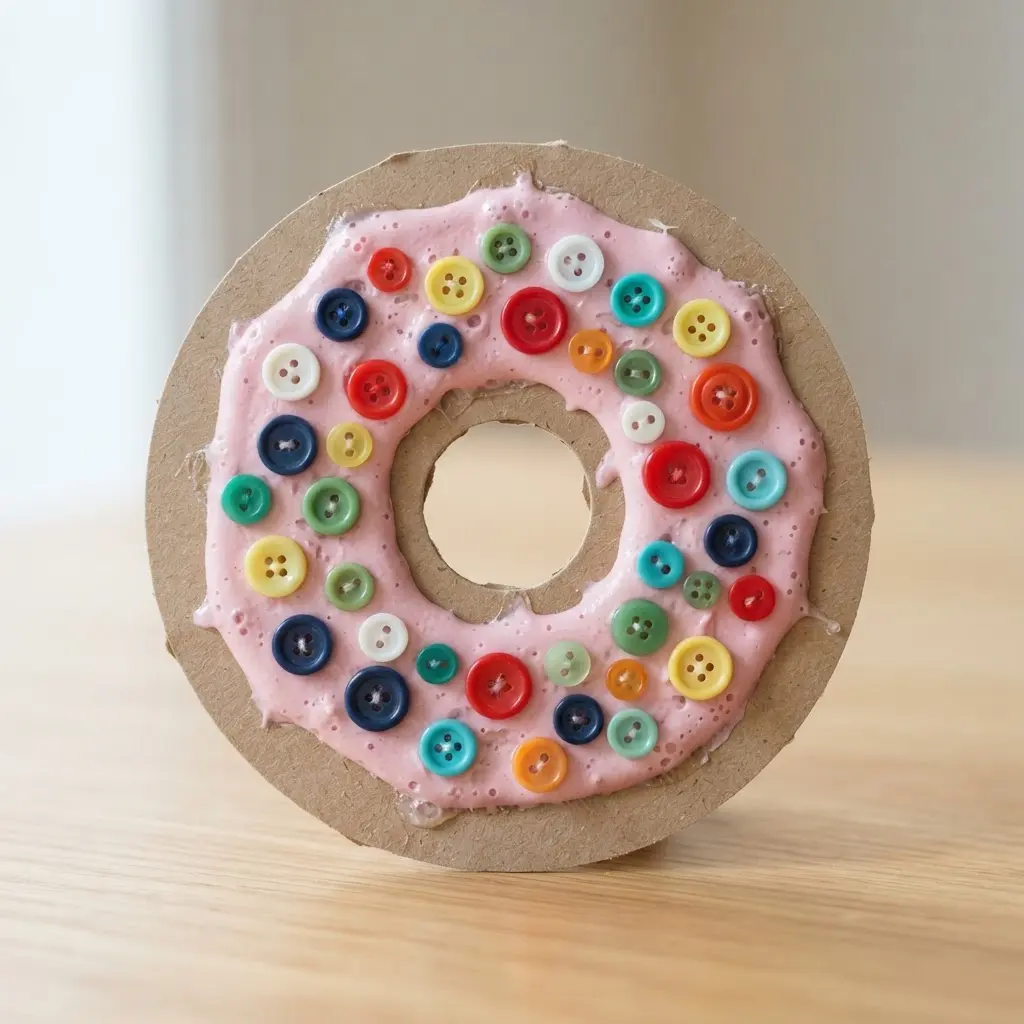
Ever wonder how to make a card that feels as fun as it looks? This one uses a simple cardstock doughnut shape and a layer of lighter paper for the glaze.
The clever use of colorful button sprinkles guarantees your Easy doughnut card ideas stand out with playful charm. I love how the different sizes and textures create such a playful, tactile surface. It works because the sweet, whimsical theme is universally charming.
You will get the best results by arranging your buttons on the glaze before you glue anything down. This lets you perfect your sprinkle pattern. A small dot of strong craft glue on each button back keeps things neat and secure.
This is a fantastic project for using up spare craft supplies. The 3D effect from the buttons makes it feel special, and it is a hit with kids. For another sweet and colorful project that uses a similar playful approach, look into watercolor heart painting crafts. Does that not look delightful?
4. Interactive Pop Up Doughnut Centerpiece Card
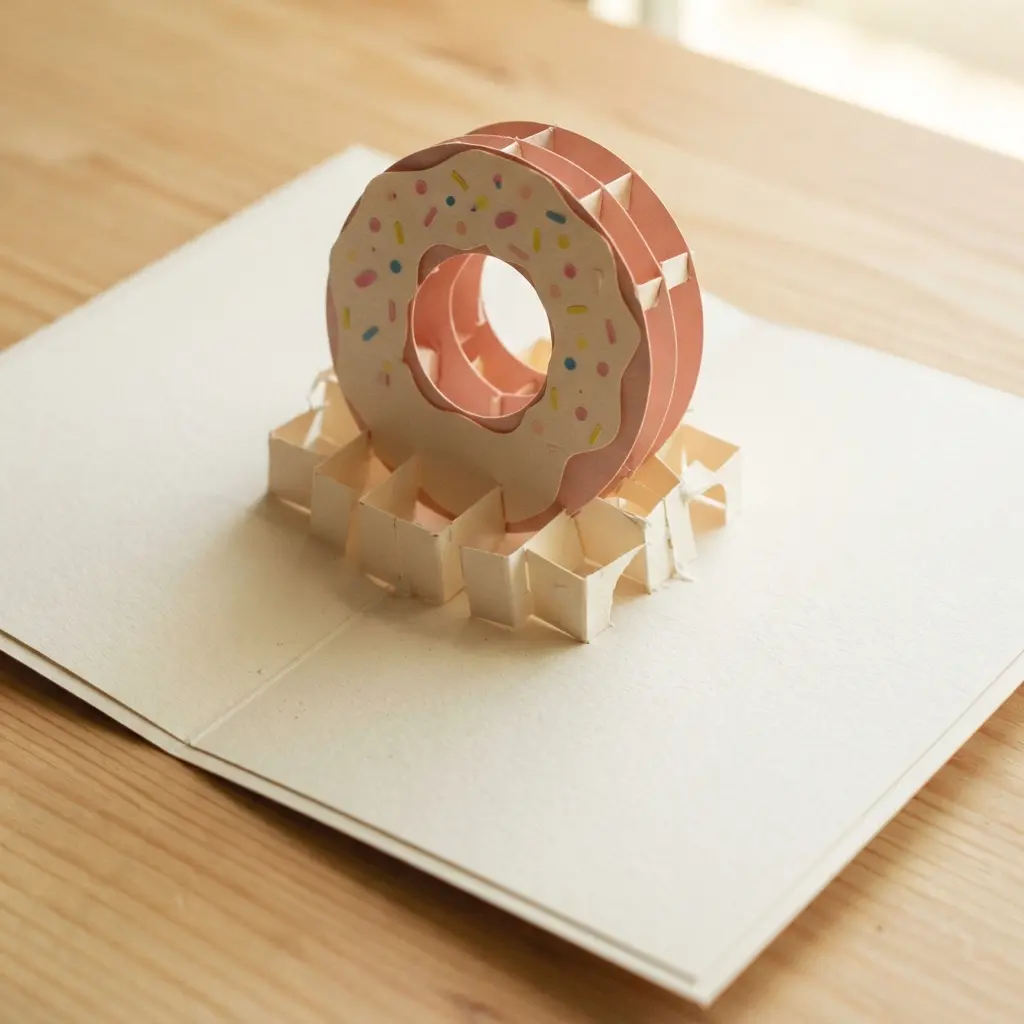
This one looks so impressive, but trust me, the core mechanism is simple. You cut a few precise slits and folds in your heavyweight cardstock to create the pop-up platform. That clever folding technique completely transforms basic Easy doughnut card ideas into dynamic keepsakes. Then, you glue your decorated doughnut shapes right onto those little platforms.
They stand up tall when the card opens. The real fun is in the decorations. You can layer different colored papers for frosting, add glitter glue for a glossy look, or even hide a secret message under a flap.
I love how this transforms a flat greeting into a little 3D sculpture. It works so well because that surprise pop-up element feels like a tiny celebration all by itself. Your recipient will get a kick out of it.
A great tip for the interactive part is to use a simple pull tab mechanism made from ribbon. It is a fantastic project to pair with some easy paper collage projects if you are making a whole themed gift. Does that not look stunning when it all pops up? Keep your cuts precise for smooth movement.
5. Washi Tape Frosted Doughnut Card
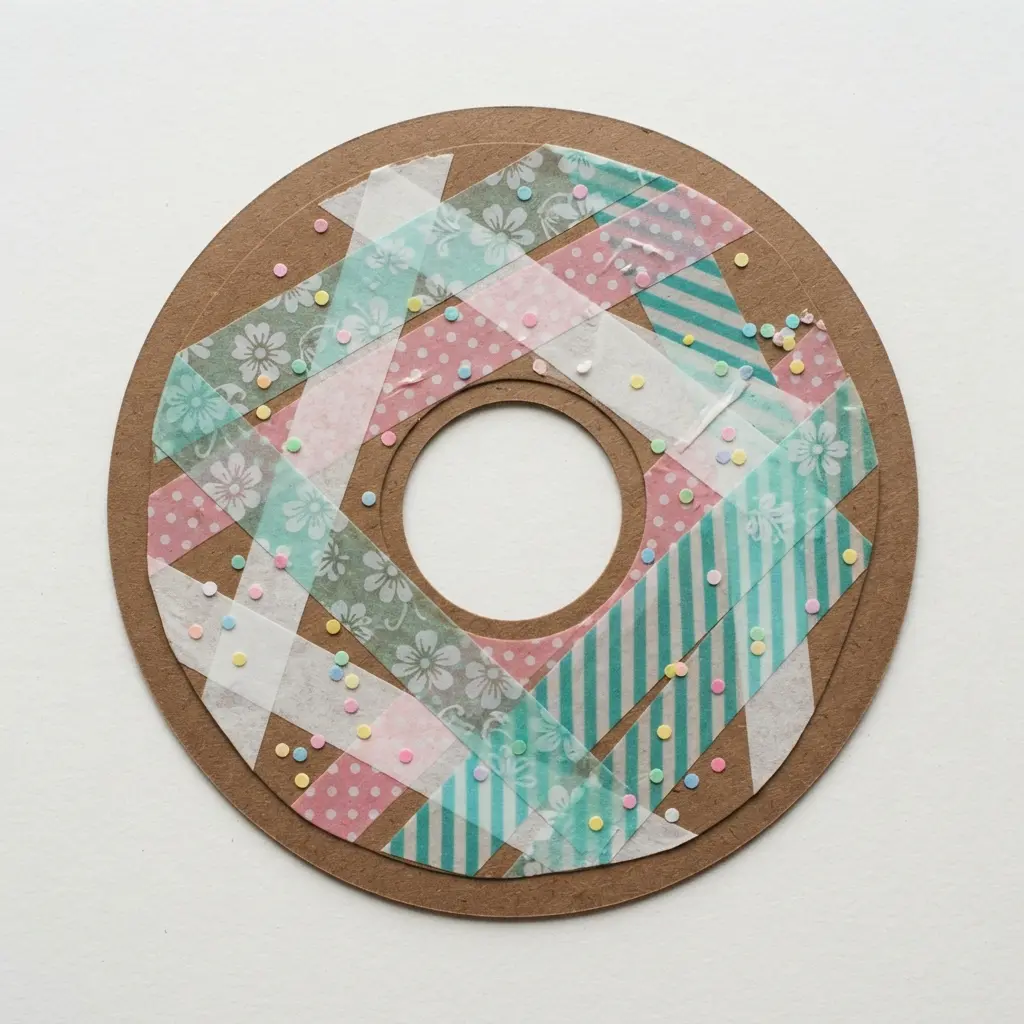
This one is a total win for crafters who want vibrant patterns without the mess. You start by cutting a doughnut shape from light brown cardstock. Then you cover it completely with strips of wider washi tape for the frosting. Add thin, colorful strips on top for the sprinkles.
The vibrant finish makes this tape method one of the brightest choices for Easy doughnut card ideas. The best part is how each roll of tape gives you a totally unique, cheerful design. I love how this technique turns simple supplies into something so playful and sweet. It is perfect for making with kids or for sending a burst of color to a friend.
To get a clean look, make sure you press down firmly on each piece of tape to avoid bubbles. A fun next step after mastering this tape technique is to try your hand at some fun puffy paint projects for even more texture. Does that not look delicious? Smooth each edge for a neat finish.
6. Glitter Glue Drip Topping Card
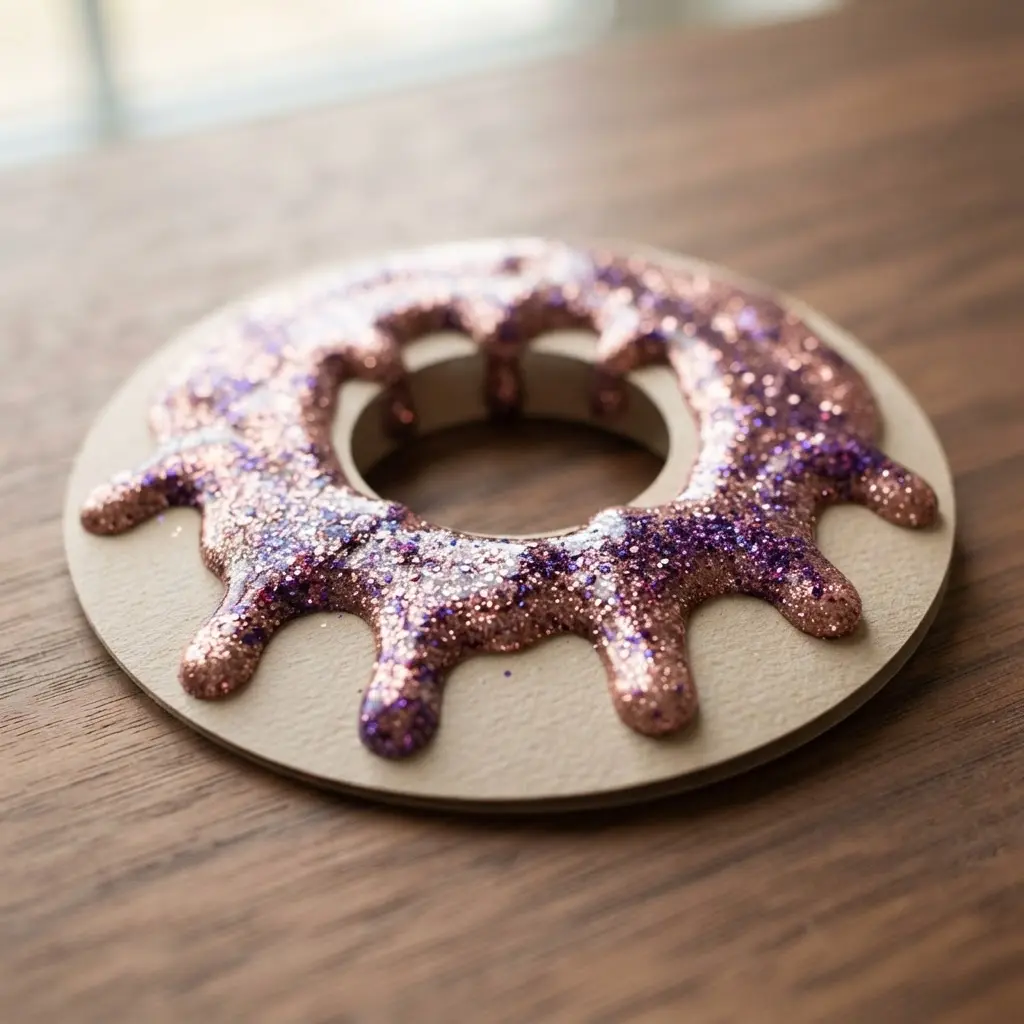
Ever wanted your cards to have that irresistible bakery window sparkle? This technique uses glitter glue to create a realistic, drippy frosting effect that looks good enough to eat. That shimmering drip adds the flashiest finish to your Easy doughnut card ideas. You apply the glitter glue to a separate cardstock layer, letting it flow into drips.
Let it dry completely before you add any optional sprinkle embellishments. Then, pop that finished layer onto your card base with some dimensional foam tape for a fun, 3D look. It works because that shimmering texture instantly feels festive and special, like a real treat.
My go-to tip is to test your glue on scrap paper first to make sure it dries with a nice, raised shine. Patience here guarantees a flawless final appearance. Your shiny creation will absolutely catch the eye.
7. Textured Corrugated Cardboard Doughnut Card
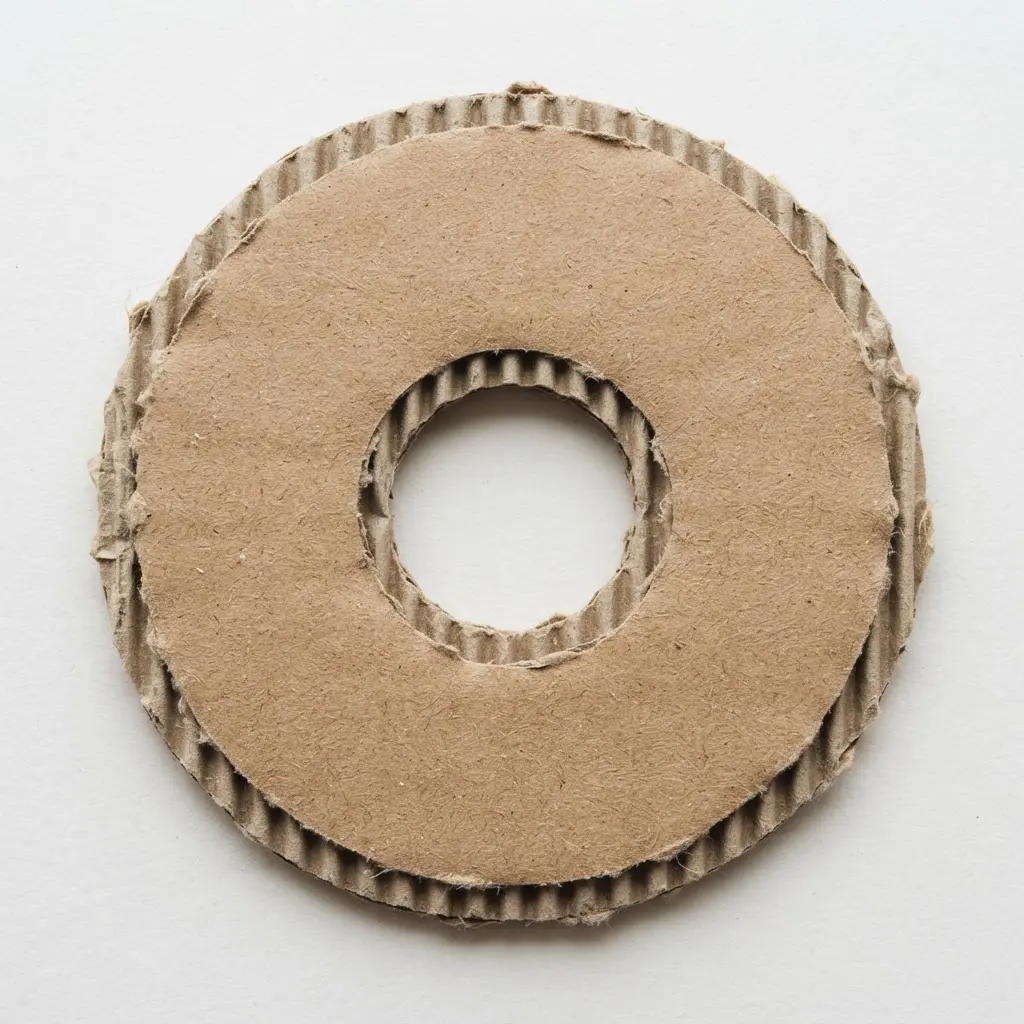
Ever wondered how to get that perfect bakery texture without a ton of layers? Grab some corrugated cardboard from an old box. I love this one because it gives you instant, believable texture for your icing and sprinkles.
You simply cut a doughnut shape from the flat side of the cardboard, then gently peel back the top layer. That exposed ridge creates the most convincing texture for your Easy doughnut card ideas with almost no effort. Use that exposed, ridged section as your frosted area and paint it with thick acrylics or glue on glitter.
It creates such a fun, dimensional look. Why does this work so well? The cardboard’s natural grooves mimic the swirls and peaks of real frosting perfectly. Try it and you will feel like a clever texture wizard.
For an extra pop, you can get inspiration from other projects using fluid mediums, like checking out some watercolor craft ideas to see how they handle color flow. Paint lightly to highlight the grooves.
8. Yarn Wrapped Doughnut Shape Card
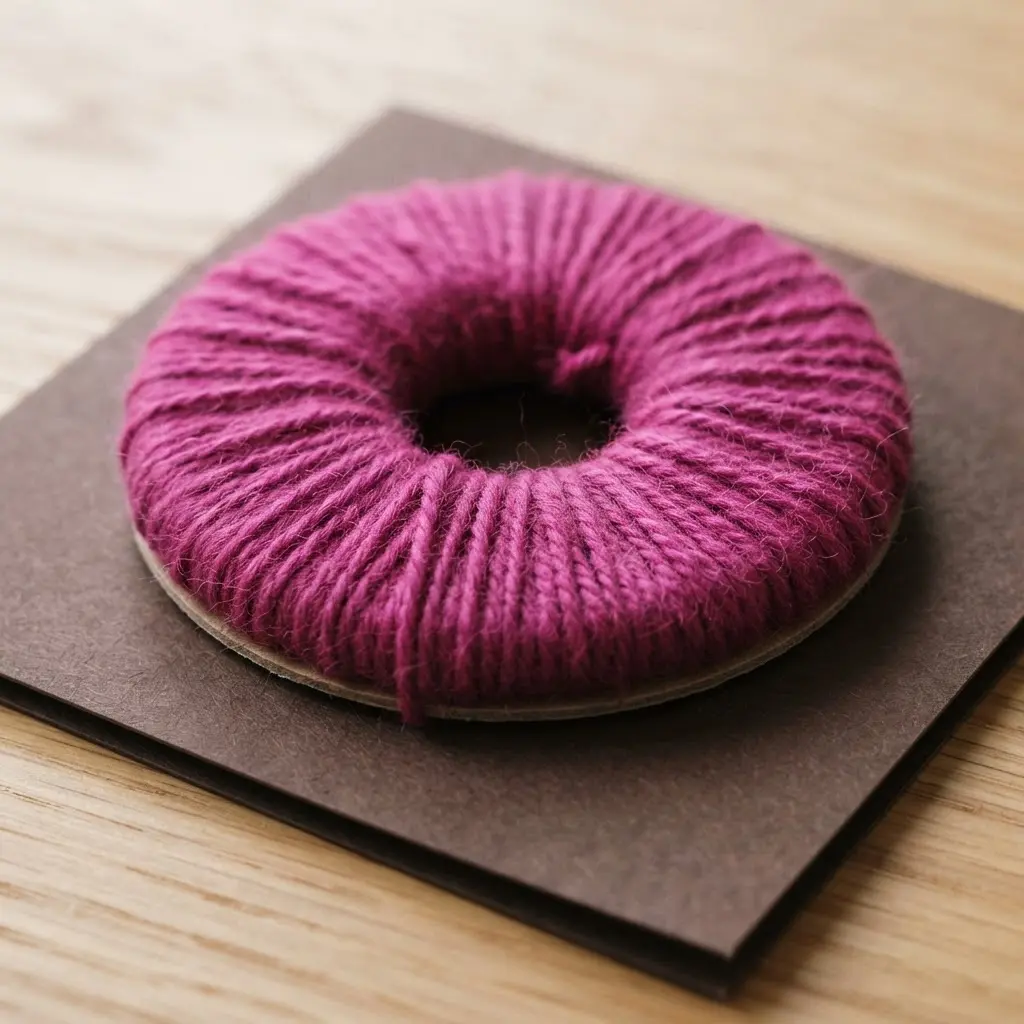
Who would have thought yarn scraps could turn into a delicious-looking card? This project is a fantastic way to use up leftover bits and create something wonderfully tactile. You start by cutting a simple cardboard doughnut ring, then wrap it tightly with yarn in your favorite colors to look like frosting. That cozy yarn wrapping turns basic Easy doughnut card ideas into surprisingly plush keepsakes.
The repetitive wrapping is relaxing, and you can add beads or sequins for sprinkles. It works so well because the texture is instantly charming and every single one turns out unique. A practical tip is to secure your yarn ends with a dab of glue to prevent any unraveling. Wrap tightly for a smooth surface.
Your finished creation makes a perfect easy DIY gift tags or a sweet ornament. It is durable enough for long storage. Hang it somewhere safe to dry.
9. Felt Detail Soft Texture Card
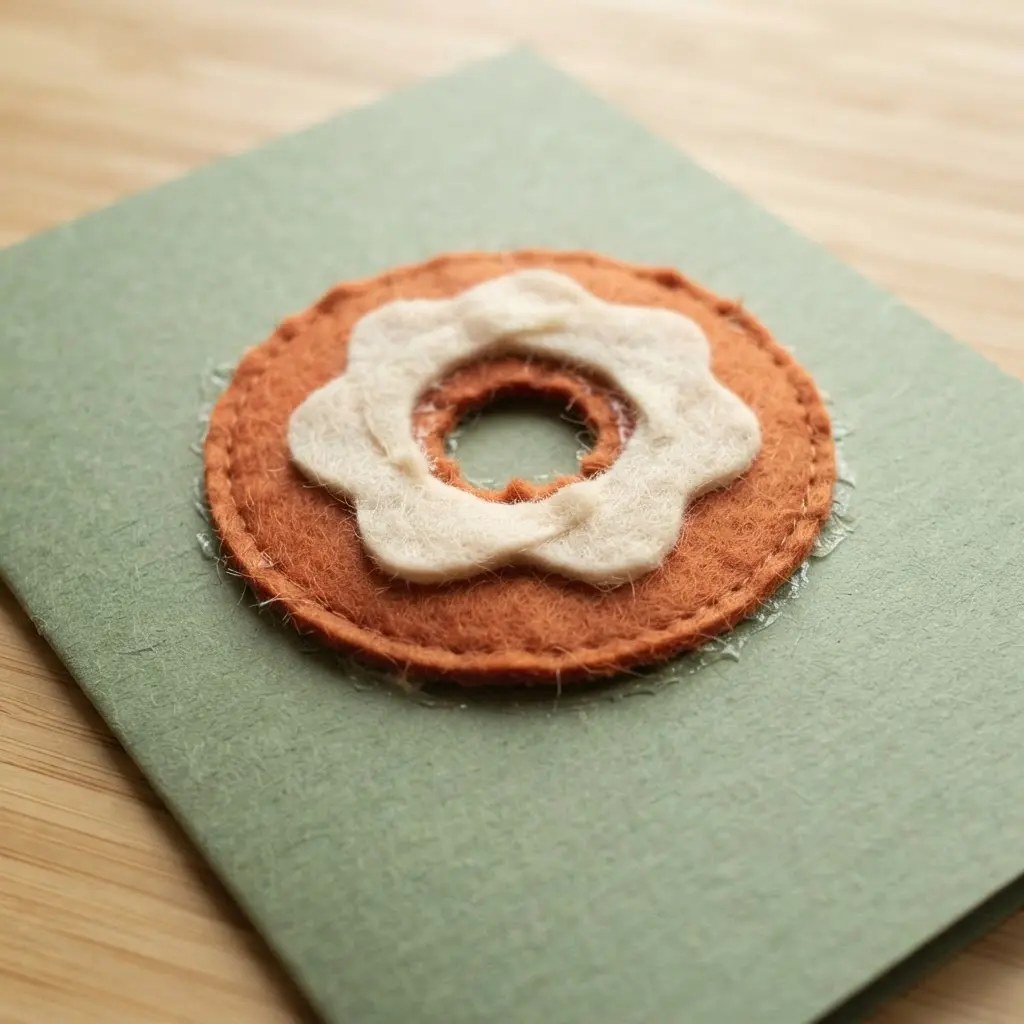
Ever run your fingers over a card and felt that wonderful, fuzzy surprise? This is all about adding that soft texture with felt fabric details. You cut simple shapes, like little doughnuts or sprinkles, and glue them onto your card base. The fuzzy contrast makes these tactile Easy doughnut card ideas unforgettable.
The contrast between the smooth paper and the cozy felt is instantly charming. I love how this turns a flat greeting into a tiny, touchable piece of art. It is so satisfying to make something that feels as special as it looks. Trim the edges for a crisp appearance.
For a super easy start, especially with kids, look into simple craft projects for kids that use similar forgiving materials. My go-to tip is to use a tiny dot of fabric glue instead of a big glob to prevent any soggy bleed-through. Let it dry completely, and you have got a card that is sure to bring a smile. Press firmly until the bond sets.
10. Doughnut Shaped Foldable Greeting Card
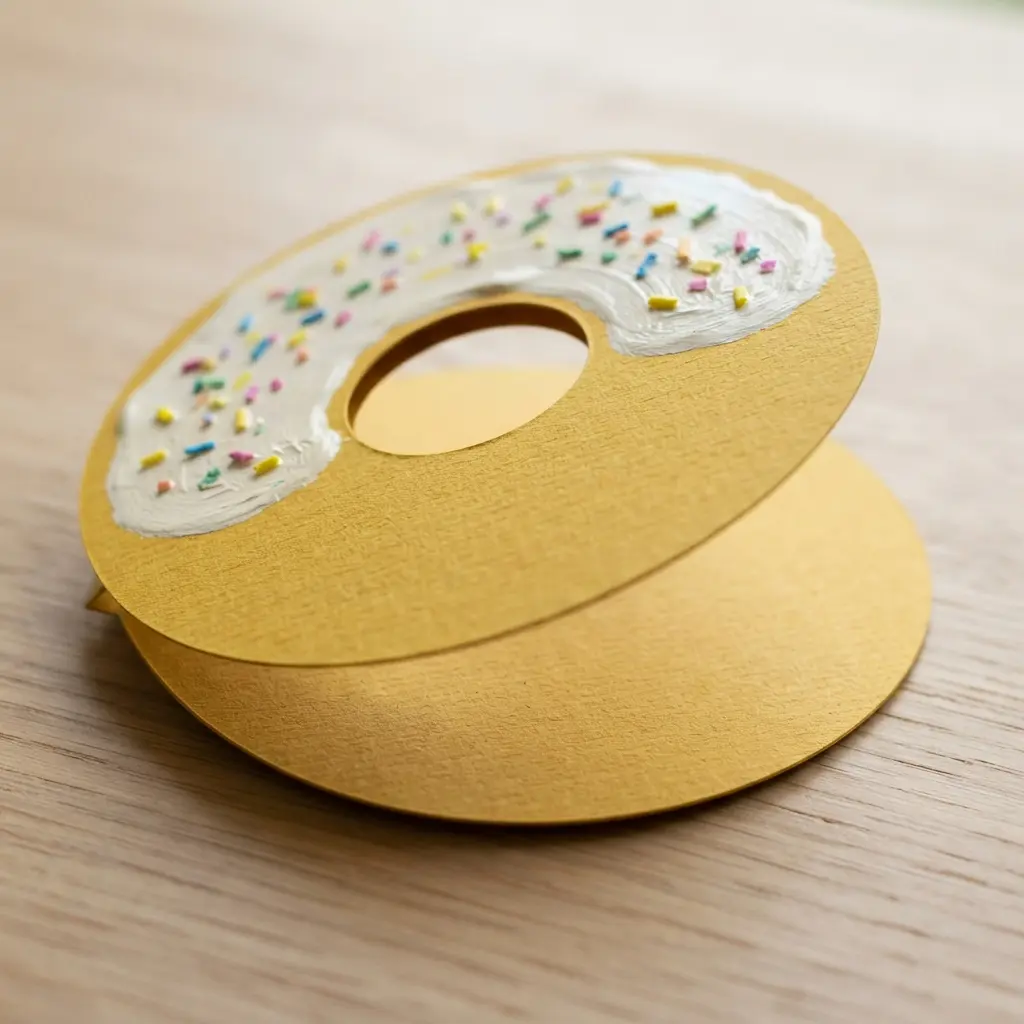
Who says a greeting card has to be a boring rectangle? This project turns a sweet treat into a clever, interactive card you can open. You will cut two identical doughnut shapes from sturdy cardstock and attach them along one edge to create a hidden hinge. That clever folding technique redefines standard shapes for your Easy doughnut card ideas. Then you add a layer of frosting cardstock and decorate it with colorful sprinkles.
It works so well because the shape is instantly recognizable and joyful. That fold adds a fun surprise when someone opens it to find your message inside. I love how sturdy cardstock makes it feel like a real gift, not just a piece of paper. Crease each fold for sharp edges. Score before bending the paper. Keep your cuts uniform.
For the finishing touch, you can use your favorite markers to draw details on the inside. If you enjoy adding hand-drawn elements, you might want to look at some sharpie marker art projects for inspiration on decorating the edges. Experiment with different color palettes. Test your design on scrap first.
Attaching Gift Cards securely to Doughnut Embellishments
A mini glue dot placed on the back of a gift card holds it firmly to your decorated doughnut front. These adhesive dots are strong enough to support the slight weight of a plastic card without soaking through your paper layers. That secure placement transforms functional Easy doughnut card ideas into polished gifts. You want to avoid using liquid glue here because it can warp the cardstock and make the gift card slide around before it dries.
Position the gift card over a flat section of your doughnut design, like the center of the sprinkle-covered icing. This placement ensures the decorative elements around the edges are still visible and the card stays put. Your finished piece will feel solid and look polished, ready for a proud delivery. Check the alignment before pressing down. Smooth out any bumps gently.
Conclusion
So how did your creative brainstorming go? I hope these Easy doughnut card ideas have your little ones buzzing with excitement. Look at what you have planned, turning simple paper and glue into a gift filled with meaning.
The best part about any of these projects is that there is no wrong way to do it. If the sprinkles are a little lopsided or the frosting color is wild, it just adds more personality. My one piece of advice is to lay out all the supplies before you start and let the kids lead the way with their color choices. The goal is a fun, shared experience that ends with a card dad will treasure. Pick your favorite idea and get started right away.
FAQs
Q: What are the easiest supplies to use for kids making doughnut cards?
A: Stick to basic items like construction paper, safety scissors, washable markers, and glue sticks. These materials are simple for small hands to manage and create minimal mess.
Q: How can I make sure the card is sturdy enough for a child to give?
A: Use cardstock or a folded piece of construction paper as your base. This creates a firm foundation that holds up better than a single sheet of paper.
Q: Are these projects suitable for preschoolers?
A: Absolutely. Each idea focuses on large shapes, simple gluing, and bold decorations. Adult help with cutting might be needed, but the decorating is all theirs.
Q: What if we do not have all the specific materials listed?
A: Get creative with substitutes. Use crayons instead of markers, scraps of fabric instead of felt, or magazine cutouts instead of buttons. The project adapts to what you have.
Q: How can we add a personal message from the child?
A: Leave a blank space on the back of the card or inside the fold. Encourage them to draw a picture, write their name, or let you transcribe a short, sweet message for them.








